Spotted in a parking lot:

At least they caught it before the end of the row.
Verily, it is written that Computer Science has only two hard problems:
- Cache invalidation
- Naming things
- Off-by-one errors
I hate it when that happens on my projects …
The Smell of Molten Projects in the Morning
Ed Nisley's Blog: Shop notes, electronics, firmware, machinery, 3D printing, laser cuttery, and curiosities. Contents: 100% human thinking, 0% AI slop.
Words to design by, live by, work by …

Spotted in a parking lot:
At least they caught it before the end of the row.
Verily, it is written that Computer Science has only two hard problems:
I hate it when that happens on my projects …
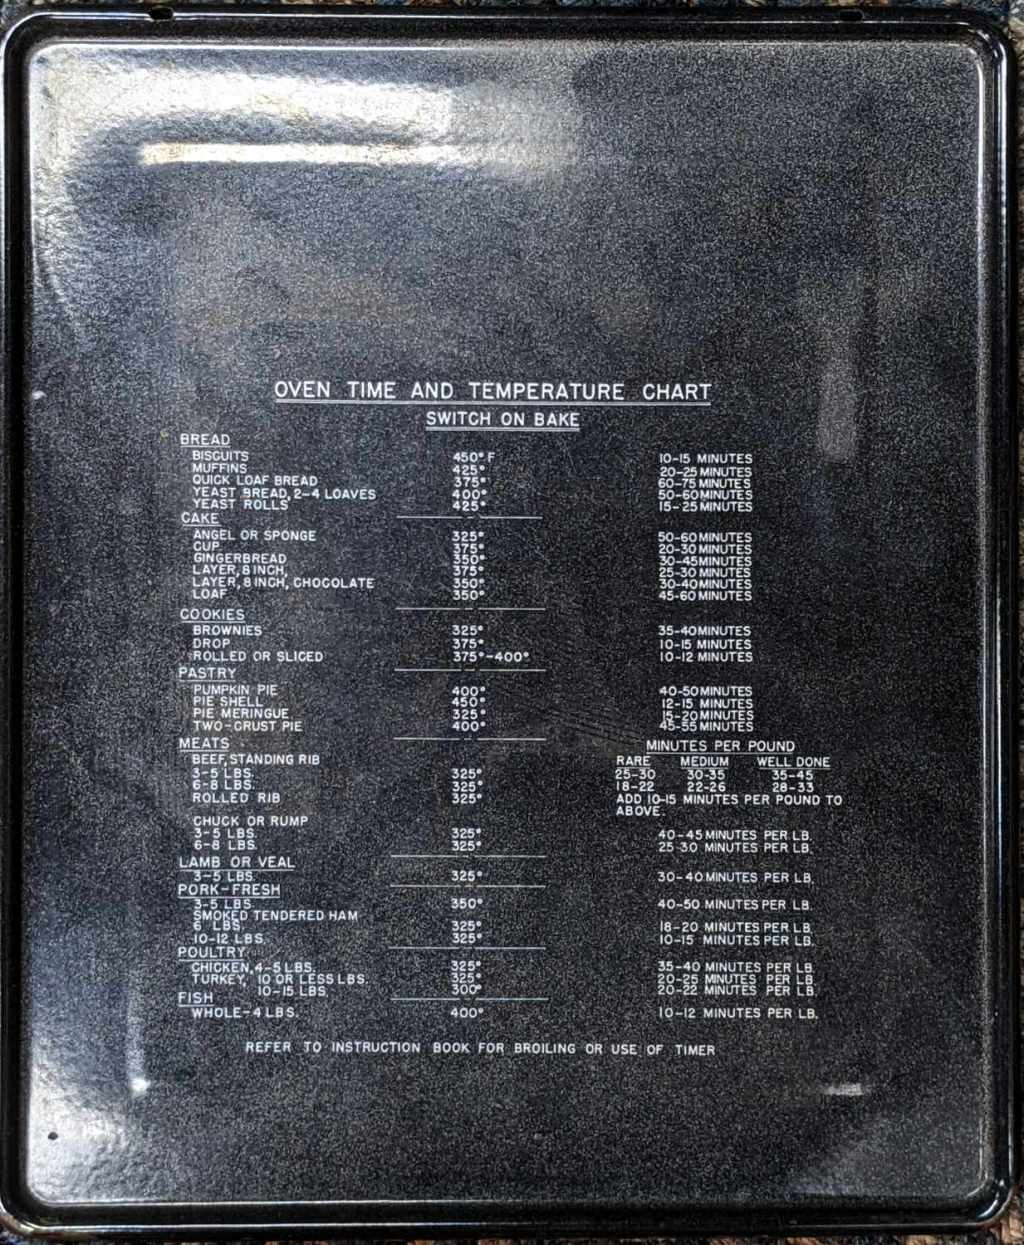
Crawling around on the floor under the oven reminded me of the bottom pan we salvaged from the hulking oven that Came With The House™:

A closer look:
I can’t vouch for their accuracy, but finding recommended baking temperatures and times printed exactly where they will come in handy seems like a great idea.
It’s another example of the rule Eks taught me: When you must look up something, write it where you will need it the next time.
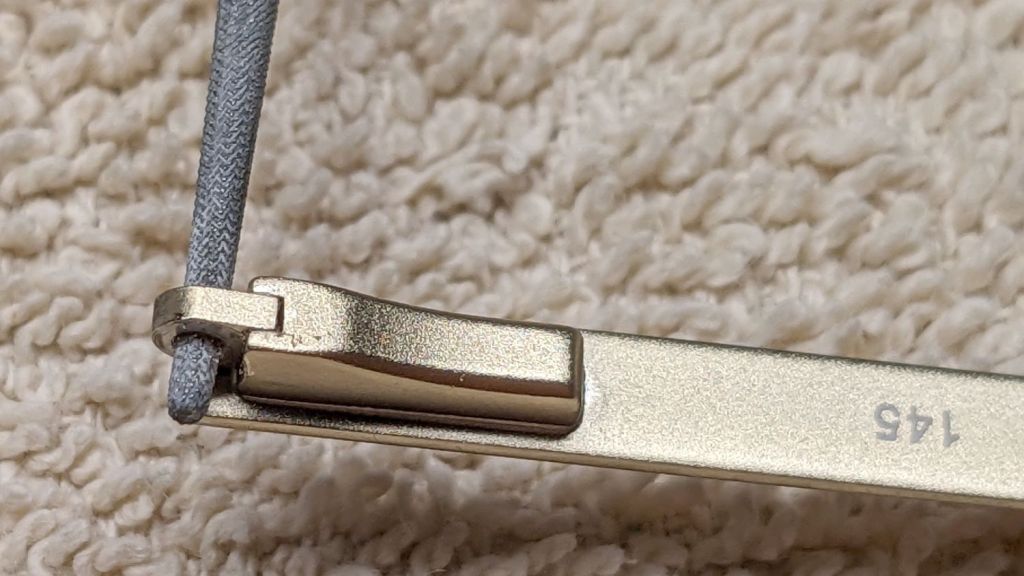
A screws in one of Mary’s eyeglasses unscrewed itself, but, miraculously, we found it and I retired to the shop.
Because the glasses have spring temples, the screw would not align no matter what force I applied to it:
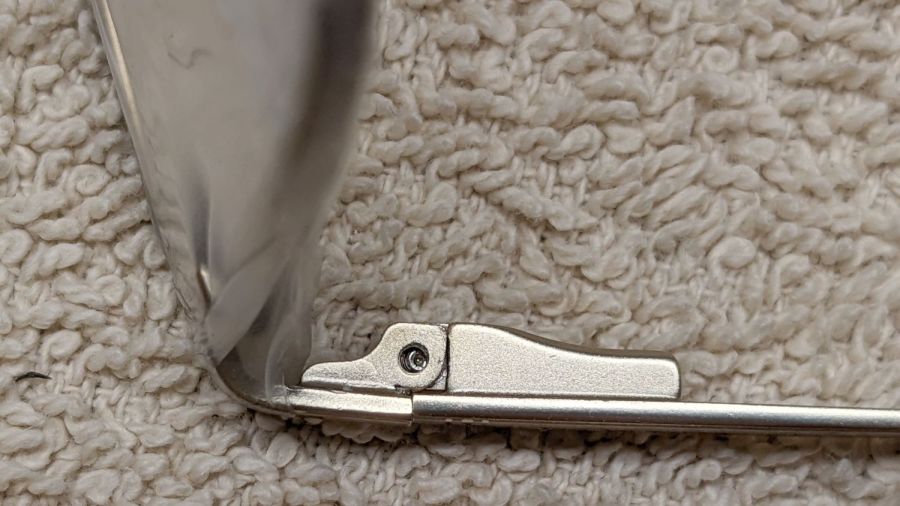
So I just embiggened the hole until the available force did the trick:
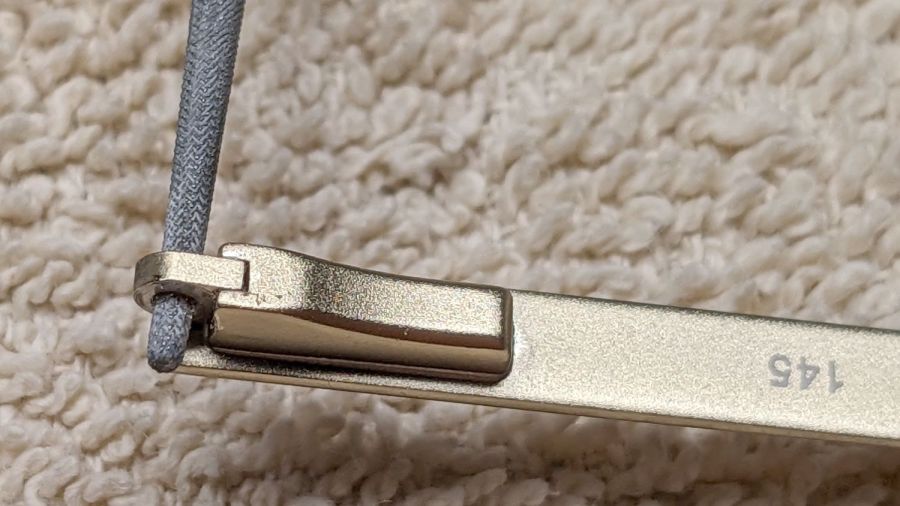
Dots of Loctite worked into the threads should prevent that from happening again, but I’ve learned to never say never.
In retrospect, the temple pivots have an exposed slot that I think would allow jamming a block in place after pulling the spring-loaded pivot outward. Temple springs are impossibly stiff and I have previously failed to budge them in glasses without the slots, so I don’t know how well that might work.
Verily: If brute force isn’t working for you, then you’re not using enough of it.
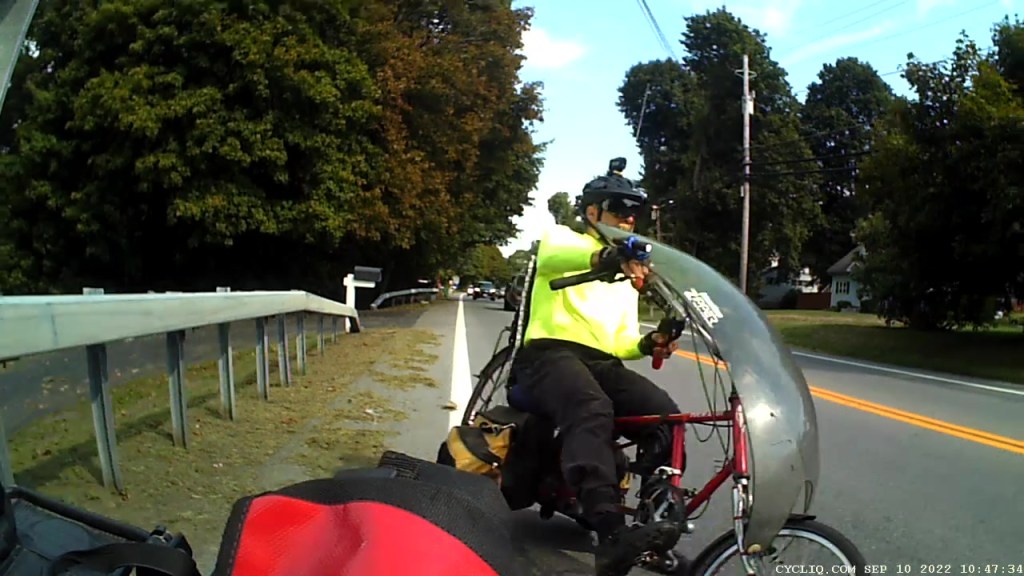
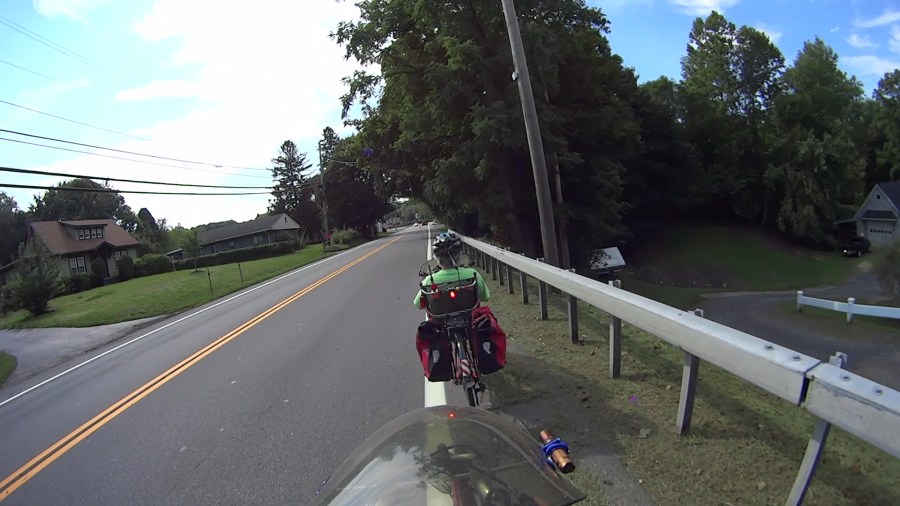
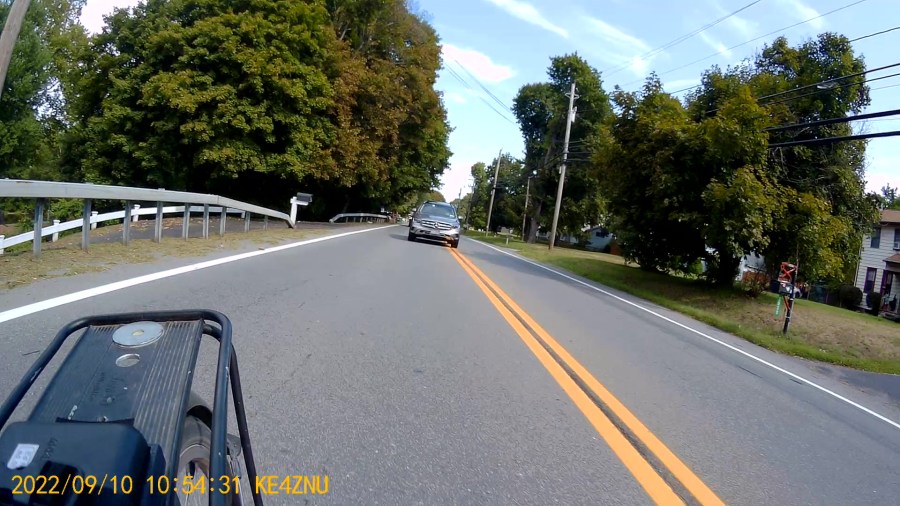
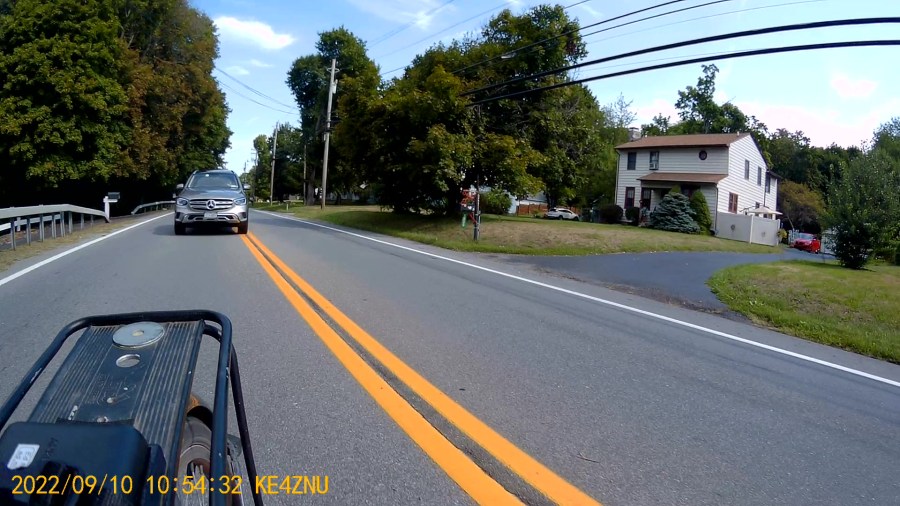
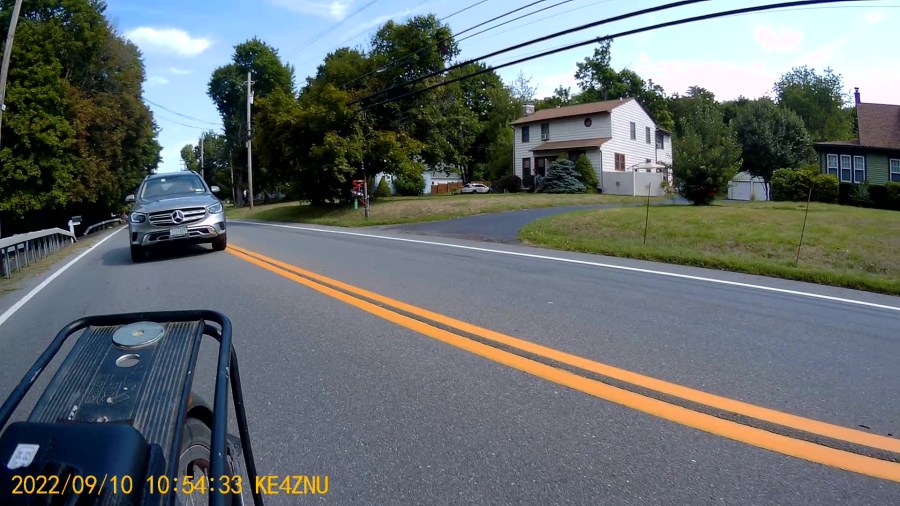
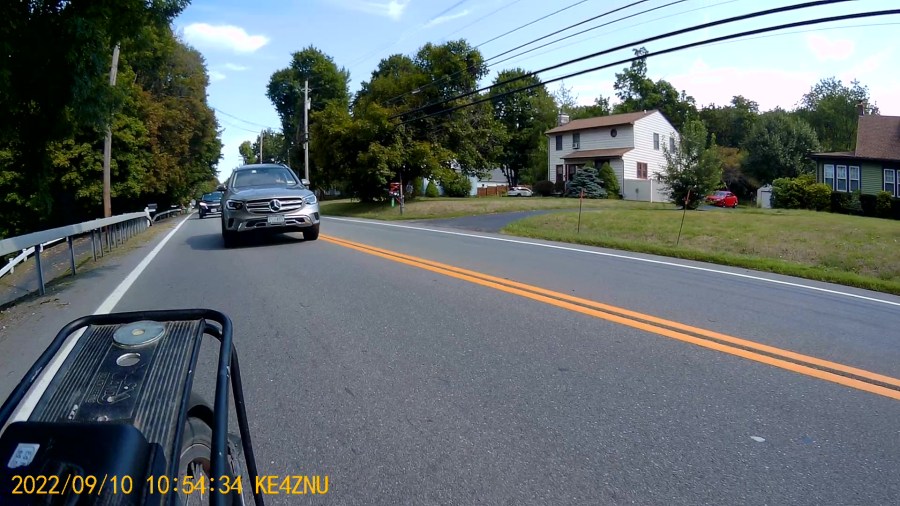
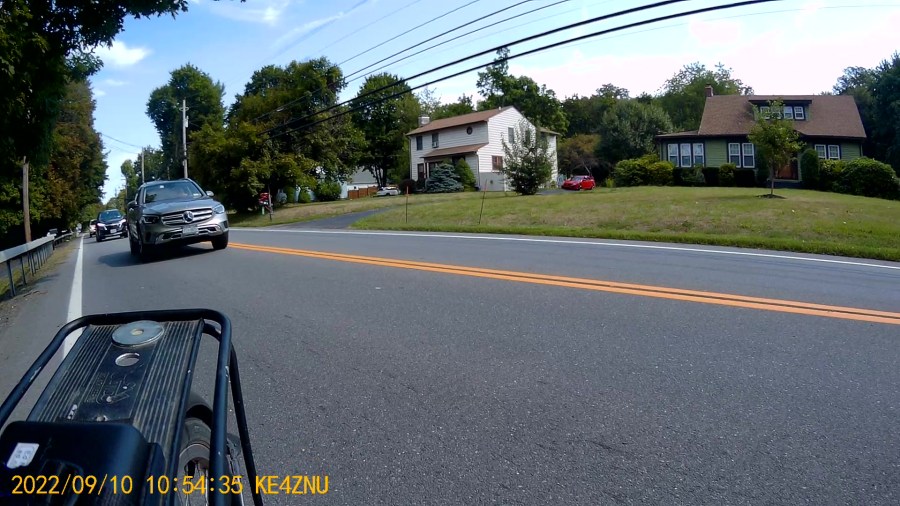
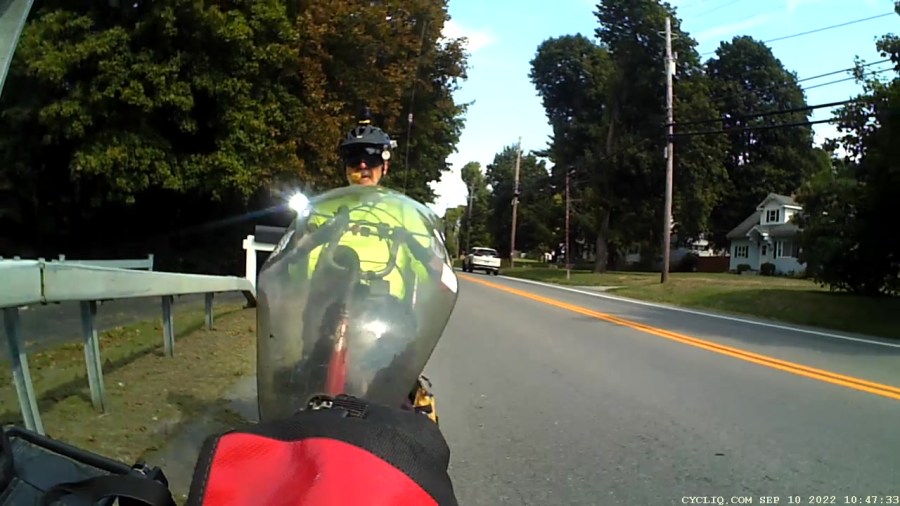
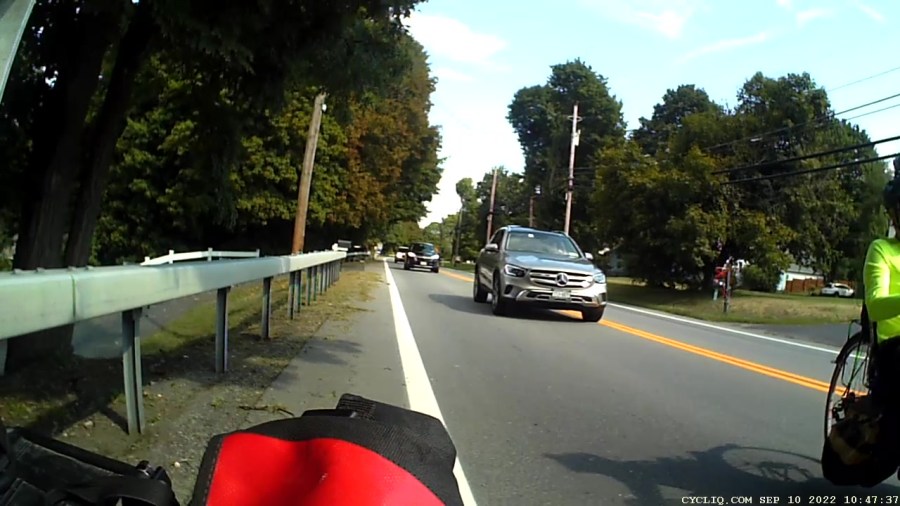
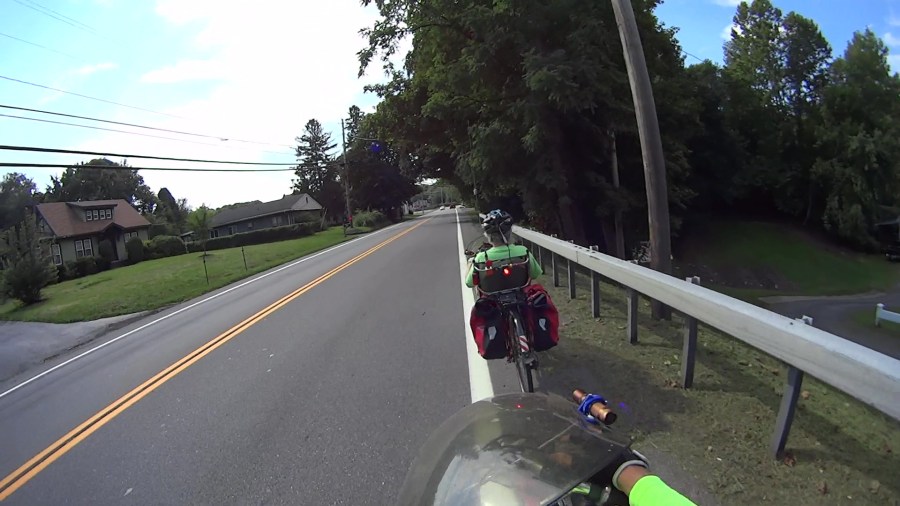
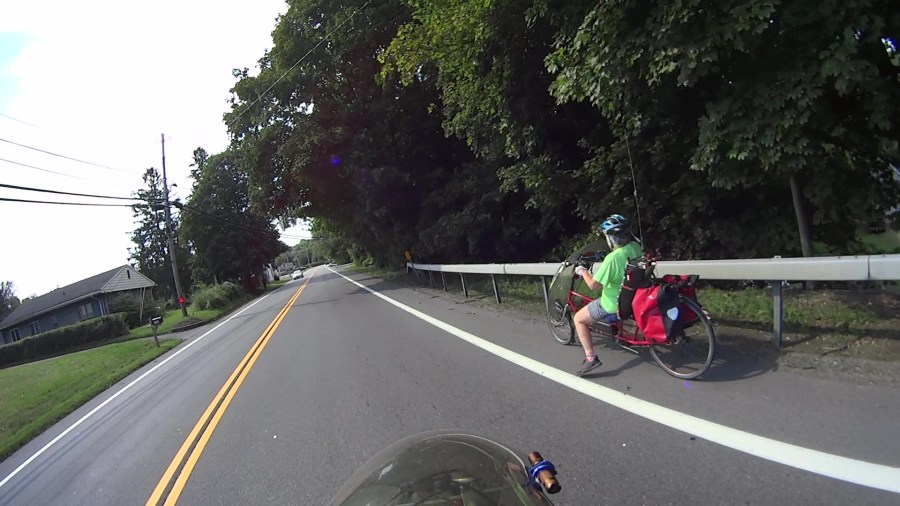
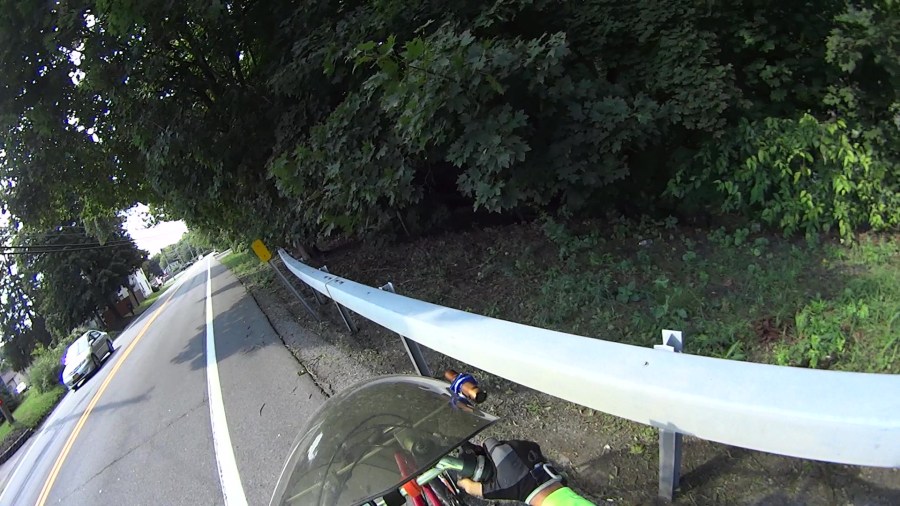
We’re southbound on Rt 376, ticking along at about 15 mph, with fresh string-trimmer debris littering the shoulder:
Did you notice the rock? I didn’t.
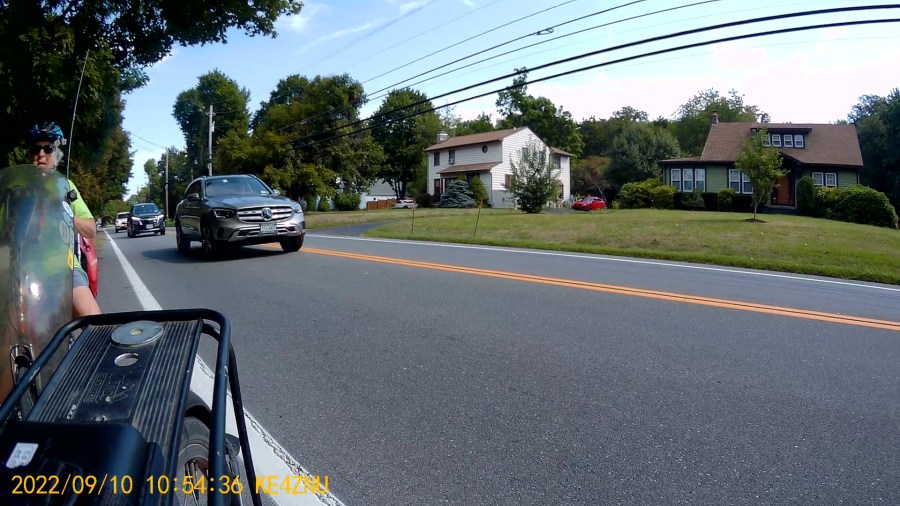
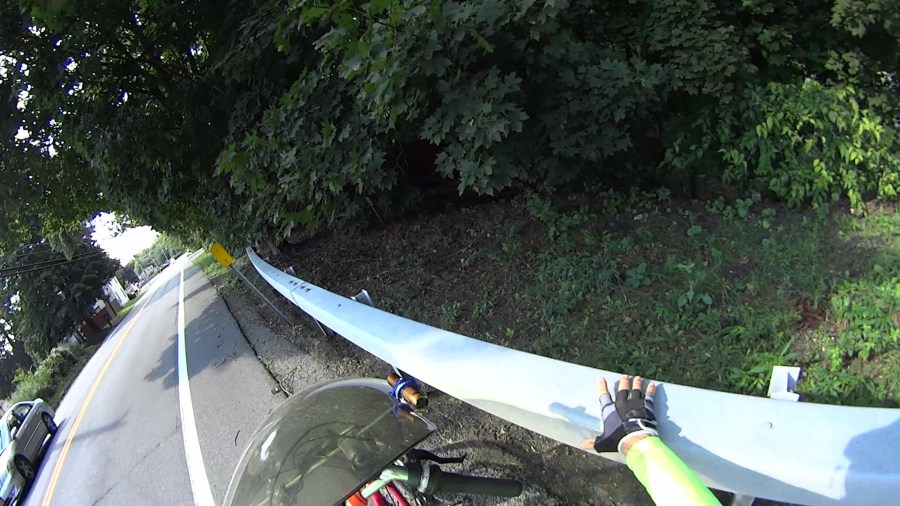
The fairing ripples as my front tire hits the left side of the rock:
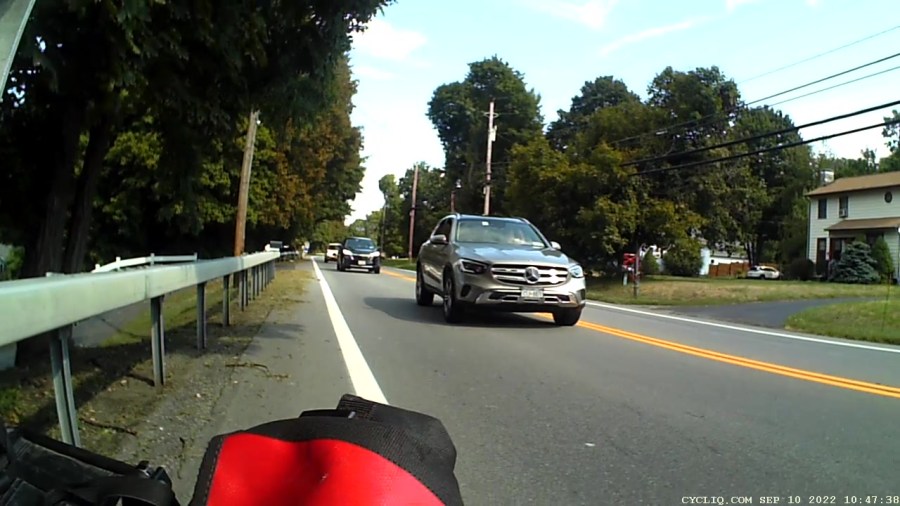
I have no memory of the next two seconds.
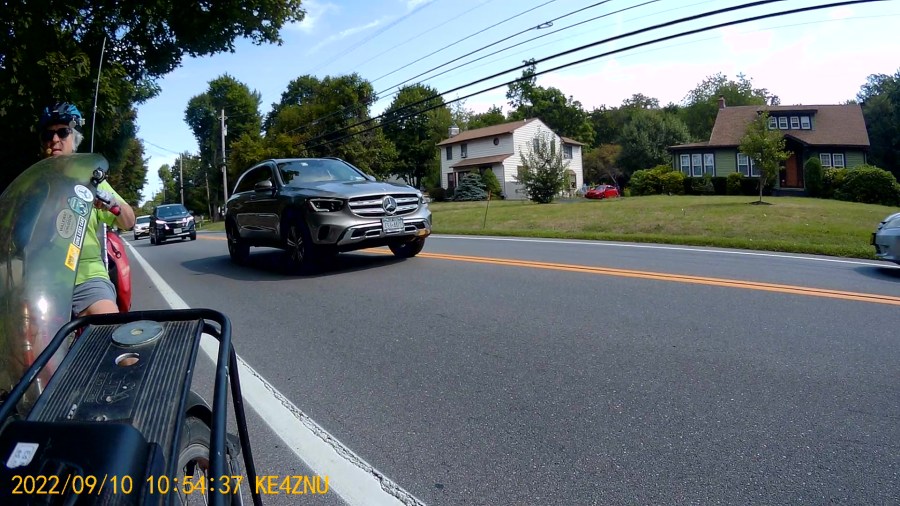
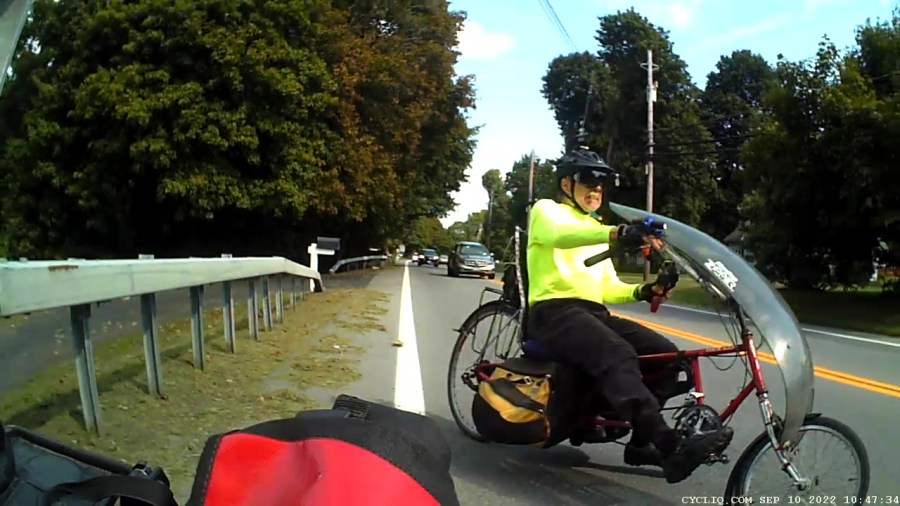
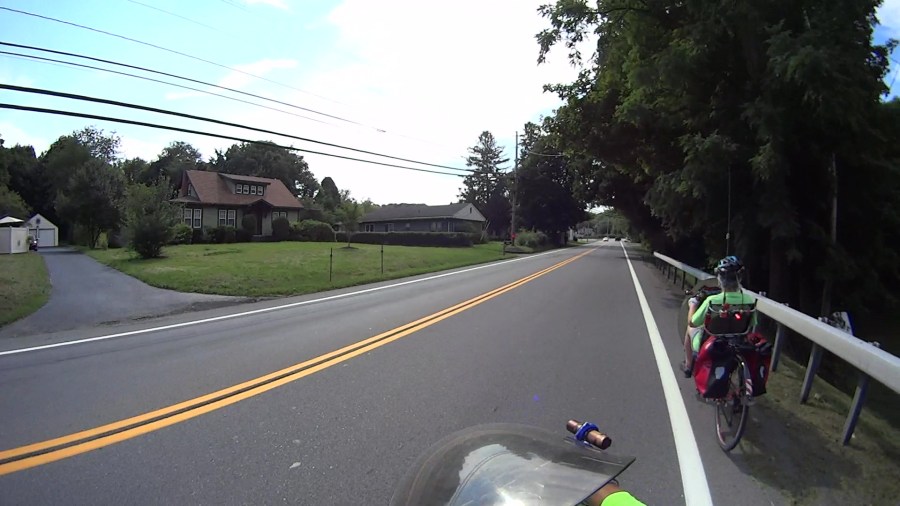
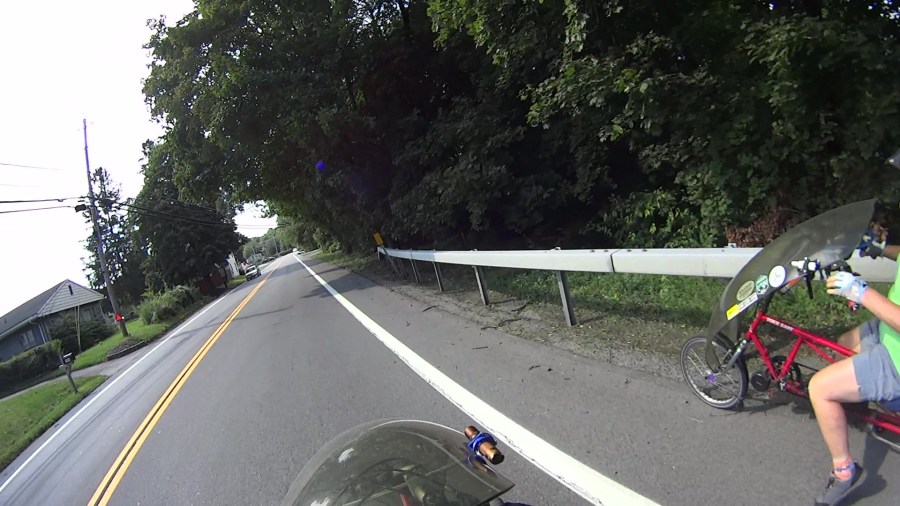
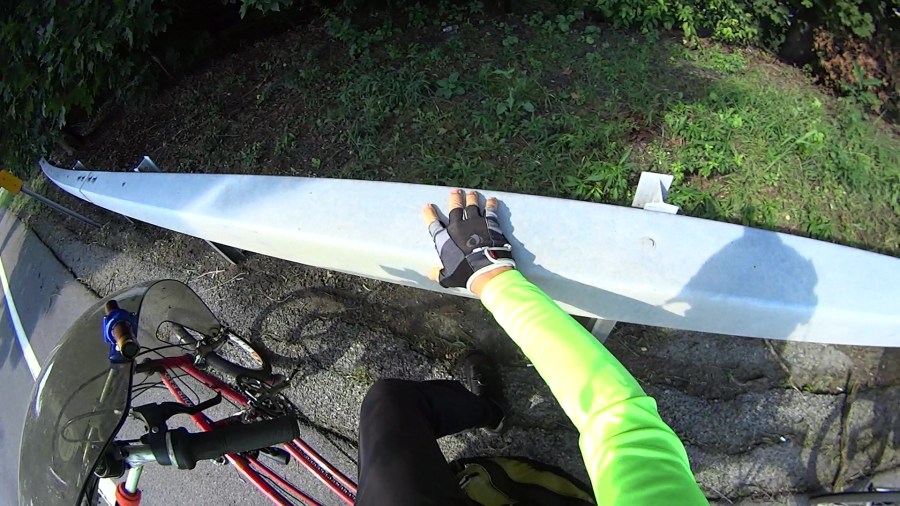
The offset impact turns the front wheel to the left, so the bike steers out from underneath my weight:
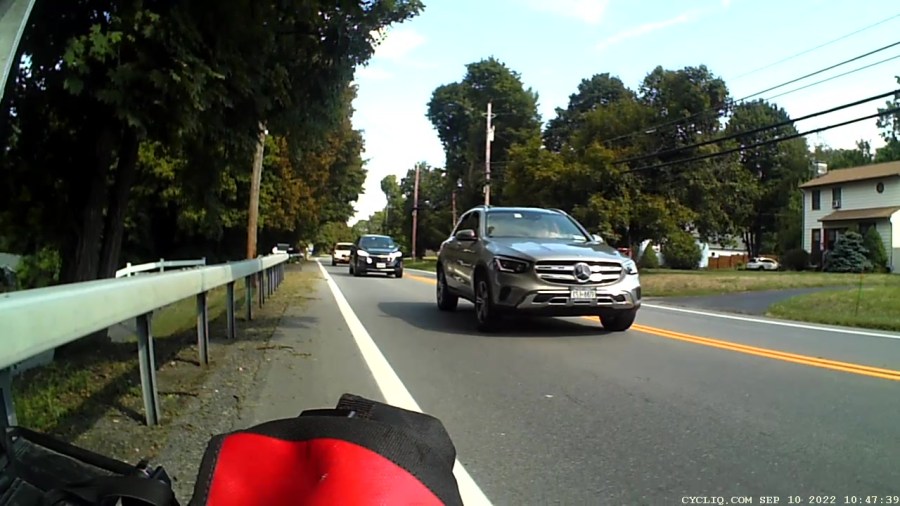
Because the bike frame was still aimed straight ahead, the wheel is steering further to the left and putting me even more off-balance. I am somehow trying to lean left far enough to get my weight lined up with the bike:
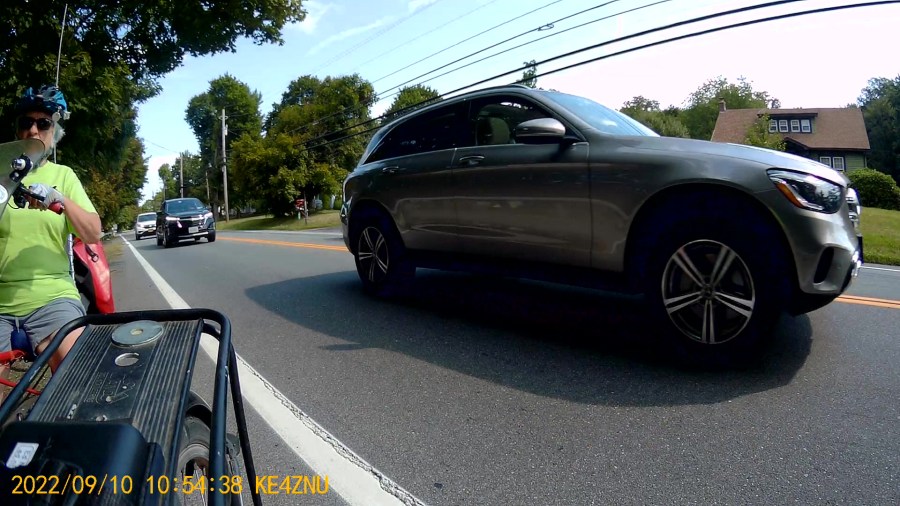
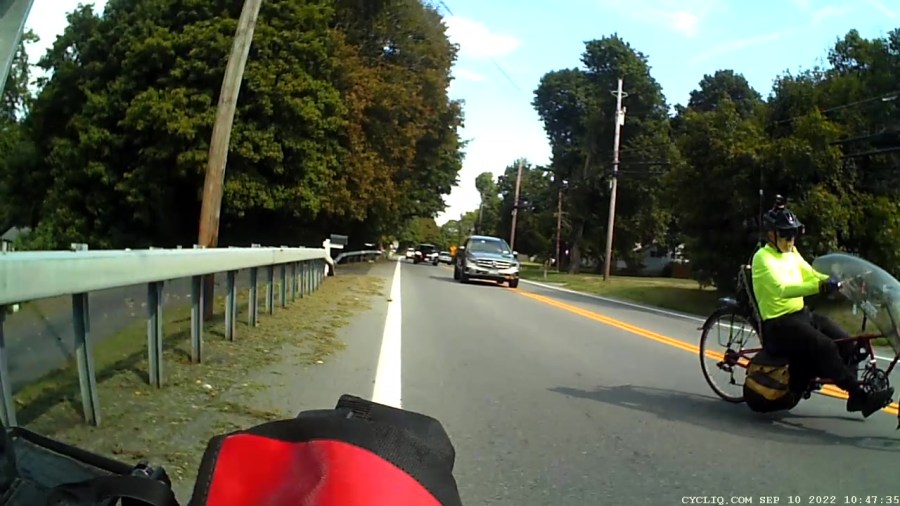
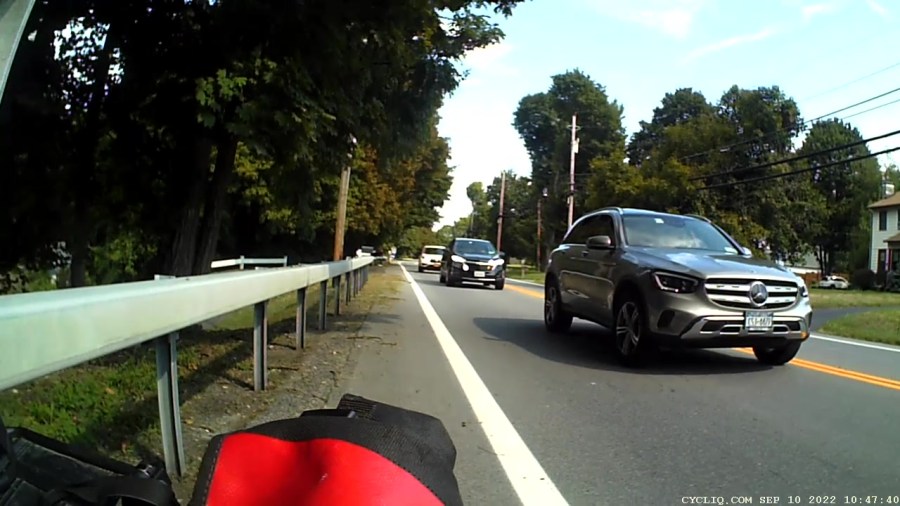
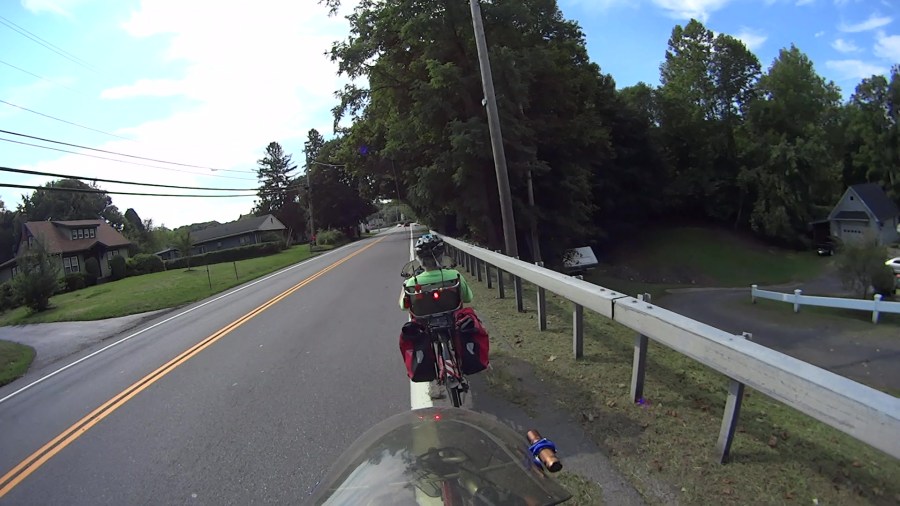
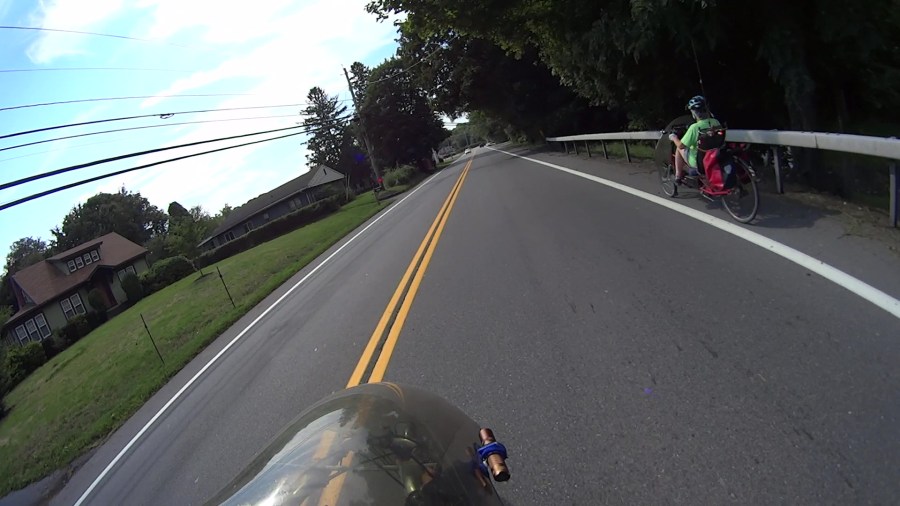
One second into the event, Mary has no idea what’s going on behind her.
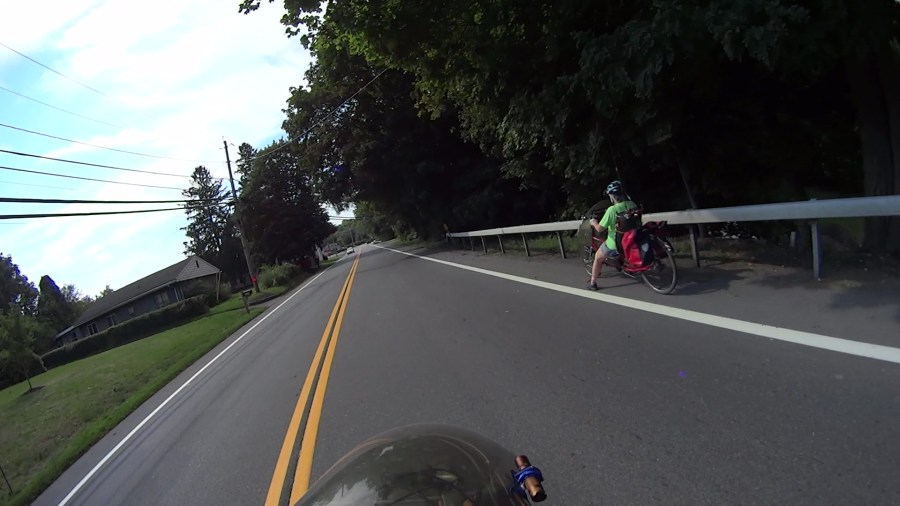
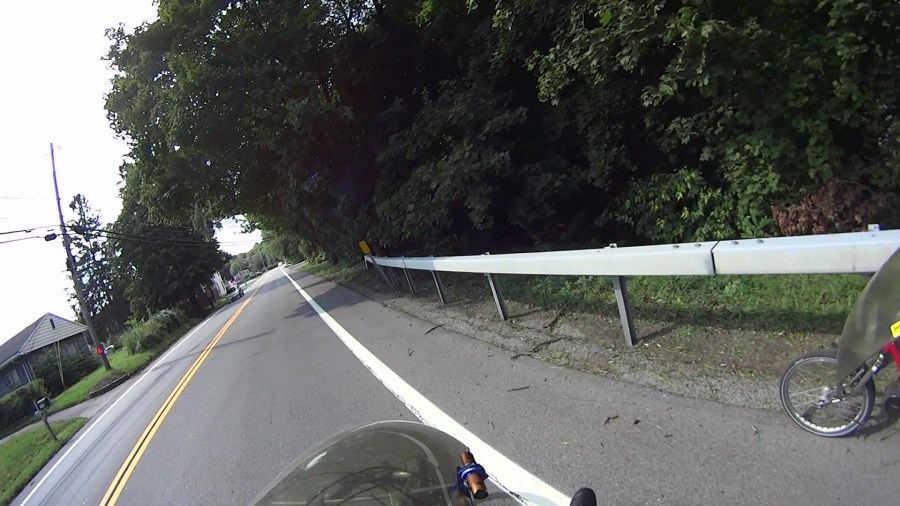
My memory resumes with an image of the yellow midline just beyond my left foot:
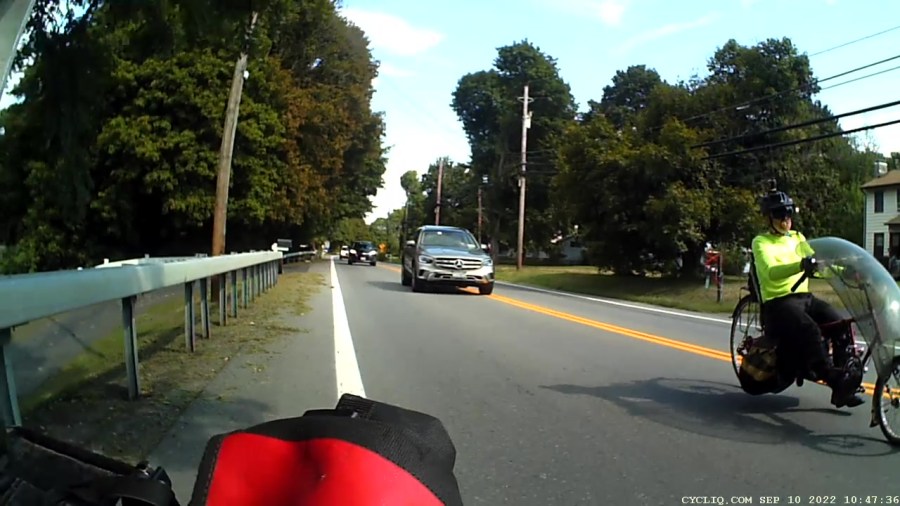
Mary heard an odd sound and asks (over the radio) “Are you all right?”
I’m approximately balanced, turning toward the shoulder, and manage to shout “NO!”:
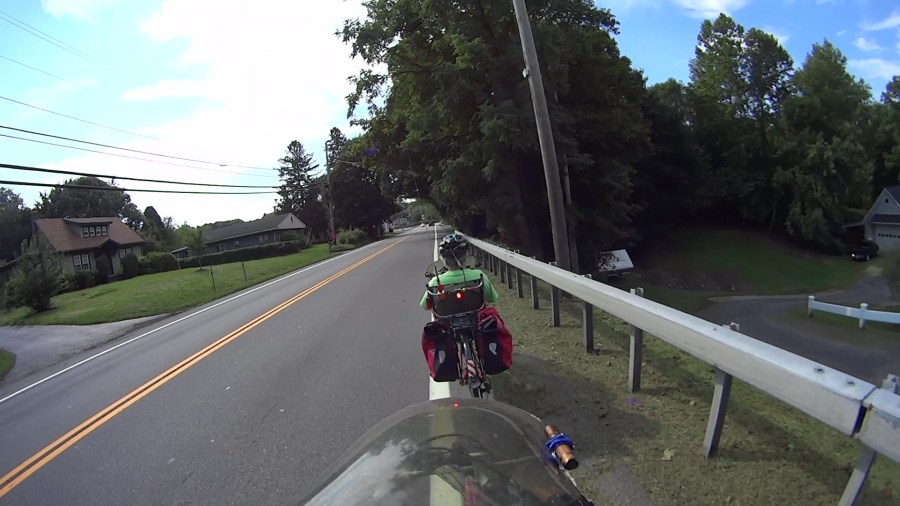
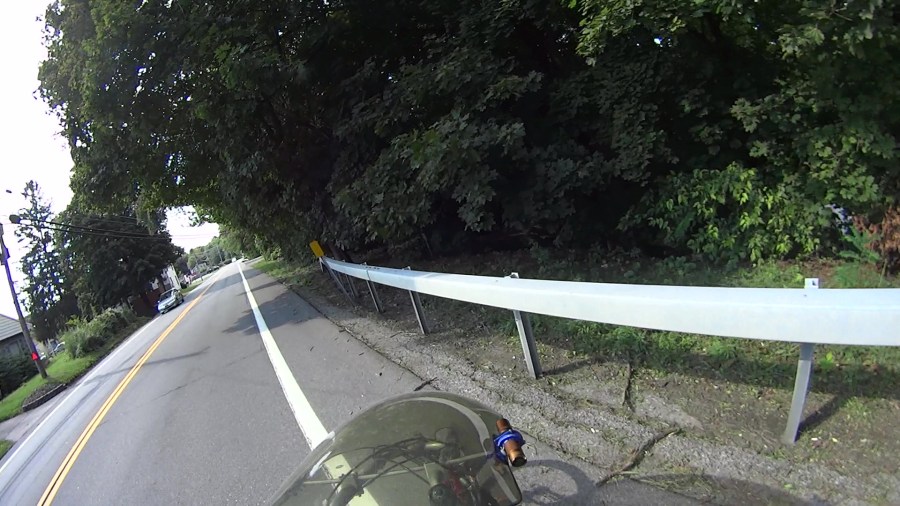
I’m coasting toward the shoulder with my feet off the pedals:
Mary is stopping and I coast past her:
Landing gear out:
Back on the shoulder, lining up with the guide rail:
Dead slow:
Docking adapter deployed:
And stopped:
I sat in that exact position for nearly four minutes.
A slideshow view of the same images so you can watch it unfold:
Doesn’t look like much, does it?
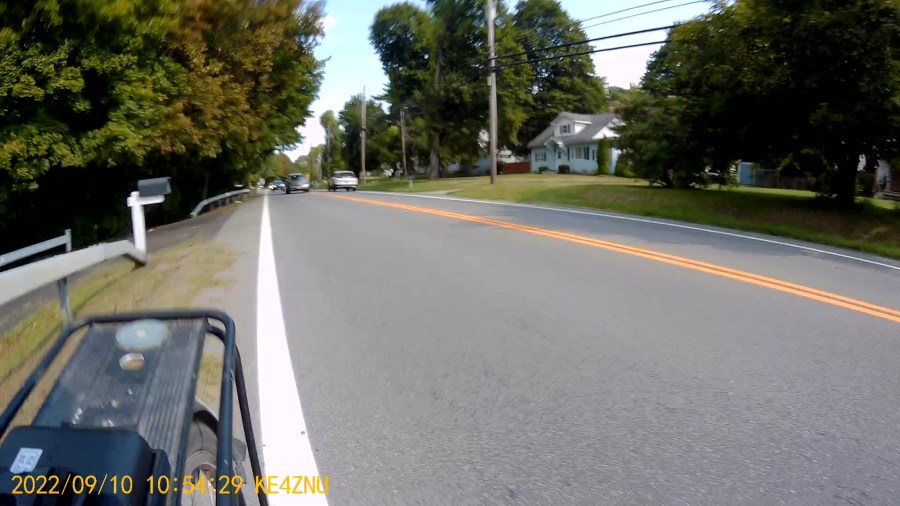
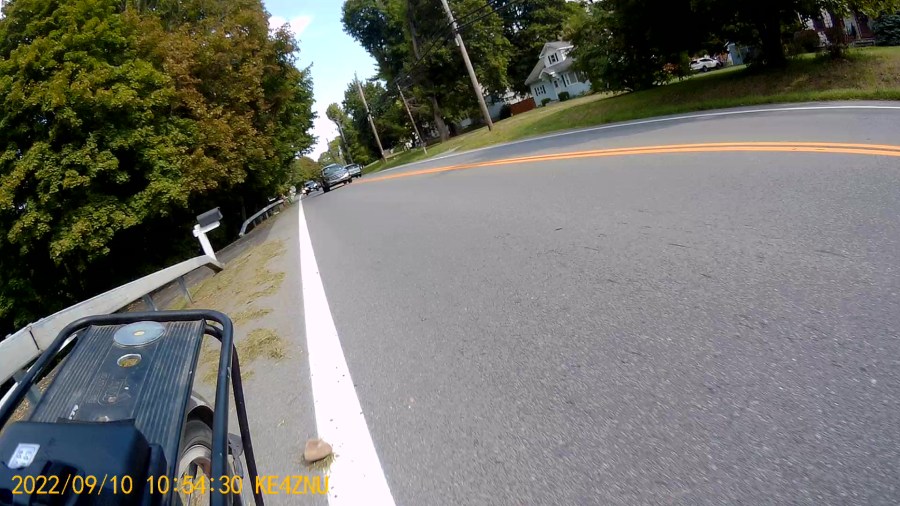
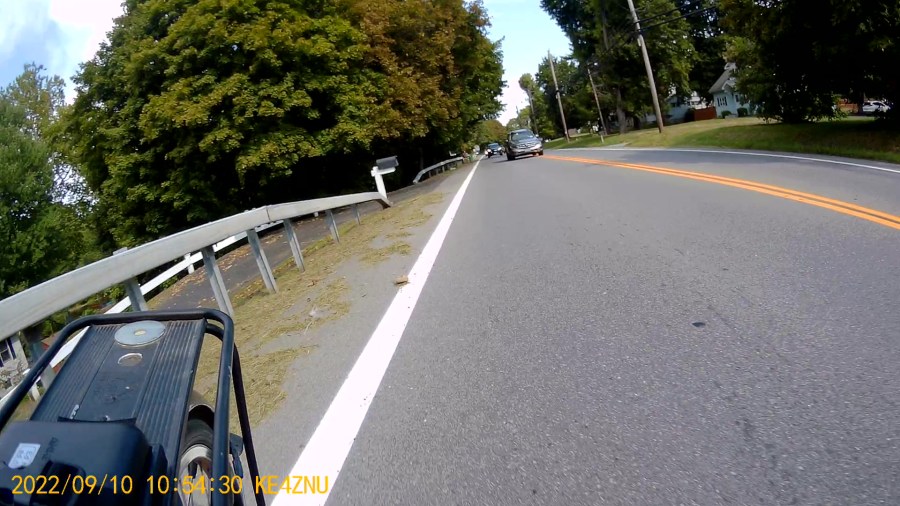
If I could have looked over my shoulder, this is what I would have seen, starting at T = 0 with the rock impact blurring the image:
Surely scared the daylights out of that driver, perhaps confirming all the usual expectations of crazy bicyclist behavior.
Here’s what Mary would have seen over her shoulder, again starting at T = 0 with the fairing bulging from the impact:
Timing is everything.
That Benz is new enough to have automatic emergency braking, as it slowed pretty dramatically while I was busy getting out of the way, but it’s not clear whether AEB knows about small / lightweight targets like pedestrians and bicyclists.
We completed the ride as planned, although I finally realized the front fender bracket had broken a few miles later.
Every adult human male has at least one story beginning “But for that millisecond or inch, I wouldn’t be here.” Now I have one more.
I must not fear. Fear is the mind-killer. Fear is the little-death that brings total obliteration. I will face my fear. I will permit it to pass over me and through me. And when it has gone past I will turn the inner eye to see its path. Where the fear has gone there will be nothing. Only I will remain.
Frank Herbert, Dune
Spotted on a walk around the neighborhood:

If only it was a sign of the times …

Spotted behind a mall undergoing renovation:
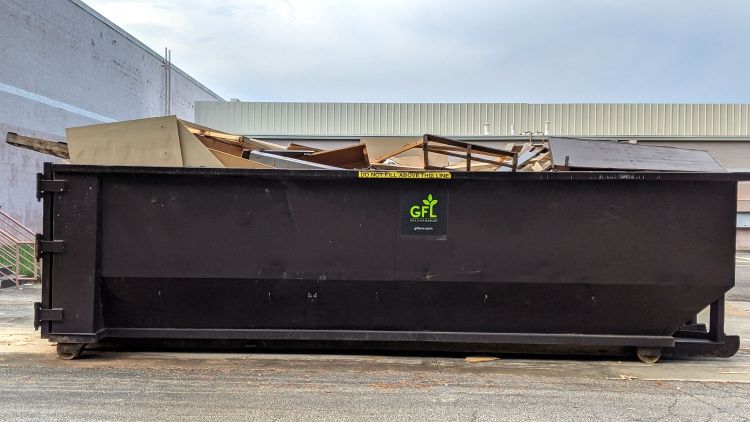
Perhaps they were loading it from the end and didn’t notice the instructions:
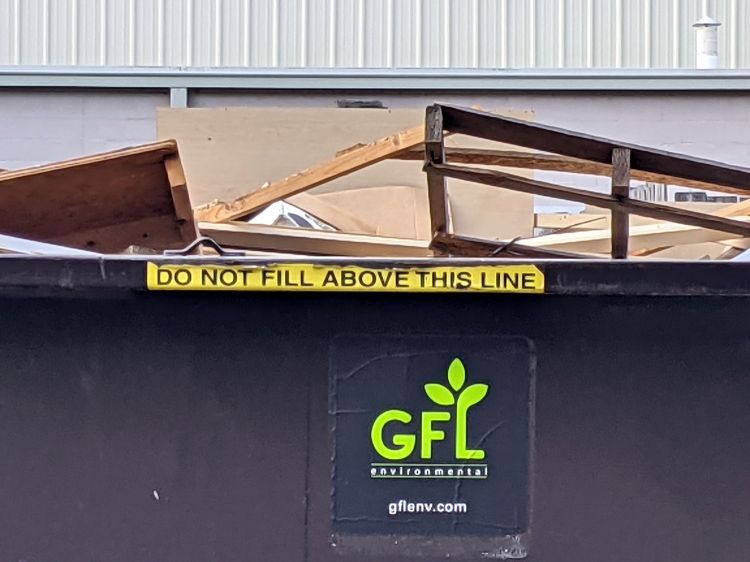
Protip: Always get the biggest dumpster available!
We generally don’t get hassled during our bike rides, perhaps because we ride like narrow vehicles and don’t pull stupid bicyclist tricks. The few folks who do hassle us seem to be twenty-something males, an endangered species of its own.
A shout of “Assholes!”
Unusually, there was no nearby traffic, so it’s not a case of mistaken identity.
Protip: Don’t do something in your employer’s vehicle that your employer may regret.
A shout of “Fuck you!”
Protip: Your car has a license plate. JCX-1393, matching my high-res version against the audio track; I shout the license plate and identifying information while I can see it.
Yes, I was young once … and stupid.
One hopes they outgrow it, too.