The Smell of Molten Projects in the Morning

Ed Nisley's Blog: Shop notes, electronics, firmware, machinery, 3D printing, laser cuttery, and curiosities. Contents: 100% human thinking, 0% AI slop.

Category: PC Tweakage

Remembering which tweaks worked

  • Input-Remapper Key Macros

    Input-Remapper Key Macros

    Having gotten the Huion H610Pro V2 tablet buttons working again, I must document the input-remapper settings I use for all the UI devices under my fingers.

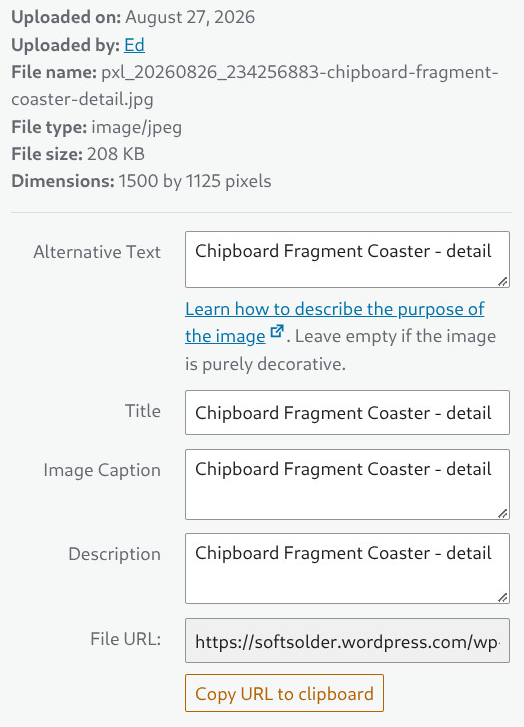
    Button 3 on the tablet fills in the fields for WordPress media images:
    WordPress Media Fields
    WordPress Media Fields

    Which start out with only the Title field prefilled with the name I created when I saved the file:

    PXL_20260826_234256883 - Chipboard Fragment Coaster - detail.jpg
    

    I highlight everything to the left of “Chipboard” and tap Button 3 to fire this series of keystrokes into the browser to cut the highlighted file name, then copy-n-paste everything else into the other three fields:

    modify(KEY_LEFTCTRL,key(x)).
    modify(KEY_LEFTCTRL,key(a)).
    modify(KEY_LEFTCTRL,key(c)).
    key(KEY_TAB).
    modify(KEY_LEFTCTRL,key(v)).
    key(KEY_TAB).
    modify(KEY_LEFTCTRL,key(v)).
    modify(KEY_RIGHTSHIFT,key(key_tab)).
    modify(KEY_RIGHTSHIFT,key(key_tab)).
    modify(KEY_RIGHTSHIFT,key(key_tab)).
    modify(KEY_RIGHTSHIFT,key(key_tab)).
    modify(KEY_LEFTCTRL,key(v))
    

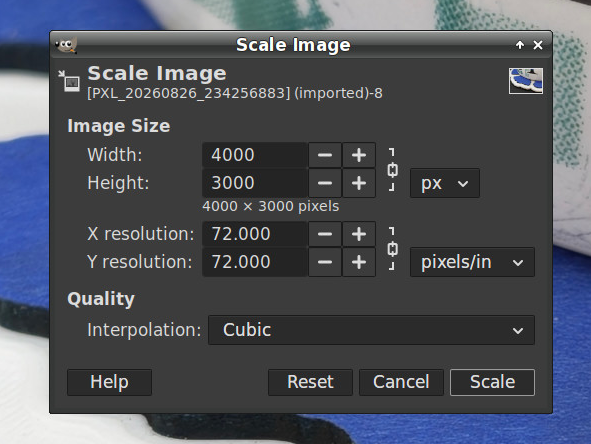
    Part of creating those image files in GIMP involves cropping the file to a standard aspect ratio (4:3, 16:9, rarely 32:9 for really skinny images), then scaling to make the widest / tallest edge 1500 pixels with this dialog (invoked by the * key on the numeric keypad):
    GIMP Scale Image fields
    GIMP Scale Image fields

    For unknown reasons, Pixel 10a phone cameras have reverted to 72 DPI images, rather then the previous 300 DPI. Because some programs / browsers / whatever set the physical image size by dividing the number of pixels by the DPI, I prefer to set those fields to 300 DPI.

    So click to put the cursor in the widest field, then hit Button 4 to fill in the rest with these keystrokes:

    modify(KEY_LEFTCTRL,key(a)).
    key(KEY_1).key(KEY_5).key(KEY_0).key(KEY_0).
    key(KEY_TAB).key(KEY_TAB).key(KEY_TAB).key(KEY_TAB).
    key(3).key(0).key(0).
    key(KEY_TAB).key(KEY_TAB)
    

    Fortunately, the Resolution fields are locked, so filling in either one sets the other to match, and the keystrokes work correctly in either the Width or Height field.

    For unknown reasons, the Huion tablet appears once in the lsusb listing:

    Bus 001 Device 017: ID 256c:006d HUION Huion Tablet


    But dmesg shows many variations:

    [    2.826523] input: HUION Huion Tablet Pen as /devices/pci0000:00/0000:00:14.0/usb1/1-4/1-4.2/1-4.2:1.0/0003:256C:006D.0004/input/input15
    [    2.826632] input: HUION Huion Tablet Pad as /devices/pci0000:00/0000:00:14.0/usb1/1-4/1-4.2/1-4.2:1.0/0003:256C:006D.0004/input/input16
    [    2.826723] input: HUION Huion Tablet Touch Strip as /devices/pci0000:00/0000:00:14.0/usb1/1-4/1-4.2/1-4.2:1.0/0003:256C:006D.0004/input/input17
    [    2.826816] input: HUION Huion Tablet Dial as /devices/pci0000:00/0000:00:14.0/usb1/1-4/1-4.2/1-4.2:1.0/0003:256C:006D.0004/input/input18
    [    2.826941] uclogic 0003:256C:006D.0004: input,hidraw11: USB HID v1.11 Keypad [HUION Huion Tablet] on usb-0000:00:14.0-4.2/input0
    [    2.834767] uclogic 0003:256C:006D.0005: hidraw4: USB HID v1.11 Device [HUION Huion Tablet] on usb-0000:00:14.0-4.2/input1


    Those devices (endpoints, whatever) change as various other USB devices get plugged / unplugged / enumerated:

    12986.011937] usb 1-4.2: USB disconnect, device number 16
    [12986.359640] usb 1-4.2: new full-speed USB device number 17 using xhci_hcd
    [12986.579858] usb 1-4.2: New USB device found, idVendor=256c, idProduct=006d, bcdDevice= 1.00
    [12986.579876] usb 1-4.2: New USB device strings: Mfr=1, Product=2, SerialNumber=3
    [12986.579882] usb 1-4.2: Product: Huion Tablet
    [12986.579887] usb 1-4.2: Manufacturer: HUION
    [12986.642042] input: HUION Huion Tablet Pen as /devices/pci0000:00/0000:00:14.0/usb1/1-4/1-4.2/1-4.2:1.0/0003:256C:006D.0014/input/input50
    [12986.642609] input: HUION Huion Tablet Pad as /devices/pci0000:00/0000:00:14.0/usb1/1-4/1-4.2/1-4.2:1.0/0003:256C:006D.0014/input/input51
    [12986.643357] input: HUION Huion Tablet Touch Strip as /devices/pci0000:00/0000:00:14.0/usb1/1-4/1-4.2/1-4.2:1.0/0003:256C:006D.0014/input/input52
    [12986.643699] input: HUION Huion Tablet Dial as /devices/pci0000:00/0000:00:14.0/usb1/1-4/1-4.2/1-4.2:1.0/0003:256C:006D.0014/input/input53
    [12986.644245] uclogic 0003:256C:006D.0014: input,hidraw0: USB HID v1.11 Keypad [HUION Huion Tablet] on usb-0000:00:14.0-4.2/input0
    [12986.707886] uclogic 0003:256C:006D.0015: hidraw1: USB HID v1.11 Device [HUION Huion Tablet] on usb-0000:00:14.0-4.2/input1
    [14148.081803] input: HUION Huion Tablet Pad as /devices/virtual/input/input55


    On some occasions, based on no events I understand, input-remapper will recognize the tablet as any one of:

    drwxr-xr-x  2 ed ed 4.0K Feb 18  2025 'HUION Huion Tablet'/
    drwxr-xr-x  2 ed ed 4.0K Sep  1 10:43 'HUION Huion Tablet Pad'/
    drwxr-xr-x  2 ed ed 4.0K Apr  3  2024 'HUION Huion Tablet Pen'/


    The dates show it’s been ‘HUION Huion Tablet Pad’ for a while, but ya never know what tomorrow will bring.

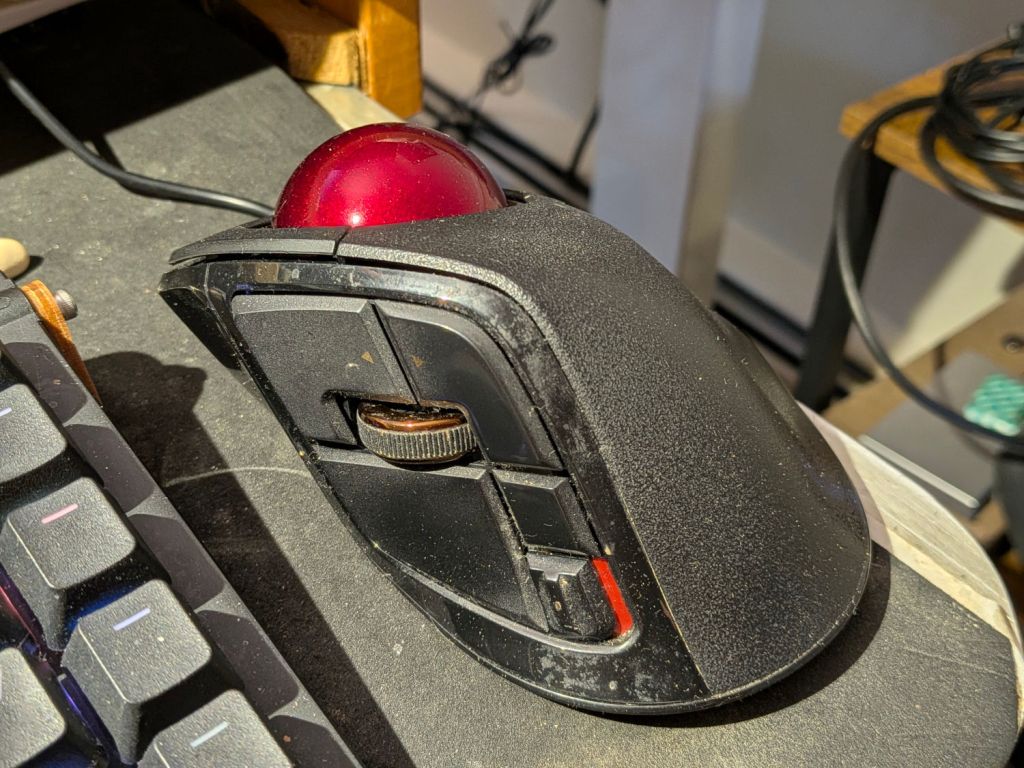
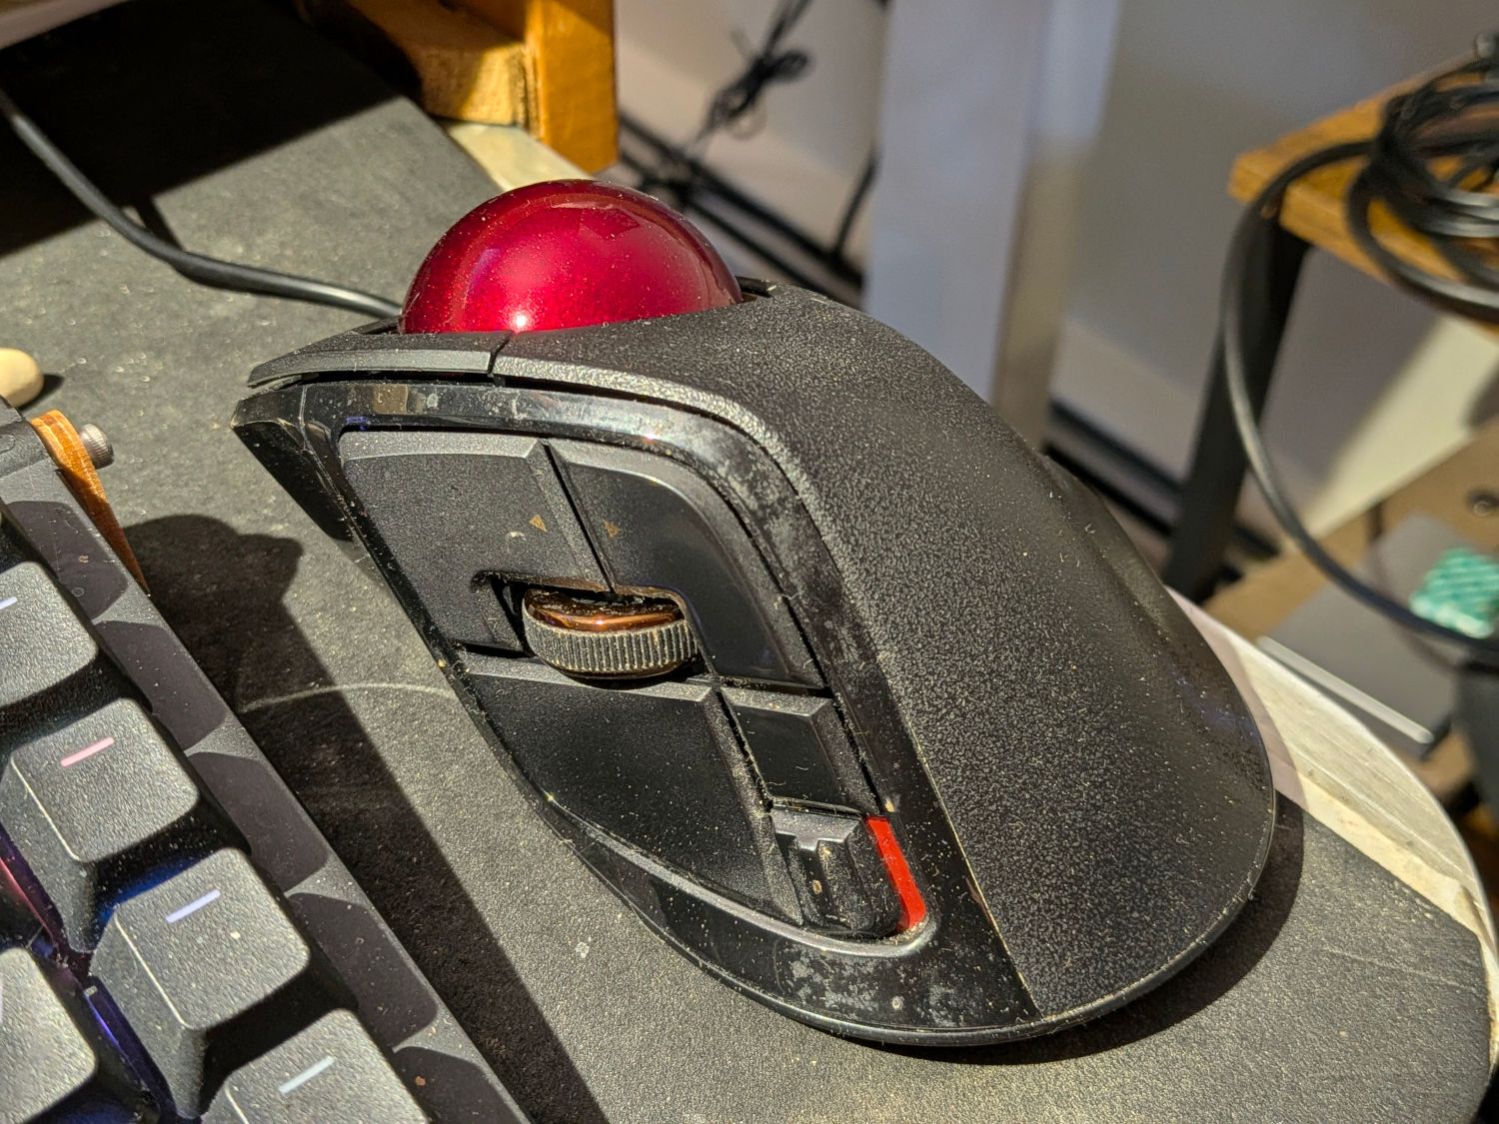
    The Elecom Deft Pro trackball at my right hand has seven buttons (three hidden around the ball) and a scroll wheel with up-down switches (called Wheel Right and Wheel Left from their horizontal mouse ancestry):
    Elecom Deft Pro trackball
    Elecom Deft Pro trackball

    Yeah, I oughta scrub that puppy more often.

    The wheel up-down switches map to the Home and End keys with the Ctrl key held down to jump to the beginning and end of the page:

    KEY_LEFTCTRL+KEY_HOME
    KEY_LEFTCTRL+KEY_END
    

    The wheel also has a push switch (the Middle mouse button) that I find inconvenient, so Button 6 (labeled Fn1 on the button) under my forefinger does that:

    BTN_MIDDLE
    

    Closing a browser tab happens so often it’s mapped to the small square button just over the resolution slide switch where my thumb can hit it:

    KEY_LEFTCTRL+w
    

    The Kensington Expert Mouse trackball (which continues to work!) under my left hand:
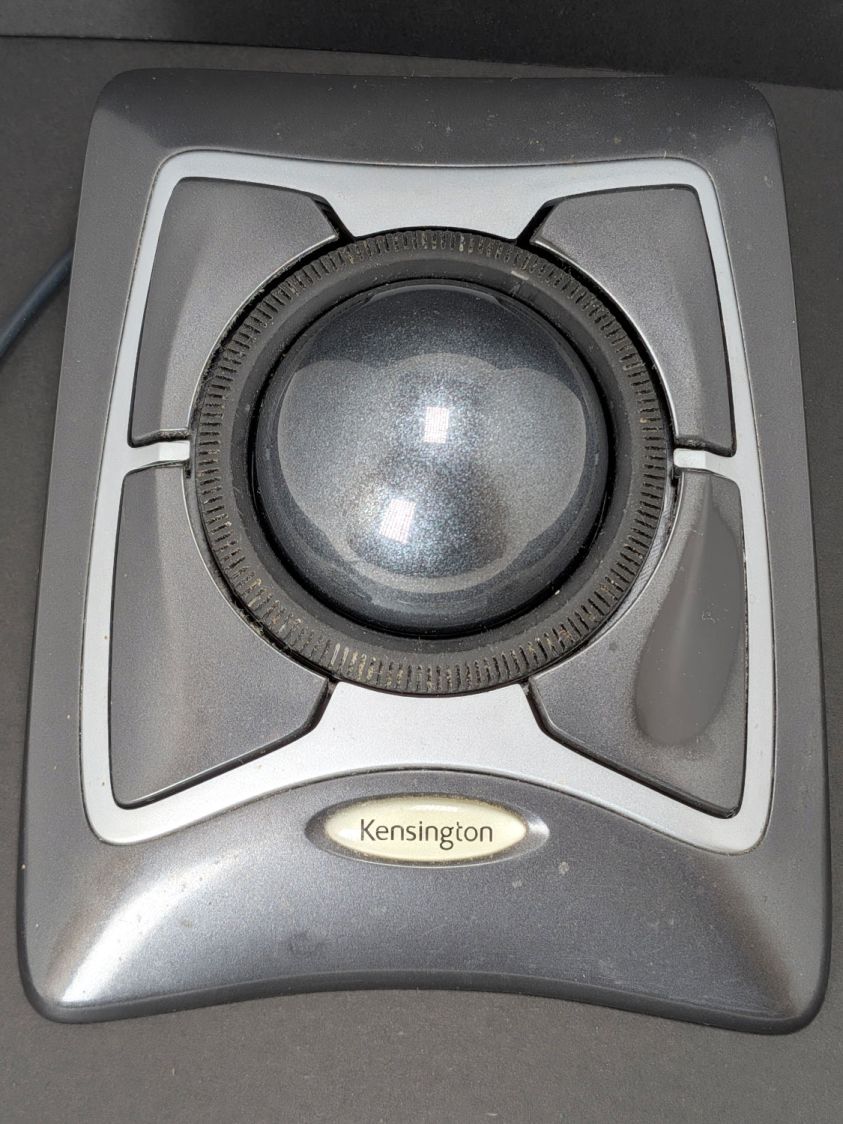
    Kensington Expert Mouse Trackball - worn button
    Kensington Expert Mouse Trackball – worn button

    Has had its buttons thoroughly rearranged:

    LL = Mouse Button LEFT → BTN_RIGHT
    UL = Mouse Button MIDDLE → XF86Back
    LR = Mouse Button RIGHT → BTN_LEFT
    UR = Mouse Button 4 → BTN_MIDDLE


    Your mileage will most certainly be different.
  • Huion H610Pro Tablet vs. Digimend vs. DKMS

    Huion H610Pro Tablet vs. Digimend vs. DKMS

    A month or two ago the Huion H610Pro tablet’s buttons stopped working with the input-remapper macros I set up to do useful things. Considerable searching showed that the Digimend kernel driver project previously handling the buttons went inertial two years ago and, apparently, no longer worked with contemporary kernels. Further searching suggested old Huion tablets, which mine certainly is, should be handled by the native kernel / X drivers, so I uninstalled Digimend.

    Which produced a persistent error message from the DKMS machinery telling me something awful was happening with the now-missing Digimend.

    An Arch Linux BBS thread suggested manually removing various detritus left behind during successive kernel updates in places like /usr/lib/modules and /var/lib/dkms. Given that my desktop box runs the 6.18 kernel, I felt reasonably confident in removing the 5* kernel directories and anything mentioning digimend from those locations.

    After the box started up the next morning, all the tablet buttons once again worked the way they use to.

    The nice thing about Free Software is having access to all the pieces when something breaks …

  • Sherline vs. LinuxCNC 2.9.8

    Sherline vs. LinuxCNC 2.9.8

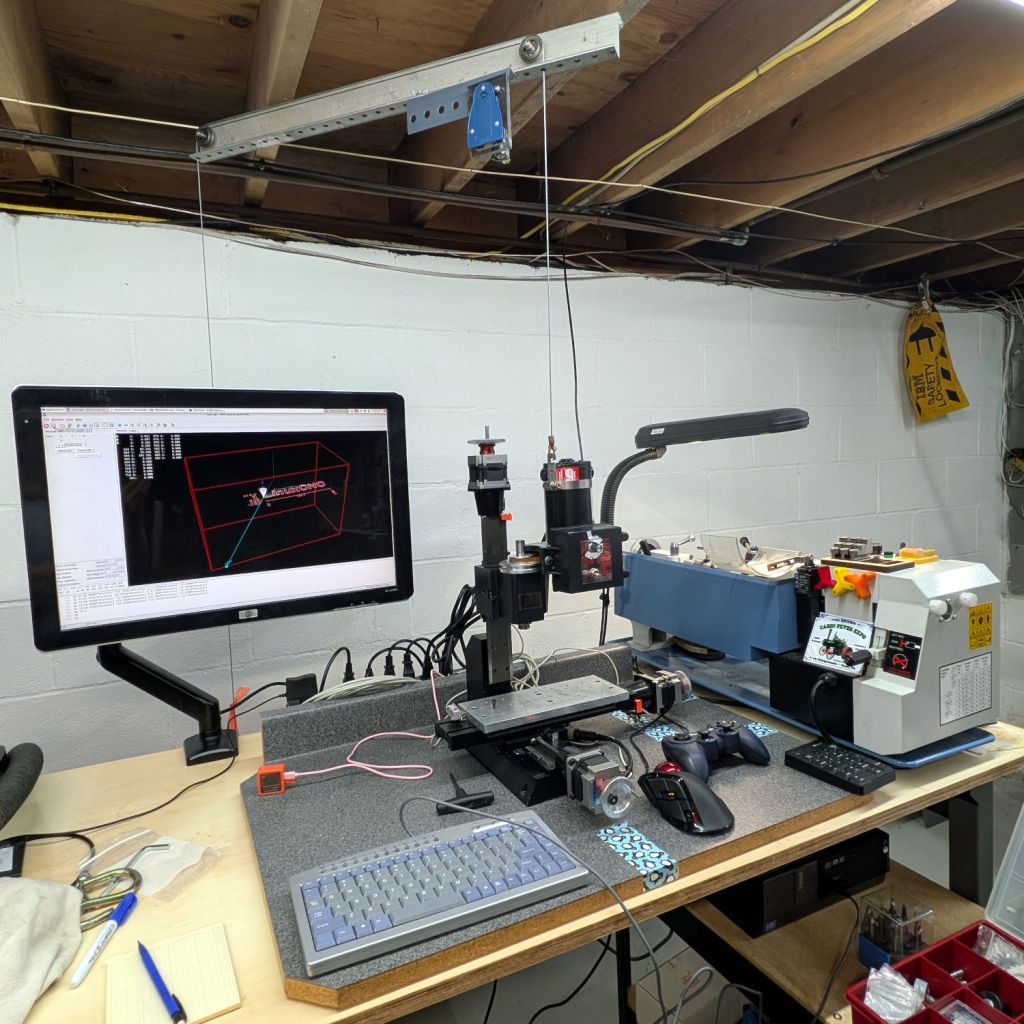
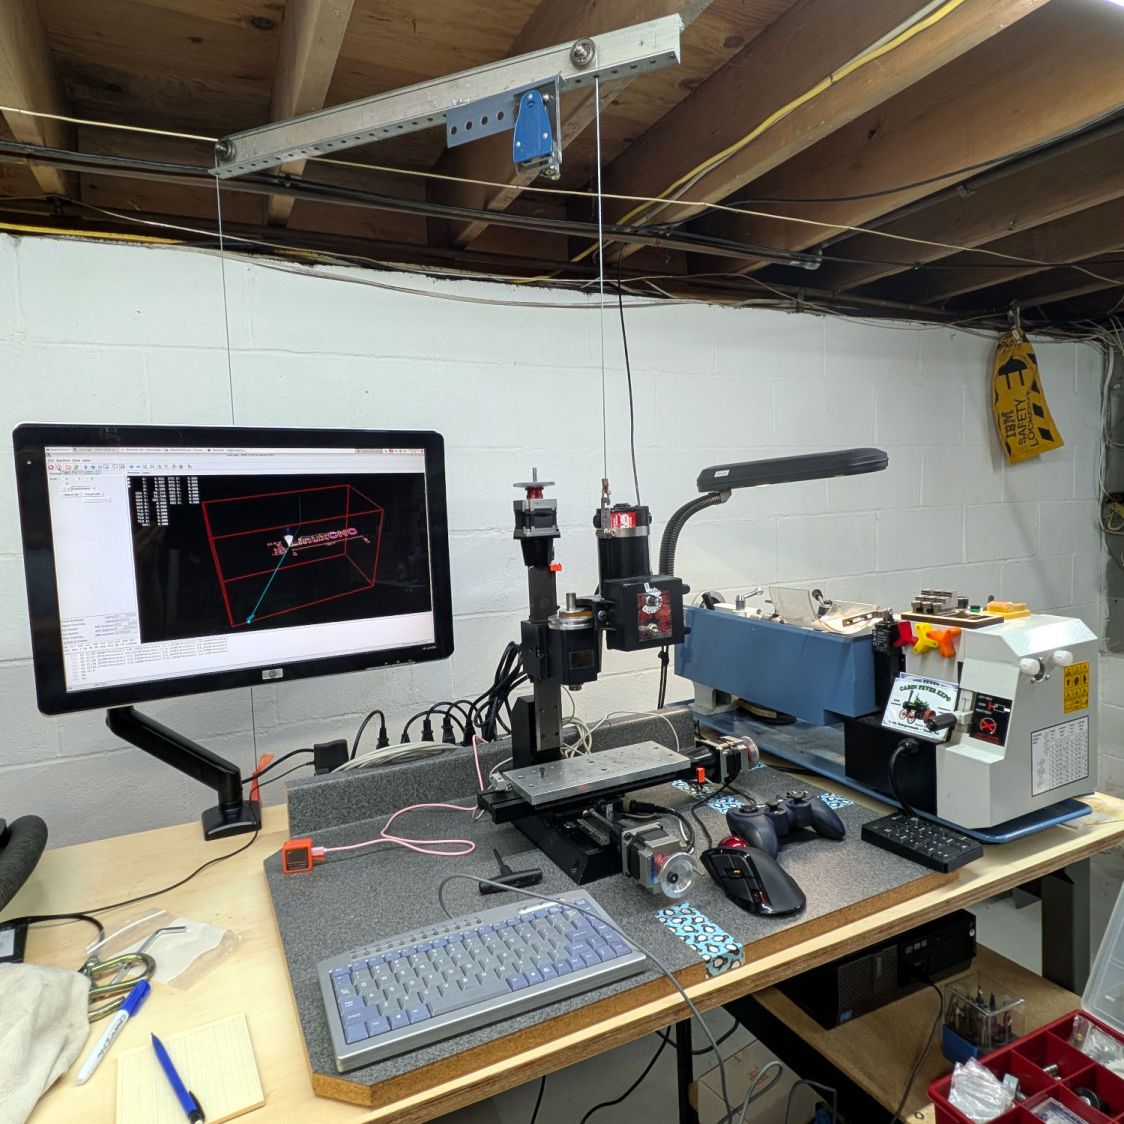
    Notes on finally getting the Sherline CNC mill operating in its new home, with a suitable Axis startup image:

    Sherline setup 2026-06
    Sherline setup 2026-06

    The gray countertop from its former home sits on foam strips soaking up a slight warp with enough isolation to keep things quiet.

    The gantry required the usual fiddling to make the cable hoist the Z axis directly upward, with the orange flag on the counterweight barely visible below the monitor.

    I recently touched the box of precision XYZ positioners and there might be something useful, albeit grossly overqualified, in there to simplify dropping the laser pointer beam directly through the spindle bore.

    A clean installation of LinuxCNC 2.9.8 on an ancient Dell Optiplex 9020 proceeded smoothly. Installing x11vnc let the rest of the proceedings happen from upstairs in the Comfy Chair. For unknown reasons, vinagre works better than Reminna as a VNC client, after recalling F11 enters / exits fullscreen mode.

    The mesaflash utility accompanying LinuxCNC 2.9.8 did not recognize the Mesa 6i25 card. Fetching & compiling the most recent version (3.5.17) cleared that hump and flashed the bitmap:

    sudo mesaflash --verbose --device 5i25 --write 5i25/configs/hostmot2/5i25_prob_rfx2.bit
    

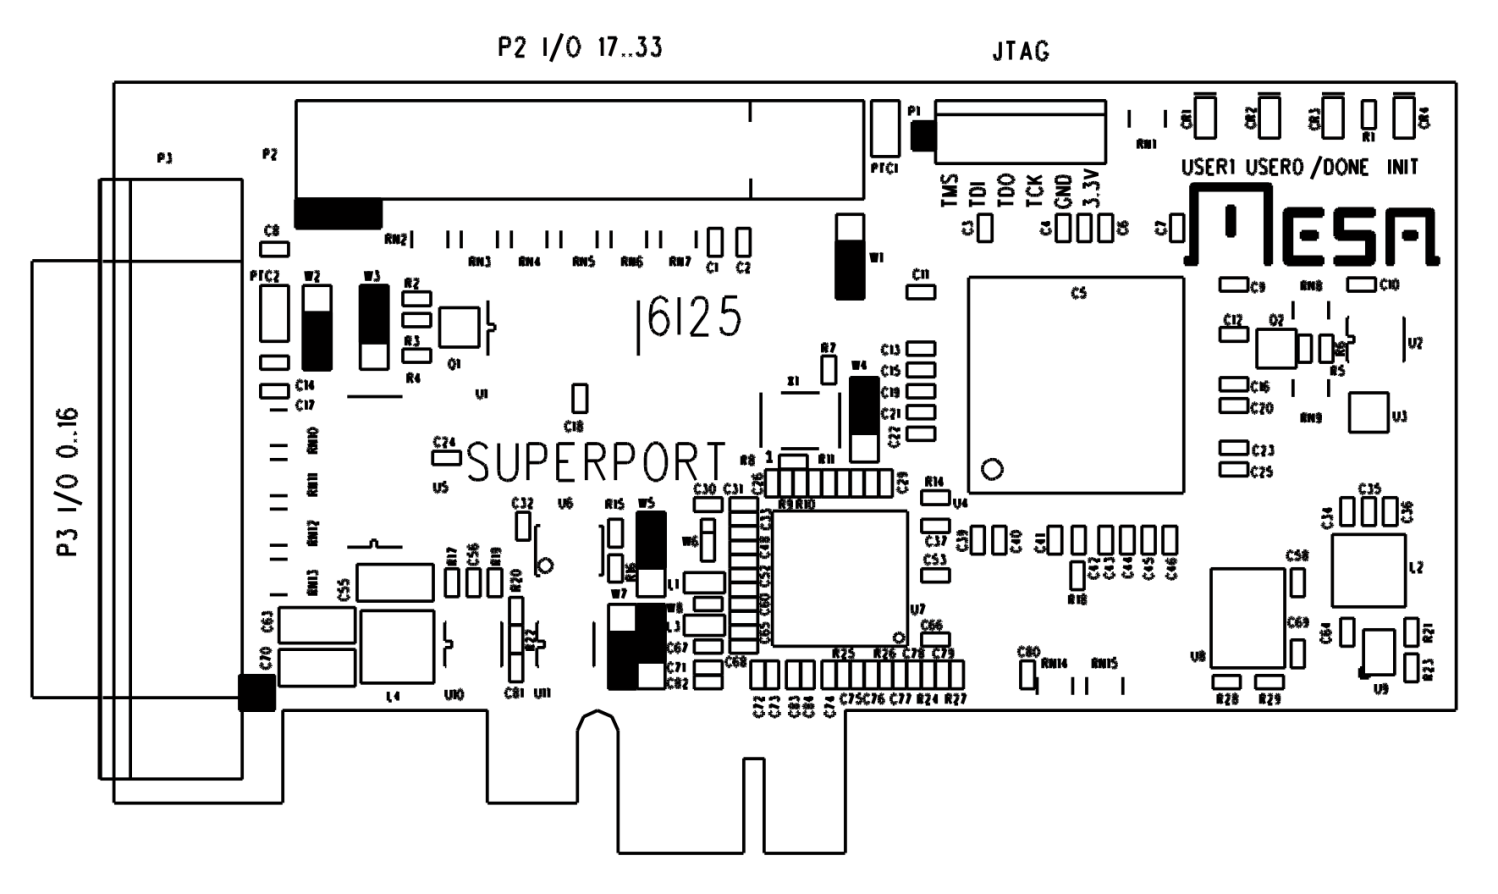
    The 6i25 wants to be known as a 5i25, with its jumpers in their default positions:

    Mesa 6i25 - jumper locations
    Mesa 6i25 – jumper locations

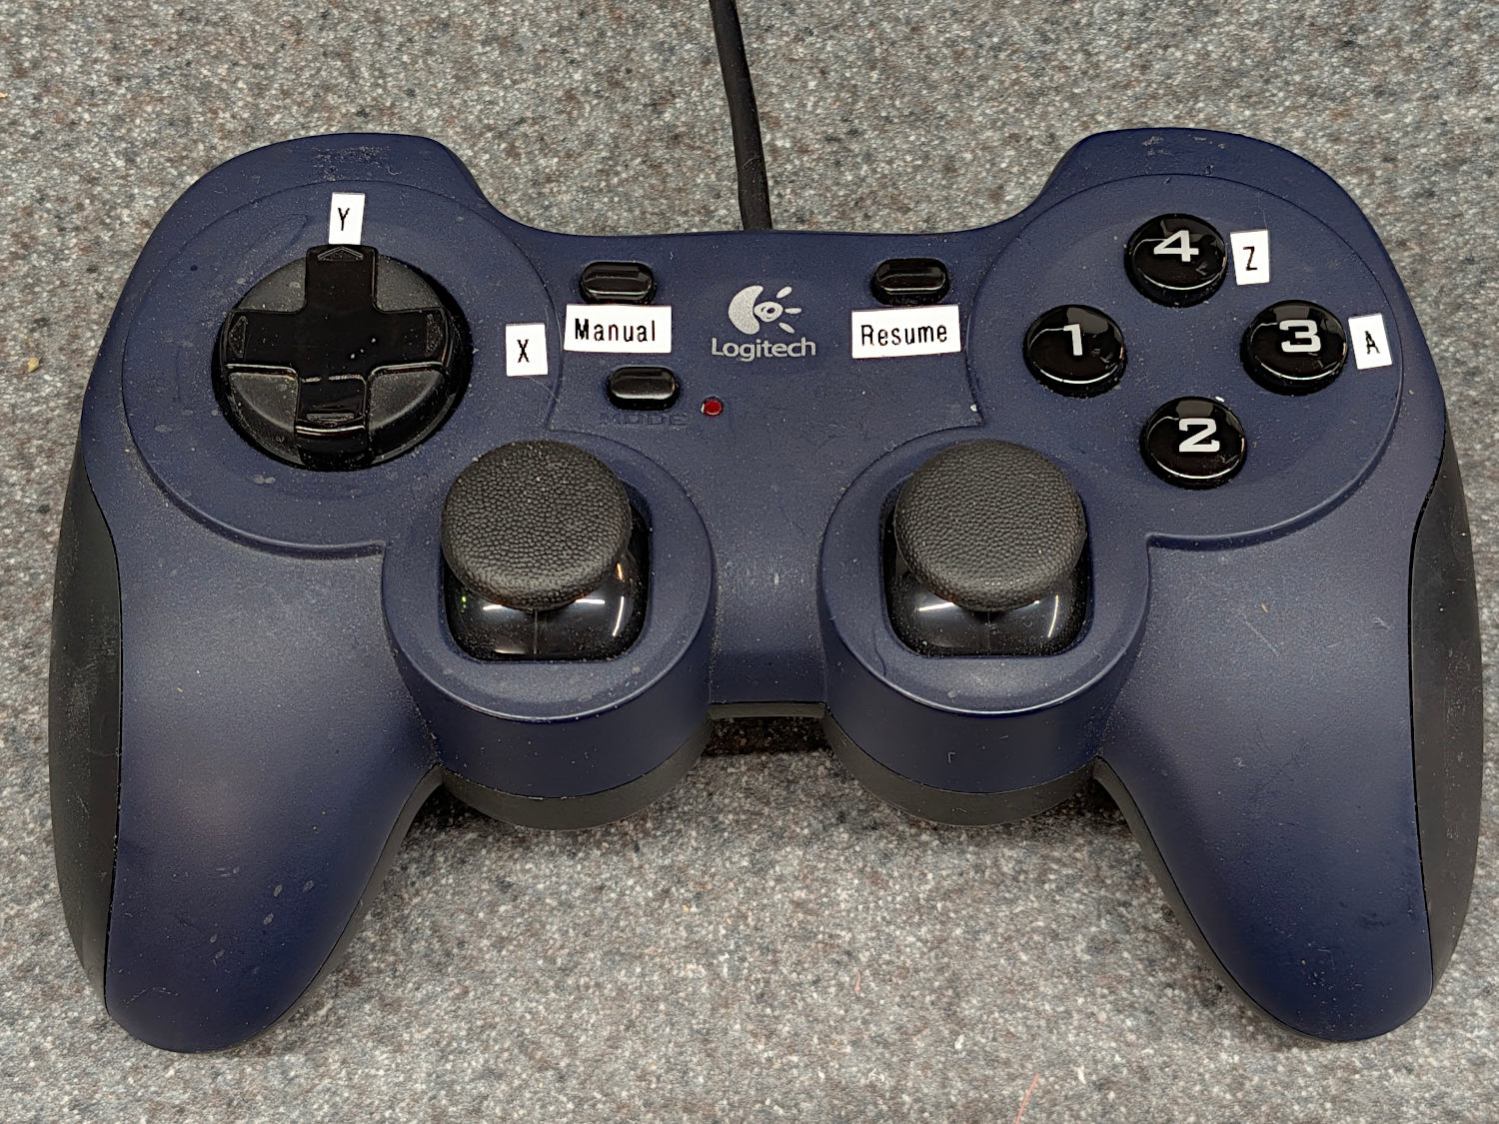
    For unknown reasons, the button originally known as btn-trigger became btn-joystick for a while and has now reverted to btn-trigger. It’s labeled 1 in the four-button cluster:

    Logitech Dual-Action Gamepad - relabeled
    Logitech Dual-Action Gamepad – relabeled

    Which required changing the pin name in the Kicad library component:

    Sherline HAL schematic - Logitech button 1 name
    Sherline HAL schematic – Logitech button 1 name

    Which required converting the old Kicad library format into the new Kicad library format, a completely automatic process without, AFAICT, any unpleasant side effects.

    The new name fed into the schematic as expected, after minor fumbling while re-adding the modified component and setting its annotation number:

    Sherline HAL schematic - Logitech AZ button logic
    Sherline HAL schematic – Logitech AZ button logic

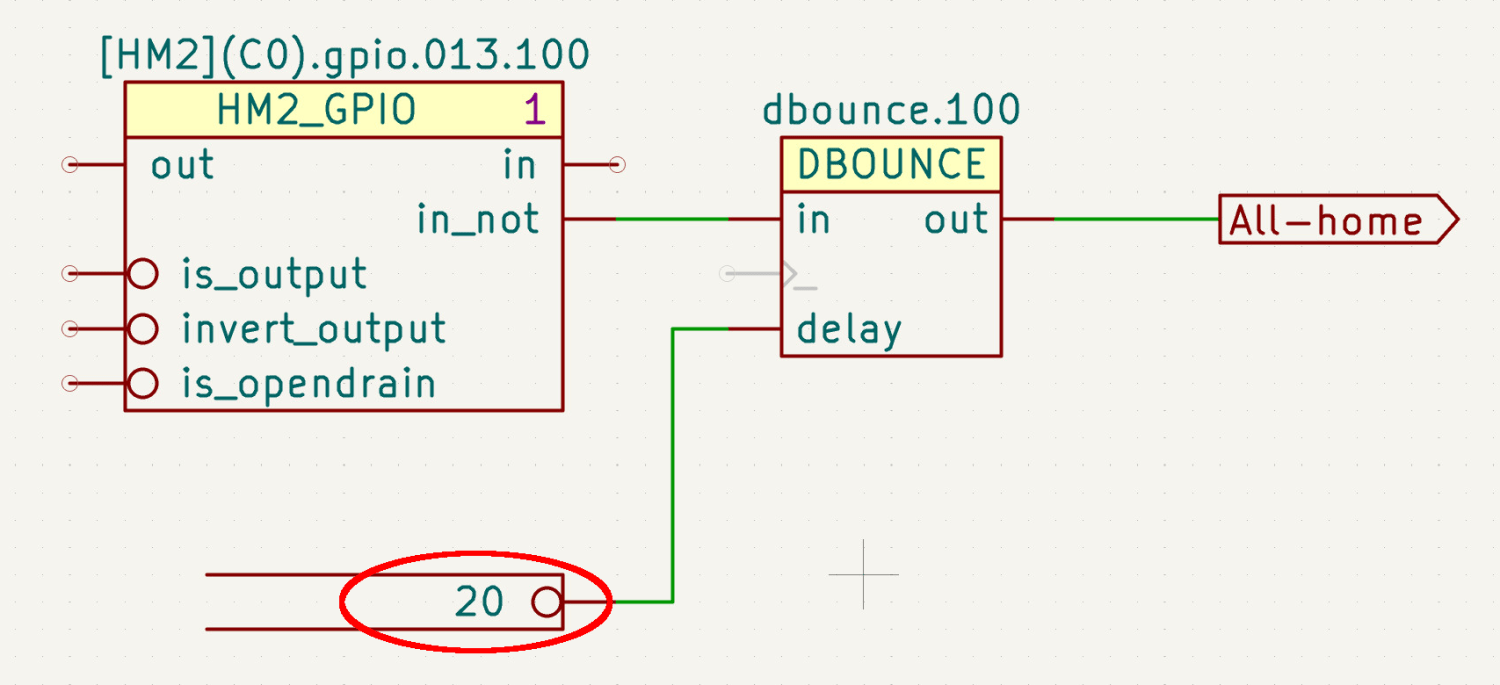
    The X axis home microswitch has (apparently) become more bouncy while it was idle, so I increased the number of samples before HAL sees a change in that GPIO input:

    Sherline HAL schematic - home switch debounce
    Sherline HAL schematic – home switch debounce

    The dbounce block runs in the servo thread at 1 m per tick, so those 20 samples take all of 20 ms while the X axis moves 0.15 mm. At some point I should apply a scope to that switch, but for now It Just Works™.

    Considerably to my surprise, compiling the modified Kicad schematic into a HAL file proceeded without incident, despite various Python updates in the last five years.

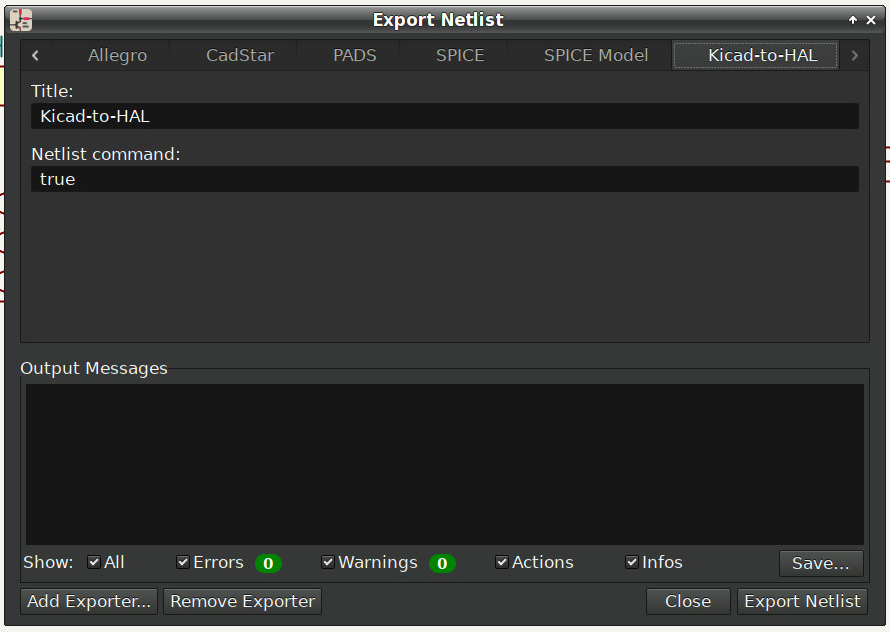
    Kicad produces an “intermediate XML file” containing the netlist data intended for a conversion / export program, which is basically what my Kicad-to-HAL lashup does. I told Kicad to use Bash’s true command as a converter:

    Sherline HAL schematic - netlist export
    Sherline HAL schematic – netlist export

    So I can run the Kicad-to-HAL converter manually:

    python ../Kicad\ Conversion/Kicad-to-HAL.py Sherline\ HAL\ -\ Logitech\ Gamepad\ jogging.xml Sherline.hal
    

    You could tell Kicad to run it and it would probably Just Work™, but I’m used to peering at the results and dinking with my program.

    Which produced a new Sherline.hal file that Just Worked™ with the existing Sherline.ini file containing the configuration constants.

    The Sherline has cut only air so far, but, as the man said, “E pur si muove.”

  • Keychron C3 Pro Keyboard: Taming

    Keychron C3 Pro Keyboard: Taming

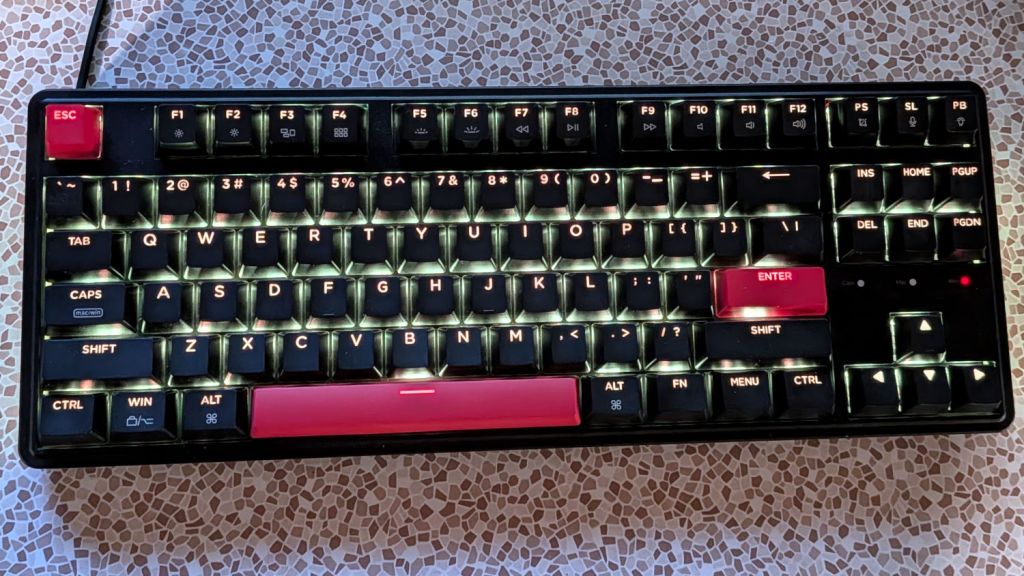
    Having set the Moonlander to use Auto Shift, I’ve come to depend on it, so I got a Keychron C3 Pro keyboard for one of the Basement Shop’s PCs because it glows in the dark and can be configured with QMK:

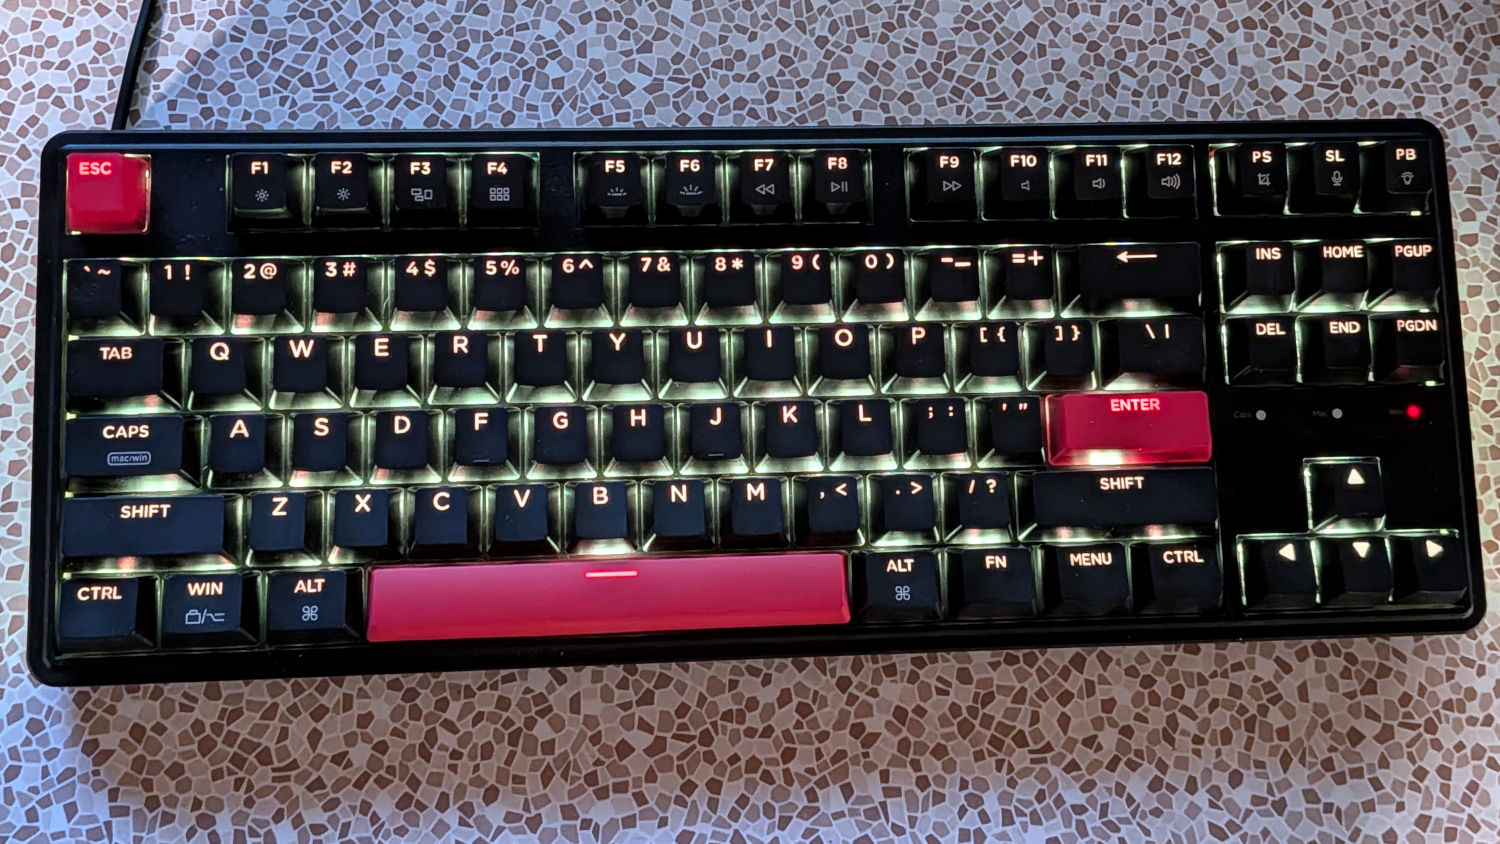
    Keychron C3 Pro - tamed
    Keychron C3 Pro – tamed

    The default setup has rainbow hues cycling across the keyboard, which I find entirely too distracting. Although you can manually select the solid-color variant from the myriad possibilities using the keyboard, I forced a solid color with this config.h file:

    #define RGB_MATRIX_DEFAULT_ON true // Sets the default enabled state, if none has been set
    #define RGB_MATRIX_DEFAULT_MODE RGB_MATRIX_SOLID_COLOR // Sets the default mode, if none has been set
    #define RGB_MATRIX_DEFAULT_HUE 36  // Sets the default hue value, if none has been set
    #define RGB_MATRIX_DEFAULT_SAT 255 // Sets the default saturation value, if none has been set
    #define RGB_MATRIX_DEFAULT_VAL 255 // Sets the default brightness value, if none has been set


    Enabling Auto Shift requires this rules.mk file:

    AUTO_SHIFT_ENABLE = yes
    

    Both of those go in the keymap directory defining the keyboard mapping for my custom setup:

    qmk_firmware/keyboards/keychron/c3_pro/ansi/rgb/keymaps/ednisley
    

    The keymap.c file remains unchanged, although I’m mildly tempted to toss the Mac layouts overboard.

    For the record, setting QMK to compile that keyboard configuration goes like this:

    qmk setup -H /base_directory/…/qmk_firmware
    <snippage>
    qmk new-keymap -kb keychron/c3_pro/ansi/rgb -km ednisley
    qmk config user.keyboard=keychron/c3_pro/ansi/rgb user.keymap=ednisley
    qmk compile
    qmk flash
    

    Flashing the keyboard firmware goes like this:

    • Run qmk flash
    • Unplug the USB cable
    • Hold down the Esc key
    • Plug in the USB cable
    • Release the Esc key

    I should boot the Atreus configuration into the current decade, but that’s for later.

  • Kensington Expert Mouse Trackball: Switch Failure

    Kensington Expert Mouse Trackball: Switch Failure

    All of my Kensington Expert Mouse Trackballs have worked fine for the last several years, despite their previous history of scroll ring troubles, until the main button on the trackball at my left hand stopped responding to thumb pressure.

    You can tell that button has done a lot of clicking:

    Kensington Expert Mouse Trackball - worn button
    Kensington Expert Mouse Trackball – worn button

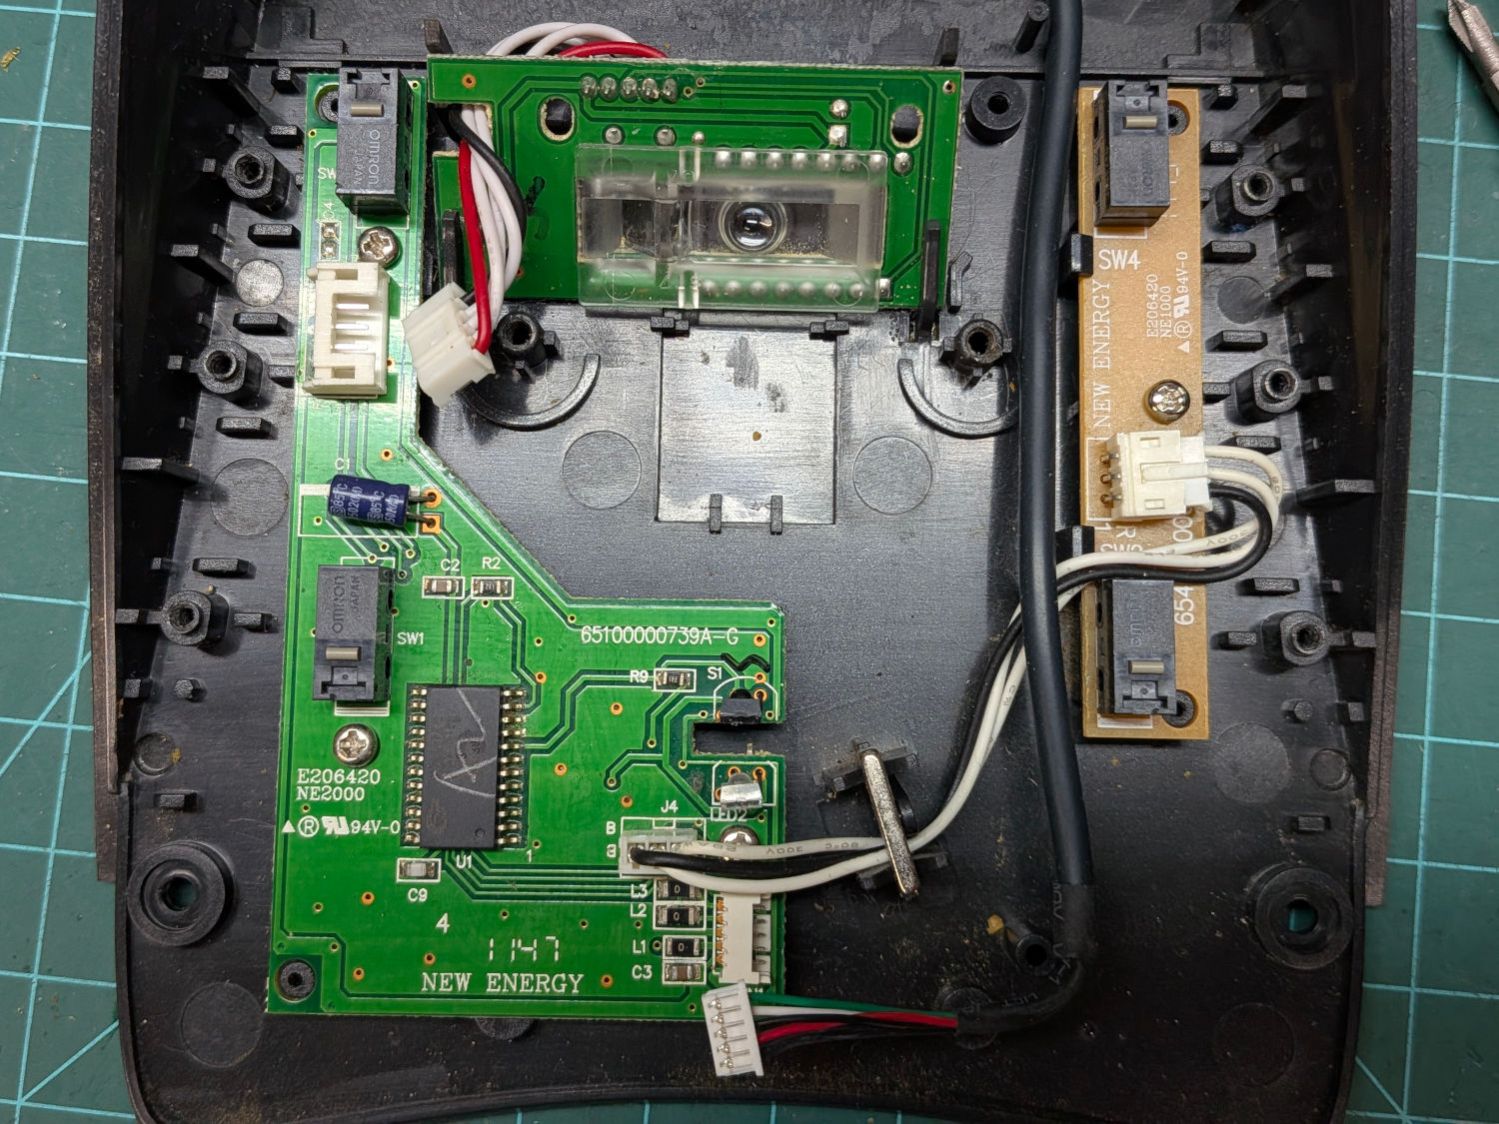
    The switch layout comes as no surprise:

    Kensington Expert Mouse Trackball - switch layout
    Kensington Expert Mouse Trackball – switch layout

    Those are Genuine Omron D2F-01 SPDT switches and the replacements are Genuine Anonymous D2F-01F. While I had the cover off, I replaced all four switches.

    Protip: The black cable on the right must go under the three wires between the PCBs. Arranged as shown, the scroll ring will drag on the cable.

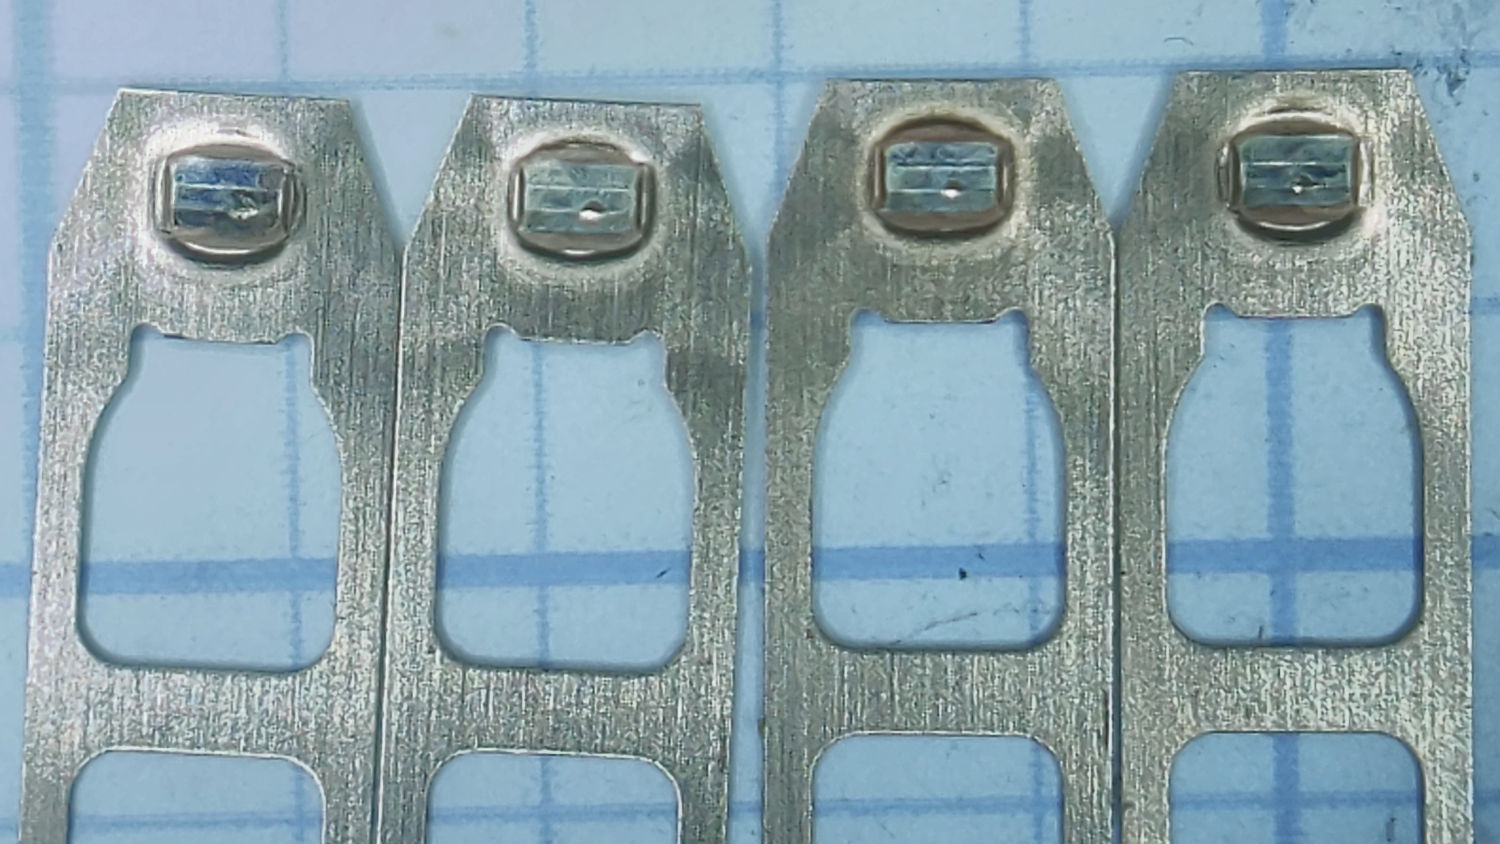
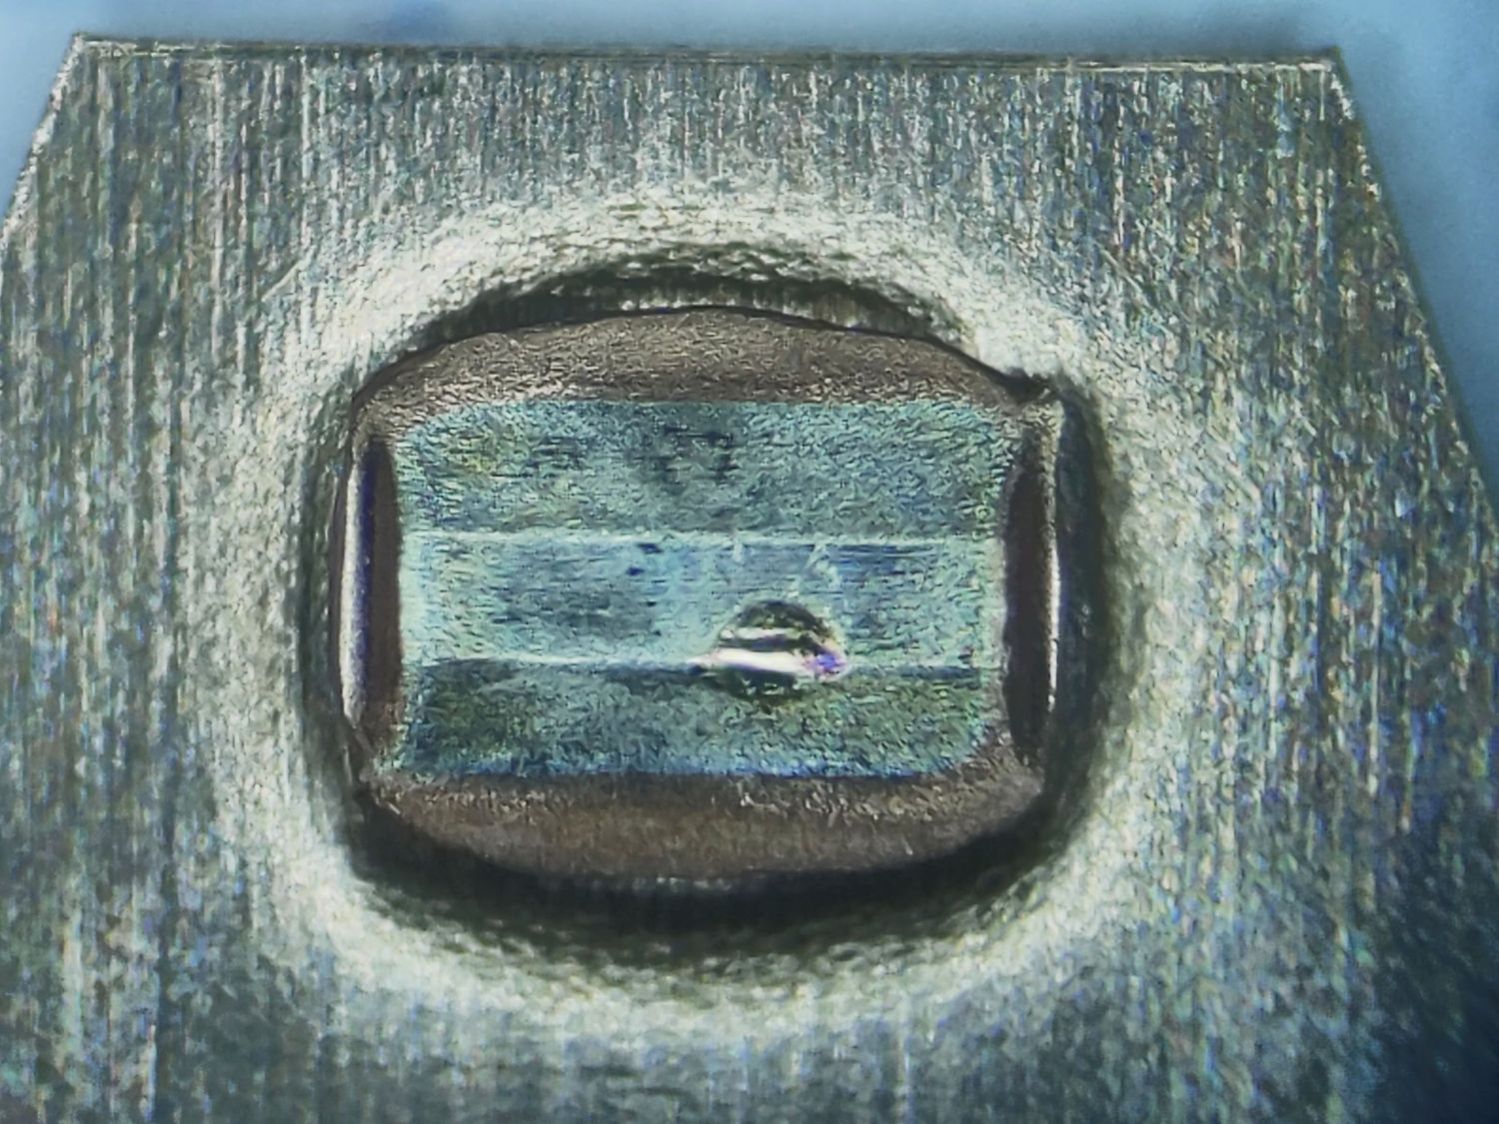
    I dismantled the switches and put their Common bar under the microscope. I believe these contacts rest on the Normally Closed switch terminal, which is electrically inert:

    Kensington Expert Mouse Trackball - NC contacts
    Kensington Expert Mouse Trackball – NC contacts

    Three of them have about the same amount of wear:

    Kensington Expert Mouse Trackball - NC contact 2
    Kensington Expert Mouse Trackball – NC contact 2

    The leftmost one looks worse:

    Kensington Expert Mouse Trackball - NC contact 1
    Kensington Expert Mouse Trackball – NC contact 1

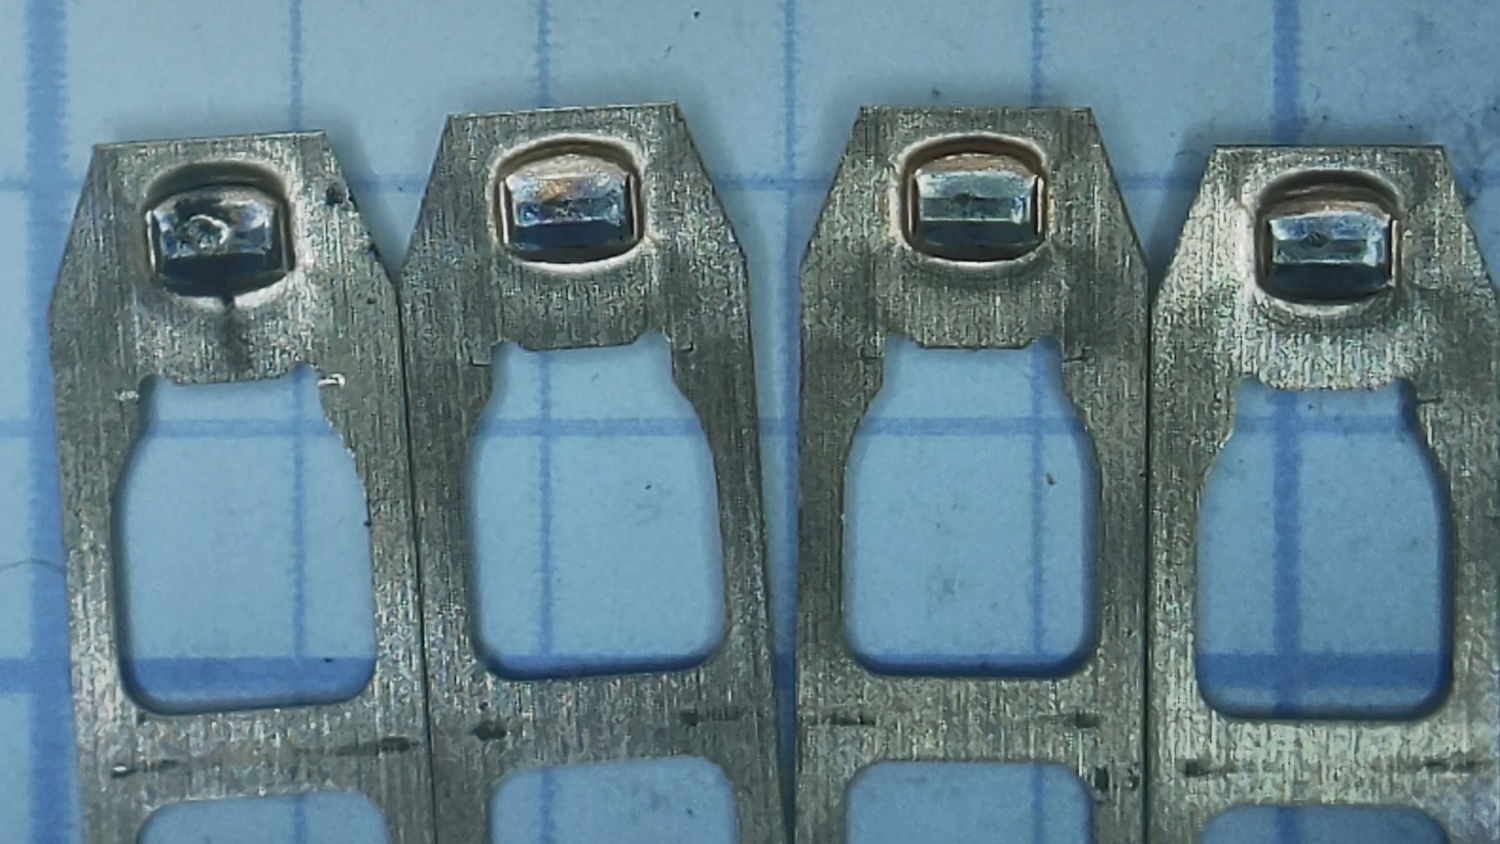
    Flipping them over (in the same order) exposes what I think are their Normally Open contacts responsible for all the button action:

    Kensington Expert Mouse Trackball - NO contacts
    Kensington Expert Mouse Trackball – NO contacts

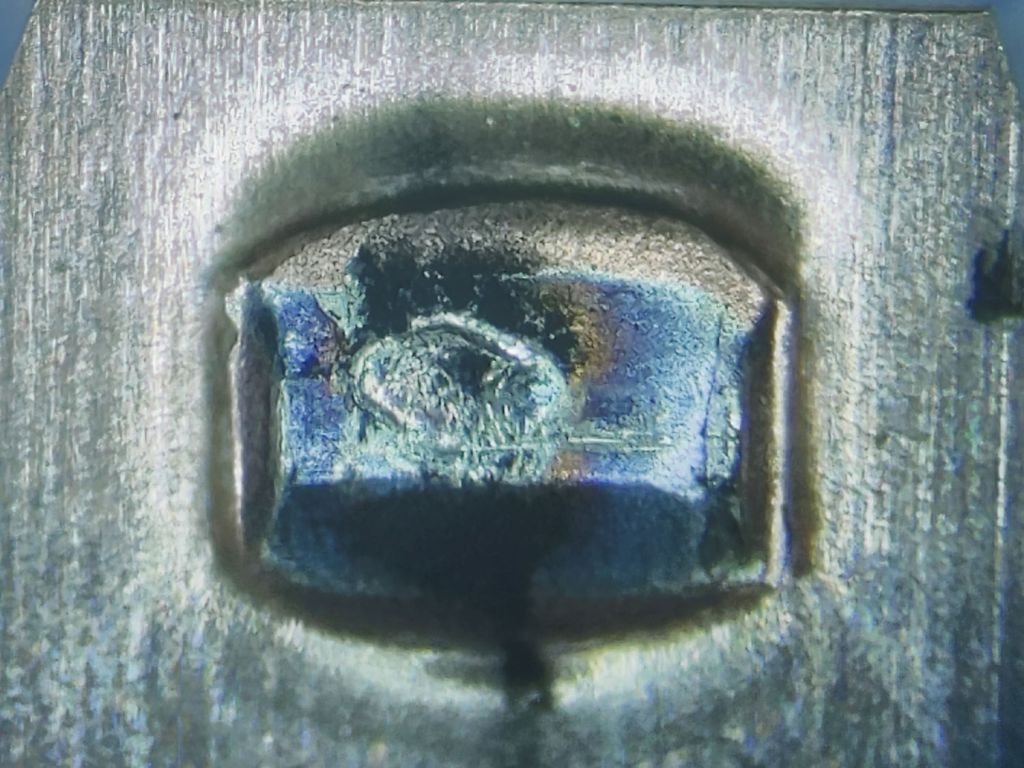
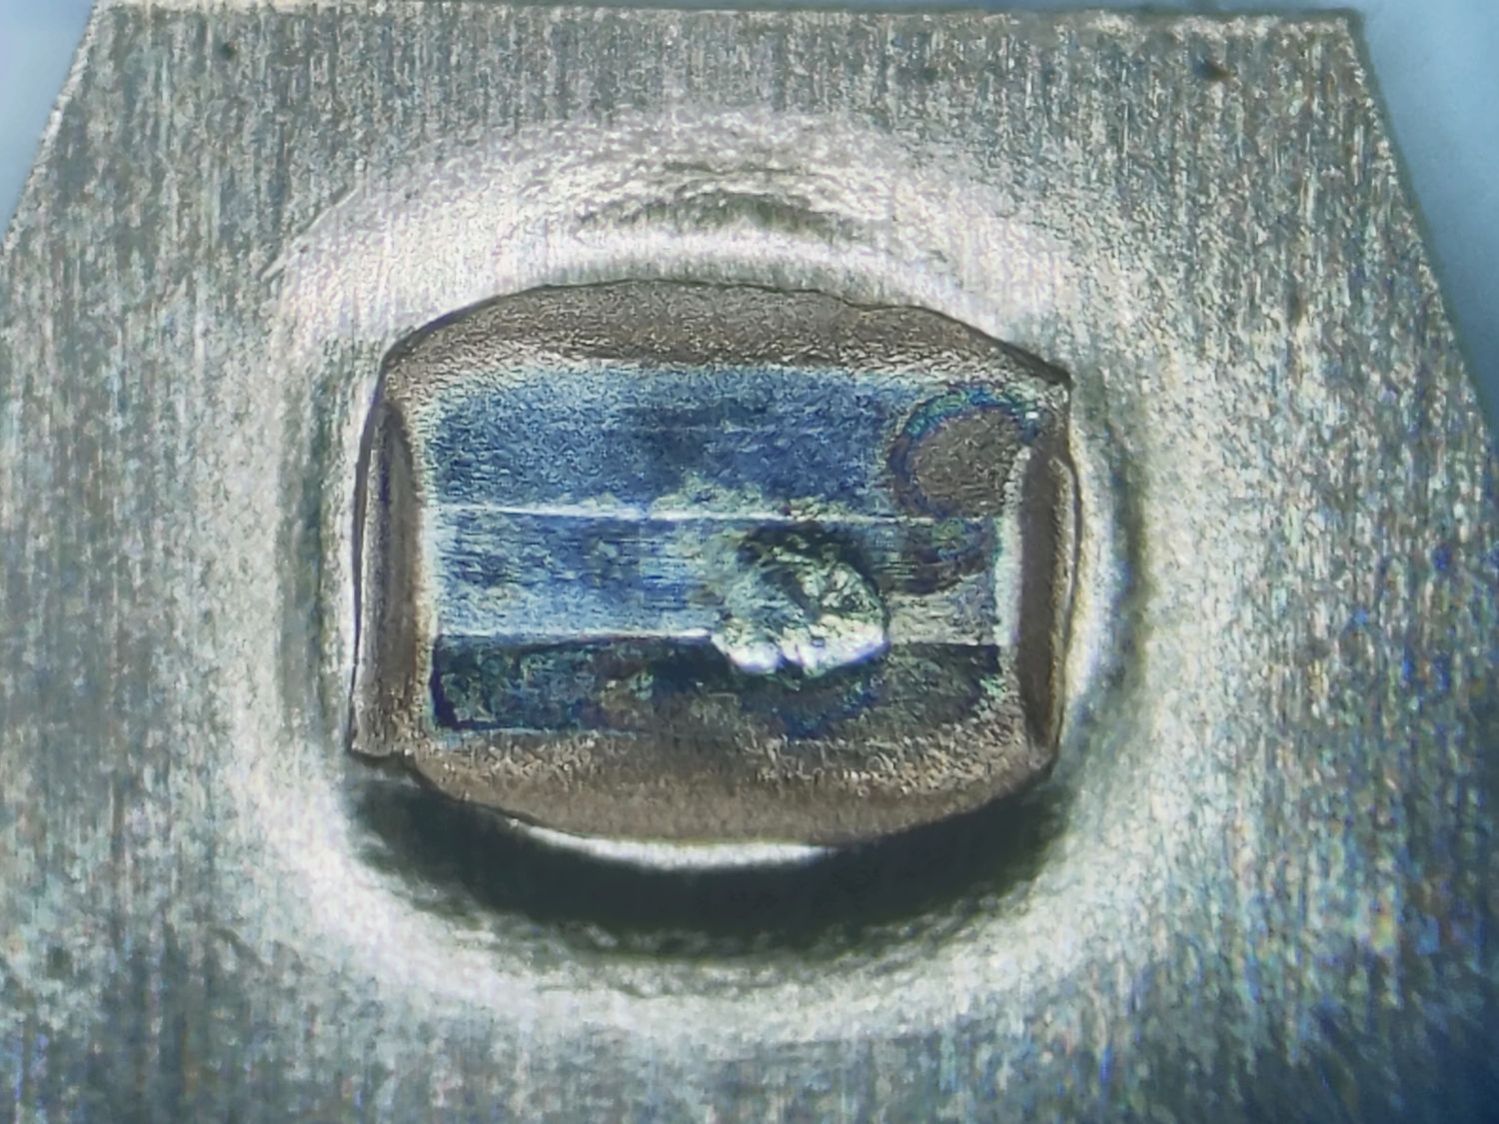
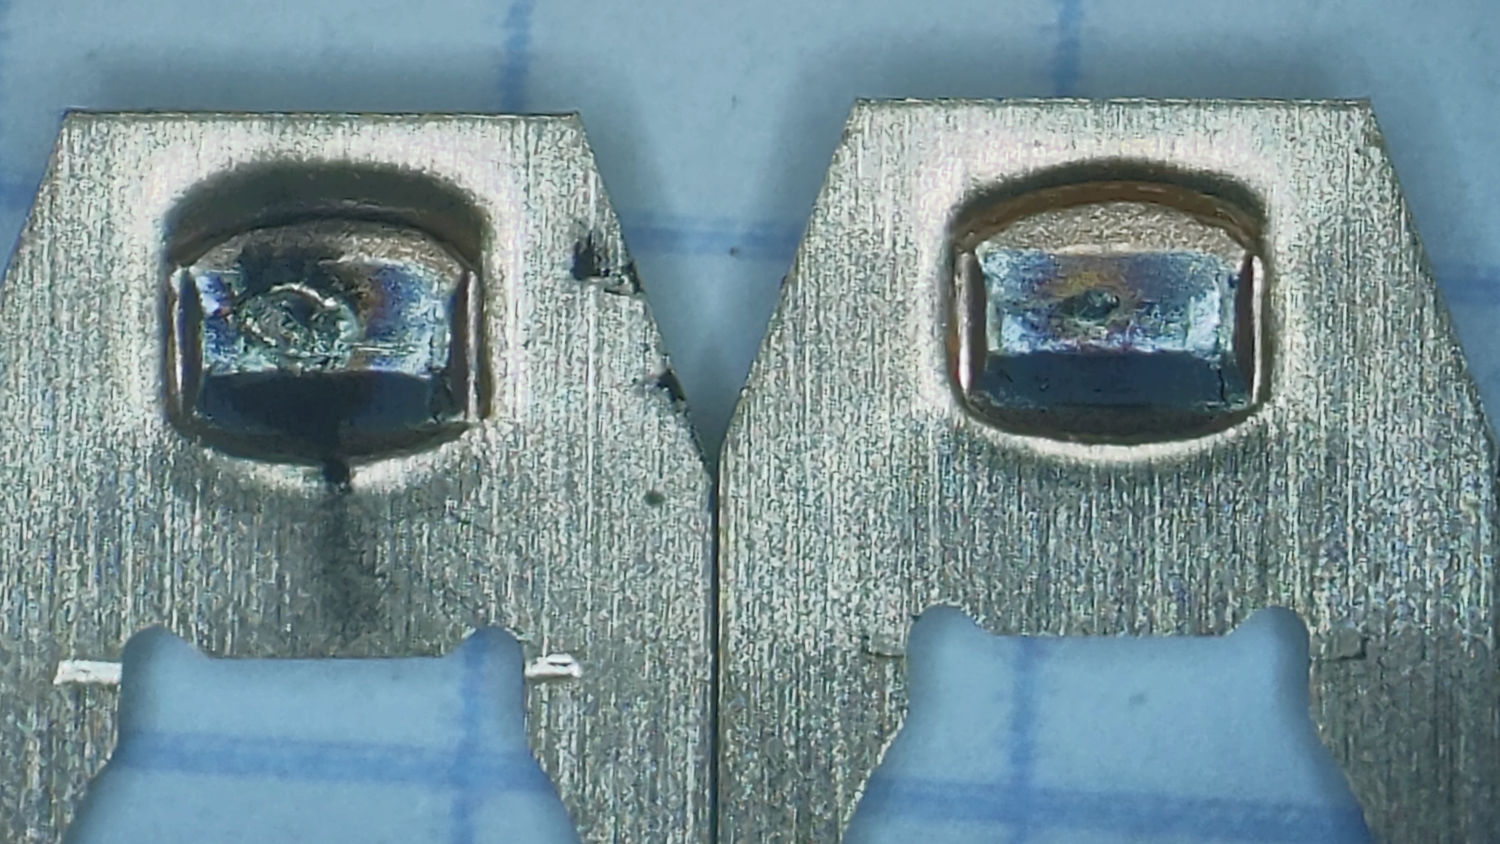
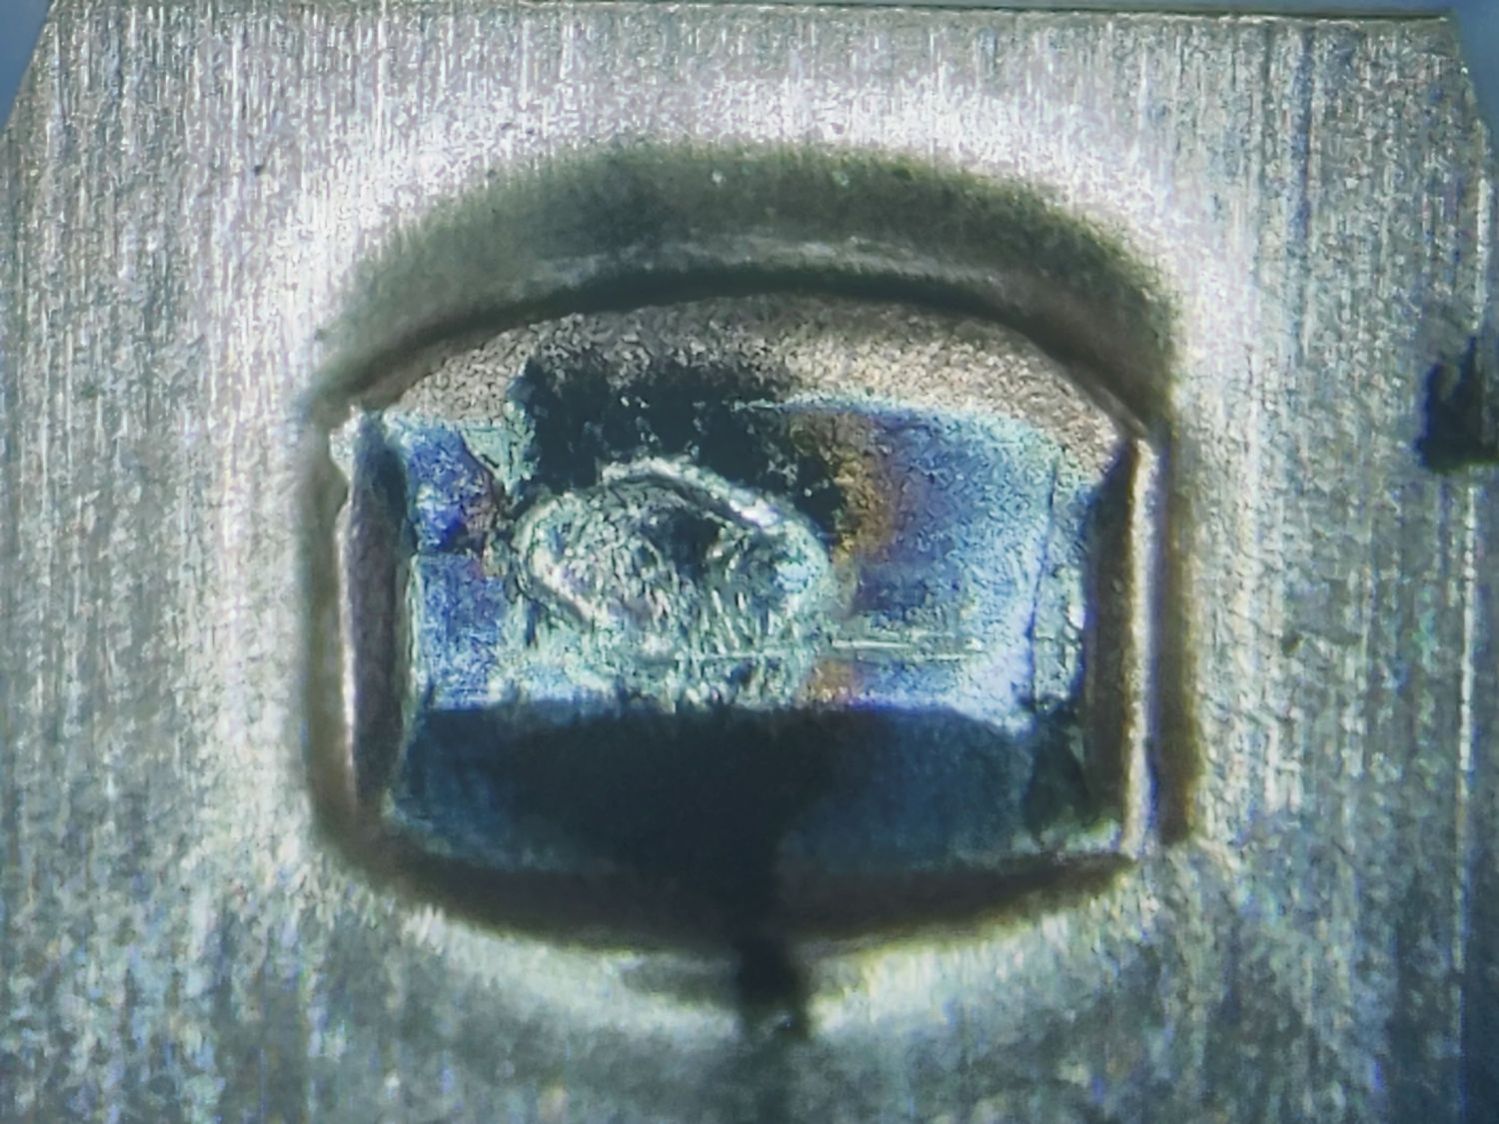
    Again, the rightmost three look about the same and the contact on the left shows more wear, plus what looks like a soot streak:

    Kensington Expert Mouse Trackball - NO Contacts 1 2
    Kensington Expert Mouse Trackball – NO Contacts 1 2

    A closer look:

    Kensington Expert Mouse Trackball - NO Contact 1
    Kensington Expert Mouse Trackball – NO Contact 1

    These things operate at logic levels, so most of the damage surely comes from mechanical erosion and the soot is pulverized metal.

    While waiting for the switches to arrive, I deployed an Expert Mouse Trackball from a PC in the Basement Shop. The repaired unit went down there, so its new switches should survive longer even if they’re of mediocre quality.

  • Monitor Arm Tilt Adjustment: Bad Part Repair

    Monitor Arm Tilt Adjustment: Bad Part Repair

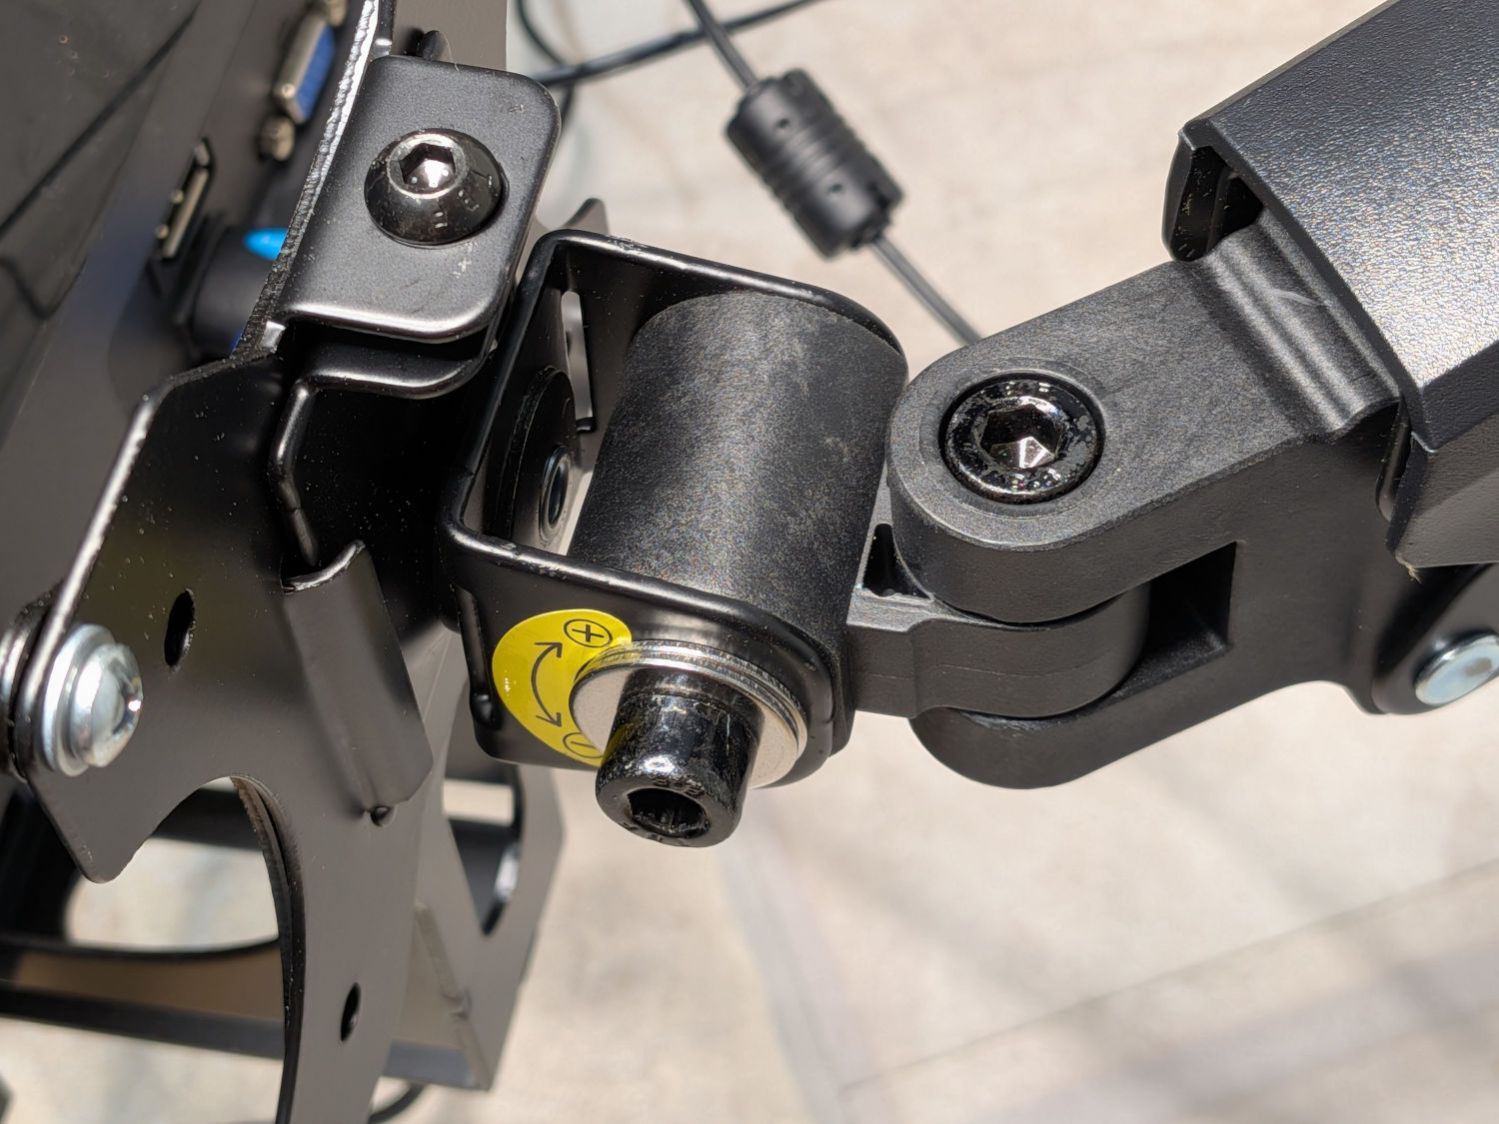
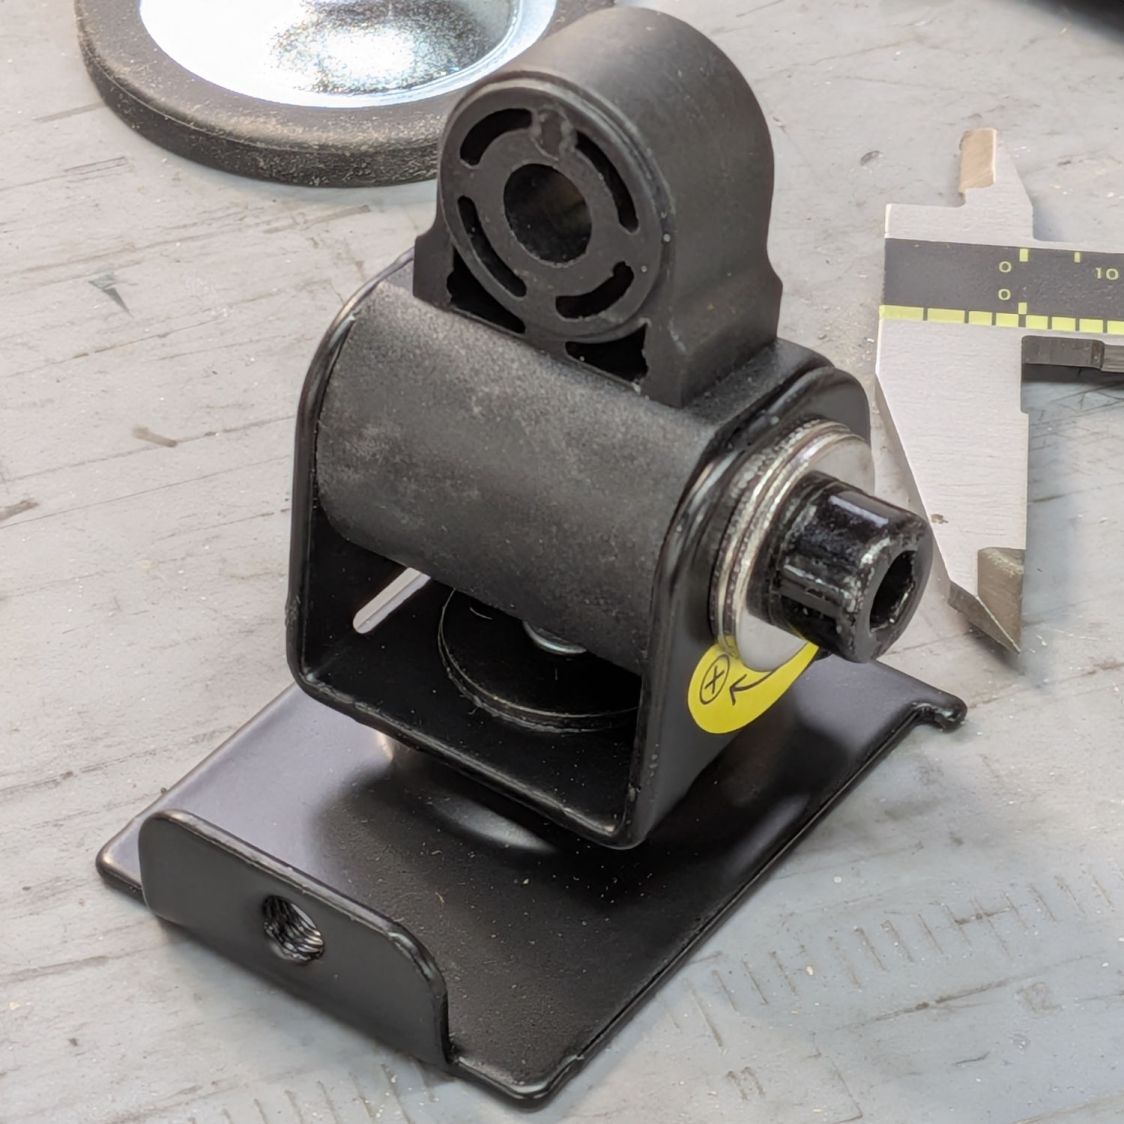
    The tilt (it’s really “pitch”, but I can’t make a case for being that pedantic) adjustment on a recently arrived monitor stand / arm was nonfunctional, because the metal clamp had been bent about a millimeter too narrow to fit the plastic core. This is how it should look:

    Monitor tilt adjustment - installed
    Monitor tilt adjustment – installed

    As delivered, the plastic core was 32-ish mm wide and the gap at the base of the metal clamp was 31 mm, so the clamp arms stuck out at an angle on both ends of the core .

    Because the cap screw bottomed out on the threads in the far side of the clamp, it couldn’t be tightened enough to force the clamp arms against the core.

    Well, if the core is a millimeter too large for the clamp, shortening it should solve the problem; I can always shorten the screw if it comes to that.

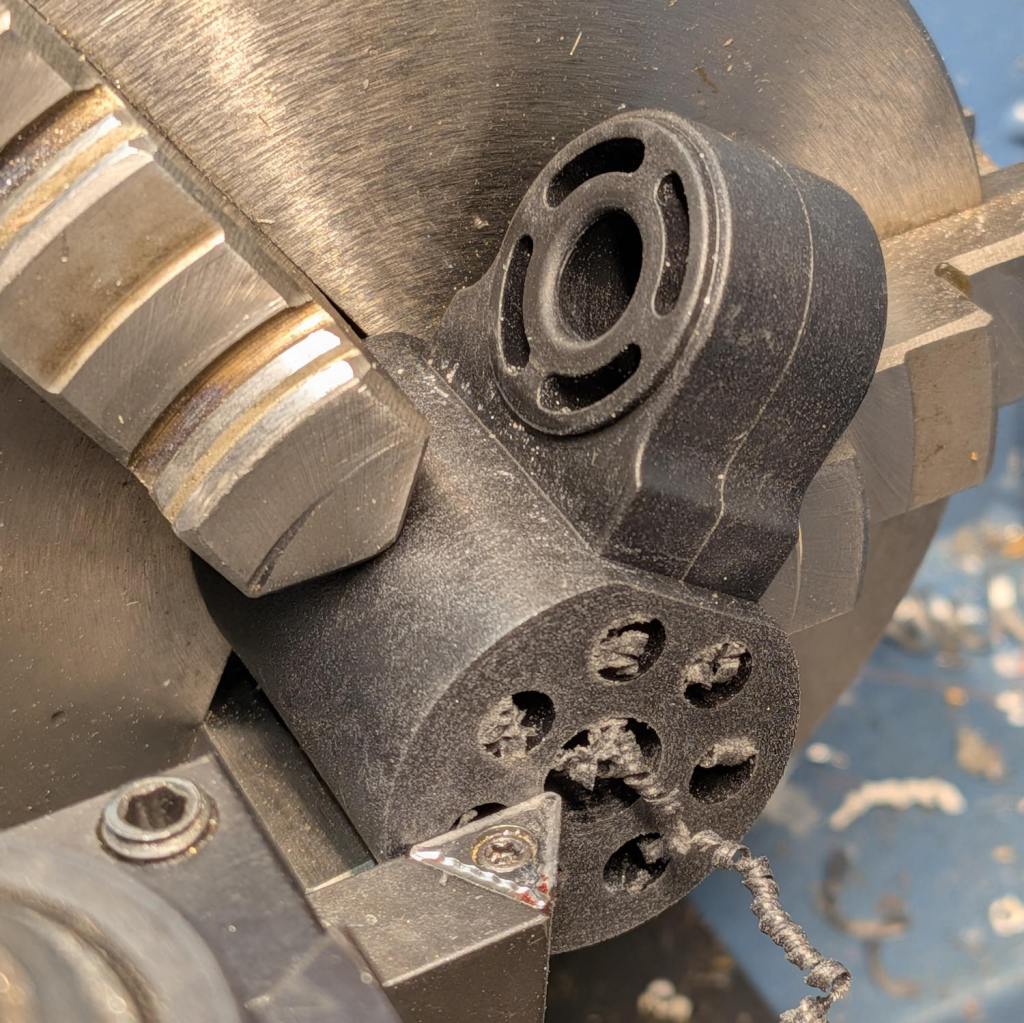
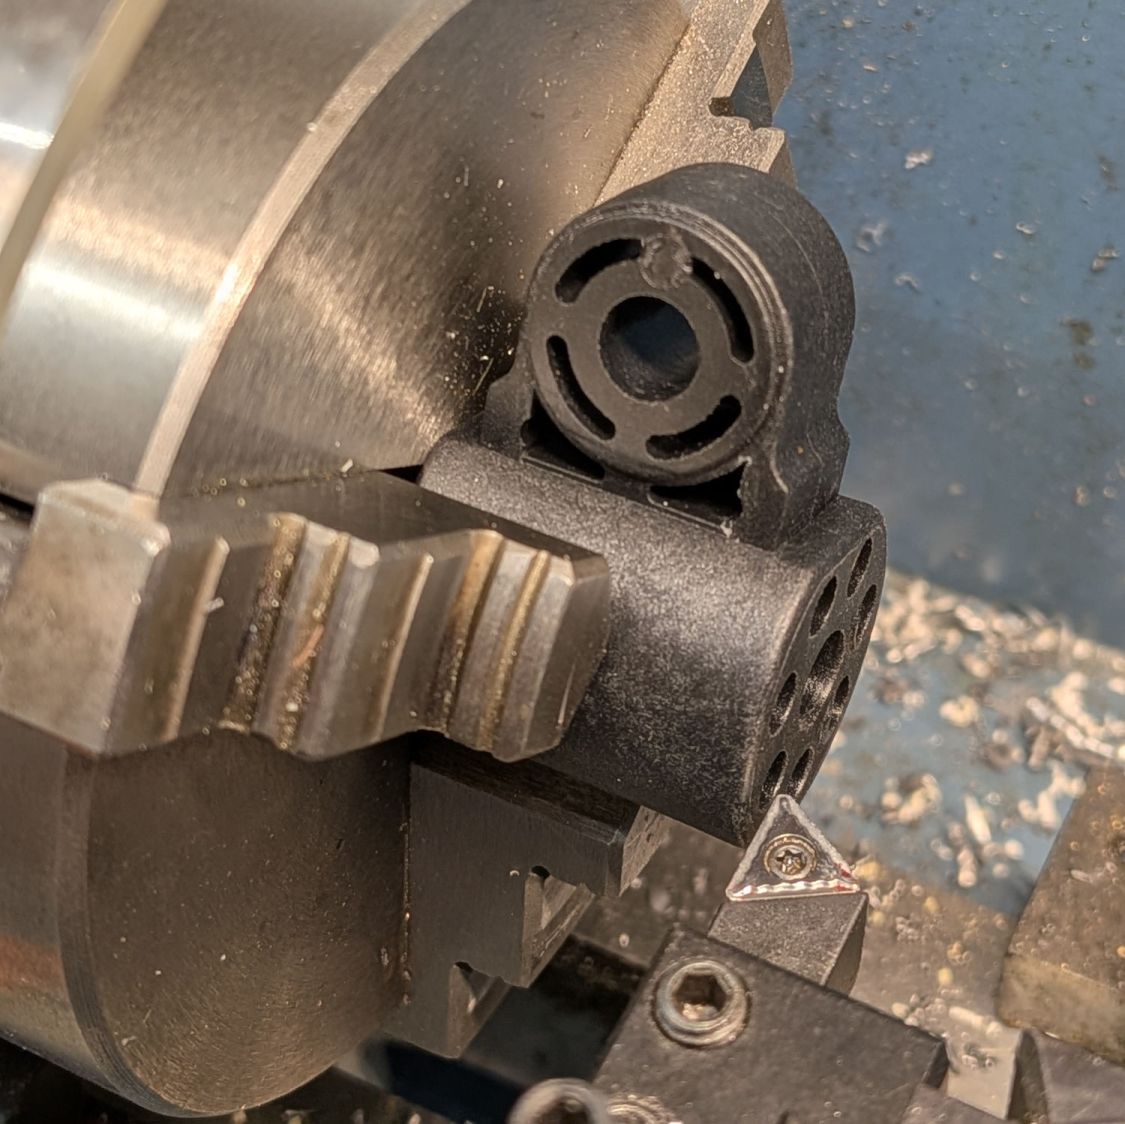
    Quick! To the mini-lathe:

    Monitor tilt adjustment - lathe setup
    Monitor tilt adjustment – lathe setup

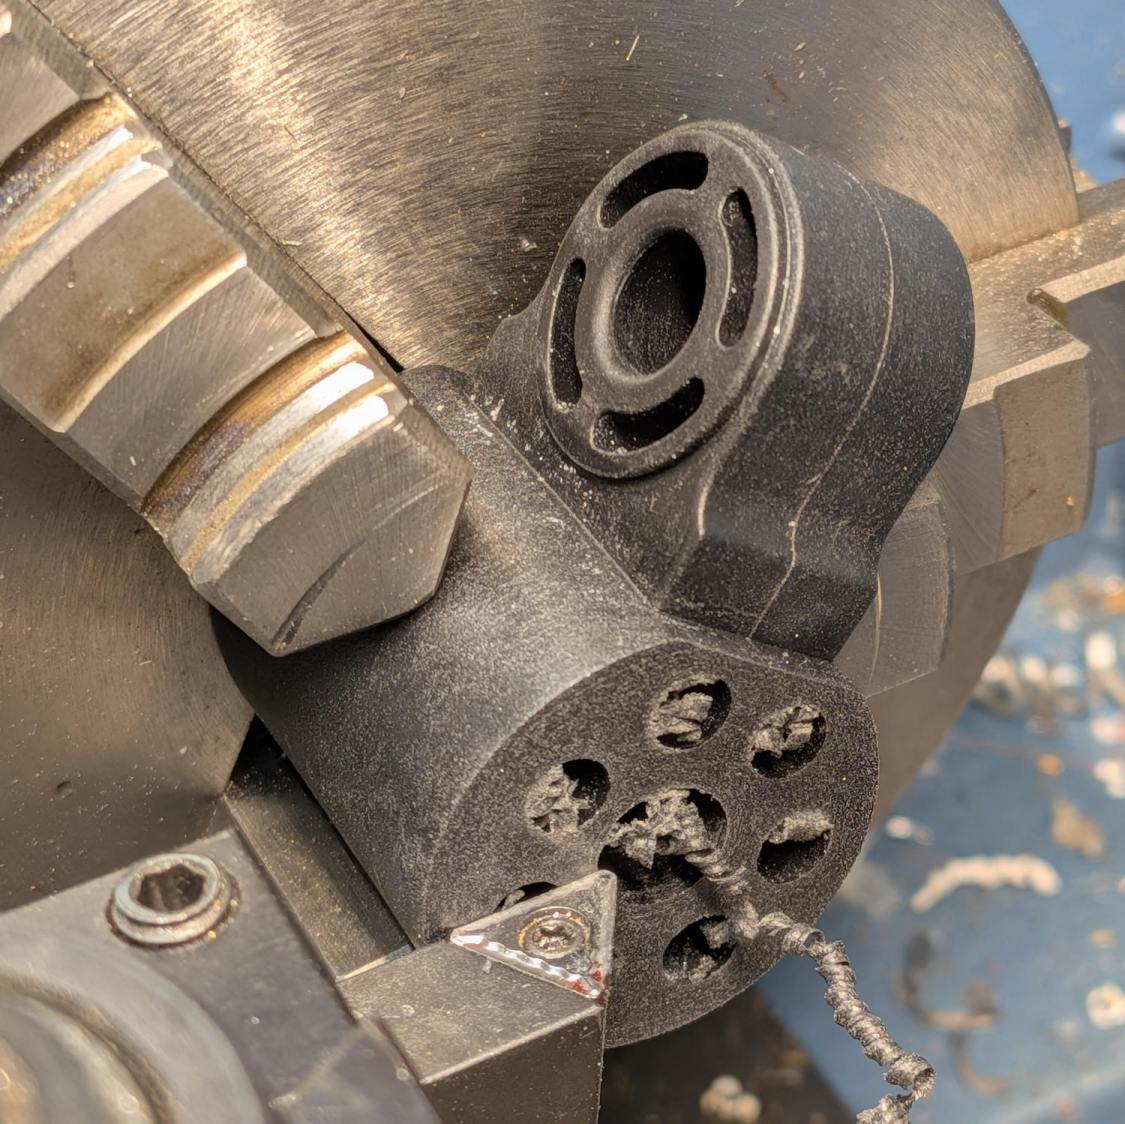
    Shaving half a millimeter from each side:

    Monitor tilt adjustment - shaved
    Monitor tilt adjustment – shaved

    Twirling a deburring bit in each hole got rid of the swarf.

    Rather than trimming the cap screw, a pair of fender washers keep it from bottoming out. With the core fitting into the clamp, the arms grip the core firmly on both sides with plenty of friction:

    Monitor tilt adjustment - tweaked
    Monitor tilt adjustment – tweaked

    I’ve bought this brand of arm before and the most recent pair have definitely been cheapnified from earlier ones. Because only one had a bad tilt clamp, the OEM may be in the middle of a changeover and shipped it with mismatched parts.

    I wonder how many stands / arms get returned because they just don’t work?

  • Desktop PC Fuzz

    Desktop PC Fuzz

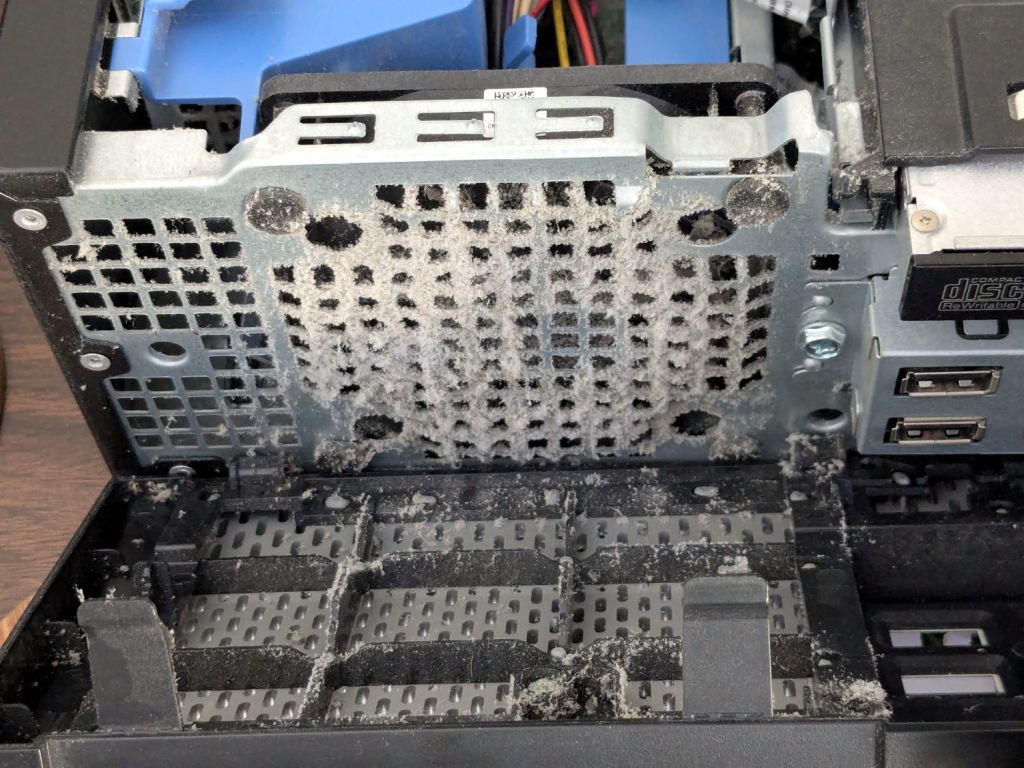
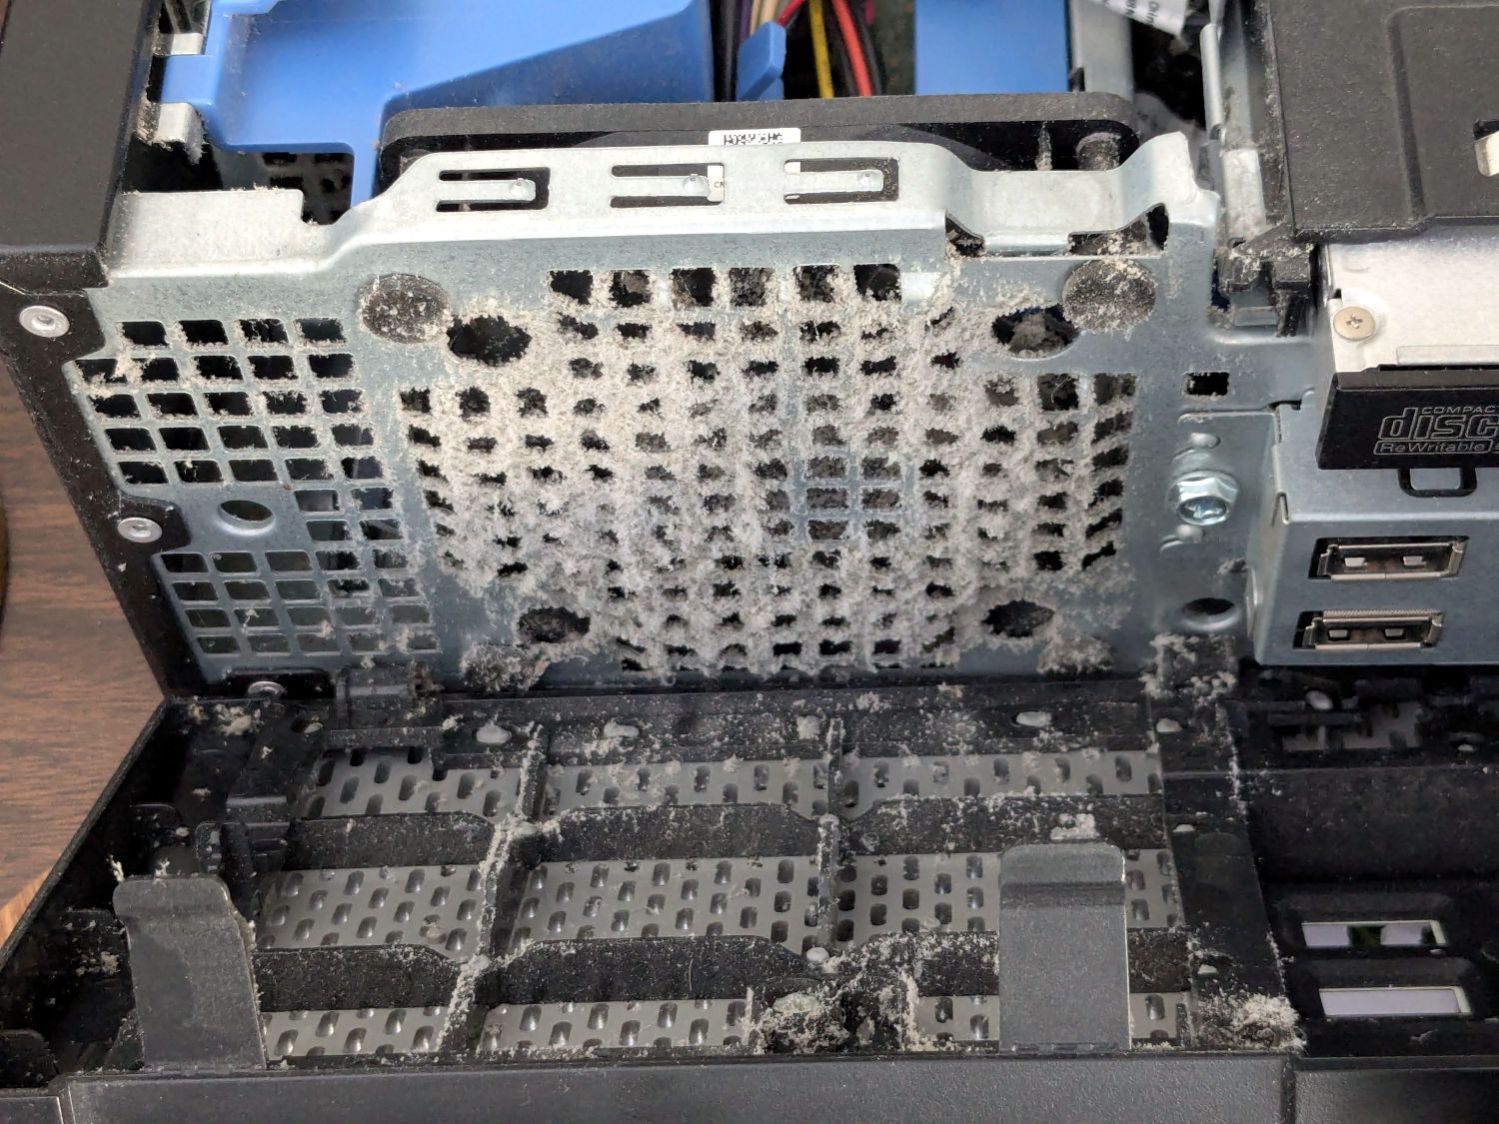
    Obviously, I haven’t popped the top on this PC for a while:

    Optiplex 9020 - intake fuzz
    Optiplex 9020 – intake fuzz

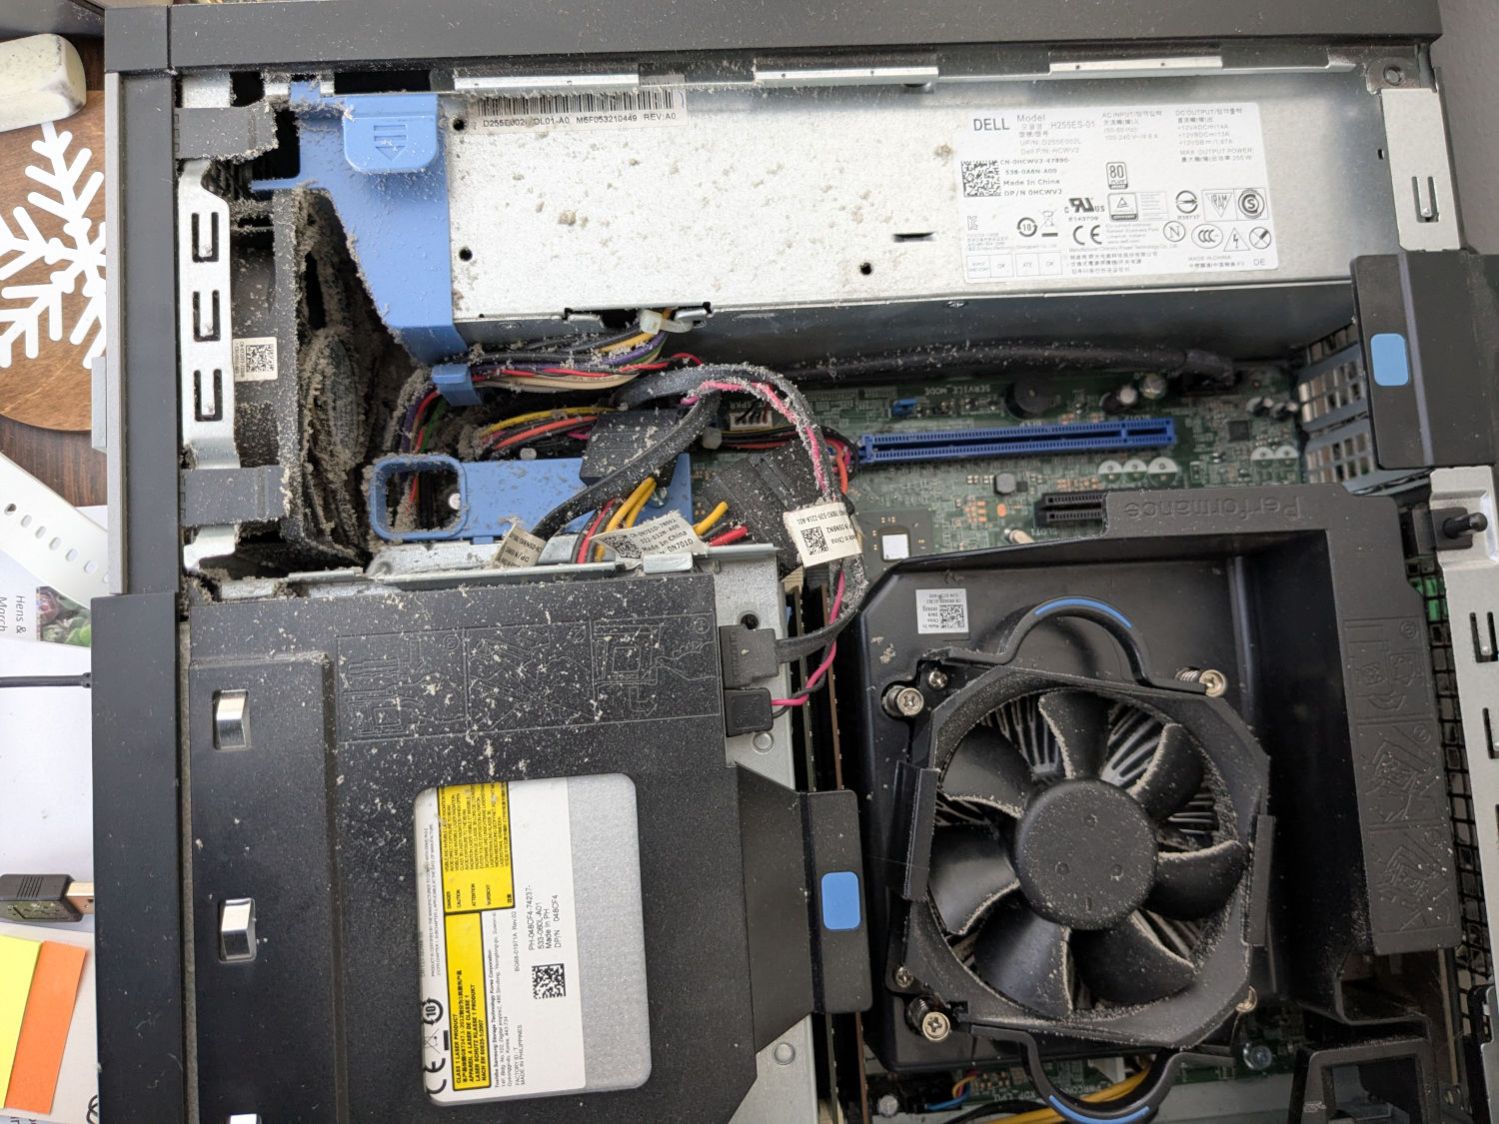
    Some fuzz made it past the grille:

    Optiplex 9020 - internal fuzz
    Optiplex 9020 – internal fuzz

    PSA: In the unlikely event you still use a desktop PC, it’s time to pop the top on yours, too.