The Smell of Molten Projects in the Morning

Ed Nisley's Blog: Shop notes, electronics, firmware, machinery, 3D printing, laser cuttery, and curiosities. Contents: 100% human thinking, 0% AI slop.

Category: Home Ec

Things around the home & hearth

  • Gas Furnace Zone Drain Valve Refurbishment

    Gas Furnace Zone Drain Valve Refurbishment

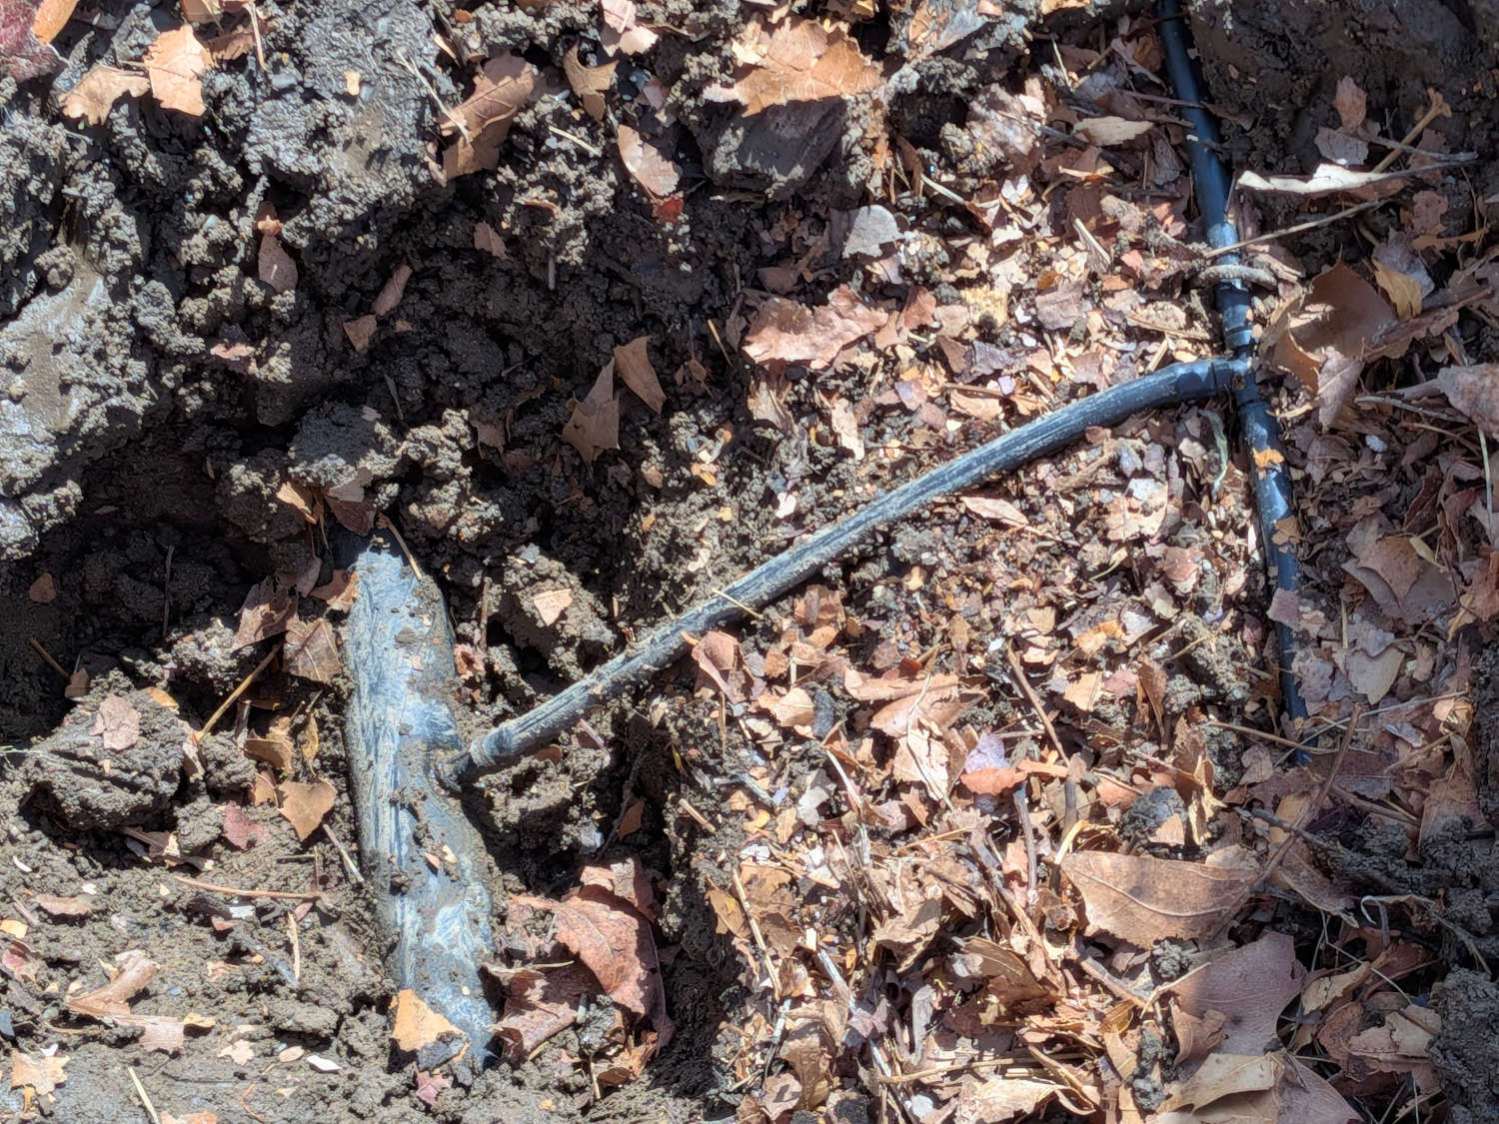
    One of the zone valves on the gas furnace developed a slow leak around its actuator stem, so (now that the heating season is definitely over) I’ve been refurbishing all the long-neglected rubbery bits and pieces.

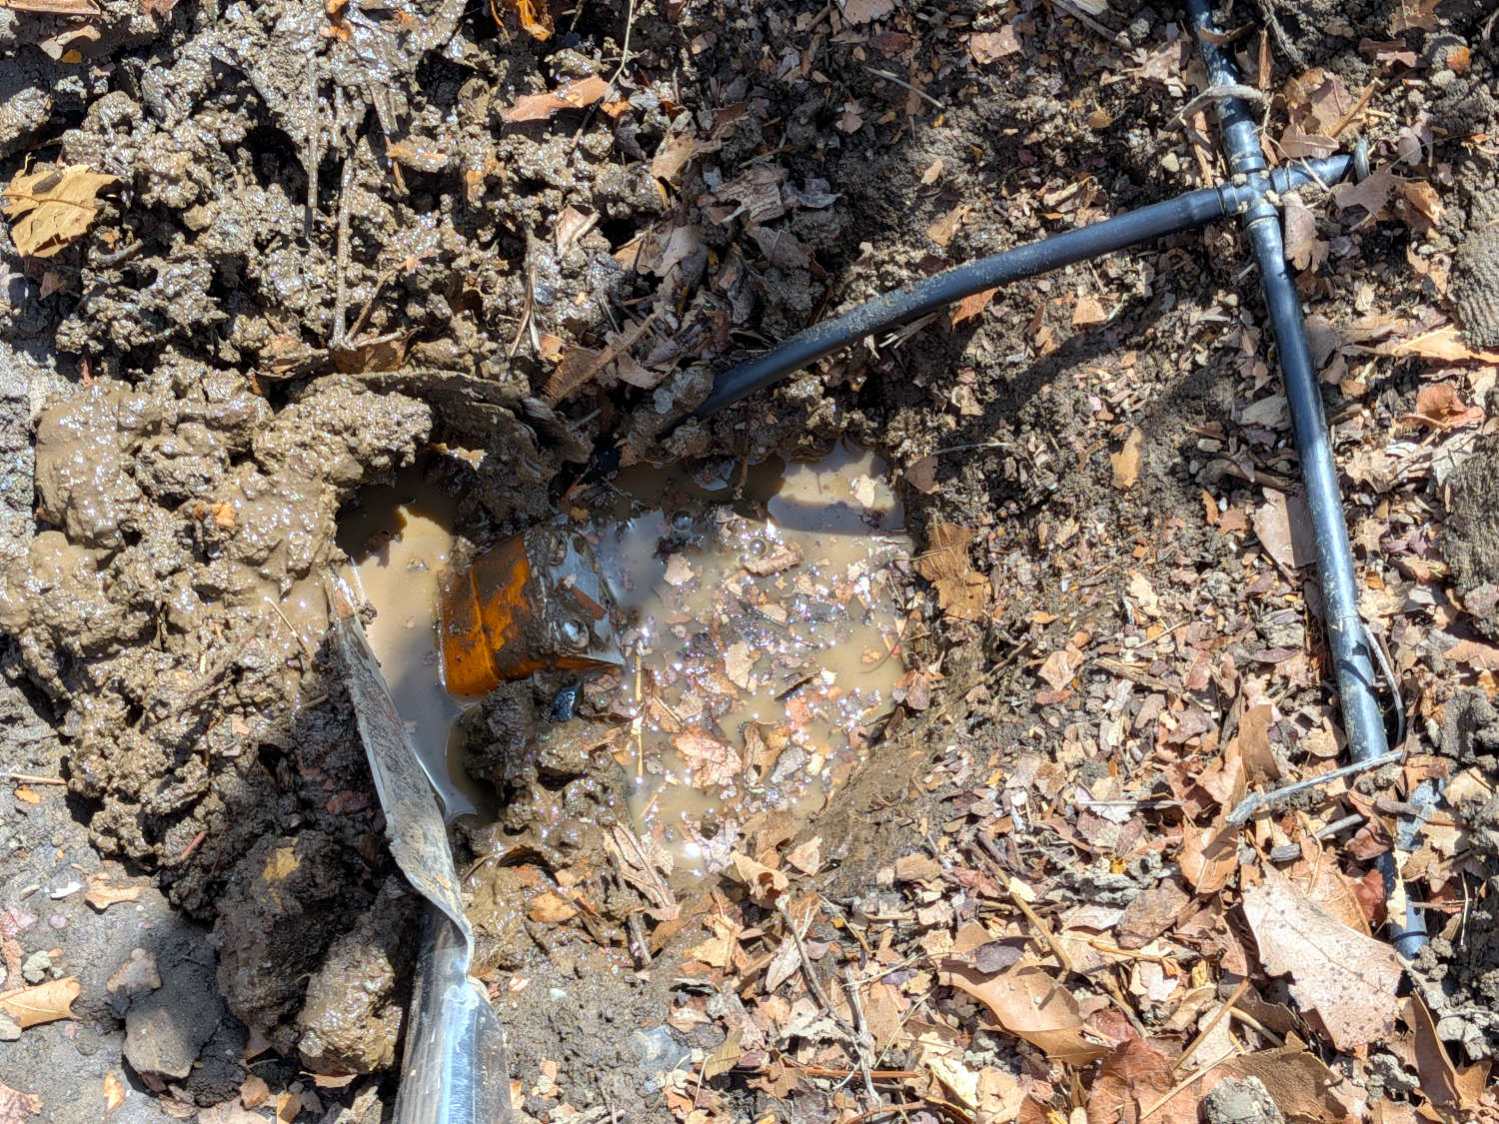
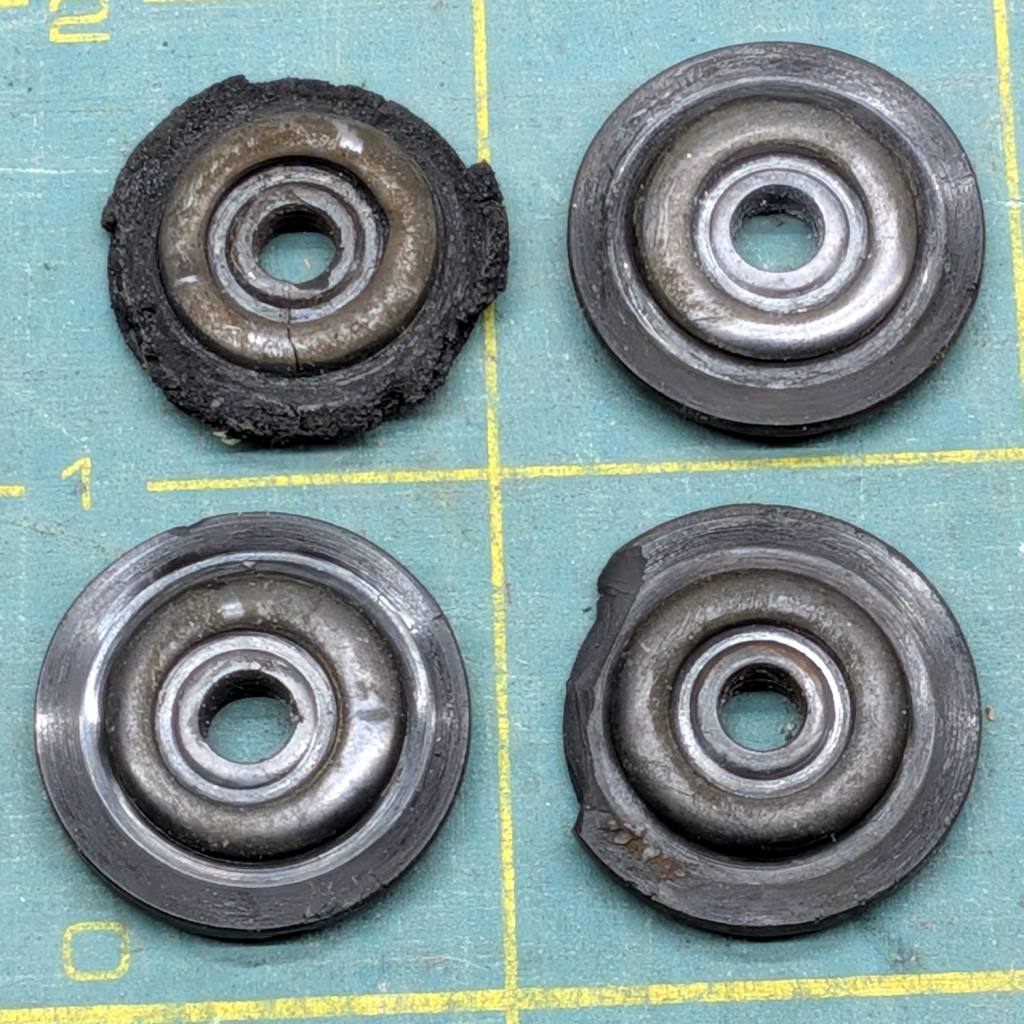
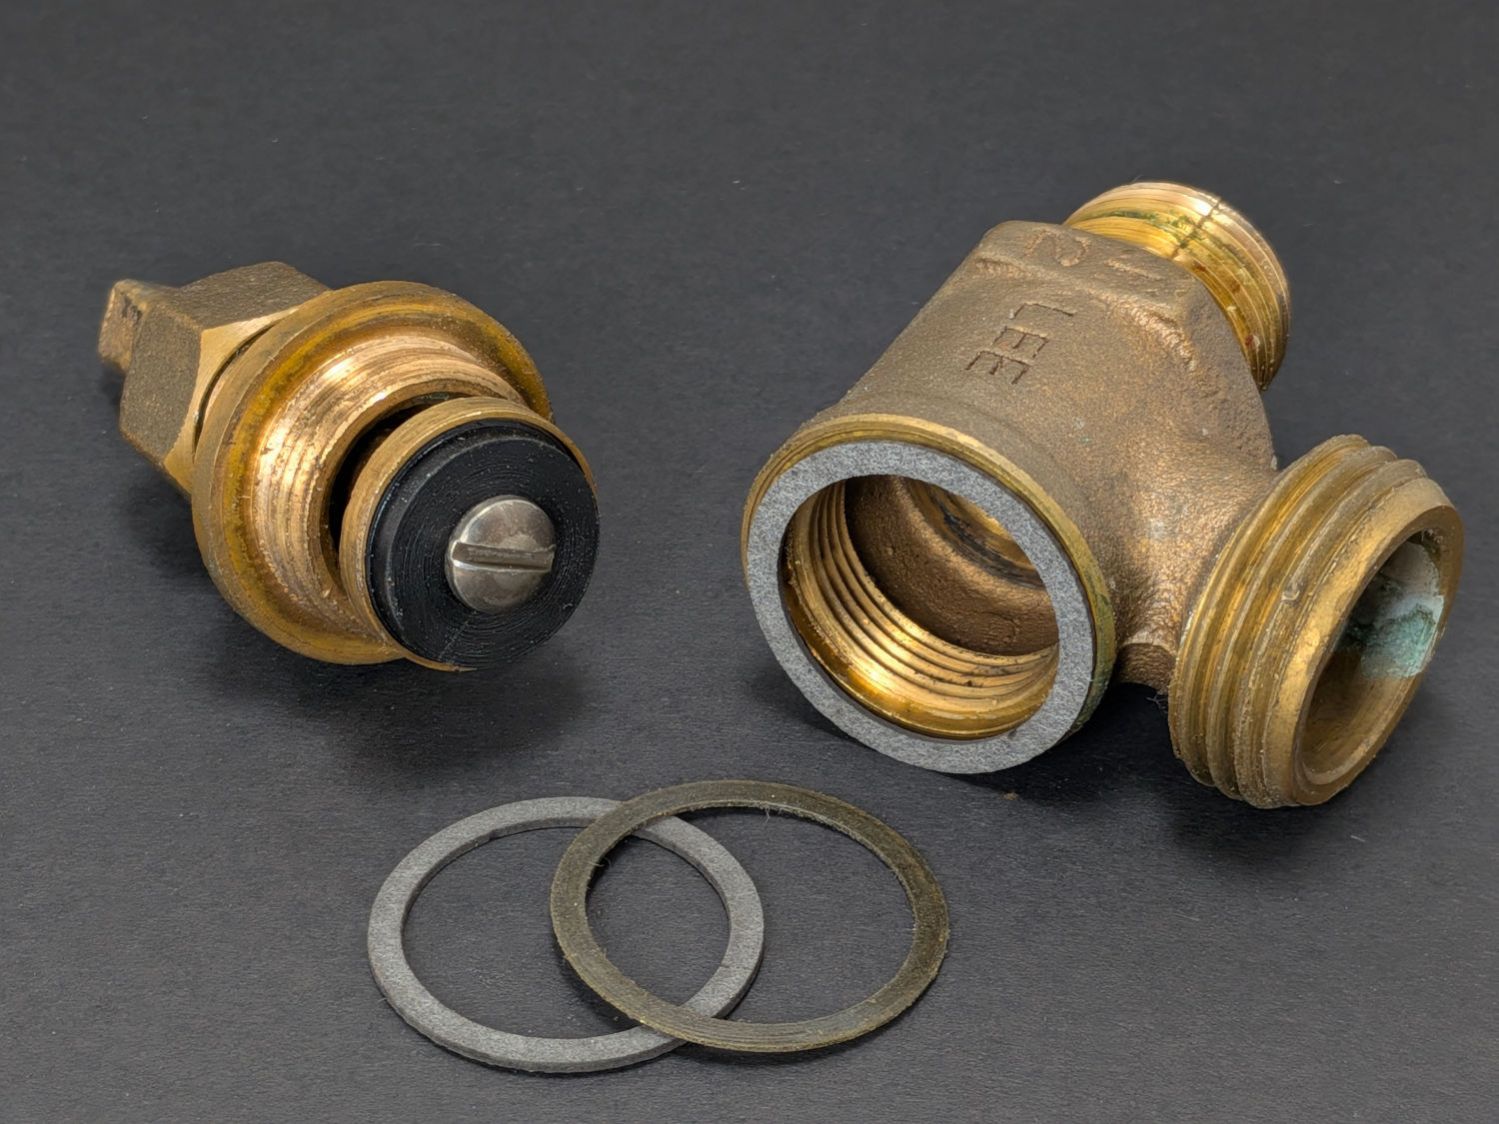
    The four zone drain valves showed signs of having leaked in the past, so I took them apart to replace the washers:

    Furnace zone drain valve - washers
    Furnace zone drain valve – washers

    As you’d expect, the two most-deteriorated washers were on the valves with the most corrosion.

    As I expected, the faucet washer assortment on the shelf didn’t have that size. Figuring the size based on the outside diameter produced a description of faucet washer size labels that confirmed my suspicion: it makes no sense whatsoever. In the event of link rot, a lightly reformatted version of his table:

    Faucet Washer Sizes
    Faucet Washer Sizes

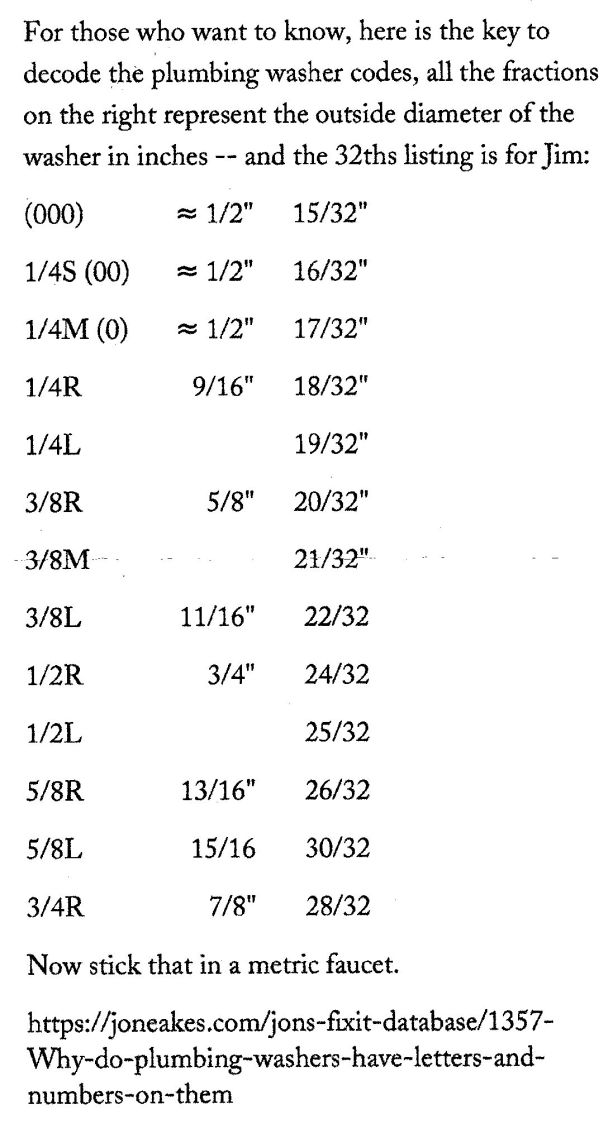
    Careful measurement suggested they were 3/8L, which fit perfectly:

    Furnace zone drain valve - gaskets
    Furnace zone drain valve – gaskets

    I added the spares and a copy of that table to the washer kit, although I’m certain the next project will involve a washer with yet another nonstandard standard size.

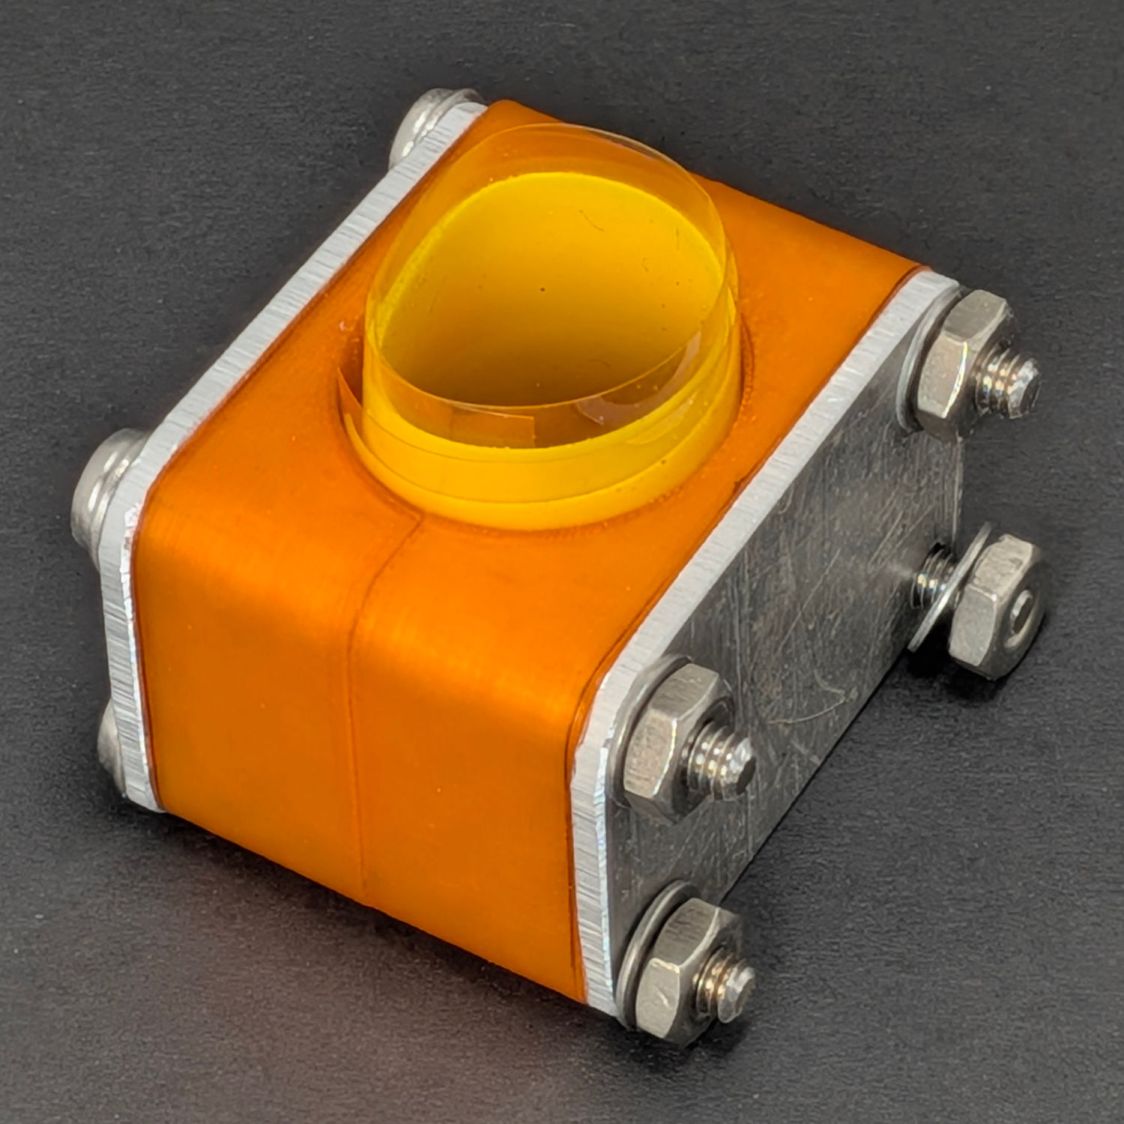
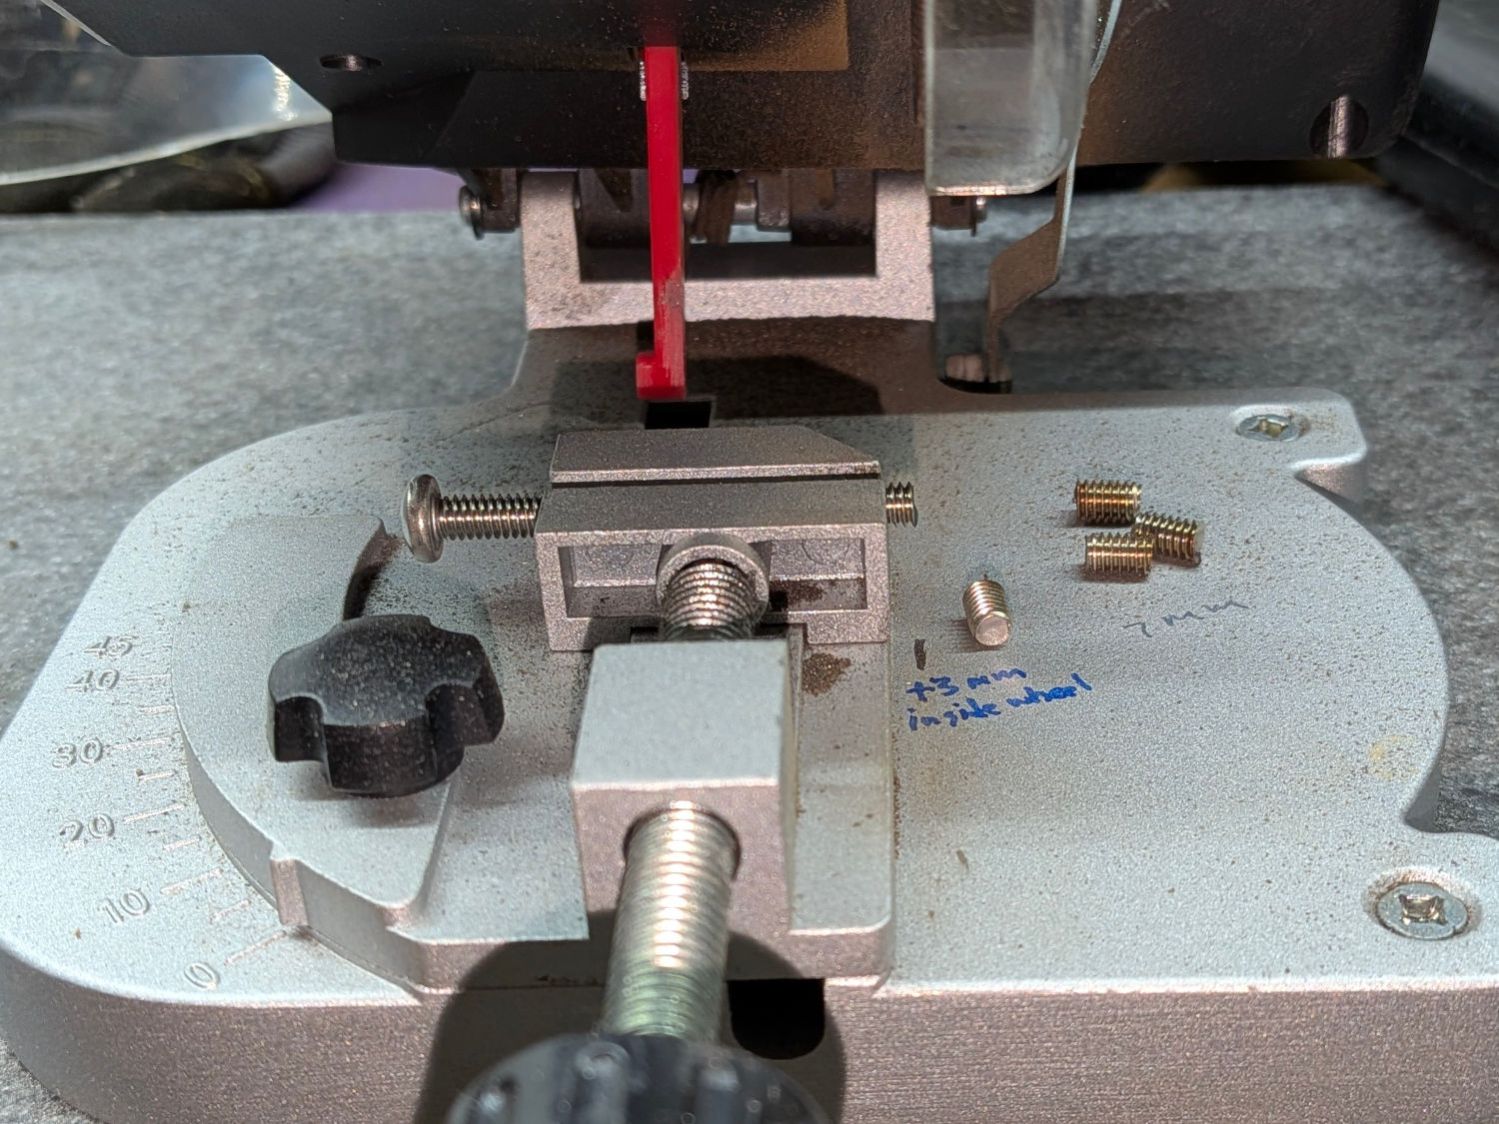
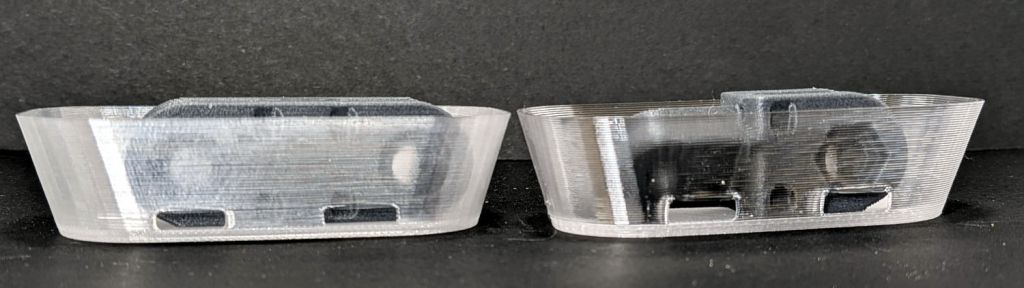
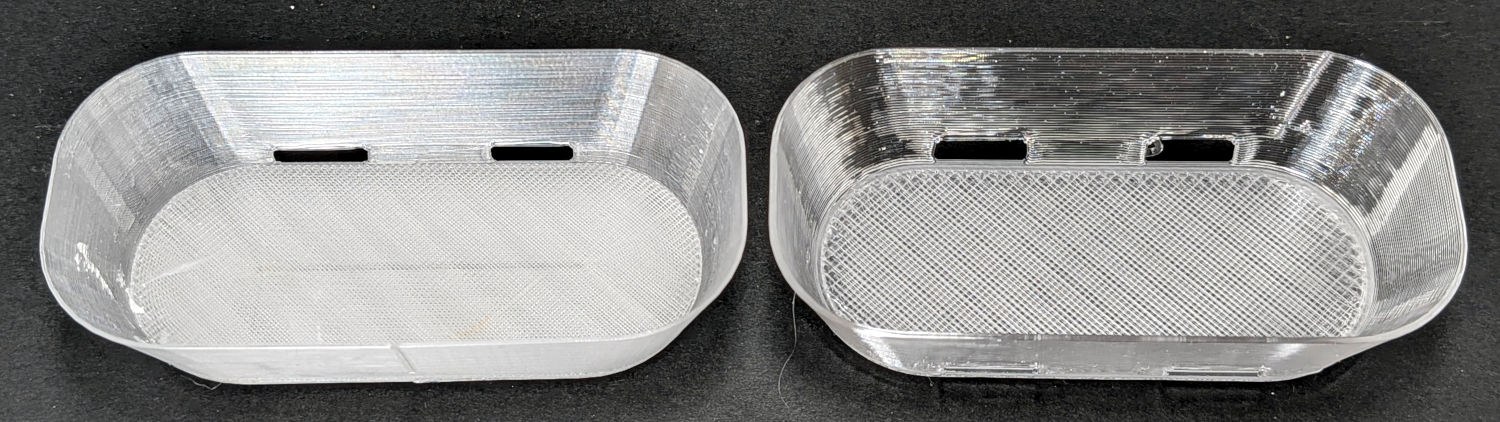
    Replacing the washers required dismantling the valves and the first valve produced a gasket that fell out in brittle fragments. Although the remaining three gaskets emerged intact, I picked up some gasket material and laser-cut four new gaskets from the 0.8 mm sheet.

    The OD fits into the valve body rebate:

    Furnace zone drain valve - gasket installed
    Furnace zone drain valve – gasket installed

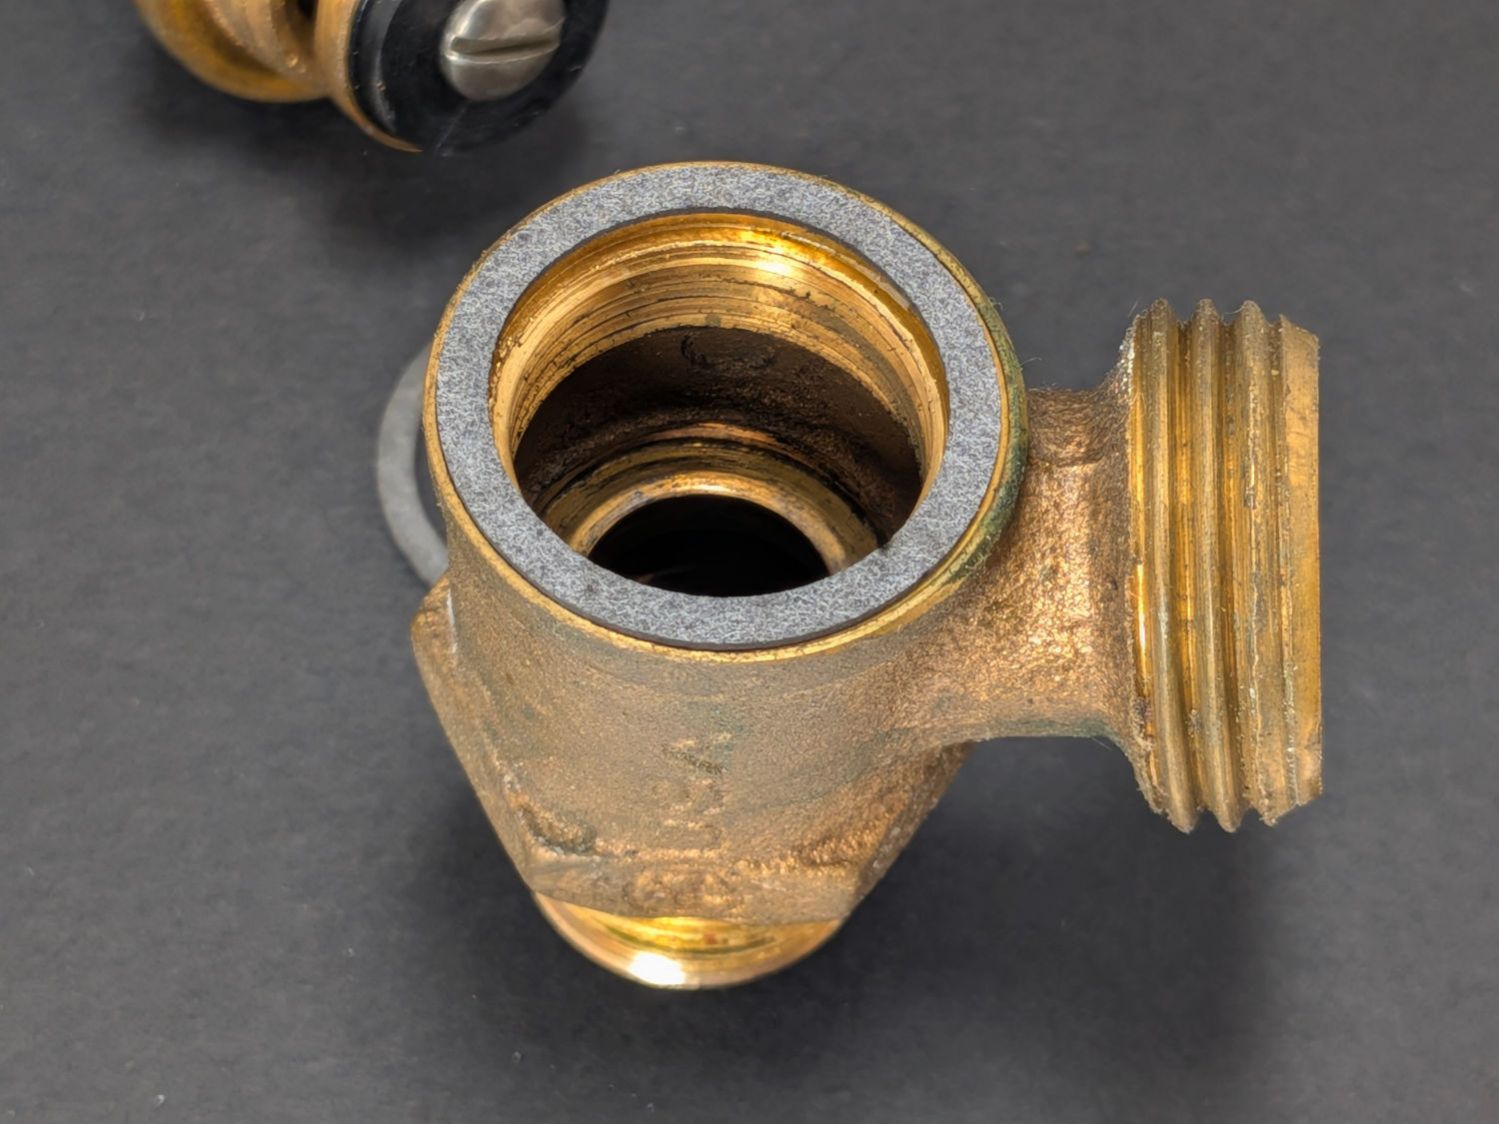
    Because these valves are closed in operation and even when open won’t operate under any significant pressure, the gaskets aren’t particularly critical, but I dabbed joint compound into the body threads just to be sure.

    And, while I was ordering things, I got a set of knobs to replace the sad bent wreckage on their stems.

  • Dripworks Mainline Leak: Repair Under Field Conditions

    Dripworks Mainline Leak: Repair Under Field Conditions

    A large gooey puddle helped isolate a leak in the Dripworks main line pipe running the length of Mary’s Vassar Farms plot:

    Dripworks Mainline clamp - injured hose joint
    Dripworks Mainline clamp – injured hose joint

    Much of the tubing between the transfer barb in the buried pipe and the cross coupling lies on the surface, where it’s subject to missteps. This being just a few feet inside the garden gate, it’s no surprise enough missteps caused the barb to no longer seal properly.

    So I pulled the barb out of the pipe and deployed the backup pipe clamp I made after fixing a previous mishap:

    Dripworks Mainline clamp - installed
    Dripworks Mainline clamp – installed

    You’re supposed to wrap silicone tape while keeping its surface clean, which is obviously impossible in a hole rapidly filling with water draining from the plumbing but the clamp presses the tape firmly against the pipe and seals the leak.

    There is, I regret to say, an 8-32 stainless steel washer lost somewhere deep in the muck.

    I punched a new barb into the pipe with slightly longer tubing to the cross fitting, in the hope it’ll be more resilient.

    Another clamp with its silicone tape snippet stands ready for duty:

    Dripworks Mainline Pipe Clamp - assembled
    Dripworks Mainline Pipe Clamp – assembled

    For the record, the Micromark Cutoff Saw has a 3 mm offset between the side of the vise and the left edge of the blade:

    Micromark abrasive cutoff - work offset
    Micromark abrasive cutoff – work offset

    I still lack a Round Tuit for improving that vise.

  • Earplug Case

    Earplug Case

    A no-assembly-needed earplug case from Printables will be more easily found in Mary’s purse than the previous small bag:

    Earplug case
    Earplug case

    That’s the “grippy bits” version of the model, which really is easier to open than the straight-sided version.

    I printed a few more, loaded them with earplugs, and put them where they may come in handy. In retrospect, I should have used clear PETG to show off the retina-burn plugs.

    Living in the future is great!

  • Amazon Unit Pricing: Go Ask Alexa

    Amazon Unit Pricing: Go Ask Alexa

    I long ago learned to never trust Amazon’s unit pricing (or, for that matter, their recommendations), so this came as no surprise:

    Amazon unit pricing - hose per ounce
    Amazon unit pricing – hose per ounce

    OK, you generally don’t buy hoses “by the ounce”, but “per fluid ounce” may not mean what you think it means:

    Amazon unit pricing - cups per ounce
    Amazon unit pricing – cups per ounce

    Pricing items individually should be simple, if you know what a single item is:

    Amazon unit pricing - batteries per each
    Amazon unit pricing – batteries per each

    Even knowing the number of items and the overall price isn’t enough for Amazon to get it right:

    Amazon unit pricing - just plain wrong
    Amazon unit pricing – just plain wrong

    Amazon now has a “shopping assistant”, so I asked Alexa why the unit prices were incorrect. After some back-and-forth providing details Alexa should have known from the context, this seemingly plausible sequence of words emerged:

    Amazon unit pricing - ask Alexa
    Amazon unit pricing – ask Alexa

    Amazon apparently stopped commingling knockoff crap with brand-name products under the same SKU earlier this year, a change driven by major brands refusing to have anything to do with Amazon’s “supply chain”, but the probability of my one-by-one reports producing any discernible improvement seems low.

  • Samsung Dishwasher Drying Fan Replacement

    Samsung Dishwasher Drying Fan Replacement

    The Samsung dishwasher (model DW80K7050US/AA 03) that Came With The House fails immediately after entering the Dry part of the cycle: a relay in the control PCB under the door goes doink, all the LEDS go off then on again, the countdown timer stops changing, and that repeats as long as you like.

    After considerable listening & pondering, I decided one event early in the Dry cycle involved starting a fan to vent the steam out of the interior. The wiring diagram shows the fan has a Fault wire: perhaps the fan has failed.

    The maintenance manual shows different fans in three different places, although the control board has a connector for only one. By process of elimination, I found the fan atop the cabinet:

    Samsung dishwasher - top view
    Samsung dishwasher – top view

    The cable from the fan in the vented compartment on the left burrows under the gray duct, around its back side, and plugs into the small white connector on the right. You must ease the cable from a row of hooks guiding it around the back of the duct, which requires slightly lifting the duct.

    Unhook the two metal straps, remove four screws from the black vent, and lift it off the top to reveal the duct outlet pores:

    Samsung dishwasher - fan duct - overview
    Samsung dishwasher – fan duct – overview

    Remove four more screws, lift the fan duct assembly just a little bit, and pry open three latches around the fan compartment with a consumer electronics case-cracking tool:

    Samsung dishwasher - fan housing
    Samsung dishwasher – fan housing

    The new fan (on the right) looks very much like the OEM fan (on the left), even though it’s the $15 version rather than the $150 version you might buy from similar randomly named sellers if you were so inclined:

    Samsung dishwasher - OEM vs new fan
    Samsung dishwasher – OEM vs new fan

    Detach the old fan & its cable, drop the new fan in place, snake its cable, plug its plug, and install All The Things in reverse order.

    Unfortunately, after shoving the dishwasher back into its cubby, the new fan didn’t change the failure at all.

    I hitched the old fan up to the bench supply and it spun just like it should. Wiring the Fault wire to a 5 V supply through a resistor shows it’s the usual tachometer signal pulsing as the rotor spins.

    Which means the next step requires more pondering and PCB probing. The failure is too consistent to be a Heisenbug, but maybe something shook loose in there.

  • Credit Union App: User Tracking

    Credit Union App: User Tracking

    Two years ago I installed the DuckDuckGo browser on my phone and activated its app tracker blocking, which is basically a fake VPN swatting known tracker destinations out of the bitstream.

    Somewhat to my surprise, the credit union’s app attempted to send my personally identifiable bits to a destination seemingly unrelated to any banking needs:

    HVCU App Tracking - 20240525
    HVCU App Tracking – 20240525

    So I called up the credit union and asked:

    • Why was their app sending that information to a third party?
    • How do I disable that tracking, because I do not want those companies to know every time I use the app?
    • Why did they think this was a good idea?

    Over the course of the next few weeks and many follow-up calls, I was told:

    • I must be mistaken, there is no tracking
    • My information is correct, but the credit union doesn’t have a relationship with that company
    • They do have a relationship, but the app doesn’t send any of my information to that company
    • They only send the information if I am responding to a survey
    • The app does send my information even without my responding to a survey, but in accord with their privacy policy
    • OK, the credit union’s privacy policy doesn’t specifically describe their app, but the companies behind the app have privacy policies at various links
    • Even though the documents at those links describe the general sharing arrangement between each company and the credit union, I am not authorized to see the specific agreements related to my information
    • I can opt out of the tracking by setting an option in my account profile
    • OK, that option doesn’t exist, but when I disable the app’s access to my location, the tracking will cease

    The intensity of the tracking attempts continued, even after disabling location sharing and not opening the app on any given day:

    HVCU App Tracking - 20240605 - A
    HVCU App Tracking – 20240605 – A
    HVCU App Tracking - 20240605 - B
    HVCU App Tracking – 20240605 – B

    Eventually, I was told, in no uncertain terms:

    • If I don’t want to be tracked, I should not use the app
    • This will be their final discussion of the subject

    They never did answer any of my original questions.

    As I get very few checks in the mail, I have had little occasion to fire up the app since then.

    The tracking continues apace, albeit with a different cast of characters:

    HVCU App Tracking - 20260609 - A
    HVCU App Tracking – 20260609 – A
    HVCU App Tracking - 20260609 - B
    HVCU App Tracking – 20260609 – B

    You might think “The Trade Desk” has something to do with financial trading. You would be wrong.

    I expect commercial banks to be even worse, so there’s nothing to be done.

    Apart, of course, from blocking app tracking attempts with DuckDuckGo, using Firefox (with uBlock Origin) rather than Chrome, and running Pi-Hole on a Raspberry Pi for the home network. I admit my faith is touching.

  • Translucent vs. Transparent PETG Soap Dishes

    Translucent vs. Transparent PETG Soap Dishes

    In addition to printing bendy objects with TPU, the 0.8 mm nozzle 3D-prints PETG into thin walls with better transparency than the default 0.4 mm nozzle:

    Clear PETG - 0.4 vs 0.8 mm nozzle - side view
    Clear PETG – 0.4 vs 0.8 mm nozzle – side view

    The wall is now 1.0 mm thick, rather than 0.6 mm, and is much closer to being transparent. Those gray links from the RPi camera mount inside the dishes help show the difference.

    The 2.0 mm thick base plate is also more transparent, but mostly just reveals the 0.4 mm thick infill layers:

    Clear PETG - 0.4 vs 0.8 mm nozzle - top view
    Clear PETG – 0.4 vs 0.8 mm nozzle – top view

    More study is needed, even if we already have far more soap dishes than strictly necessary.