Ed Nisley's Blog: Shop notes, electronics, firmware, machinery, 3D printing, laser cuttery, and curiosities. Contents: 100% human thinking, 0% AI slop.
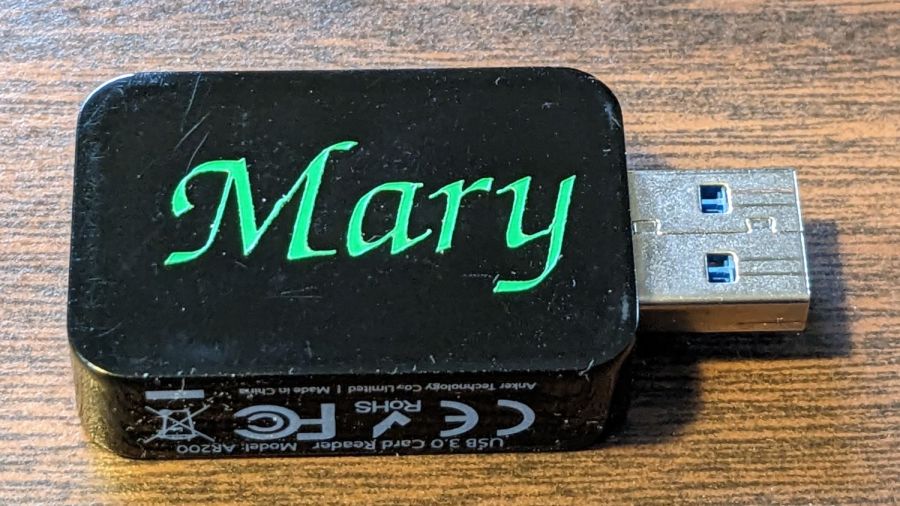
Mary’s ResMed AirSense 11 saves the data from every overnight breath she takes on an SD card, which she uploads to OSCAR once a week. I figured she needed an SD card to USB adapter / card reader of her very own:
The LightBurn layout is pretty much what you’d expect, with the letter inside the outline of the USB dingus on a tool layer to get the size right:
PU PSA Vinyl test – LB layout
The red layer is a “kiss cut” through the vinyl (remember: polyurethane) that leaves the backing paper mostly undamaged:
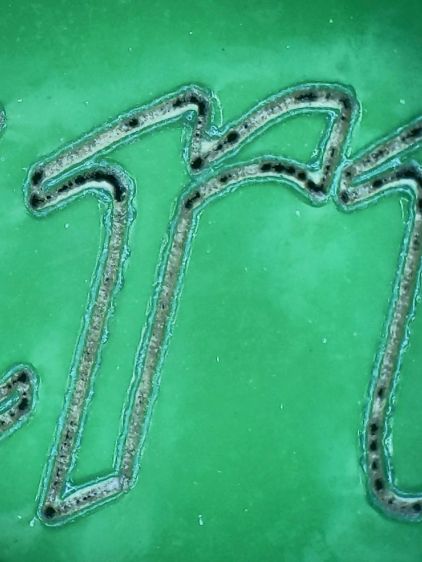
PU PSA Vinyl test – dot mode cut detail
The cut uses Dot Mode, with the laser firing at 10% power for 2 ms, spaced every 0.1 mm along the cut. I found 0.1 mm spacing produced a more-or-less continuous cut in the PETG sheet for the Tek Circuit Computer cursor hairline, but this picture shows it’s definitely running in pulsed mode. In any event, Dot Mode is the only way a 60 W CO₂ laser can make a kiss cut, as a normal vector cut can’t run fast enough to prevent cutting all the way through the backing paper, even at 10% power, around those letters.
The edges of the letters are slightly melted with a raised border, although they look pretty good if you’re not peering at them through a microscope.
I cut the rectangular outline with scissors, peeled the waste vinyl away, and weeded the ‘a’ with tweezers:
PU PSA Vinyl test – weeded
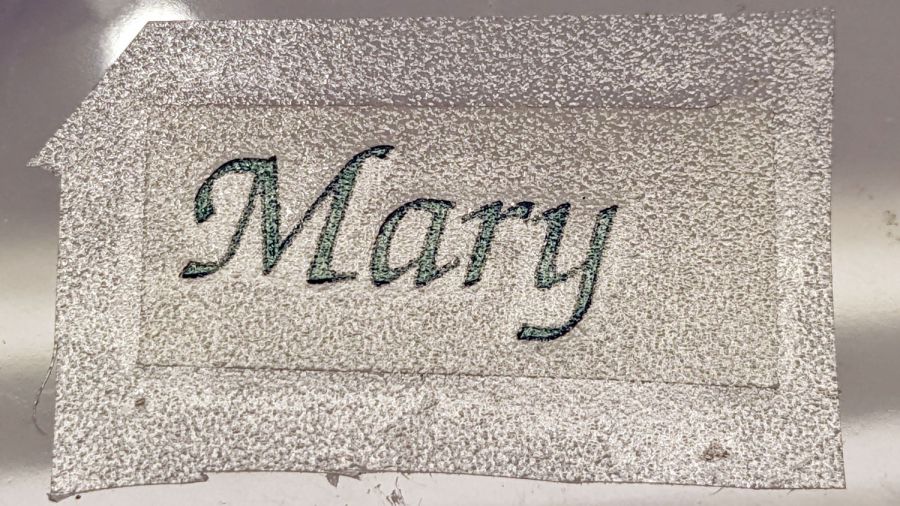
Stick a snippet of transfer tape on top:
PU PSA Vinyl test – transfer tape
In theory, the transfer tape sticks more firmly to the cut letters than the letters adhere to their backing paper, so peeling off the tape also peels the letters off the backing paper.
Which did not go well:
PU PSA Vinyl test – transfer tape – peeling
The two adhesions obviously require a delicate balance to work properly and I would be unsurprised to learn different transfer tapes behave differently on each type of vinyl sheet, with no way to know the results without trying every possible combination.
A few retries got the “r” back in position on the transfer tape, but a bit of kink remains in the “M”.
A third adhesion balance occurs between the transfer tape and the USB card reader, where the tape must stick to the letters slightly less than the letters stick to the reader. Burnishing the tape + letters to the reader encouraged the letters to stick and the tape pulled off without dislodging them.
We deemed the result good enough for the purpose and the process taught me a few lessons along the way. Next time, maybe it’ll work out better.
A new ResMed ClimateLine headed CPAP hose arrived on schedule and let me measure the old hose:
ResMed ClimateLine heated hose ends
The center two they-are-not-USB contacts on the input end of the hose (on the right) are for the heating element spiraling around the tube and measure 10.0 Ω.
The outer two contacts report back from what must be a 10 kΩ thermistor embedded in the dingus sticking into the hose lumen at the output end (on the left). It reads 12 kΩ in a 68 °F room and responds to warmth with a lower resistance, which is what you’d expect.
Plugging the ClimateLine hose into the AirSense 11 unit enables temperature sensing at the end of the hose, with closed loop control from 60 °F to 86 °F. Mary set it to 80 °F in manual mode, which apparently produces different results from the same temperature in Auto mode, and declared victory.
A humidity setting of 4, in the middle of the 1 – 8 range, works for her.
Both the AirSense 11 and its power brick claim 24 VDC at a suspiciously exact 2.71 A. The hose heater could soak up 2.4 A of that, but the AirSense 11 also heats the humidifier’s water tank (“tub”), so it’s unlikely they’re both seeing the full 24 V.
I am prohibited from further investigation. [grin]
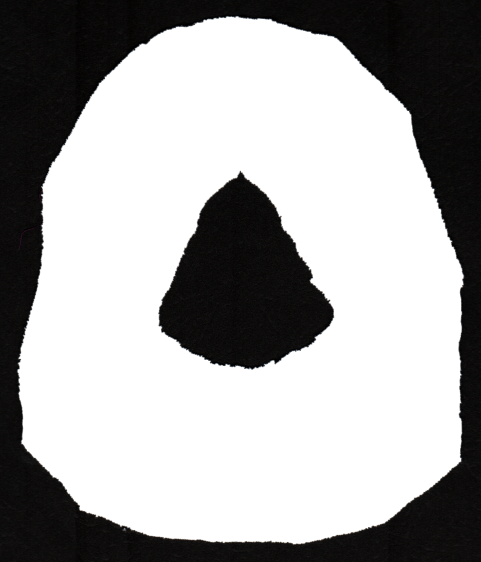
Mary cut out a simple cloth liner for her ResMed F20 CPAP mask (a.k.a. “cushion”) and snipped away at the fabric until it felt about right. I scanned the result and turned it into a bitmap mask (which is entirely different from a CPAP mask):
Mask liner – scanned
Given that as a start:
Import the scanned image into LightBurn
Fair a few curves around the perimeters by hand, rather than attempting to trace the thing
Rationalize the sizes
Make it symmetric
Cut a few prototypes while tweaking the fit
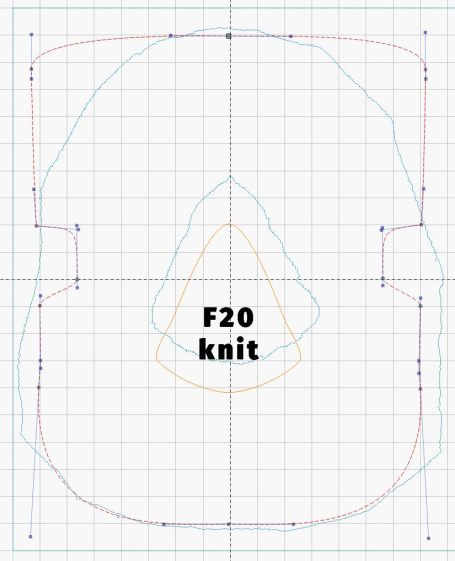
Which leads to a pattern like this:
CPAP Mask Liner – F20 knit – spline fit
The rectangular upper part forms a simple eyeshade that also keeps minor leaks from disturbing her sleep. Your mileage may vary, depending on how much you toss and turn during the night.
We found the fit depends on the fabric, with woven fabric requiring a taller opening:
CPAP Mask Liner – F20 knit woven – LB layout
The engraved legend verifies I used the proper design for the fabric:
Laser cut CPAP Mask Liner – F20 – knit fabric
The opening has tabs holding it in place while cutting, at least until we get this down to a routine.
Then make enough for a while:
Laser cut CPAP Mask Liner – F20 – production
The usual woodstove odor vanishes after half a day sitting atop the clothes washer. Putting them in a mesh bag and tossing them into the regular wash refreshes them after use.
During the course of diagnosing and fixing the latest oven igniter failure, an unrelated series of events produced a flood under the kitchen sink and across the floor. After cleaning up the mess and determining the floor under the cabinet was merely damp, rather than wet, I drilled a hole suitable for another PC cooling fan from the Box o’ MostlyFans, installed the fan to pull air upward, and let it run for a couple of days while watching the humidity drop.
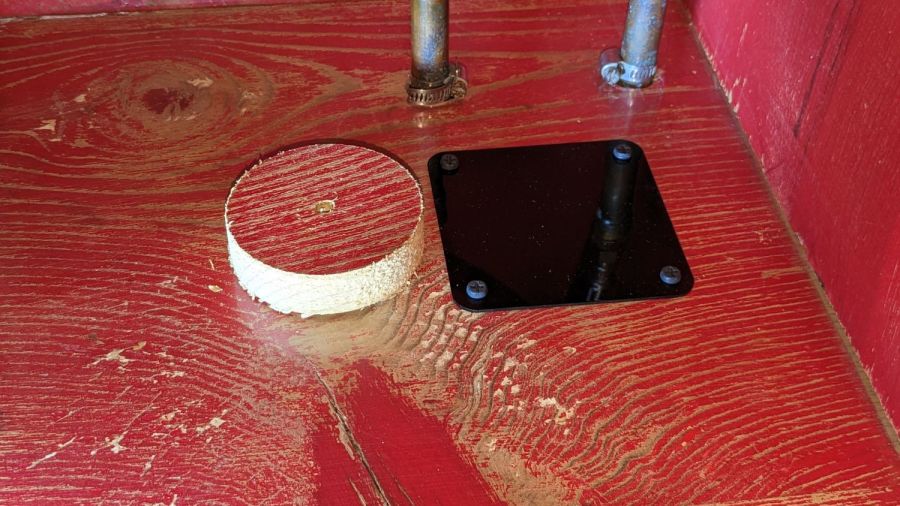
Fortunately, I had a hole saw exactly the right size for an 80 mm case fan:
Kitchen sink – fan cover plate
I will lay big money on a bet saying your kitchen cabinets don’t have Real Wood like that, nor are the interiors painted bold Chinese Red. This place really is a time capsule from 1955.
While the drying happened, I made a hole cover from 1.5 mm black acrylic and, there being no style points involved, rounded up a quartet of black-oxide self-drilling sheet metal screws to hold it in place.
Although it’s not obvious, there’s a layer of transparent plastic “shelf paper” in there. It covers the fan hole under the cover, so any future spills will have approximately the same difficulty reaching the floor as this one did.
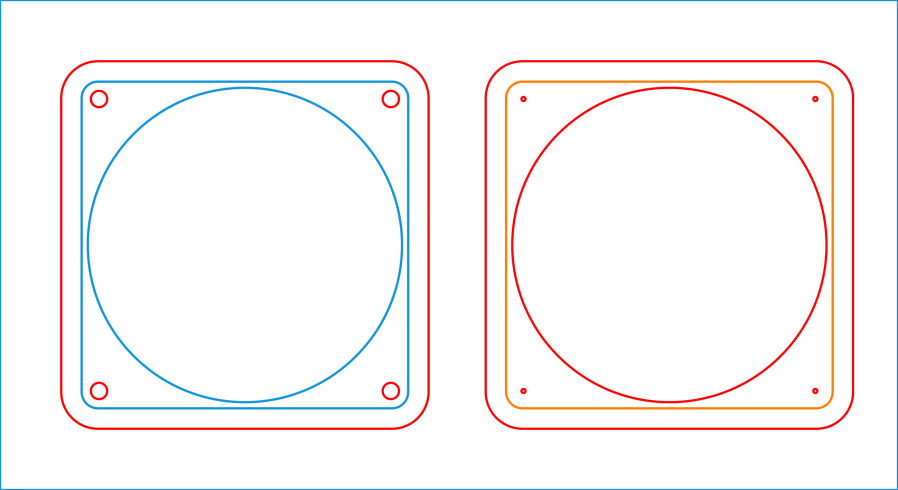
The LightBurn layout produces both the fan cover and a template to mark the four screw holes around the fan opening:
Kitchen Sink Fan – LB layout
The blue tool layer lines serve as a guide for the rest of the cover layout; the matching orange square on the right marks the fan outline on the drill template as a quick size check.
No need for an SVG version, because now that you have the general idea, it’s easy to recreate it for your own fan.
It did, however, dry the tubing and the construction was Pretty Close™ to being the proper size.
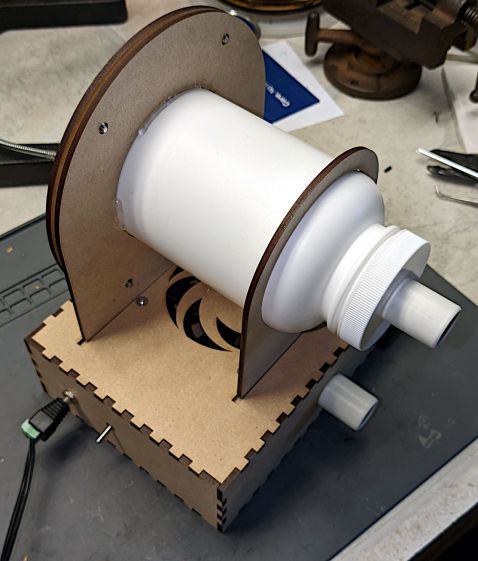
Making the stand from acrylic sheet eliminates the MDF stench:
CPAP Dryer filter – acrylic stand – fitting end
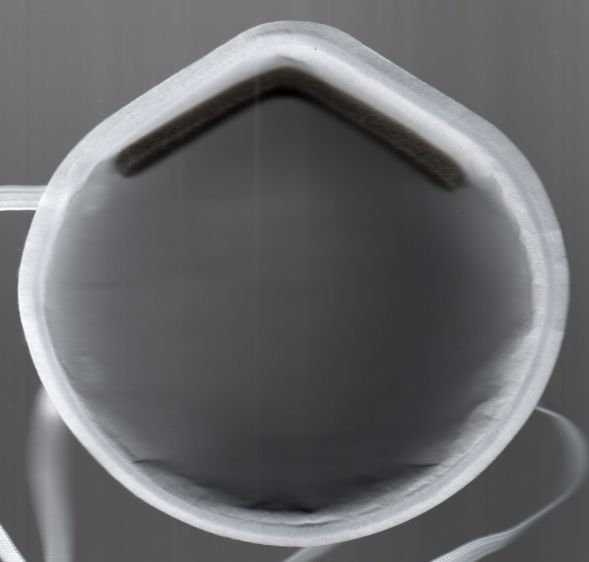
Incoming air passes through a dome-style N95 mask:
CPAP Dryer filter – acrylic stand – filter end
The mask sets the overall size of the stand:
CPAP Dryer – Filter holder – LB layout
Given that we’re not talking Level 4 Biohazard, any filter would work equally well. A dome mask has a nicely defined and self-supporting shape with a flange around the edge.
The flange provides a convenient way to build the clamp ring, starting with a scan from the face side:
Demetech Dome Mask – interior scan
Tracing the flange outline using GIMP’s Scissor Select tool and doing a little cleanup in Quick Mask mode produced a selection suitable for becoming a binary mask of the N95 mask:
Demetech Dome Mask – perimeter mask
Ex post facto, I realized the mask has a sufficiently regular outline to fit a much simpler Beziér spline:
CPAP Dryer – Filter holder – LB splines
That began in LightBurn as a circle fitting the lower part of the mask, converted to a path, then tweaked with the Node Editor to fit the top of the nose and add two nodes to pull the path inward on either side. In the unlikely event I make another bottle stand, the cut will be irrelevantly smoother.
The hole in the clamp comes from insetting that path by the flange width of 4 mm, whereupon the N95 mask pretty much self-centers in the hole:
They’re shortened by 1 mm (from the original length shown in the upper right) to fit 1 mm of mask sandwiched inside a pair of 3 mm acrylic sheets:
CPAP Dryer filter – Rivnut installed
The glowy edge-lit acrylic sheet has 4.8 mm holes for a snug push fit and the white clamp ring has 5.1 mm holes for a loose alignment fit. I drilled out the laser-cut holes for nice smooth sides.
I picked a bottle large enough to also hold the mask’s elbow, so that it would dry in the same stream of clean air. So far, the elbows dry well enough on their own, but the bottle remains a convenient size for fitting the mask on its end.
On the other end of the bottle, the lid gets a hose fitting turned from PVC pipe:
CPAP Dryer – filter hose fitting glue rings
The Official ResMed fittings on the masks and the AirSense 11 machine are about 20 mm long and just over 22 mm OD with a slight taper. The unheated hose has silicone rubber ends fitting very snugly around those cylinders, so I made the pipe fittings 25 mm long and 21 mm OD to ensure a low-effort, but still secure, fit.
The grooves cut into the fitting anchor a generous hot-melt glue blob sealing it to the lid:
CPAP Dryer – filter hose fitting inside
Yes, the foam disk and the hole through the lid were both laser-cut. Making perfect circles in thin organic material with zero drama is wonderful.
The downstream / mask end of the heated ClimateLine hose (left) is physically identical to the unheated hose ends, but the machine / upstream end (right) sports an electrical connector for the spiral heating element and the thermistor (in the white stud protruding into the mask end lumen):
ResMed ClimateLine heated hose ends
Yes, that does look a lot like a naked USB connector, as does the main power connection on the machine, and you can actually slide a Type A USB connector around it. The ResMed manual pointedly notes:
•Do not insert any USB cable into the AirSense 11 device or attempt to plug the AC adaptor into a USB device. This may cause damage to the AirSense 11 device or USB device. •The electrical connector end of the heated air tubing is only compatible with the air outlet at the device end and should not be fitted to the mask.
The four ribs inside the upstream end slide over a 23.5 mm cylinder, which is enough larger than the 22 mm cylinder on the machine to wiggle the not-USB connector into place. Without a connector to worry about, I turned a sleeve adapting the smaller fitting to those ribs:
CPAP Dryer filter – heated hose bushing
It’s 27 mm long to keep the lip of the silicone seal away from the setscrew, 23.5 mm OD to exactly fit between the ribs, and a 21.5 mm ID slip fit over the bottle snout.
The tiny M3 setscrew lives in a hole tapped into the inner tube, because the sleeve is only 1 mm thick:
CPAP Dryer filter – acrylic stand – bushing center drill
The setscrew turns outward into a clearance hole drilled in the sleeve to lock it in place.
The outer PVC pipe in the vise is a simple cylinder fixture bored to match the sleeve, so I could grab it in the lathe chuck / vise without distortion. Just the force from a normal grip squishes the fixture enough to keep the sleeve from turning / moving / getting annoyed.
Improving the MDF fan box awaits a few parts, but, being downstream, isn’t on the critical path for drying hoses. The only trick is keeping the bottle inlet upstream of the fan exhaust.
For all the usual reasons, we’re now confronted with the need to dry a freshly washed CPAP hose:
CPAP Dryer – water droplets in hose
Those droplets might not seem like much, but I am reliably informed they produce over-humid air and sprinkle when they migrate into the mask during the night.
Commercial drying machines are available, but seem grossly overqualified and require proprietary foam filters. I wondered if simply pulling air through the hose for a few hours would work:
CPAP Dryer – dried hose
Why, yes, it does.
That test took two hours and another with a different hose required about five, but simply “hanging the hose up to dry” consistently produced poor results after three days, so we count a few hours as a win.
Stipulated: MDF is absolutely the wrong material for an air-handling project, because laser-cut MDF stinketh unto high heaven. This was the first pass using cheap material to see how well, if at all, the idea worked.
The CPAP hose goes between the fittings on the bottle and box, with air entering the bottle through a hole drilled in what was its bottom:
CPAP Dryer – filter bottle cutout
An air filter seemed like a Good Idea™, if only to keep ordinary room fuzz out of the bottle and hose. In this Third Pandemic Year, I could simply pull a least-favorite N95 mask from the stockpile and fit a clamp ring around it:
CPAP Dryer – filter clamp installed
The motivation for pulling air through the tube, rather than pushing it, came when I realized I could build a much cleaner intake structure by starting with an ordinary HDPE bottle than I could possibly assemble from random parts.
So the fan in the box pulls air through the fitting on the side of the box and blows it out the swirl on top:
CPAP Dryer – fan box
The box contains a coaxial power jack, the switch, and an 80 mm fan extricated from the Box o’ MostlyFans. I briefly considered an LED, but it’s obvious when the fan runs. The box and swirl cutting patterns come from the invaluable festi.info.
The two slots give the bottle somewhere to stand while idle. In use, the hose is sufficiently unwieldy to require standing the bottle wherever it wants to be, rather than insisting on putting it anywhere in particular.


