I’ve been working on an object (more on this later) that requires precise alignment of two parts that capture a nut deep inside. This calls for alignment pins, similar to the ones I used for, say, the Triple-Cylinder Thing:
The general idea is to design holes that fit the pins, then locate them at the parting line of the model, where they’re subtracted from the solid and appear in exactly the proper places when the model splits for printing:

You slather solvent glue on both halves, jam pins into the holes, slap the parts together, and clamp until cured. Works fine, I use pins all over the place.
The gotcha of using just a (polygonal) cylinder as the hole: if you glue one end of the pin at a time, a small rim of dissolved plastic may form around the pin at the surface. That can bond the two halves together or prevent them from joining properly after being disassembled.
Sooo, here’s a new alignment pin hole with a gutter around the pin on both surfaces to capture the glop:

Remember, that’s the negative volume that will hold the pin, not the pin itself!
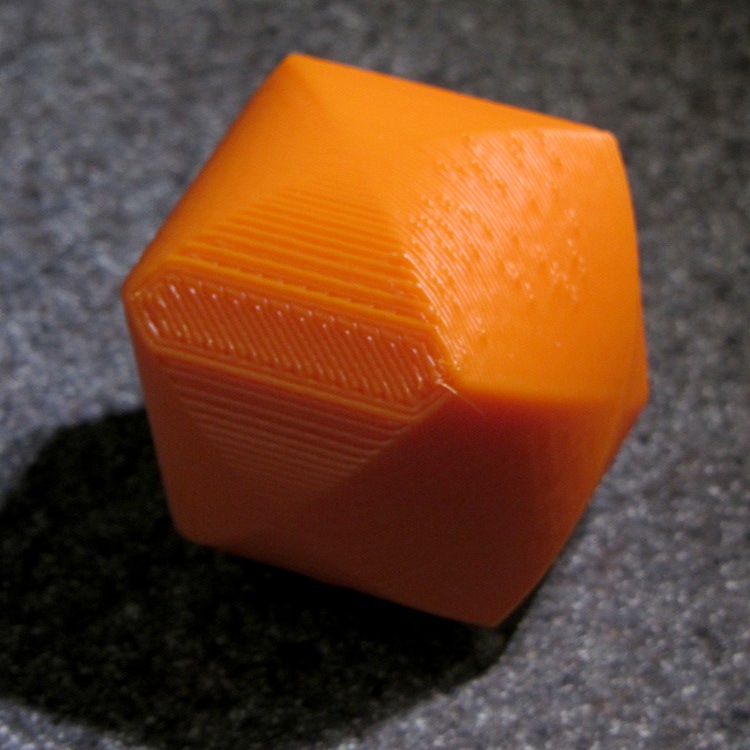
Here’s how it works in real plastic, with a 1.75 mm peg glued into one hole with a bit of crud in the gutter:

The secret to making the gutter work: offset the second layer by half the thread width, so that it’s reasonably well supported on the first layer. If you don’t do that, the inner layers simply drop down through the hole and fill the gutter. Even doing that, notice the distortion of the first few layers inside the hole.
The OpenSCAD source code looks about like you’d expect:
//-- Locating pin hole with glue recess

module LocatingPin(Dia=PinOD,Len=5.00) {

	translate([0,0,-ThreadThick])
		PolyCyl((Dia + 2*ThreadWidth),2*ThreadThick,4);

	translate([0,0,-2*ThreadThick])
		PolyCyl((Dia + 1*ThreadWidth),4*ThreadThick,4);

	translate([0,0,-(Len/2 + ThreadThick)])
		PolyCyl(Dia,(Len + 2*ThreadThick),4);
}
Ideally, the pin length should extend at least two diameters into each side of the object, but you can feed in whatever you need to make it come out right.
The PolyCyl() routine produces a low-vertex-count polygon that circumscribes the nominal diameter, which is what you need for vertical holes in 3D printed objects:
module PolyCyl(Dia,Height,ForceSides=0) {			// based on nophead's polyholes

  Sides = (ForceSides != 0) ? ForceSides : (ceil(Dia) + 2);

  FixDia = Dia / cos(180/Sides);

  cylinder(r=(FixDia + HoleWindage)/2,
           h=Height,
	   $fn=Sides);
}
Tip o’ the cycling helmet to nophead for figuring out the polyhole idea and explaining why they’re needed…

Comments
7 responses to “Improved Alignment Pin Hole for Split 3D Prints”
I saw your comment on glue gutters on the broom handle screw post and wasn’t quite sure what you meant, so I rendered your model just to look at them. Looks like you’ve already improved the process slightly with the stepped/offset layer since then.
You get a gold star on your report!
I’ve been tinkering with improving the holes for a while. The Triple Cylinder Thing had the old-style holes and the broom doodad got caught in the middle with holes that fell through themselves.
[…] a handy tip from Ed Nisley’s Softsolder.com blog for the common desktop 3D printing trip of splitting non-flat object in half and then pinning the […]
[…] could also print it without support by laying it flat, then glue the halves together with alignment pins. This is a bottom […]
[…] and glue filament snippets as alignment pins, trim about 1 mm over the surface to fit the small […]
[…] molds have alignment pin holes in the […]
[…] to attack the acrylic, lined it up, and pressed it in place. The positives have recesses for alignment pins, but even I think that’s overkill in this […]