Mary made a neck cozy based on a Craftsy description using a pattern I’d extracted from the low-res photo and rescaled to the proper size. The perimeter came out grittier than I like, but the laser had no trouble chopping it from a sheet of paper, and she cut smoothly around the lumps:
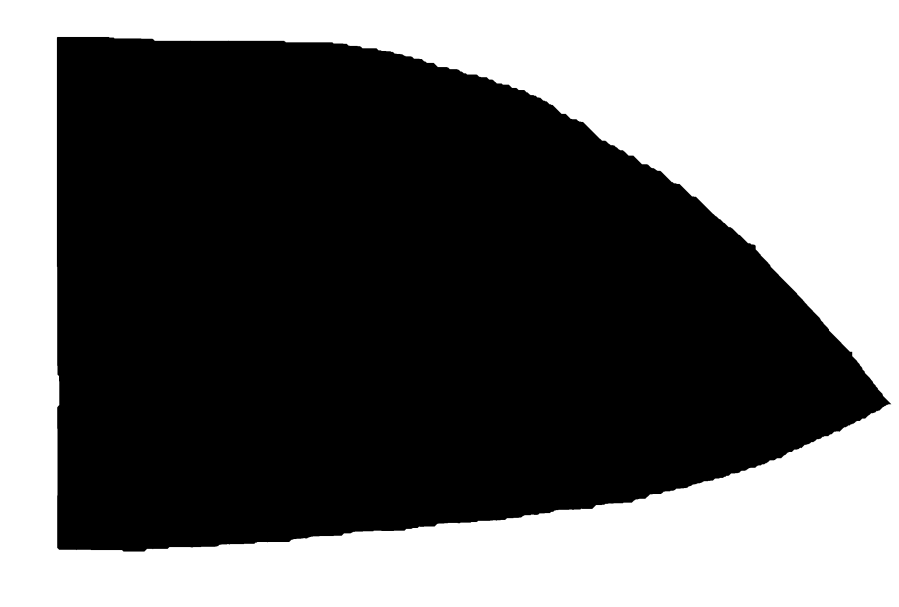
It looks better on her, but you get the general idea:

After some experience, however, she wanted to lengthen the top and bottom seams to improve the way it draped, which meant I had to modify the extracted pattern. The original pattern in the Craftsy photo was hand-drawn (which is perfectly fine) and the two halves were of two different sizes; we decided to work with the left half and produce a symmetric result.
Rather than fiddle with the bitmap, I drew a rectangle around the outside of the left pattern mask, converted it to a path, moved the nodes to key locations, then fiddled with the control points to lay the splines along the perimeter:

Removing the bitmap makes the splines much more obvious and shows the much smoother perimeter:
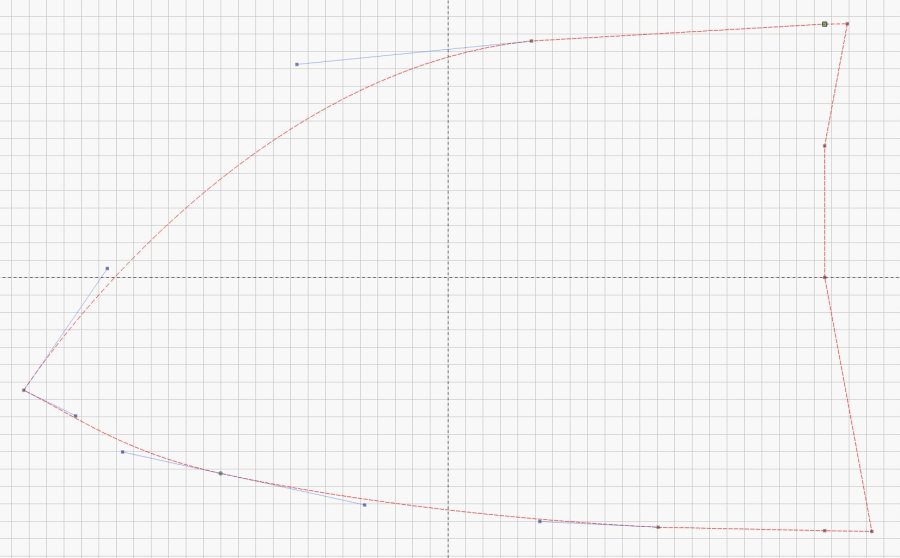
Adding a few nodes to change the splined shape is much simpler than fiddling with the bitmap, particularly when tweaking their position as directed by someone who knows how the fabric will eventually take shape.
Add fiducial marks and a label, duplicate the shape, mirror it to get the other half, and fire the laser:

Fabric cutting isn’t in my wheelhouse, but I made the offer …
The LightBurn layout as a GitHub Gist:

Comments
2 responses to “Splined Neck Cozy Pattern”
Ah yes, editing splines with someone who knows the physics of the end result is much more fun than guessing, and the end result is going to be better!
“Move it half an inch” … “A little more” … “Looks good”
Long experience shows we make a pretty good team!