One of Mary’s friends asked us to take a look at her Kenmore 158.17032 sewing machine that suffered from a Showstopper Problem: the handwheel turned the main shaft, but the motor pulley spun freely. You could rev the motor to maximum speed without budging the shaft, which suggested something was wrong with the clutch joining the handwheel and the belt pulley to the main shaft. This being a slightly newer model than the others in our stable, I was mildly surprised to find a completely different clutch mechanism between the drive belt and the main shaft.
The plastic cover plate in the handwheel yielded to an old crochet hook:
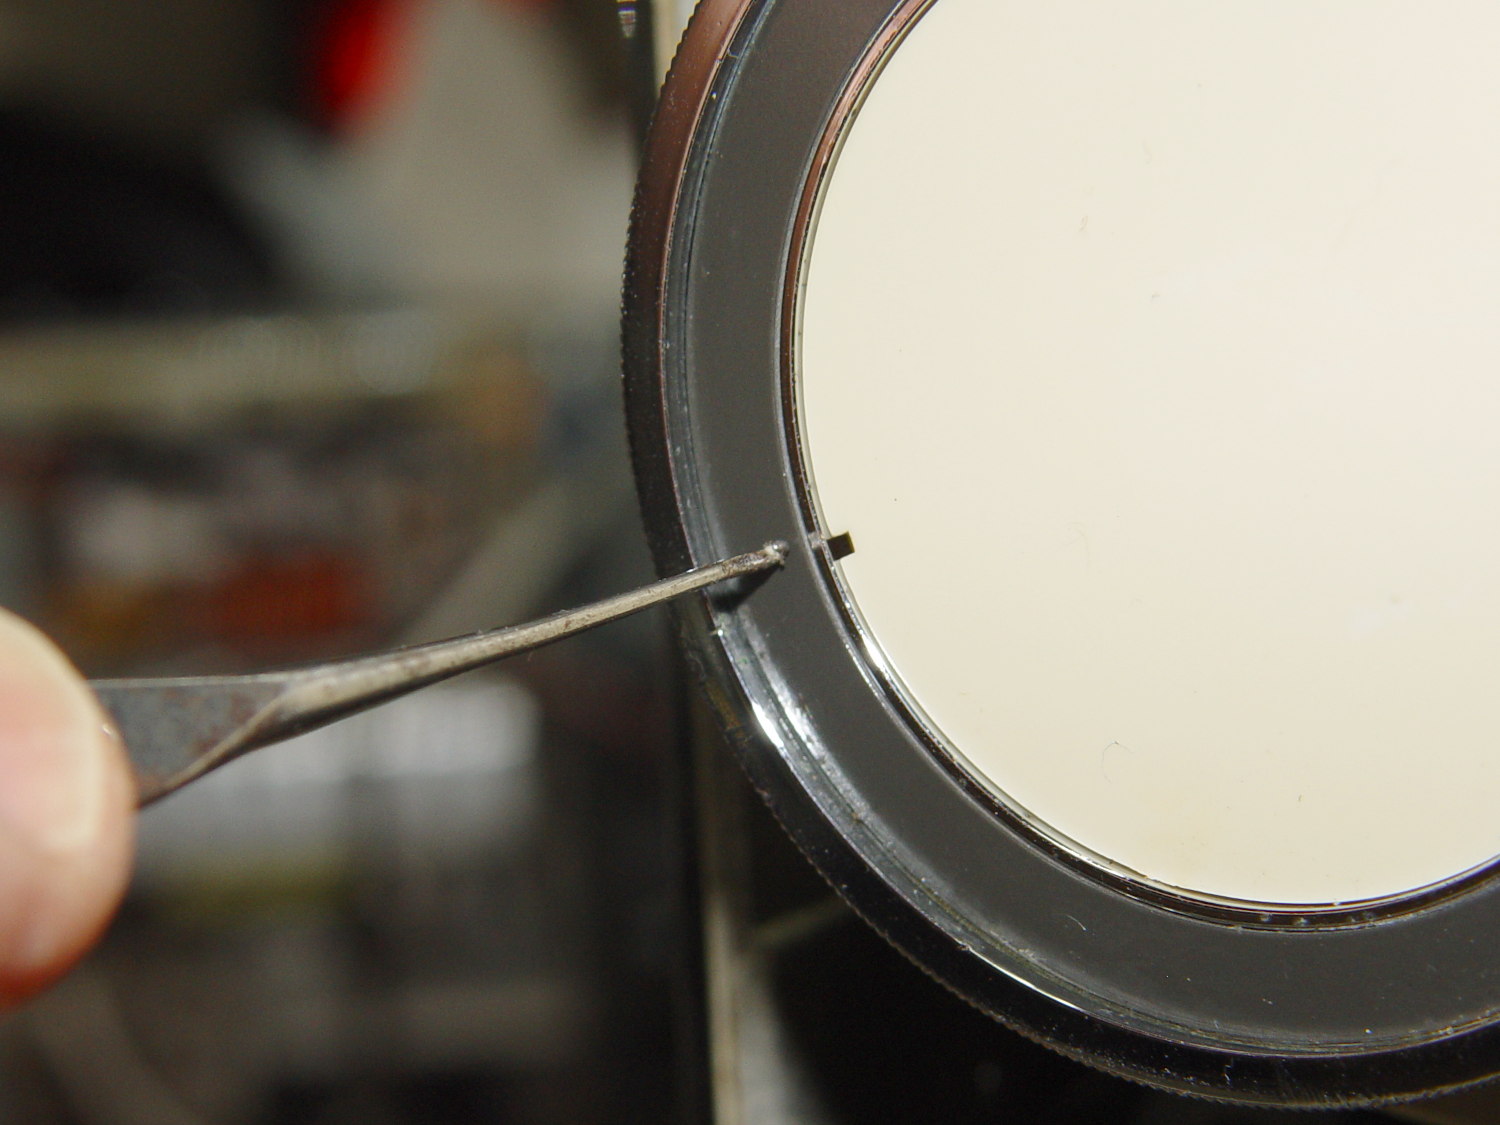
Stick the hook into the tiny notch, engage hook with cover, pull outward, and it’ll fall into your other hand.
That exposes a simple screw holding the chromed plastic handwheel in place on the motor shaft. After taking the pulley and clutch off the Hard Way, I discovered the Right Way, which is hereby documented for The Next Time Around. In order to show what’s needed, I’ll start in the middle and work outward.
Pull the handwheel off and remove the machine’s end cover.
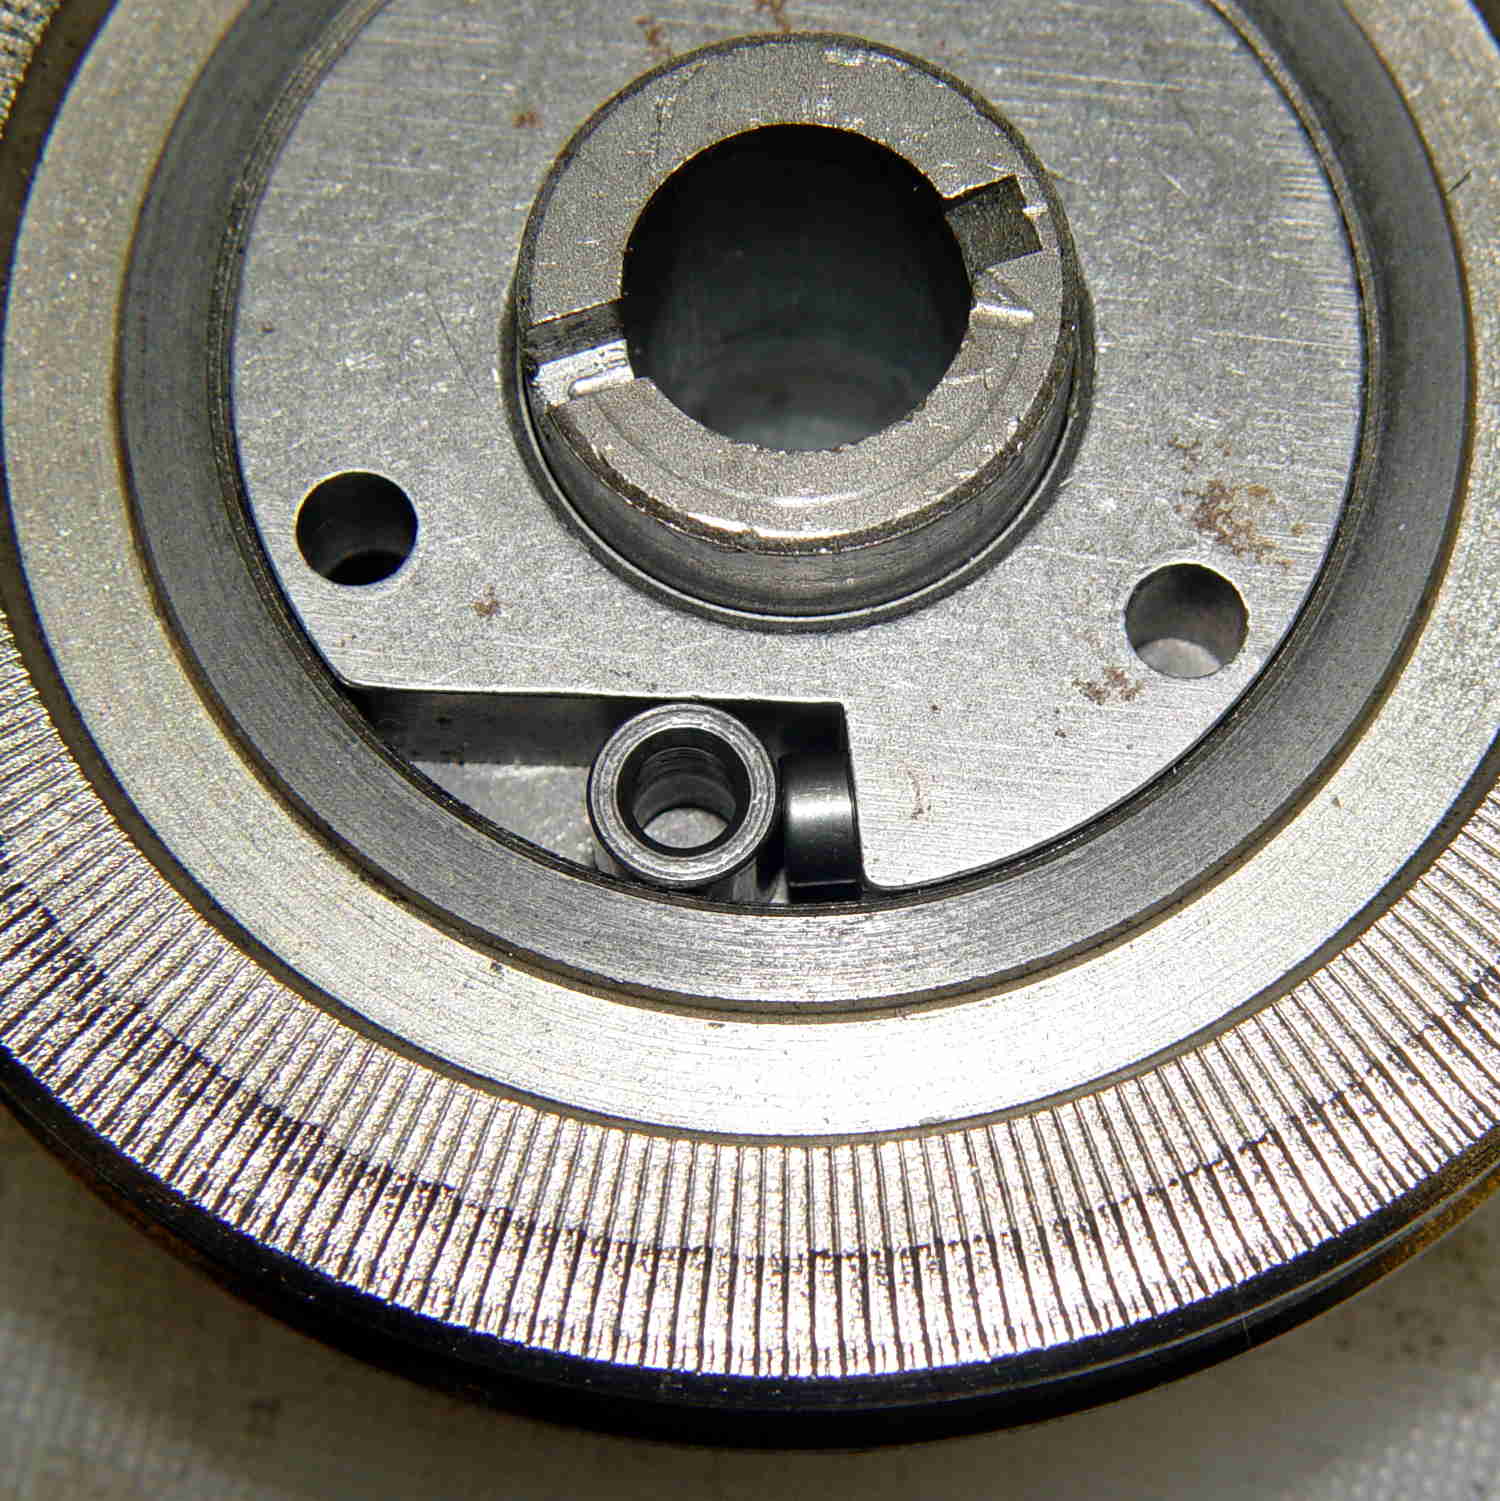
With the clutch assembly removed (which you can’t do yet), you can see a pair of pot metal bands that act as a brake when the bobbin winder snaps off a full bobbin. They look like this in the normal running position:
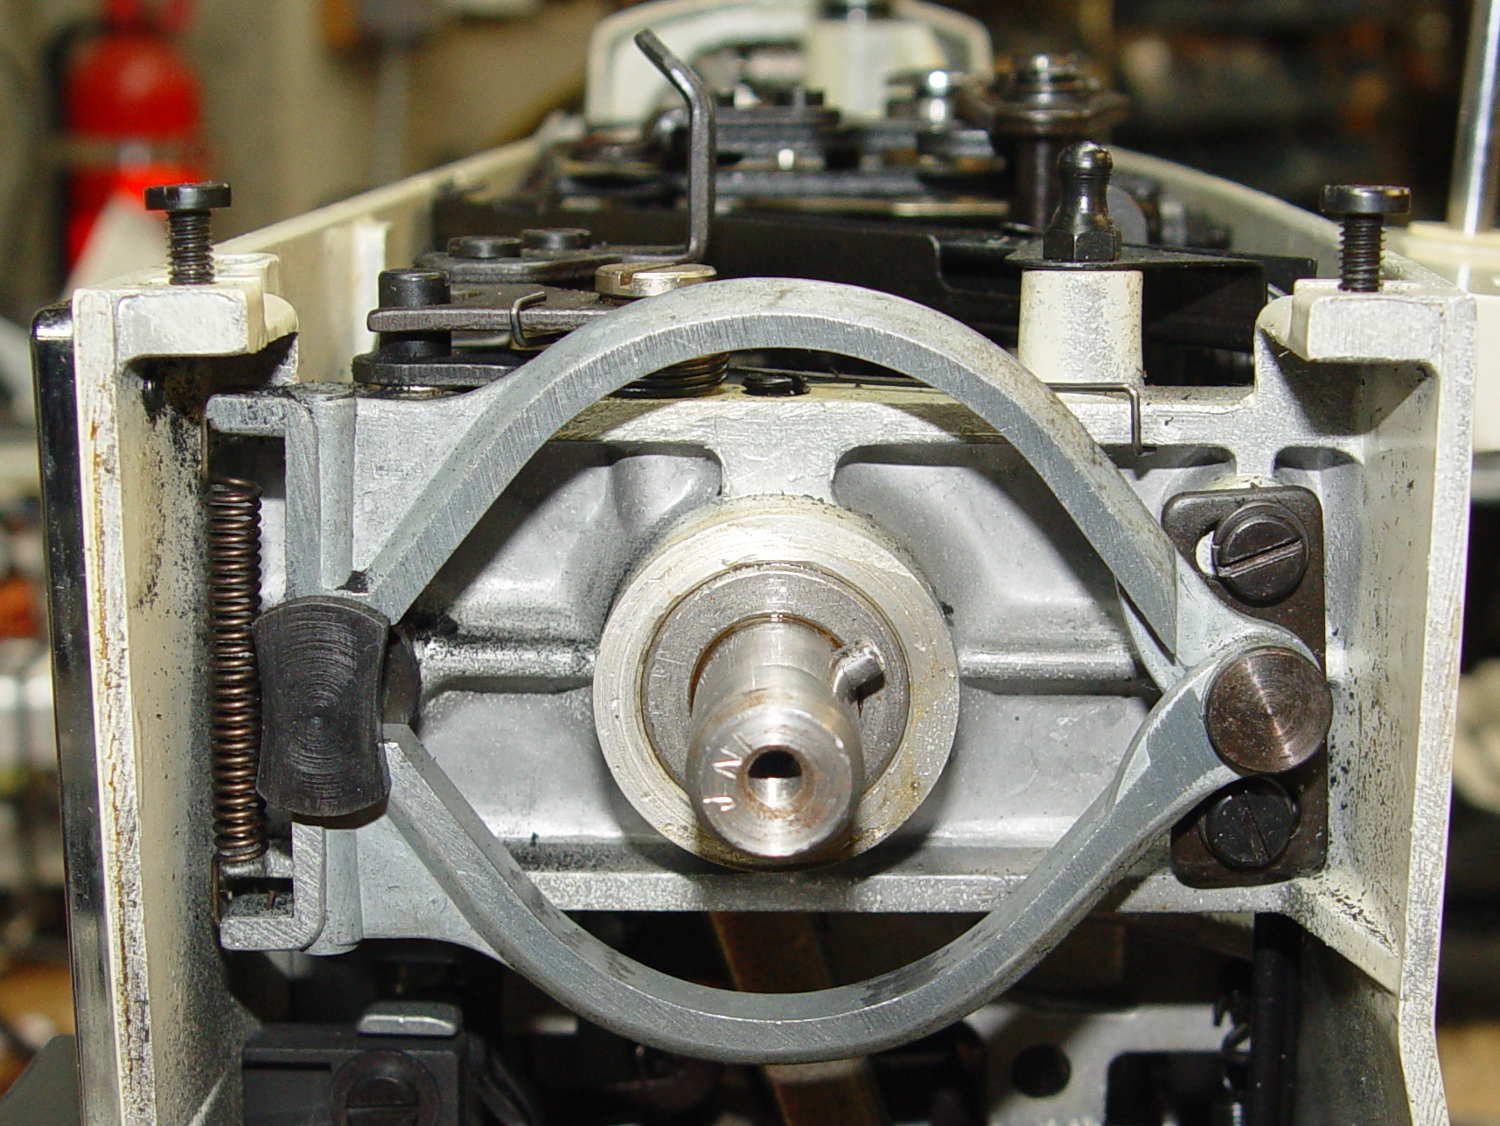
The black bow-tie at 9 o’clock is vertical, holding the brake bands apart and clearing the tab on the clutch asembly (which you haven’t seen yet).
They look like this when the bobbin winder has just snapped:
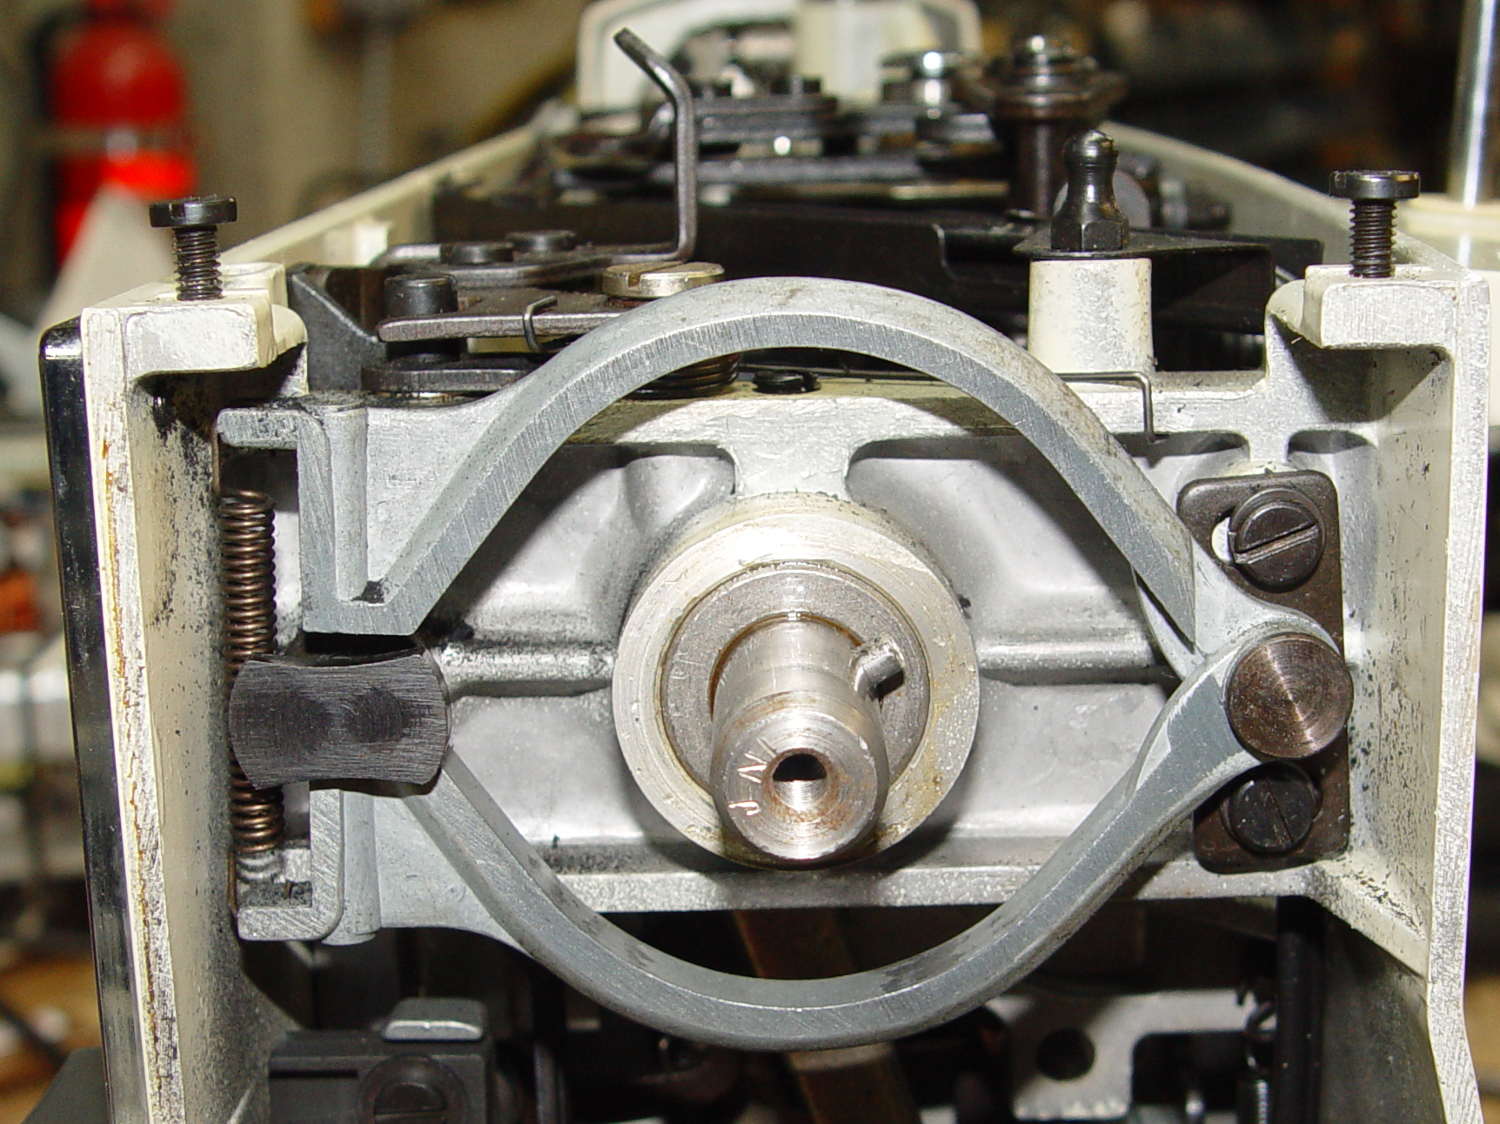
The Bobbin Winder Reset Button atop the machine (which our machines don’t have and this one does) presses on the tab sticking out toward you on the horizontal bar pivoting on the front of the machine:
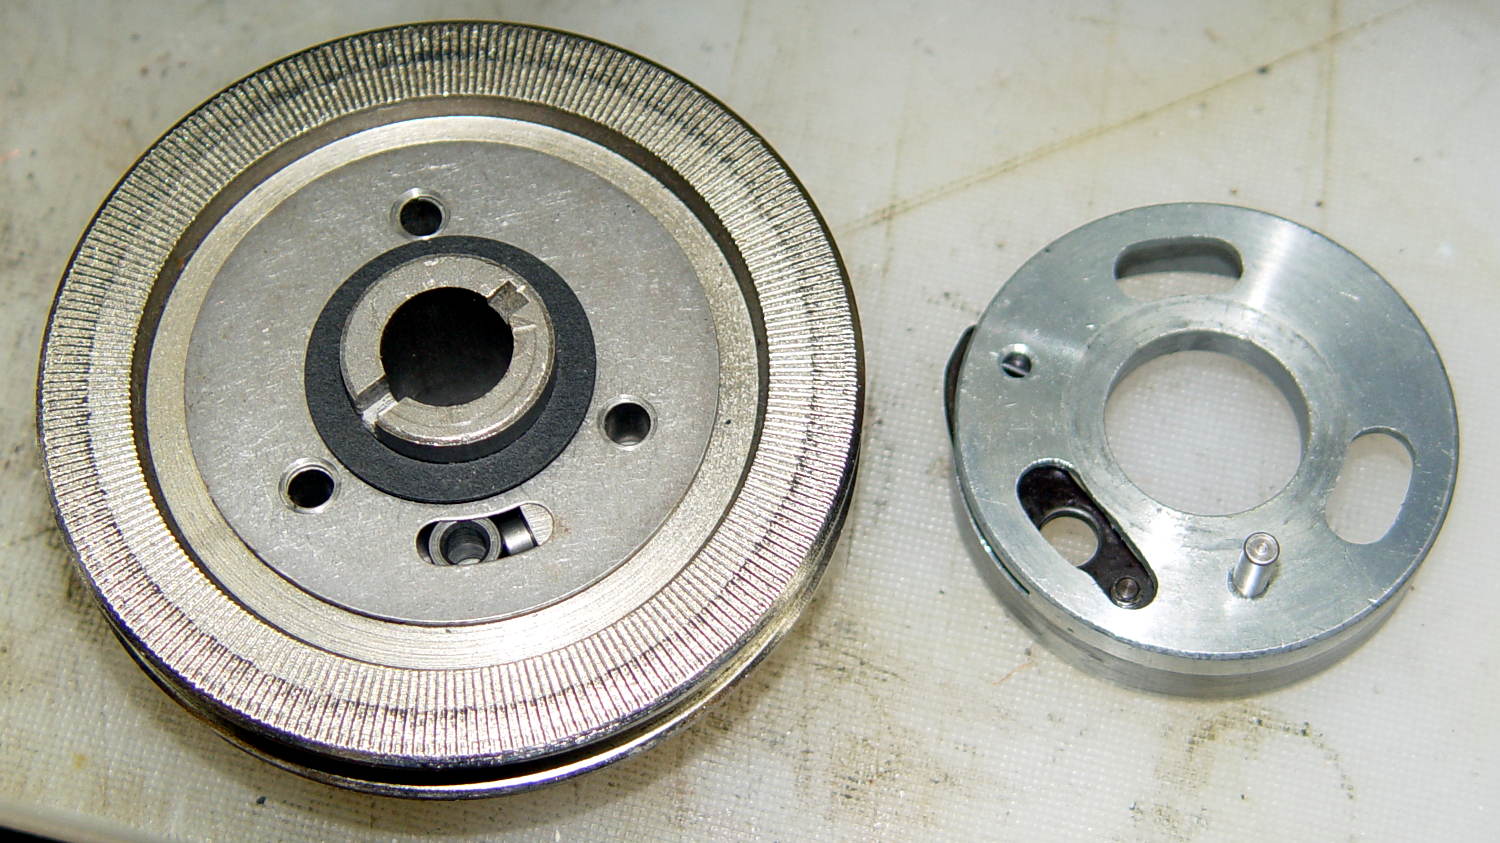
In that position, the button is up, the bobbin is ready to load, the brake bands are off, and you can gently tap the clutch assembly off the main crankshaft:
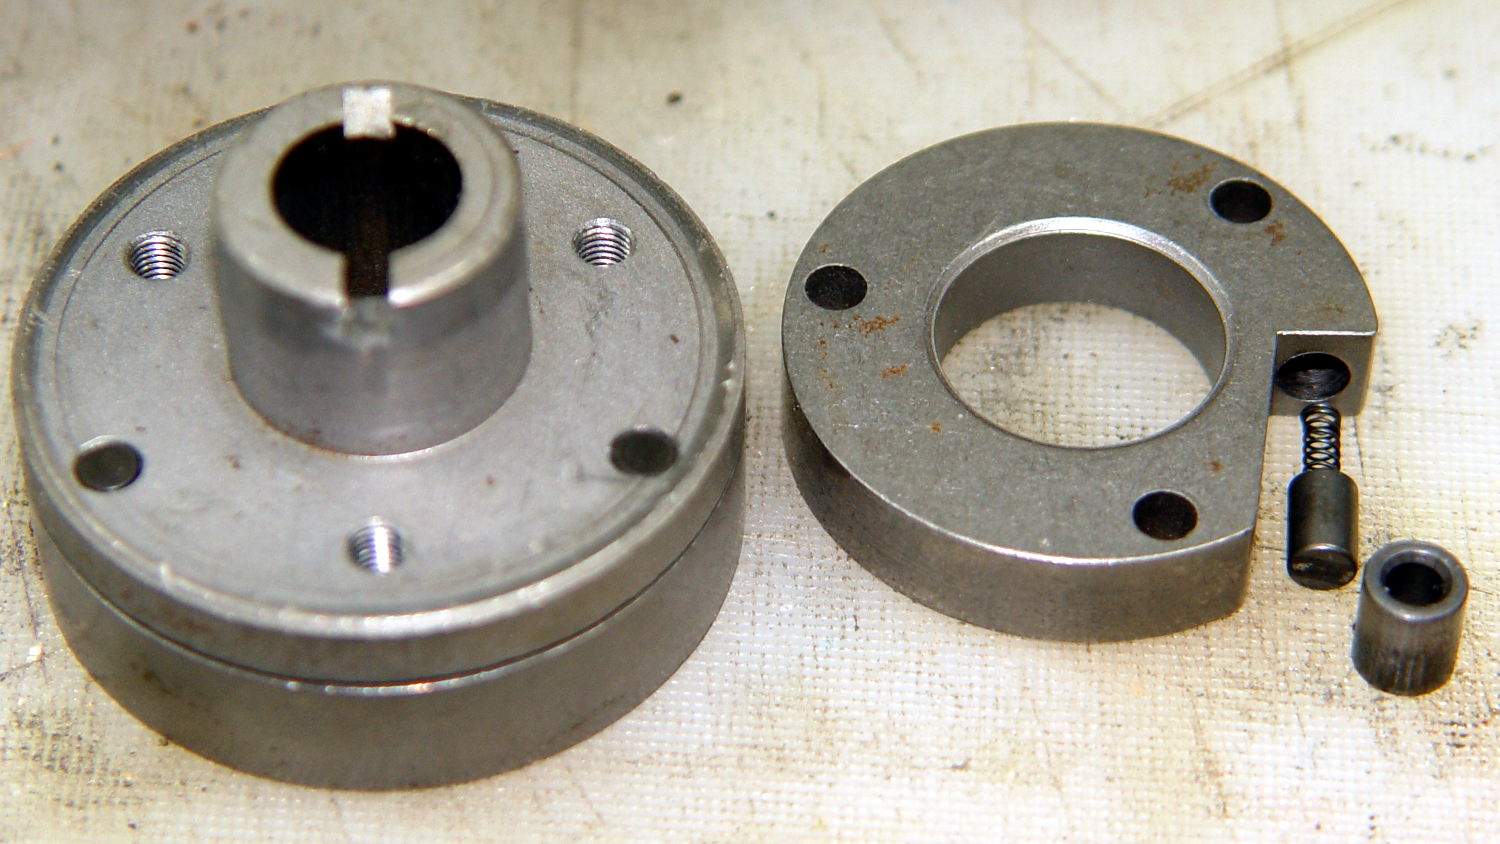
The inner hub rotates very slightly with respect to the belt drive pulley (which has the grooves that drive the bobbin winder tire). That didn’t quite work on this machine, due to the usual lack of lubrication / mechanical wear / what-have-you.
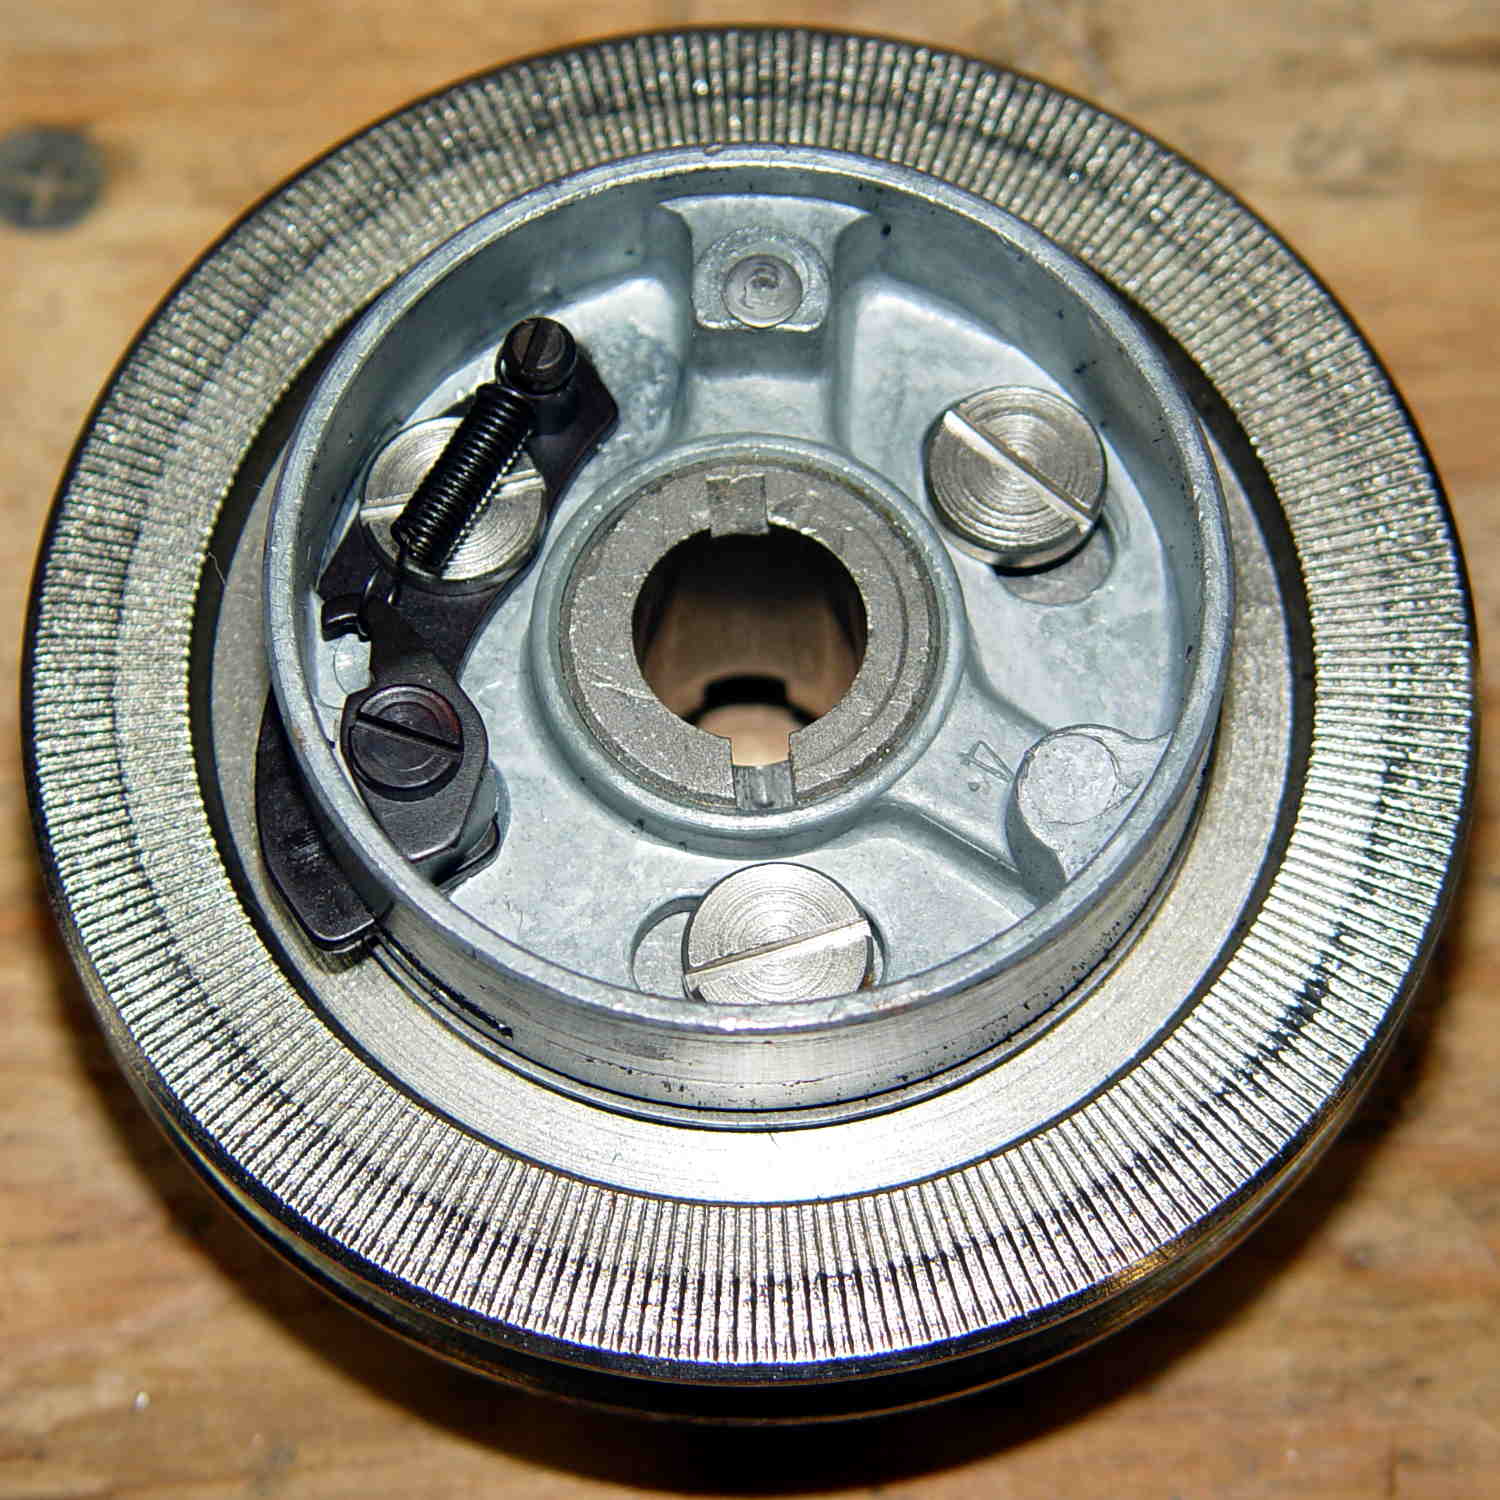
The innermost part (with the notches for the pin visible at 2 o’clock on the main shaft) rotates with the handwheel. The belt pulley rotates with the motor belt. The clutch lets you turn the handwheel with the motor stopped. Normal rotation is clockwise in this view; on the machine, you turn the top of the wheel toward you.
Carefully remove the spring that retracts the clutch lever, remove both black screws, remove the big flat head screw, and slide the black lever out to the side.
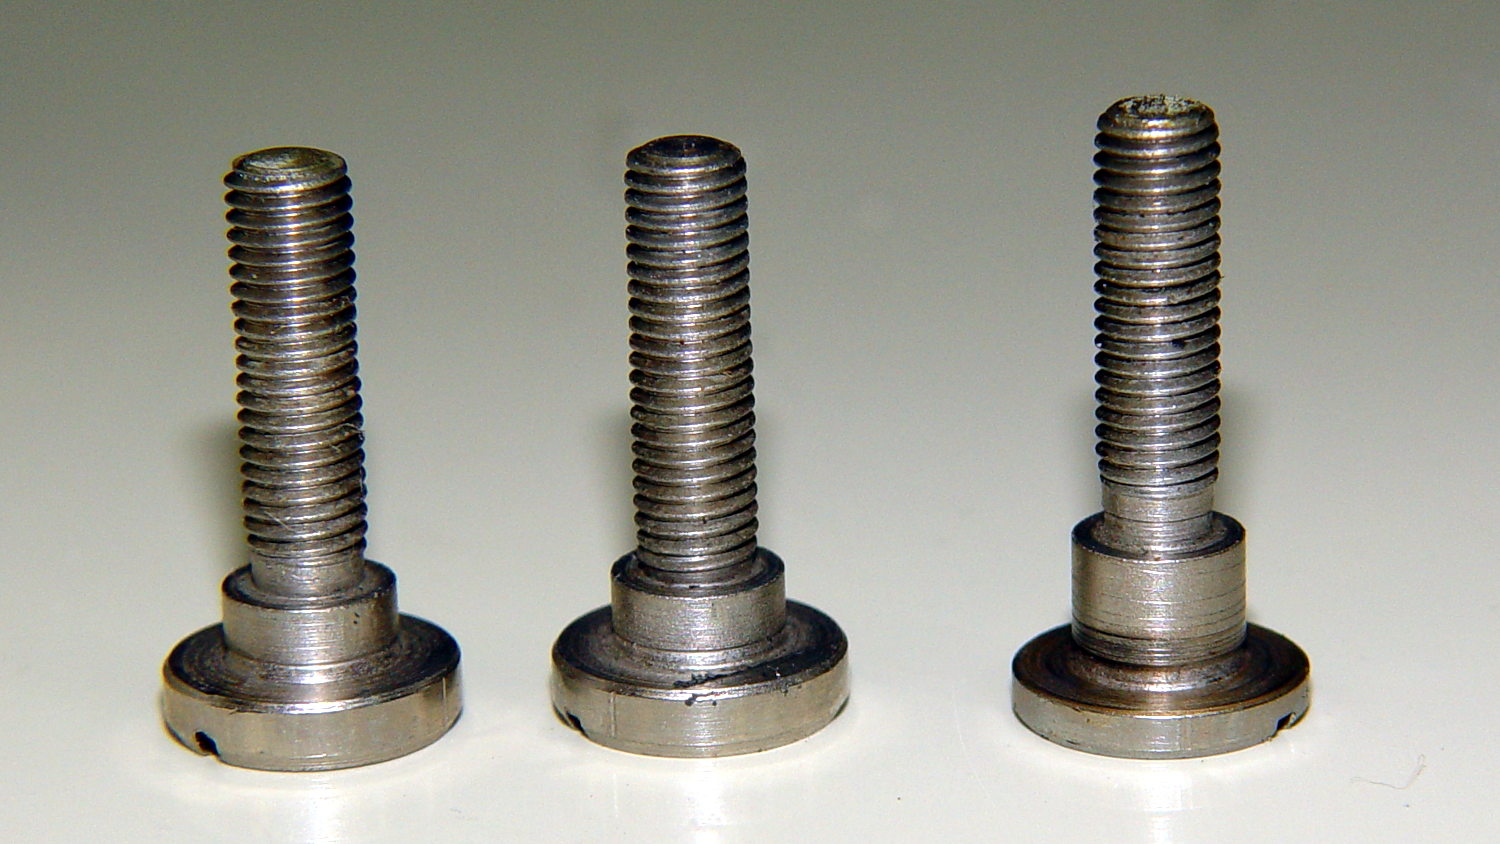
Unscrew the two remaining flat-head screws holding the hub / lever in place. The one with the longer shoulder goes into the lever:
Removing the hub reveals the pin that engages the clutch mechanism visible through the slot at 6 o’clock in the handwheel:
Remove the fiber washer and the steel cover plate to expose the clutch mechanism:
The pin pressing against the hollow cylinder (which is the actual clutch!) has a powerful spring:
If you hold the cylinder in place, you can rotate the clutch body enough to unload the spring just enough to let you ease the cylinder out and gently release the spring. Good luck!
With all the parts on the bench, clean everything, lube only the parts that need it (like the spring-loaded pin, but not the clutch cylinder), put everything back together, and it should Just Work.
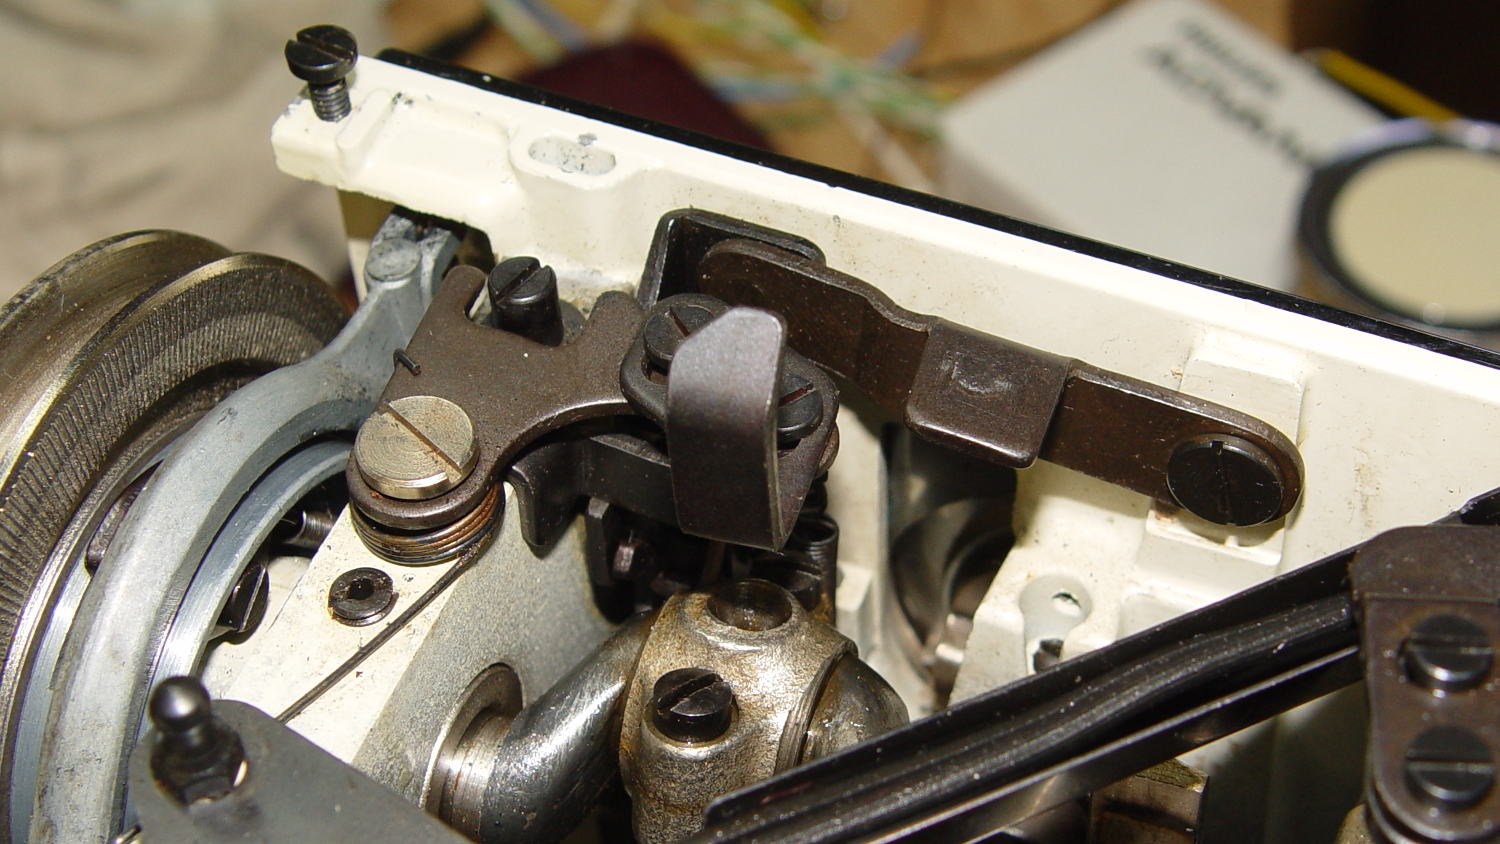
The screwdriver points out the tab engaging the black bow-tie doodad:
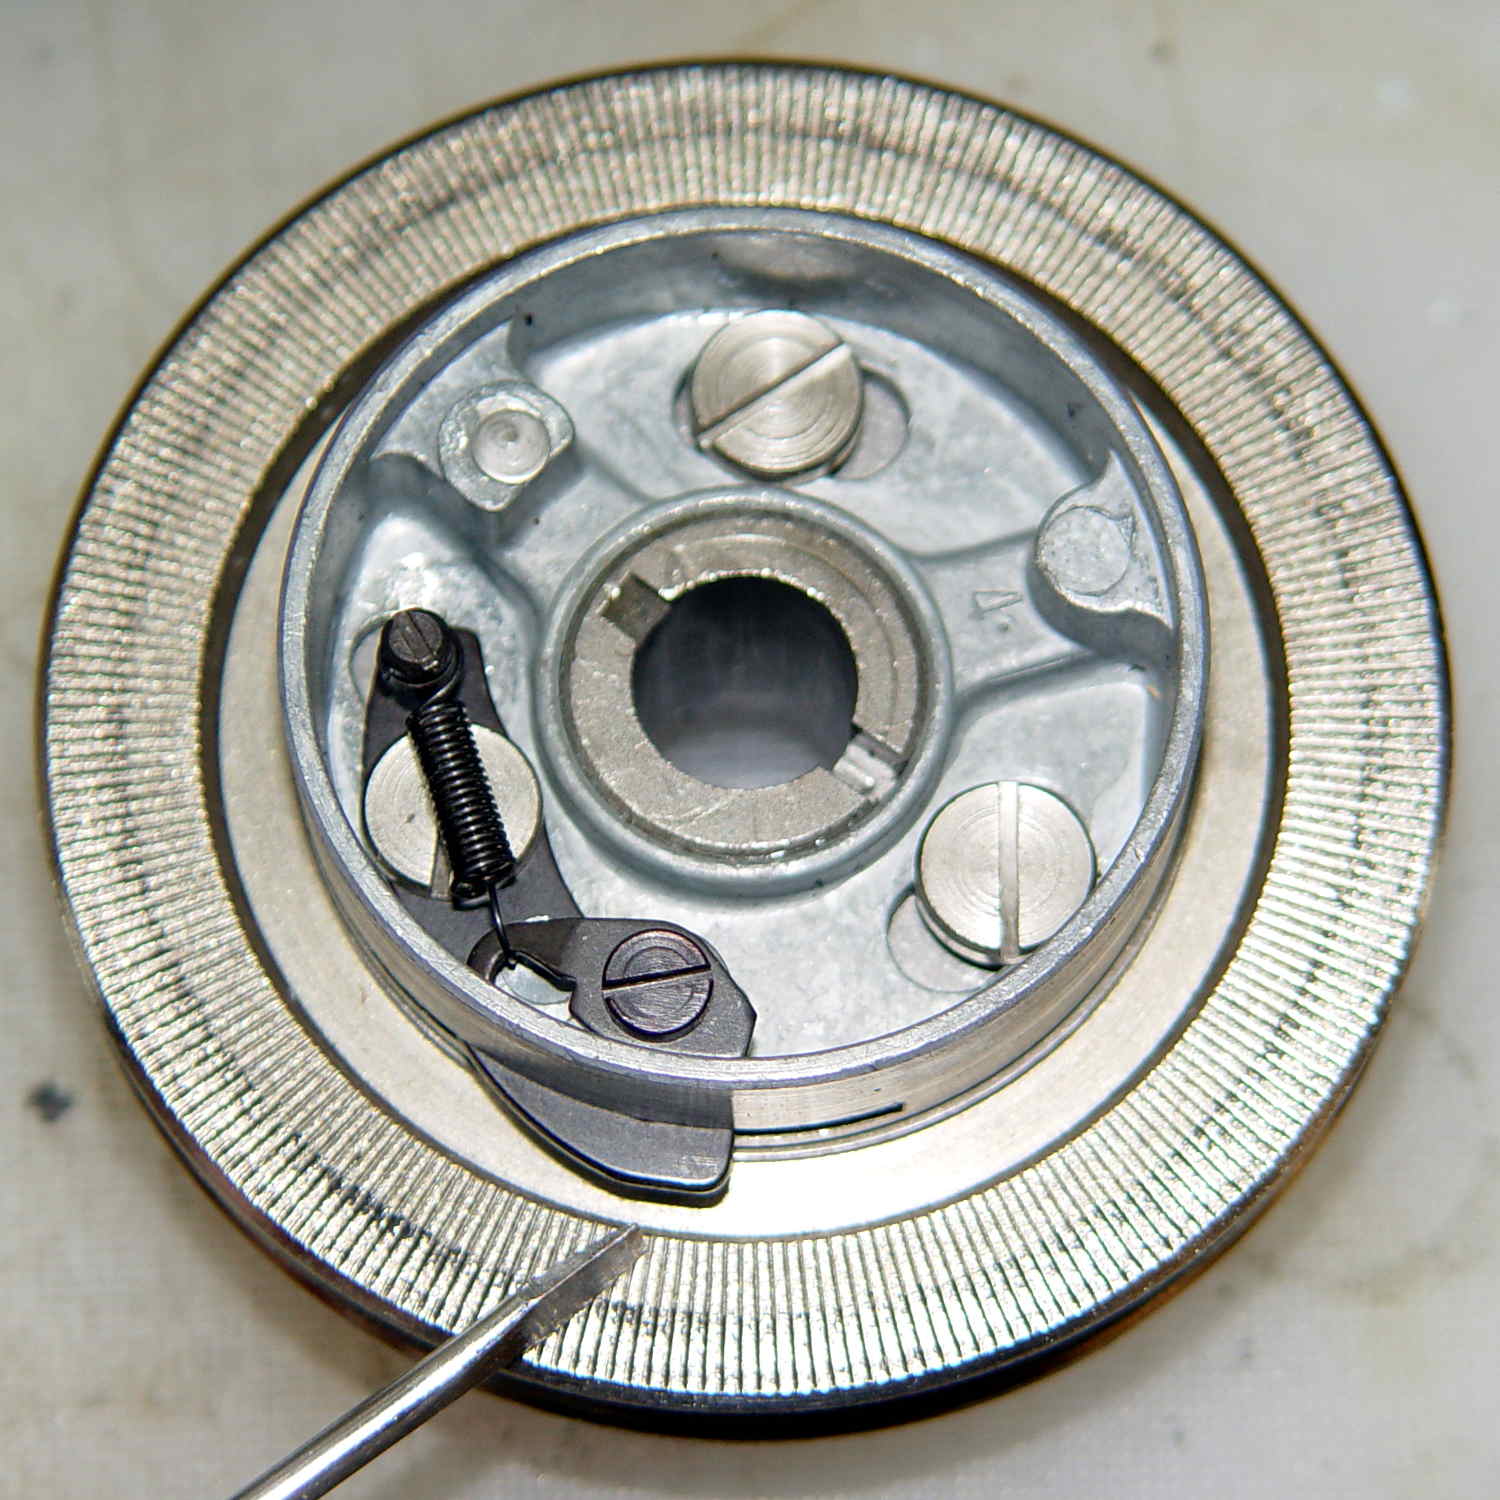
The object of the games is to make the tab pivot smoothly around the large flat-head screw under the spring as you press the part that sticks out, so the clutch will be either completely disengaged or firmly engaged.
When you get it working smoothly, release the brake bands, slide the clutch assembly back on the shaft, reinstall the cover, install the handwheel, install the screw, pop the plastic hub back in, and you’re done!
Update:
Even though I write this stuff down to help me remember what I did, sometimes other folks find it useful:
Just read your article about Kenmore 158.17032 Handwheel clutch and was able to repair a machine because of you. I so appreciate that you take the time to post such things. I would not have taken the thing apart had I not found your article and I just wanted to say THANKS. I browsed some of your other projects also. Wow.
Thanks Again,
Donnie
… and …
I have spent weeks searching for how to fix the Kenmore 158.1703 clutch ( a very weird one) for a friend of mine. I was pointed to your post by the Vintage Kenmore sewing machine groups.io.
I jumped up and down with joy to read and see the photos.
Yes! I can fix this and get it back to her. THANK YOU! I will try later today with your post printed out.
Thank you!
Linda
More small victories in the struggle against entropy!
The Kenmore Vintage Sewing Machine group may come in handy.

Comments
One response to “Kenmore 158.17032 Handwheel Clutch Disassembly”
[…] « Kenmore 158.17032 Handwheel Clutch Disassembly […]