I recently replaced the hack-o-matic icemaker + fountain pump cooler with a LightObject Q600 water chiller, an entirely uneventful process. The Q600 has a back panel “aviation connector” with an alarm output for water flow (more precisely, lack thereof) or over / under temperature: pins 1 and 3 are closed during normal conditions and open during alarms (and when the power is off).
I finally wired the chiller into the OMTech 60 W laser’s internal water flow switch circuit, so that should either flow sensor have a problem with the water or the chiller detects an out of bounds temperature, the laser won’t fire.
You may recall the laser’s HV power supply arrived with its Water Protect input jumpered to ground, which I then wired to the lid interlock switch to (presumably) reduce the likelihood the replacement power supply will fail hot. The laser’s water flow switch goes to the Ruida controller’s WP input, where it behaves as it should.
Pin 2 of the chiller’s alarm connector is not connected to anything, so I added a safety ground wire for no good reason:
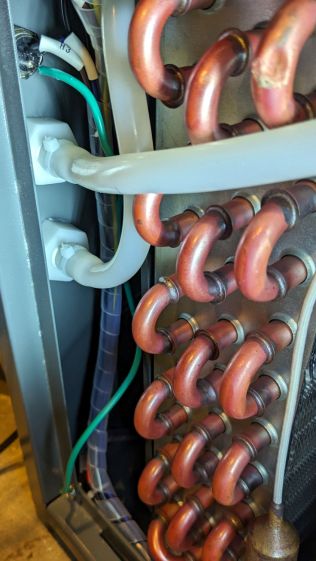
The dent in the evaporator tube (upper left) is worrisome.
While I had the side panel off, I jammed a strip of closed-cell foam around the base of the compressor to silence a truly spectacular rattle:
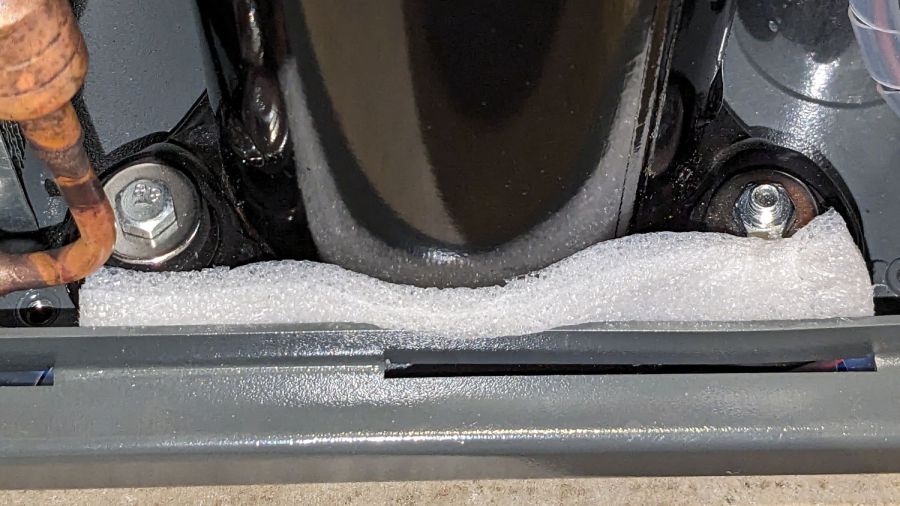
I think the three mounting screws (yes, of these two: one up, one down, for no reason I can see) are looser than they should be, but I’m reluctant to tip the whole thing over with a tank full of water to get at the nuts / bolt heads on the bottom.
The connectors have a twist-lock notch that you must release after removing the screw (on the far side) holding the shell to the body:

I repurposed a USB cable from the Big Box o’ Cables, wrapped with enough silicone tape to fill the cable clamp:
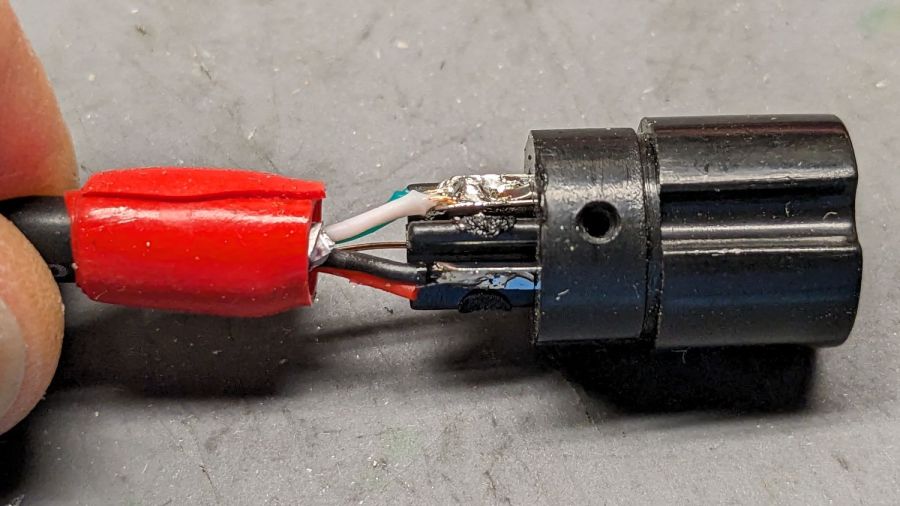
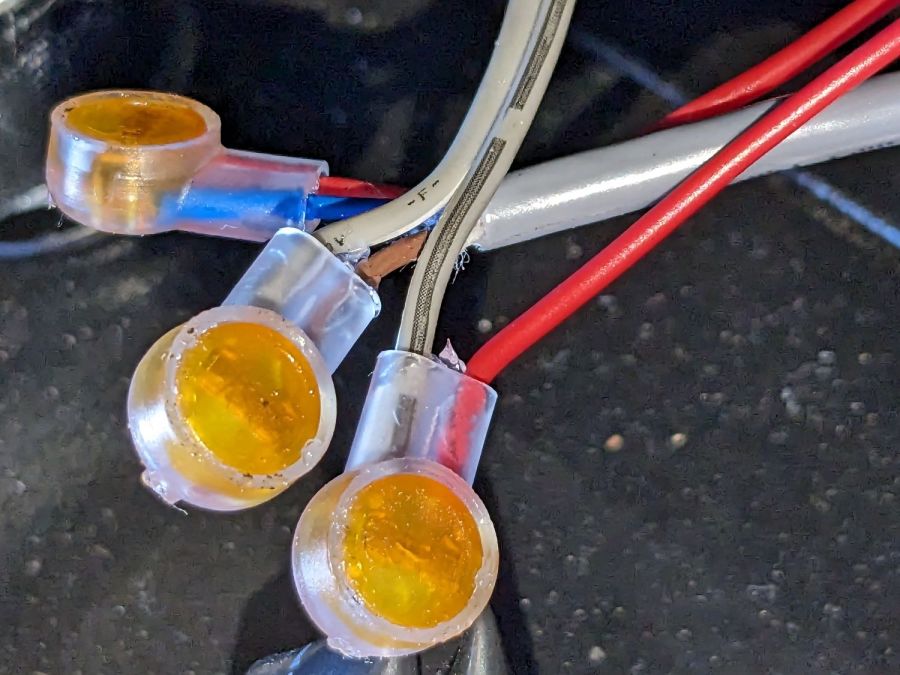
In retrospect, I should have paired the red + green and black + white wires, but nobody will ever notice. The drain wire carries the safety ground from pin 2 to the shielding, not that it matters. Both ends of the cable have identical connectors.
The laser cabinet has a convenient hole, albeit just a bit larger than required, which now has a simple adapter plate with the proper flats:
The blue ring is the same size as the hole, so as to ease lining it up, and the red perimeter surrounds the connector with strips of good double-sided foam tape for maximum sticktivity. Done in clear acrylic from the scrap pile, the platform’s internal lights give it that subtle blue-white hi-tech glow:
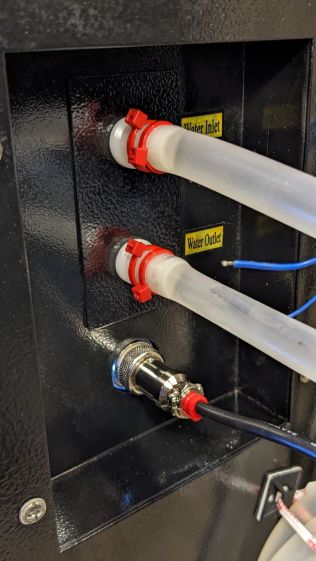
The doubled-up cable ties on the water hose barb connectors are a Good Idea™ due to the somewhat higher pressure of the chiller’s water pump. The bottom of that recess had traces of water on it and, of course, having a hose pop off its barb is a Bad Thing™.
The new connector is wired in series with the internal flow switch, using a trio of grossly overqualified silicone-filled splices:
I did not connect the safety ground from the chiller to the laser’s frame, because they do not share a common breaker circuit and I have better things to do than chase ground loops.
For whatever it’s worth, the gray cable that came with the laser might also be a repurposed USB cable, too: it has two fat wires and two thin wires, although it’s not wearing USB livery.
The laser is happy when the chiller is running and unhappy when it’s off, so life is good.
