The Smell of Molten Projects in the Morning

Ed Nisley's Blog: Shop notes, electronics, firmware, machinery, 3D printing, laser cuttery, and curiosities. Contents: 100% human thinking, 0% AI slop.

Tag: Repairs

If it used to work, it can work again

  • Extruder Clog

    Extruder Clog

    The test pieces for the Mesh Screen Frame came out a bit short:
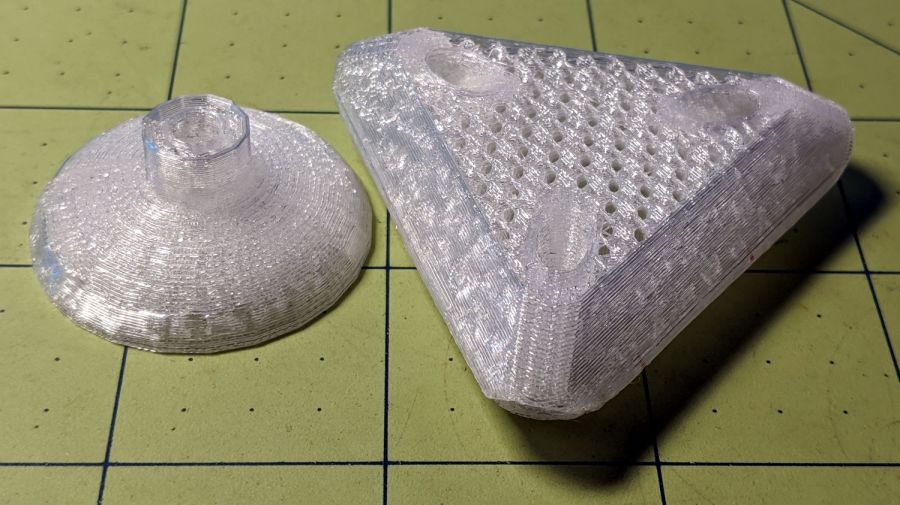
    Extruder Clog - failed print
    Extruder Clog – failed print

    Which turned out to be the M2’s first extruder clog in a long, long time. The printer shut down normally, with no error messages, and the objects look fine as far as they go, making the diagnosis fairly simple.

    Just to be sure, I verified:

    It’s worth noting I use only PETG plastic from a single supplier, so Slic3r uses set-and-forget temperature and speed values, and I manually change colors only on those rare occasions when color matters. Most clogs occur after switching from a higher- to a lower-temperature plastic (PETG to PLA), where a chunk of soft-but-not-molten plastic jams in the nozzle; not the situation here.

    Unscrew the clamp screw enough to release the spring pressure on the idler bearing:

    Makergear M2 - spring-loaded filament drive
    Makergear M2 – spring-loaded filament drive

    Undo the various screws holding the block to the drive gear housing and pull it off. The drive block looked fine, with a clear round hole along the entire filament path, so that’s not the problem.

    The filament snippet sticking up out of the hot end also looked fine, apart from the expected drive gear gouge, with nice serrations below that point into the hot end. It’s the third filament from the top in this group photo:
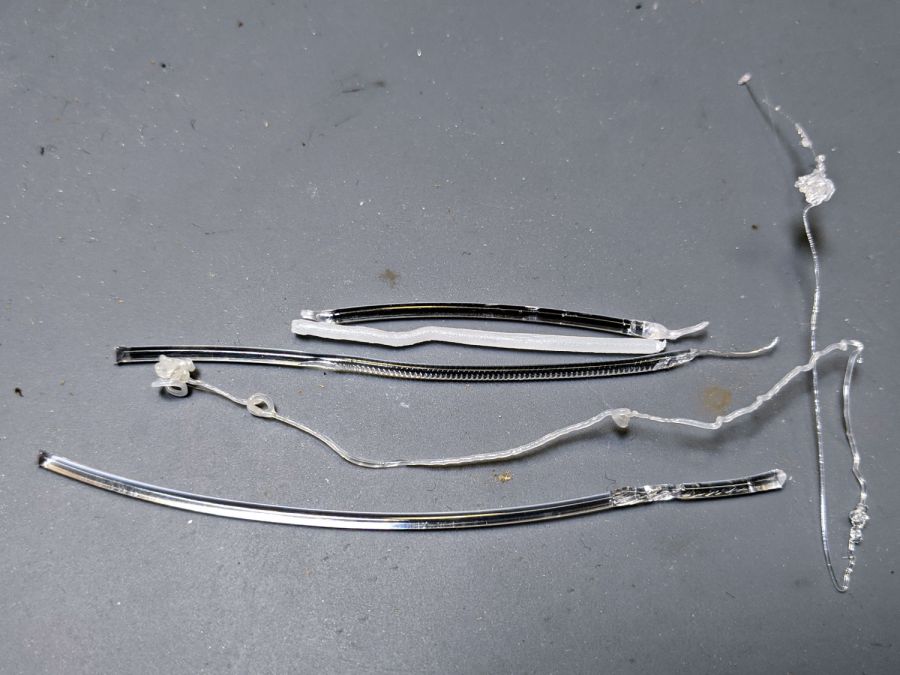
    Extruder Clog - filament snippets
    Extruder Clog – filament snippets

    Although it’s called a “cold pull“, you can’t yank a solid hunk of plastic out of the hot end. Warming the PETG to around 200 °C and pulling the snippet out produced the long tapered end shown above.

    I rammed another snippet into the hot end to bond with whatever was inside:

    Extruder Clog - PETG pull
    Extruder Clog – PETG pull

    Which produced the top snippet above, with no particular trouble found.

    Repeating the process with some nylon (?) cleaning filament:
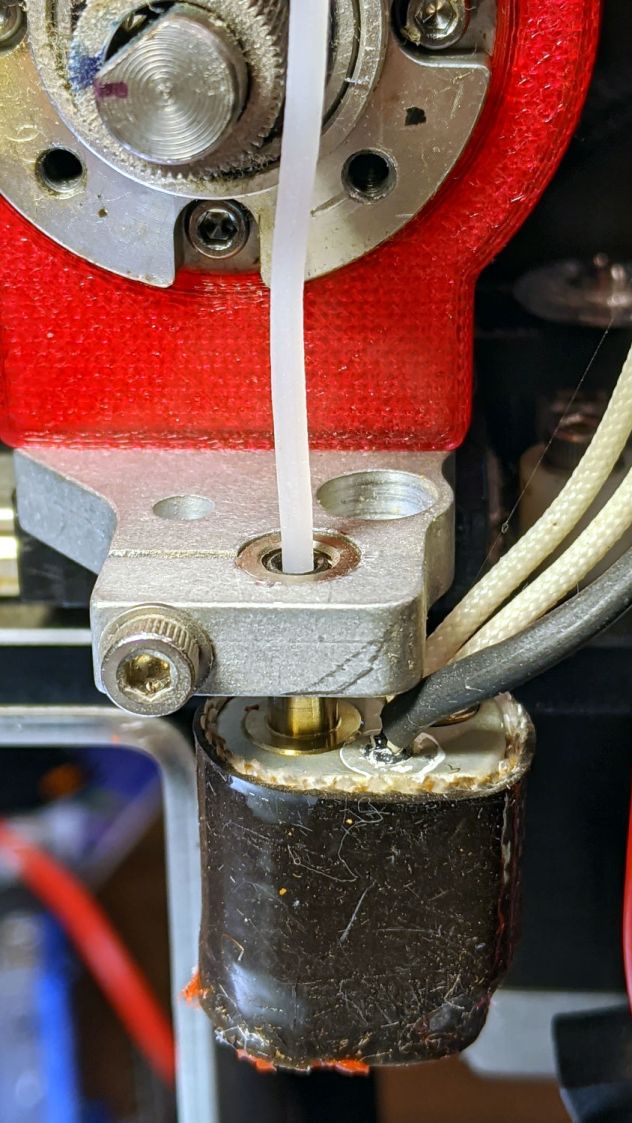
    Extruder Clog - cleaner pull
    Extruder Clog – cleaner pull

    In need of more traction, I sank a #60 twist drill into the molten plastic:

    Extruder Clog - drill bit insertion
    Extruder Clog – drill bit insertion

    Let things cool a bit, haul it out (it’s halfway in the picture above), and we’re making progress:
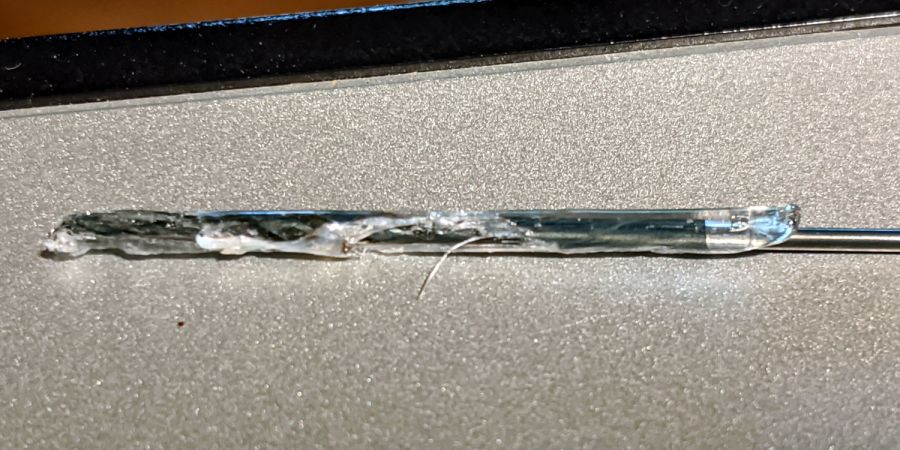
    Extruder Clog - drill bit extraction
    Extruder Clog – drill bit extraction

    I warmed the PETG-encrusted bit over a butane flame, wiped it on a shop rag to get most of the plastic off, then drilled a few holes in a hardwood block.

    Note that a #60 drill (40 mil = 1 mm) is much much much larger than the nozzle hole:
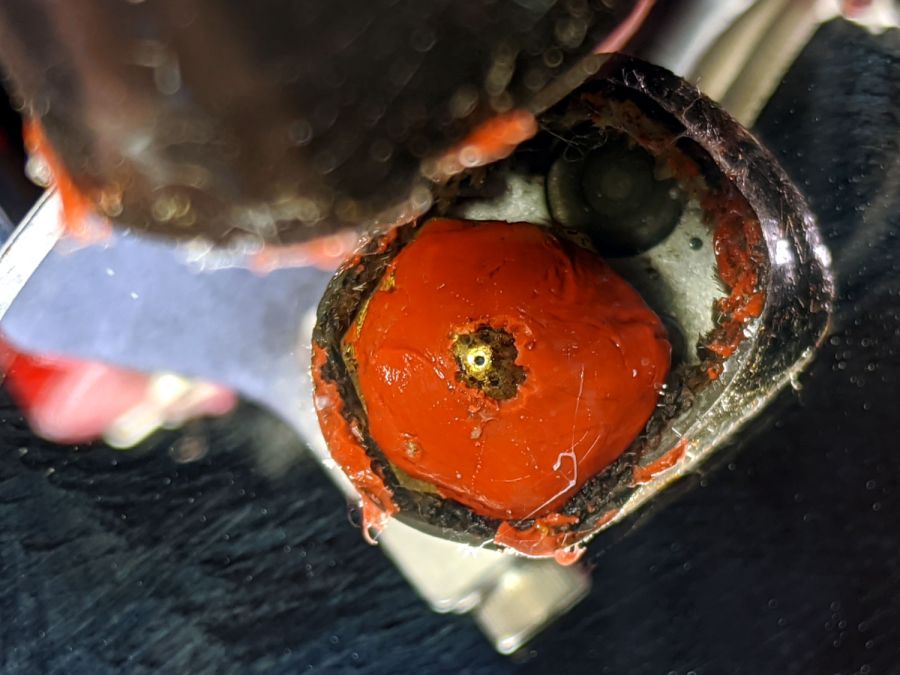
    Extruder Clog - nozzle view
    Extruder Clog – nozzle view

    The vertiginous view looks downward into a small hand-held mirror.

    Although some folks swear by 0.3 mm carbide drills for nozzle cleaning, I doubt I could avoid wrecking that nice round 0.35 mm hole. The new red silicone coat has chipped from around the nozzle over the last few sessions, so it’s no longer wiping the top layer.

    During all this flailing, something that might have been a glass fiber emerged from the nozzle while shoving one of those PETG snippets into the hot end. Of course, when I pried it out of the goo with tweezers, it snapped away into the clutter, never to be seen again. Despite being covered in PETG, it was a rigid sliver, rather than the gooey extruded thread. Perhaps the whisker extending from the PETG surrounding the drill bit was a similar fiber, but I didn’t notice it at the time.

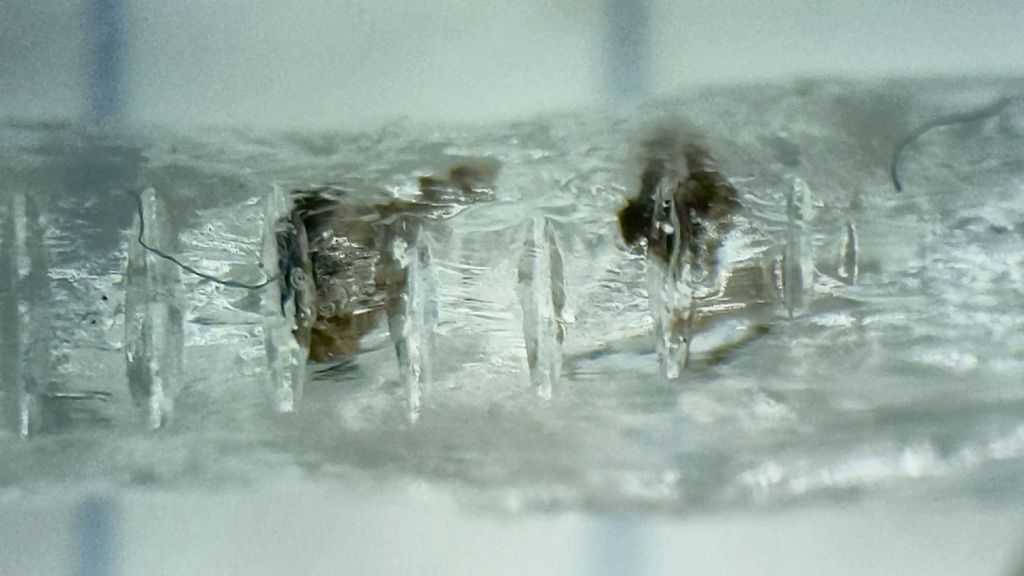
    One of the PETG cold warm pulls contained two brownish lumps:

    Extruder Clog - PETG inclusions
    Extruder Clog – PETG inclusions

    This chunk doesn’t appear in the group portrait. It’s obviously been melted, measures a bit under 1.75 mm diameter, and the drive gear tooth marks show it passed through the filament drive block under motor control, most likely retraction.

    Passing the Xacto Knife of Inquiry through the leftmost lump split it neatly in two. The left section:
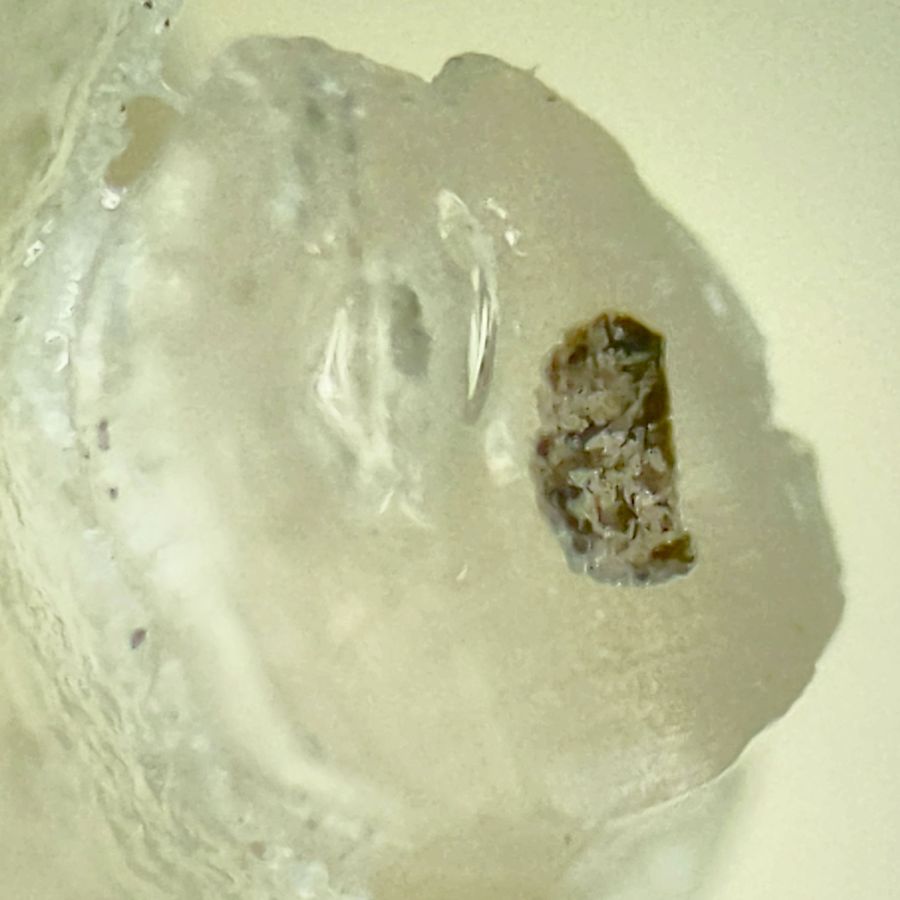
    Extruder Clog - PETG inclusion - section L
    Extruder Clog – PETG inclusion – section L

    And the right section:

    Extruder Clog - PETG inclusion - section R
    Extruder Clog – PETG inclusion – section R

    In person, the sections look like granular / burned residue surrounded by clear PETG. I’d expect anything burned to come from inside the hot end, but I don’t know how those lumps would get surrounded by nice, clear PETG inside a reasonably cylindrical section with drive gear notches.

    Anyhow, the clog has now Gone Away™ and the M2 extrudes just fine. I’ll declare victory and move on …
  • Half-Teaspoon Soldering

    Half-Teaspoon Soldering

    My favorite half-teaspoon measure hit the floor with a surprising sproing:

    Half-teaspoon soldering - broken
    Half-teaspoon soldering – broken

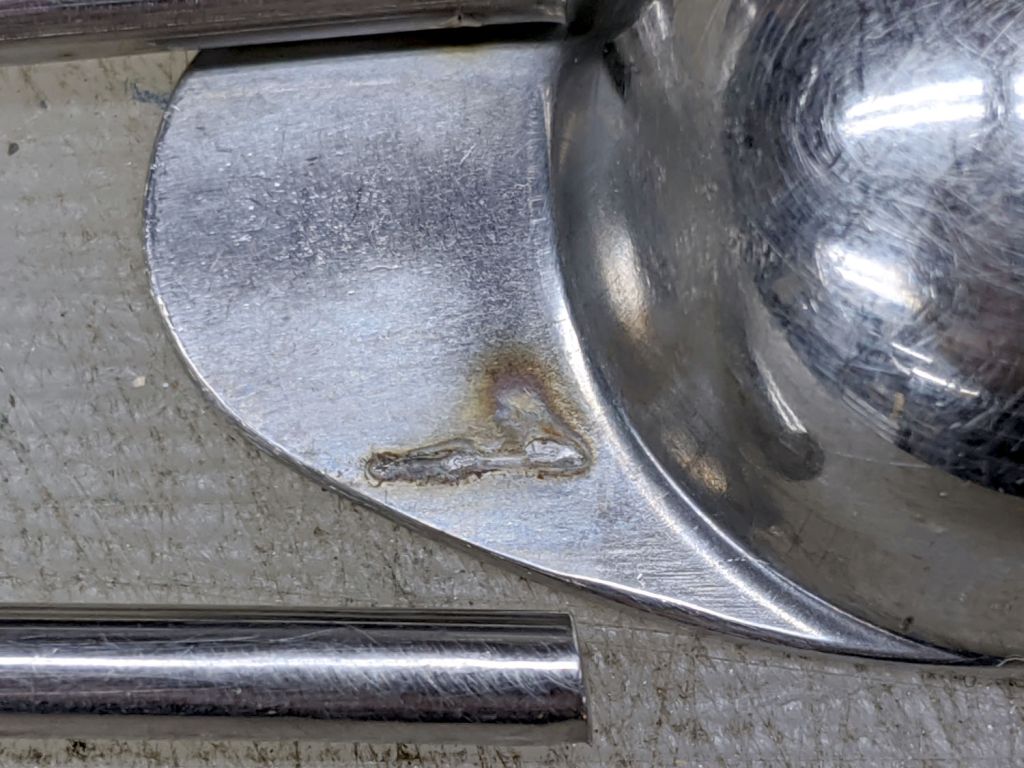
    The weld lasted far longer than anyone should own a spoon, I suppose, but it wasn’t much to begin with:

    Half-teaspoon soldering - sprung handle
    Half-teaspoon soldering – sprung handle

    Having had much the same thing happen to a measuring cup from the same set, I cleaned the back of the spoon and the front of the handle with a stainless steel wire brush in the Dremel and gingerly re-bent the handle to remove any inclination it might have to break free again:

    Half-teaspoon soldering - cleaned and rebent
    Half-teaspoon soldering – cleaned and rebent

    Some 60% silver solder (the formula evidently changed in the last few decades), nasty flux, and propane torch work produced a decent fillet:

    Half-teaspoon soldering - cooling
    Half-teaspoon soldering – cooling

    It looks a bit worse on the far side, but I’ll never tell.

    Rinse off the flux, wire-brush the joint, wash again, and it’s all good.

    I thought about excavating the resistance soldering gadget, but the torch was closer to hand and a bigger fillet seemed in order.

  • Shuttles Board Game: Replacement Pegs

    Shuttles Board Game: Replacement Pegs

    For reasons not relevant here, I made replacement pegs for the Shuttles board game:

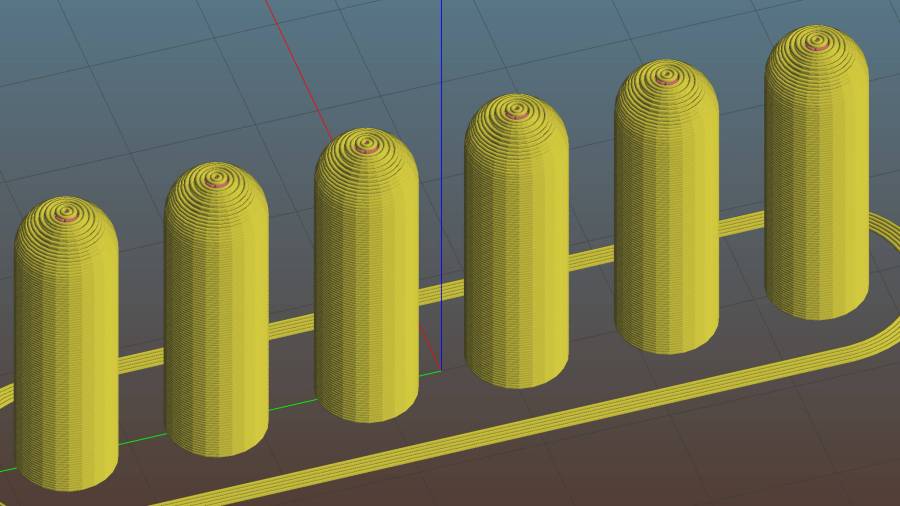
    Shuttles Game - solid model - Slic3r
    Shuttles Game – solid model – Slic3r

    Not the most challenging solid model I’ve ever conjured from the vasty digital deep, but 3D printing is really good for stuff like this.

    The OEM pegs have a hollow center, most likely to simplify stripping them from the injection mold, which I dutifully duplicated:

    Shuttles Game pegs - hollow - solid model
    Shuttles Game pegs – hollow – solid model

    It turns out the additional perimeter length inside the pegs requires 50% more printing time, far offsetting the reduced 10% infill. Given that each solid set takes just under an hour, I decided to lose half an hour of verisimilitude.

    I plunked a nice round cap atop the OEM peg’s flat end, but stopped short of printing & installing a round plug for the butt end.

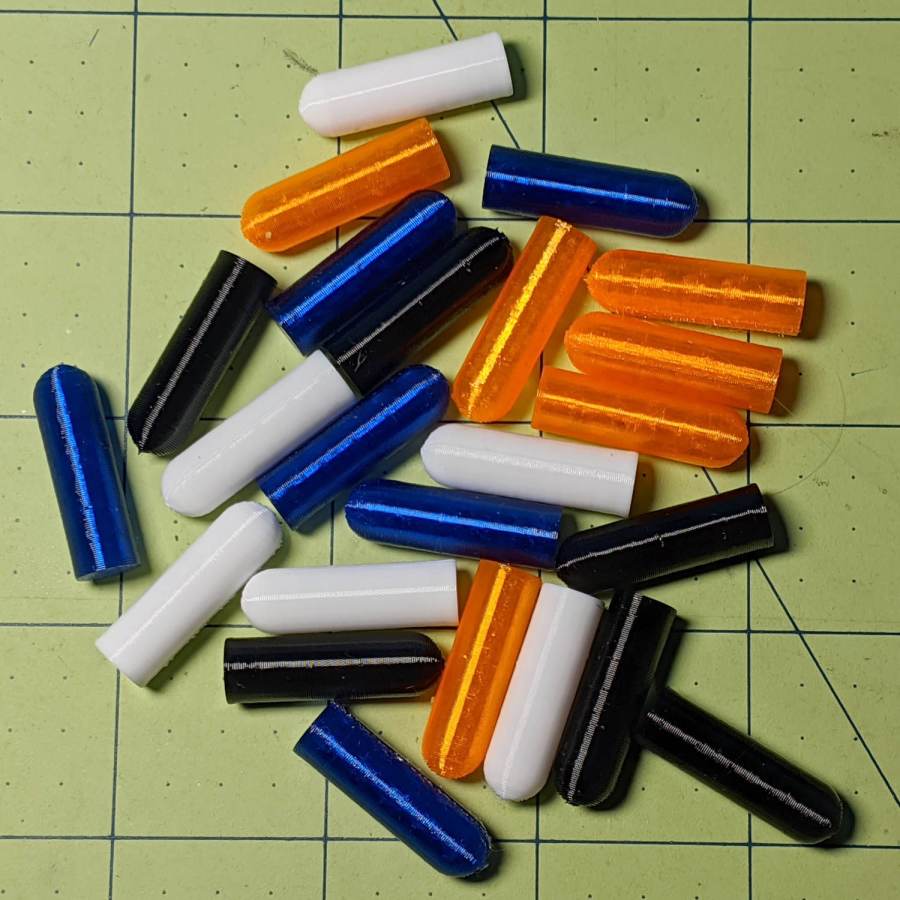
    While the 3D printer’s hot, ya may as well make a bunch:

    Shuttles game pegs
    Shuttles game pegs

    Game on …

    The OpenSCAD source code as a GitHub Gist:

    Update: They’re a bit too large, so the Gist now produces tapered pegs.

    // Shuttles game pegs
    // Ed Nisley KE4ZNU – July 2020
    /* [Layout Options] */
    Layout = "Peg"; // [Build, Peg]
    Hollow = false;
    //——-
    //- Extrusion parameters must match reality!
    /* [Hidden] */
    ThreadThick = 0.25;
    ThreadWidth = 0.40;
    HoleWindage = 0.2;
    Protrusion = 0.1; // make holes end cleanly
    ID = 0;
    OD = 1;
    LENGTH = 2;
    //——-
    // Dimensions
    /* [Dimensions] */
    Peg = [4.0,7.5,26.0]; // overall length, including the rounded Cap
    Taper = 1.0;
    CapRadius = Peg[OD]/2;
    PegBaseLength = Peg[LENGTH] – CapRadius;
    NumPegs = [1,6]; // lay out in array
    ArrayCenter = [NumPegs[0] – 1,NumPegs[1] – 1] / 2;
    NumSides = 6*4;
    //——-
    module PolyCyl(Dia,Height,ForceSides=0) { // based on nophead's polyholes
    Sides = (ForceSides != 0) ? ForceSides : (ceil(Dia) + 2);
    FixDia = Dia / cos(180/Sides);
    cylinder(r=FixDia/2 + HoleWindage,h=Height,$fn=Sides);
    }
    //——-
    // One peg
    module Peg() {
    union() {
    translate([0,0,PegBaseLength])
    difference() {
    sphere(d=Peg[OD],$fn=NumSides);
    translate([0,0,-Peg[OD]/2])
    cube([2*Peg[OD],2*Peg[OD],Peg[OD]],center=true);
    }
    difference() {
    cylinder(d1=Peg[OD] – Taper,d2=Peg[OD],h=PegBaseLength,$fn=NumSides);
    if (Hollow)
    translate([0,0,-Protrusion])
    PolyCyl(Peg[ID],PegBaseLength+Protrusion,NumSides);
    }
    }
    }
    //——-
    // Build it!
    if (Layout == "Peg")
    Peg();
    if (Layout == "Build")
    for (i=[0:NumPegs[0] – 1], j=[0:NumPegs[1] – 1])
    translate([(i – ArrayCenter.x)*1.5*Peg[OD],(j – ArrayCenter.y)*1.5*Peg[OD],0])
    Peg();

  • Miniblind Cord Caps: White PETG

    Miniblind Cord Caps: White PETG

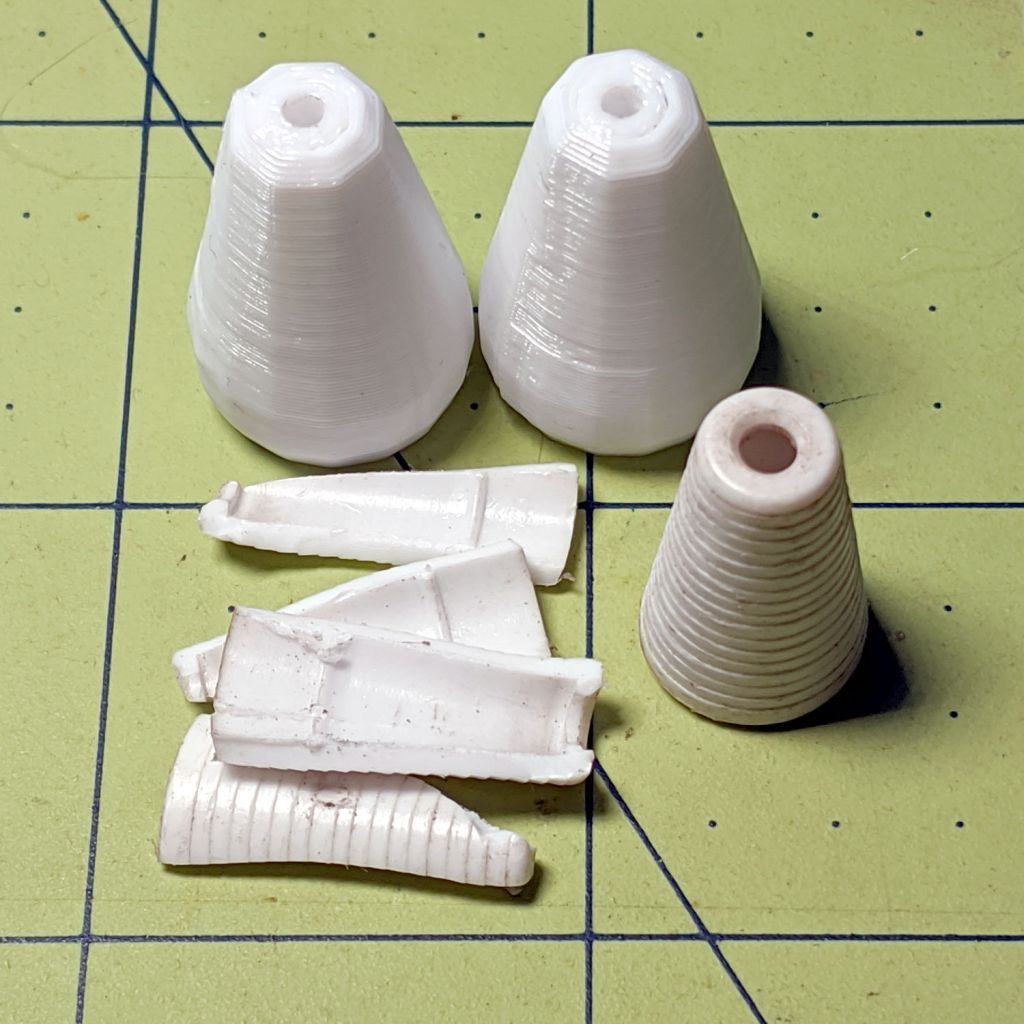
    I managed to smash another miniblind cord cap and used white PETG this time around:

    Miniblind cord caps - white PETG
    Miniblind cord caps – white PETG

    It’s the same solid model as before, sliced with whatever improvements have transpired during the last four years.

    Made four of ’em, preemptively replaced the cap on the adjacent window, and tucked the last two away against future need.

  • Makergear M2 V4 Nozzle: Silicone Refresh

    Makergear M2 V4 Nozzle: Silicone Refresh

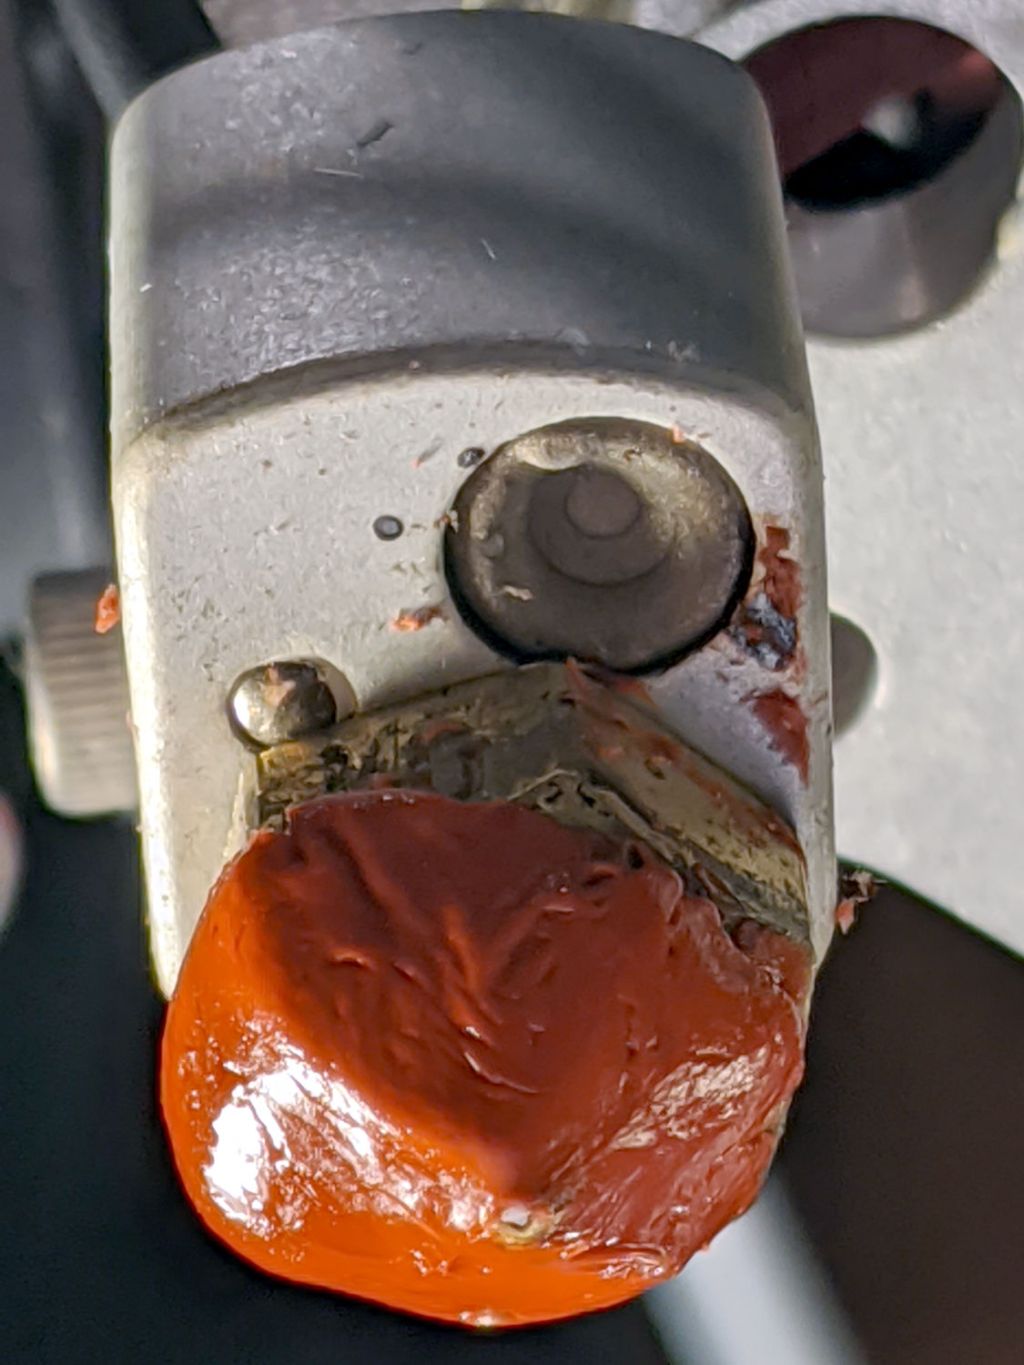
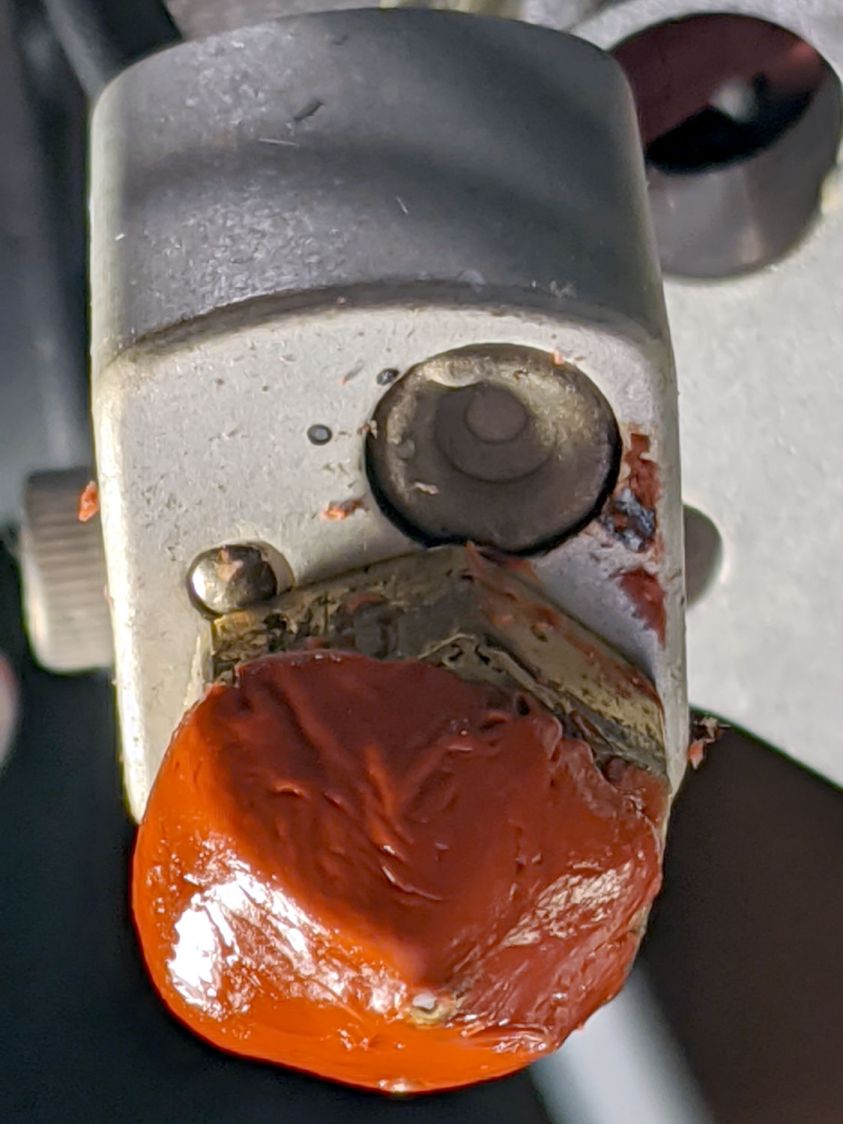
    After a year and a half, the silicone coat I’d applied to the M2’s nozzle had pretty much worn away, so I peeled off the remnants, buffed up the brass, and mushed on another coat:

    Makergear M2 V4 Nozzle - High-temp silicone coat
    Makergear M2 V4 Nozzle – High-temp silicone coat

    The coverage isn’t even, particularly in the direction I can neither see nor reach with the hot end still in the printer, but it’s way less hassle than recalibrating the Z=0 position. The very thin layer over the brass around the nozzle will vanish immediately on the skirt surrounding the first part.

    I should definitely recoat the nozzle more often, because PETG doesn’t stick to silicone nearly as well as it does to brass: a nice new coat makes the PETG burned-snot problem Just Go Away.

  • Can Opener Re-Gearing

    Can Opener Re-Gearing

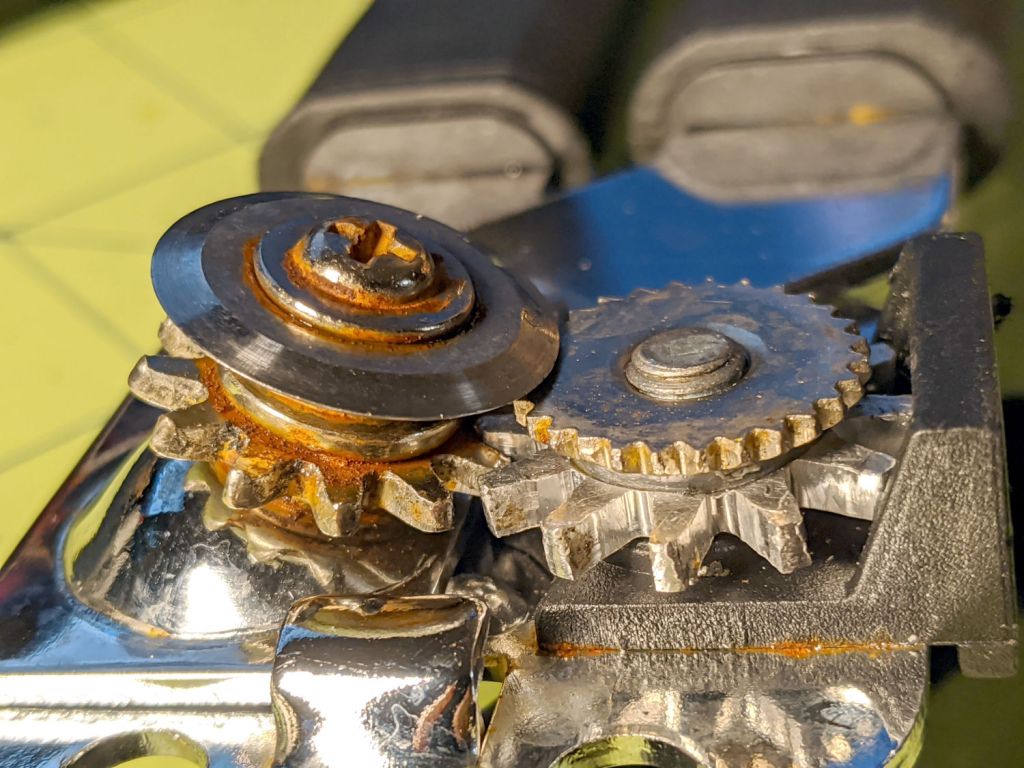
    Six years on, I just deployed the last of the aluminum spares from the original CNC project:

    Can opener - new gear installed
    Can opener – new gear installed

    I swear the cutter gear on the left does not show that rust in person!

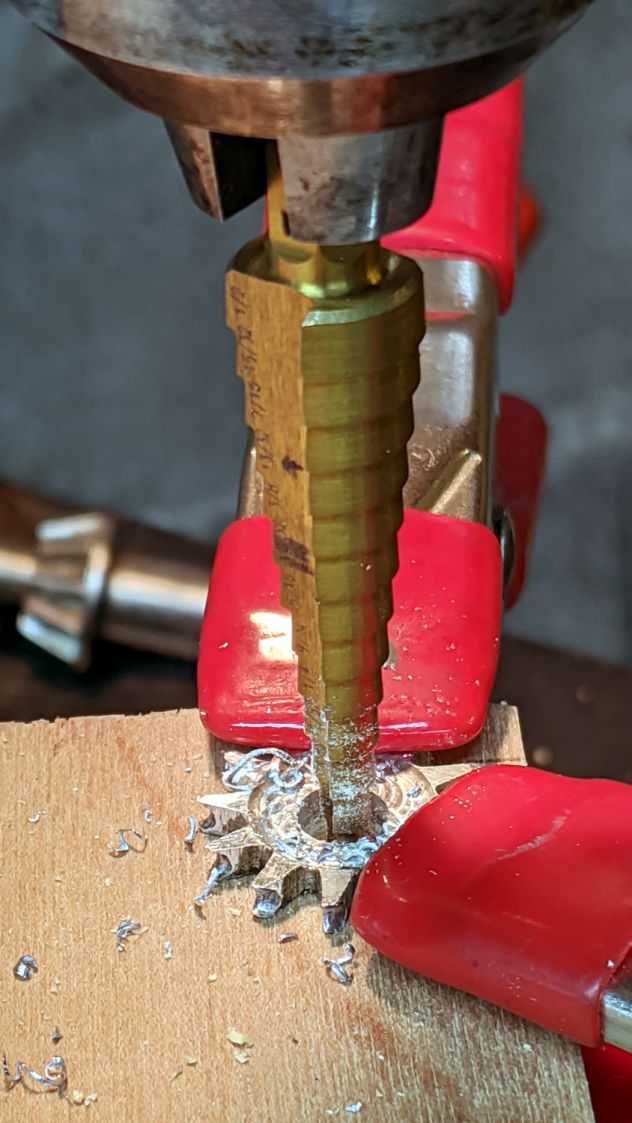
    This can opener has a slightly larger bolt than the previous ones, so I embiggened the hole with a step drill:

    Can opener - redrilling new gear
    Can opener – redrilling new gear

    Having run out of aluminum gears, I’ll be forced to make a hob to make a steel gear. Drat!

  • OXO Pepper Grinder: Inadvertent Abuse

    OXO Pepper Grinder: Inadvertent Abuse

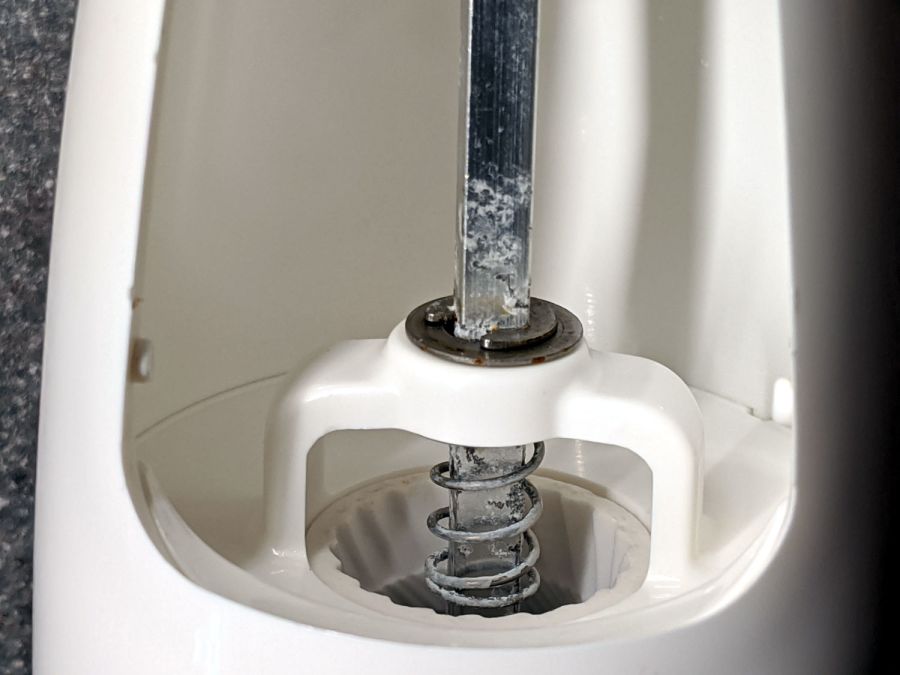
    Being that type of guy, I’m reasonably sure I would not have bought what’s now clearly labeled as an OXO Radial Pepper Grinder for use as a salt mill:

    OXO Salt Mill - corrosion
    OXO Salt Mill – corrosion

    Mary recalls we got it at Target, back when one could go places and buy things, and I vaguely recall contemplating a wall of OXO gadgets. It’s been a while and I neglected to save the packaging for future reference.

    Obviously not stainless steel, but not lethal, so we’ll continue abusing it.