Ed Nisley's Blog: Shop notes, electronics, firmware, machinery, 3D printing, laser cuttery, and curiosities. Contents: 100% human thinking, 0% AI slop.
It’s been in the bottom of my clamp box forever, so I figured I should either fix it or toss it. Grabbing the butt end in the bench vise and applying some percussive adjustment with a 3 pound hammer straightened it right out:
The cheese slicer frame looked much better after sandblasting with 220 aluminum oxide grit:
Cheese slicer – sandblasted
The flower bed outside the Basement Laboratory door seems a bit dusty, though.
Slathering it with JB Weld steel-filled epoxy went reasonably well:
Cheese slicer – JB Weld curing
JB Weld is much much more viscous than the clear XTC-3D I used last year and the final coating, while smoother than what you see here, has too many sags and dents to say “good job”. I didn’t bother coating the upper tips, because the epoxy will wear off from my morning KP.
The aluminum roller turned on those bare stainless steel screws in the tray, with the threads chewing into the roller bore. While the epoxy was curing, I drilled out the roller to remove most of the ridges:
Cheese slicer – drilling roller
Cut a pair of stainless screws slightly longer than the old screws, then turn the threads off to make a shaft:
Cheese slicer – screw reshaping
The lathe spindle runs in reverse, so the cutting force tends to tighten the screw in the nuts. The big old South Bend lathe had a screw-on chuck and didn’t really like turning backwards.
The new screws won’t win any beauty prizes, but they get the job done:
Cheese slicer – screw shafts
Turn a Delrin rod to a press fit in the drilled-out roller:
Cheese slicer – turning Delrin bearing
Part it off, repeat, ram them into the roller, then drill to a loose fit around the smooth-ish screw shafts:
Cheese slicer – drilling Delrin bearing
Reassemble in reverse order:
Cheese slicer – rebuilt
Looks downright industrial, it does.
Stipulated: this makes no economic sense, absent the simple fact we appreciate utensils that just work.
The tiny sandblaster turns out to be a Badger 260 with miniature Propel threaded fittings on the air line:
Badger Propel air fitting – DIY cork washers
Foreseeing a Propel washer getting lost in the confusion, I punched a few from a cork sheet and trimmed them to half-thickness. The little brass hole punch isn’t good for more than a few whacks, but that’s all I needed. My cork is crumblier than theirs, but I got a few decent-looking washers and, with a bit of luck, won’t need any of them.
Maybe I should make a soft gasket from a thin plastic sheet?
Most of the epoxy remains in good shape, but it’s obviously not the right hammer for this job.
Having recently spotted my tiny sandblaster, I think I can clear off the corrosion and epoxy well enough to try again with good old JB Weld epoxy. It’s not rated for underwater use, so I don’t expect long-term goodness, but it’ll be an interesting comparison.
Bonus: the slicer will start with a uniform gray surface!
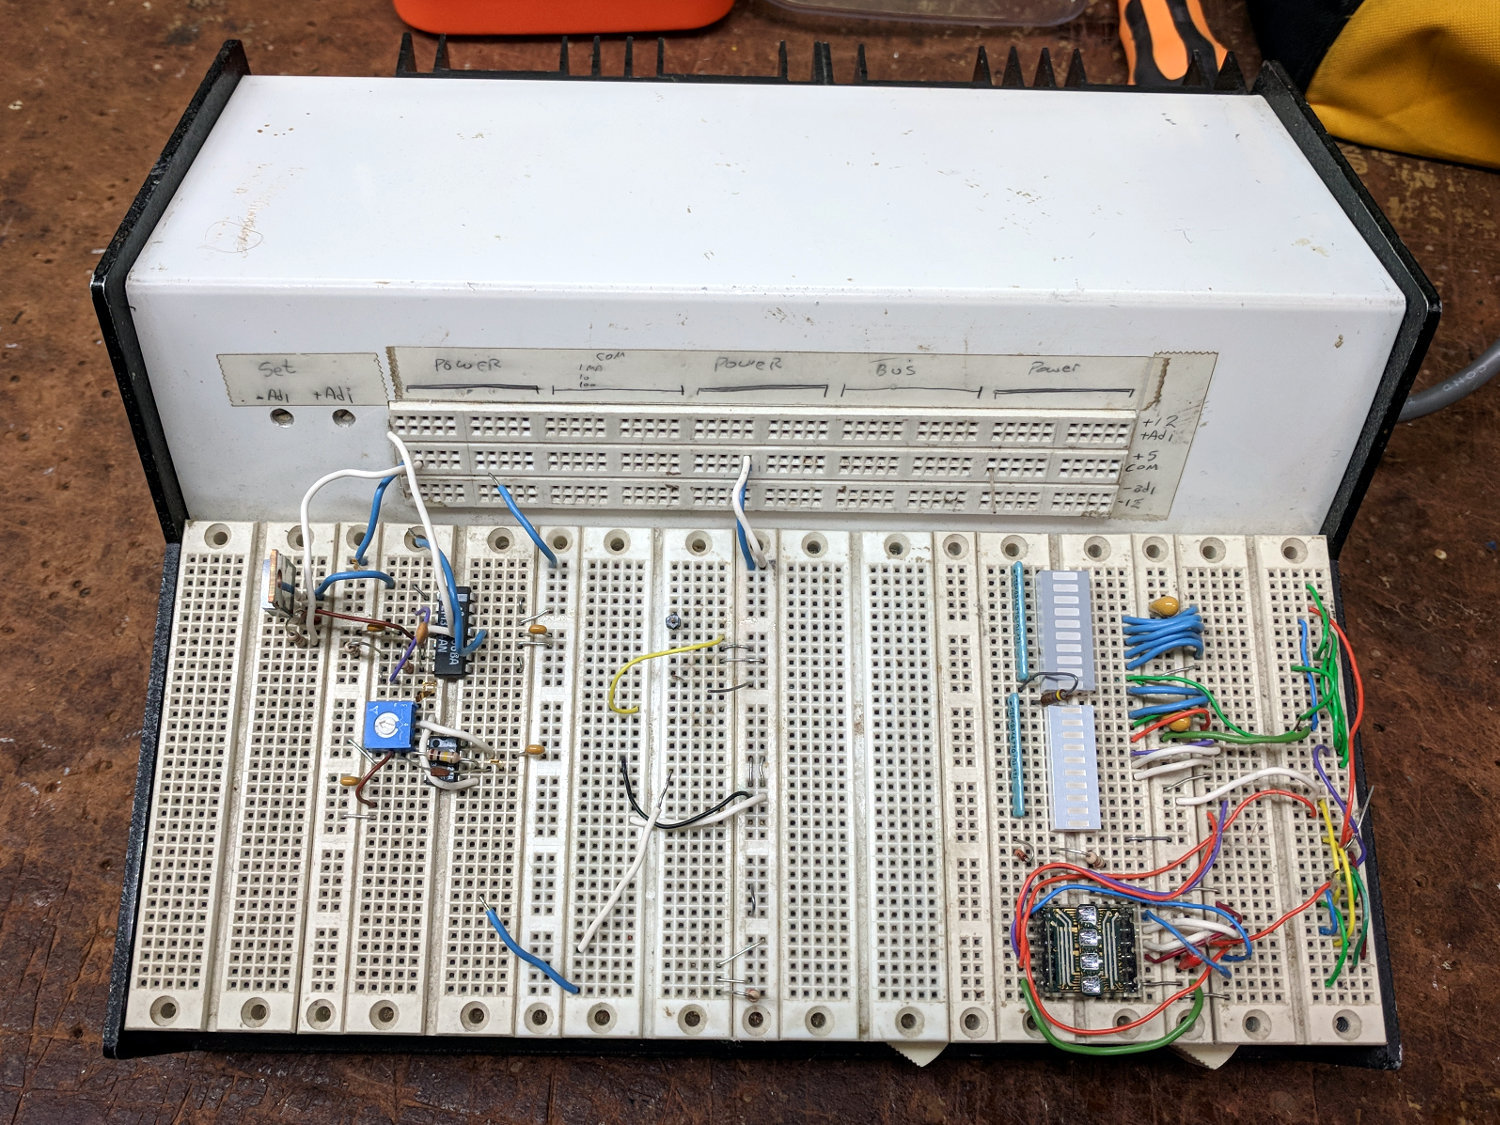
One of my very first projects, after setting up my very first home shop in our very first home, was building an overly elaborate prototype board with five (!) linear power supplies:
Proto Board – overview
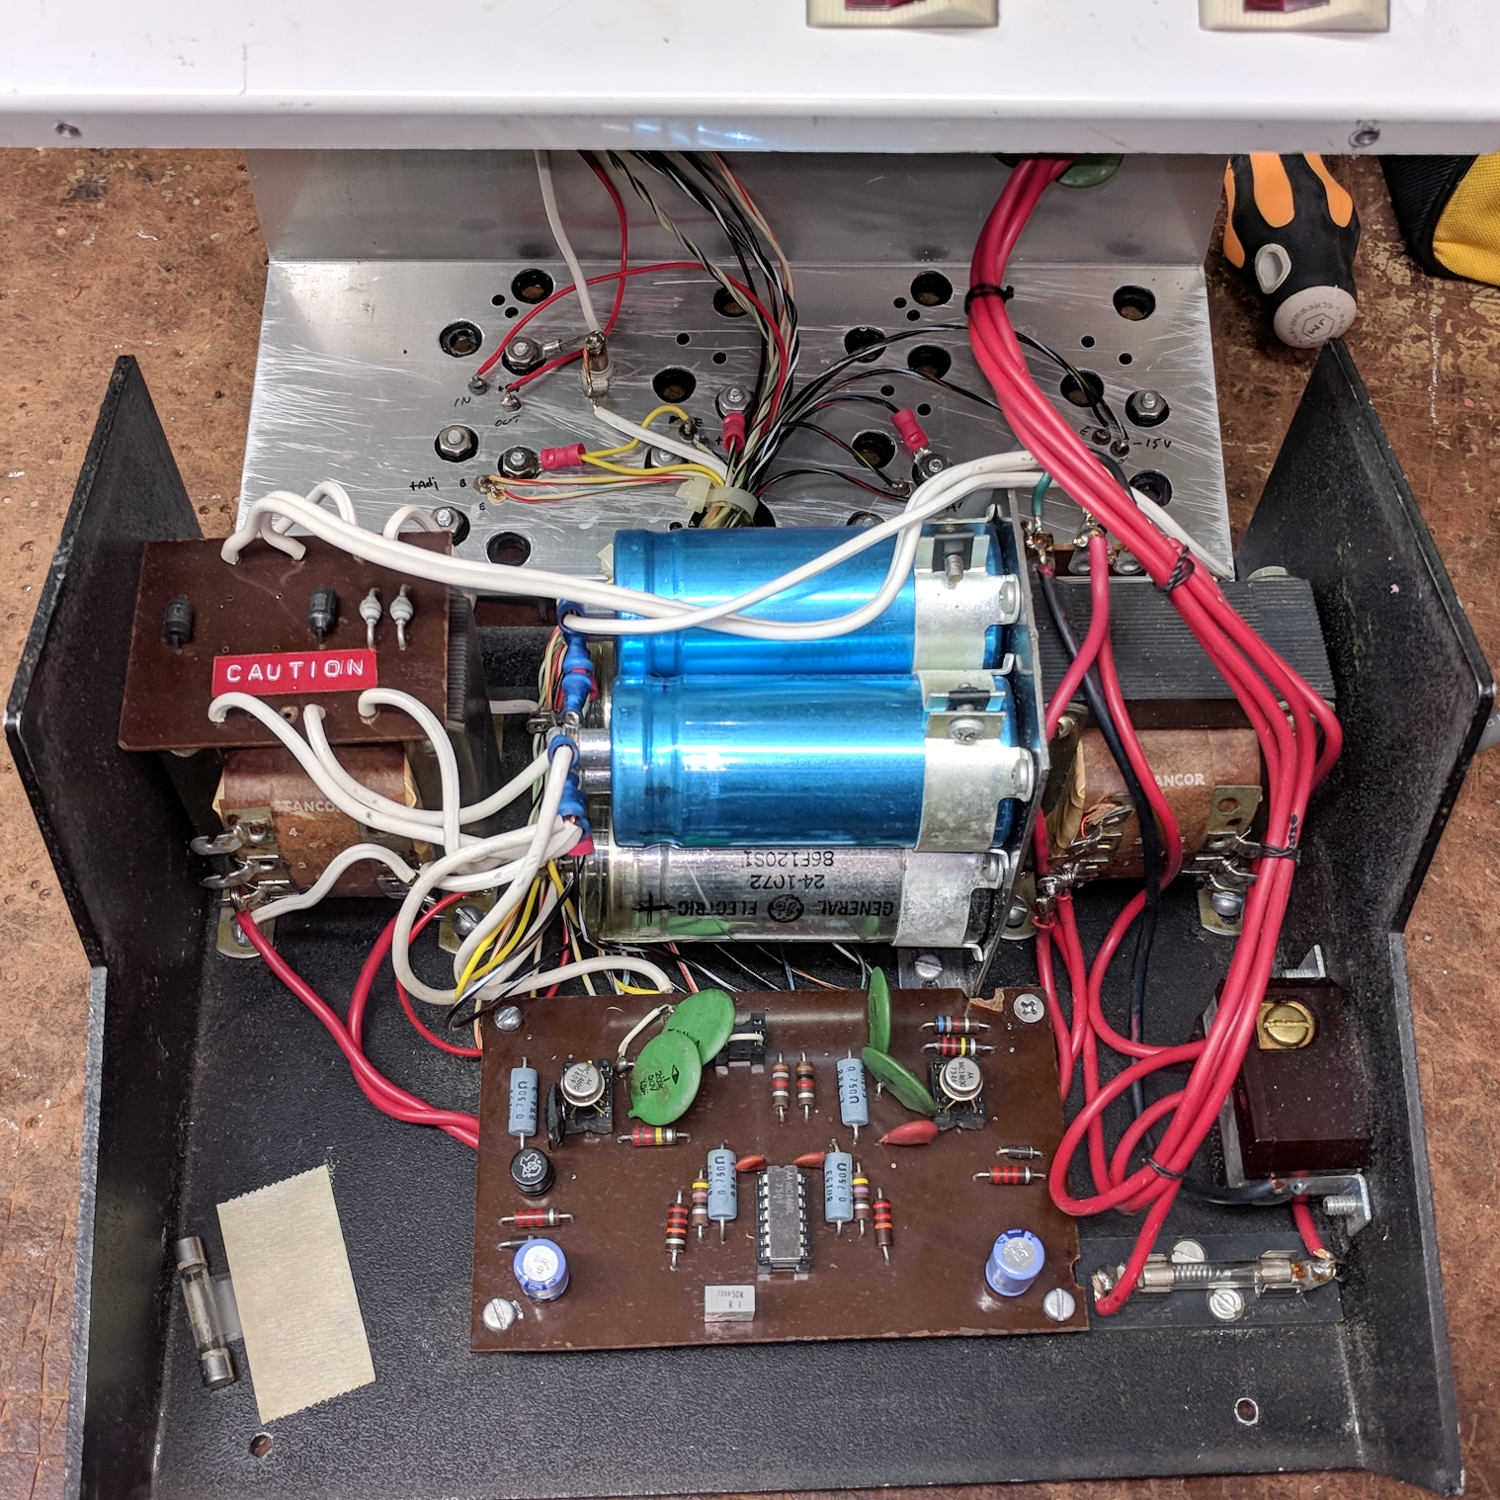
The components come from the mid-70s and the shop happened around 1980, so it’s been ticking along for nigh onto four decades. Of late, the supply voltages became erratic and I eventually popped the top:
Proto Board – innards
Yeah, linear pass transistor regulators driven from bulk cap storage, hand-hewn bridge rectifiers, and multi-tap transformers. Everything mounts on screws tapped into the 1/8 inch aluminum chassis, with power transistors on a huge finned heatsink attached to the rear panel. The thing weighs 11.6 pounds = 5.3 kg.
Not a trace of firmware to be found. Heck, surface-mount components hadn’t yet come into common use.
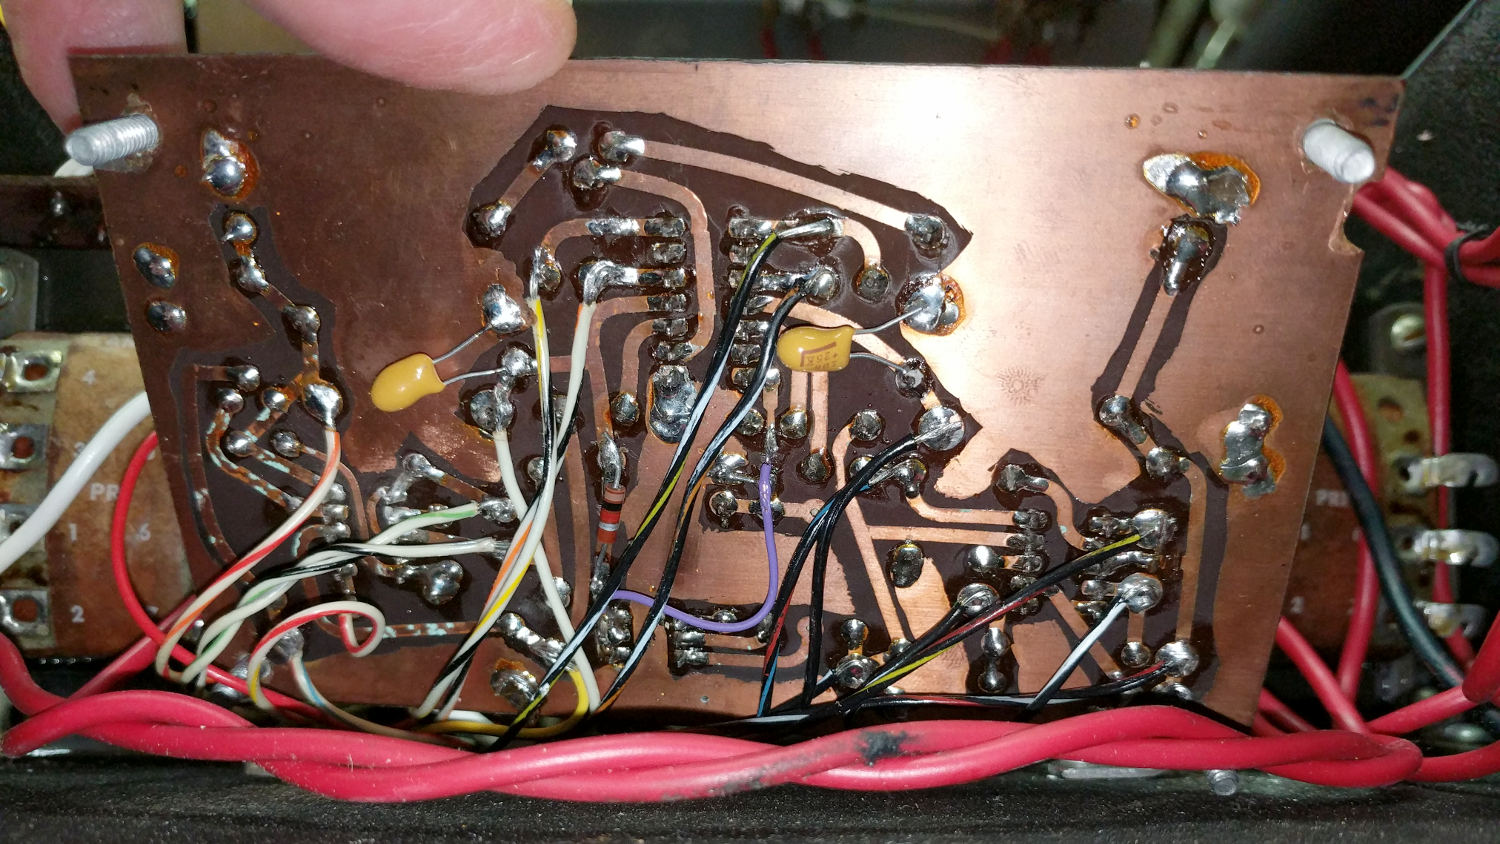
The circuitry lives on a crudely etched phenolic board:
Proto Board – etched circuit board
There may be a schematic somewhere in my collection, but it hasn’t surfaced in a long time. I’m mildly surprised I didn’t tuck it inside the case, which may have been a life lesson yet to be learned.
Based on my recent experience with the Tek AM503, I wiggled the two metal-can regulators and the ceramic (!) regulator, gingerly plugged in the line cord, flipped the switch, and all the supply voltages once again work perfectly.
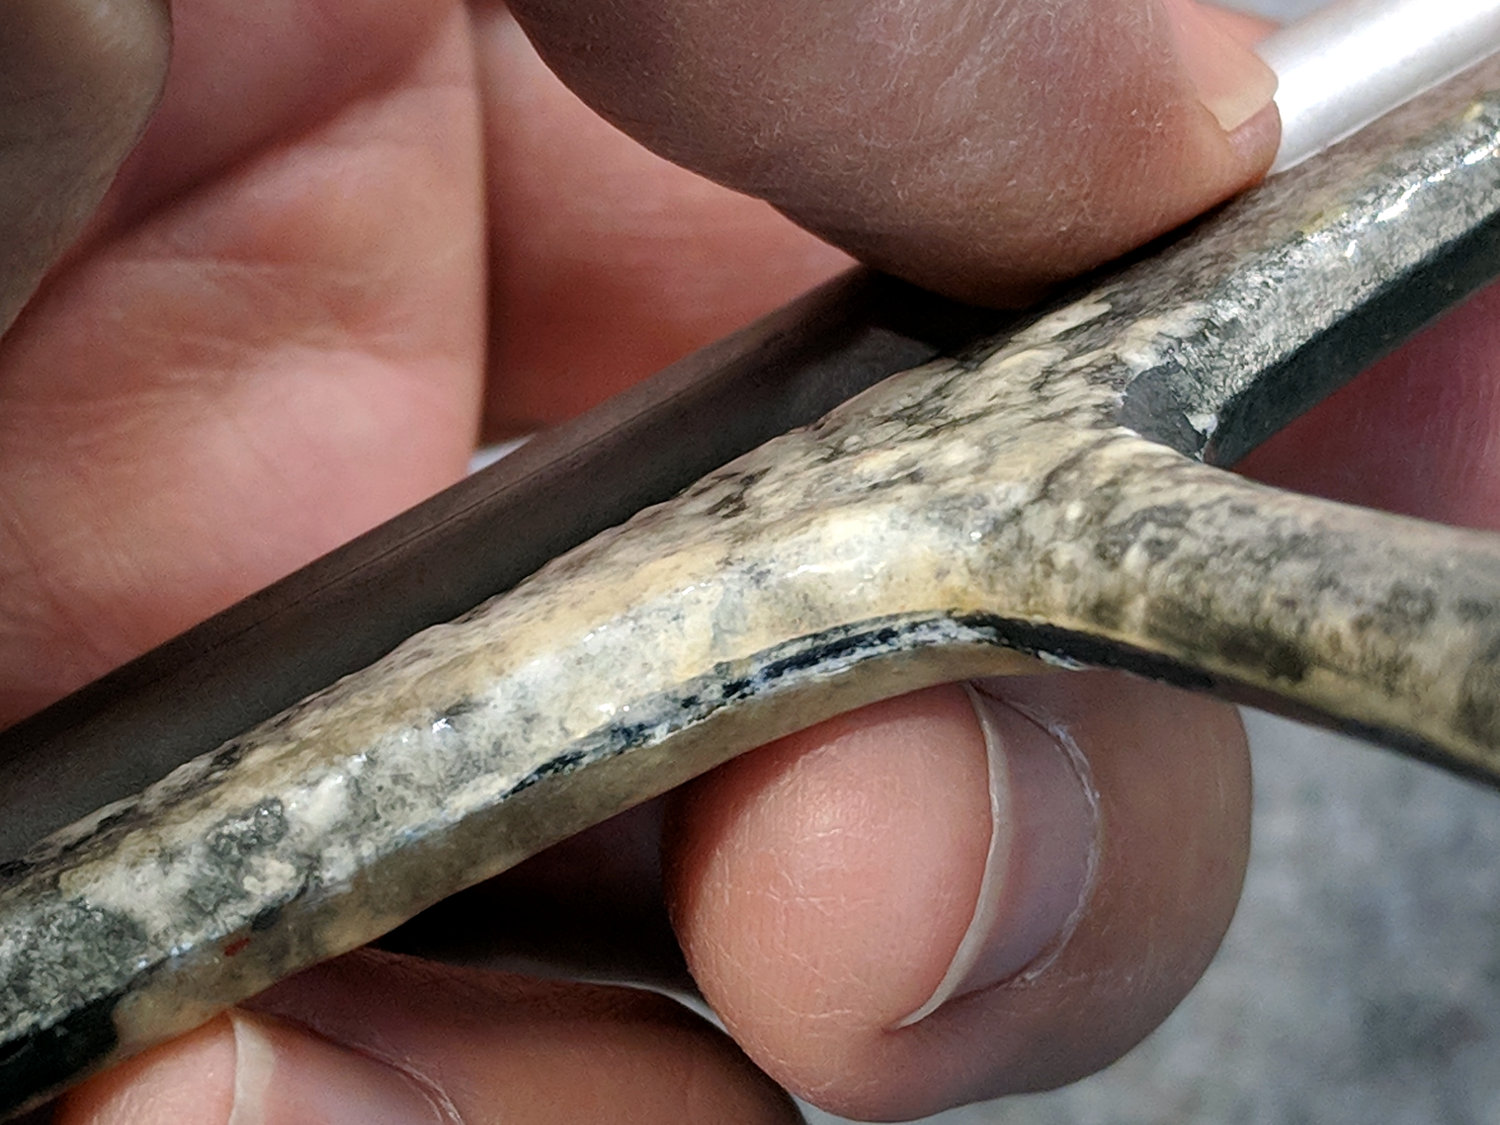
The outer doorknob on the kitchen pantry became very loose and sloppy, with the screw holding the inner knob on the shaft remaining snug. Obviously, something else was wrong inside the door.
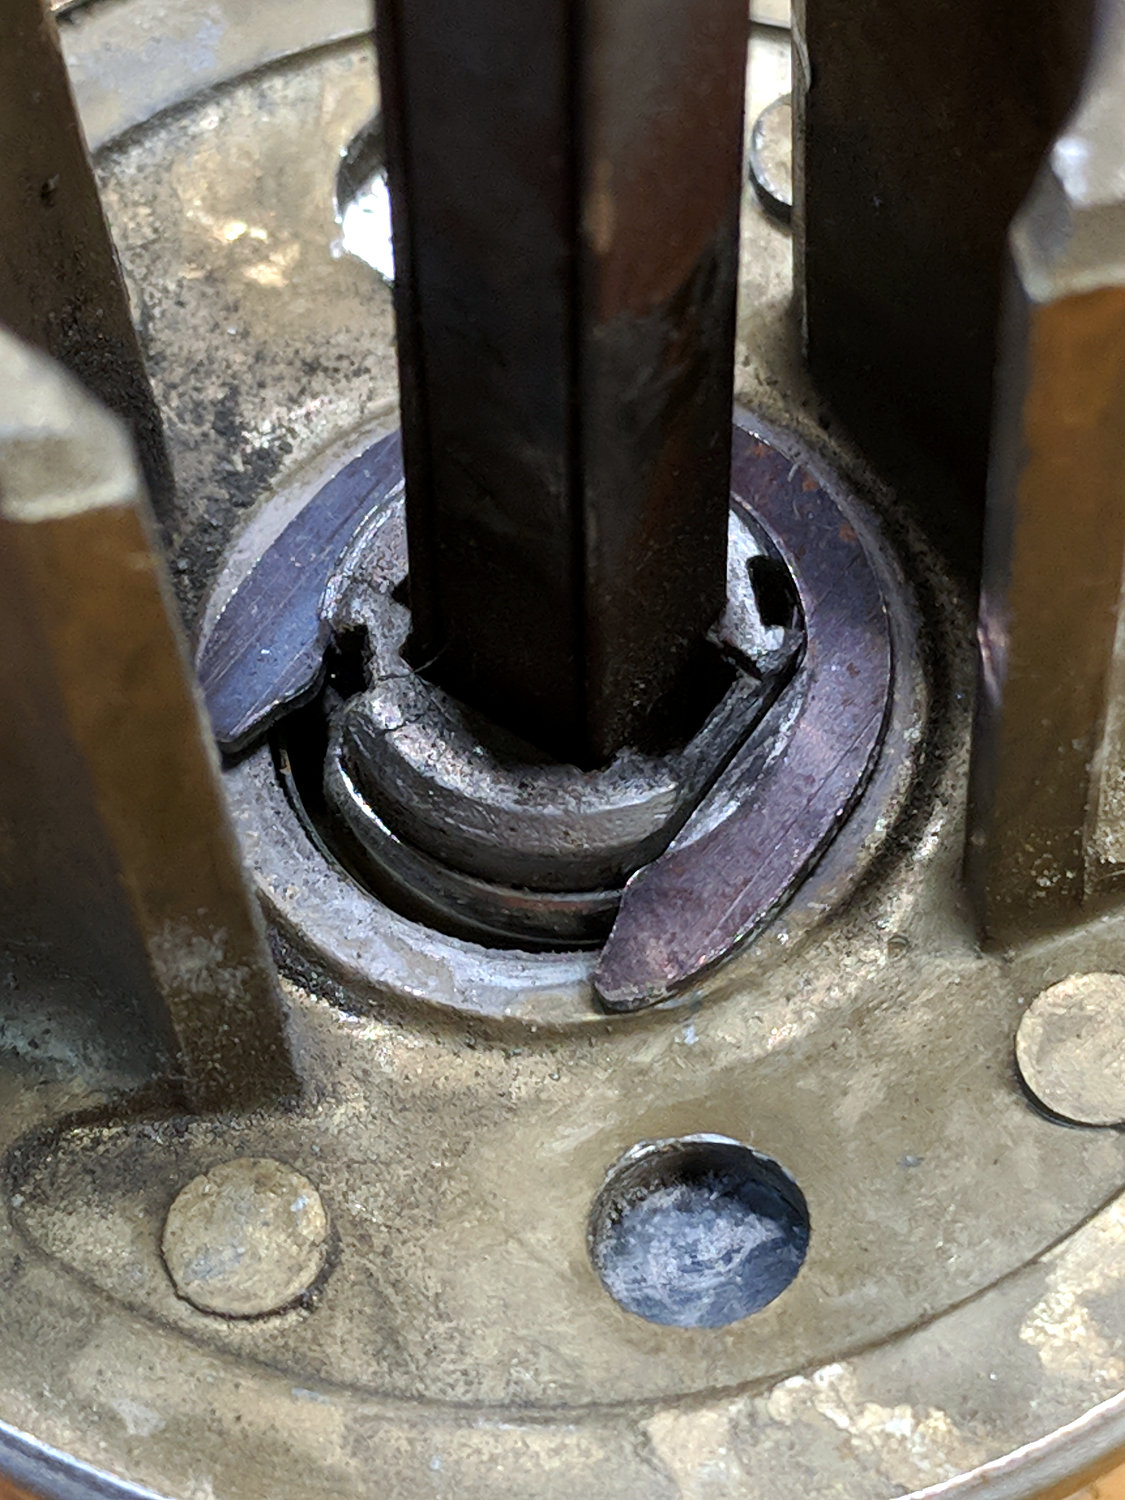
A spring clip should retain the outer knob in the escutcheon:
Doorknob – worn retaining flange – detail
The flange holding the clip has worn away, letting the clip fall loose. A side view shows the problem:
Doorknob shaft – worn retaining flange
Yes, the knob’s chrome plating is in sorry shape after six decades of wear. I’d rather keep using a solid knob, instead of force-fitting some contemporary half-assed / cost-reduced junk into the door.
Reference: beausage. I say it “beau-sage”, the beauty that comes from usage.
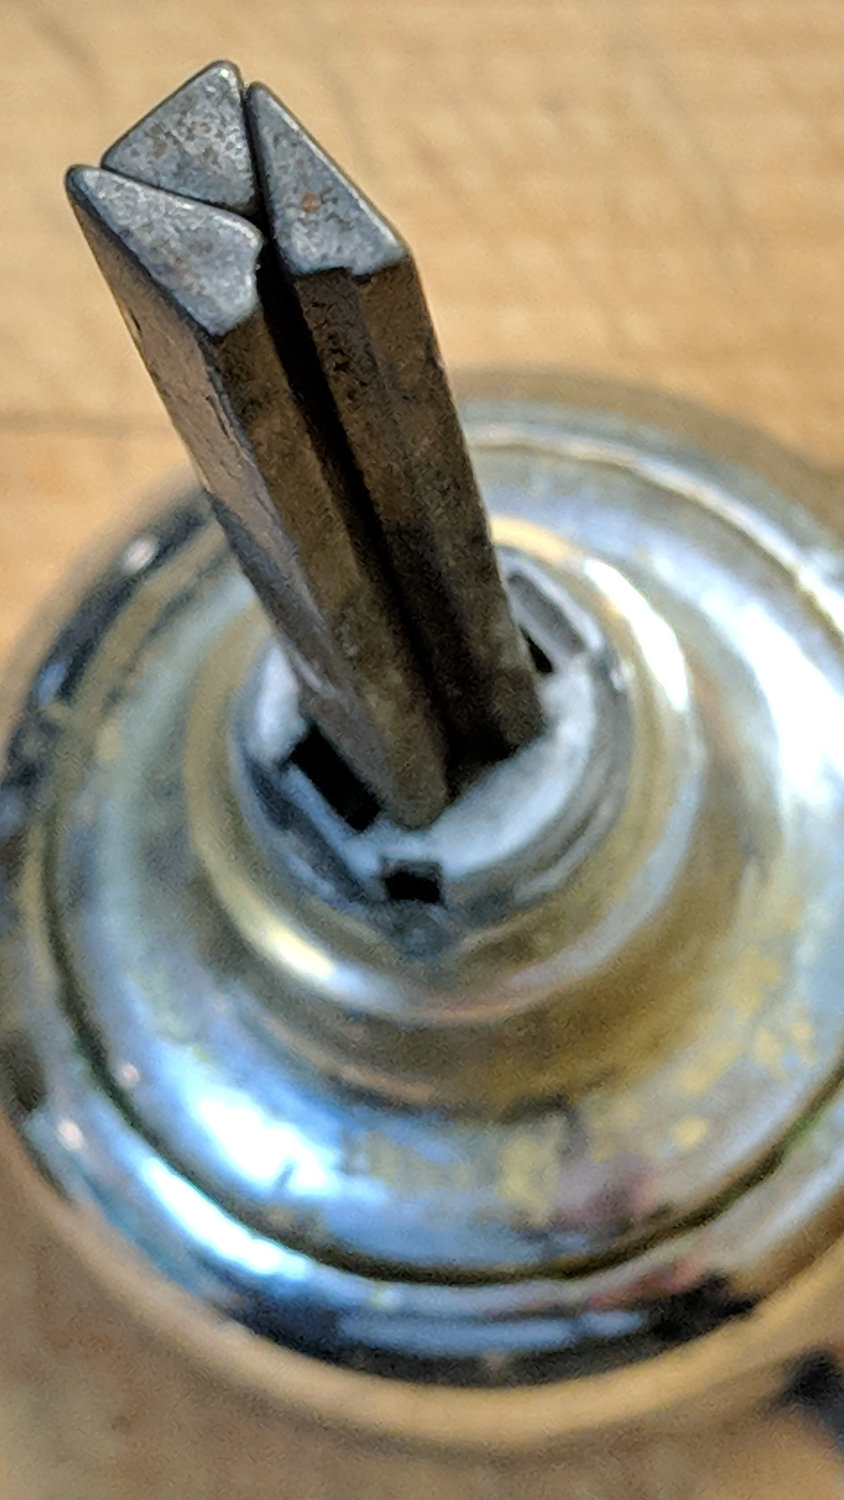
The shaft consists of three triangular rods, with the setscrew on the inner knob pressing against the smaller rod to lock all three of them in place and eliminate all rattle & play:
Doorknob shaft – detail
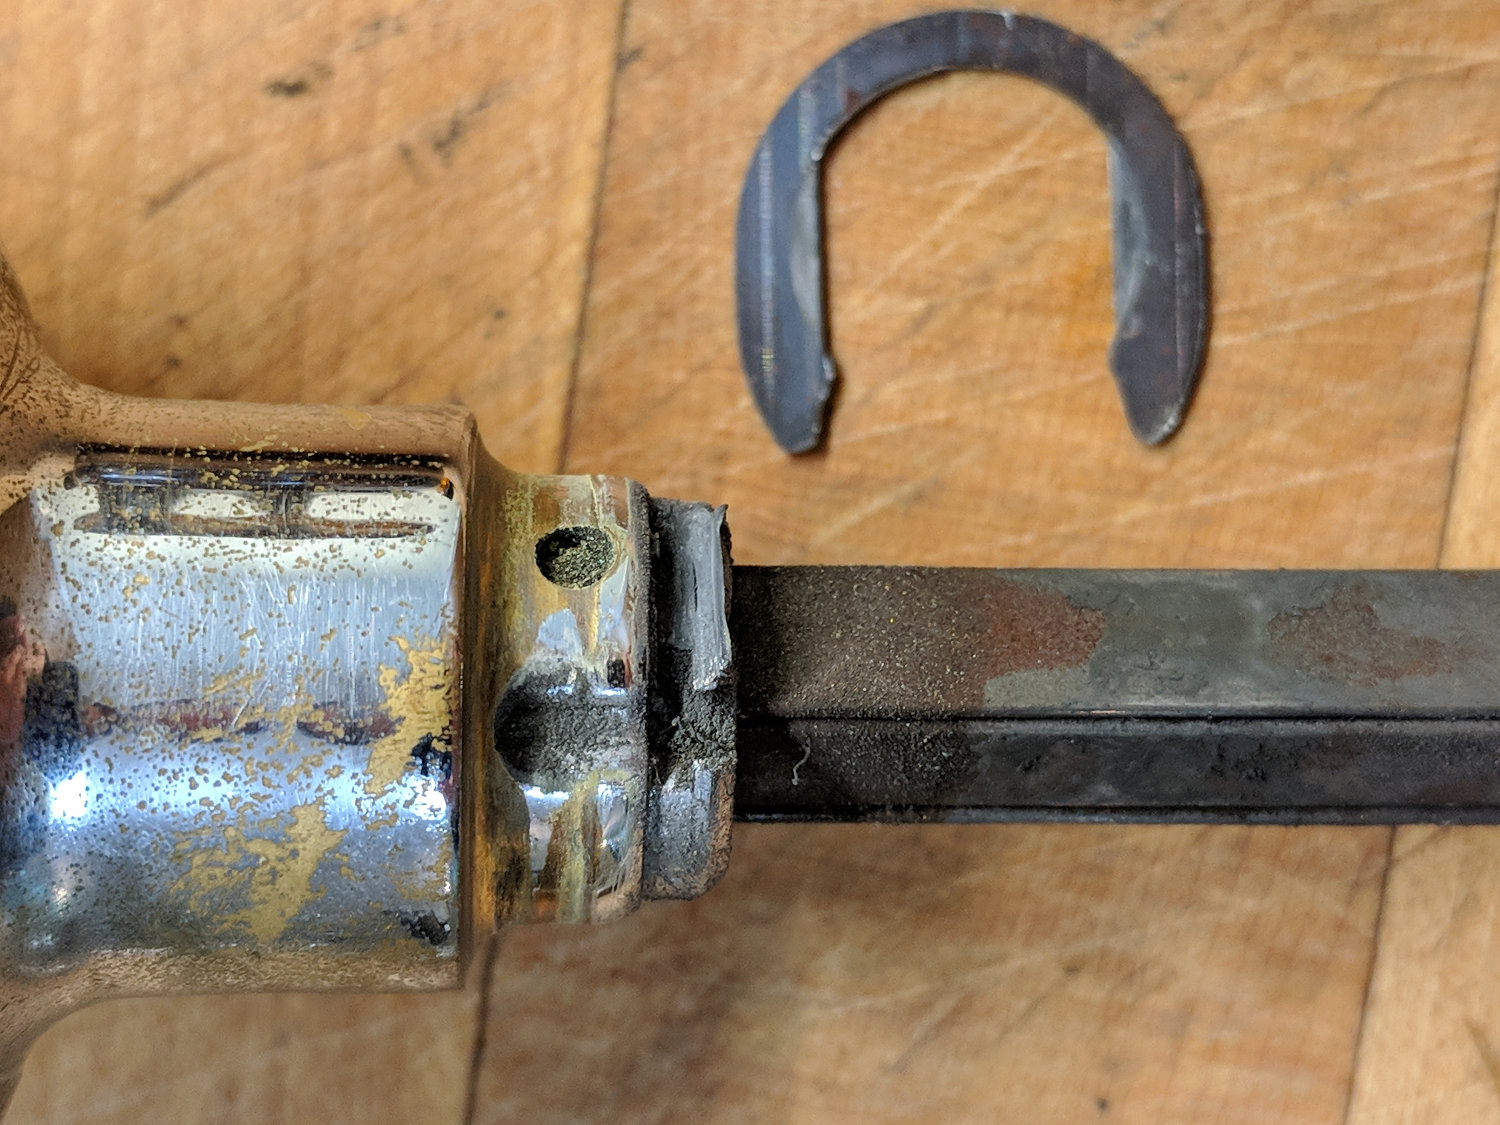
A tapered pin (!) locks the three shaft rods into the outer knob:
Doorknob shaft – tapered pin
Some doodling, most of which turned out to be irrelevant, captured the essential dimensions and suggested how to replace the flange:
Doorknob – dimension doodles
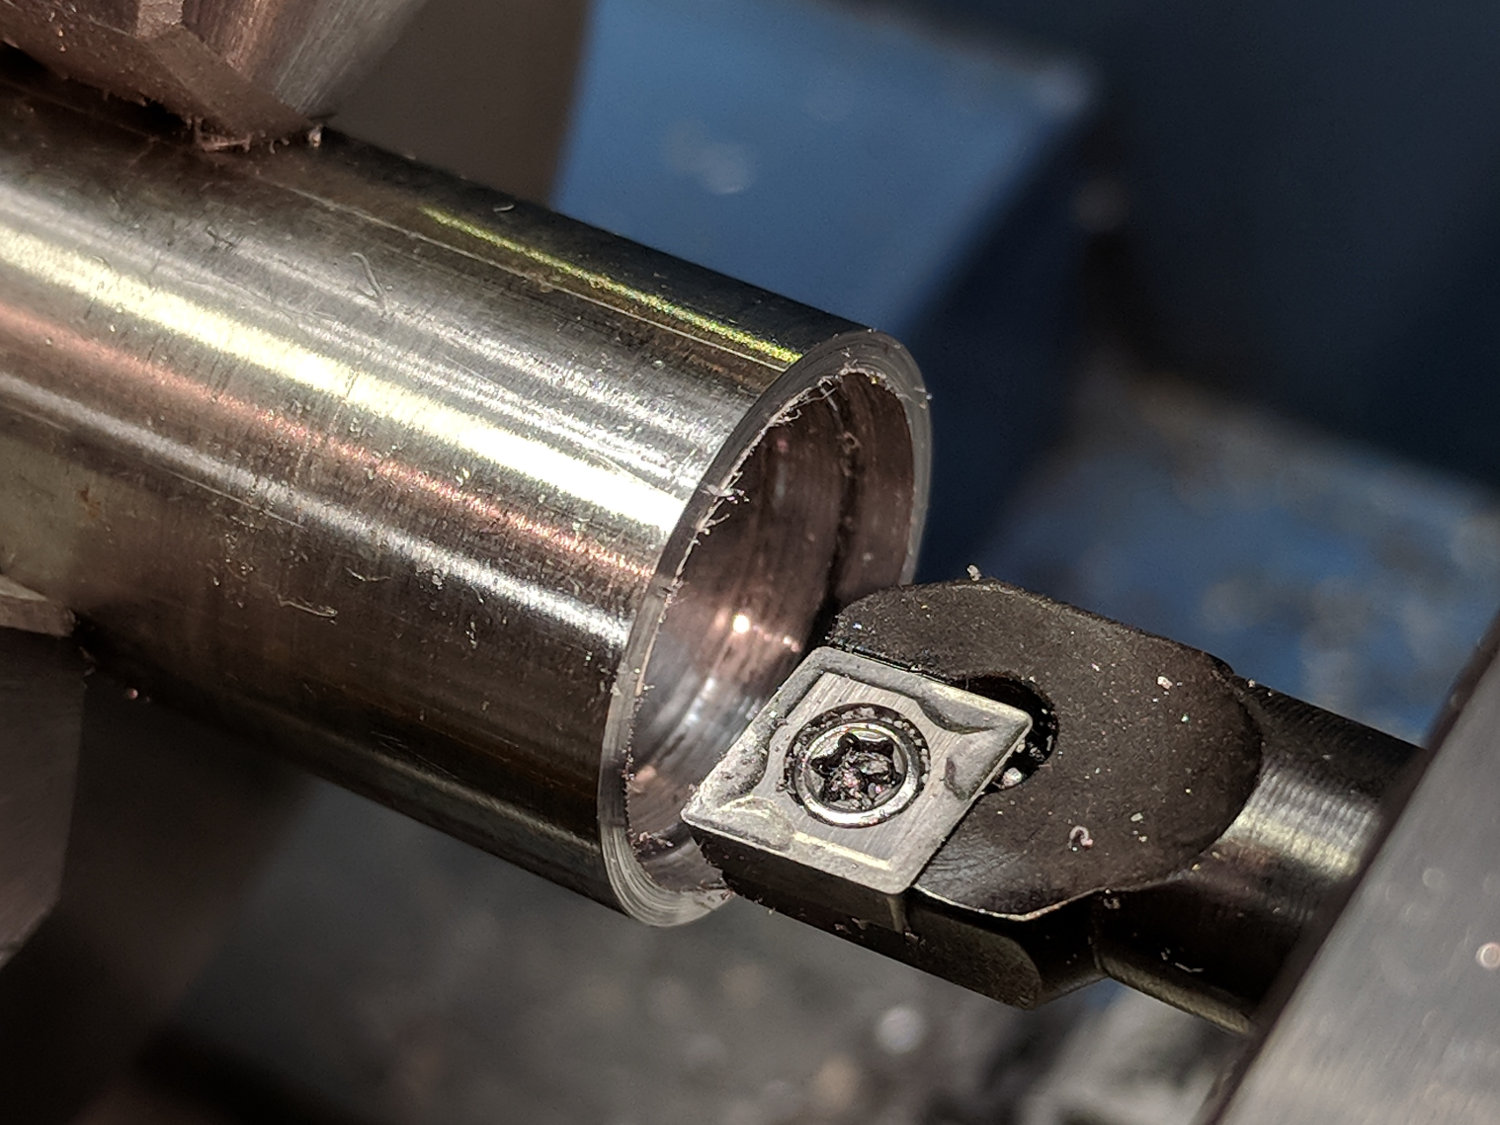
The stock is 11/16 inch O-1 oil-hardening rod, forever to remain unhardened:
Doorknob – retainer ring boring
I drilled a few holes to get up to 1/2 inch, the largest drill bit I have and just barely clearing the the boring bar.
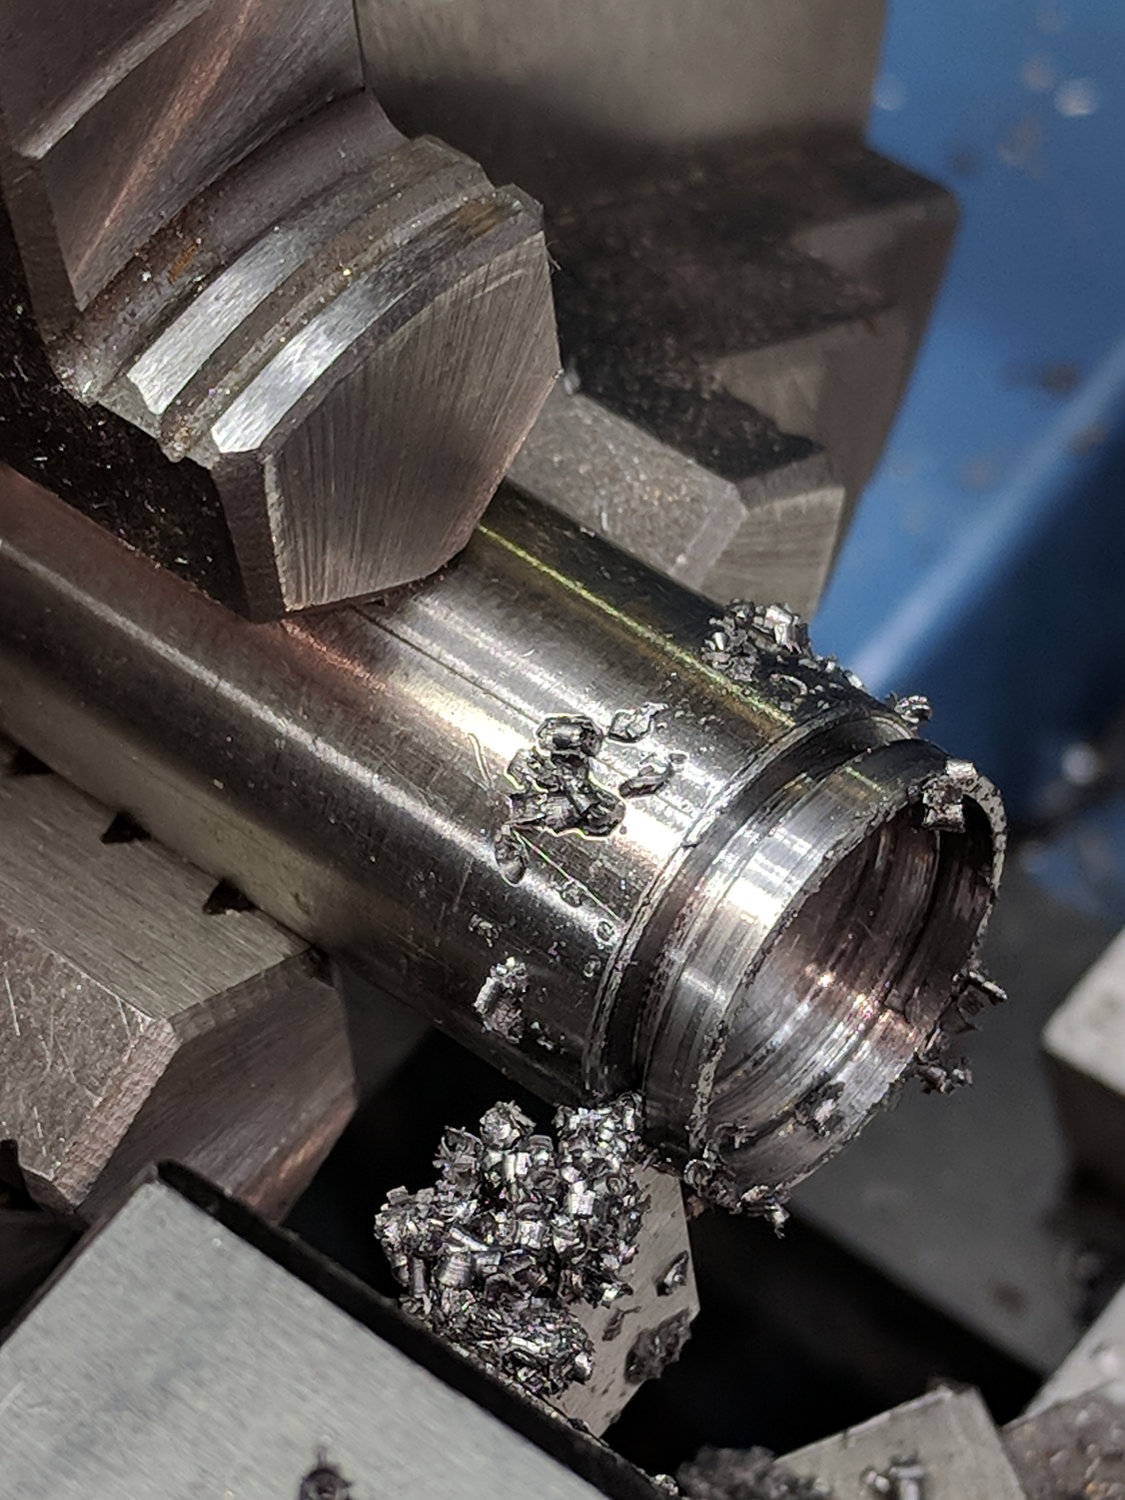
With the hole bored out to fit the end of the knob, cut it off:
Doorknob – retainer ring cutoff
Trial-fit the ring on the knob with the spring clip:
Doorknob – retainer trial fit
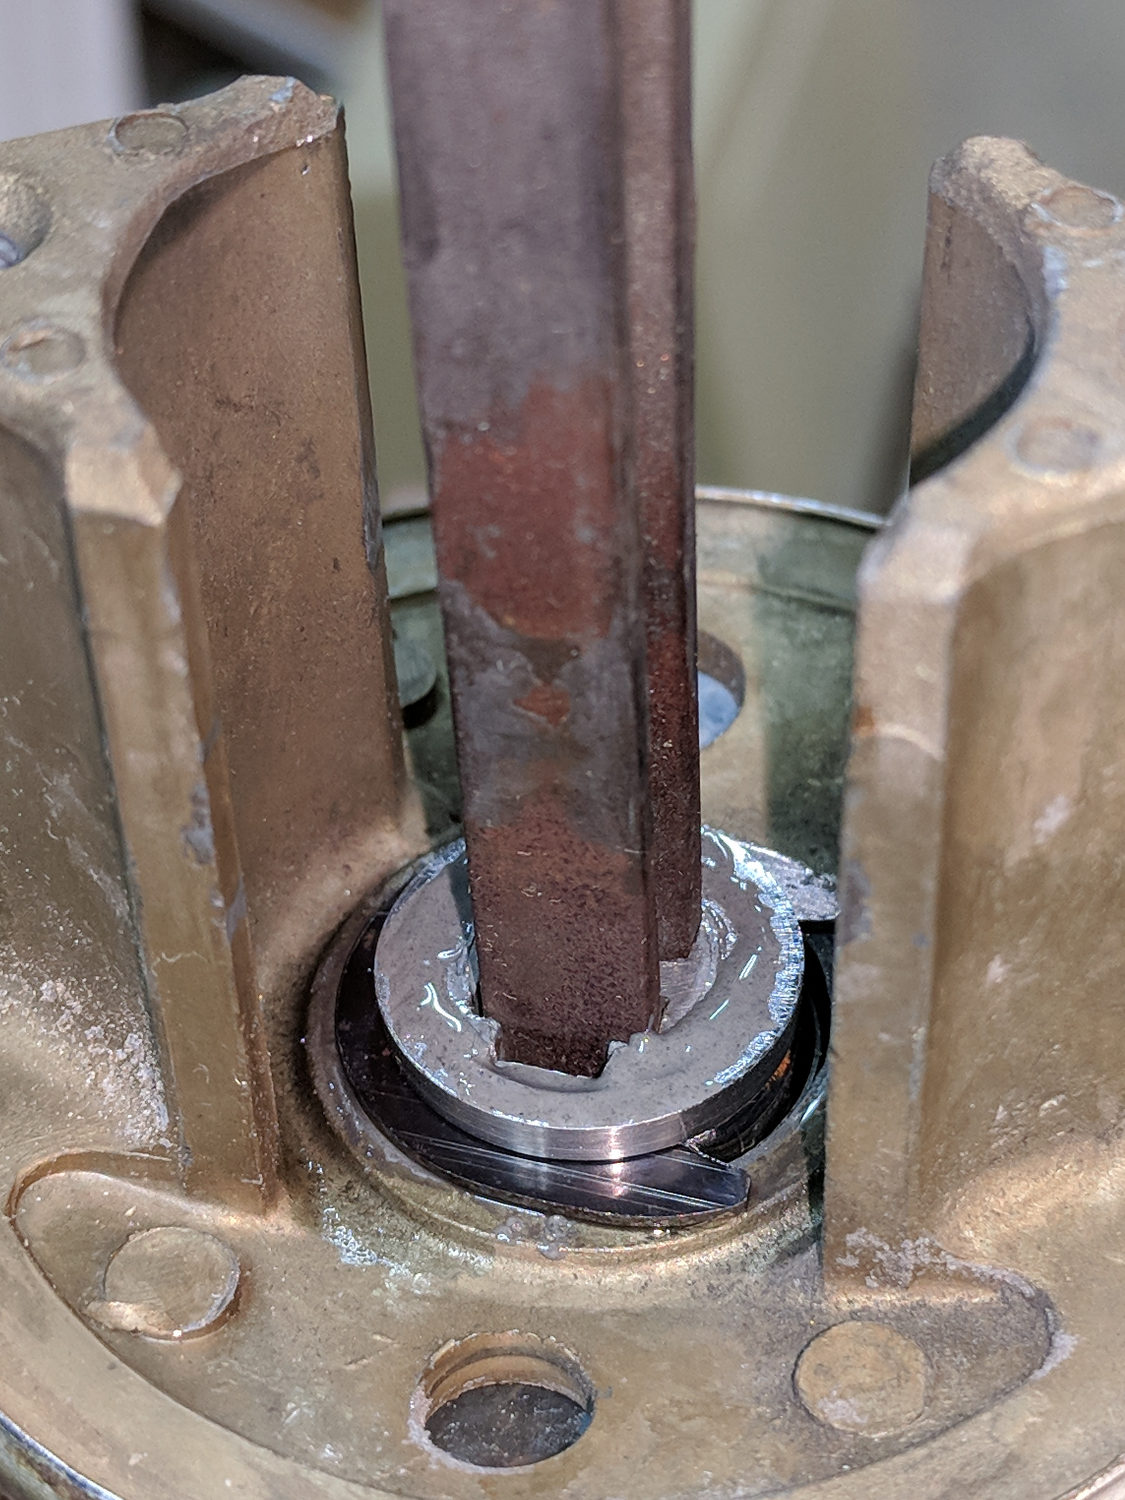
Reinstall the shaft, tap in the retaining pin, then epoxy the ring in place with the knob supported from below to eliminate having to fiddle with the spring clip:
Doorknob – retainer ring epoxy
Add a few dots of oil here & there, reinstall the parts in reverse order, and the knob works perfectly again. Still looks heavily used, of course, but that’s OK.
They definitely don’t make ’em like that any more …