Ed Nisley's Blog: Shop notes, electronics, firmware, machinery, 3D printing, laser cuttery, and curiosities. Contents: 100% human thinking, 0% AI slop.
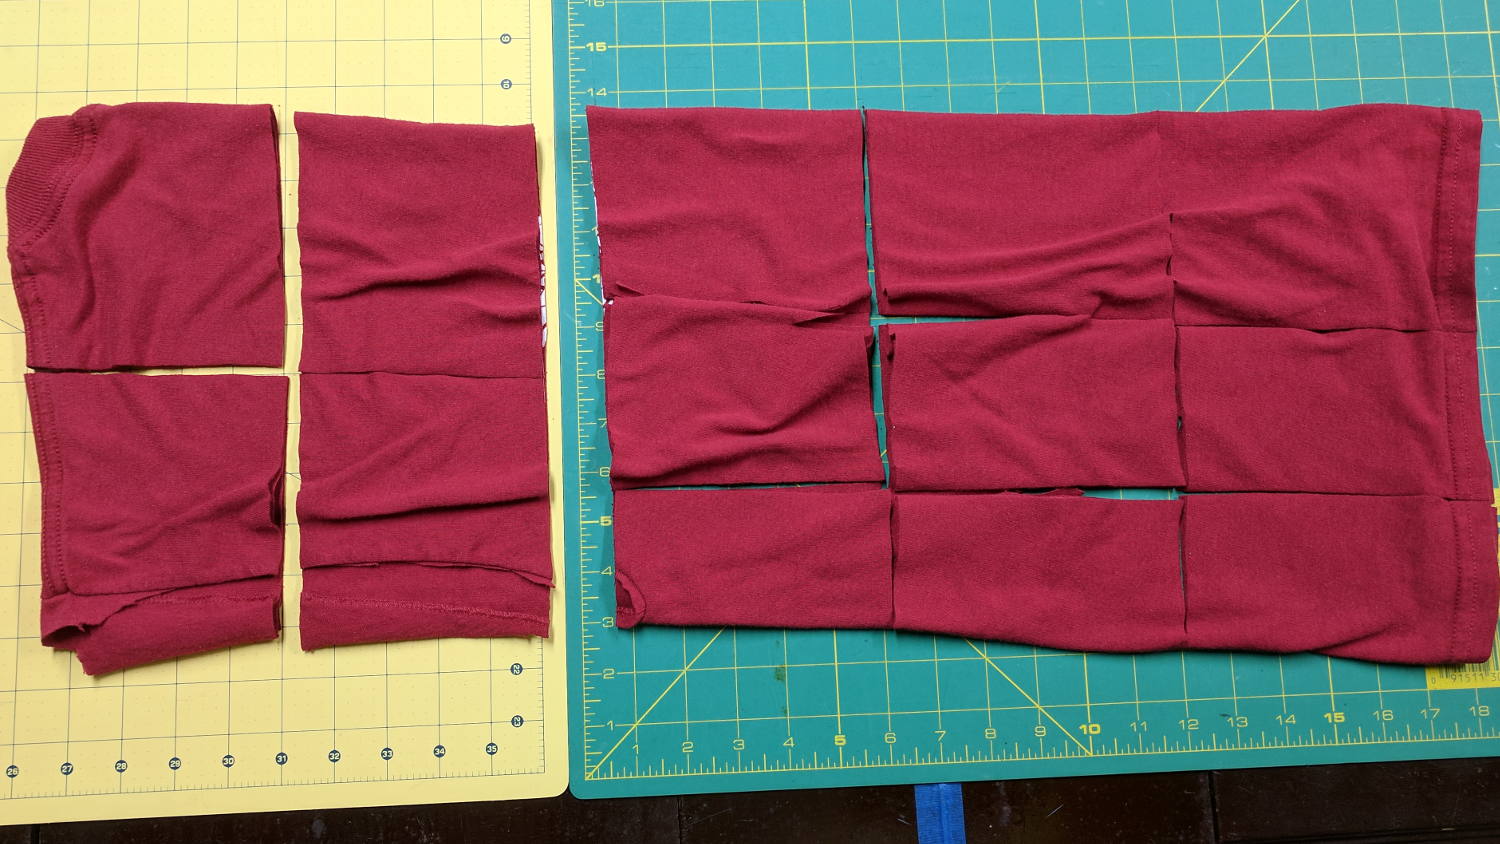
Small wipes made from worn-out cotton t-shirts absorb most shop liquids, don’t overstay their welcome after short projects, and prevent the deep emotional attachment leaving swarf in the clothes washer. Scissors cutting gets tedious, so mooch a rotary cutter and slash away:
T-shirt shop rags
Synthetic fabrics don’t work nearly as well as cotton, so pay attention to the labels.
So now we know a chrome-plated steel rod will survive 16 years in a bathroom drain, at least if you’re willing to coddle the fool thing far more than seems reasonable.
I eased a slug of epoxy into the brass tube to seal the wet end. Given how little use the stopper gets, I hope it lasts forever …
After 4.5 years, one of the silicone tubes on the Epson R380’s continuous ink supply system broke:
Epson R380 – broken CISS tube
The yellow smudges in front of the tubing clamp and across the top suggest the total mess lying in wait between the cartridges. Donning my shop apron and wielding damp paper towels cleaned things up well enough.
I cut through all the tubes a few inches back from the clamp, pulled the stubs off the elbow connectors, reinstalled the fresh ends, and re-repaired the clamp with a new cable tie:
Epson R38 – CISS tubes
Although the failing yellow supply surely contributed to the problem, the printhead seems to be on its last legs after nearly nine years. IIRC, I got the printer for $15 after rebate, spent maybe four times that on CISS tanks, and perhaps $200 on good-quality ink in pint bottles, it doesn’t owe me much.
Maybe I shouldn’t buy ink in pint bottles any more.
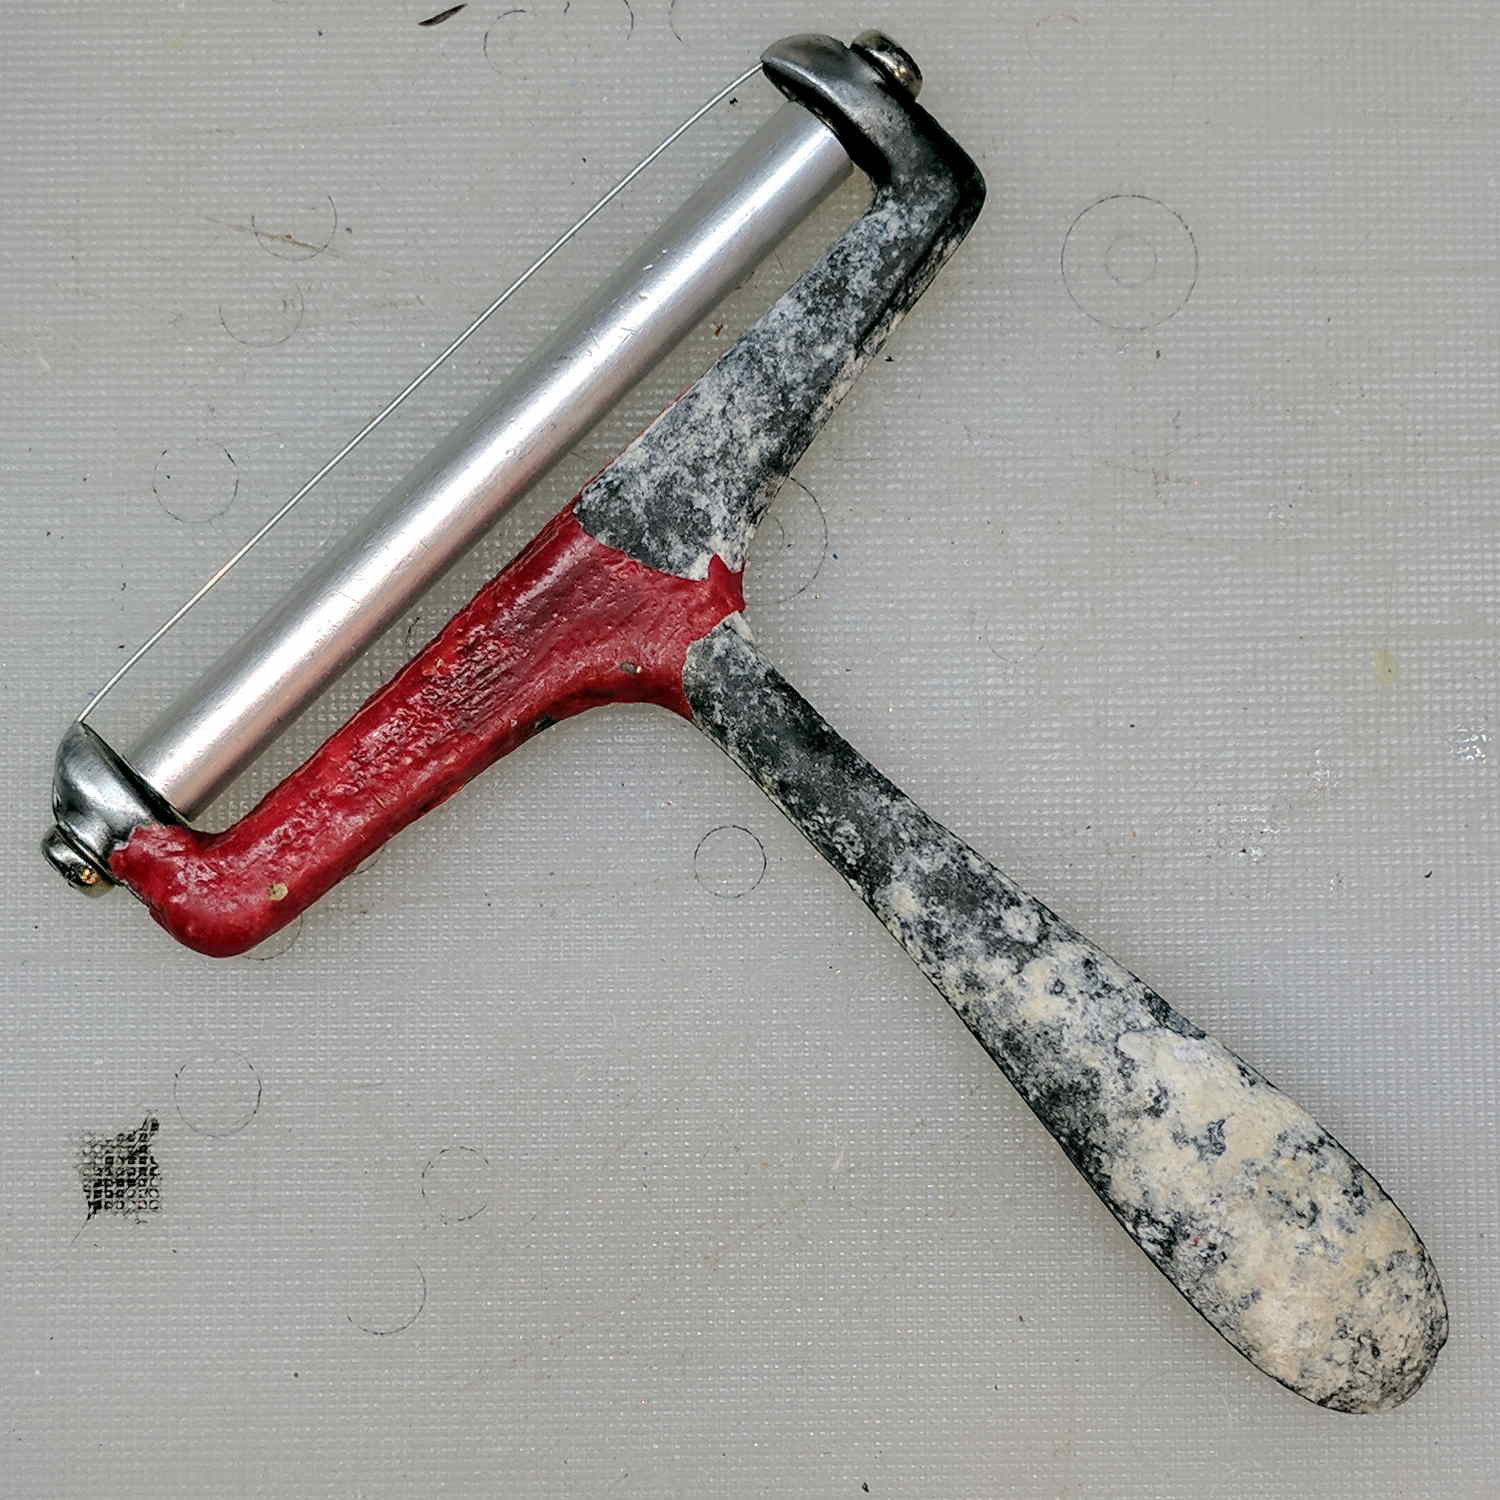
We have, as you might expect, a Favorite Cheese Slicer of no particular provenance. Being made of cheap pot metal, it left black smudges wherever it went and, decades ago, I coated it with bright red rubbery grip material. Recently, the coating became lumpy and peeling off the loose sections revealed a definite problem:
Cheese slicer – aluminum corrosion
Vigorous scrubbing with a foam sanding block and a Scotchbrite pad, interspersed with rotary wire brushing, removed the corrosion and left a slightly pitted metal frame. Protip: scrub under water and wire-brush with a vacuum hose to keep the dust under control.
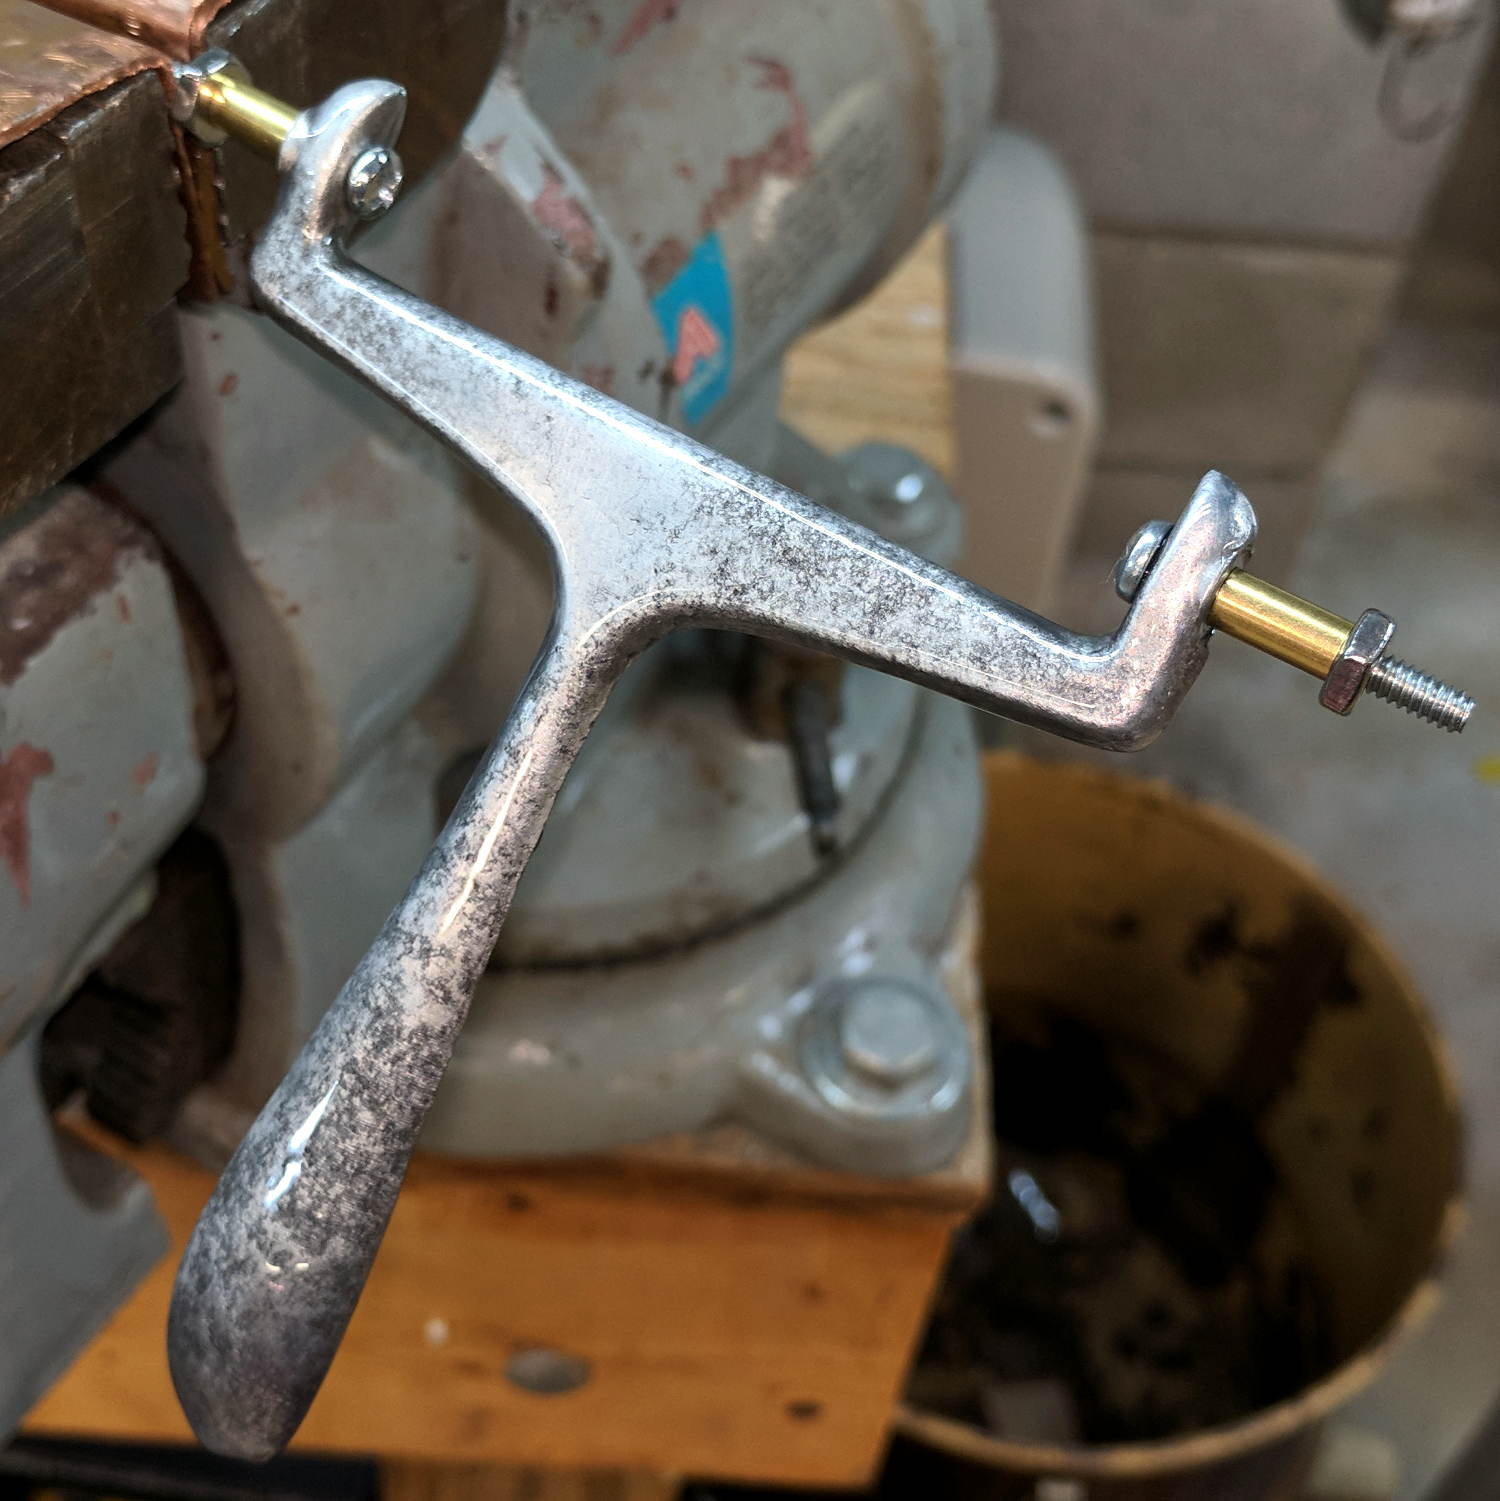
A pair of 6-32 screws, nuts, and brass sleeves, with two oil dots protecting the frame threads, provided hand grips while I wiped it down with denatured alcohol and coated it with XTC-3D epoxy:
Cheese slicer – epoxy curing
Turns out the mixing stick worked quite well to cover the entire thing, as the epoxy does a great job of leveling itself. I suppose wasting a tiny brush would be more professional, but …
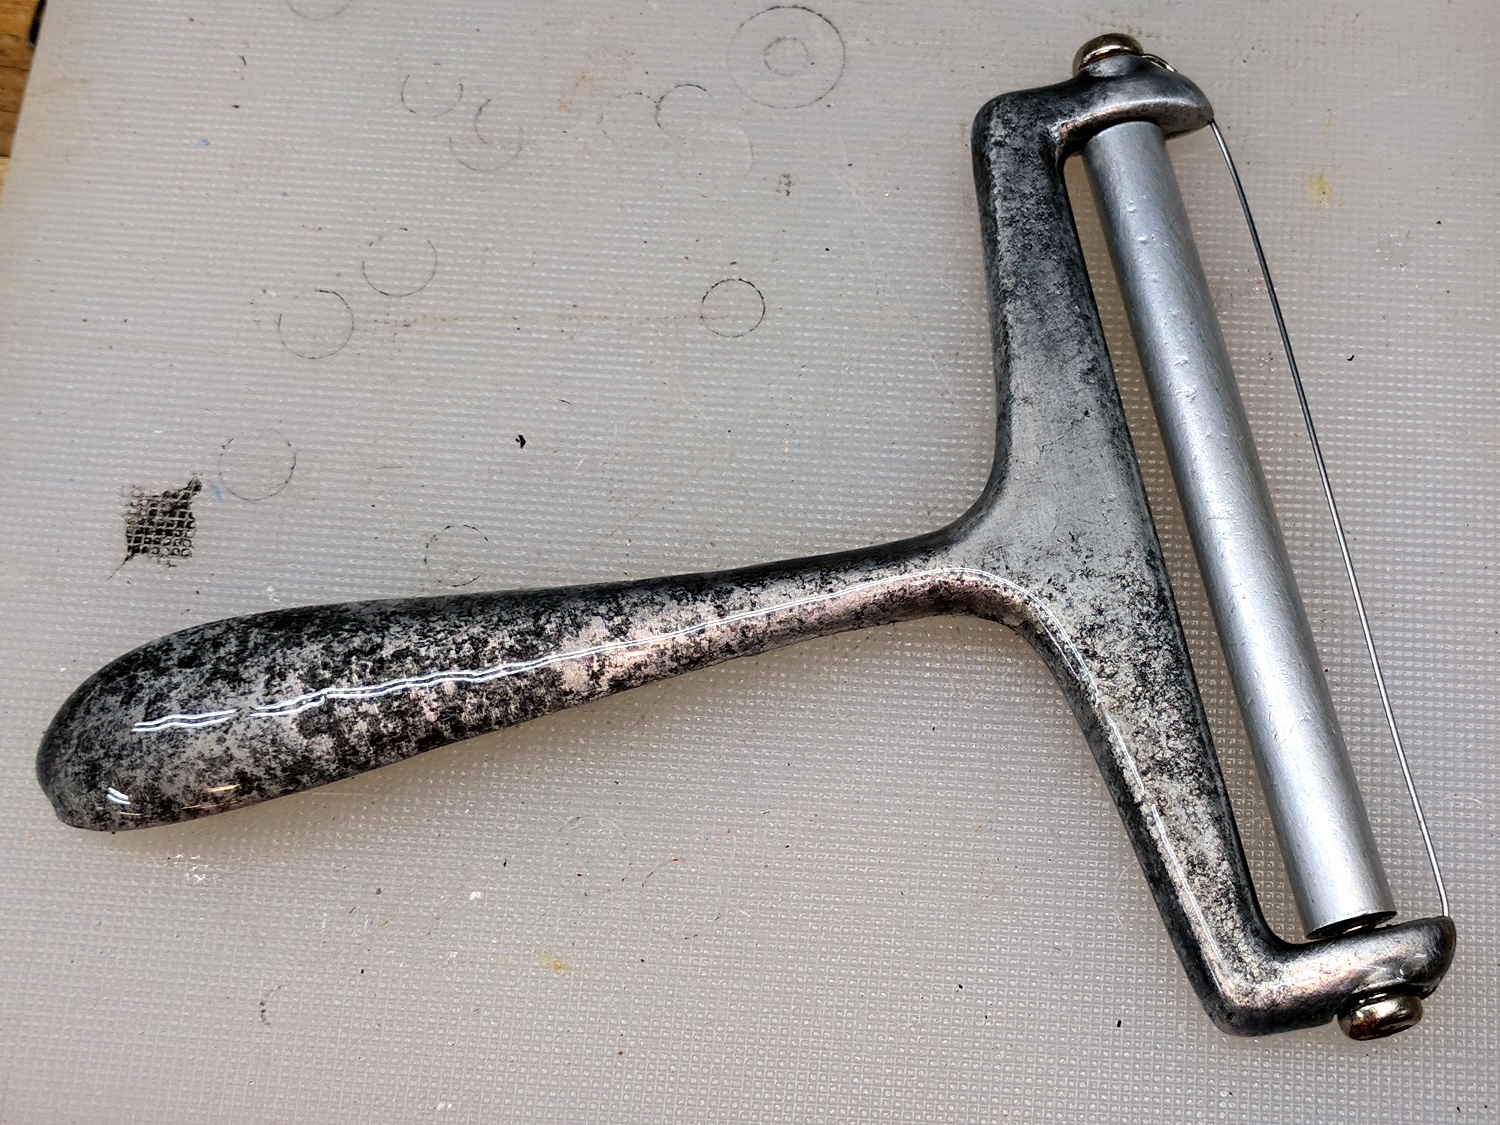
It quietly dripped excess epoxy into a strategically placed trash can for about ten minutes. I wiped off the final drip before the epoxy solidified, leaving a smooth layer over the end of the handle:
Cheese slicer – reassembled
It’s back in service and works as well as ever, with a handle now smooth to the touch. I suppose I could have tinted the epoxy to hide the metal, but we regard those corrosion pits as beausage.
I’ve slathered XTC-3D on some3D printed parts, but have no idea how durable it is; this should serve as an accelerated survival test under rather harsh usage.
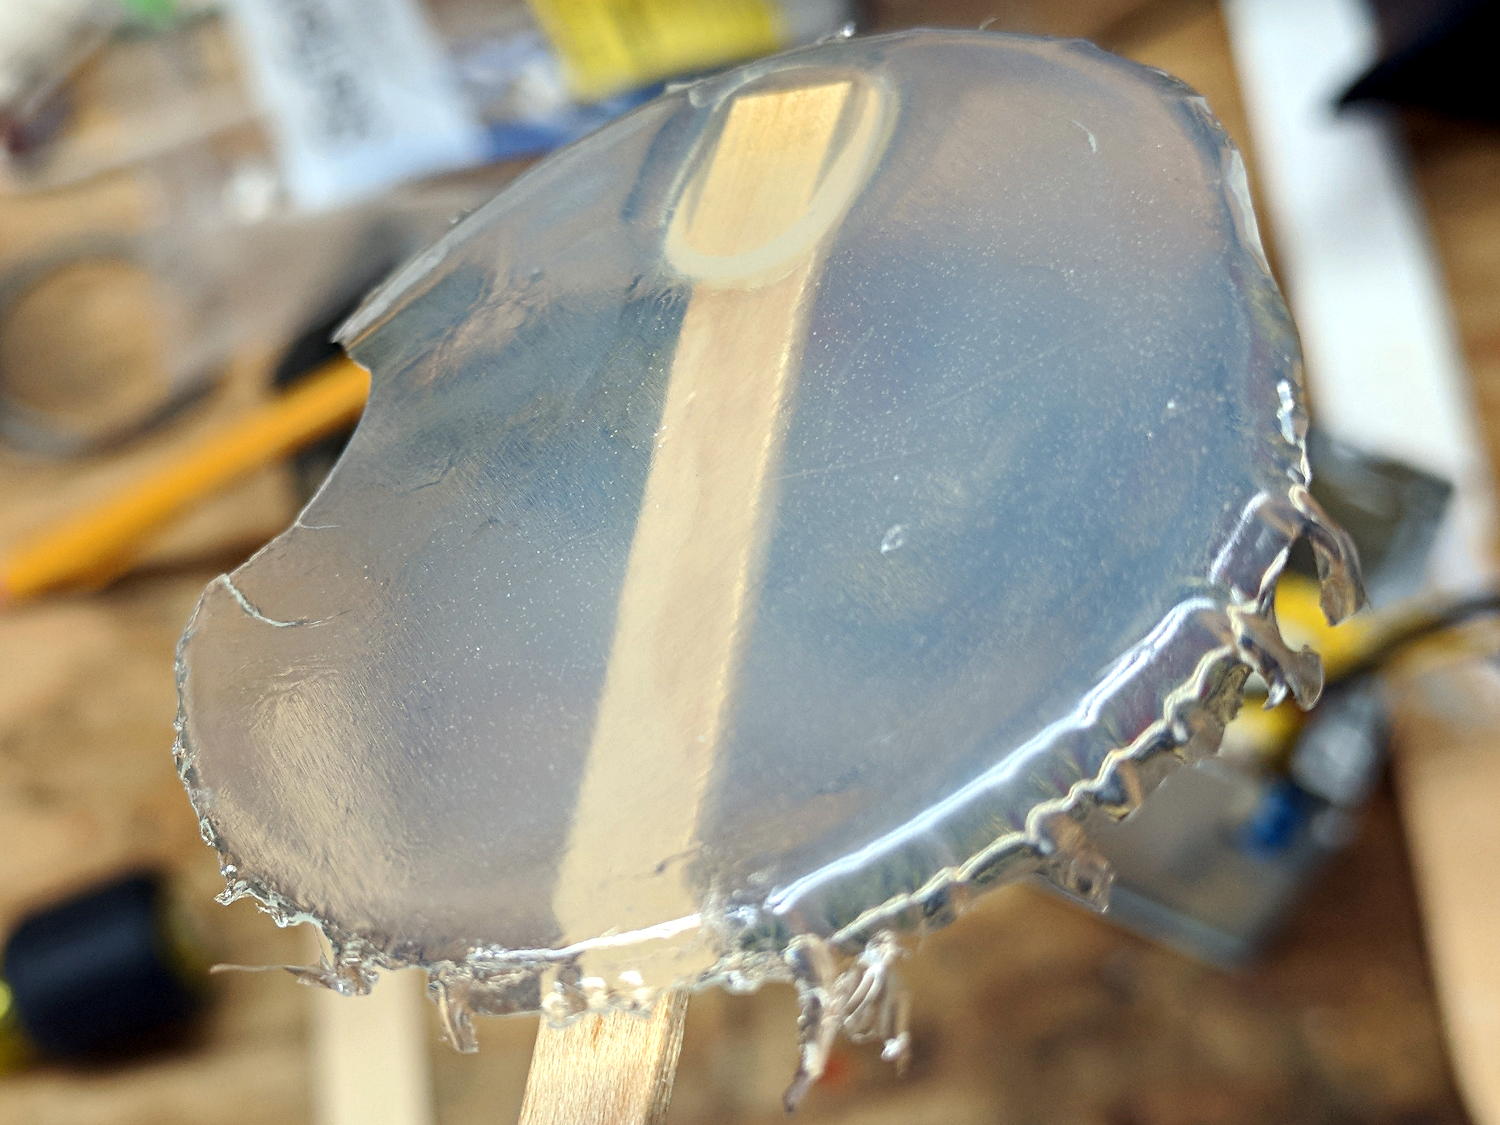
The instruction sheet says XTC-3D isn’t the most transparent epoxy they make and, indeed, the layer left in the mixing pan came out more hazy than I expected:
XTC-3D Epoxy – thin cured layer
They point out the haze doesn’t matter for thin surface coatings, which is certainly true.
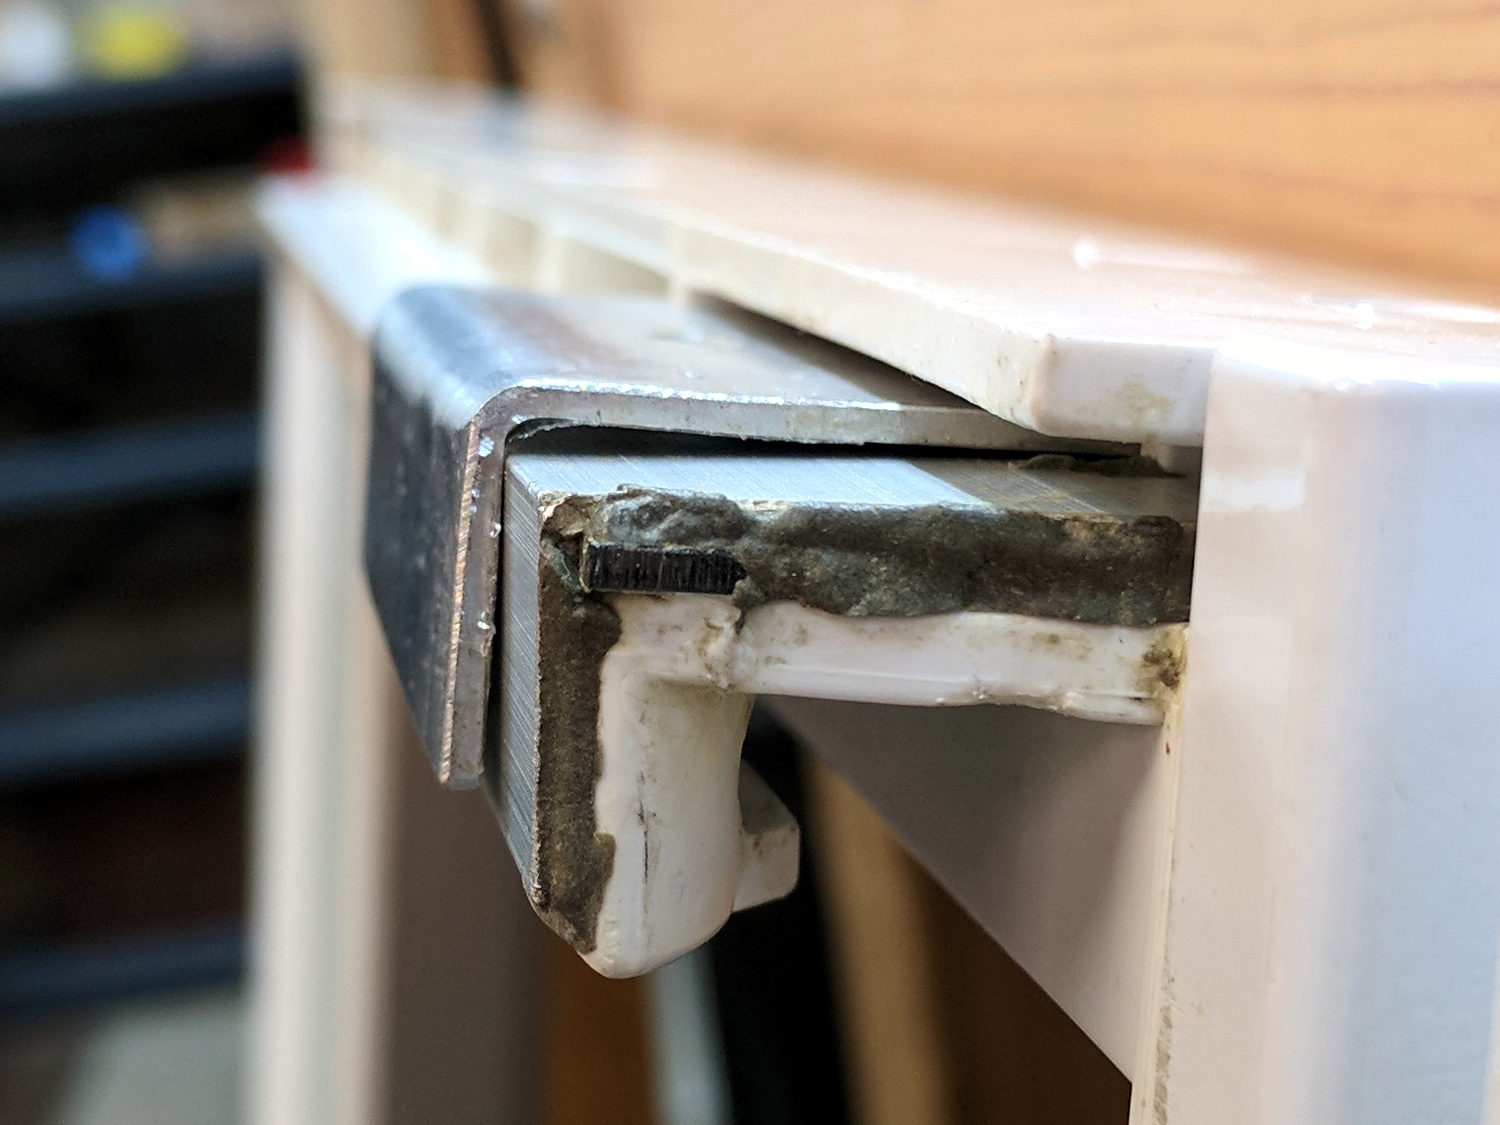
The general idea is to wrap a new bracket around the old bracket, because trying to remove the old one will probably cause more damage:
Refrigerator shelf slide – trial assembly
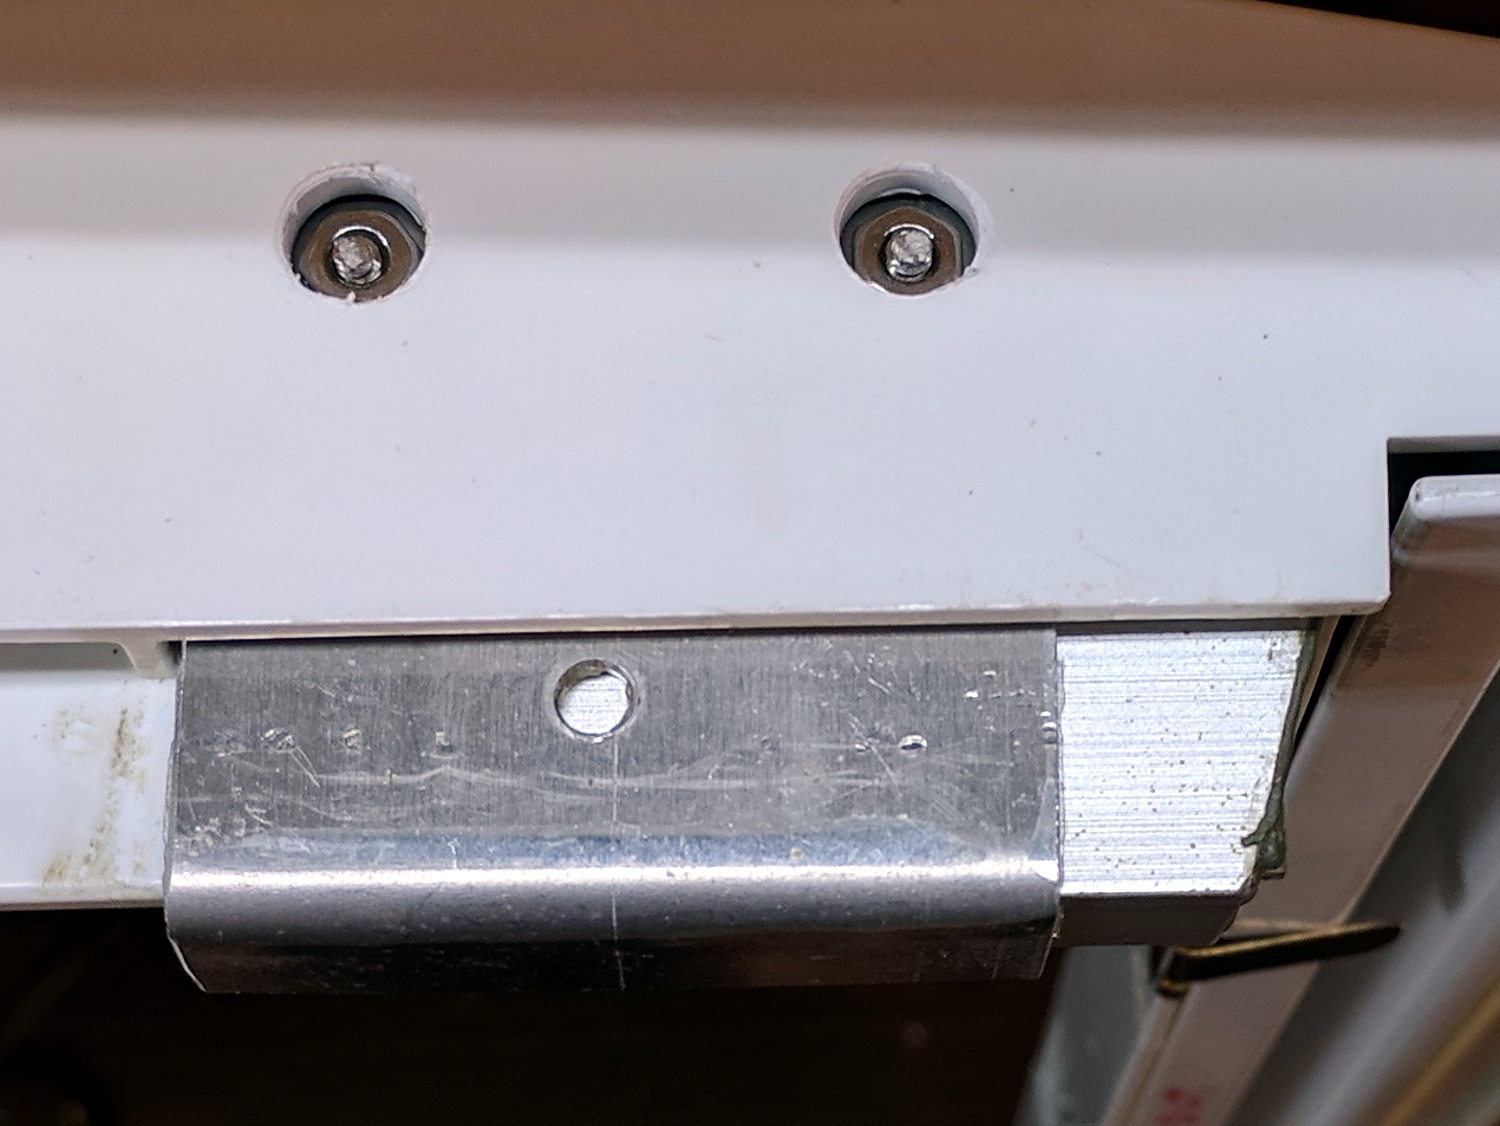
A pair of screws hold the new bracket to the shelf support:
Refrigerator shelf slide – support screw nut openings
Those two screws must support the entire weight of the drawer, which is exactly what broke the original all-plastic frame and slide.
The epoxy chip and transparent plastic sheet in the first picture spaced the old aluminum bracket away from the shelf support and reduced the space beyond the new bracket enough to require drilling access holes. Fortunately, they’re hidden inside the support frame, so nobody will ever know.
The shelf support is a huge floppy rectangle, so I clamped it to the bench vise while drilling the holes:
Refrigerator shelf slide – upright vise clamp
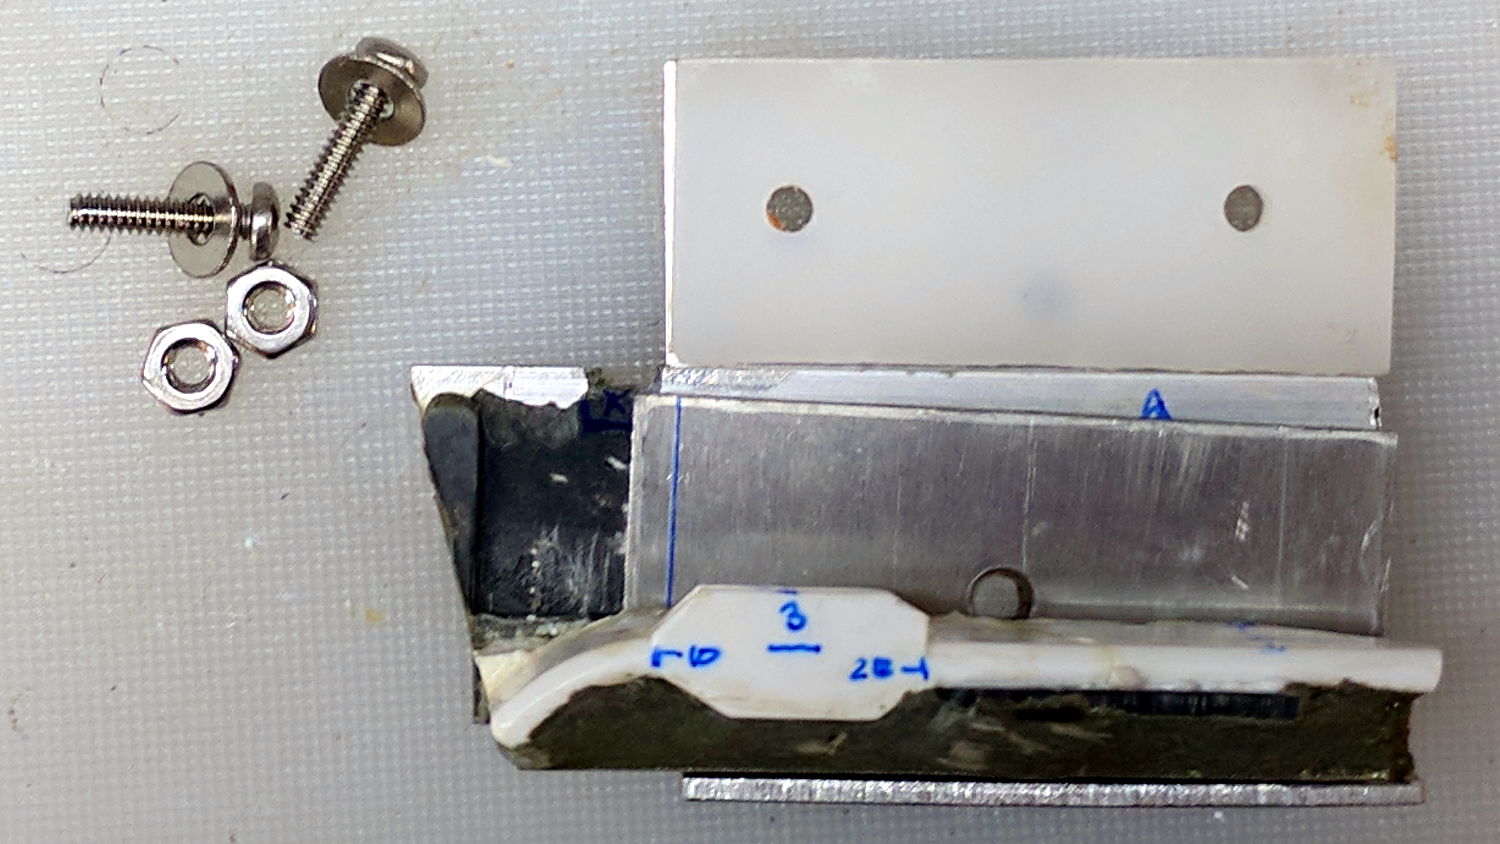
The new bracket is on the right, with a sheet of white acrylic spacing it away from the shelf support by exactly the same distance as the angled aluminum snippet replacing the failed epoxy & plastic on the broken part:
Refrigerator shelf slide – bracket parts
The two holes in the middle of the aluminum parts show that I used exactly the same angle brackets as raw material. It’ll be a sad day when I eventually use the last of those brackets.
Putting the parts together, with double-stick tape holding all the parts in place, shows how they fit:
Refrigerator shelf slide – repair trial assembly
And then it just snapped into place. I didn’t bother pretending solvent glue would help anything, nor did I apply any epoxy, so this whole thing hangs from those two 4-40 screws. On the other paw, their steel beats the original white plastic.
I devoutly hope to never rebuild the actual drawer slide, but these dimensions may help somebody else out of a jam:
Refrigerator shelf slide – dimensions
The vertical “40” dimension refers to the available space from the bottom of the white plastic part to the top of the shelf support frame; the new bracket is a tad shorter than that.
The plastic parts in that refrigerator have been a complete disappointment: were it not for my relentless repair jones, we’d likely be on our third or fourth refrigerator by now. Oddly, the cooling parts continue to chug along (*), without more than the occasional loud noise in the middle of the night.
We’re definitely doing our part to reduce our waste stream.