The Smell of Molten Projects in the Morning

Ed Nisley's Blog: Shop notes, electronics, firmware, machinery, 3D printing, laser cuttery, and curiosities. Contents: 100% human thinking, 0% AI slop.

Author: Ed

  • Tour Easy 1 W Amber Running Light: End Cap

    Tour Easy 1 W Amber Running Light: End Cap

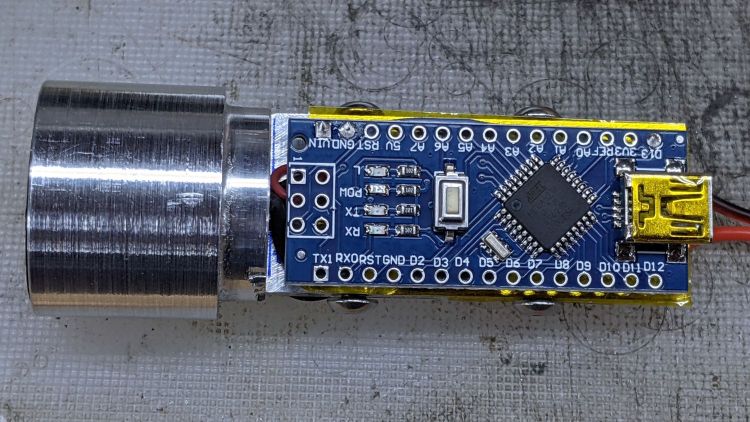
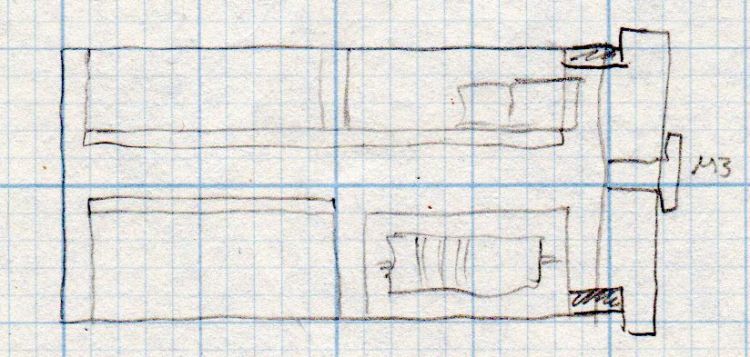
    My initial doodles suggested an end cap with an opening for the Arduino’s USB port and something for the power cable from the Bafang controller:

    1 W LED Running Light - internal assembly
    1 W LED Running Light – internal assembly

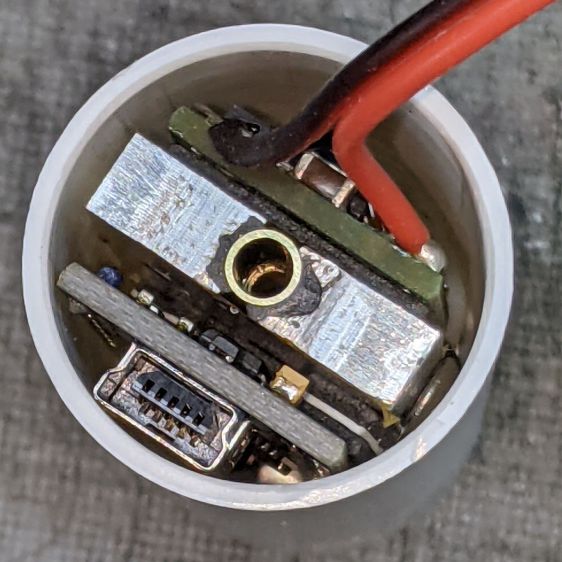
    Common sense finally broke out and I made a simple disk cover held in place with an M3 screw:

    1 W Amber Running Light - bench test
    1 W Amber Running Light – bench test

    Unfortunately, I cut the PVC shell flush with the USB port, which meant the cap couldn’t have a little shoulder to stabilize it on the shell. Maybe next time?

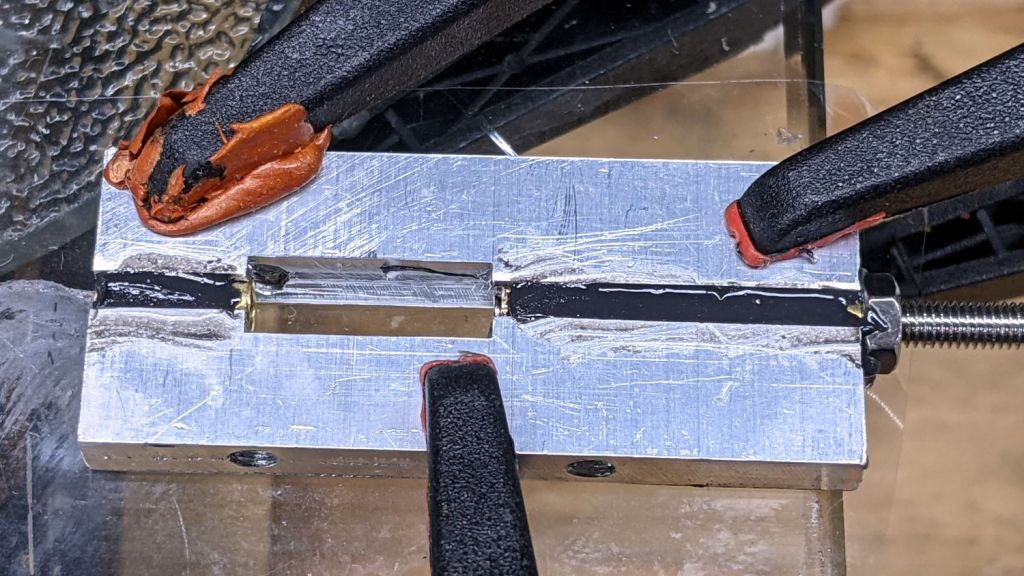
    Machining the disk required using the scrap of aluminum rod left over from the heatsink as a fixture with a piece of sandpaper stuck to the front surface:

    1 W Amber Running Light - end cap setup
    1 W Amber Running Light – end cap setup

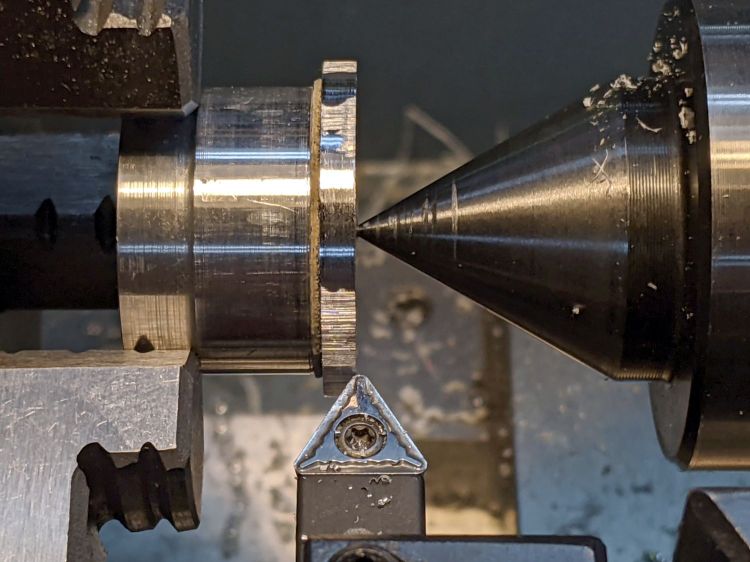
    The live center presses the bandsawed + disk sanded cap against the sandpaper, providing barely enough traction for sissy cuts reducing the disk to the proper diameter:

    1 W Amber Running Light - end cap turning
    1 W Amber Running Light – end cap turning

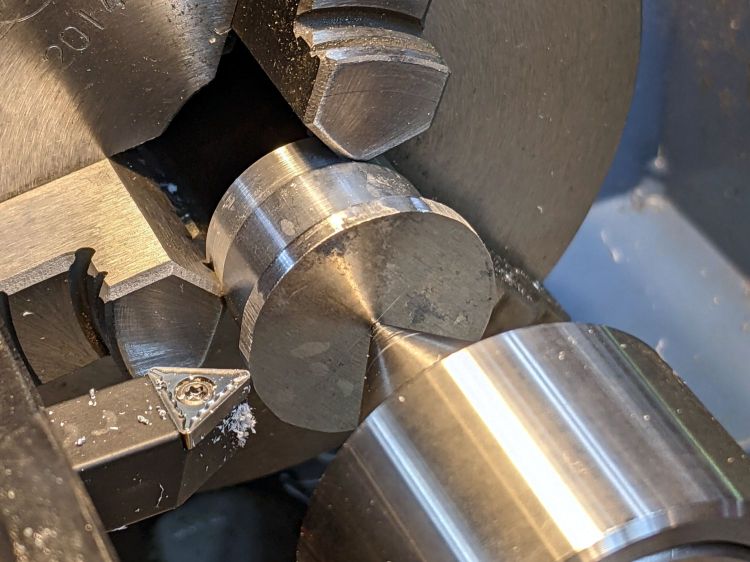
    It actually worked pretty well, although next time I’ll skip the sandpaper, affix the disk directly to the double sided duct tape, and be done with it.

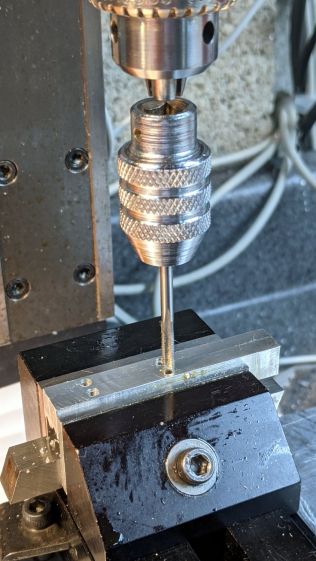
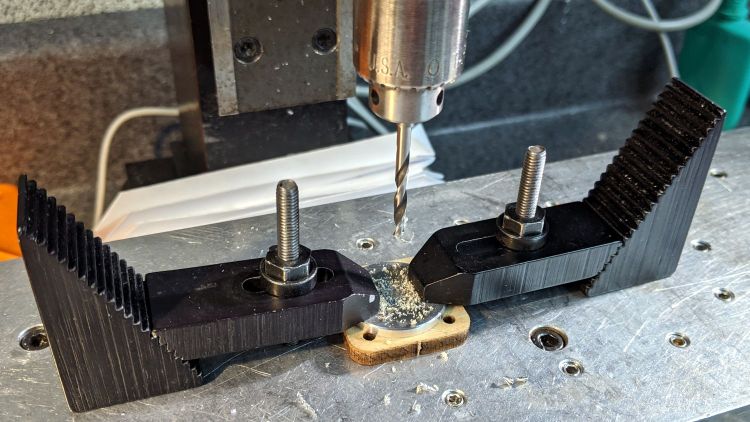
    Line up the center punch dimple and drill a hole for the M3 screw:

    1 W Amber Running Light - end cap drilling
    1 W Amber Running Light – end cap drilling

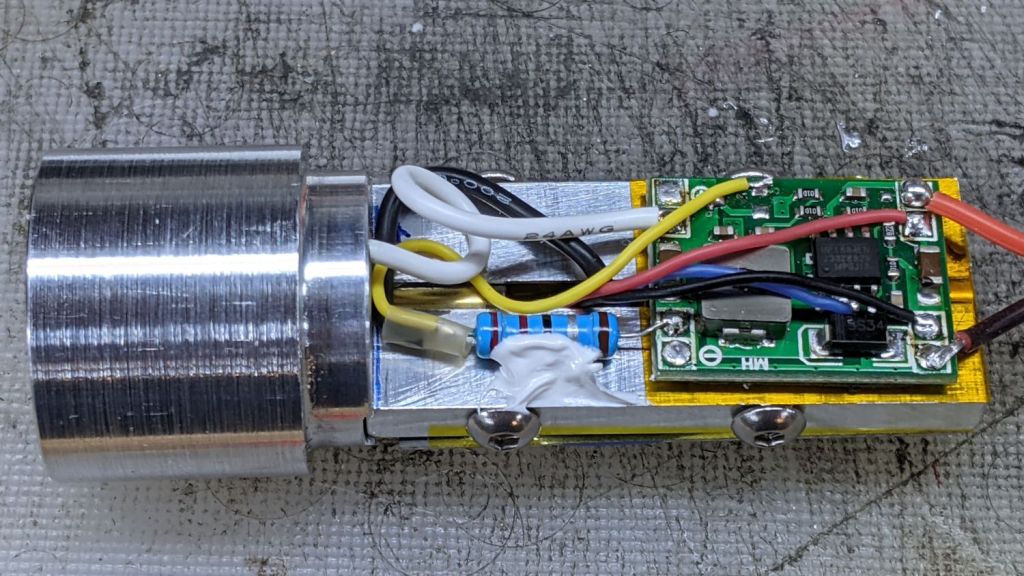
    The power cable port turned into a little slot bandsawed into the edge of the disk with the sharp edges filed off.

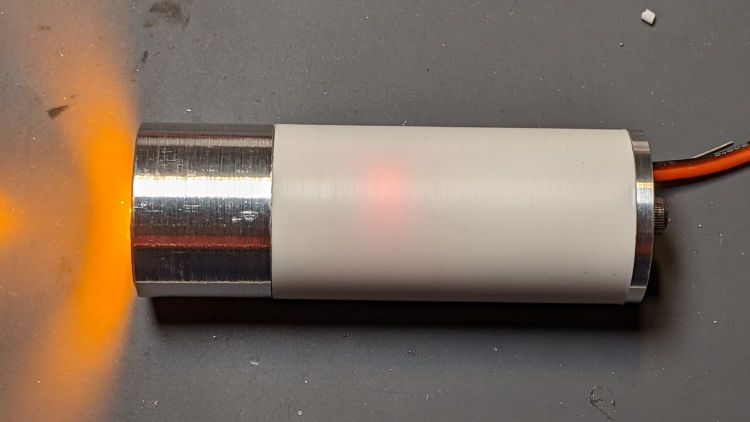
    Basically, the thing needs some road testing before I build one for real …

  • Tour Easy 1 W Amber Running Light: Circuitry

    Tour Easy 1 W Amber Running Light: Circuitry

    With the internal slab attached to the 1 W LED heatsink, some double-sided foam tape affixes an Arduino Nano to one side of the slab:

    1 W LED Running Light - Arduino side
    1 W LED Running Light – Arduino side

    The MP1584 regulator and its 2.2 Ω current-sensing resistor (tacked down with acrylic adhesive) go on the other side:

    1 W LED Running Light - Regulator side
    1 W LED Running Light – Regulator side

    The Arduino and regulator draw power from the Bafang motor controller’s 6.3 V headlight circuit. The 2.2 Ω resistor sets the LED current to 360 mA = 900 mW. The blue wire connects the Arduino’s default LED output pin (D13) to the regulator’s Enable input (pin 2) to allow programmatic blinkiness.

    The end view shows everything Barely Fits™:

    1 W LED Running Light - internal assembly
    1 W LED Running Light – internal assembly

    All it needs is a rear cover of some sort …

  • Tour Easy 1 W Amber Running Light: Internal Plate

    Tour Easy 1 W Amber Running Light: Internal Plate

    A semi-scaled doodle laying out an Arduino Nano and the MP1584 regulator board suggested they might fit behind the heatsink with the 1 W LED:

    Amber running light - board layout doodle - side
    Amber running light – board layout doodle – side

    A somewhat more detailed doodle of the end view prompted me to bore the PVC pipe out to 23 mm:

    Amber running light - board layout doodle - end
    Amber running light – board layout doodle – end

    The prospect of designing a 3D printed holder for the boards suggested Quality Shop Time combined with double-stick foam tape would ensure a better outcome.

    So I bandsawed the remains of a chunky angle bracket into a pair of rectangles, flycut All The Sides to square them up, and tapped a pair of M3 holes along one edge of each:

    1 W LED Running Light - baseplate tapping
    1 W LED Running Light – baseplate tapping

    The other long edges got the V groove that killed the Sherline’s Y axis nut:

    Sherline Y-Axis Nut Mishap - setup
    Sherline Y-Axis Nut Mishap – setup

    The groove holds a length of 4 mm OD (actually 5/32 inch, but don’t tell anybody) brass tubing:

    1 W LED Running Light - baseplate trial fit
    1 W LED Running Light – baseplate trial fit

    The M3 button head screws are an admission of defeat, as I could see no way of controlling the width + thickness of the aluminum slabs to get a firm push fit in the PVC tube. The screws let me tune for best picture after everything else settled out.

    A little more machining opened up the top of the groove:

    1 W LED Running Light - baseplate dry assembly
    1 W LED Running Light – baseplate dry assembly

    A short M3 button head screw (with its head turned down to 4 mm) drops into the slot and holds the slab to the threaded hole in the LED heatsink. The long screw is holding the threaded insert in place for this dry fit.

    I doodled a single long screw through the whole thing, but having it fall off the heatsink when taking the rear cover off seemed like a Bad Idea™. An M3 button head screw uses a 2 mm hex key that fits neatly through the threaded insert, thereby making it work.

    Butter it up with epoxy, scrape off the excess, and let things cure:

    1 W LED Running Light - baseplate curing
    1 W LED Running Light – baseplate curing

    This was obviously made up as I went along …

  • Naming Is Hard

    A recent update to the X Windowing System (or whatever it’s called) once again changed the names of its monitors / displays / output devices, so that my startup script no longer confined the tablet to the landscape display.

    In mostly reverse chronological order, here are various commands I’ve puzzled out:

    #xsetwacom --verbose set "HUION Huion Tablet stylus" MapToOutput "DP1-8"
    xsetwacom --verbose set "HUION Huion Tablet stylus" MapToOutput "DP-1-8"
    #xsetwacom --verbose set "HUION Huion Tablet Pen stylus" MapToOutput "DP-1"
    #xsetwacom --verbose set "Wacom Graphire3 6x8 Pen stylus" MapToOutput "DP-1"
    #xsetwacom --verbose set "Wacom Graphire3 6x8 Pen stylus" MapToOutput "HEAD-0"
    #xsetwacom --verbose set "Wacom Graphire3 6x8 Pen eraser" MapToOutput "DP-1"
    #xsetwacom --verbose set "Wacom Graphire3 6x8 Pen eraser" MapToOutput "HEAD-0"
    

    Over the last two years, the display name changed from DP-1 to DP-1-8 to DP1-8, and back to DP-1-8. I grew accustomed to this with the Wacom tablet (HEAD-0‽)and now know where to look, but I still have no idea of the motivation.

    Aaaand the tablet’s stylus name? The Wacom names were stable, but the Huion names apparently come from the Department of Redundancy Department.

  • Guten Tag, Deutchland!

    Guten Tag, Deutchland!

    Mostly, this blog ticks along with 400 to 500 page views per day, with 300-ish visitors looking at a page or two each.

    This week, something happened:

    Blog Stats - 2021-08-28
    Blog Stats – 2021-08-28

    Both of those spikes came from Germany:

    Blog Countries - 2021-08-28
    Blog Countries – 2021-08-28

    Traffic spikes generally come from a single post getting fifteen minutes of Reddit fame, with a zillion visitors hitting a specific page.

    In this case, a German “visitor” read nearly all of my 4461 posts on two days: 822 + 3561 = 4383. I’m reasonably sure no human finds my writing that interesting, so it’s likely a scraper capturing my text for the purposes of spinning it into a blog-like site with “unique content” for the purposes of SEO.

    Perhaps the first traffic spike was a targeting run?

    I’ll never know the rest of the story, but if you happen to stumble across a blog with an uncanny resemblance to this one, written by something with a wide vocabulary and no techie knowledge, let me know.

  • Tour Easy: Rear Brake Pads

    Tour Easy: Rear Brake Pads

    A horrible grinding sound from behind me suggested it was time to replace the Tour Easy’s rear brake pads:

    Tour Easy - worn rear pads - side
    Tour Easy – worn rear pads – side

    Yeah, about half of the “Wear Line” text remains visible; the actual line is long gone to dust.

    The retaining pin in the lower pad is twisted forward:

    Tour Easy - worn rear pads - face
    Tour Easy – worn rear pads – face

    The pad wore enough to let it scrape on the rim, which certainly can’t be good for it.

    The new Kool-Stop KS-MTTSA pads tout their leading wedge’s suitability for scraping mud off the rims, which isn’t a problem with my use case:

    Tour Easy - Kool-Stop MTTSA pads - 20873 miles
    Tour Easy – Kool-Stop MTTSA pads – 20873 miles

    The odometer reports 20873 miles since the last battery replacement fumble.

  • Arduino MEGA Debugging LEDs

    Arduino MEGA Debugging LEDs

    Kibitzing on a project involving an Arduino Mega (properly MEGA, but who cares?) with plenty of spare I/O pins led me to slap together a block of LEDs:

    Arduino Mega Debugging LEDs
    Arduino Mega Debugging LEDs

    The excessive lead length on the 330 Ω resistors will eventually anchor scope probes syncing on / timing interesting program events.

    Not that you have any, but they’re antique HP HDSP-4836 tuning indicators: RRYYGGYYRR. If you were being fussy, you might use 270 Ω resistors on the yellow LEDs to brighten them up.

    A simple test program exercises the LEDs:

    /*
      Debugging LED outputs for Mega board
      Ed Nisley - KE4ZNU
      Plug the board into the Digital Header pins 34-52 and GND 
    */
    
    byte LowLED = 34;
    byte HighLED = 52;
    byte ThisLED = LowLED;
    
    //-----
    void setup() {
      pinMode(LED_BUILTIN,OUTPUT);
      
      for (byte p = LowLED; p <= HighLED; p+=2)
        pinMode(p, OUTPUT);
    
    //  Serial.begin(9600);
    }
    
    // -----
    void loop() {
      digitalWrite(LED_BUILTIN,HIGH);
      
      digitalWrite(ThisLED, HIGH);
      delay(100);
      digitalWrite(ThisLED, LOW);
     // delay(500);
    
      ThisLED = (ThisLED < HighLED) ? (ThisLED + 2) : LowLED;
    
    //  Serial.println(ThisLED);
    
      digitalWrite(LED_BUILTIN,LOW);
    }


    Nothing fancy, but it ought to come in handy at some point.