Ed Nisley's Blog: Shop notes, electronics, firmware, machinery, 3D printing, laser cuttery, and curiosities. Contents: 100% human thinking, 0% AI slop.
For reasons that surely made sense at the time, the Huion H610Pro (V2) tablet can recognize when it’s connected to an Android device’s USB port and enter a special mode where the stylus only responds in a phone-shaped portrait rectangle over on the left side:
Huion H610Pro (V2) Tablet – Android layout
There’s a Vulcan Nerve Pinch button push to force the tablet into Android mode if it doesn’t automagically get there on its own, but AFAICT there’s no way to force it out of Android mode.
It’s a USB 2.0 device, but I had plugged it into a USB 3.0 port on my desktop box, whereupon it would enter Android mode on pretty nearly every boot. The only way to coerce it back into normal mode was to unplug it, replug it, then manually run the xsetwacom incantation to restrict the coordinates to the portrait monitor.
I just discovered it works perfectly when plugged into one of the few USB 2.0 ports on the box.
Apparently, USB 3.0 ports keep the thing powered all the time, whereupon it doesn’t see the proper sequence of events (or, perhaps, sees the Android sequence) during the next boot. USB 2.0 ports don’t do that and it works fine all the time.
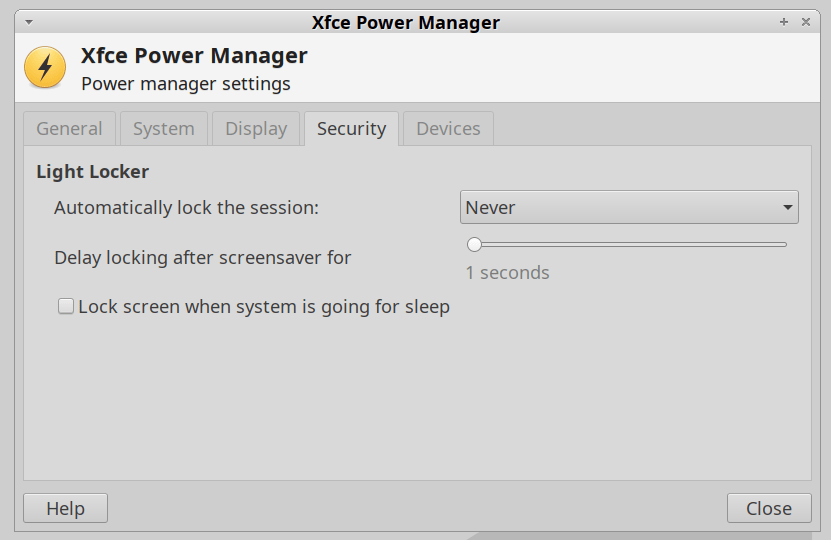
For reasons not relevant here, I was asked to tweak an XFCE 20.04 installation to not ask for a password after the screen power-saver kicks in. There’s no need for a screensaver with an LCD panel, so this should be straightforward, as per the XFCE 18.04 setup:
XFCE Power Manager Light Locker settings 18.04
Which had no effect.
For some reason, perhaps having to do with an upgrade from 18.04 to 20.04, Light Locker wasn’t actually handling the screen locking; some dedicated searching suggested this is a problem of long standing.
So tweak the Lock Screen settings of the screen saver that’s not in use:
XFCE Screensaver Lock Screen Preferences – 20.04
If you’re doing this remotely, adding a stanza to ~/.config/xfce4/xfconf/xfce-perchannel-xml/xfce4-screensaver.xml should suffice:
Just before midnight, the garage door opened, but, being early-to-bed folks, it wasn’t either of us. I pulled my fingernails out of the ceiling, padded out to the garage, verified there was nobody (not even a critter more substantial than a spider) inside, closed the door with the hardwired control button on the wall, and went back to bed. An hour later, the door opened again, then tried to take a bite out of me when I walked under it.
I pulled the opener’s plug, yanked its emergency release latch, lowered the door, and returned to bed; it was not a restful night.
The key to the diagnosis came from the little yellow LED on the back of the opener, just above the purple LEARN button:
Craftsman Garage Opener – indicator LED
In addition to indicating various programming states, it also lights when the opener’s radio receives a transmission from one of the remote controls. The LED was flickering continuously, showing that something was hosing the receiver with RF.
We have three remotes: one in the car, one on my bike, and one in the back room overlooking the garage. None of them worked reliably, suggesting the RF interference was clobbering their transmissions.
Disabling the remotes by removing their batteries (which were all good) also stopped the interference. Reinstalling the batteries one-by-one identified the rogue opener:
Craftsman Garage Opener – remote innards
The slip of paper let me isolate the battery terminal and stick a milliammeter in the circuit, which showed the remote was drawing about 1.5 mA continuously. I thought one of the pushbutton switches had gone flaky, but swapping an unused one for the main door switch had no effect.
I lost track of which remote it was, but it lived in the car or the back room for all its life, so it hasn’t suffered extreme environmental stress. I have no idea why it would fail late one night, although I admit to not monitoring the LED on a regular basis. For whatever it’s worth, in the weeks leading up to the failure, activating the opener sometimes required two pokes at the remote, but nothing bad enough to prompt any further investigation.
A new cheap knockoff remote arrived in few days and it’s all good.
Protip: different openers, even from the same company, use different RF frequencies. For Craftsman openers, the color of the LEARN button is the key to the frequency; purple = 139.53753 MHz.
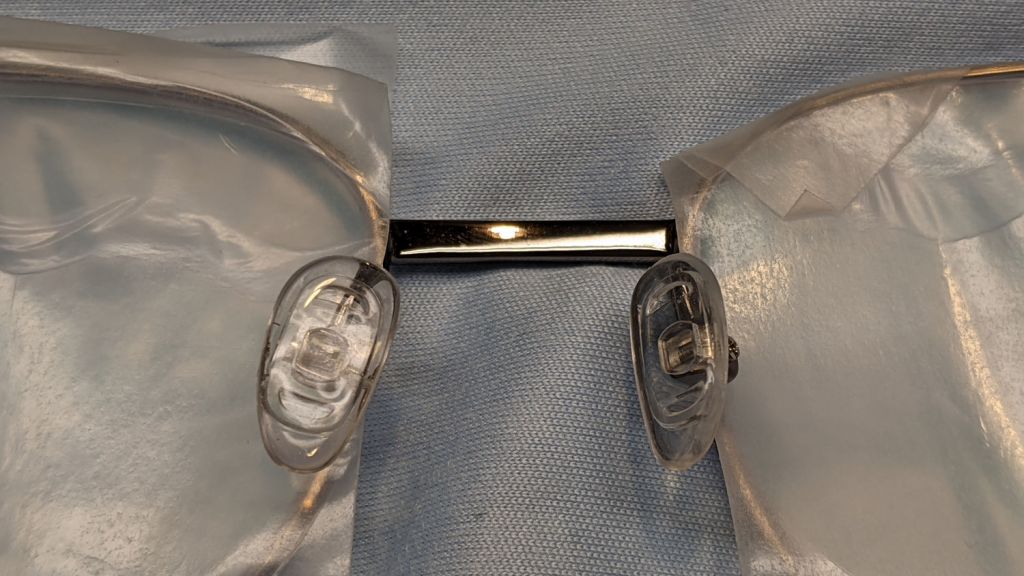
Start by removing the tiny screw and the nose pad:
Zenni glasses nosepad – socket
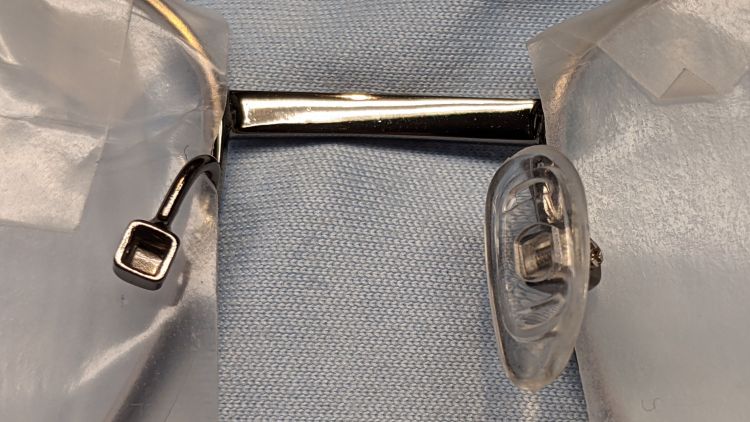
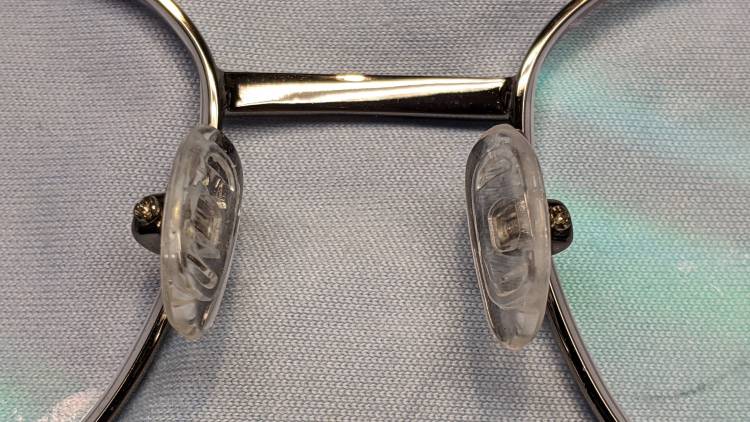
Apply a metal bending pliers (with the concave jaw around bottom of the socket), twist until it lines up properly, then reinstall the pad:
Zenni glasses nosepad – aligned
No big deal if you happen to have the pliers. Bonus: apply Parafilm to prevent scratching the lenses, OK?
For what it’s worth, the latest set of four spectacles with high-index (not polycarbonate) progressive lenses in metal frames cost a bit over $200 delivered. The last time around, two specs cost a bit more than half that.
On the other paw, I’ve been repairing Mary’s collection of full-frontal retailglasses for quite a while, because she’s frustrated with making multiple trips to have The Nice Man repeatedly apply final tweakage.
Despite carrying a glass-fronted gadget in my pocket for most of the past two decades, this is the first time I’ve done this:
Pixel 3a screen protector – as broken
Turns out you can’t trust a rolling seat on a slightly unlevel surface, as shifting your weight can let the thing roll out from under you with no warning. If you’re taking a picture at the same time, the phone reaches the impact point before your hand: even a nice case with bumpers all around won’t be quite enough protection.
I was tempted to leave it un-fixed as a constant reminder to not do that again, but the broken glass was rough to the touch and interfered with Android’s swipe-upward gestures.
Fortunately, the tempered-glass screen protector absorbed the energy without damage to the actual screen:
Pixel 3a screen protector – sidelit
A thin plastic layer holds the protector’s fragments together; I hadn’t known it was a two-layer structure.
Being that type of guy, I had a spare protector in a desk drawer and managed to apply it without trapping any bubbles or fuzz underneath.
It’s been hiding back there since the first (attempted) use showed it wasn’t a quadruped:
Erick Magna Holder – as-delivered stance
Grabbing the other end in the bench vise and whacking the top of the offending leg with a brass persuader pretty much lined it up. Closer inspection showed a problem with the push-to-detach lever:
Erick Magna Holder – rivet pivot
The rivet head and thin washers extend a bit beyond the circular arc, with the rivet holding the leg above whatever it’s supposed to stick to. I think the scarring on the rivet was an attempt to improve the situation, perhaps during a QC adjustment session, that didn’t quite work.
The hole through the leg is a touch under 4 mm and the Big Box o’ Random Small Screws disgorged a 6-32 screw with what might have been a 5/32 inch = 4 mm nominal = 3.8 mm actual shoulder of exactly the right length:
Erick Magna Holder – 6-32 screw clearance
The screw head flange cleared the floor, but wasn’t much of an improvement over the rivet. I eventually chucked it in the lathe and removed the flange & hex-head corners, an improvement you won’t see here.
Even with the frame whacked into alignment, all four feet didn’t contact the surface plate along their entire lengths. Absent a surface grinder, I deployed a big blue Sharpie and the largest file on hand:
Erick Magna Holder – filing base
Iterating Sharpie and file eventually knocked off enough of the high spots to make it Good Enough™ for the intended purpose, which is definitely notprecision metrology:
Erick Magna Holder – bottom filed
Those chunky cross-pieces are Old School alnico magnets, which is the only reason a simple lever can pry it off a steel plate.
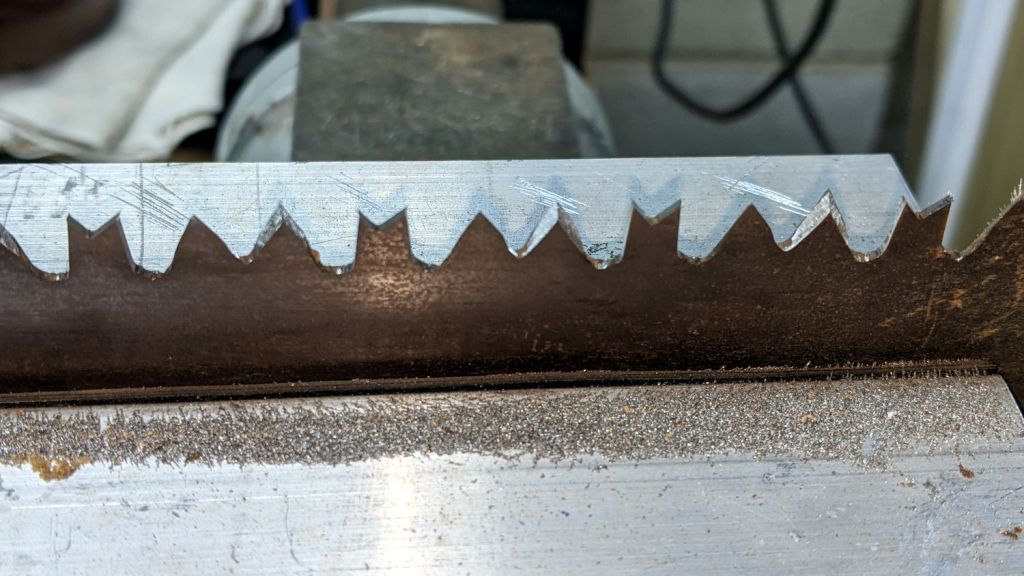
As part of a recent homeowner project, I applied a file to dull pruning saw that, as far as I can recall, Came With The House™ and has been untouched for decades:
Pruning Saw sharpening – top view
Yeah, that’s a lot of steel filings; it was really really dull. Notice how they’re neatly lined up toward the blade?
It looks better from the side:
Pruning Saw sharpening – side view
Despite my crude technique, it cuts wood like a hot knife through butter.