According to the manual, which I have hitherto had no reason to doubt, our non-turbo 2015 Subaru Forester has a 15.9 gallon fuel tank:

One screen shown on the dashboard’s Multi-Function Display gives the current mileage and estimated range:
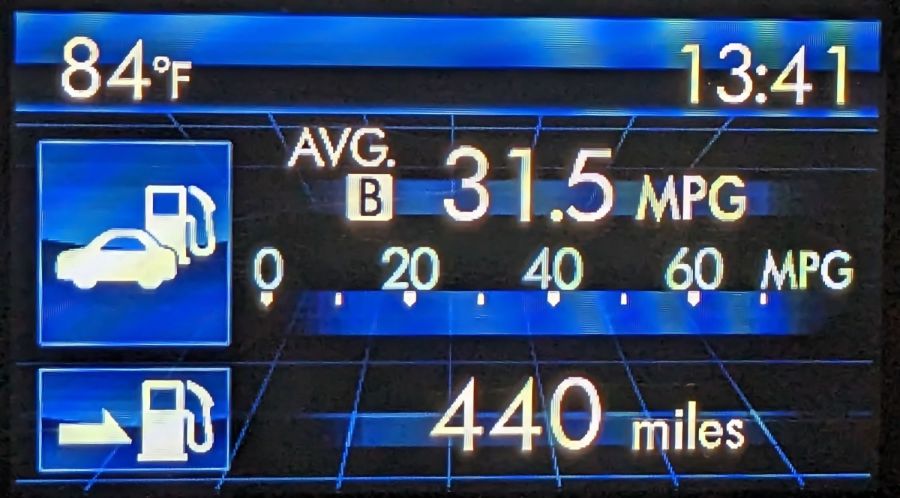
Dividing those two numbers gives you 13.97 gallons, the current fuel level. As you’d expect, should the average miles per gallon change, the range will change accordingly.
The trip odometer says we have driven 72.8 miles since I filled the tank. Dividing that by the average mpg gives 2.3 gallons, so the tank could possibly hold 16.2 gallons, which, given all the averages involved, is reasonably close to the 15.9 gallons shown in the manual.
Being that type of guy, I have a spreadsheet tallying each fillup since the car was new:
- 8.1 gal average
- 7.5 gal median
- 13.9 gal maximum
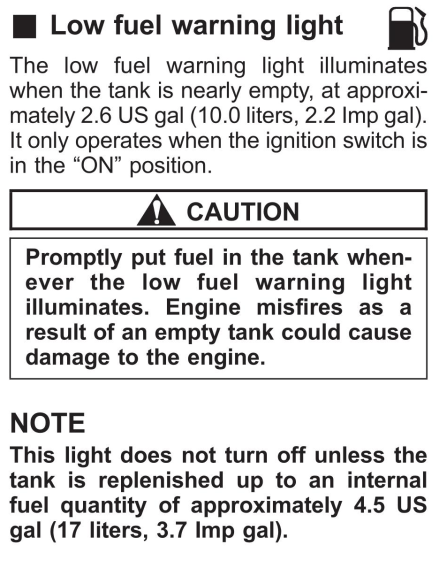
Long ago, my father taught me to fill the tank when the needle got halfway down and I’ve been doing so ever since. As a result, we have only rarely seen the Low Fuel Warning Light:
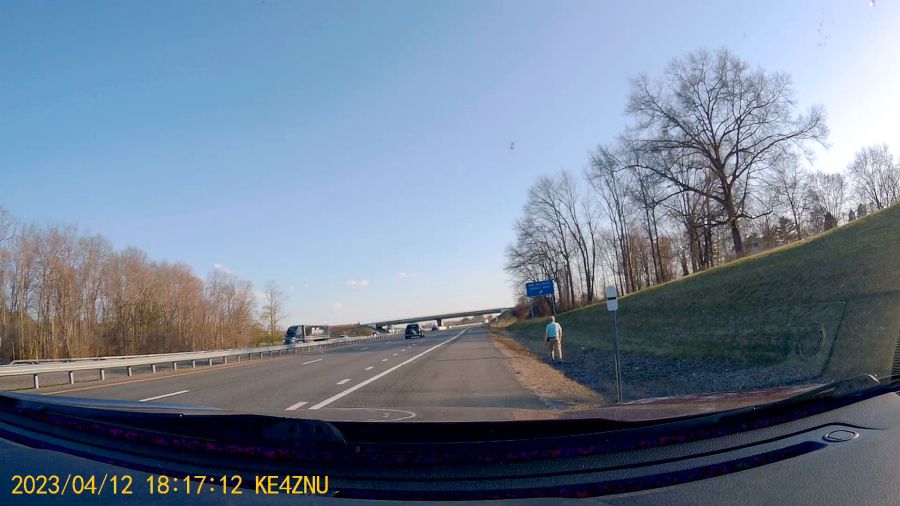
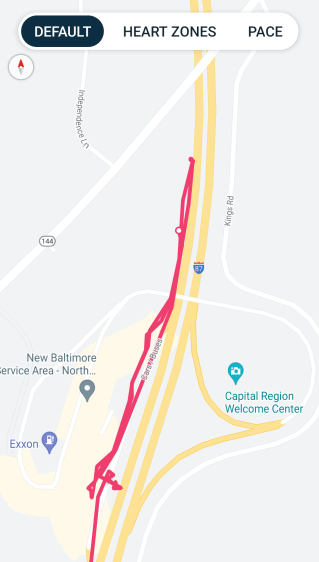
A concatenation of unavoidable events put us southbound on I-87 when that light went on. Given the estimated range of 70-ish miles, I planned to refuel at the New Baltimore Service Area, about a dozen miles ahead.
The engine shut down and all the dashboard warning lights lit up with the Service Area Ahead sign in view:
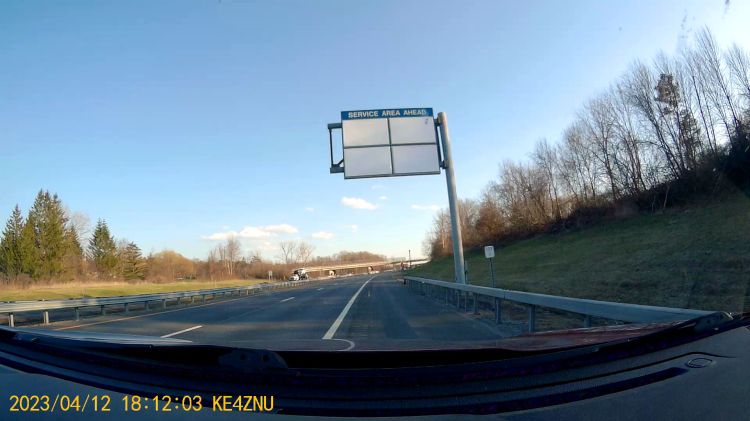
All the “facilities” are blank because they’re rebuilding the whole place, with the gas station remaining open.
So I slapped the shifter into neutral and we drifted slowly along the shoulder, under the bridge visible ahead, and eventually came to a halt at the beginning of the exit lane.
There was only one thing to do:
Some storytelling later:

Just because I could:
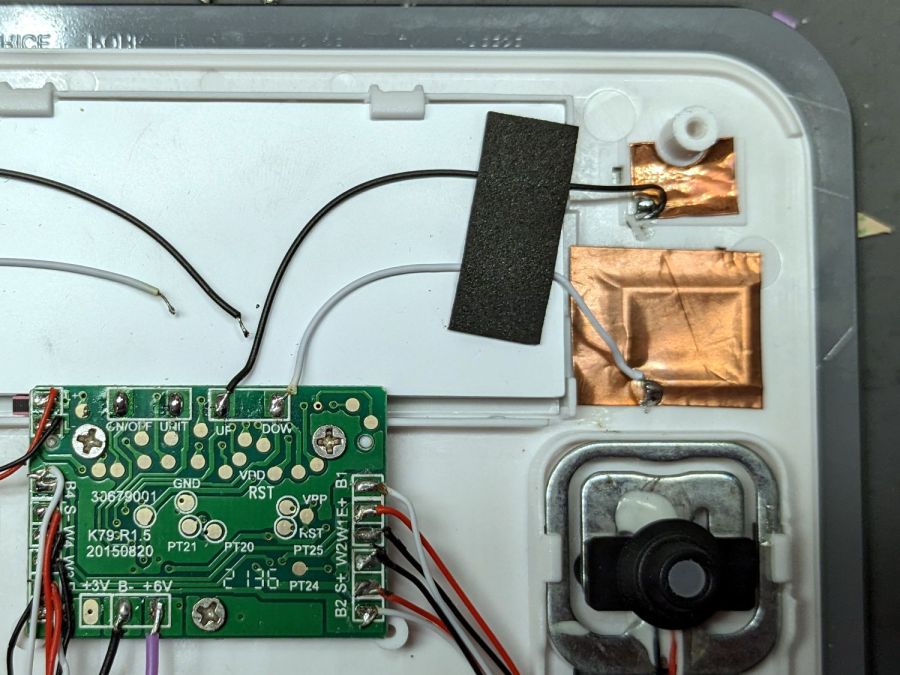
For what are, I trust, understandable reasons, I started the tracker after I began hiking and forgot to turn it off before driving away.
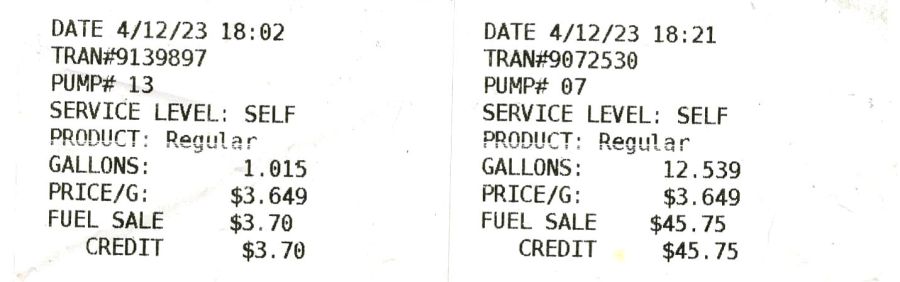
After figuring out the devilishly complex spring-loaded anti-spill spout on the gas can, we drove 1500 feet to the Service Area:
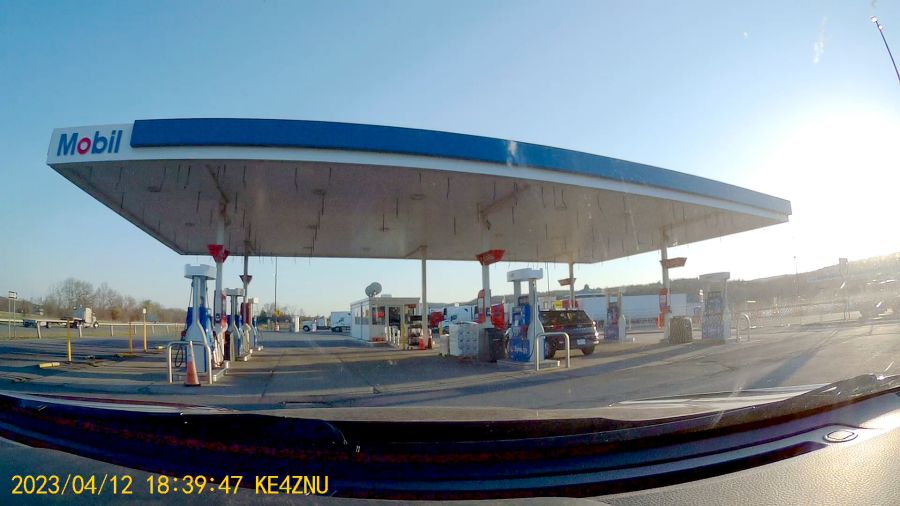
As usual, I filled the tank until the nozzle automatically shut off, for a total of 13.554 gallons in two transactions:
Now, it is possible the Forester fuel system has another 2.3 gallons tucked away somewhere, but if that reserve doesn’t make the wheels go around, it’s not doing me the least bit of good.
The fact that I’ve occasionally added just short of 14 gallons suggests the estimated remaining capacity depends strongly on the average mileage up to that point and I have come very very close to running out of gas on several occasions.
As far as I can tell, the usable fuel capacity is a scant 14 gallons and the Low Fuel Light goes on with, at most, a dozen more miles in the tank.
This is the second time in more than half a century of driving I’ve run out of gas.
My father was right and I shall henceforth mend my wayward behavior.