Ed Nisley's Blog: Shop notes, electronics, firmware, machinery, 3D printing, laser cuttery, and curiosities. Contents: 100% human thinking, 0% AI slop.
So the oven igniter I installed in January failed to ignite the oven when its current draw fell far enough below the valve’s 3.3 A minimum:
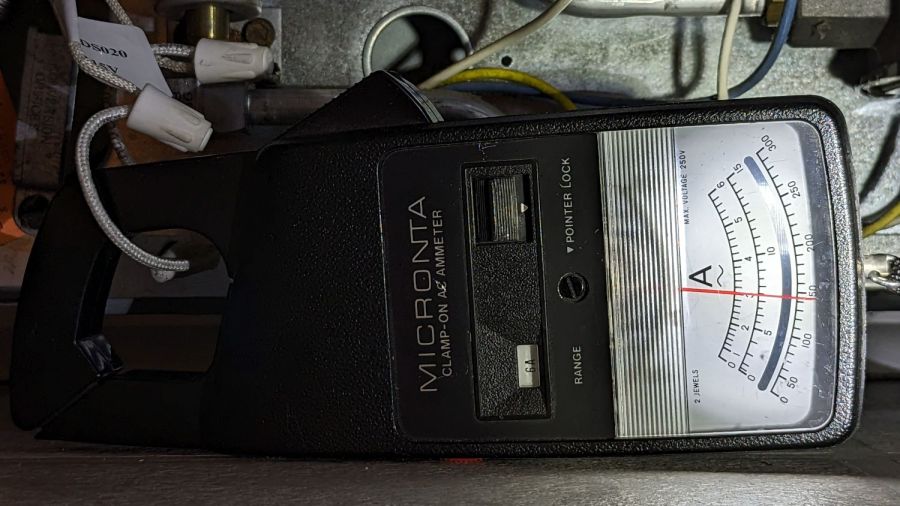
Oven Igniter – 2.3 A current
Of course, the seller no longer offers that particular igniter.
I described the problem:
The igniter just failed. The oven gas valve requires 3.3 to 3.6 amps to open, but this igniter now draws only 2.3 amps, as shown by the clamp-on current meter.
Because of the low current, the valve does not open and the oven does not heat.
The igniter should last more than five months! How do I go about getting a replacement or a refund? Thanks …
Which generated pretty much the reply you’d expect:
We are very sorry, because your product is 5 months from the date of purchase, we cannot offer you a refund. Please purchase another replacement.
Which made me a bit salty:
” the best quality for greater power connection, higher load and longer service life “
” We stand by our products, and our customers are our focus as a business. If you have any quality problem, please contact Funmit customer service team in time, and we will try our best to solve your problems “
So five months is “longer service life” with “the best quality”.
Bonus: now I understand what “try our best” means, too.
But to no avail:
Have a nice day! We are glad to serve you. We are very sorry that you are not satisfied with our products. Amazon.com Return Policy:Amazon.com Voluntary 30-Day Return Guarantee: You can return many items you have purchased within 30 days following delivery of the item to you. Our Voluntary 30-Day Return Guarantee does not affect your legal right of withdrawal in any way. However, the product has passed the return and exchange period, so it cannot provide you with a warranty. If you have other questions, please contact us in time, we will serve you wholeheartedly. Thank you. Sincere wishes, –By Funmit
So I bought a slightly more expensive igniter from a different randomly named seller that draws a slightly under-spec but entirely typical 3 A:
Oven Igniter – 3.0 A initial current
This one, however, allegedly comes with a one year warranty:
Quality you can Trust – All Snap Products are made with premium materials and are tested so they last Buy with Confidence – Snap Supply Parts always come with a 1 Year Warranty
Which surely requires the seller remaining in business until then.
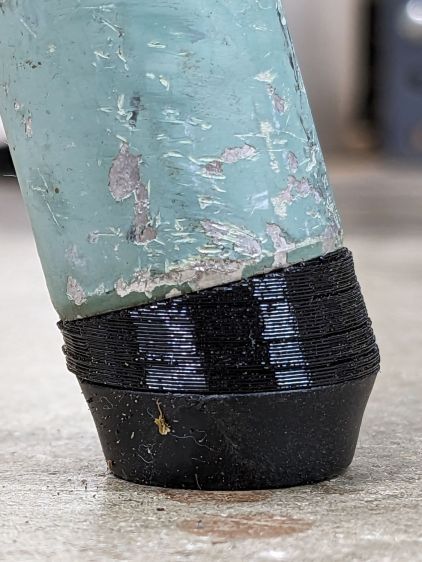
Some years ago we acquired a free quartet of aluminum-frame patio chairs in need of new straps and feet. Eventually enough straps broke to force me to re-strap the things and I finally got around to replacing the badly worn OEM feet:
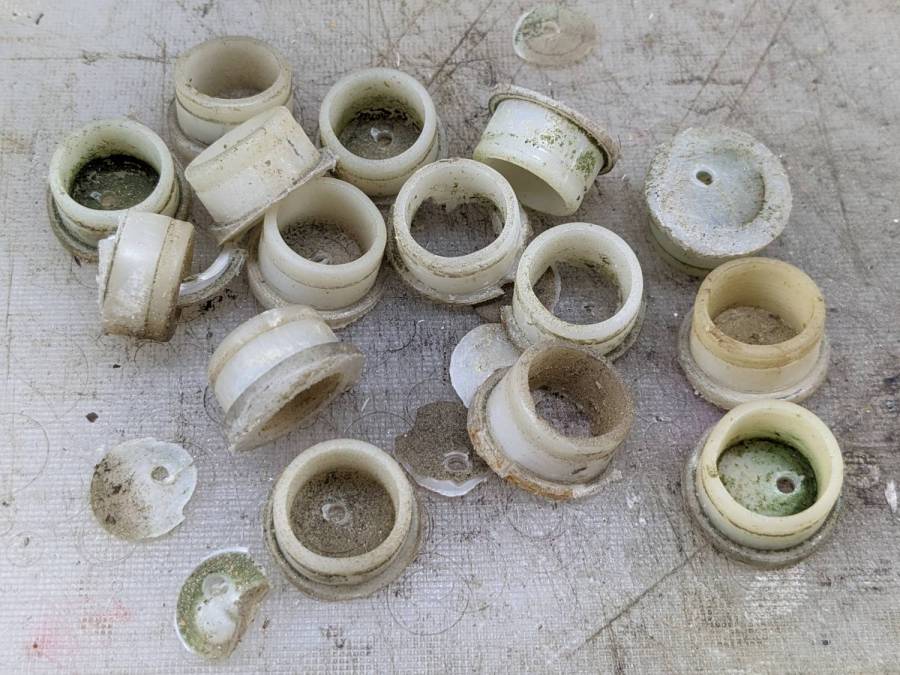
Patio Chair Foot Adapter – OEM feet
The small drilled holes let me yoink most them out with sheet-metal screw attached to a slide hammer, then apply the Designated Prydriver to the most recalcitrant / broken ones.
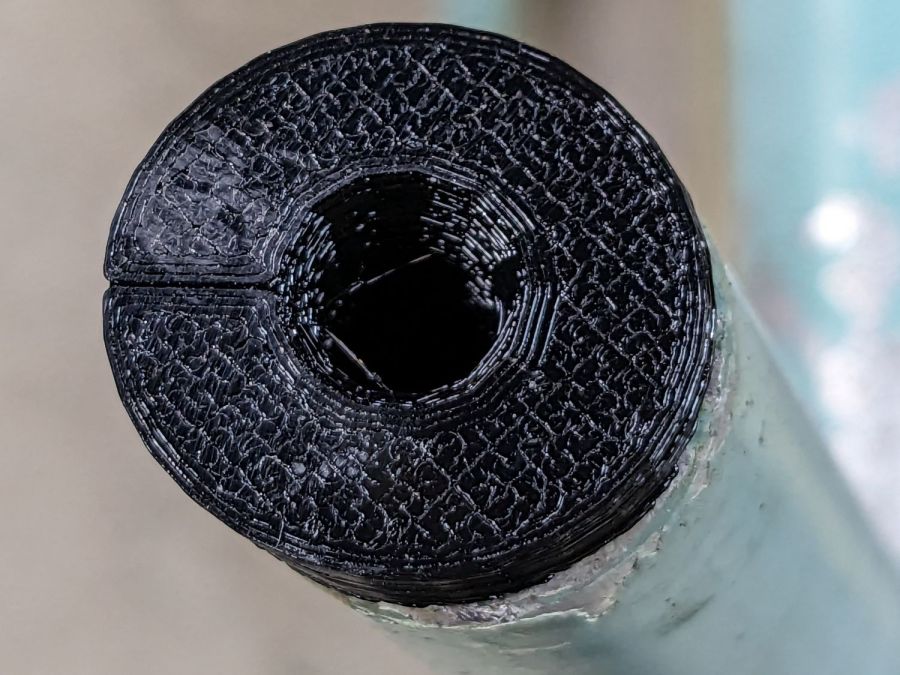
Some feet had worn enough to expose the aluminum tubes, but most had at least a thin layer of plastic:
Patio Chair Foot Adapter – OEM foot erosion
Obviously, I should have stripped and repainted the frames (if that’s possible, as they’re probably powder-coated), but a man’s gotta know his limitations and this job needed to get done.
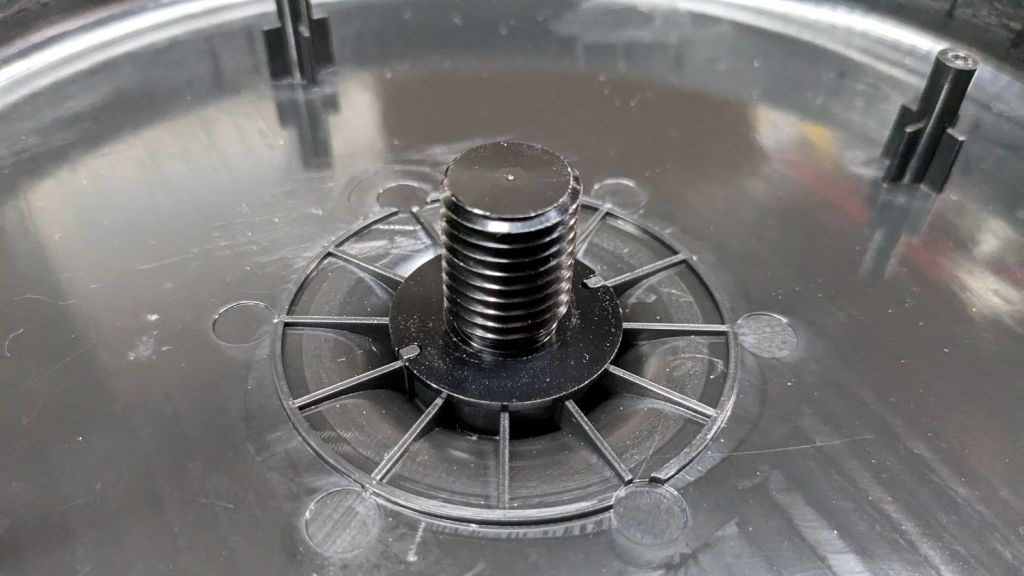
One might think patio furniture replacement feet are cheap & readily available, but no amount of keyword engineering produced search results with any degree of assured fit, so I conjured adapters for screw-in feet from the vasty digital deep:
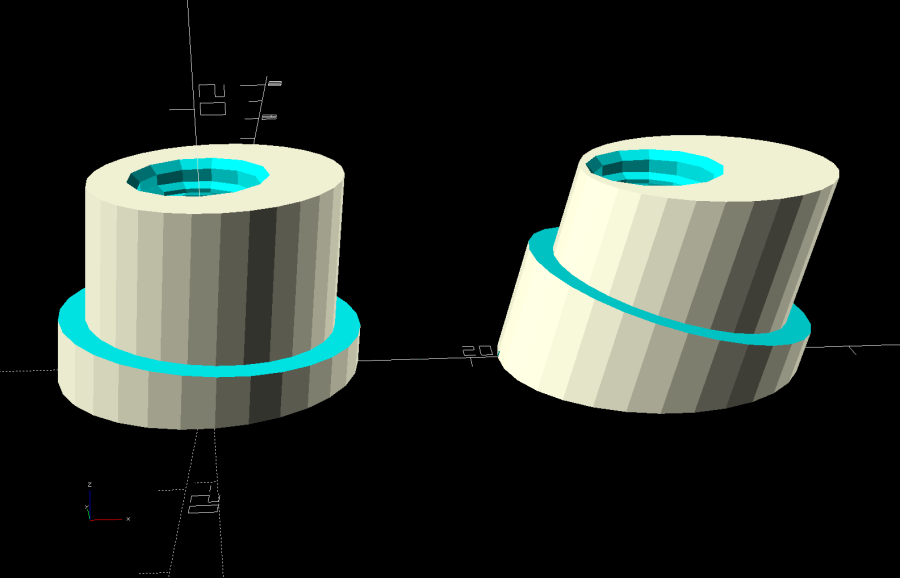
Patio Chair Foot Adapters – solid models
This was a long-awaited opportunity to explore the BOSL2 library and it worked wonderfully well. Each adapter is whittled from a huge hex nut with threads that perfectly fit the M8×1.25 stud, which stands vertically through the middle of the (slightly oval) bottom surface parallel to the floor.
The front tubes have a 5° angle with respect to the vertical:
Patio Chair Foot Adapter – front
And the rear tubes are 15° off:
Patio Chair Foot Adapter – rear
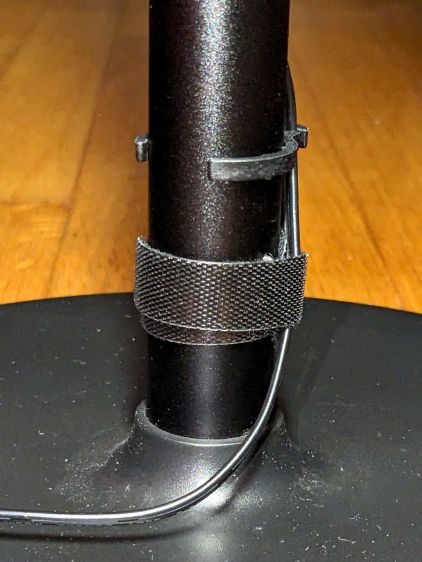
Each adapter has an orientation notch pointing toward the front of the front leg and the rear of the rear leg:
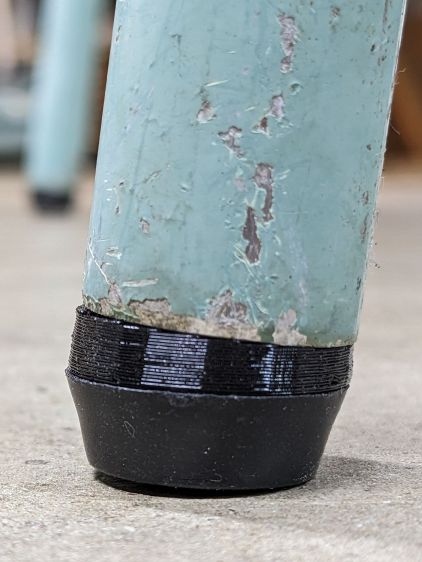
Patio Chair Foot Adapter – orientation notch
I expected to apply adhesive on the inside and outside of the adapters, but they tapped firmly into place inside the legs and the studs screwed firmly into them, so we’ll see how they survive in actual use. I expect the studs to rust after a while, but that might not be the most awful thing ever to happen.
This file contains hidden or bidirectional Unicode text that may be interpreted or compiled differently than what appears below. To review, open the file in an editor that reveals hidden Unicode characters.
Learn more about bidirectional Unicode characters
An unfortunate confluence of weather, schedule, and enthusiasm led to mowing all the yard in one session:
Mowing pattern – 2023-05-27
I managed to remember to pause the tracker during a break in the middle, so it’s really just shy of three wall-clock hours from start to finish. It’s amazing how much work you (well, I) can get out of 100 mg of caffeine.
Despite what you see here, the path on what’s euphemistically called “our lawn” show a much more organized solution to the problem of covering our property with non-overlapping foot-and-a-half stripes. As with my leaf-shredding track, I neither venture into the road nor mow the neighboring yards.
Because the lamp has a big nut apparently holding the pole socket to the base, I figured a dab of threadlock on the pole or the base would solve the problem: lock the pole to the socket, then remove the nut to disassemble when needed. That turned out to be a Bad Idea™.
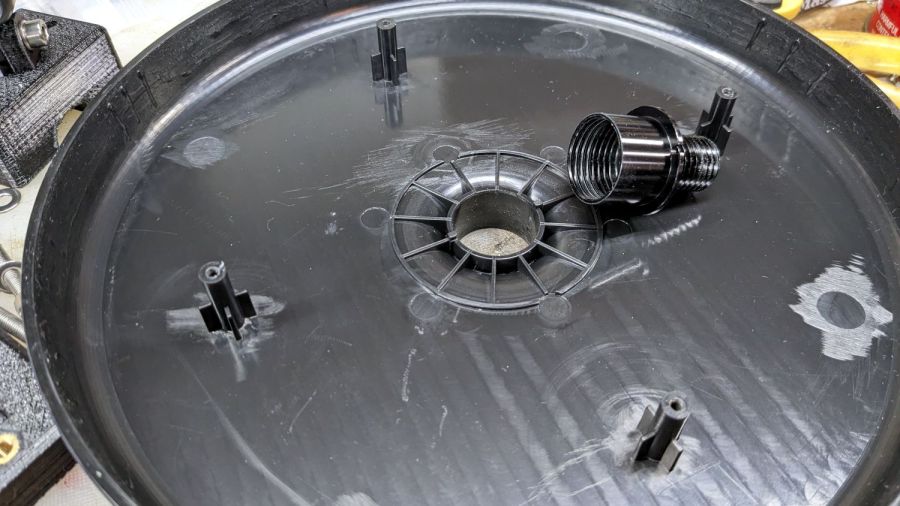
The socket is a plastic part separate from the base cover plate:
Miroco floor lamp base – socket
A pair of keys prevent the socket from rotating in the hole:
Miroco floor lamp base – socket in place
Four threaded bosses (two visible there) hold the rim of the cover to the weight, with the socket doing the hard work.
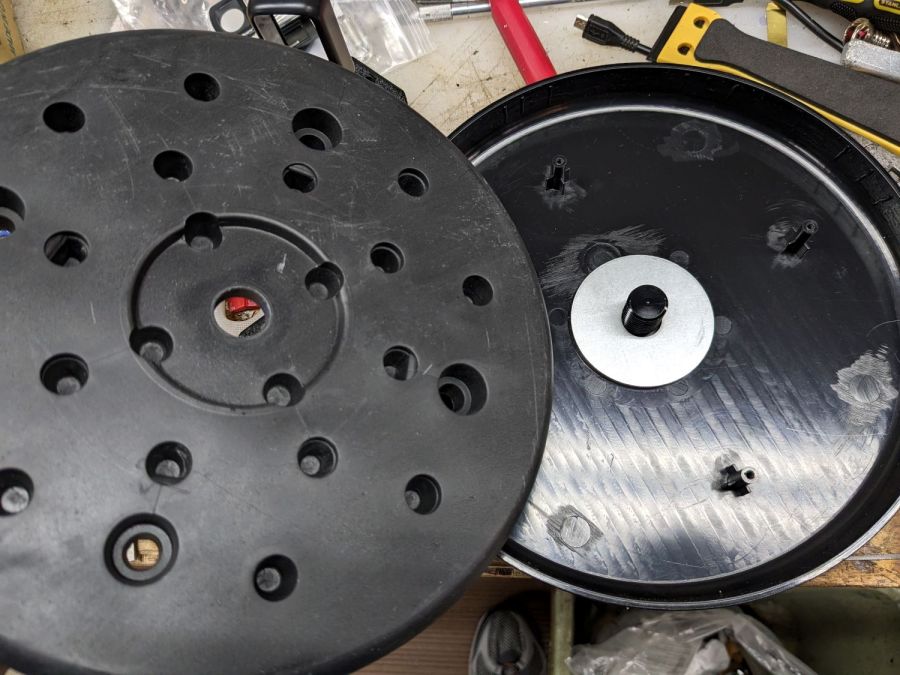
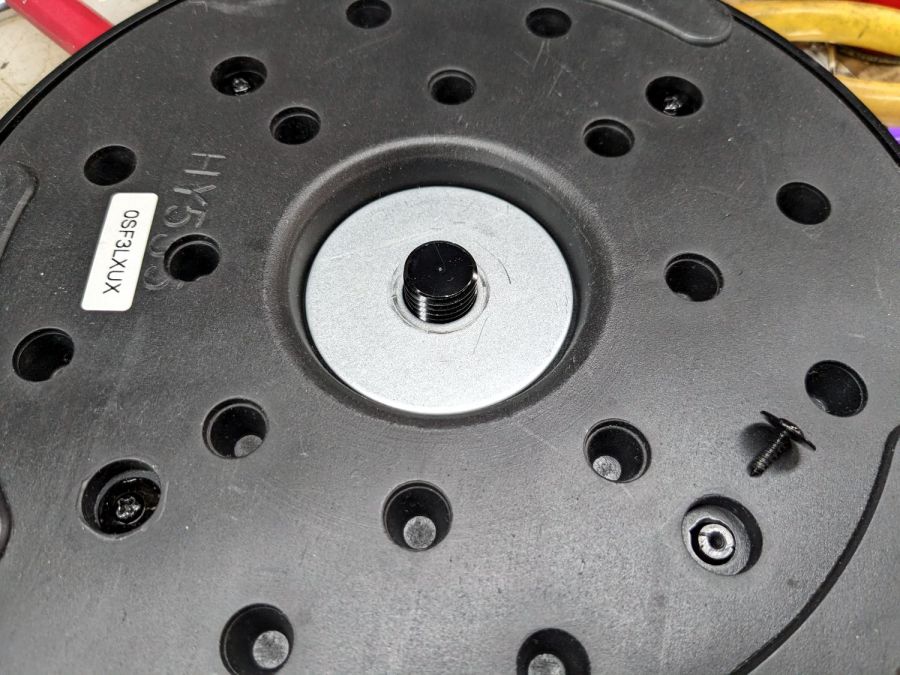
A fender washer atop the weight distributes stress from the pole:
Miroco floor lamp base – weight top washer
Another fender washer on the bottom of the weight lets the nut jam against steel, rather than soft plastic:
Miroco floor lamp base – weight bottom washer
FWIW, the nut is either a perfect 15/16 inch or, more likely, a sloppy 24 mm.
In any event, permanently locking the pole to that socket will also lock the pole to the base, with no way to dismantle the lamp when I must once again repair it.
Perhaps a wrap of PTFE tape on the threads will stiffen it enough?
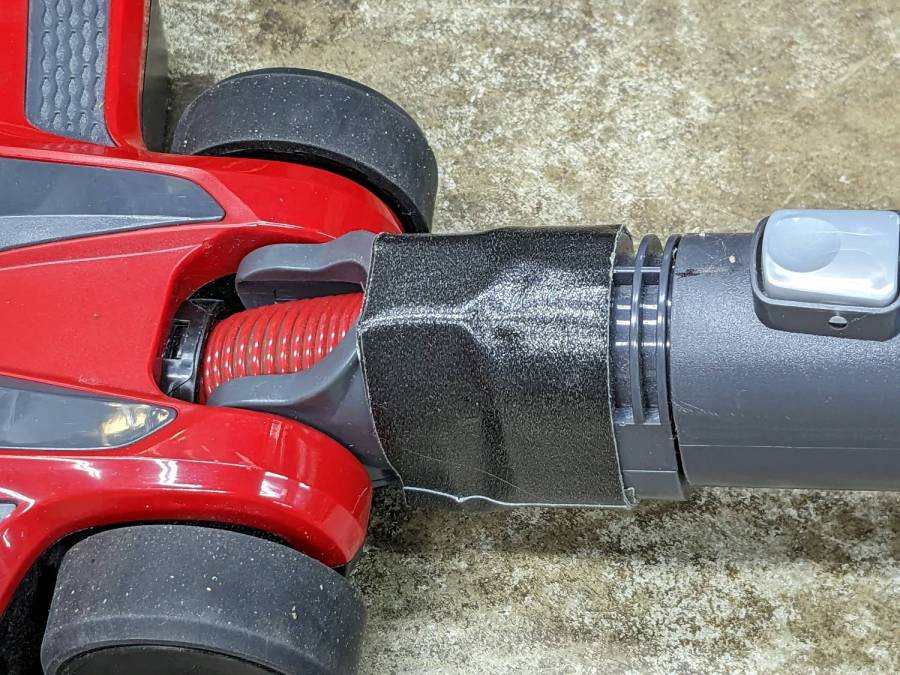
The knuckle joint on the Dirt Devil stick vacuum failed, so it followed us home instead of leaping into the trash:
Dirt Devil – broken swivel joint
Although the fitting seems to be made of ABS, it’s now missing major chunks of plastic in the high-stress areas, so rebuilding it seems not worth the effort.
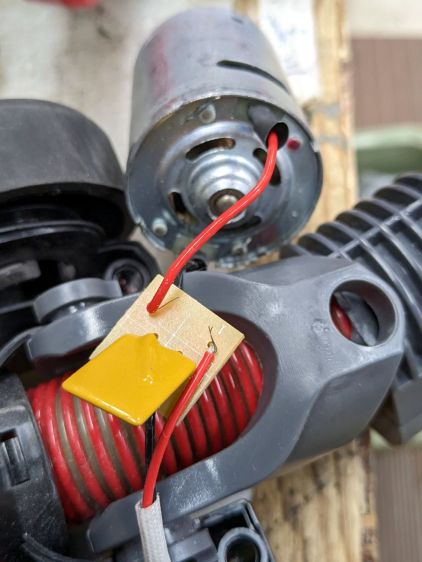
Because we don’t have any carpets and this one will never leave the basement, I extracted the carpet beater brush and its motor, only to find Yet Another Example of poor assembly practices:
Dirt Devil – stray strands
It’s a 12 V (-ish, I didn’t measure whatever comes out of the vacuum head) DC motor and those errant strands aren’t quite long enough to meet in the middle. The yellow rectangle is a thermal fuse that would be shorted out if the strands were a bit longer.
The broken joint lets the head swivel from side to side, but the elevation joint is still good. If I don’t expect too much, the thing might still suffice for extracting dust from under the benches:
Dirt Devil – taped joint
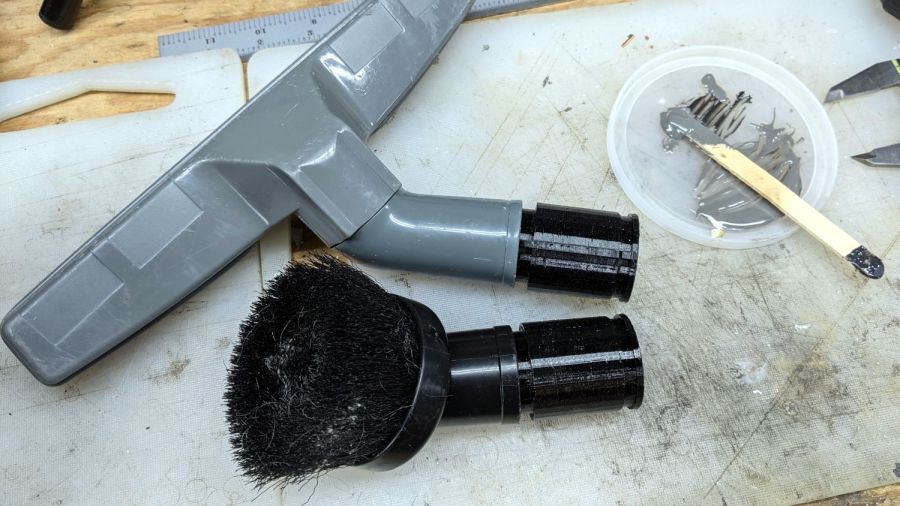
Worst case, I can swap in a classic floor brush using one of the adapters I made a while ago:
Dirt Devil adapters – assembled
That was easy, if only because I skipped the hard part …