The Smell of Molten Projects in the Morning

Ed Nisley's Blog: Shop notes, electronics, firmware, machinery, 3D printing, laser cuttery, and curiosities. Contents: 100% human thinking, 0% AI slop.

Tag: Repairs

If it used to work, it can work again

  • American Standard Kitchen Faucet: Ceramic Valve

    It seems everybody must disassemble an American Standard kitchen faucet to replace the spout seal O-rings, as my description of How It’s Done has remained in the top five most popular posts since I wrote it up in 2009.

    About two years ago, I replaced the valve cartridge with a (presumably) Genuine Replacement; unlike the O-rings, the original valve lasted for nigh onto a decade. A few weeks ago, the replacement valve began squeaking and dribbling: nothing lasts any more. Another (presumably) Genuine Replacement, this time from Amazon, seems visually identical to the previous one and we’ll see how long it lasts.

    I always wondered what was inside those faucets and, after breaking off the latching tabs in the big housing to the upper right, now I know:

    American Standard Faucet - disassembled
    American Standard Faucet – disassembled

    You get a bunch of stuff for twelve bucks! The stainless steel valve actuator is off to the right, still grabbed in the bench vise.

    The valve action comes from those two intricate ceramic blocks with a watertight sliding fit:

    American Standard Faucet - ceramic valve parts
    American Standard Faucet – ceramic valve parts

    In fact, you (well, I) can wring the slabs together, just like a pair of gauge blocks. That kind of ultra-smooth surface must be useful for some other purpose, even though I can’t imagine what it might be…
  • Kindle Fire Power Switch Rebuild

    The single moving part on my first-generation (2011) Kindle Fire tablet stopped working: the power switch became erratic, to the point where the only dependable way to turn the thing on required the USB charging cable. Obviously not a long-term solution.

    Having nothing to lose, I consulted the Internet’s vast steaming pile of advice on how to pop the Kindle’s cover, picked one, and ran with it. Basically, you jam a sharp tool into the end with the speakers, then crack the back off along both sides, leading to this:

    Kindle Fire - pre-teardown overview
    Kindle Fire – pre-teardown overview

    Things to note:

    • No need to remove the battery: pull the heavy connector straight out
    • Disconnect the battery first, before unplugging anything else
    • Most of the ribbon cable connectors have a white flip-up latch
    • You will break the ground shield from the flex PCB to the battery along the left edge
    • The antenna must make that 270° turn into the minuscule U.FL connector
    • The four-wire cable to the speakers has a pull-out connector in the lower right corner
    • The PCB backplate on the large video (?) connector in the upper right pulls straight up-and-out

    Remove the six obvious screws, pull the battery edge of the board upward, and rotate the whole affair out of the chassis:

    Kindle Fire - power LED board - in place
    Kindle Fire – power LED board – in place

    Protip: the power switch is not mounted on the tiny PCB (under the ribbon cable with the blue tab) sometimes advertised as the Power Button Board. That tiny PCB suspends an amber/green LED behind the visible button, but a yoke surrounds the LED to transfer the button motion to the power switch soldered to the CPU board. Replacing that board will not cure an erratic power switch; I think the entire CPU board is the FRU.

    Fortunately, I can actually see the power switch and know sorta-kinda what to expect.

    A bit of awkward multimeter probing showed the switch was defunct, with intermittent action and generally high resistance when pressed. I unsoldered the switch, verified that it didn’t work in isolation, and examined some likely candidates from the Big Box o’ Small Switches:

    Kindle Fire - potential power switches
    Kindle Fire – potential power switches

    Some could be made to fit and maybe actually function, with effort ranging from tedious to Really Hard.

    Then it occurred to me that maybe, just maybe, I could refurbish / clean / repair the Kindle’s switch contacts. Shaving off the two heat-staked plastic bumps on the front and prying the side latches outward produced an explosion of small parts:

    Kindle Fire - disassembled power switch
    Kindle Fire – disassembled power switch

    That’s after cleaning the expected grunge from the three contact strips in the body and the innermost of the two (!) buckling-spring contact doodads (bottom left). I scrubbed with the cardboard-ish stem of a cotton swab and, as always, a dot of DeoxIT Red, inserted the unused-and-pristine contact spring doodad (bottom right) first, and reassembled the switch in reverse order.

    The metal shell around the body has two locating tabs that fit in two PCB holes, giving the switch positive alignment and good strain relief. The front view shows the three human-scale components amid a sea of 0201 SMD parts:

    Kindle Fire - repaired power switch - front
    Kindle Fire – repaired power switch – front

    For completeness, the view from the battery side:

    Kindle Fire - repaired power switch - rear
    Kindle Fire – repaired power switch – rear

    It’s worth noting that you can see right through the 3.5 mm headphone jack, which accounts for the remarkable amount of dust & fuzz I blew out of the chassis. The overall dust sealing isn’t great, but after five years of life in my pocket, I suppose that’s to be expected.

    Installing the board requires holding all the cables out of the way (tape the antenna & speaker wires to the battery), aiming the USB connector into its cutout, rotating the battery edge of the board downward, pushing the mesh EMI shield along the battery upward to clear the board edge, not forcing anything, and eventually it slides into place.

    Insert cables, latch latches, plug in the battery, snap the rear cover in place, and It Just Works again. The power switch responds to a light touch with complete reliability; it hasn’t worked this well in a year.

    Bonus: To my utter & complete astonishment, disconnecting the battery for few hours had no effect on the stored data: it powered up just fine with all the usual settings in place. I expected most of the settings to live in the Flash file system, but apparently nothing permanent lives in RAM.

    Take that, entropy!

  • More Cheap eBay Hardware Failures

    Data points…

    Another knockoff Neopixel failed in the usual way, after a few days of operation: the first W2812B chip in the string gave off intermittent and random flashes of pure primary colors, the second was dead in the water. Replacing the first chip with Yet Another Knockoff from the same lot restored the tube to good health.

    Some oscilloscope probing revealed a pooched serial data output with no active pullup, so the output data rarely exceeded VCC/2 and generally wouldn’t be accepted by the downstream W2812B. Nothing to show for it, as I couldn’t be bothered to upload a scope shot. Maybe next time.

    One of the counterfeit FTDI USB-to-serial adapters in another tube base failed after a few weeks of operation, with symptoms ranging from hangs while downloading the Arduino program to readback verify mismatches. Replacing the failed adapter and the knockoff Arduino Pro Mini with a knockoff Arduino Nano (using a CH340 USB interface, presumably not a counterfeit) from a recently arrived envelope restored that tube to good health.

    All in all, those knockoff Neopixels have been a constant source of amusement; worth every penny just for the privilege of holding them up for ridicule. The “genuine” FTDI chips weren’t much of a surprise, but I am mildly surprised they work so poorly.

  • Miniblind Bottom Rail Caps

    A few days after installing the replacement cord caps, I bumped the bottom rail of the miniblind while opening the window and had one endcap disintegrate; apparently window hardware isn’t hardened against prolonged UV exposure. Who knew?

    Fortunately, I can fix that:

    Miniblind bottom rail caps
    Miniblind bottom rail caps

    Making the walls three threads wide provides enough room for a single solid infill thread:

    Miniblind Endcaps - Slic3r Preview
    Miniblind Endcaps – Slic3r Preview

    The exterior shape comes from a hull wrapped around six circles: four to define the corner radius and a pair that bump the center out by the calculated chord height. The interior shape comes from a pair of chord-radius polygonal circles (they only have three facets across the length of the inside wall) that fit the bottom rail almost perfectly.

    As always, natural PETG has a crystalline, slightly transparent, appearance:

    Miniblind bottom rail cap installed
    Miniblind bottom rail cap installed

    I should spring for some opaque white filament, but that way lies madness; I might start caring what these things look like.

    You can buy entire miniblinds for a few bucks a pop, but the last time we did that, they were different than the ones we had before. That wouldn’t matter if the standard miniblind mounting brackets fit our 1955 Anderson windows, but noooo they don’t: the custom adapters I machined for the first miniblind brackets, of course, didn’t fit the new miniblinds.

    Now I can just snap the replacement endcaps (and cord pulls) in place, declare victory, and move on.

    The OpenSCAD source code as a GitHub Gist:

    // Cap for miniblind cord and bottom rail endcaps
    // Ed Nisley KE4ZNU – September 2016
    Layout = "BaseEndCap"; // CordCap BaseEndCap
    //- Extrusion parameters – must match reality!
    ThreadThick = 0.25;
    ThreadWidth = 0.40;
    Protrusion = 0.1;
    HoleWindage = 0.2;
    //——
    // Dimensions
    OD1 = 0;
    OD2 = 1;
    LENGTH = 2;
    //———————-
    //- Build it
    if (Layout == "CordCap") {
    Cap = [9.0,16.0,25.0];
    Cord = [2.5,7.0,Cap[LENGTH] – 5];
    NumSides = 8;
    difference() {
    hull() { // overall shape
    translate([0,0,Cap[LENGTH] – Cap[OD1]/2])
    sphere(d=Cap[OD1],$fn=NumSides);
    translate([0,0,0.5*Cap[OD2]/2])
    sphere(d=Cap[OD2],$fn=2*NumSides); // round the bottom just a bit
    }
    translate([0,0,-Cap[LENGTH]/2]) // trim bottom
    cube([2*Cap[OD2],2*Cap[OD2],Cap[LENGTH]],center=true);
    translate([0,0,Cap[LENGTH] + 0.8*Cap[OD1]]) // trim top (arbitrarily)
    cube([2*Cap[OD1],2*Cap[OD1],2*Cap[OD1]],center=true);
    translate([0,0,-Protrusion])
    cylinder(d=Cord[OD1],h=(Cap[LENGTH] + 2*Protrusion),$fn=NumSides);
    translate([0,0,-Protrusion])
    cylinder(d1=Cord[OD2],d2=Cord[OD1],h=(Cord[LENGTH] + Protrusion),$fn=NumSides);
    }
    }
    if (Layout == "BaseEndCap") {
    Base = [25.2,9.0,12.2]; // base outside dimensions
    Edge = 8.0; // size of sqare ends
    CornerRadius = 0.75;
    Wall = 3; // wall thickness in threads
    ChordHeight = (Base[1] – Edge) / 2;
    ChordRadius = (pow(ChordHeight,2) + pow(Base[0],2)/4) / (2*ChordHeight);
    NumSides = 4*4;
    echo(str("Chord height: ",ChordHeight," radius: ",ChordRadius));
    difference() {
    linear_extrude(height=Base[2],convexity=2) {
    hull() {
    for (i=[-1,1], j=[-1,1])
    translate([i*(Base[0]/2 – CornerRadius + Wall*ThreadWidth),j*(Base[1]/2 – CornerRadius + Wall*ThreadWidth)])
    circle(r=CornerRadius,$fn=4*4,center=true);
    for (j=[-1,1])
    translate([0,j*(ChordHeight + Base[1]/2 – CornerRadius + Wall*ThreadWidth)])
    rotate(180/(2*4))
    circle(r=CornerRadius,$fn=2*4,center=true);
    }
    }
    translate([0,0,3*ThreadThick])
    linear_extrude(height=Base[2],convexity=2)
    intersection() {
    intersection_for (j=[-1,1])
    translate([0,j*(ChordHeight + Base[1]/2 – ChordRadius)])
    circle(r=ChordRadius,$fn=32*4,center=true);
    square([Base[0],2*Base[1]],center=true);
    }
    }
    }

    The original doodle with some dimensions that didn’t withstand careful measurements:

    Miniblind Endcap dimension doodle
    Miniblind Endcap dimension doodle
  • Cast Iron Pan Seasoning

    The motivation for stripping our cast iron pans:

    Wagner cast iron skillet - before - top
    Wagner cast iron skillet – before – top

    The bottom, of course, carried a heavier layer of crust:

    Wagner cast iron skillet - before - bottom
    Wagner cast iron skillet – before – bottom

    The wet areas came from the usual after-breakfast washing.

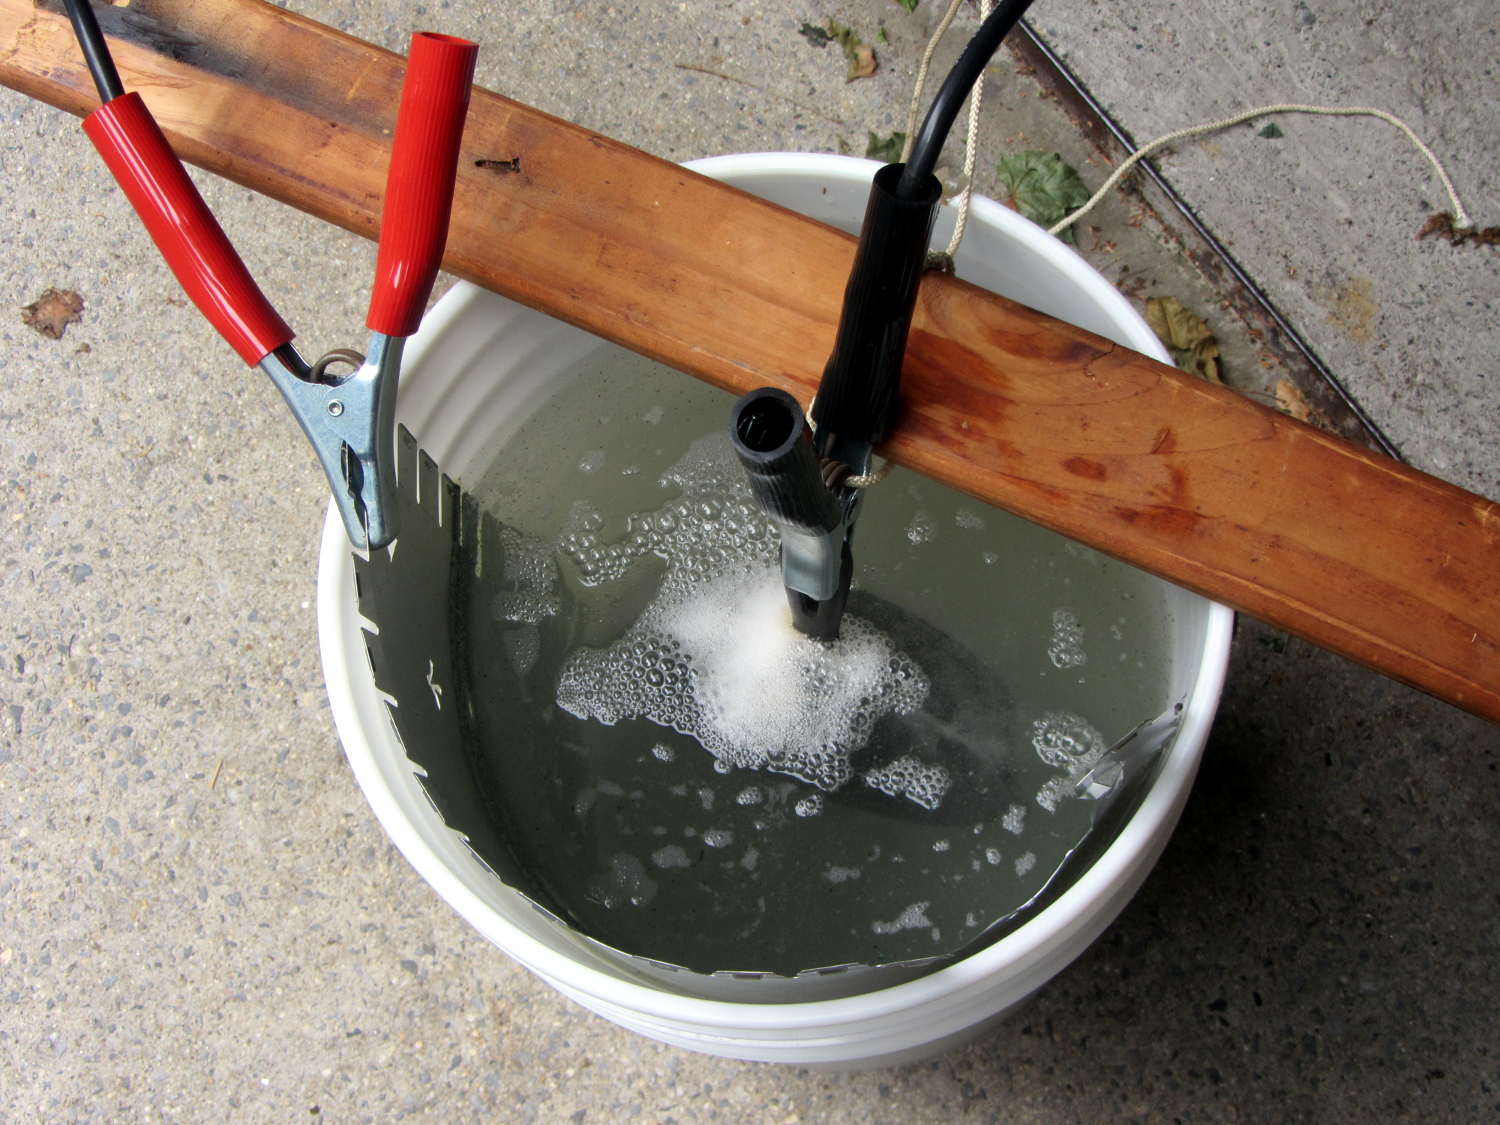
    Looking down into the electrolytic stripping bath, with bubbles forming on exposed metal areas around the crust on the bottom of the pan:

    Wagner cast iron skillet - in stripping bath
    Wagner cast iron skillet – in stripping bath

    After a day of electrolysis, all the crust was gone. Low labor, low danger, no fuss, not much muss.

    Given three stripped pans, the seasoning process involved wiping them with flaxseed oil, baking at 500 °F for an hour, cooling for two hours, and repeating. Six iterations occupied a long day, uncomfortably warmed the kitchen during a long hot summer day, and turned out to be just fussy enough to fit around some short-attention-span projects.

    Fast forward one day.

    The outside of the seasoned pans looks lovely:

    Wagner cast iron skillet - after - bottom
    Wagner cast iron skillet – after – bottom

    I’d have been hard-pressed to pick out the “Wagner Ware” before stripping the pan.

    The inside of all three pans had a peculiar mottled appearance:

    Wagner cast iron skillet - after - top
    Wagner cast iron skillet – after – top

    The medium pan:

    Medium cast iron pan - after - top
    Medium cast iron pan – after – top

    The small pan:

    Small cast iron pan - after - top
    Small cast iron pan – after – top

    The dark spots might suggest I used too much oil and it puddled / collected / whatever while baking, except that I’d slathered the oil on using a scrap from a cotton towel (actually, many scraps, one per iteration), then wiped it off with more towel scraps before baking the pans.

    Protip: You’ll eventually have a pile of cotton rags soaked in a drying oil similar to linseed oil. Woodworkers will tell you to wet oily rags with water before sealing them in a plastic bag, because the “drying” process is exothermic: oil-soaked rags can get hot enough for spontaneous combustion. Make it so.

    Breakfast proceeded pretty much as usual and the giant omelet (5 eggs, lots of chopped chard, two finely chopped bacon rashers, cheddar cheese, plenty of oil, stuff like that) seemed to stick somewhat less than usual: it’s not a Teflon-coated pan, but worked pretty well.

    I did the usual post-breakfast KP, which involves washing the pan with ordinary dish soap, scuffing the recalcitrant bits, and dropping the pan in the dish drainer. I don’t scour the pans, but I don’t treat them with fawning obeisance, either; they’re utensils, not sacred objects.

    Just before lunch, this appeared:

    Wagner cast iron skillet - washed - top
    Wagner cast iron skillet – washed – top

    The bottom sported similar rust spots:

    Wagner cast iron skillet - washed - bottom
    Wagner cast iron skillet – washed – bottom

    So that suggests I didn’t apply enough oil. Or scrubbed too hard. Or did something utterly wrong.

    Haven’t a clue about what happened. If I didn’t follow the seasoning process, I don’t know what I’d change. Ditto for washing up; it’s not like we haven’t been using the pan for decades.

    After supper, I washed & dried the pan, slathered on a generous oil coating, and let it sit, all in the hope the oil eventually forms a good crusty layer.

    By and large, the pan works better than it did before and the seasoning not nearly as well as I expected.

  • Taylor Kitchen Thermometer Dial Cover

    Fortunately, it didn’t fall off into the roasting pan:

    Taylor meat thermometer - cover failure
    Taylor meat thermometer – cover failure

    The lens slides right out of that nicely curved and crimped housing, the rim ID of which should be slightly smaller than the lens OD. But it ain’t and I definitely can’t crimp it any further.

    Three small dabs of clear epoxy and it should be good forever more…

    It’s a simpler replacement for the digital thermometer, when continuous monitoring isn’t needed. I thought it’d be more durable, but … no.

  • Cast Iron Pan Electrolysis Stripping

    Our cast iron pans need seasoning, so I decided to start with full-metal-jacket electrolysis stripping, rather than soaking them in oven cleaner / smogging the kitchen with the self-cleaning oven / actually doing any work. The electrolysis setup involves the big battery charger and a bucket of sodium carbonate solution:

    Cast iron pan electrolysis - setup
    Cast iron pan electrolysis – setup

    Although the charger has a 40 A capacity, the small pan bubbles along merrily at a self-limited 7 A:

    Cast iron pan electrolysis - bucket
    Cast iron pan electrolysis – bucket

    The anode is a big sheet of steel that was once an EMI shield in a big PC case. The side facing the pan corroded very quickly, but the outside remains in good shape and I think it’ll suffice for the medium and large pans.

    After two hours, only the crustiest bits of the crust remained:

    Cast iron pan electrolysis - 2 hours
    Cast iron pan electrolysis – 2 hours

    Those flakes fell right off after a few pokes from my demolition scraper; definite anticlimax, that.

    Another hour in the tank cleaned the handle and removed a few other spots; it now sports a layer of flash rust that’ll require another pass after I strip the other two pans…