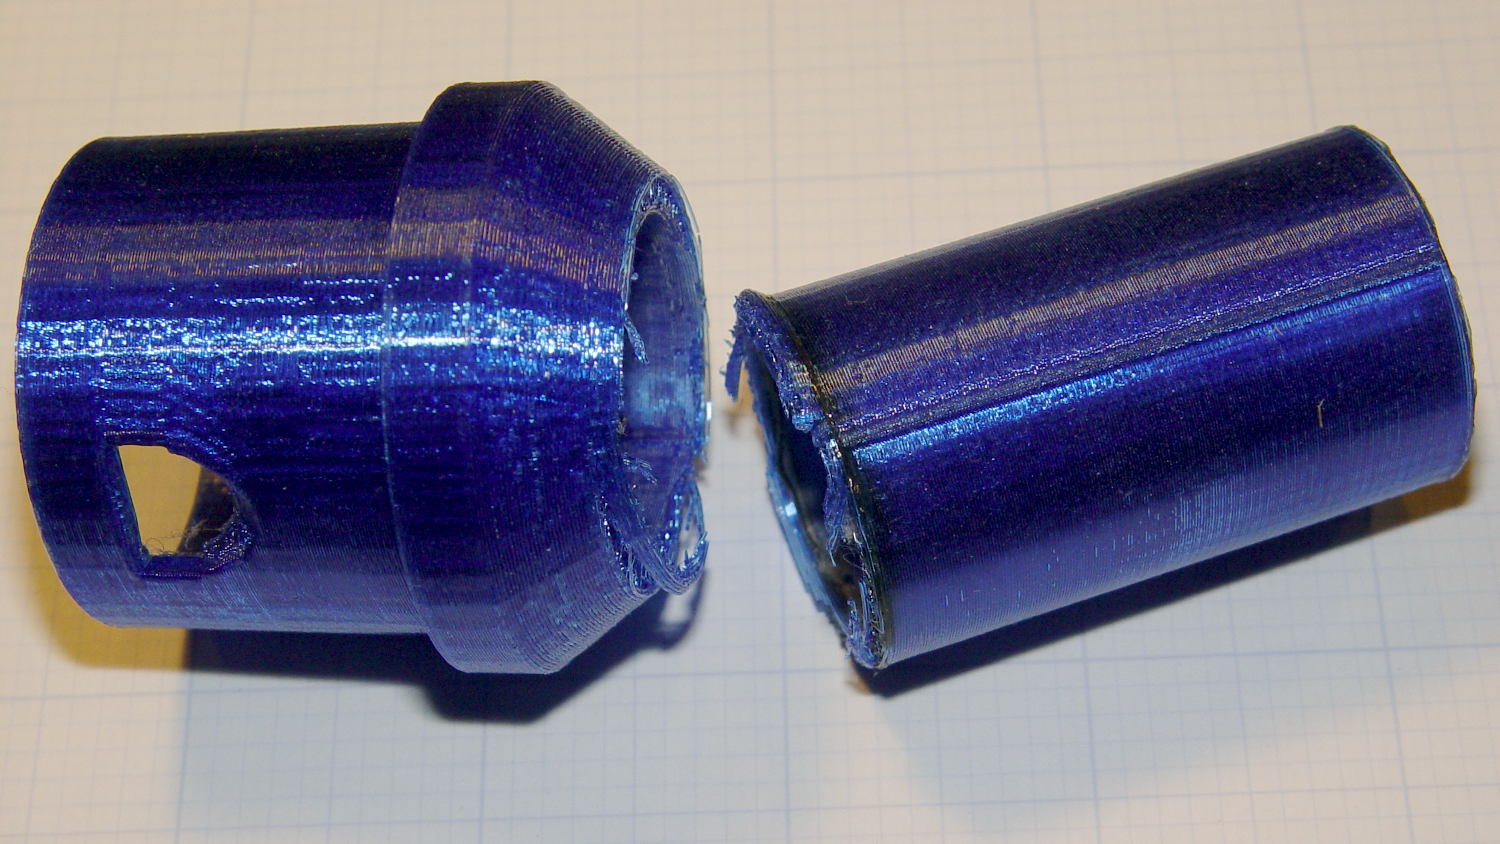
Pretty much as expected, the dust brush nozzle failed again, adjacent to the epoxy repair:
A bit of rummaging turned up some ¾ inch Schedule 40 PVC pipe which, despite the fact that no plumbing measurement corresponds to any physical attribute, had about the right OD to fit inside the adapter’s ID:
The enlarged bore leaves just barely enough space for a few threads around the circumference. Fortunately, the pipe OD is a controlled dimension, because it must fit inside all the molded PVC elbows / tees / caps / whatever.
The pipe ID isn’t a controlled dimension and, given that the walls seemed far too thick for this purpose, I deployed the boring bar:

That’s probably too much sticking out of the chuck, but sissy cuts saved the day. The carriage stop keeps the boring bar 1 mm away from the whirling chuck.
Bandsaw it to length and face the ends:

The PVC tube extends from about halfway along the steep taper from the handle fitting out to the end, with the section closest to the handle making the most difference.
Ram it flush with the end:
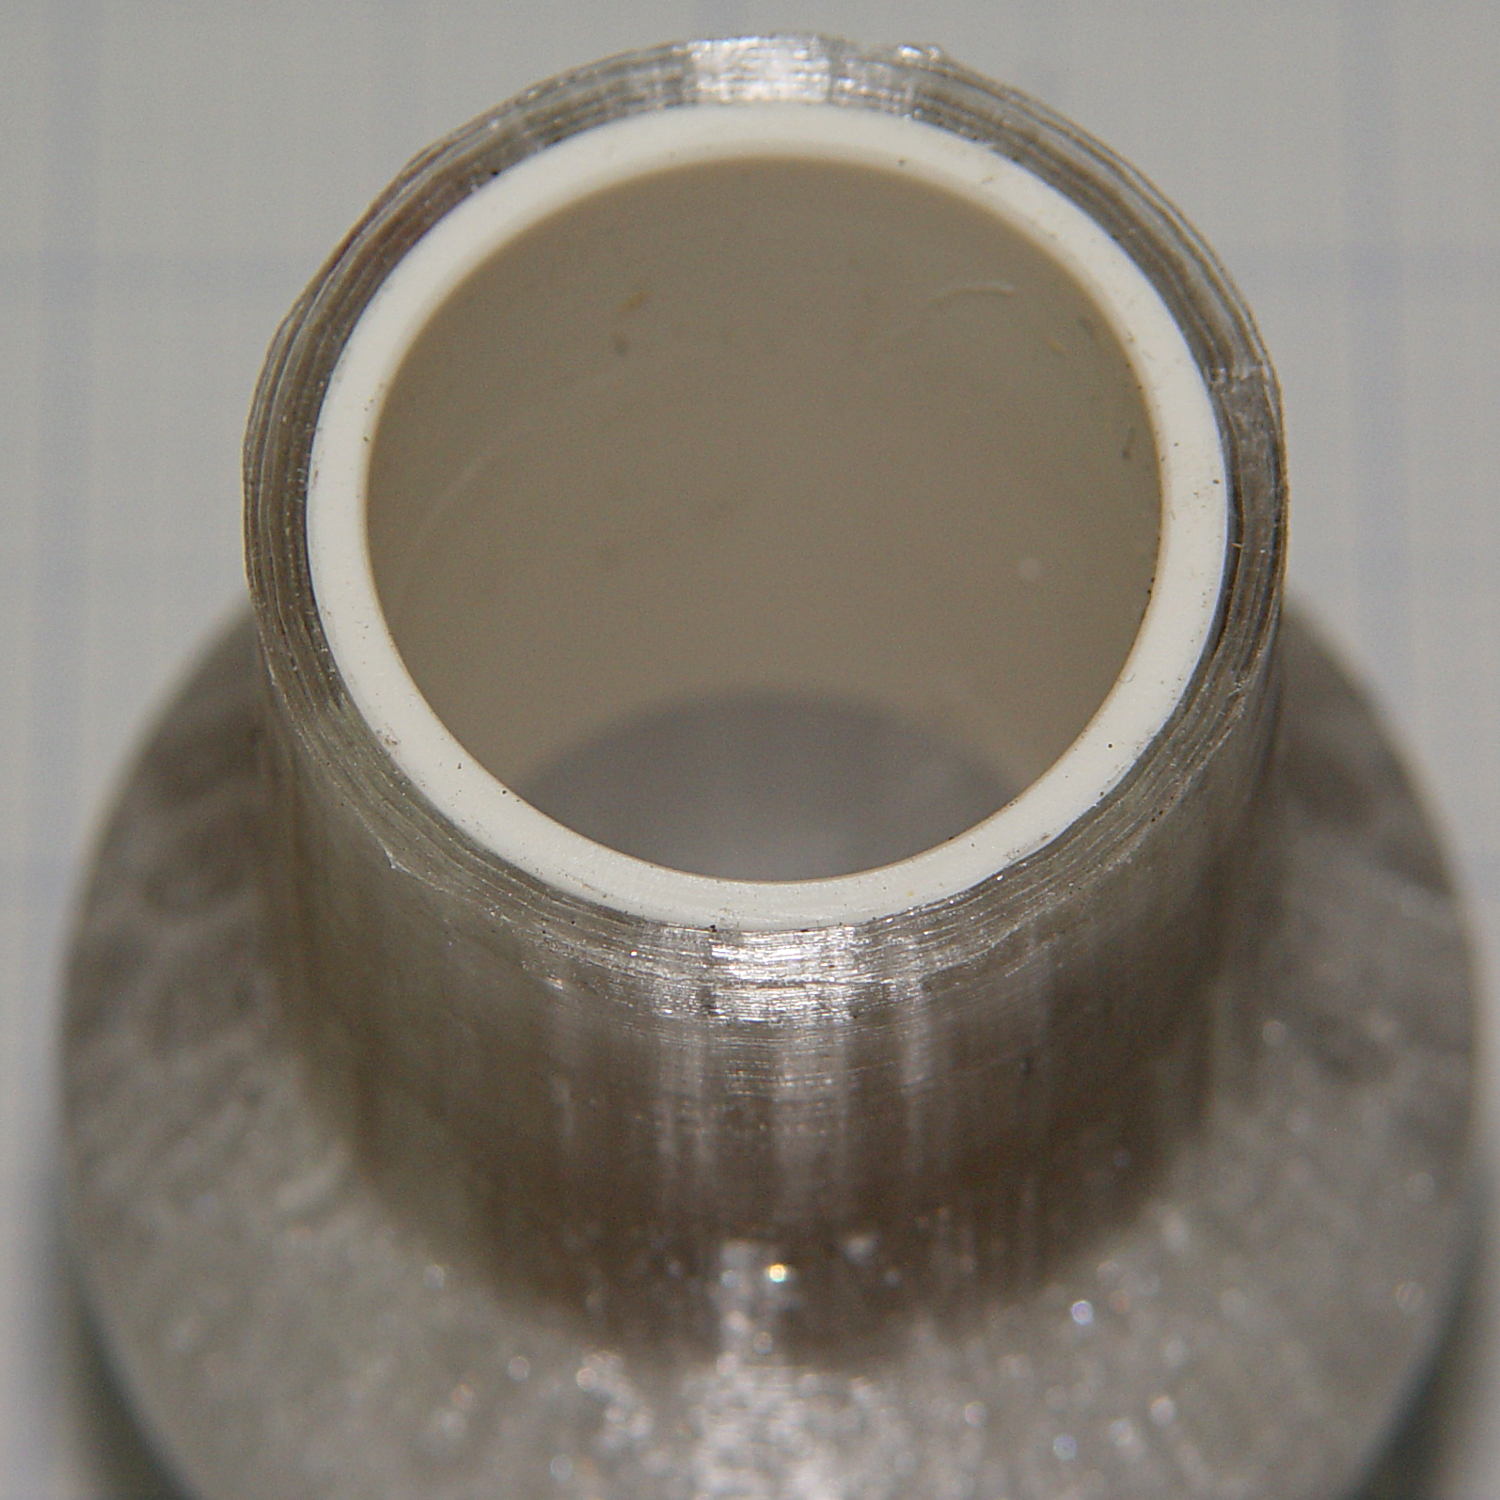
I thought about gluing it in place, but it’s a sufficiently snug press fit that I’m sure it won’t go anywhere.
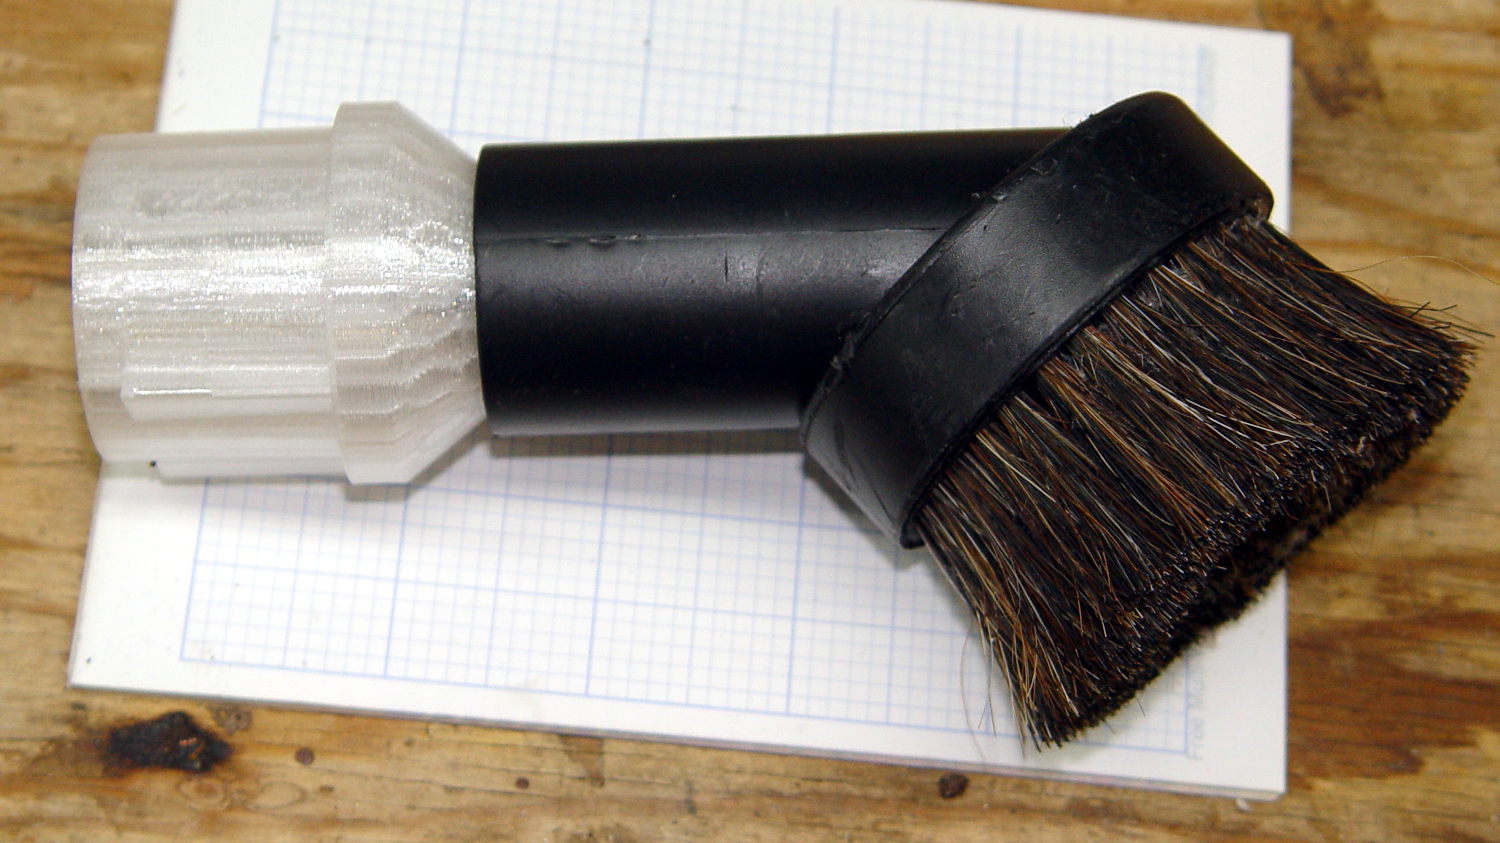
Natural PETG probably isn’t the right color:
Now, let’s see how long that repair lasts …
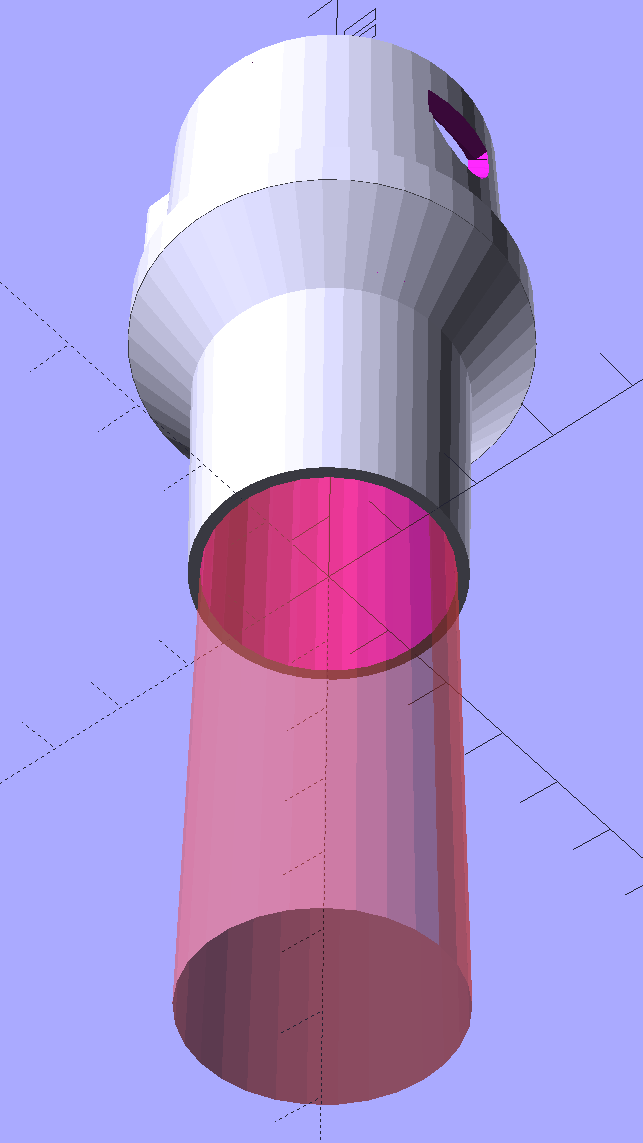
The OpenSCAD source code as a GitHub Gist:
| //——————- | |
| // eBay horsehair dusting brush | |
| // Hacked for 3/4" Schedule 40 PVC stiffening tube | |
| module DustBrush() { | |
| union() { | |
| translate([0,0,40.0]) | |
| rotate([180,0,0]) | |
| difference() { | |
| union() { | |
| cylinder(d1=EndStop[OD1],d2=31.8,h=10.0); | |
| translate([0,0,10.0 – Protrusion]) | |
| cylinder(d1=32.0,d2=30.0,h=30.0 + Protrusion); | |
| } | |
| translate([0,0,-Protrusion]) | |
| cylinder(d1=26.0,d2=24.0,h=100); | |
| translate([0,0,-Protrusion]) // 3/4 inch Sch 40 PVC | |
| PolyCyl(27.0,100); | |
| } | |
| translate([0,0,40.0 – Protrusion]) | |
| MaleFitting(); | |
| } | |
| } |

Comments
9 responses to “Kenmore Progressive Vacuum Tool Adapters: Second Failure”
While it’ll probably stay in place, it seems to me that it would give better support if it were glued in place. We shall see.
Aye!
When I say it was a “sufficiently snug press fit”, I had to lean hard on that sucker to drive the parts together. I expect the next failure will be just beyond the end of the PVC at the thinnest part of the conical section, whereupon I’ll rebuild the model with a reduced ID around the PVC tube from end to end.
Inspired by what you did here, before, I very recently made an adapter for our new vacuum that lacked one of the attachments the old one had. It looks like you have similar geometries here. What I did to reduce the chance of breakage was to make the adapter a sleeve that fitted over the smaller diameter pipe so the adapter was entirely sandwiched between the old tube and the new tube. I really haven’t had as much use for the 3d printer as I’d hoped but this problem is practically tailor made. FWIW, my Deltamaker has sat for about a year an a half with the PLA just hanging there. I built a model in OpenSCAD (thanks for the recommendation, Ed!), sliced it, started up the printer and It. Just. Worked. I am amazed that I have never had any of the problems I’ve heard others had 3d printing. I just wish I could find more reasons to use it.
You forgot to wrap the assembly in multiple layers of duct tape.
Well, there’s a strip of double-stick tape between the adapter and the brush to improve the griptivity; apparently, I didn’t get the taper quite right.
It appears there’s a type of vinyl plumbing pipe called Class 200, with the same O.D. as the corresponding Sched 40 (thus compatible with fittings), but a thinner walll diameter. I wanted some to make wind instrumeents, but it seems unfindable in Canada. Don’t know why.
Just sayin’. It does look like, if you have the tools and the stuff, making 3″ of Class 200 pipe is less expensive than buying 3″ of Class 200 pipe.
Never knew of “Class 200” before, so it’s probably not in the local big-box home repair stores, but a bit of searching shows it’s intended for “projects that do not need a lot of strength”: it certainly qualifies for this job!
Thanks for the pointer; I’ll check out the local stock with more attention on my next trip.
When printing objects subjected to heavy loading, I have been experimenting with printing them with just inside and outside walls and then filling the space between with urethane resin used for casting. So far I have had some pretty good results although there are a few drawbacks. One is having to have a vacuum chamber to degass the resin before pouring. Another is some seeping of the resin through gaps in the 3D printed layers. I have only tried a couple of pieces so it is too early for me to recommend the process, but if you happen to have the necessary materials on hand…
I have a couple of compressors harvested from dead dehumidifiers that can allegedly pull a decent vacuum; they’ve been sitting on a shelf for quite a few years now, awaiting more time & motivation than I’ve come up with.
The casting resin should be stronger than all those airy printed threads, although I’m not sure a thin sheet / tube would have more stiffness. Perhaps combining resin with the usual low-infill 3D honeycomb would produce some cross-bracing? Given the stretchiness of PETG (et. al.), it sure wouldn’t work like glass fiber matting.