Ed Nisley's Blog: Shop notes, electronics, firmware, machinery, 3D printing, laser cuttery, and curiosities. Contents: 100% human thinking, 0% AI slop.
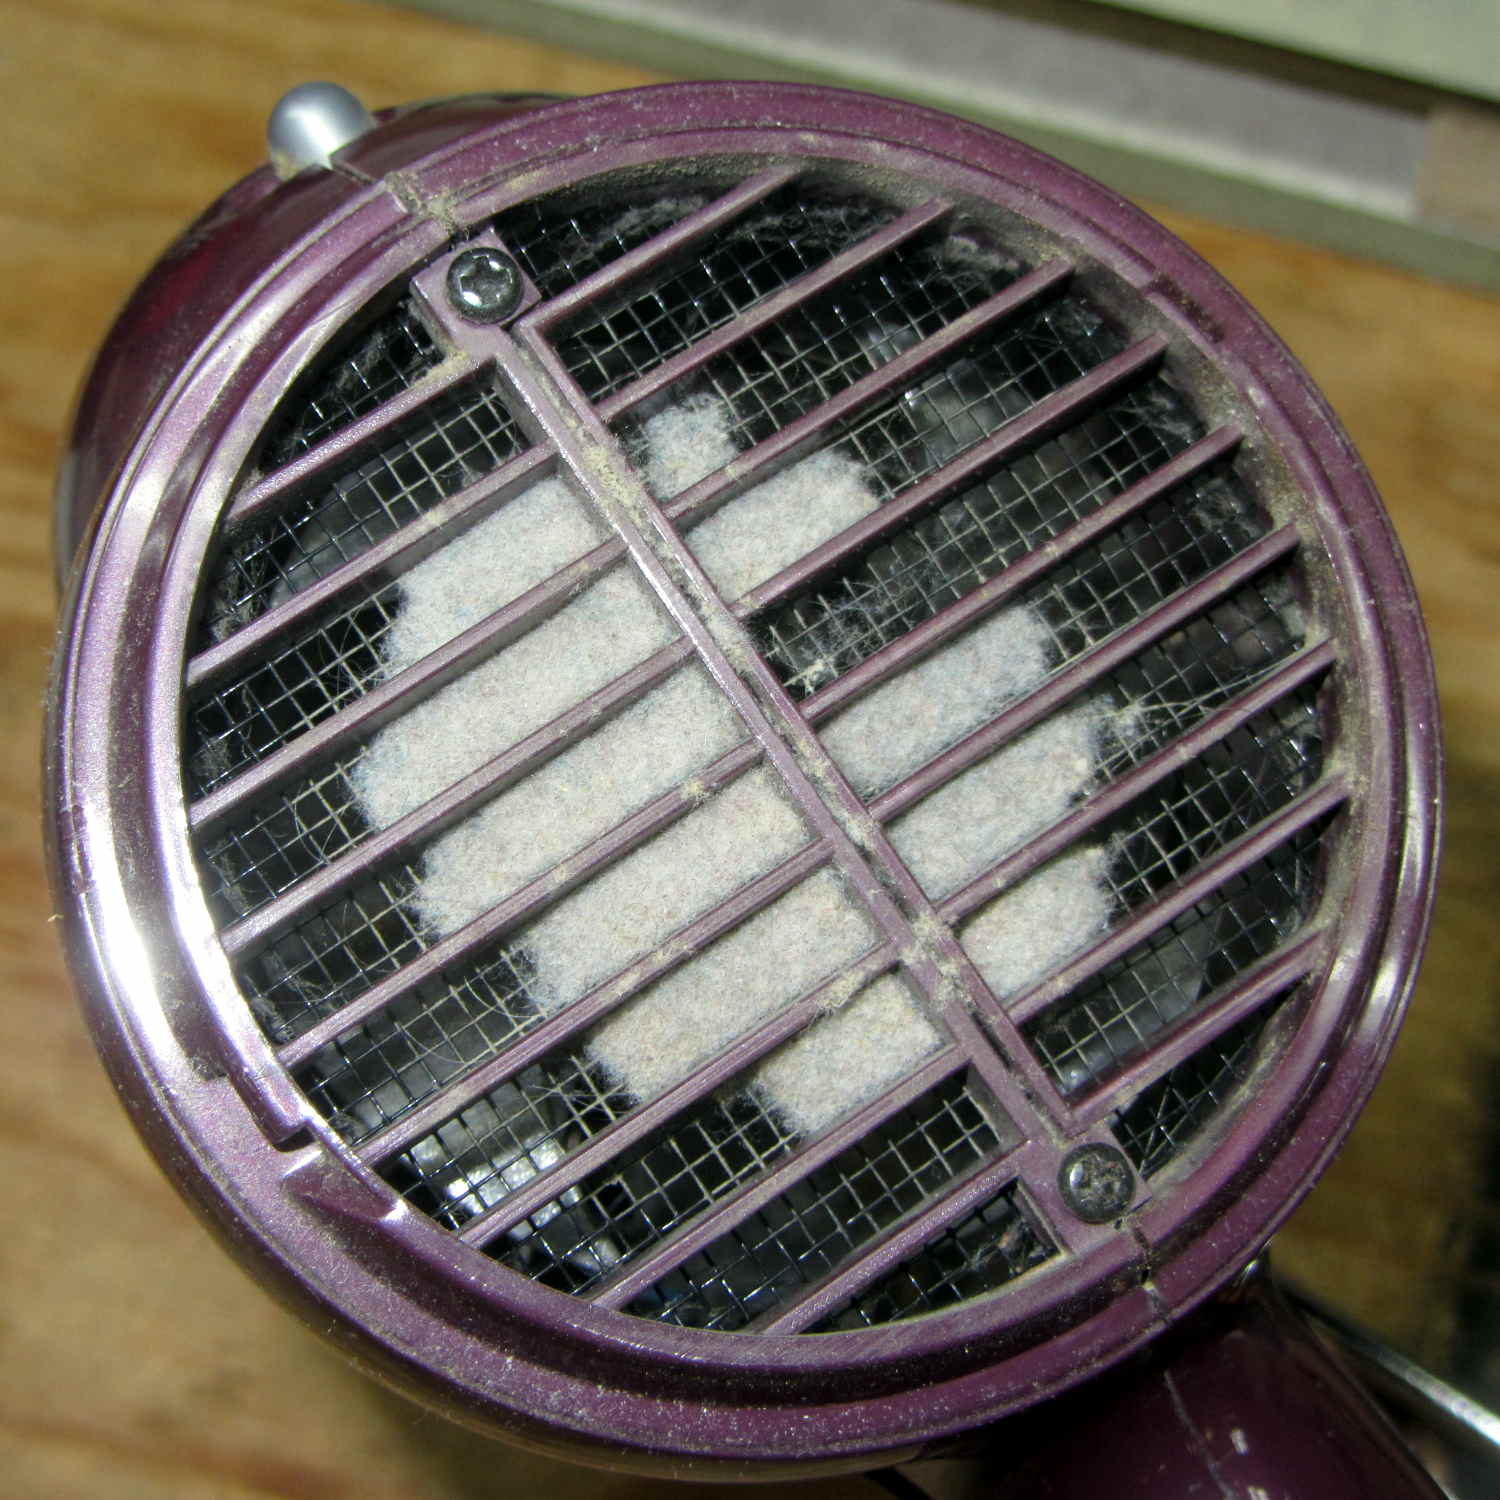
Mary reported that her hair dryer didn’t have nearly as much oomph as in the Good Old Days. After a struggle to remove the rear cover (with no affordance to turn in the direction required to release the hidden latches), this appeared:
Hair dryer inlet fuzz
One snort from the shop vacuum returned it to the Good Old Days.
For reasons not relevant here, I had a PDF made from scanned page images with far too much whitespace around the Good Stuff. As with all scanned pages, the margins contain random artifacts that inhibit automagic cropping, so manual intervention was required.
Extract the images as sequentially numbered JPG files:
pdfimages -j mumble.pdf mumble
Experimentally determine how much whitespace to remove, then:
for f in mumble-0??.jpg ; do convert -verbose $f -shave 225x150 ${f%%.*}a.jpg ; done
You could use mogrify to shave the images in-place. However, not modifying the files simplifies the iteration process by always starting with the original images.
You can only drop a small kitchen scale so many times before the plastic cover / weighing tray breaks:
Magnum scale cover – glued and clamped
The trick was to anchor the cover to the glass plate with the big clamp so that the smaller clamps could exert force straight down on the edge, without flipping the lid due to the bevel. With that all set up: apply IPS #4 to the broken edges, insert pieces, apply clamps, wait overnight.
For the record, my morning mug o’ green tea starts with 4 (-0.0 +0.4) g of leaves…
The slightly rectangular shape extracted four plates from of a scrap of 3/8 inch plywood, with almost nothing left over. The fourth plate had already found its way into the under-seat bag by the time I thought of a picture.
My can of fluorescent red paint having lost its mojo since the most recent application, these shall remain unpainted forever more; as even forget-me-not red seems to have little effect, that may not matter.
The mid-1950s wood doors on our house have wood storm doors with interchangeable wood-framed glass and screen panels. Twice a year, the diligent homeowner will swap the panels to match the season; during the last 60+ years, the glass panels remain undropped.
The back door has a diagonal tension brace to hold the door in shape; the door may be slightly distorted or the frame slightly out of square. In any event, the brace obstructs the panel, so the semiannual ritual includes loosening the brace and removing four screws. During the last 60+ years, the screw holes have required repair / filling several times; about five years ago, I plugged them with epoxy putty and drilled them to fit the screws.
That repair having aged out, I was about to renew the epoxy when I realized that I now have brass inserts that would work even better, if I replaced the original wood screws with 10-32 machine screws.
I cut the screws to the exact length using the brace and brass insert as a fixture:
Storm door – screw cutting
The vacuum cleaner nozzle to the lower right inhales the debris from the Dremel cutoff wheel that would otherwise fill the shop; I used up the last half of a wheel on four stainless steel screws.
Because each end of the brace has two screws, I knew that I couldn’t just drill out the four holes, plant four inserts, and be done with the job: the first insert on each end could go pretty nearly anywhere, but the second insert must match the brace hole spacing. The only way I know how to do that is to epoxy the first two inserts in place and let them cure, drill the other two holes slightly oversize, mount those inserts on the brace, butter them with epoxy, put the brace in place, tighten the first two screws, snug the brace, and hope I didn’t epoxy the brace to the door or the screws to the inserts.
Slips of waxed paper between the brace and the door prevented the first problem and oiling the screws prevented the second. It’s not the best-looking job I’ve ever done, but nobody will ever see the inserts behind the brace:
Storm door – inserts
Now, we’re ready for winter and I’m ready for spring!
Most likely, the new owners (whoever and whenever they may be) will never use these inserts, as they’ll replace all the windows & doors, plus sand & refinish the hardwood floors, before moving in …
Mary’s new half-gallon sprayer arrived with a kink in the hose just below the handle, which is about what you’d expect from a non-reinforced plastic tube jammed into the smallest possible box containing both the sprayer and its wand. Fortunately, the Box o’ Springs had one that just fit the hose and jammed firmly into the handle:
Sprayer hose with kink-resisting spring
The kink slowly worked its way out after being surrounded by the spring and shouldn’t come back.