Ed Nisley's Blog: Shop notes, electronics, firmware, machinery, 3D printing, laser cuttery, and curiosities. Contents: 100% human thinking, 0% AI slop.
Tag: Improvements
Making the world a better place, one piece at a time
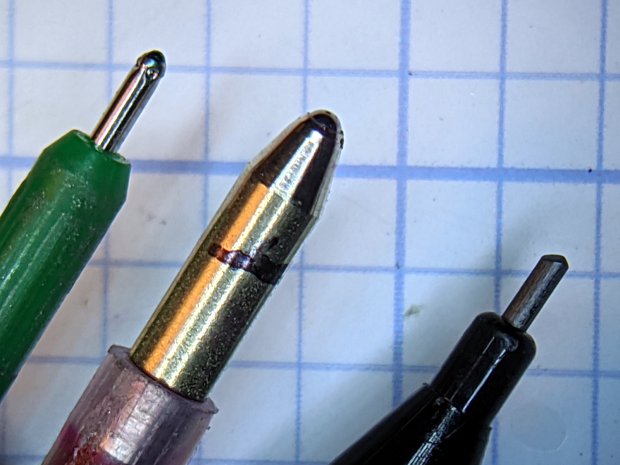
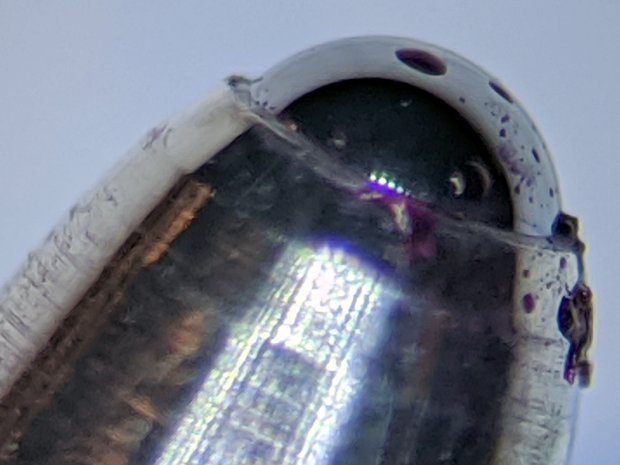
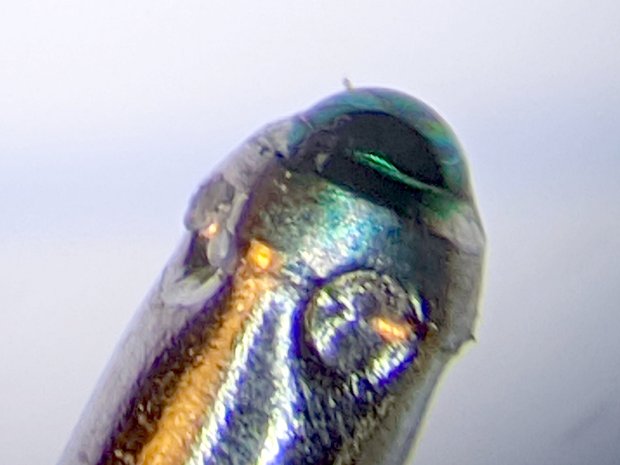
The Google Pixel 3a camera, unlike the camera in my older Google Pixel XL, takes spectacularly good images through a widefield 5X eyepiece on the stereo zoom microscope:
0.5 1.0 mm ball pens – 0.7 mm lead pencil
That’s hand-holding the phone against the eyepiece while manipulating it with the other hand. Definitely not the most stable arrangement, but the camera copes well with slight motions. I really need a gripping hand for the camera, to free up another for the microscope’s focus knob.
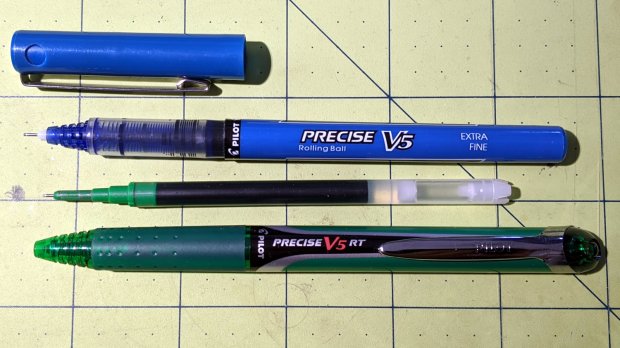
The cartridge is a nice 6 mm cylinder, eminently transformable into a plotter pen:
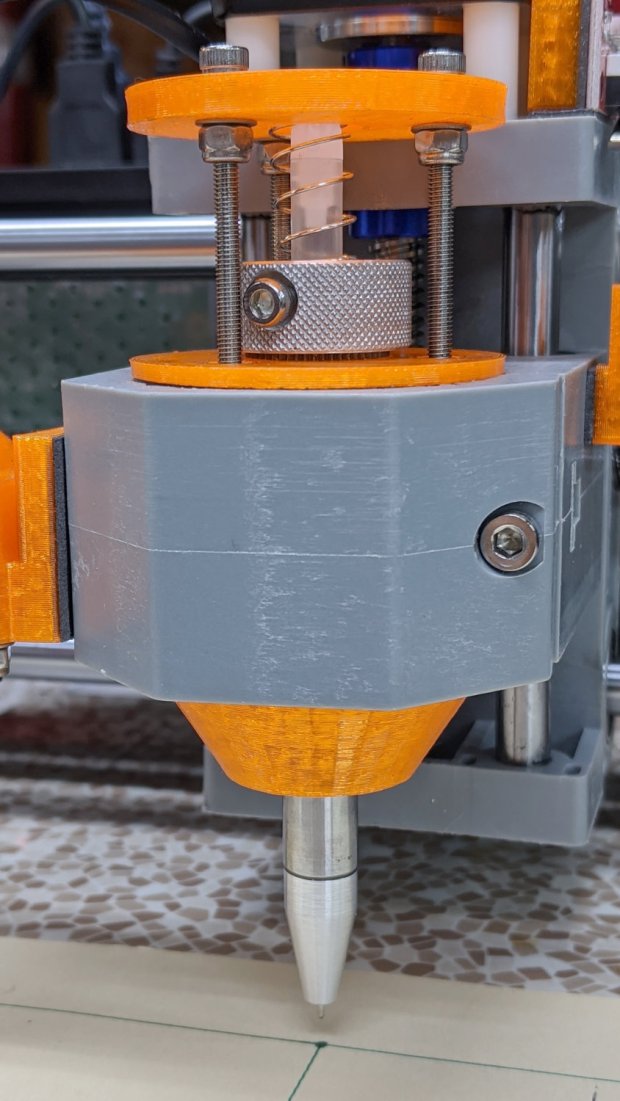
Pilot V5RT holder – installed
A few minutes with a caliper provides key measurements for a snout surrounding the business end:
Pilot V5RT Pen Holder – snout dimension doodle
The green letters & numbers give the nearest drill sizes. The “T” values along the bottom are the tailstock turns (at 1.5 mm/turn) required to poke the drills to the indicated depths, eyeballed when the body just enters the hole.
Having recently decomissioned the Thing-O-Matic and harvested its organs parts, I have a vast collection of 3/8 inch = 9.52 mm shafts and matching bronze bushings:
9.52 mm shaft and bushings
Bronze bushings have low stiction, at least when they’re co-axial, and are much shorter than linear ball bearings.
I chopped off a 70 mm length of shaft and faced the raw end:
Pilot V5RT holder – facing shaft
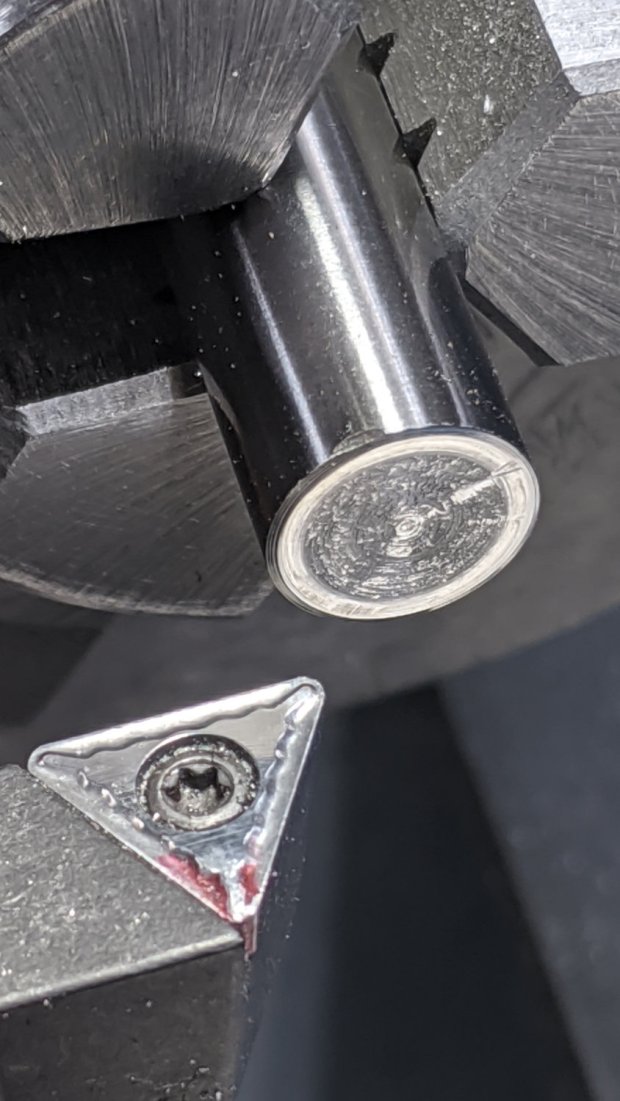
The other end had a maker’s logo, but I don’t recognize it:
Pilot V5RT holder – center drill
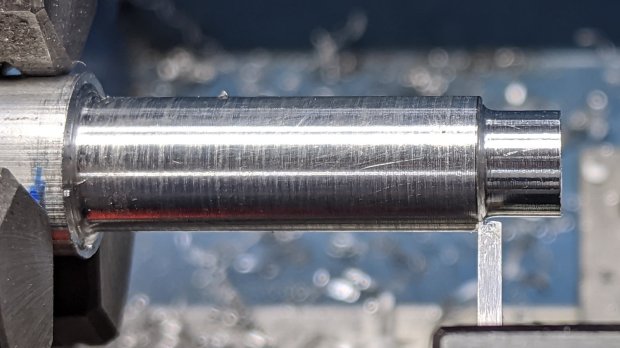
I really wanted an 8 mm bore around the snout, but it just didn’t work out. The ring around the 7.5 mm counterbore shows where the larger drill just … stopped:
Pilot V5RT holder – drilled shaft
A trial fit with the pen cartridge:
Pilot V5RT holder – pen in shaft
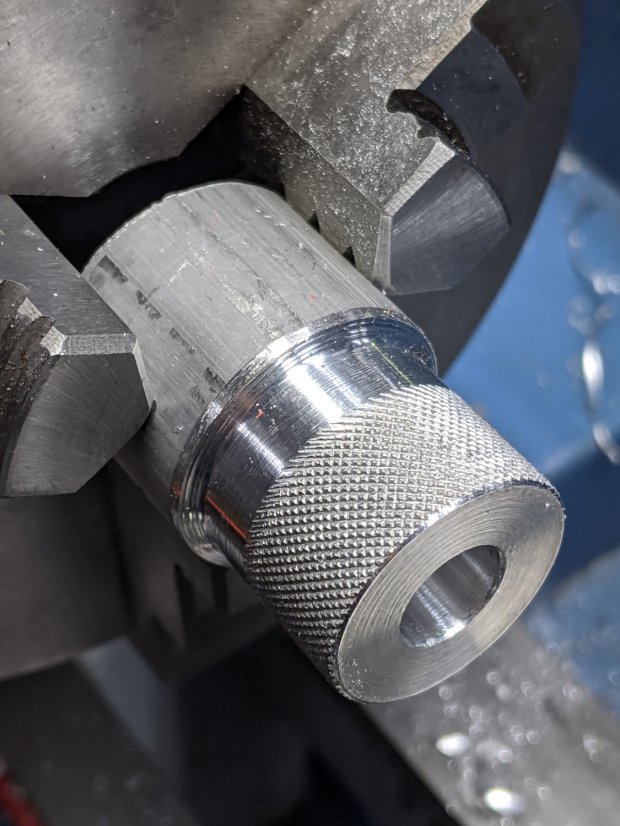
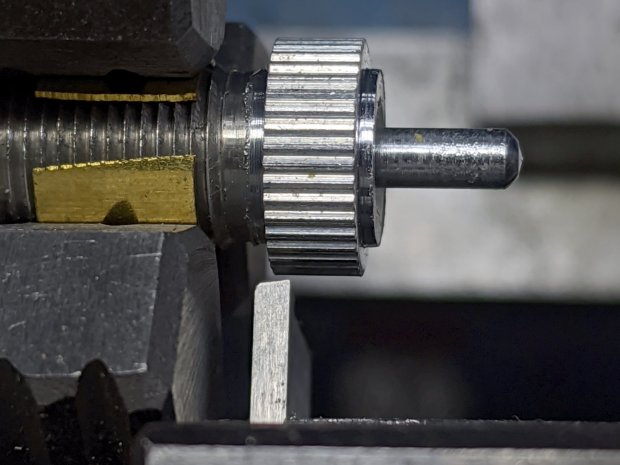
The top of the shaft gets a somewhat longer knurled ring for the 3 mm SHCS holding the cartridge in place:
Pilot V5RT holder – knurling pen clamp
The screw bears on a split collar turned and drilled from a Delrin rod:
Pilot V5RT holder – drilling Delrin clamp
The “split” came from a simple saw cut across one side and I milled a flat spot in the knurling to seat the screw. As usual, the knurled ring got epoxied to the shaft.
The snout started as a 3/8 inch aluminum rod, drilled as shown in the sketch, with a (scant) 7.5 mm section to fit the shaft. The carbide insert left a nicely rounded shoulder that required trimming to fit snugly into the shaft:
A trial fit showed the snout was a bit too long for comfort:
Pilot V5RT holder – snout test fit
Making something shorter doesn’t pose much of a challenge:
Pilot V5RT holder – trimming snout
Another trial fit shows it’s spot on:
Pilot V5RT holder – shaft snout pen test fit
The critical part is having the snout support the plastic around the pen tip to prevent wobbulation.
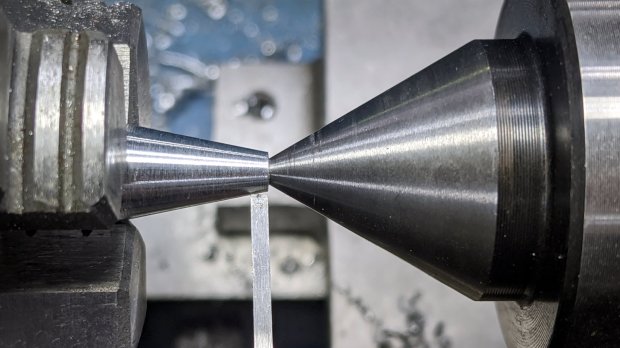
Epoxy the whole thing together, add a suitable spring, tighten the screws & nuts for the reaction plate, and it’s all good. I write with about 50 g of force for these pens, so a light preload seemed in order:
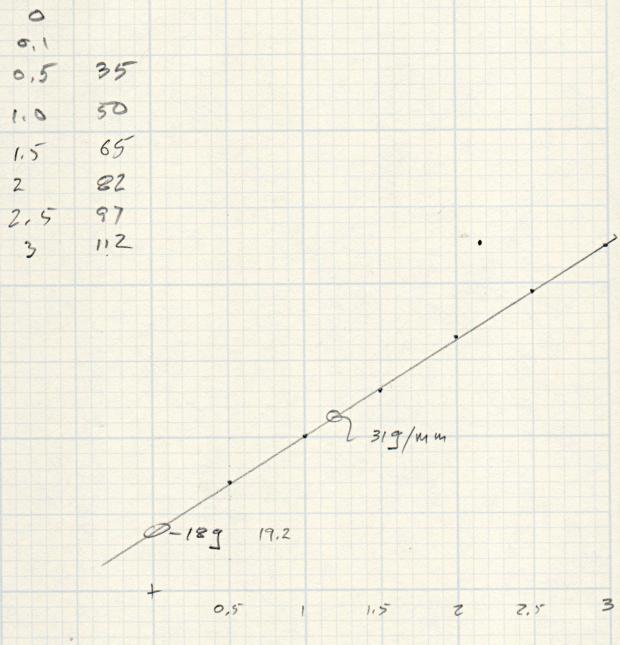
Pilot V5RT Pen Holder – initial downforce measurement
If I’d weighed the full-up shaft + snout + collar + cartridge, I’d know if the Y intercept matches that weight. It seems a little lighter, but I’m not taking the thing apart to find out.
The first version of the 3D printed holder (shown above) is a straightforward modification of the LM12UU diamond drag bit holder, but, after building enough of these things, I realized the circular reaction plate should be triangular to get more clearance in front of the Z-axis stepper motor when installing & removing the holder:
Pilot V5RT Pen Holder – solid model – show view
It also has a recess for the serrated top of the bearing, to prevent the knurled collar from clicking annoyingly as the Z-axis rises at the end of each stroke.
This file contains hidden or bidirectional Unicode text that may be interpreted or compiled differently than what appears below. To review, open the file in an editor that reveals hidden Unicode characters.
Learn more about bidirectional Unicode characters
Attempting to cut laminated cardstock decks for the Homage Tektronix Circuit Computer required a bit more blade extension than my LM12UU holder made available:
Drag Knife – LM12UU ground shaft – assembled
Shortening the 12 mm shaft wasn’t going to happen, so I knocked a little bit off the blade holder to give the knurled lock ring slightly more travel:
Drag Knife Holder – shortening stop
The lathe cutoff blade is a bit to the right of the new cut, but you get the general idea: not a whole lot of clearance in there.
lsusb
Bus 002 Device 002: ID 8087:0024 Intel Corp. Integrated Rate Matching Hub
Bus 002 Device 001: ID 1d6b:0002 Linux Foundation 2.0 root hub
Bus 001 Device 004: ID 248a:ff0f
Bus 001 Device 007: ID 058f:9410 Alcor Micro Corp. Keyboard
Bus 001 Device 006: ID 047d:1020 Kensington Expert Mouse Trackball
Bus 001 Device 005: ID 046d:c508 Logitech, Inc. Cordless Trackball
Bus 001 Device 003: ID 0451:2046 Texas Instruments, Inc. TUSB2046 Hub
Bus 001 Device 002: ID 8087:0024 Intel Corp. Integrated Rate Matching Hub
Bus 001 Device 001: ID 1d6b:0002 Linux Foundation 2.0 root hub
Bus 004 Device 006: ID 05e3:0748 Genesys Logic, Inc.
Bus 004 Device 005: ID 0480:a202 Toshiba America Inc Canvio Basics HDD
Bus 004 Device 004: ID 0bda:0411 Realtek Semiconductor Corp.
Bus 004 Device 003: ID 0451:8041 Texas Instruments, Inc.
Bus 004 Device 002: ID 0bda:0411 Realtek Semiconductor Corp.
Bus 004 Device 001: ID 1d6b:0003 Linux Foundation 3.0 root hub
Bus 003 Device 006: ID 256c:006d
Bus 003 Device 004: ID 0bda:5411 Realtek Semiconductor Corp.
Bus 003 Device 003: ID 0451:8043 Texas Instruments, Inc.
Bus 003 Device 002: ID 0bda:5411 Realtek Semiconductor Corp.
Bus 003 Device 001: ID 1d6b:0002 Linux Foundation 2.0 root hub
Yes, the space normally occupied by the product description is blank. The first blank description comes from a generic wireless keypad’s USB receiver; the 0x248a Vendor ID claims be Maxxter, a step down from the usual Logitech ID rip, and its 0xff0f Device ID looks bogus to me, too.
The 0x256c Vendor ID isn’t in the online databases yet, but some grepping found it in /lib/udev/rules.d/65-libwacom.rules:
Note, however, that the Device ID is 0x006e, where the upgraded V2 tablet is 0x006d; I have no idea why the number goes down as the version goes up. Change all instances of the former to the latter.
Even though the Wacom driver can apparently handle the older H610Pro, the V2 tablet’s buttons were missing in action.
xsetwacom --verbose set "HUION Huion Tablet Pen stylus" MapToOutput "DP-1"
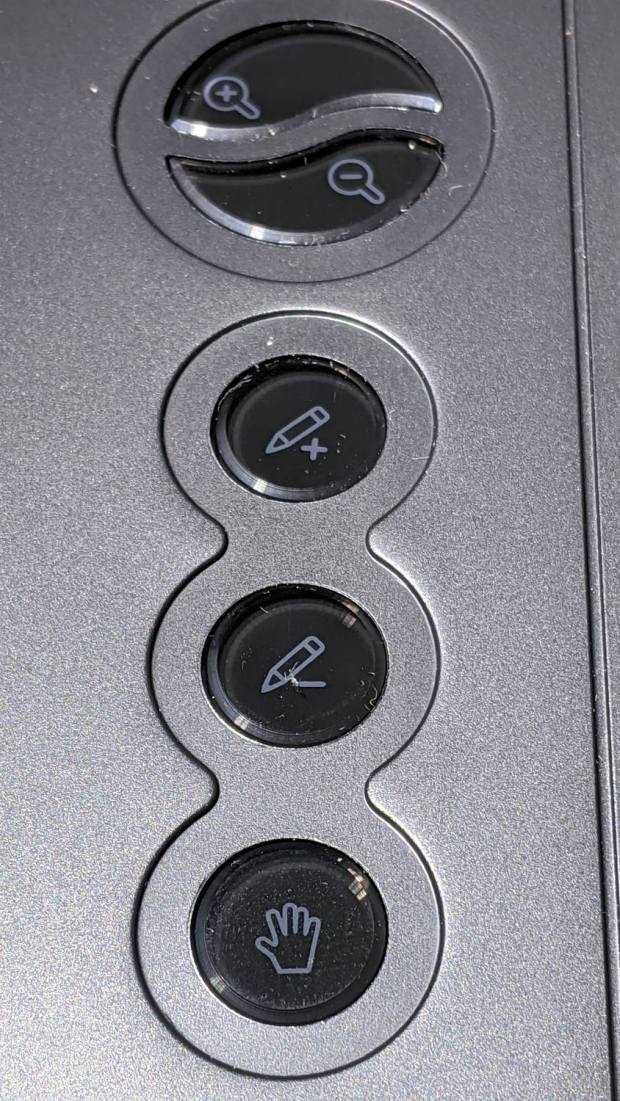
The various buttons still need configuration, although that’s in the nature of fine tuning. The top three buttons are 1, 2, 3, with the rest tagging along at 8 through 12. They take trendy gray-on-black labeling to an absurd limit:
Huion H610Pro V2 – embedded gray-on-black buttons
That’s with intense overhead lighting shining into the buttons and lighting up the lower-surface iconography. In normal light, they’re shiny black disks with invisible legends and, no, they’re not backlit.
The overall button-tweaking syntax:
xsetwacom set "HUION Huion Tablet Pad pad" button 12 key whatever
Where whatever comes from the list in /usr/include/X11/keysymdef.h, per the doc in man xsetwacom and a list of possibilities from:
xsetwacom --list modifiers "HUION Huion Tablet Pad pad"
For example, this causes the bottom button to spit out a question mark:
xsetwacom set "HUION Huion Tablet Pad pad" button 12 key shift /
It’s not obvious changing the buttons from their default button numbers to anything else makes any sense; just tweaking individual programs to map those numbers into useful actions should work better.
(*) It has a “battery-free” stylus which, to my way of thinking, is a major selling point.
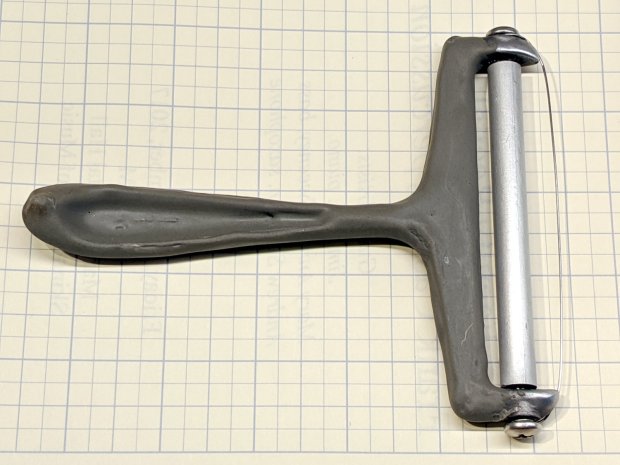
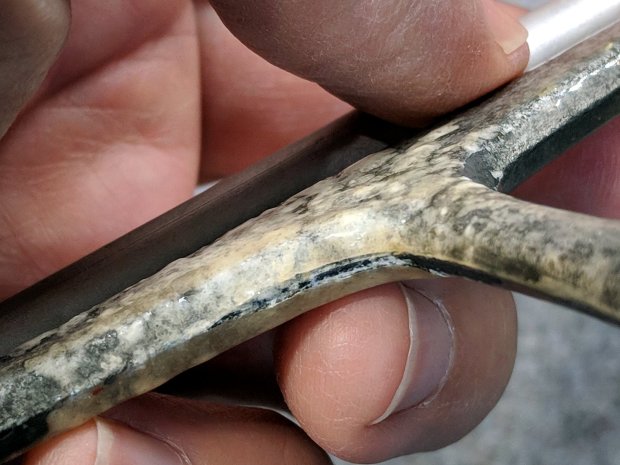
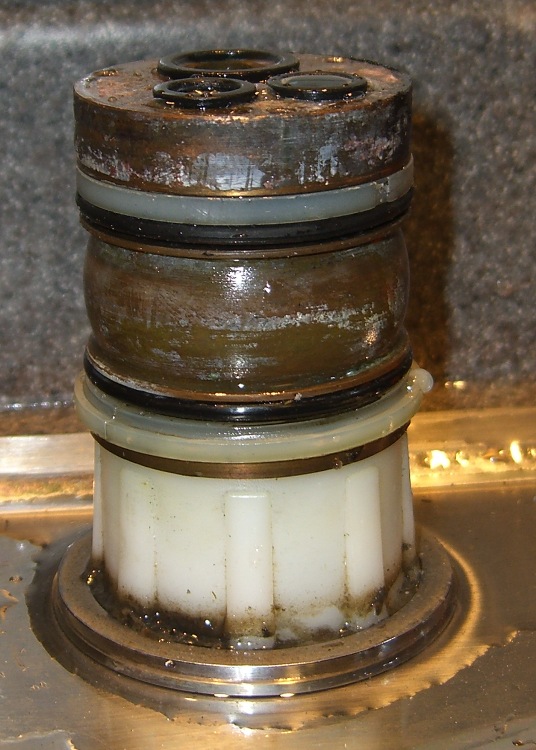
The O-ring replacement kit includes a pair of nylon (?) split rings which should provide bearing surfaces for the spout, but the upper ring sits in a groove putting its OD almost flush with the column:
Faucet column
This may be tolerance creep or just a design screwup, but the spout squashes the O-ring much more than (IMO) it should and wears it out entirely too soon.
This time around, I cut a strip of 0.4 mm thick polypropylene (from the Big Box o’ Clamshell Packages) long enough to wrap around the column and narrow enough to fit inside the groove, with the split ring holding it in place. The strip expands the ring’s OD to just barely fit inside the spout, so the spout now bears mostly on the ring, not the O-ring.
Despite measuring the groove OD and the spout ID, I had to cut-and-try several strips to find the proper thickness. Your mileage will certainly differ.
The spout now turns smoothly and freely, without leakage. We’ll see whether the new O-rings last longer than before.
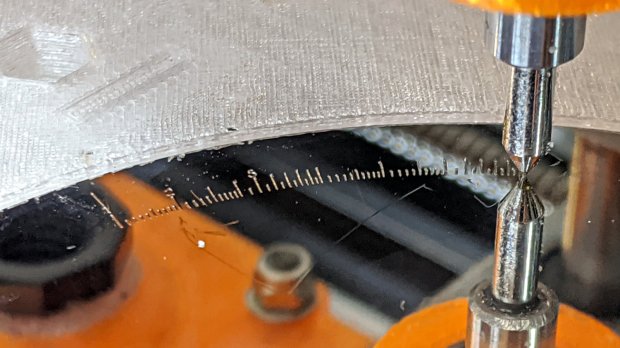
Engraving the Tektronix Circuit Computer bottom deck on a scrap hard drive platter suggested I’m entirely too much of a sissy about downforce on the diamond drag bit:
Tek CC – bottom deck – HD platter – L scale
That’s at Z=-5 mm for 350 g of downforce, with the spring preloaded with 100 g at a 50 g/mm rate. More or less, anyhow.
The GCMC code automagically scales everything by the ratio of the actual platter OD to the original Tek bottom deck. Using 93 mm for a hard drive platter (actual OD = 95 mm) sets the scaling to 0.197 = 93/197, which makes the scale legends just barely visible:
Tek CC – bottom deck – scaled to HD platter
The thing looks lovely, though, with ticks engraved at 2400 mm/min and the text at 2000 mm/min. The problem turns out to be the time taken to run the Z axis down and up while engraving so many ticks and characters!
I cranked on another 2 mm = 100 g of preload:
CNC 3018-Pro – diamond bit downforce plot
The top graph shows the downforce in 0.1 mm increments, rising from 0.0 to 217 g in 0.3 mm, which illustrates what the Y intercept of the plot means in real life.
Engraving at Z=-3 mm will now produce 350 g of downforce and cut the Z axis travel time down by a bit less than half. I have no idea what the right force might be; more experiments are in order.