Ed Nisley's Blog: Shop notes, electronics, firmware, machinery, 3D printing, laser cuttery, and curiosities. Contents: 100% human thinking, 0% AI slop.
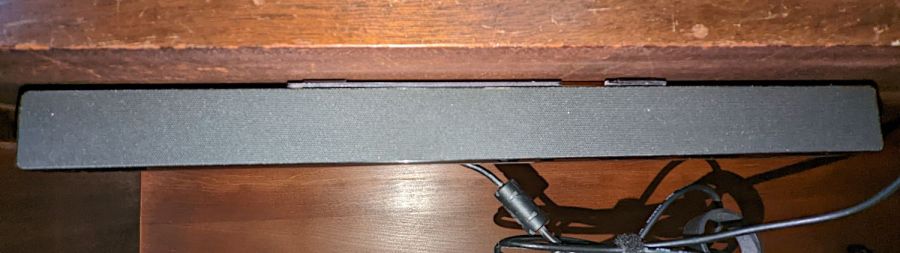
A bedroom rearrangement displaced the Dell Sound Bar attached to the streaming music player from its accustomed perch, so I conjured a mount from the parts bin to hang it from a shelf:
Dell sound bar mount – installed
The sound bar originally fit below any Dell monitor with the appropriate lugs under the bezel, but a bit of bandsaw work and hand filing produced a reasonable facsimile from an aluminum sheet:
Dell sound bar mount – plate installed
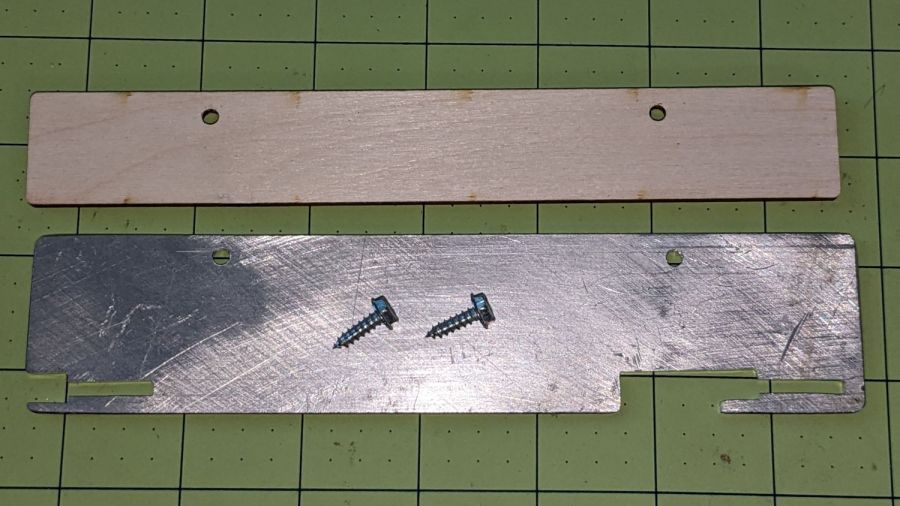
The bar’s plastic bits require a few millimeters of clearance above the sheet, now provided by a matching plywood shape:
Dell sound bar mount – parts
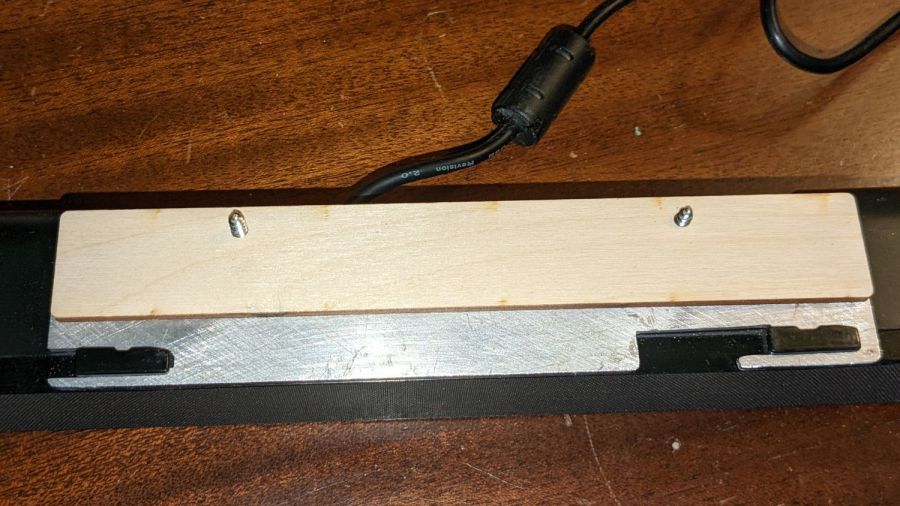
A trial fit showed all the parts would fly in formation:
Dell sound bar mount – trial fit
A laser-cut cardboard template maintained alignment and spacing while I stood on my head screwing the mount in place.
The axis scale error, however, took me by surprise.The X axis travels on the order of 0.2 mm more along 250 mm, about 0.08%, than the Y axis, even after my tedious calibration. I must do that calibration again, because, as Miss Clavel observed in a different context, Something Is Not Right.
And, yes, that tiny difference is enough to misalign the last few fingers with their holes, to the extent of requiring somewhat more than Gentle Persuasion with a plastic mallet.
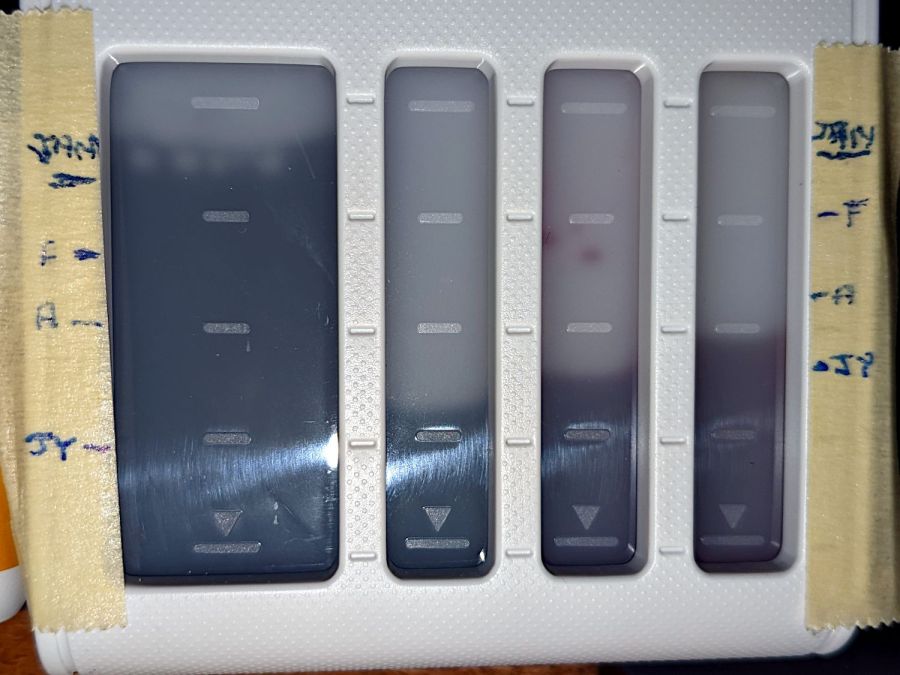
Although the blurb for the Epson ET-3830 All-In-One scanner / printer says “up to 2 years of ink in the box”, the black ink hit the bottom line of the tank near the end of August:
Being that type of guy, I keep track of ink vs. time:
Epson ET-3830 – ink status
In round numbers, it looks like we use nearly all of a 127 ml bottle of black ink and a bit more than half of an 70 ml bottle of color ink every eight months.
I find it much easier to read long articles and tech documents while slumped in the Power Chair than to scroll through them on big or little screens, so we go through much more ink and paper than most folks.
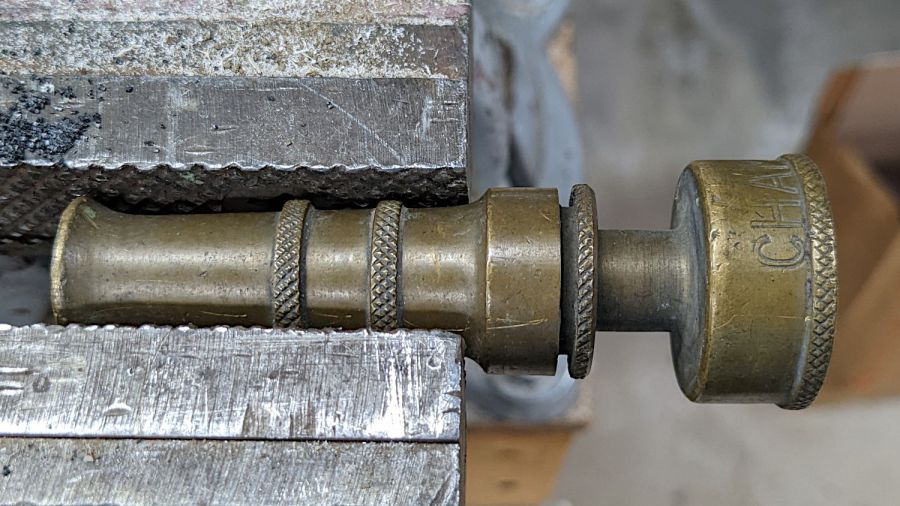
An old brass hose nozzle emerged from my garden hydraulics toolbox when a much newer plastic nozzle failed. Unfortunately, this one leaked a bit too much to serve as a replacement, so I grabbed it in the vise while pondering how to disassemble it:
Champion brass hose nozzle – disassembly
It turns out the knurled ring is threaded into the nozzle and, even at this late date, responds well to gentle persuasion with a Vise-Grip:
Champion brass hose nozzle – parts
The washer is a lost cause, but I managed to find an O-ring that fit perfectly in the space available. Clearing some crud around the nozzle hole and buffing up the matching conical section improved its sealing ability, so I’ll call it a win.
The word ITALY stamped opposite CHAMPION suggests this thing might be as old as I am; it’s been a while since either brass or Italy was competitive in the world of cheap manufactured goods.
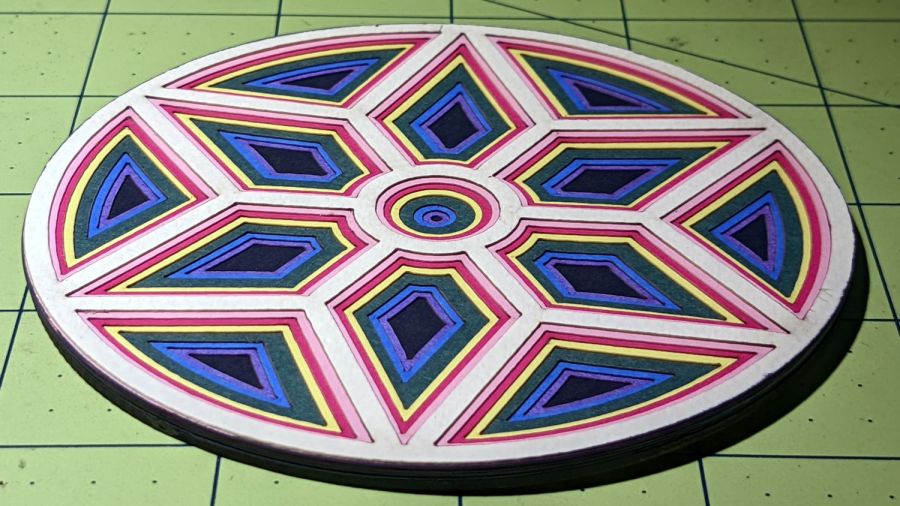
A long-forgotten pad of Art Paper in assorted colors came to the surface:
Layered Coaster – tweaked
An angled view shows off the layering a little better:
Layered coaster – side view
Done manually with LightBurn’s Offset tool: shrink the frame’s interior openings (which lie outside the frame) by 1 mm per step, then cut each shape into a different color. The black layer is a complete disk, stuck atop a plain chipboard disk for stiffening.
In the cold light of day, I think I offset the green layer by 2 mm.
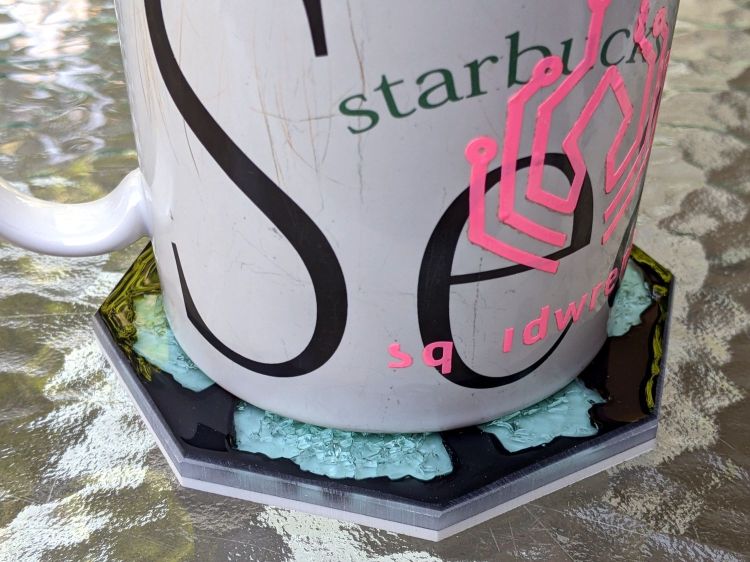
It’s not a particularly useful coaster, because you want a flat surface under your drink, but it does look pretty. Nowhere close to that good, but I like it.
The next time around, I’ll automate the process by stepping the sash width by 1 mm and saving each SVG image separately.
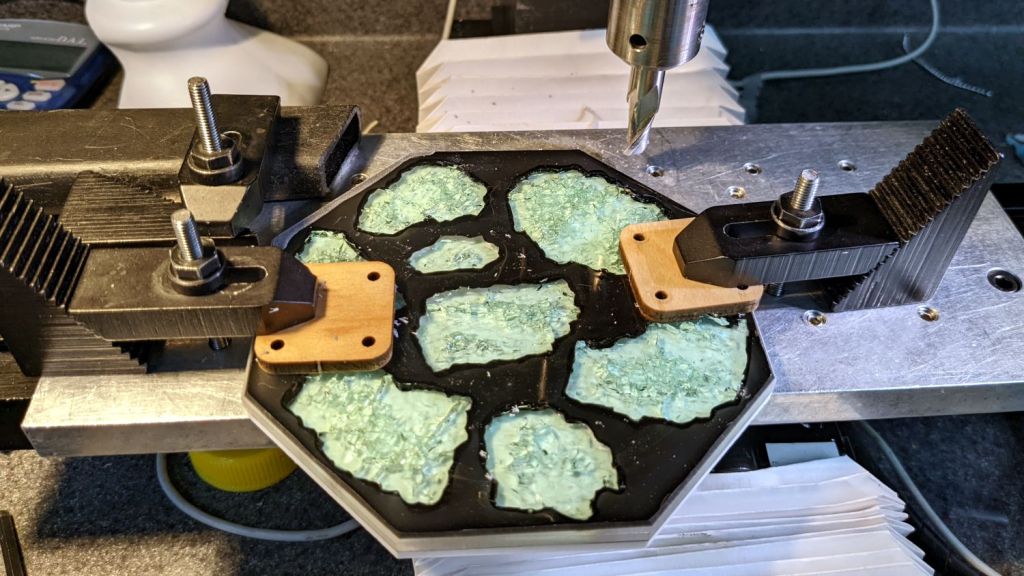
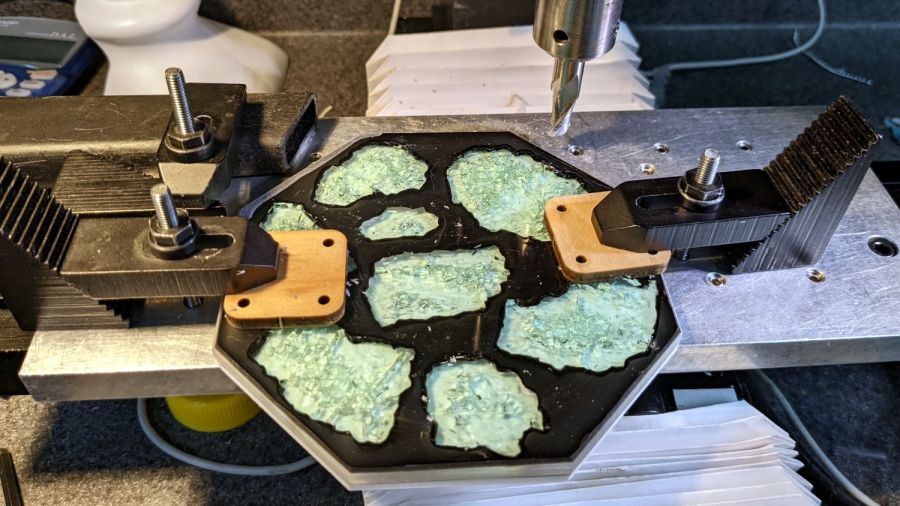
So I clamped it to the Sherline’s tooling plate and milled off the rim:
Smashed Glass Coaster – meniscus removal
Given the Sherline’s cramped work envelope, all the action took place along the rearmost edge, requiring eight reclampings indexed parallel to the table with a step clamp.
The cutter cleared off everything more than 0.3 mm above the surface of the glass chunks. I could probably have gone another 0.1 mm lower, but chopping the bit into the edge of a shattered glass fragment surely wouldn’t end well.
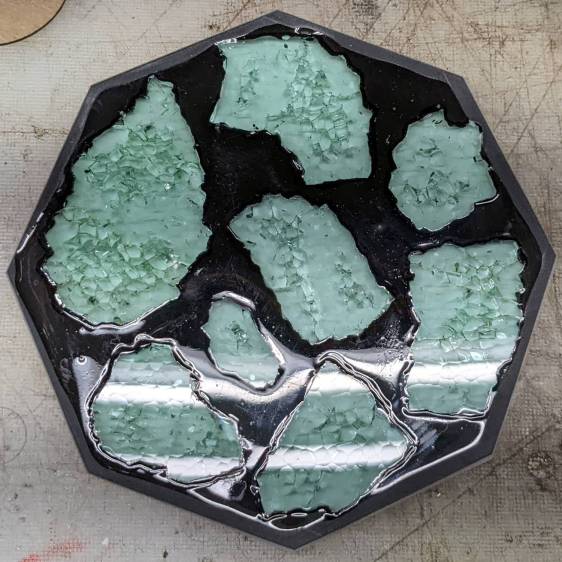
Polishing the dark gray milled surface might improve it slightly, at the risk of scuffing whatever poured epoxy stands slightly proud of the glass:
Smashed Glass Coaster – leveled edge
Perhaps if I define it to be a border, everybody will think it was intentional.
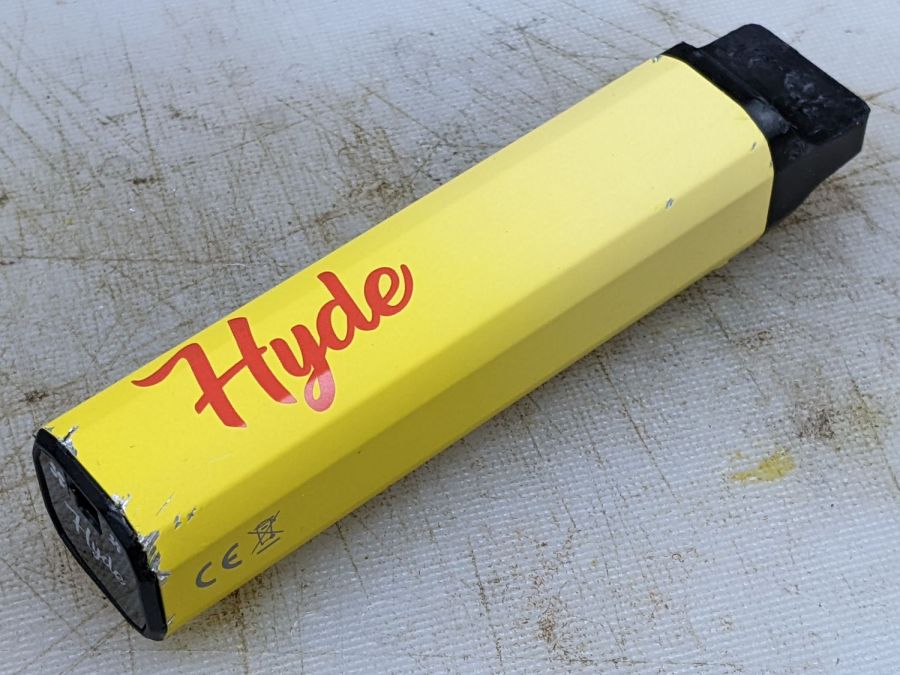
It’s a Hyde Edge Recharge vape pen or it could be a counterfeit. You (definitely not me) get “up to” 3300 puffs from the 10 ml container, with 50 mg of nicotine ensuring you can’t get enough and will come back for more. Although I don’t follow the market, “disposable” vape pens can still contain the fruity flavors prohibited in refillable pens, with the added decadence of throwing the whole thing away when the tank runs dry:
Hyde Charge Vape Pen – components
My admittedly inexperienced eye says the “tank”, which is really just a fiber cylinder soaked in fruity juice + nicotine, still has plenty of hits remaining.
The Basement Shop may never smell the same again.
Of more interest, the silvery lump wrapped in a white felt strip is a 600 mA·hr lithium cell that slurped 406 mA·hr through its USB Micro-B jack when I recharged it. Perhaps the uservictim sucker tossed it when the battery “died”, being unable / unwilling / ignorant-of-how to recharge it? The yellow aluminum case seems faded on the mouthpiece end, but that might be a stylin’ thing.
A closer look at the electronics payload:
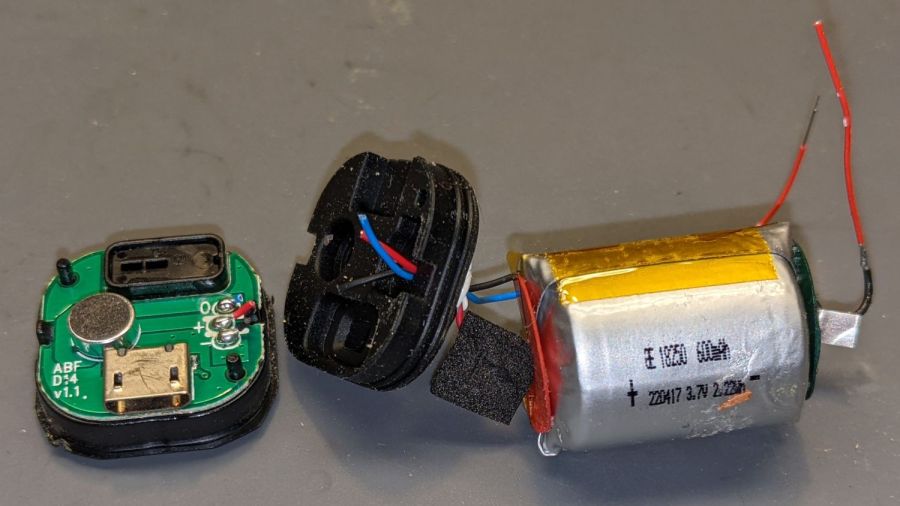
Hyde Charge Vape Pen – electronics
The two red wires over on the right went to the coil in the draw tube to the right of the “tank”. Not being interested enough to care, I wrecked the coil while extracting the rest of the contents. Comfortingly, the red and black wires from the PCB go to the positive and negative battery tabs.
A closer look at both sides of the PCB:
Hyde Charge Vape Pen – PCB detail
The SOT23 IC sports an LTH7 topmark corresponding to an LTC4054-4.2 Standalone Charge Controller (Analog Devices absorbed Linear in 2017). The two LEDs to its right glow red during charge and white during each puff.
The black felt disk covers an anonymous pressure sensor activating the coil during each puff. With four pins, the sensor must be far more complex than just a switch, but nowadays puff sensing could require an entire ARM microcontroller.