Ed Nisley's Blog: Shop notes, electronics, firmware, machinery, 3D printing, laser cuttery, and curiosities. Contents: 100% human thinking, 0% AI slop.
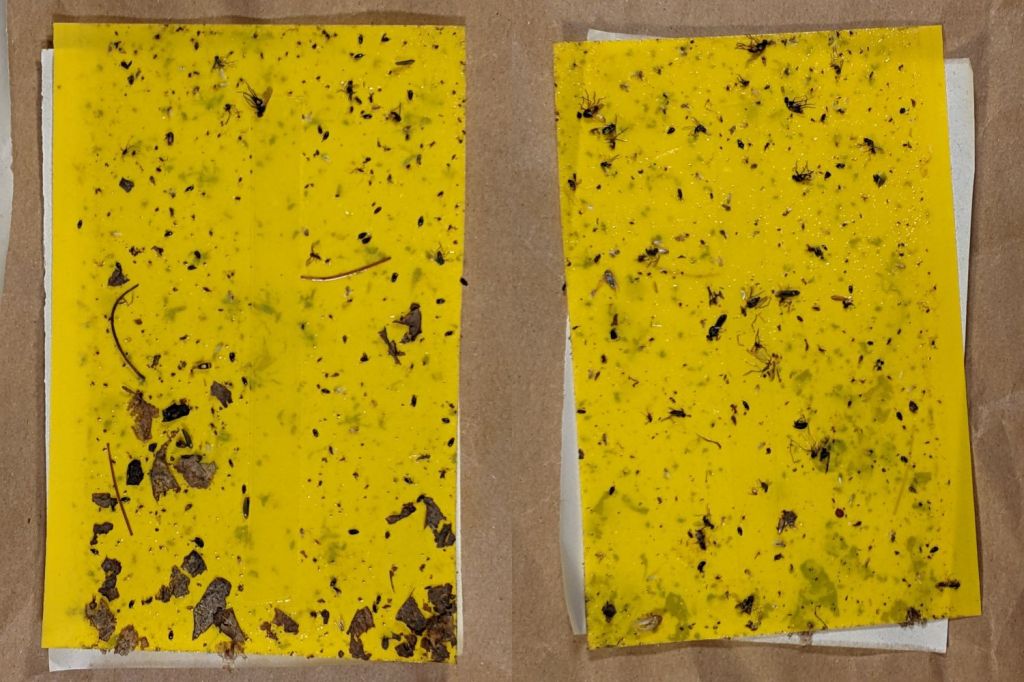
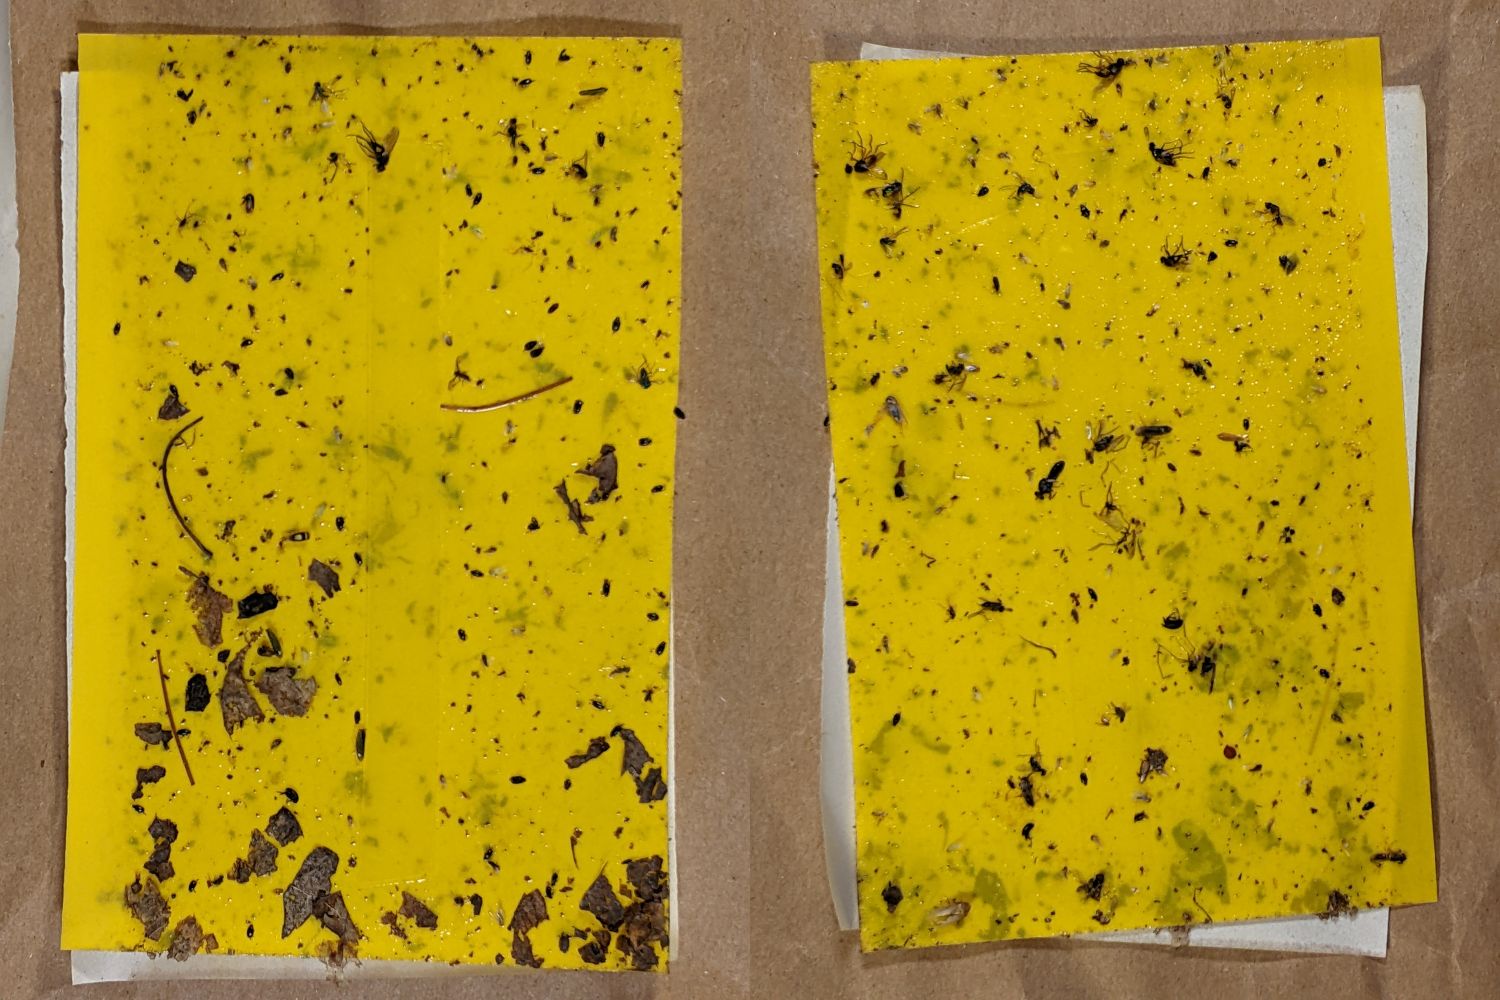
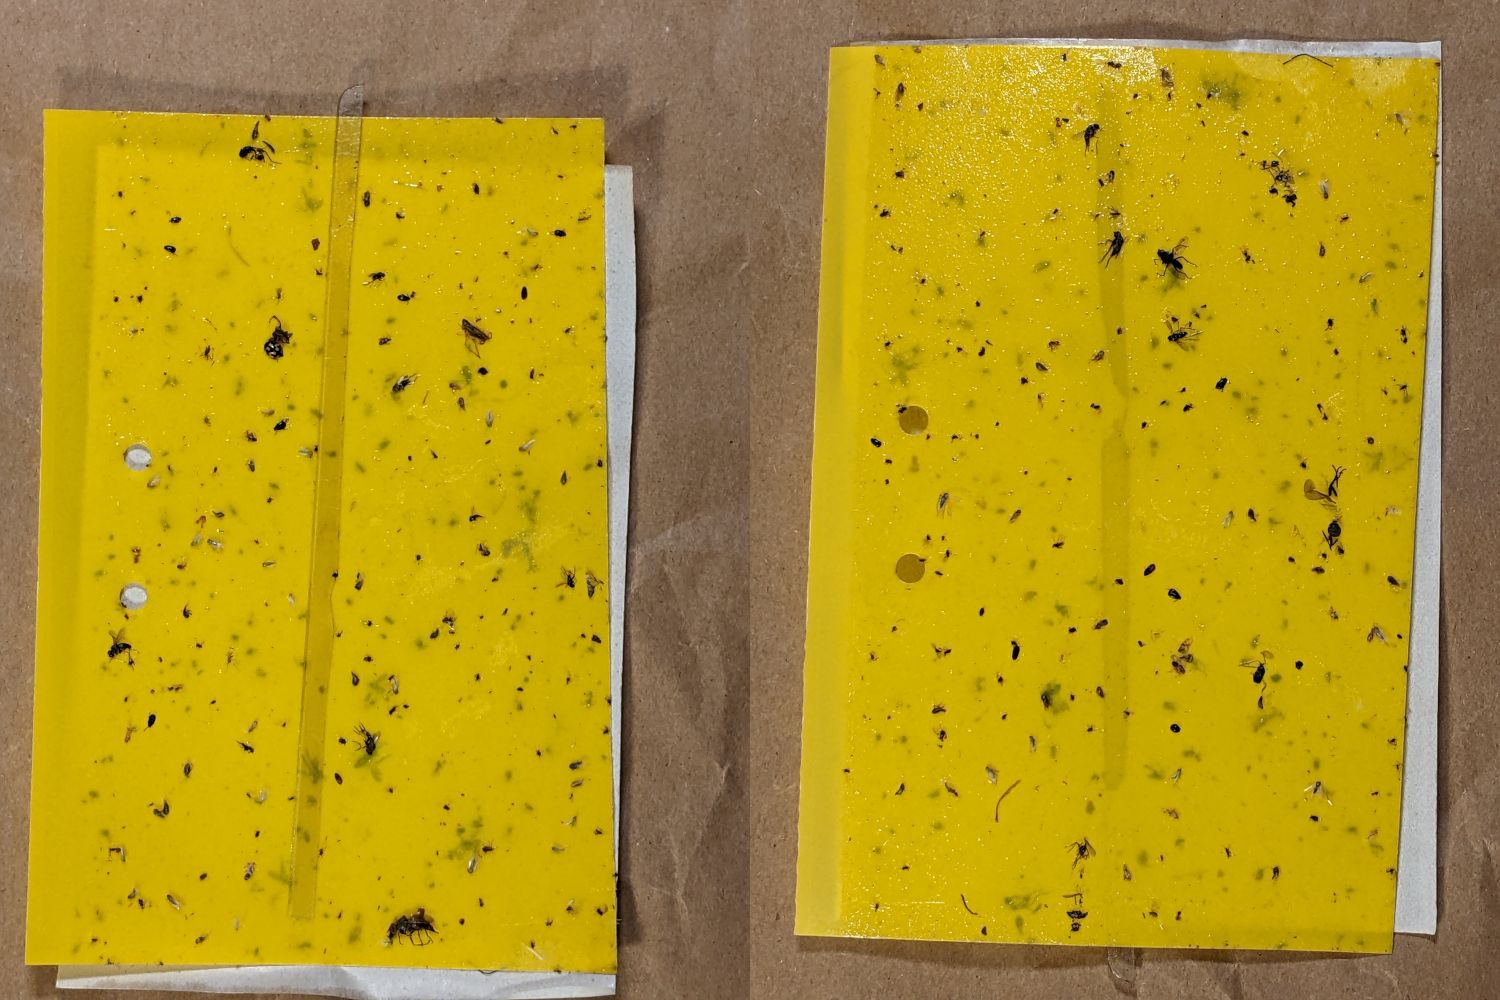
Mary decided the second round of sticky traps had collected enough Onion Maggot Flies (and other detritus) to warrant replacement, so this season will have three sets of cards.
The two sides of each card after about a month in the garden:
VCCG Onion Card A – 2022-07-17
VCCG Onion Card B – 2022-07-17
VCCG Onion Card C – 2022-07-17
VCCG Onion Card D – 2022-07-17
VCCG Onion Card E – 2022-07-17
VCCG Onion Card F – 2022-07-17
There are many flies that look (to me) like Onion Maggot Flies, in contrast with the first round of cards which had far fewer flies after about six weeks in the bed.
One of the frames screwed to a fence post suffered a non-fatal mishap, so I made and deployed a seventh trap. We’re pretty sure the garden has enough flies to go around.
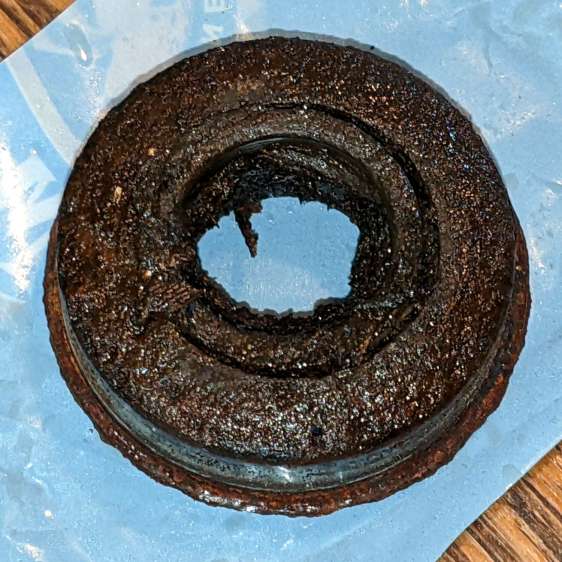
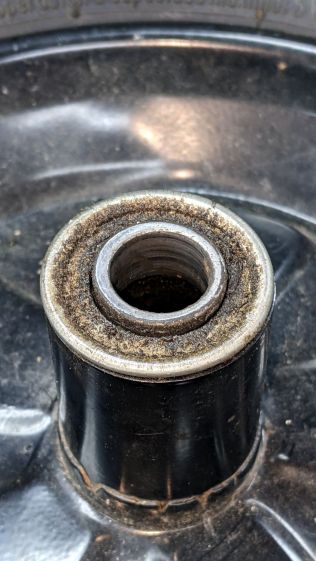
The rubber in pneumatic tires / tubes rots when left out in the open for a year or three, so I volunteered to replace the dead-flat tire (on the wheelbarrow I rebuilt last year) with the “flat free” solid foam tire+wheel harvested from an irreparably damaged wheelbarrow. Which, as it turned out, had lost one bearing and the remaining bearing wasn’t in good shape:
Wheelbarrow Wheel – victim bearing
The bearings in the pneumatic wheel were in comparatively good shape:
Wheelbarrow Wheel – donor bearing
So I knocked the good bearings out, cleaned up / re-lubed them with squirts from my lifetime supply of genuine Mobil Vactra No. 2Sticky Way Oil, and hammered tapped them into the solid-tire wheel.
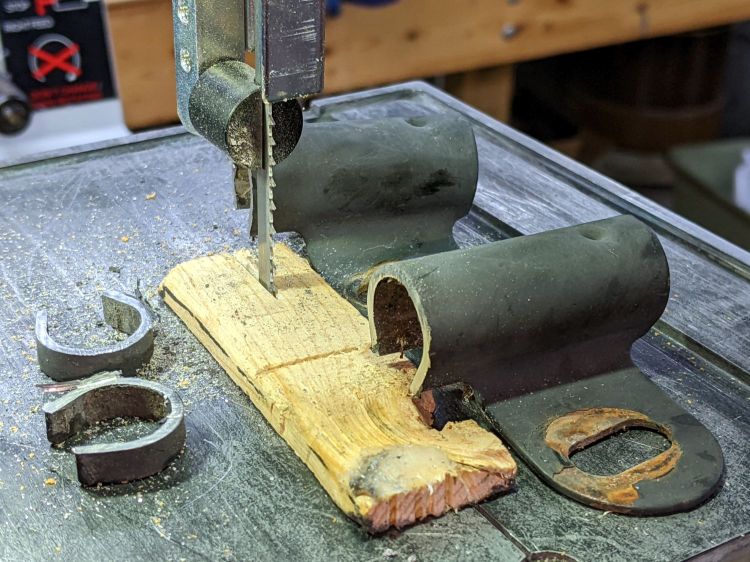
Whereupon I discovered the two wheels have different hub lengths and, unfortunately, the axle clamps in the recipient wheelbarrow lacked enough adjustment range.
Well, I can fix that:
Wheelbarrow Wheel – axle clamp cutting
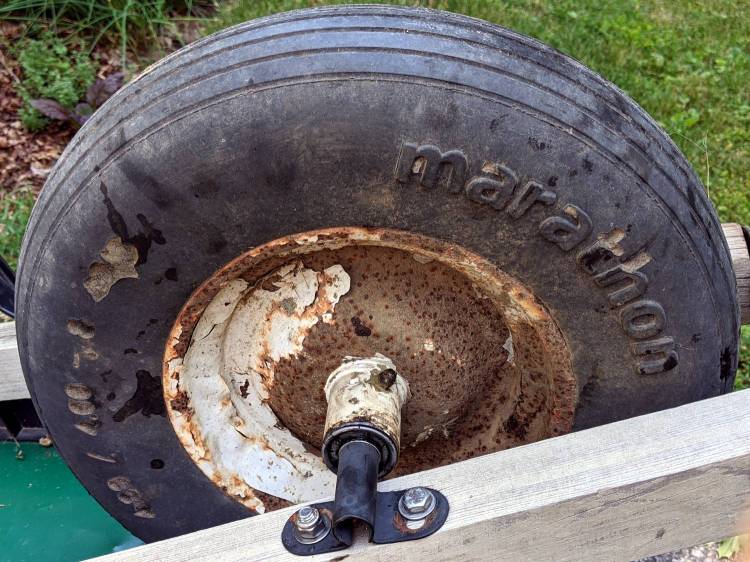
I briefly considered cleaning and repainting the wheel, but came to my senses when I considered the tire’s condition:
Wheelbarrow Wheel – transplanted
I suppose when the tread flakes off, the interior foam will rapidly erode, but we’ll burn that bridge when we encounter it.
The alert reader will have immediately noted the grease fitting on that rusty wheel: you’re supposed to periodically fill the entire hub with sufficient grease to push the crud out of the bearings. IMO, that’s so deep in silk purse territory as to be irrelevant.
The remaining useful parts from the defunct wheelbarrow will, most likely, come to good use next year …
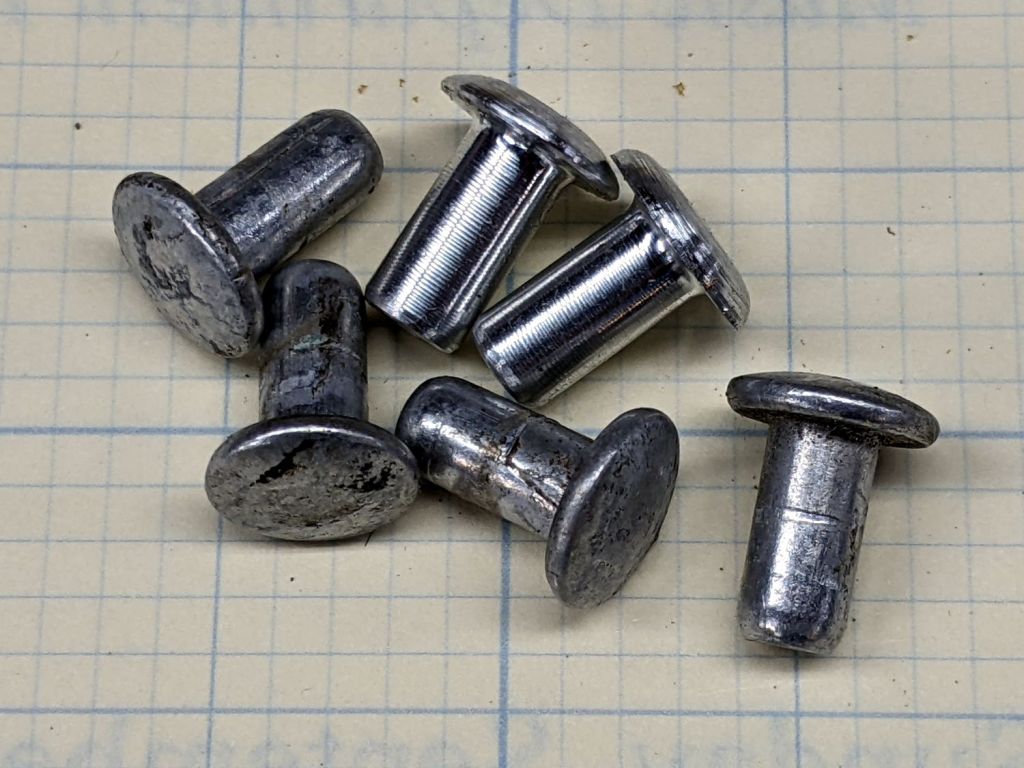
I planned to replace the vinyl straps on our set of (salvaged) lawn / patio chairs and made a pair of rivets for one long-missing strap:
Lawn chair strap rivets
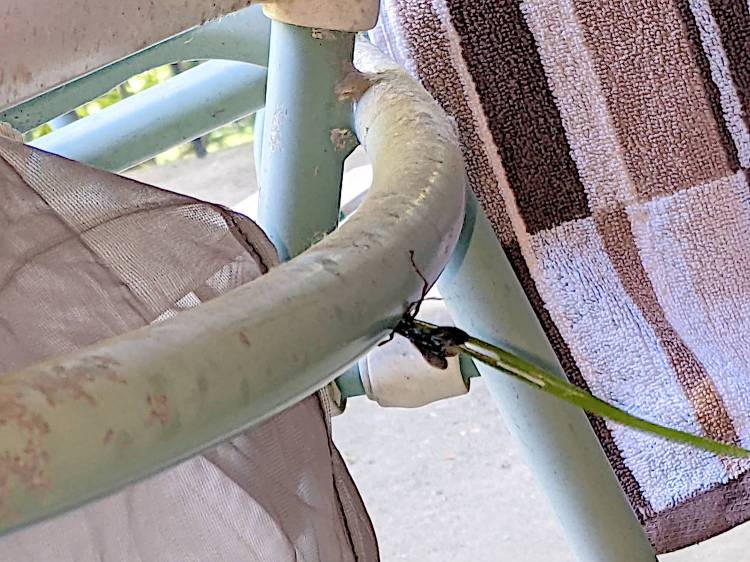
The overall project is on indefinite hold, as a Steel-blue Cricket Hunter (*) has decided at least one of the chairs is an ideal place to start a family:
Lawn chair – wasp nest under construction
The patio under the chair is littered with blades of grass and twigs that didn’t quite fit through the 5 mm vent hole in the tube, but that long stem went in just fine:
Lawn chair – wasp nest grass stem
We have seen the wasp airlifting crickets near the chair, so provisioning has begun. The cricket seemed not only larger than the hole, but also larger than the wasp; we assume the wasp knows what she’s doing.
The new wasp will hatch this year, pupate over the winter, then hatch and emerge next summer, but I plan to replace the straps after the construction season ends.
I have no idea how to clean out whatever’s accumulating in there …
(*) I learned them as Steel-blue Cricket Killer, but the crickets are just paralyzed, not completely dead.
The only LED floor lamp I bought which didn’t require extensive hackery to lower the business end to suit Mary’s preferences failed after two years. The warm white LEDs continued to work fine:
Miroco LED Floor Lamp – warm white LEDs
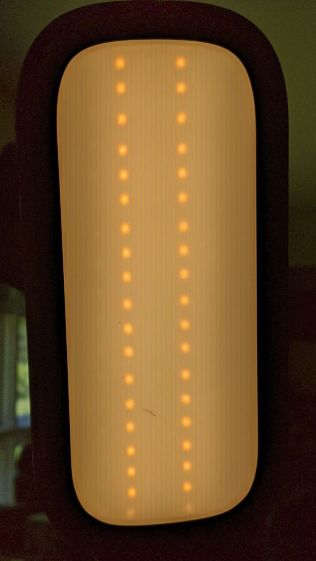
But the cool white LEDs were permanently on at a very low level and did not respond to any of the brightness controls:
Miroco LED Floor Lamp – cool white LEDs
You can’t tell, but the cool whites are on in the first picture, too.
The symptoms suggested the driver transistor for the cool whites has failed partially on, although I’d expect it to be either a dead short or completely open.
The lamp being a year or more out of warranty and having come from one of the myriad Amazon sellers banned during the Great Paid Review Purge, there’s nothing to do but remove the four screws from the back of the control lump and see what’s inside:
Miroco LED Floor Lamp – PCB packing
How this was assembled I cannot say, because the three wires going to the LED head (on the far right) have less than an inch of slack. Maybe they pulled wire into the head while screwing things together?
I think the HC8T1212 microcontroller sticking out of the foam is a distant descendant of the Motorola (remember Motorola?) MC68HC05 family. I’m mildly surprised they didn’t use a 32-bit ARM / MIPS / whatever micro, with WiFi capability and a strong desire to siphon my private bits.
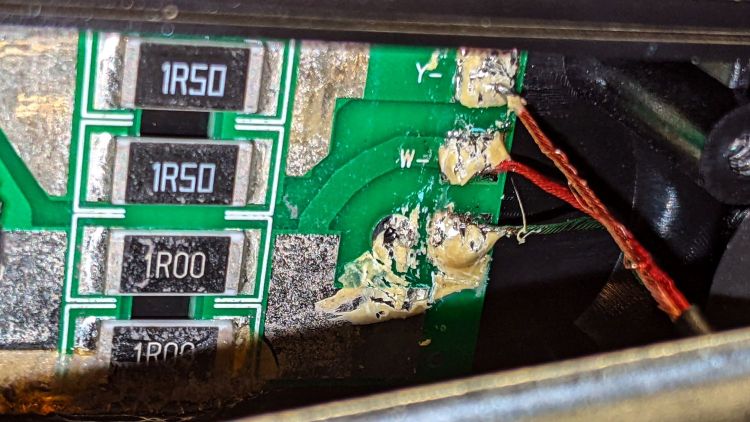
The two pieces of closed-cell foam seemed firmly glued to the PCB, but eventually yielded to brute force. Scraping brittle yellowish goo off the right end revealed the LED ballast resistors and the wire labels:
Miroco LED Floor Lamp – ballast resistors – LED wiring
Note the bar-taut Y- wire going to the warm-white (“yellow”?) LEDs.
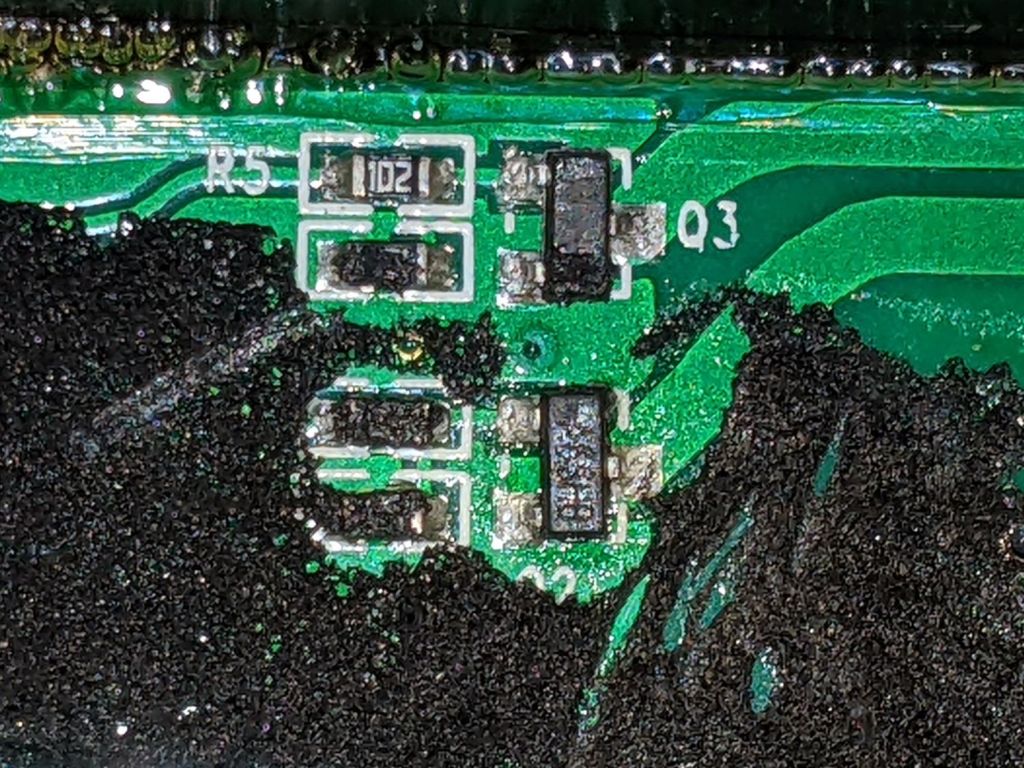
The black foam left a mess over most of the PCB, but diligent scraping eventually revealed the driver transistors:
Miroco LED Floor Lamp – A6SHB MOSFETs
You can’t read it, but the topmarks were A6SHB: an old Siliconix (remember Siliconix?) SI2306 30 V / 3 A MOSFET. Turns out you can get new-production SI2306 transistors from the usual Asian foundries through eBay, which I did.
It’s not the neatest soldering job ever, but it’ll suffice:
Miroco LED Floor Lamp – A6SHB MOSFET replaced
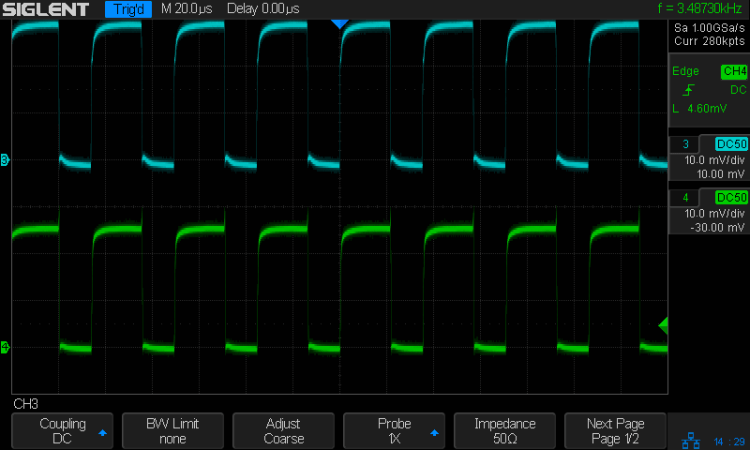
The colorful wires over on the right added enough length for a pair of Tek current probes:
Miroco LED Floor Lamp – 200 mA-div
The top (cyan) trace is the (repaired) cool LEDs, drawing 600 mA from the 10 V supply, so the 0.5 Ω ballast dissipates 180 mW. The bottom (green) trace is the warm LEDs at 500 mA through a 0.75 Ω ballast for 190 mW. That end of the control lump does feel a bit warm after a while, but nothing out of the ordinary.
Stuff the foam back in place, tuck the longer wires around the edges, snap the cover in place, reinstall the screws, and the lamp is at least as good as new.
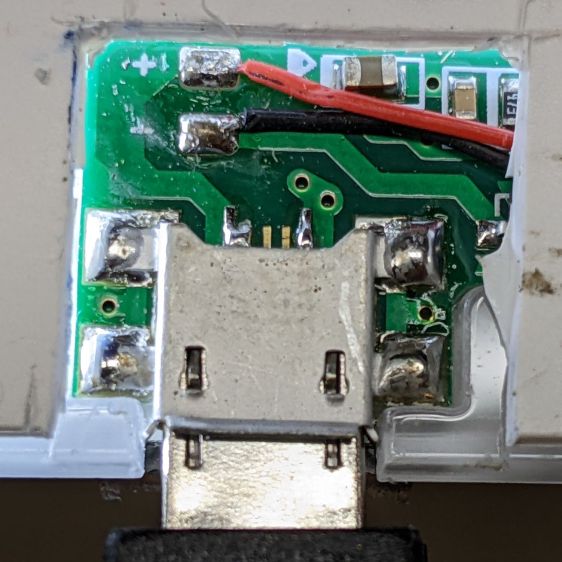
Unfortunately, reinforcing the USB Micro-B jack on the side of the LitUp LED Light Pad only delayed the inevitable: the light became erratic even without the slightest touch. The pad consists of three acrylic sheets glued together around the entire perimeter, so there’s no way to get access to the no-user-serviceable-parts within. Apparently, you’re supposed to just throw it out.
On the other paw, it’s already dead, so there’s nothing to lose:
LitUp LED Light Pad – failed USB jack
A little deft razor knife work chopped through the rear sheet without doing any (more) damage to the PCB within. The LEDs can still be convinced to light, but the USB jack is definitely wrecked.
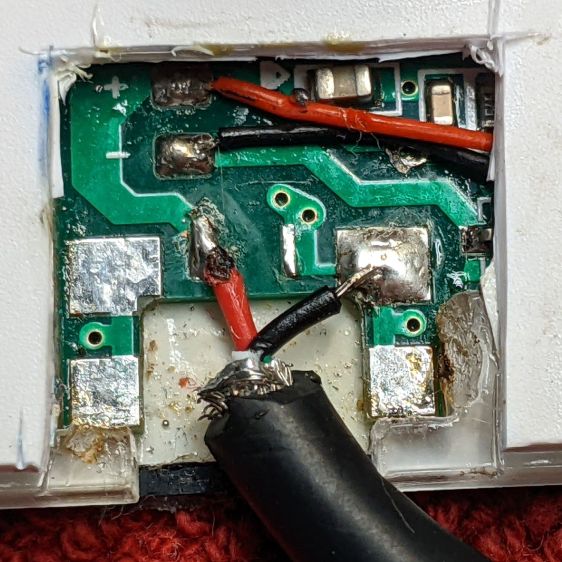
Applying some ChipQuik let me extract the jack without (too much) more damage. Rather than replace it, I just soldered a pigtail USB cable to the obvious PCB pads:
LitUp LED Light Pad – direct power wiring
If I’d noticed that little solder ball, I’d have removed it before filling the cavity with hot melt glue and squishing the cut-out piece of white acrylic in place.
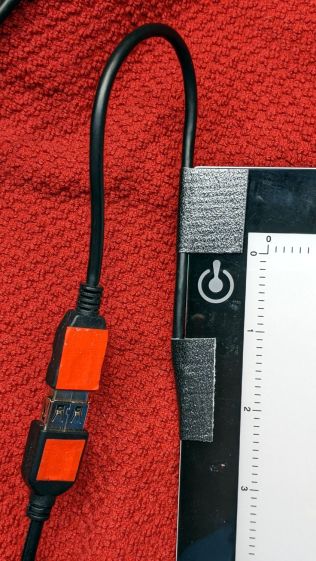
A little black duct tape should keep the wiring stable enough for the foreseeable future:
LitUp LED Light Pad – redirected cable
That was another (relatively) easy zero-dollar repair that should not be necessary.
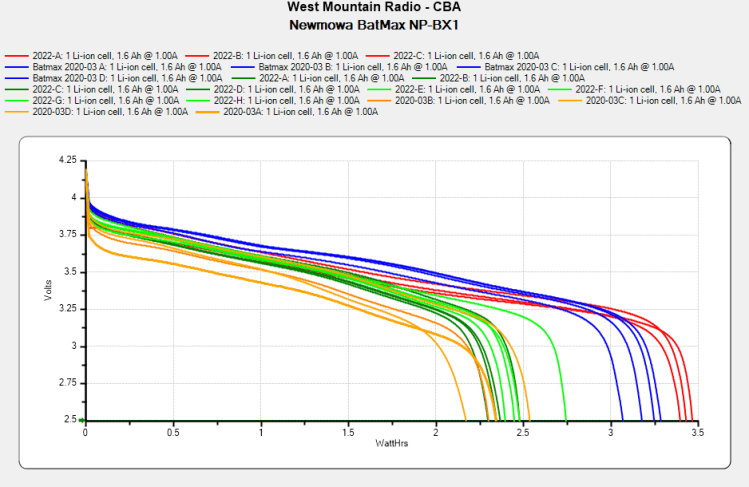
In round numbers, the total capacity declined from 3.25 W·hr to 2.5 W·hr, which means a single battery can’t quite power the camera for the duration of our normal hour-long rides. I do not know what voltage trips the camera’s decision, but the batteries definitely shut down sooner.
So, based on their previous track record, I bought another quartet of Batmax batteries. Being that type of guy, I tested both the old (2020) and new (2022) sets:
NP-BX1 – BatMax 2022 vs 2020 – used-new
The blue traces are the C/D batteries from the as-new tests back in early 2020, the green traces are C/D after two years of use, and the red traces are the “new” quartet after their first charge in the Official BatMax Charger.
It looks very much like BatMax is selling used batteries repackaged as new items, because they are indistinguishable from my used ones. They definitely are not the “Premium Grade A cells” touted in the description.
I returned them for a refund and sent the test results to BatMax; they sent “new replacements” even though I said I would not pay for any future shipments. The batteries had a slightly different wrapper, but the test results were still indistinguishable from used batteries. I offered to return the package and was told that would not be needed.
It seems three good batteries now cost about as much as four crap batteries, under the reasonable assumption chargers are essentially free.
Three batteries isn’t quite enough for my usual rotation and, for unknown reasons, one cannot buy only batteries, so in short order I will have two chargers and six batteries.
The consolidated test results:
NP-BX1 – Newmowa Batmax 2022 comparison
The color code:
Newmowa: red
BatMax 2020 new: blue
BatMax 2020 used: orange
BatMax 2022 new: green + lime
I stopped writing Amazon reviews after having a few detailed-writeups-with-graphs rejected for the usual unspecified reasons. As the Finn put it, “You wanna download, you know the access code already.”