The Smell of Molten Projects in the Morning

Ed Nisley's Blog: Shop notes, electronics, firmware, machinery, 3D printing, laser cuttery, and curiosities. Contents: 100% human thinking, 0% AI slop.

Author: Ed

  • OMTech 60 W Laser: Dual-path Air Assist

    OMTech 60 W Laser: Dual-path Air Assist

    A tweak to the air assist plumbing of my OMTech 60 W laser produces much the same result as Russ Sadler’s Super Ultimate Air Assist, with somewhat less plumbing and cheaper Amazon parts:

    OMTech Laser - air assist - plumbing
    OMTech Laser – air assist – plumbing

    The overall doodle shows the electrical wiring and pneumatic plumbing:

    Dual-path air assist diagram
    Dual-path air assist diagram

    The electronics bay now has two solid state relays:

    OMTech Laser - air assist SSRs
    OMTech Laser – air assist SSRs

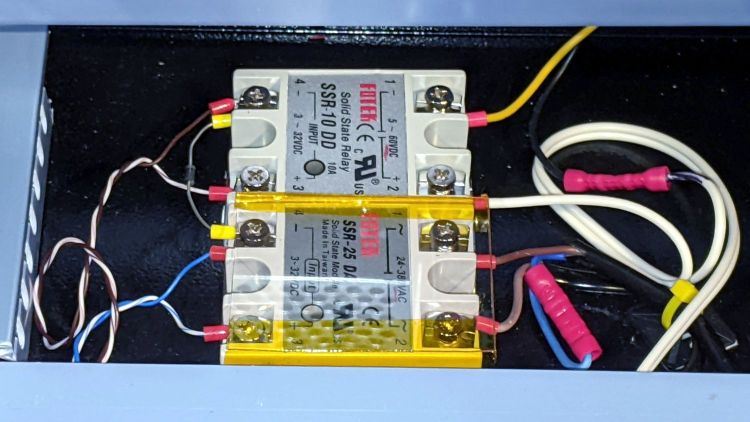
    The front SSR turns on the air pump when the controller activates the STATUS or AUX AIR outputs; the diode between the (-) terminals acts as wired-OR.

    The rear SSR turns on the solenoid valve whenever the AUX AIR output is active. The diode turns on the other SSR to start the pump.

    When the laser cutter is idle, both the STATUS and AUX AIR outputs are inactive, so the pump doesn’t run and the solenoid is closed.

    The controller has a front-panel AUX AIR button that turns on its eponymous output, which turns on both the solenoid and the pump. I have turned it on to verify the circuitry works, but don’t do any manual cutting. I never was very good with an Etch-a-Sketch and the laser’s UI is much worse.

    LightBurn includes an Air Assist setting for each cut layer, which should be OFF for engraving layers and ON for cutting layers. Basically, you go through the Material Library and tweak all the values , then It Just Works™ when you assign that material setting to a particular layer.

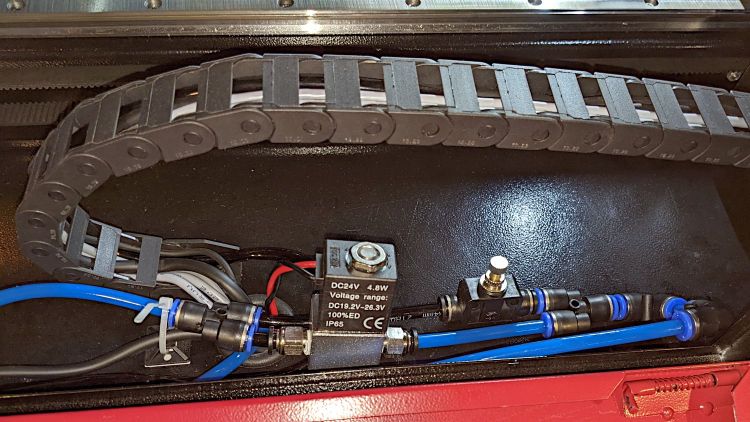
    The solenoid valve must be a “direct acting solenoid valve“, as the air pump produces about 3 psi and cannot activate a “self piloted” solenoid valve. When the valve is open, the pump can push about 12 l/min through the plumbing to the nozzle:

    OMTech Laser - air assist - 12 lpm flow
    OMTech Laser – air assist – 12 lpm flow

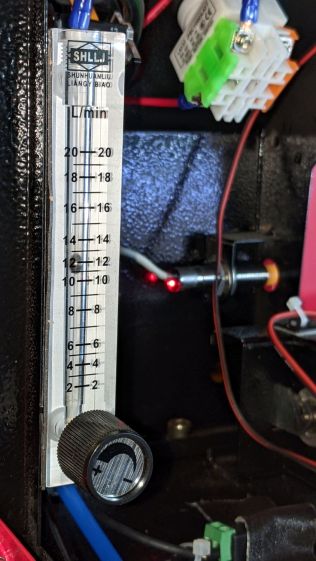
    That’s noticeably lower than the 14 l/min without all the valves and additional plumbing.

    The flow control valve is a manually adjusted needle valve to restrict the engraving air flow to maybe 2 l/min, just enough to keep the smoke / fumes out of the nozzle and away from the lens, when the solenoid valve is closed.

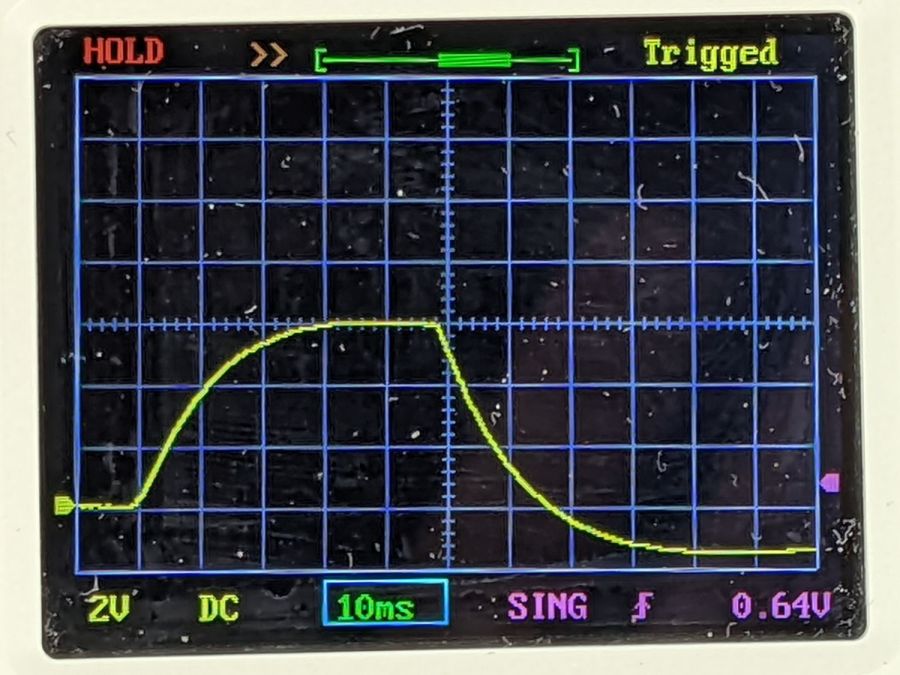
    I set the controller to delay for 1 s after activating the air pump to let it get up to speed. There’s an audible (even to my deflicted ears) rattle from the flowmeter when the air assist solenoid opens.

    The paltry 12 l/min seems to promote clean cuts and 2 l/min doesn’t push much smoke into the surface around the engraved area.

    So far, so good.

  • Laser-cut Punched Cards

    Laser-cut Punched Cards

    I just had to do this:

    Laser-cut punched card samples
    Laser-cut punched card samples

    It took several iterations to convince me I can’t quite pull it off yet, but the idea shows promise; the GitHub repo includes useful links to other variations and techniques.

    The top card starts with hole locations / column numbers preprinted by the inkjet, then (nearly but not exactly) aligned in the laser cutter for “engraving” the variable text and “punching” the corresponding holes. The other cards represent various steps along the way, all of which demonstrate why a 60 W laser is the wrong way to print text on cardstock:

    Laser cutter - engraved punched card
    Laser cutter – engraved punched card

    Aligning a preprinted sheet in the laser cutter with sufficient accuracy to hit all the holes turns out to be a significant challenge: the red dot laser pointer hangs off the rear of the nozzle with the beam at a steep angle:

    Magnetic Honeycomb Spikes - MDF
    Magnetic Honeycomb Spikes – MDF

    Which means the red dot coincides with the main laser beam only at the exact focal distance below the nozzle after painstaking (and easily disrupted) alignment. A red dot laser coaxial with the CO₂ tube / beam should produce much better results, but that’s not what I have.

    It Would Be Nice If™ I could cut the card outlines with the laser, print the hole positions on the inkjet, then align the “blanks” for “punching”, but I have yet to find any combination of parameters amid the unsteady ziggurat of Linux / CUPS printing configurations to produce properly aligned results on a custom paper size:

    Misaligned punched card printing
    Misaligned punched card printing

    You might think telling the printer it’s handling a #10 envelope with the image of the text carefully positioned to land at the proper spot on the actual card should work. You (well, I) would be wrong.

    I’m pretty sure this can be coerced into working, but it must marinate on the to-do list for a while.

  • OMTech 60 W Laser: Improved COB LED Shades

    OMTech 60 W Laser: Improved COB LED Shades

    Adding (fake) rivets to the COB LED shade brackets definitely improves their appearance:

    Acrylic COB LED Shade - installed
    Acrylic COB LED Shade – installed

    I cut new shades from vintage clear acrylic sheet, with more aluminized mylar attached to the lower surface: you can barely see the COB LED strip through the reflecting surface.

    Depending on how you arrange all the hardware hanging on the nozzle, the shades can collide with something at the home position in the far right corner:

    Acrylic COB LED Shade - X clearance
    Acrylic COB LED Shade – X clearance

    Definitely a step up from cardboard …

  • OMTech 60 W Laser: Head Alignment Puzzle

    OMTech 60 W Laser: Head Alignment Puzzle

    Having established that the laser beam comes out of the lens perpendicular to the honeycomb platform surface, this seemed peculiar:

    OMTech 60W beam alignment - head X plane
    OMTech 60W beam alignment – head X plane

    The mirror 3 + lens tube has a distinct tilt when seen from the +X direction (the right side of the machine, so it’s in the YZ plane, I suppose).

    This is not matched when seen from the -Y direction (front):

    OMTech 60W beam alignment - head Y plane
    OMTech 60W beam alignment – head Y plane

    The tilt does not seen to correct for a misalignment in the X axis rail or the brackets attaching the head to the linear bearing.

    The beam seems properly centered on the lens and nozzle, so I’m loath to twiddle the alignment just to see what happens. One of these days, for sure, that must happen …

  • OMTech 60 W Laser: Improved MDF Spikes and Stops

    OMTech 60 W Laser: Improved MDF Spikes and Stops

    A bit of tinkering suggested I needed a way to repeatably position stock sheets on the honeycomb, so I conjured stops that would be slightly taller than the magnetic spikes:

    Improved MDF Honeycomb Spikes - first pass
    Improved MDF Honeycomb Spikes – first pass

    Three of those form a corner into which you can tuck victims of the same general size:

    Improved MDF Honeycomb Spikes - stock alignment
    Improved MDF Honeycomb Spikes – stock alignment

    Those pointy MDF spikes should start with slightly rounded tops, because that’s what they’ll look like after a few uses:

    Improved MDF Honeycomb Spikes - alignment stops
    Improved MDF Honeycomb Spikes – alignment stops

    I also made a low-profile stop for victims lying directly on the honeycomb for engraving:

    Please Close The Gate - engraved
    Please Close The Gate – engraved

    The SVG images include a nested version to tile across random MDF leftovers.

    The SVG images as a GitHub Gist:

    Loading
    Sorry, something went wrong. Reload?
    Sorry, we cannot display this file.
    Sorry, this file is invalid so it cannot be displayed.
    Loading
    Sorry, something went wrong. Reload?
    Sorry, we cannot display this file.
    Sorry, this file is invalid so it cannot be displayed.

  • OMTech 60 W Laser: Magnetic Honeycomb Spikes

    OMTech 60 W Laser: Magnetic Honeycomb Spikes

    When a cardboard base plate under metal spikes would pose a fire hazard, you can position magnetic spikes where they’re needed:

    Magnetic Honeycomb Spikes - acrylic
    Magnetic Honeycomb Spikes – acrylic

    The 12 mm neodymium magnet is slightly larger than a single honeycomb cell, so it wants to center itself atop a cell. The stainless steel button head screw sits in the magnet’s countersunk hole and protrudes just enough to make sure the spike doesn’t slide sideways unless you want it to:

    Magnetic Honeycomb Spikes - parts detail
    Magnetic Honeycomb Spikes – parts detail

    A cloud of combustible gas doesn’t pose a threat under there:

    Magnetic Honeycomb Spikes - MDF
    Magnetic Honeycomb Spikes – MDF

    The thin red beam comes from the targeting laser on the back of the nozzle.

    Storage is easy: just smush a handful of the things against the side of the laser cabinet:

    Magnetic Honeycomb Spikes - storage
    Magnetic Honeycomb Spikes – storage

    Buy all the parts in lots of 100 to have supplies for other adventures!

  • Gentec ED-200 Optical Joulemeter: Oscilloscope Comparison

    Gentec ED-200 Optical Joulemeter: Oscilloscope Comparison

    The little DSO-150 oscilloscope has a 1 MΩ || 20 pF input with a 200 kHz bandwidth that should be entirely adequate for the OMTech laser’s millisecond-scale modulation signals from the Gentec ED-200 Optical Joulemeter. There is, however, only one way to be sure:

    Gentec ED-200 - scope test setup
    Gentec ED-200 – scope test setup

    The two scope inputs are in parallel, so the joulemeter over on the far right sees a 500 kΩ load, half of the specified 1 MΩ load, with at least twice the capacitance. If the two scopes display pretty much the same result, then it’s good enough.

    A 50 ms pulse at half power looks the same on both scopes:

    • Gentec ED-200 - 50 ms - DSO-150
    • Gentec ED-200 - 50 ms - Siglent

    A 50 ms pulse at full power doesn’t quite top out:

    • Gentec ED-200 - 11V 50ms - DSO-150
    • Gentec ED-200 - 11V 50ms - Siglent

    Given that the pulse duration should be less than the detector’s 1.5 ms risetime, using a 50 ms pulse is absurd. Right now I’m just looking at the overall waveform and detector range, not trying to get useful numbers out of the poor thing.

    All in all, the DSO-150 will do just fine.