The Smell of Molten Projects in the Morning

Ed Nisley's Blog: Shop notes, electronics, firmware, machinery, 3D printing, laser cuttery, and curiosities. Contents: 100% human thinking, 0% AI slop.

Tag: Repairs

If it used to work, it can work again

  • End of the Sienna

    Although I knew the Sienna showed signs of a leaky head gasket, the exhaust system needed some attention, and a sporty used car recently put it in the shade, this still came as a surprise:

    I’m trying to get a crew … together and live the demolition derby dream

    By the time I arrived, the dashboard trim had vanished and the air bags were safely out:

    Demolition Derby - Sienna dashboad prep
    Demolition Derby – Sienna dashboad prep

    Diligent application of a Harbor Freight “Professional Windshield Removal Kit” cut through the side window seals, but the rear window rested on four impossible-to-cut locating studs:

    Sienna - rear window locating stud
    Sienna – rear window locating stud

    I managed to pry the glass off using a Gasket Scraper and considerable muttering.

    With all the exterior trim, lights, and mirrors gone, the Sienna was in fine race trim:

    Sienna - Demo derby race trim
    Sienna – Demo derby race trim

    But, being no longer street-legal, it required trailering. For the record, not all huge pickup trucks have bulky guys with pot bellies behind the wheel:

    Demolition Derby - Tow Vehicle Rental
    Demolition Derby – Tow Vehicle Rental

    A few hours later, it was in the Short Track Full Size pack at the Upperco Volunteer Fire Company’s Demolition Derby:

    Sienna at Upperco VFC Demolition Derby - start
    Sienna at Upperco VFC Demolition Derby – start

    The driver required a few laps to shake off years of safe-driving indoctrination:

    Sienna - Demolition Derby - running alone - 2018-04-28
    Sienna – Demolition Derby – running alone – 2018-04-28

    But eventually the spirit of the thing took over:

    Sienna - Demolition Derby - right crunch - 2018-04-28
    Sienna – Demolition Derby – right crunch – 2018-04-28

    We now know the transmission oil cooler sat just ahead of the left front wheel, where it was exposed to damage by a glancing collision:

    Sienna - Demolition Derby - left crunch - 2018-04-28
    Sienna – Demolition Derby – left crunch – 2018-04-28

    The Sienna finished the race and made it almost all the way to the trailer before bleeding out through the ATF cooler.

    The driver emerged in fine shape, although the door didn’t work nearly as well as it had fifteen minutes earlier:

    Sienna - Driver exiting Van - 2018-04-28
    Sienna – Driver exiting Van – 2018-04-28

    A race staffer in a Bobcat aimed the carcass in the right general direction and shoved it onto the trailer for the return to base:

    Sienna - Final Trailer Tiedown - 2018-04-28
    Sienna – Final Trailer Tiedown – 2018-04-28

    You can find shaky low-res camera action documenting the event, because video-or-it-didn’t-happen.

    We piled the windows / parts / detritus into the back, a scrapper hauled it away the next morning, and that’s the end of our Sienna’s story.

    Toyota sold a lot of Siennas, which means the Hot Topics list over on the right will show a need for Sienna ABS trouble codes long into the future.

    In fact, the adjacent motel slot had a disconcerting sight:

    Yet Another Sienna
    Yet Another Sienna

    I think it was a 2001 model, but …
  • Torque Drivers

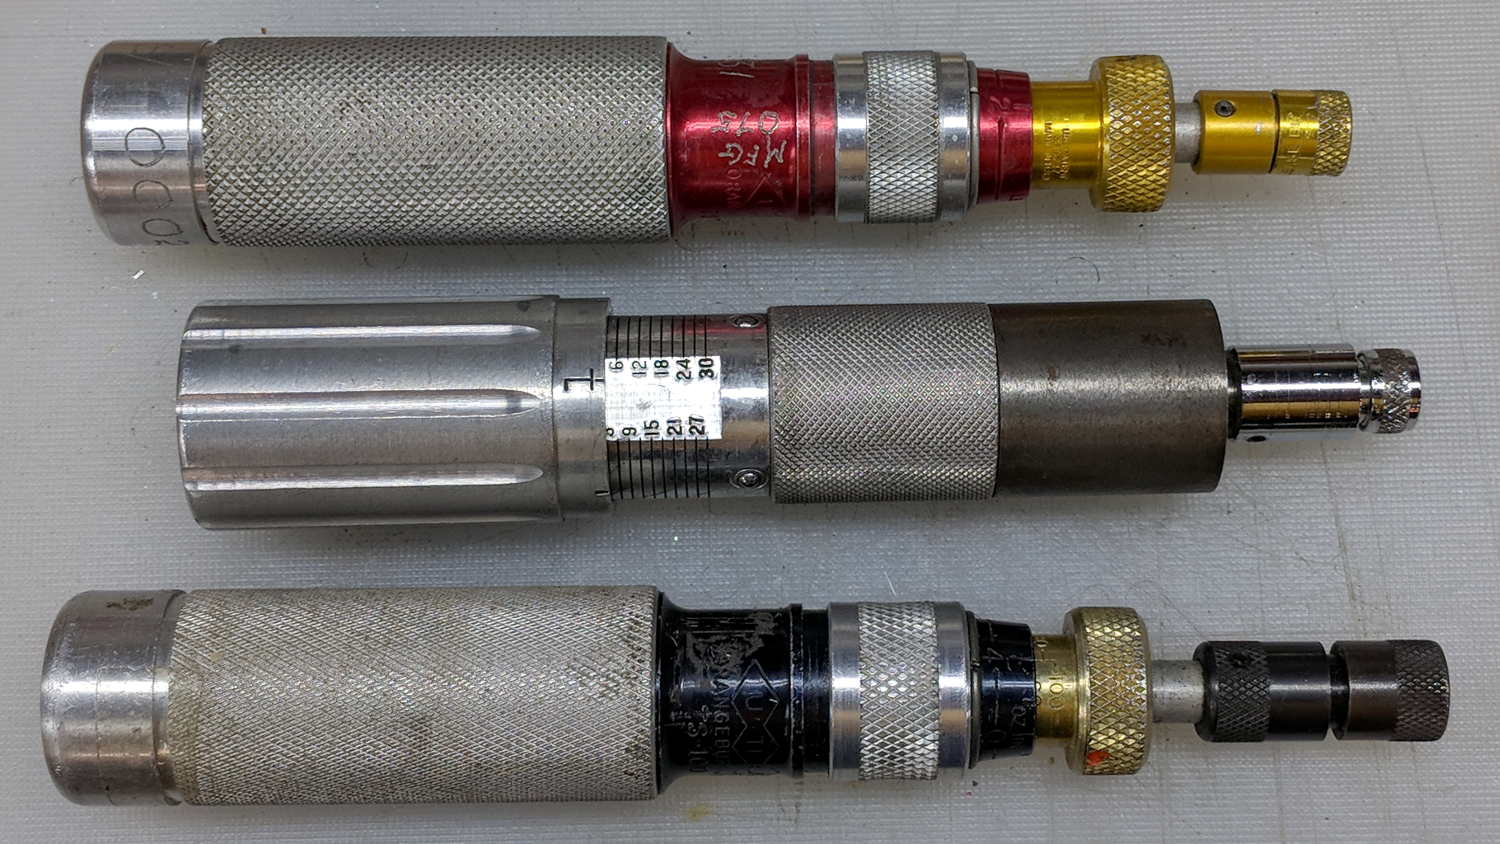
    A stack of loot boxes prize crates treasure chests on the Squidwrench Operating Table yielded a big box of torque drivers, two of which now grace my collection:

    Torque Drivers
    Torque Drivers

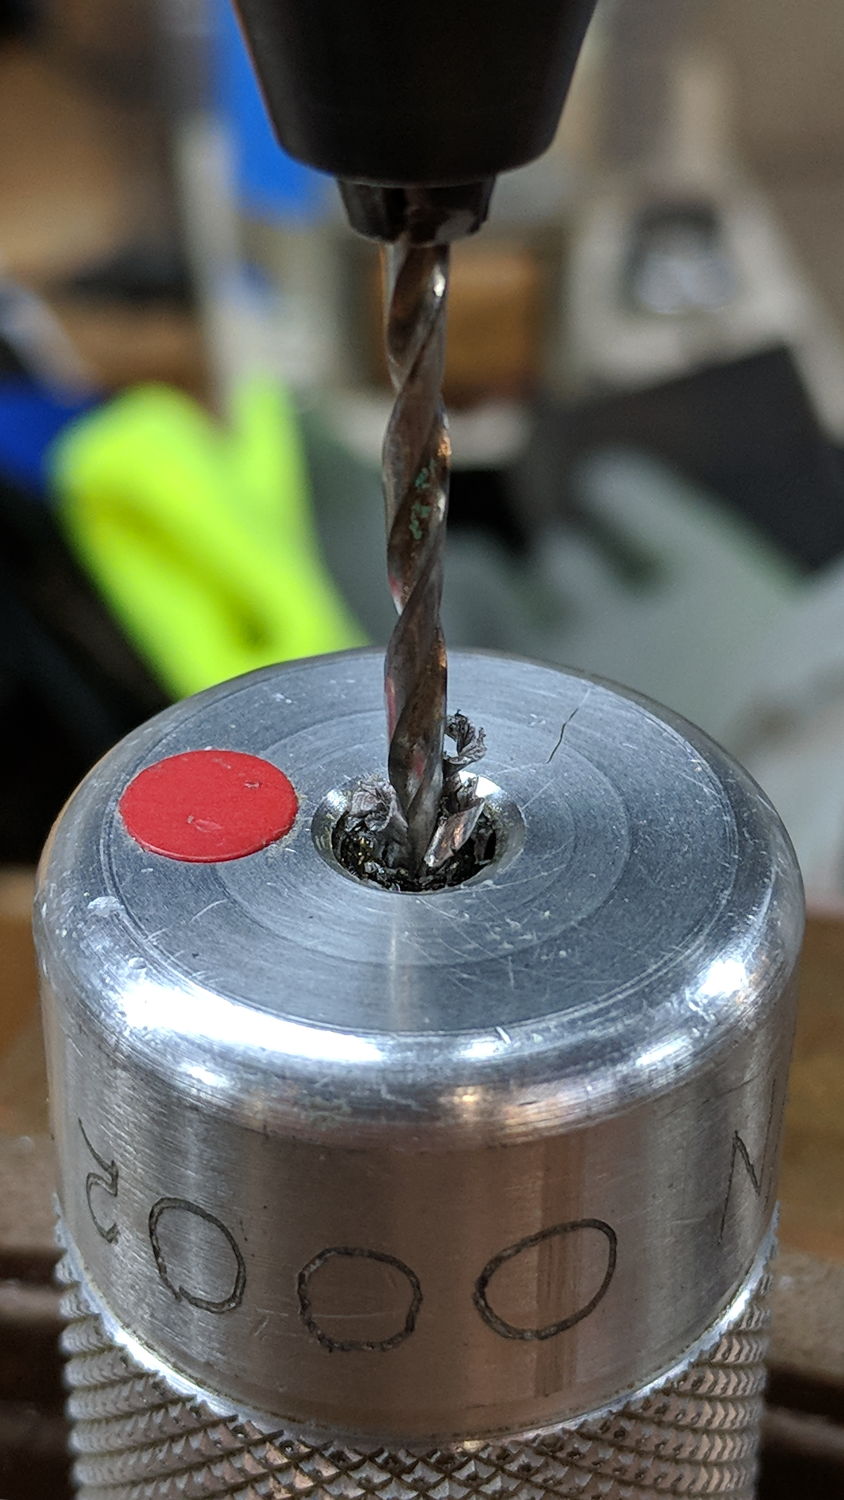
    As with clocks: when you have more than one torque wrench, you don’t know what torque it is. The black driver had a solder blob in its adjustment socket, obviously intended to prevent unqualified people (that would be me) from bungling a production-critical calibration.

    A suitable drill in a pin vise put a hole down the middle of the blob:

    Torque Driver - lead calibration seal
    Torque Driver – lead calibration seal

    Turning a tap into the hole produced enough traction to yank the solder shell straight out of the hex. Whew!

    The red driver goes to 30 lb·in, the silver to 30 lb·in, and the black to 100 oz·in. The red and black now agree to within maybe 4 oz·in, which I think is Good Enough, and both within 4 lb·ft of my Harbor Freight 200 lb·ft clicky wrench, which probably doesn’t mean much at the low end of the wrench’s scale.

    The silver driver refuses to agree with anything, which suggests somebody else monkeyed with its calibration before I laid hands on it.

    More calibration is needed.


  • Mis-Punched Scope Probe Hook

    Back in the day, HP scope probes had a rugged music-wire hook on the tip:

    HP scope probe tip
    HP scope probe tip

    These days, scope probe tips use ordinary sheet steel punched into a hook shape:

    Siglent scope probe - good tip
    Siglent scope probe – good tip

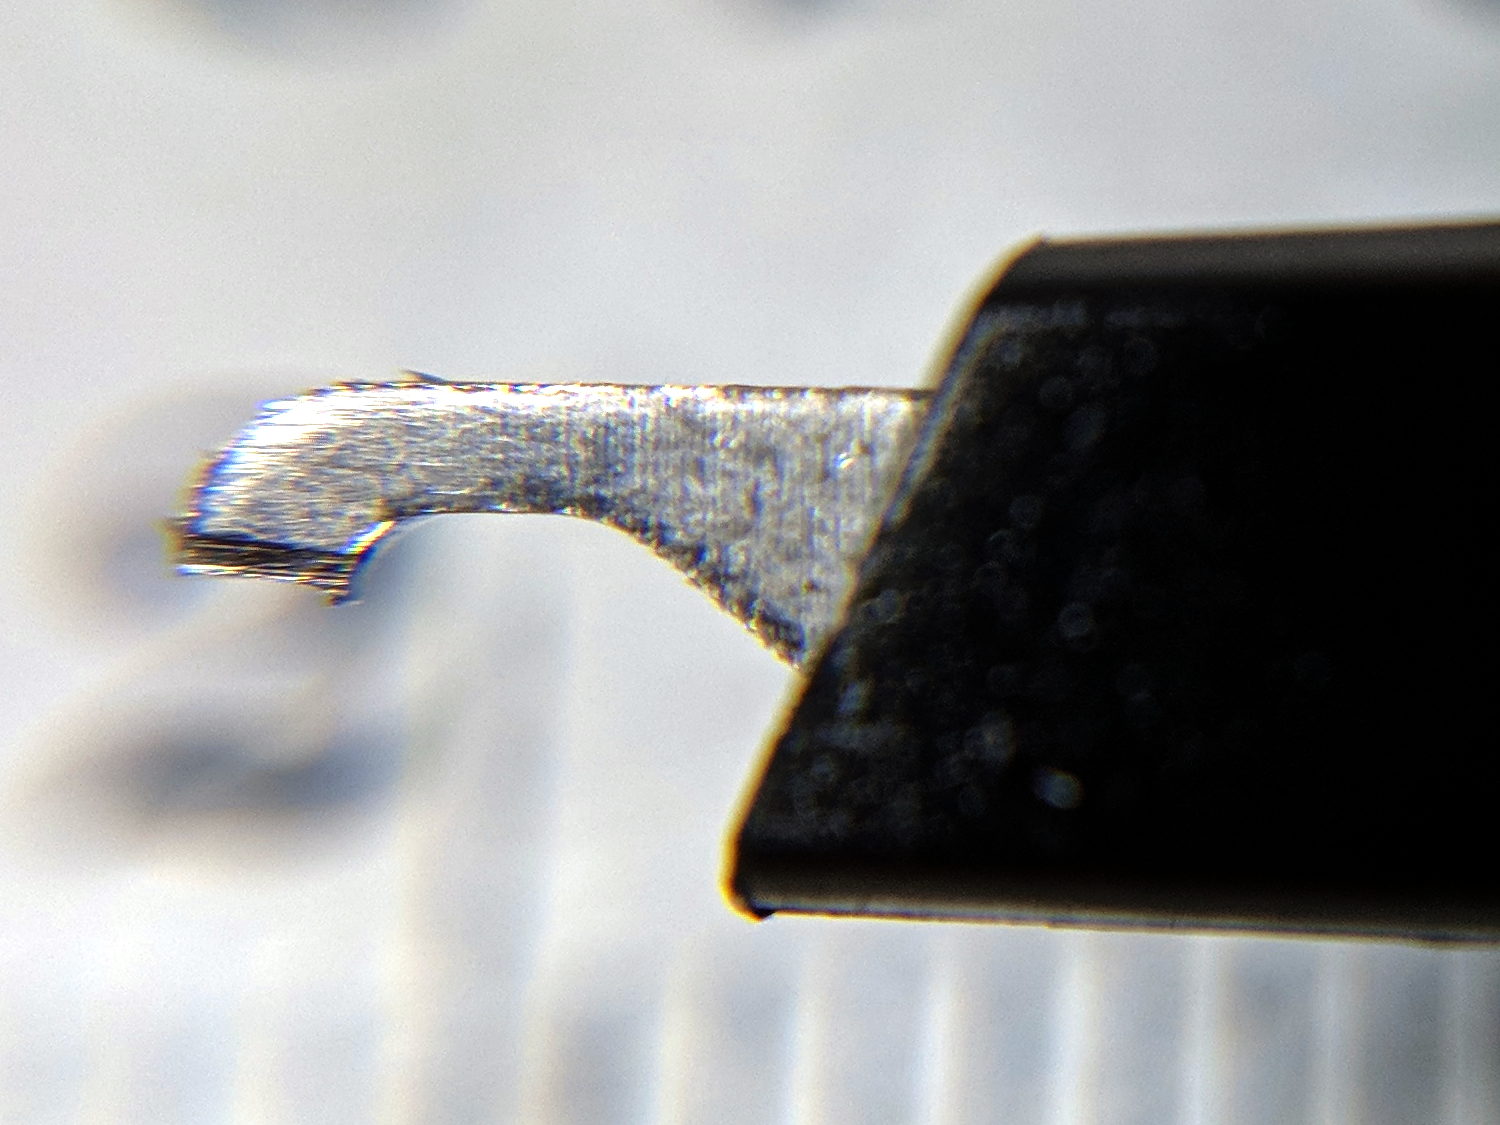
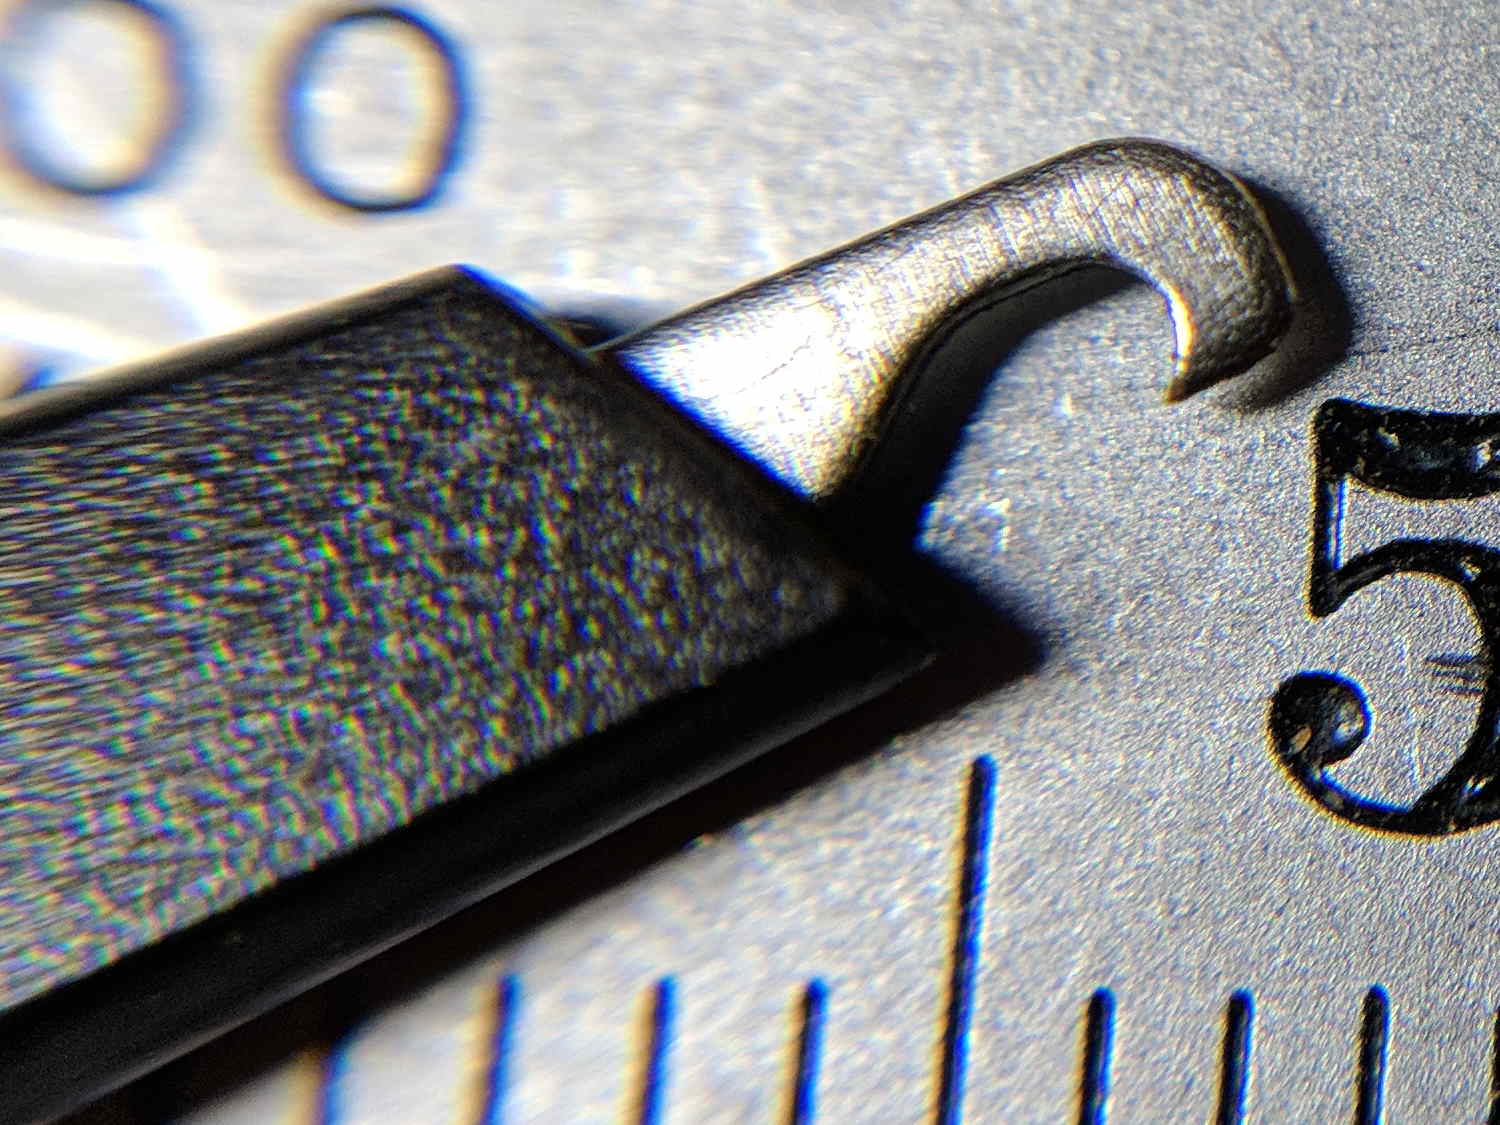
    By sheer bad luck, the first probe out of the bag had a mis-punched end with no griptivity:

    Siglent scope probe - mis-cut tip
    Siglent scope probe – mis-cut tip

    Dunno what happened, but it was definitely sheared off in the factory.

    After I finally recognized the problem, I shaped a crude hook with a safe-edge needle file and continued the mission:

    Siglent scope probe - filed tip
    Siglent scope probe – filed tip

    A quick note to Siglent put a replacement probe tip in the mail, so it’s all good.

  • Fluorescent Shop Light Ballasts, Redux

    As usual, several shoplights didn’t survive the winter, so I gutted and rebuilt them with LED tubes. Even the fancy shoplights with genuine electronic ballasts survive less than nine years, as two of those eight “new” lamps have failed so far.

    The dead ballast looks the same as it did before:

    Electronic ballast - label
    Electronic ballast – label

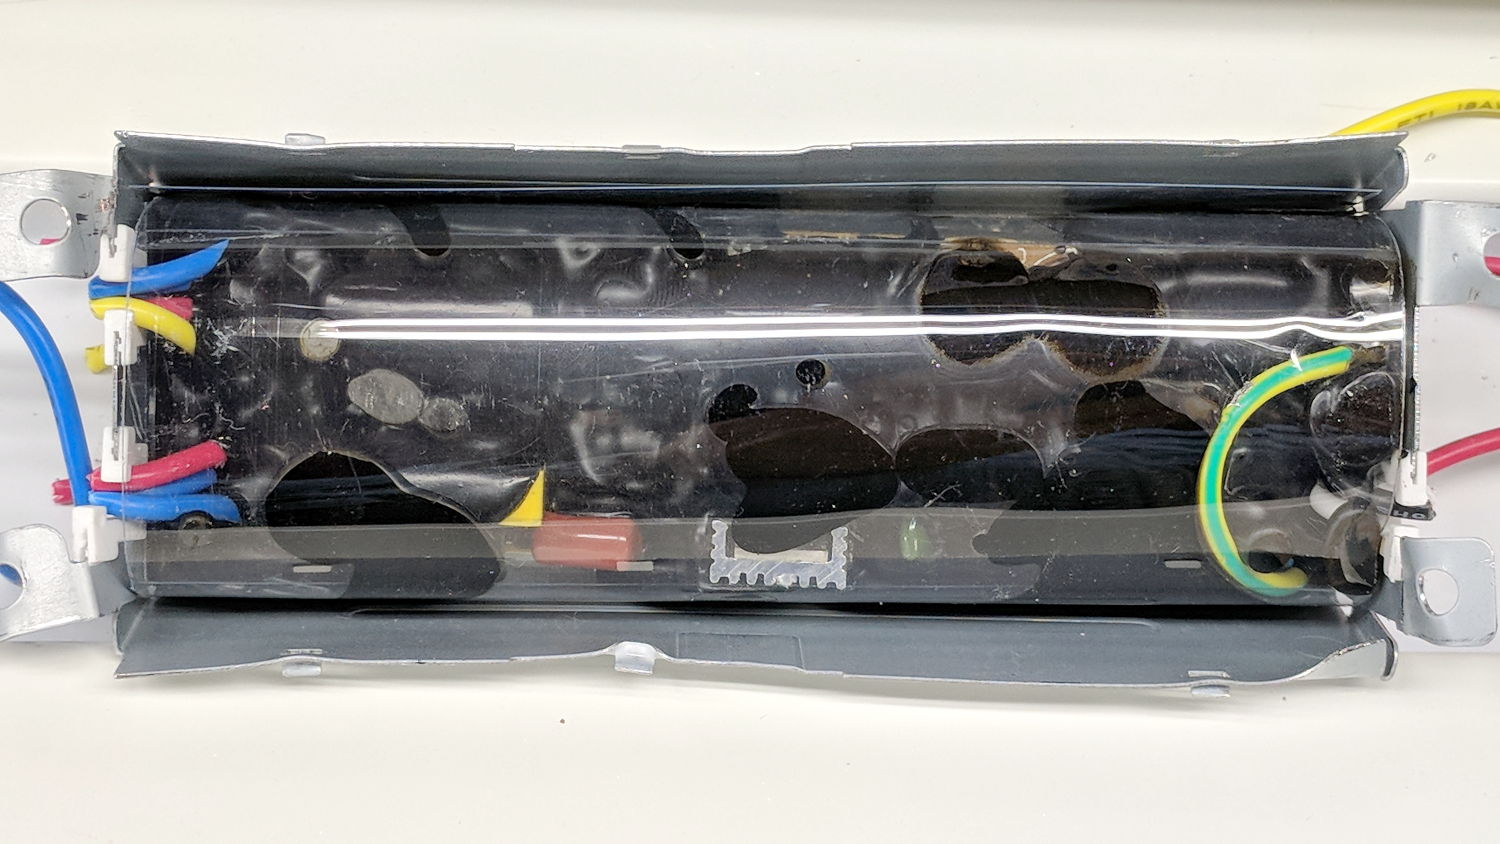
    Some deft work with a cold chisel and my Designated Prydriver popped the top to reveal a plastic-wrapped circuit board:

    Electronic ballast - interior wrapped
    Electronic ballast – interior wrapped

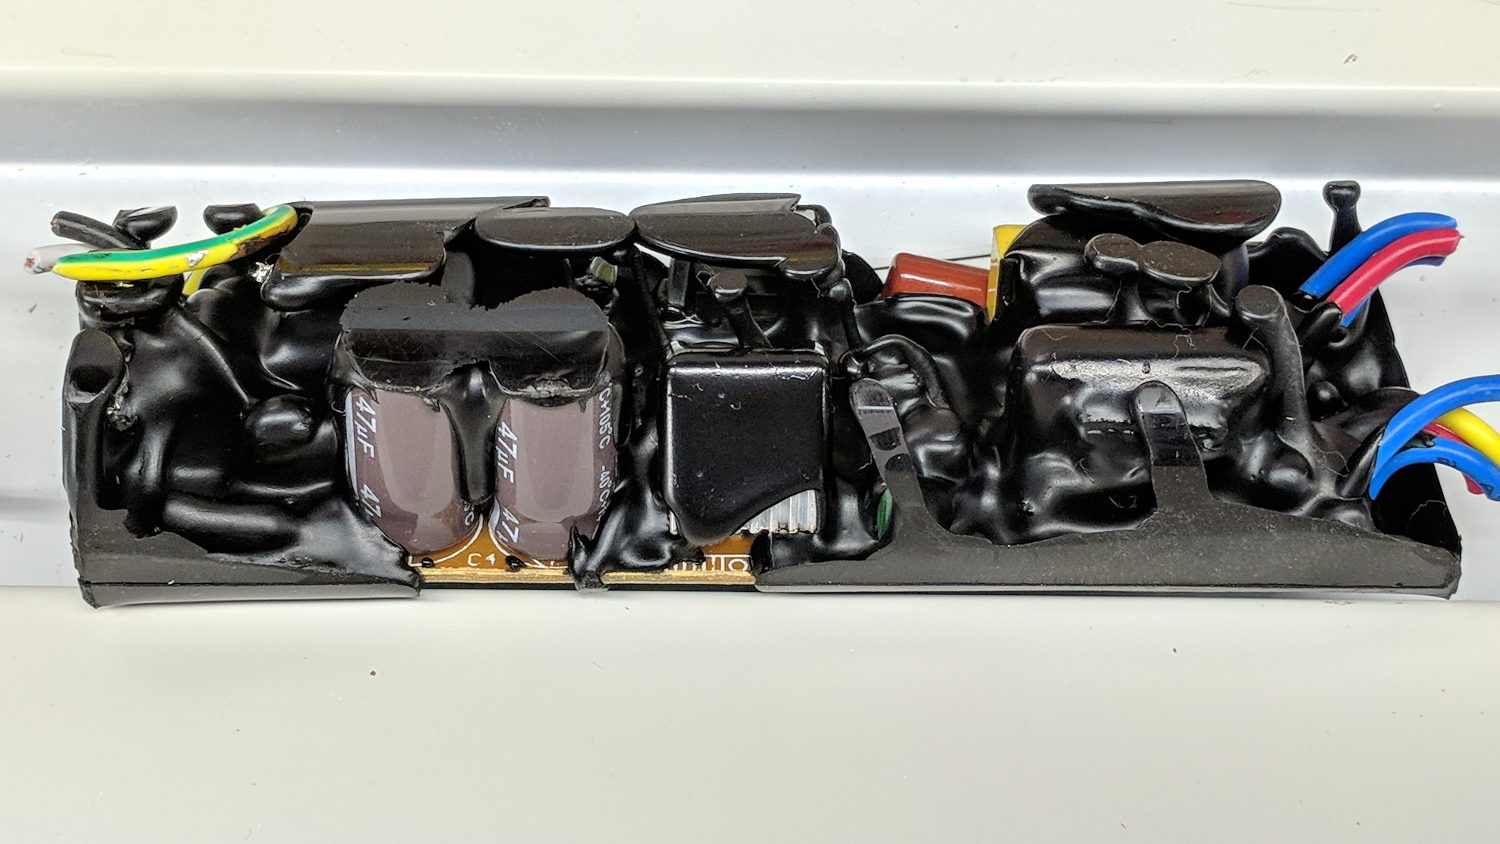
    Perhaps the flexy gunk reduces the sound level:

    Electronic ballast - interior A
    Electronic ballast – interior A

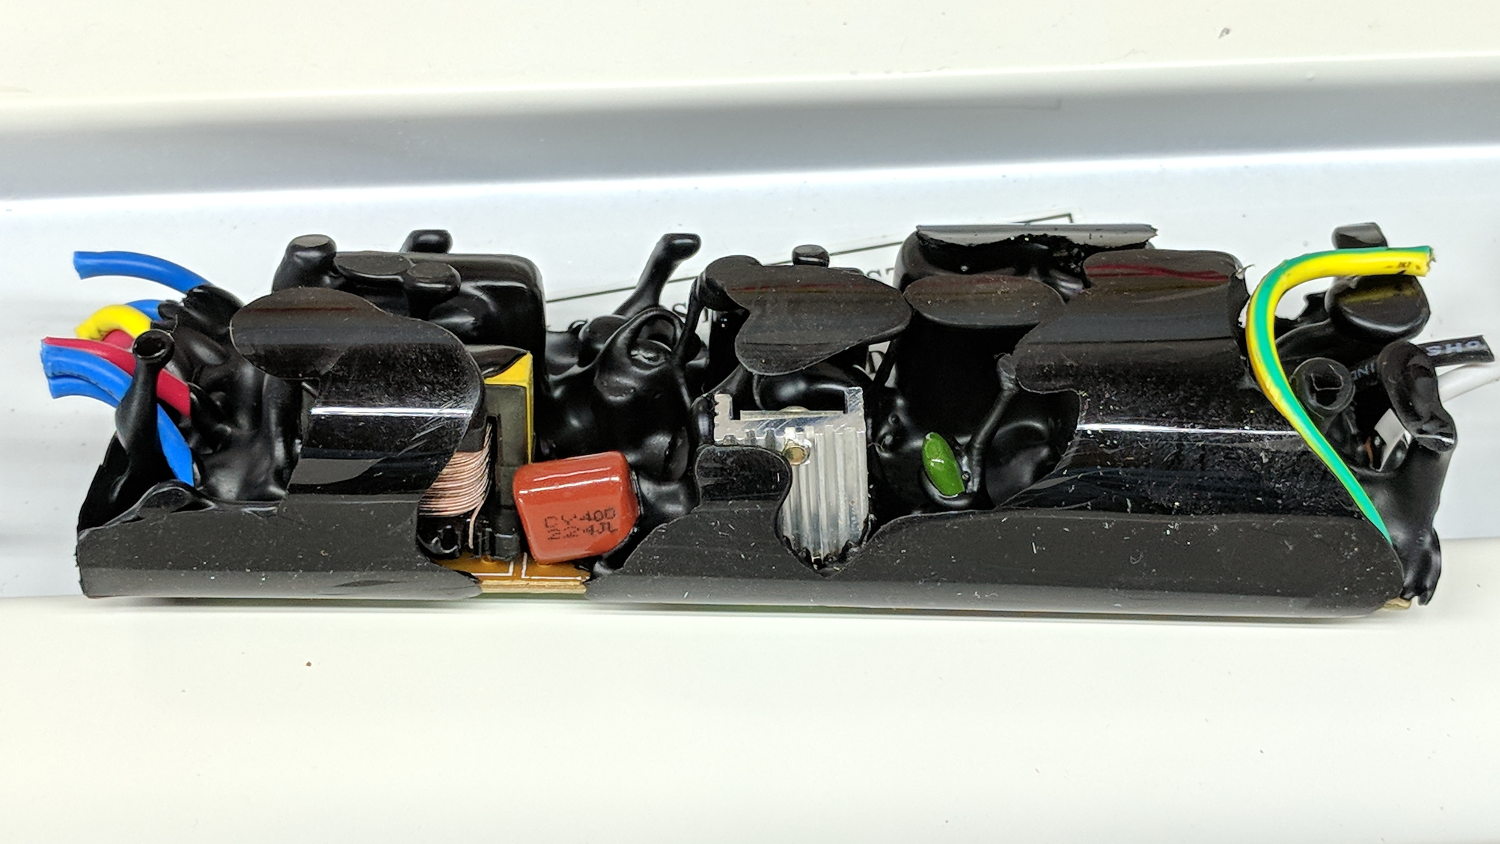
    While also preventing casual failure analysis and organ harvesting:

    Electronic ballast - interior B
    Electronic ballast – interior B

    The black gunk smells more like plastic and less like old-school tar. It’s definitely not a peel-able conformal coating.

    One the other paw, the two magnetic ballasts in another lamp sported actual metal-film capacitors, which I harvested and tossed into the Big Box o’ Film Caps:

    Shoplight choke ballast - film cap
    Shoplight choke ballast – film cap

    If a dying ballast didn’t also kill its fluorescent tube(s), I’d be less annoyed. I’m running the remaining tubes through the surviving fixtures, but the end is nigh for both.

    The new LED tubes produce more light than the old fluorescents, although I still don’t like their 6500 K “daylight glow” color.

  • Snowblower Muffler Bracket

    After three years, the bracket locking the snowblower’s muffler bolts broke, but this time I saw the bolt pop out of the muffler, fall to the driveway, and lie there sizzling in the slush. I tightened the remaining bolt and completed the mission.

    The OEM bracket was thin sheet metal and broke across one bolt hole under the head. I sawed a rectangle out of a defunct PC case, then drilled clearance holes:

    Snowblower muffler - drilling bracket
    Snowblower muffler – drilling bracket

    Bending two corners upward locks the bolt heads in position. I started the bends by clamping the bracket in the bench vise and whacking the corners, then finishing the job with a drift punch after installing it:

    Snowblower muffler installed
    Snowblower muffler installed

    Of course, I renewed the Never-Seez on the bolt threads; they obviously weren’t corroded in place!

    For whatever it’s worth, the many spot welds joining the top bracket to the muffler are doing just fine.

  • Baofeng BL-5 Pack Rebuild

    The 18650 cell protection PCBs with 8205 ICs arrived and seemed small enough to simply tuck into the gap between the rounded cells in the second Baofeng BL-5 pack:

    Baofeng BL-5 - new protection PCB - wiring 1
    Baofeng BL-5 – new protection PCB – wiring 1

    For whatever it might be worth, you’re looking at the only Baofeng battery pack containing an actual 10 kΩ thermistor, harvested from the benchtop Tray of Doom:

    Baofeng BL-5 pack - thermistor
    Baofeng BL-5 pack – thermistor

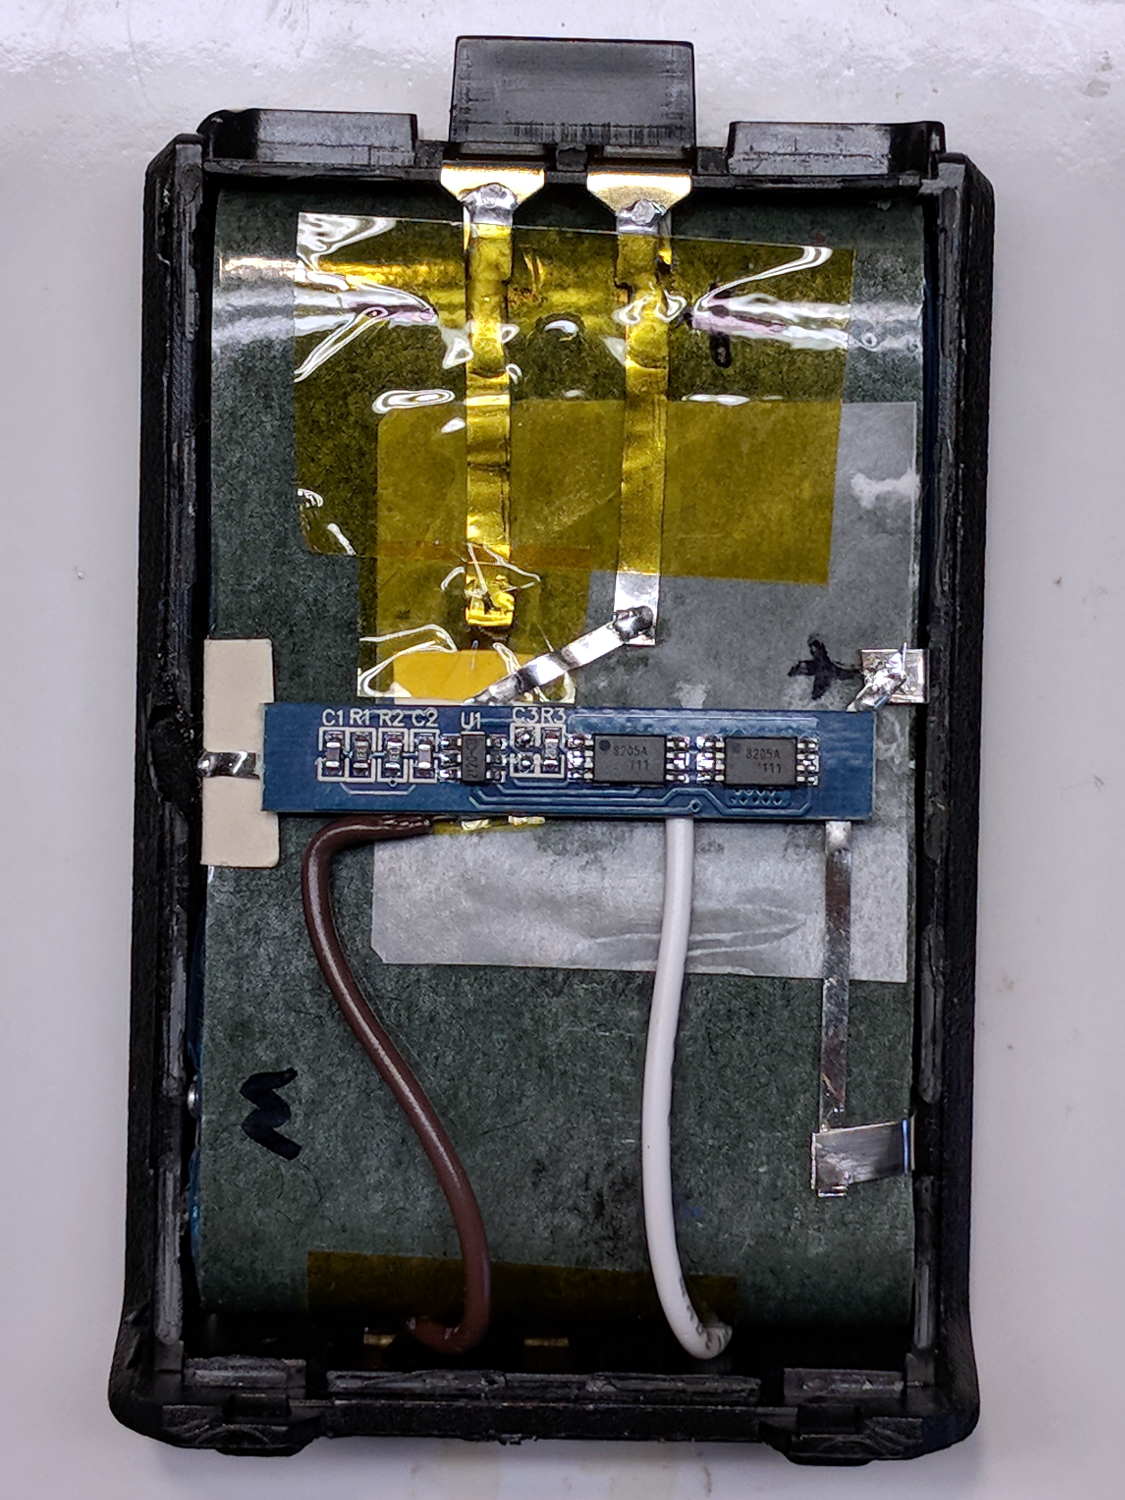
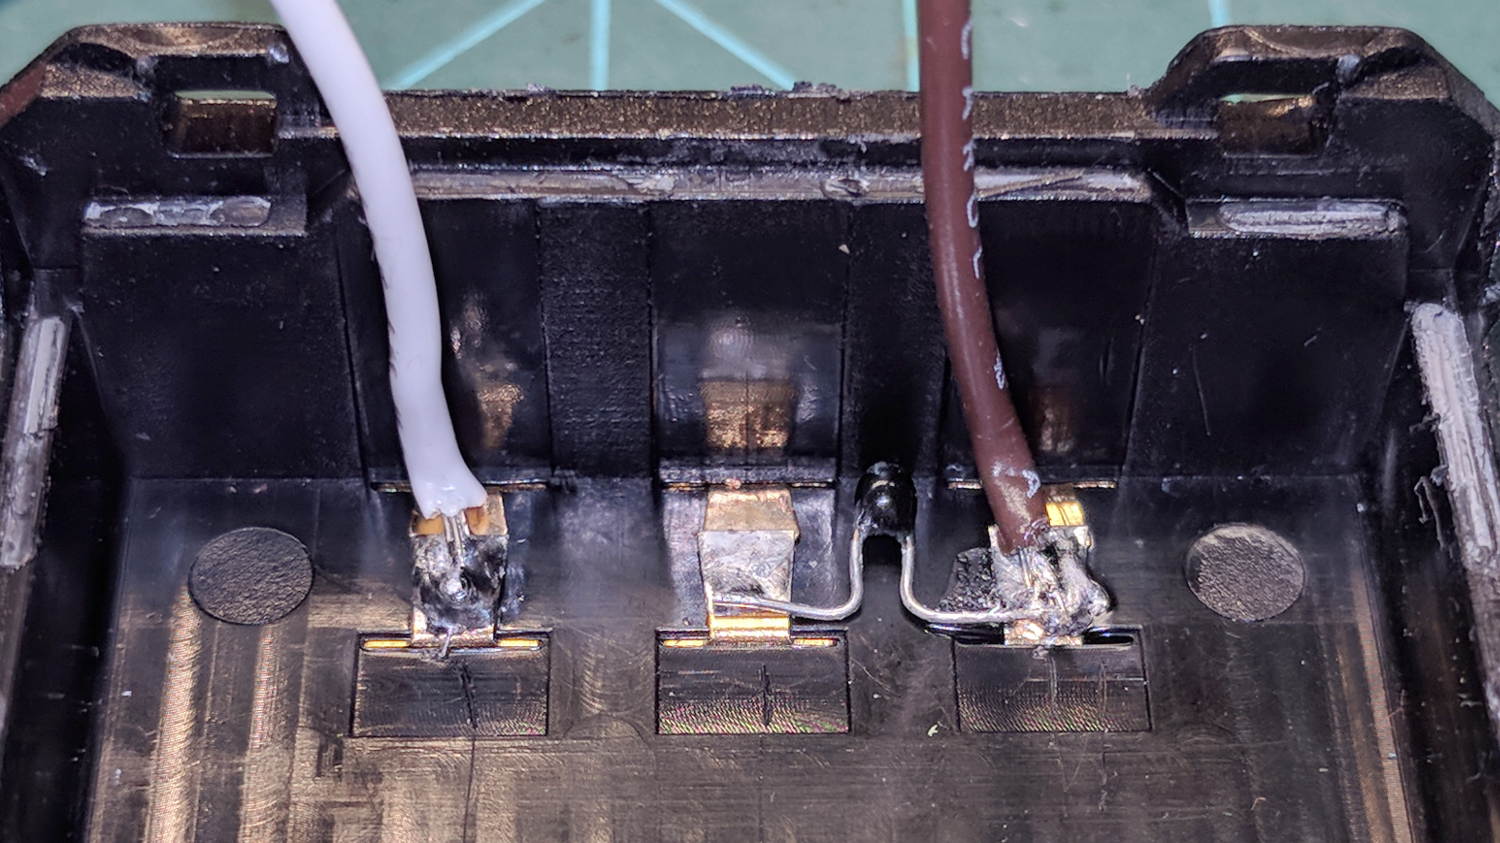
    Unfortunately, the components on the PCB stuck up a bit too far from the cell surface and held the lid just slightly proud of the case. Applying pressure to lithium cells being a Bad Idea, I rearranged the layout by flipping the cells over, tucking the PCB components between the cells, and connecting everything with nickel tape instead of insulated wires:

    Baofeng BL-5 - new protection PCB - wiring 2
    Baofeng BL-5 – new protection PCB – wiring 2

    The snippets of manila paper and Kapton tape hold things apart and together, as needed. Looks ugly, fits better.

    Pop it in the charger to reset the protection PCB lockout and it’s all good again.

  • Bench Leg Repair

    A long long time ago, I conjured a short bench for our Larval Engineer from a pair of junked folding-table legs and a truly hideous mid-50s Genuine Formica countertop salvaged from the kitchen refurbishment:

    Bench Leg - overview
    Bench Leg – overview

    Most recently, it held a pile of test equipment and random stuff next to the MPCNC, whereupon the welds holding the tube with the feet to one of the vertical tubes on the far end failed. It wasn’t in the critical path, so I broke the welds on the other tube, propped the vertical tubes on wood blocks, and continued the mission. Having finally finished those measurements, I could clear off the bench and repair the legs.

    I no longer have my welding gear and, in any event, it’s still winter outside, so a low-excitement repair seemed in order: drill suitable holes into the leg crosspiece, make threaded inserts for the tubes, and join them with 3/8-16 bolts.

    So, we begin.

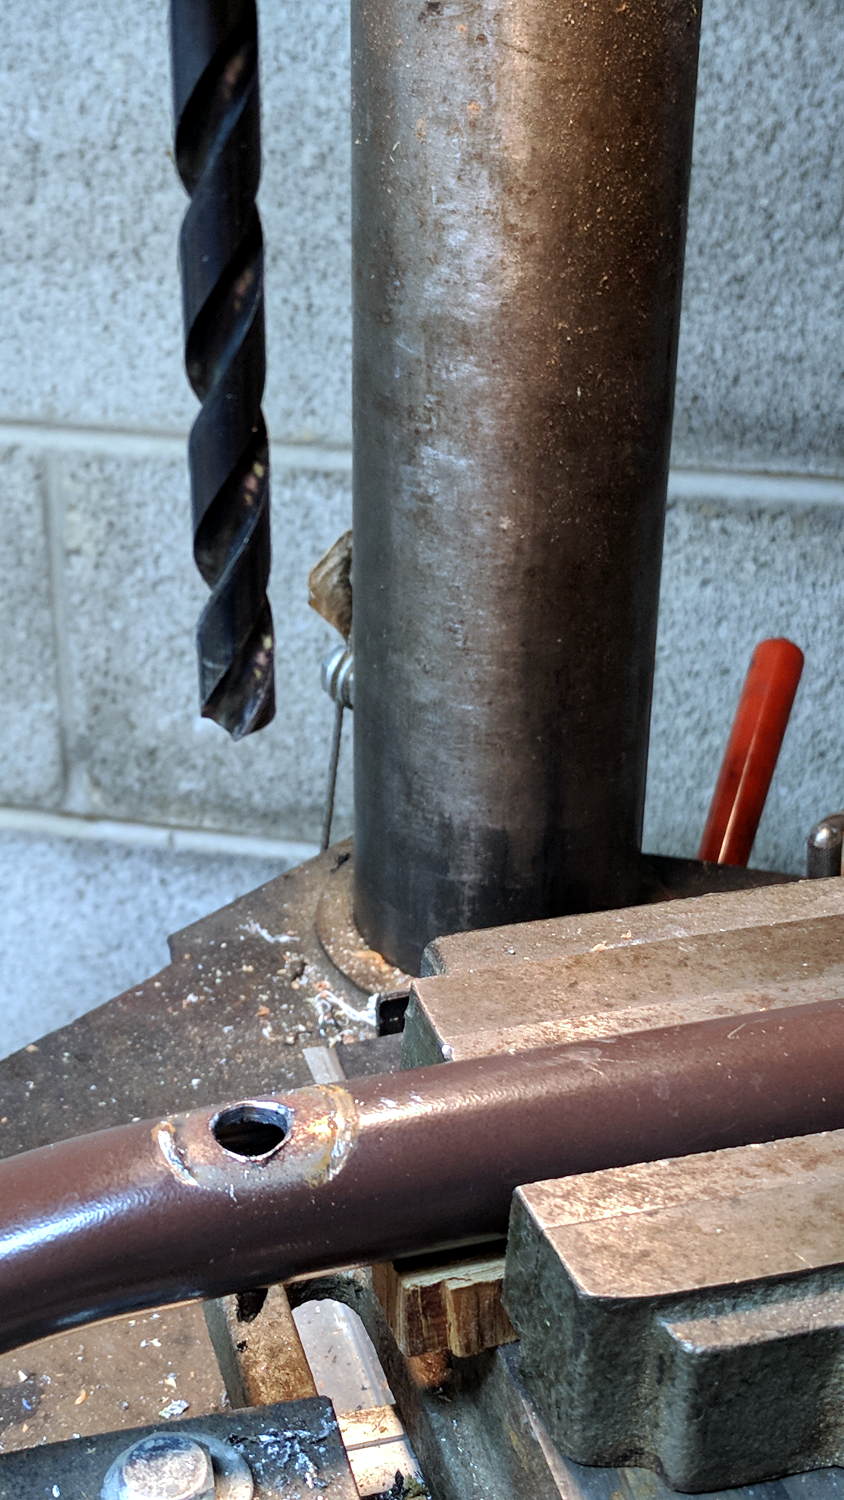
    File the broken welds off the foot tube, align it in the drill press vice (where it barely fits!), center drill to make a pilot hole, then poke a 3/8 inch drill completely through to line up both holes:

    Bench Leg - through drilling
    Bench Leg – through drilling

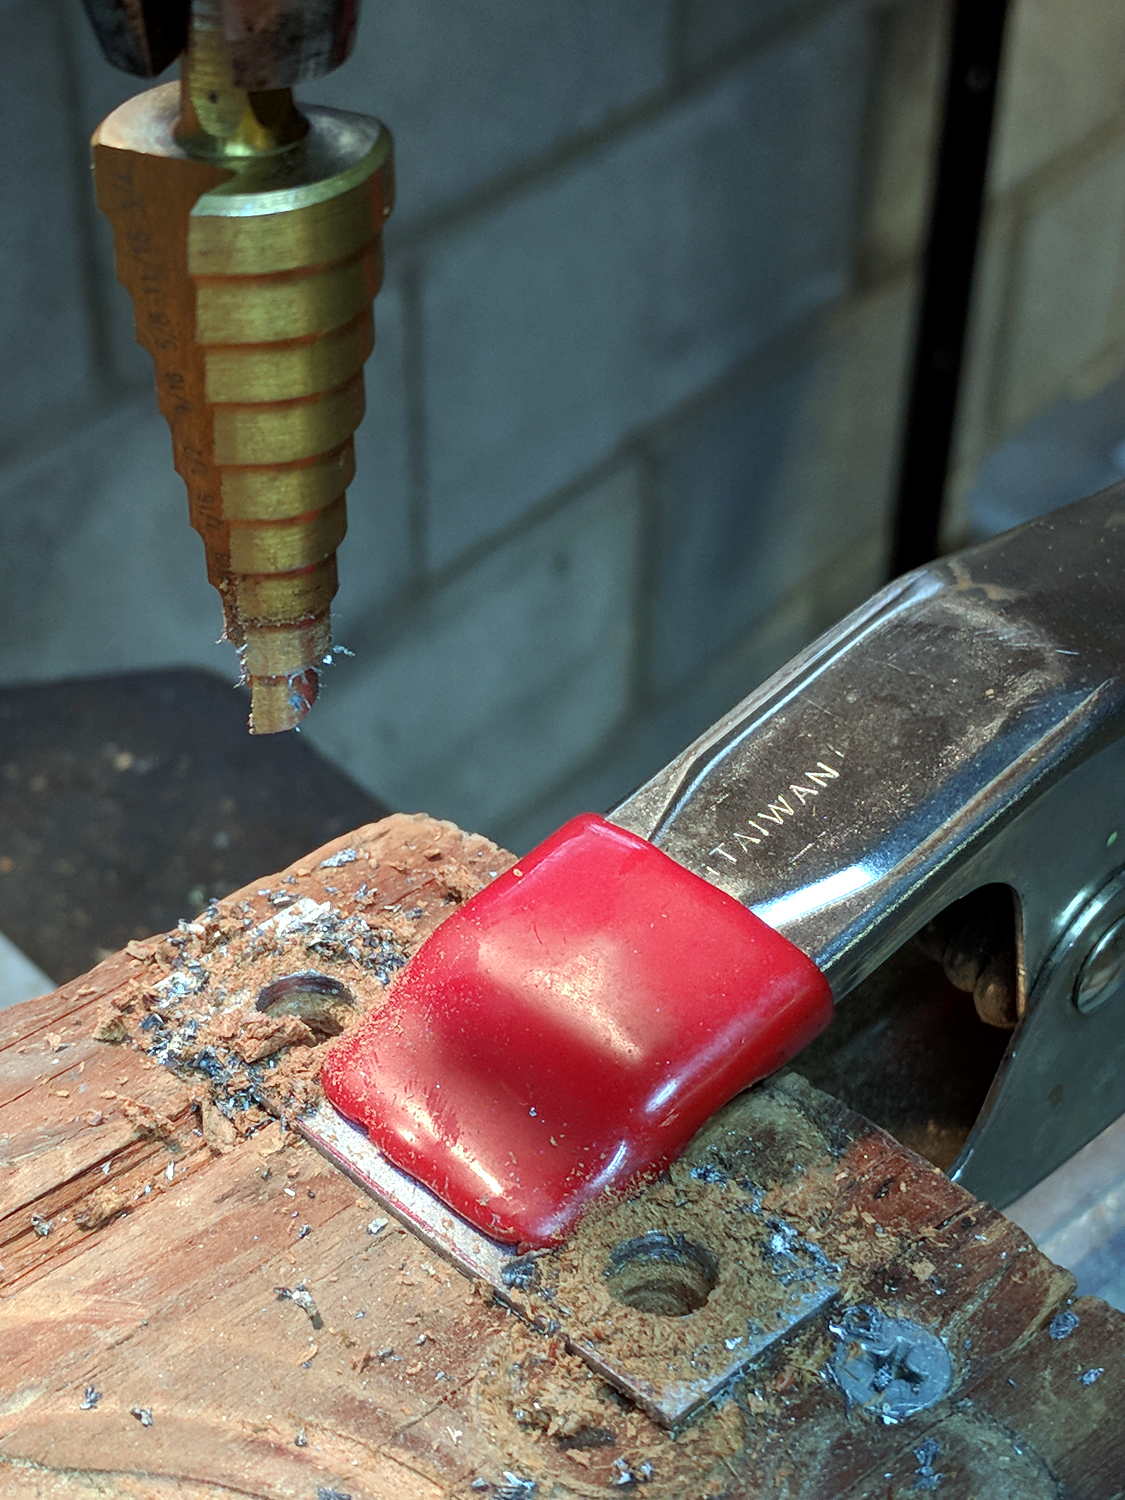
    By the Universal Law of the Conservation of Perversity, a 3/8 inch bolt didn’t quite fit the 3/8 inch hole, so I embiggened the holes with a step drill:

    Bench Leg - step-drilling to size
    Bench Leg – step-drilling to size

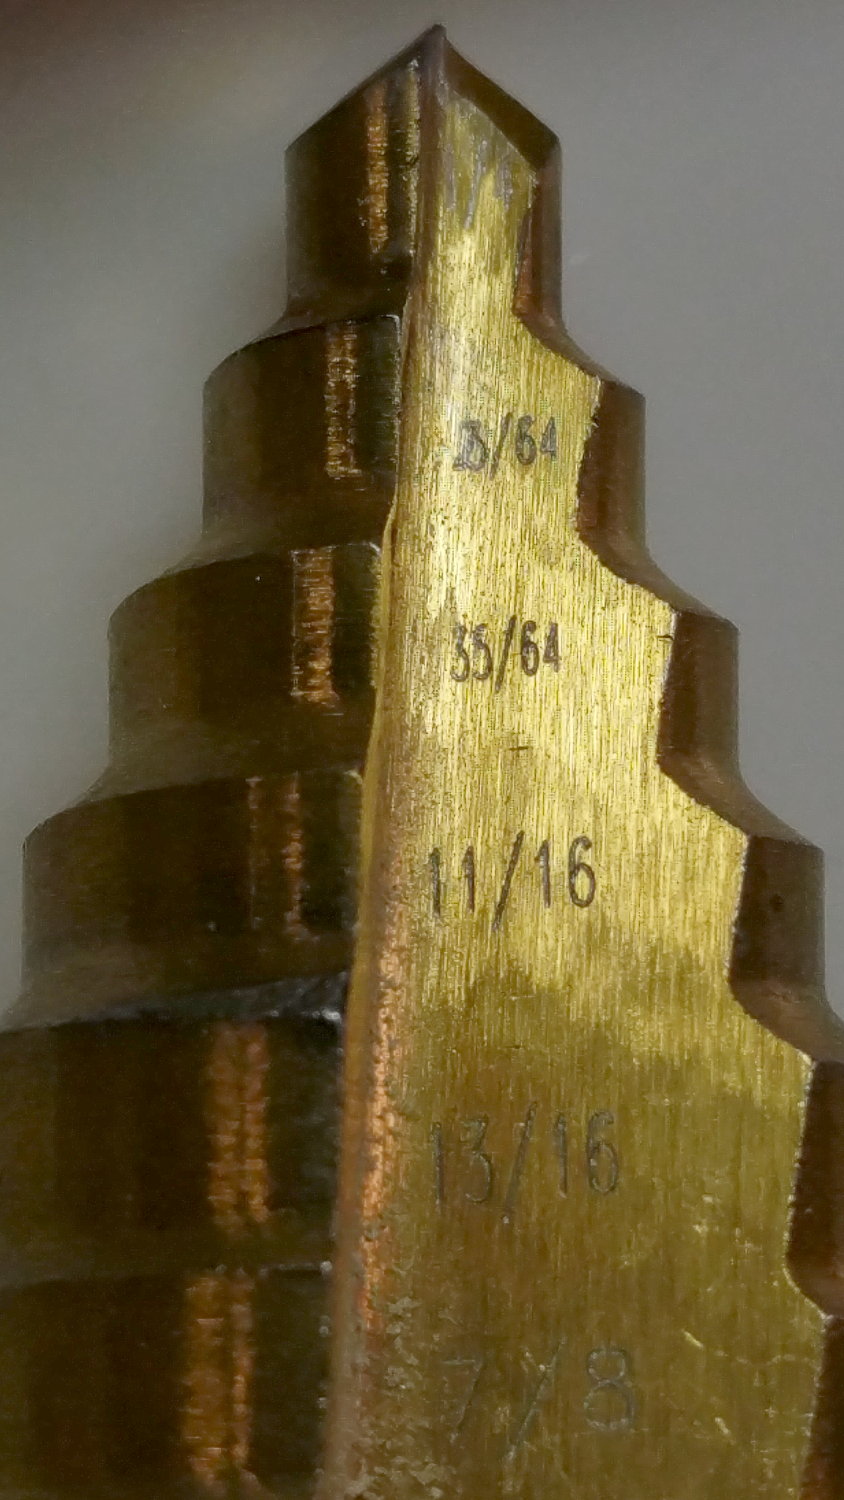
    The step drill obviously has hard metric diameters labeled as weird inch sizes:

    Quasi-inch step drill
    Quasi-inch step drill

    I can’t read the second step, either, but it’s apparently 25/64 inch = 9.8 mm, which is just enough over 3/8 inch = 9.5 mm to be useful. The next step is 14 mm = 35/64 inch, so the drill is a bit of a lump.

    The leg tubes were a hair over 0.9 inch ID and not particularly round. Tolerances being slack, slice a bit more than two inches off a 1 inch OD aluminum rod:

    Bench Leg - sawing rod stock
    Bench Leg – sawing rod stock

    I wanted more than one diameter in the tubes, but the bolts in my stash topped out at 2 inches and, really, an inch of aluminum won’t go anywhere.

    Clean up one end of the rod to 0.9 inch OD, flip, and center drill:

    Bench Leg - center drilling insert
    Bench Leg – center drilling insert

    Obviously, surface finish and concentricity aren’t critical, but the cleaned-up OD of the left end lined up at  barely perceptible mismatch with the (yet to be done) right end.

    Sunder in twain:

    Bench Leg - sawing leg inserts
    Bench Leg – sawing leg inserts

    Betcha you can’t spot the junction between the two ODs, either.

    Drill 3/8 inch through, then discover you (well, I) have neither a drill big enough nor a boring bar small enough to embiggen one end of the hole for a nasty interference fit against the tips of a 3/8 inch hex nut.

    Once again, a step drill to the rescue:

    Bench Leg - step-drilling insert
    Bench Leg – step-drilling insert

    Because it’s a step drill, the counterbore isn’t quite deep enough for the whole nut, so turn the nut to fit the recess left by the drill:

    Bench Leg - nut shaping
    Bench Leg – nut shaping

    Put a bolt through the insert as a guide, spin the nut on, backstop the insert with a machinist’s parallel jaw clamp (loose, just to give the head somewhere to go), line ’em up, and mash the nut into place with the bench vise:

    Bench Leg - nut pressed in place
    Bench Leg – nut pressed in place

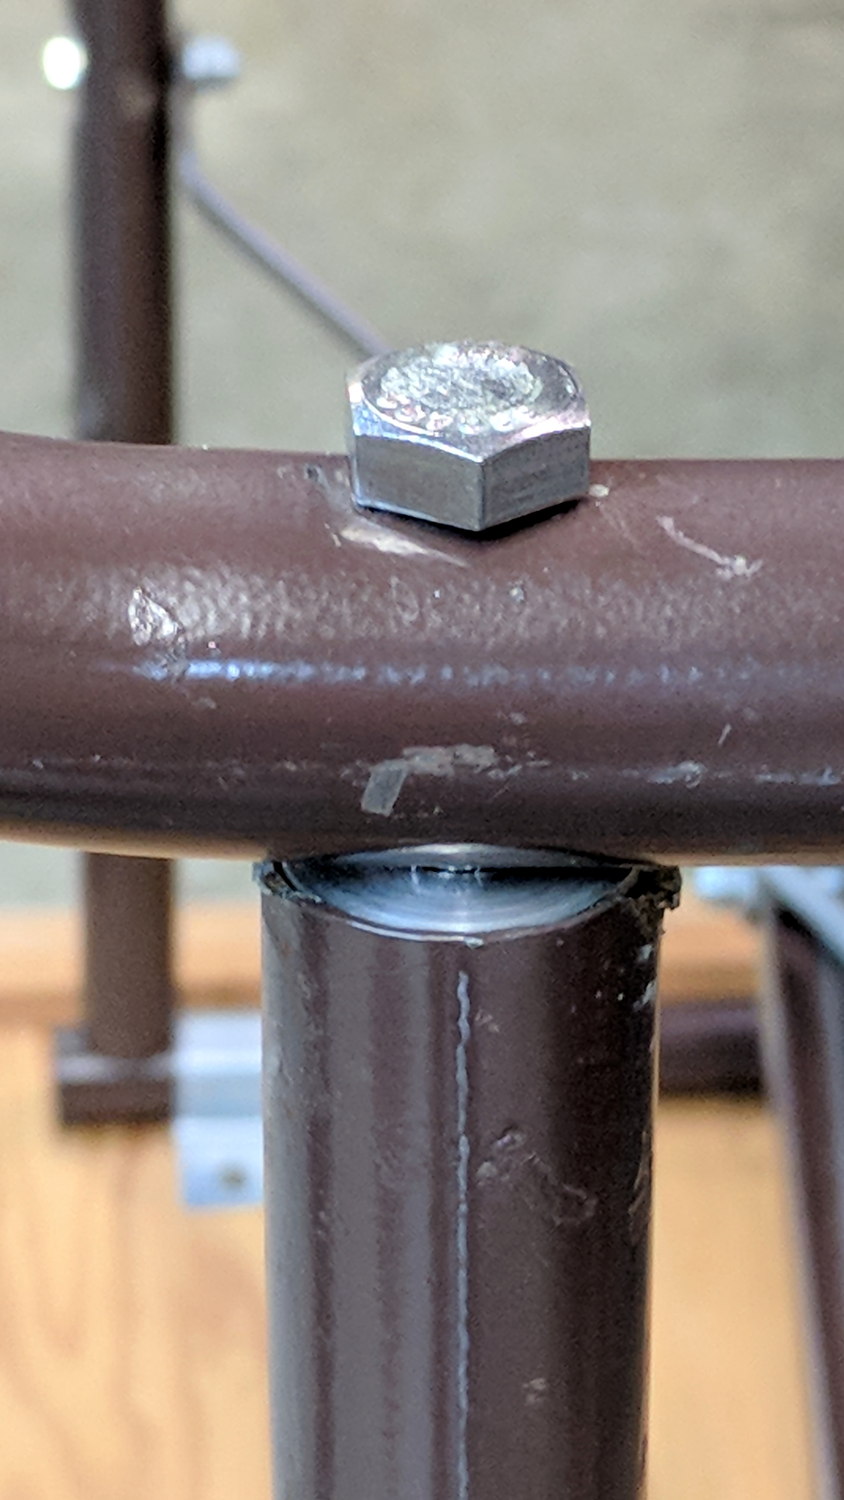
    Clean up the broken welds with a rat tail file, hammer the inserts into the tubes:

    Bench Leg - insert installed
    Bench Leg – insert installed

    Which, as I expected, rounded them nicely while producing an absolutely solid, ain’t gonna work loose, dry joint.

    Add threadlocker to the bolts and it’s all good:

    Bench Leg - repaired
    Bench Leg – repaired

    Stipulated: butt-ugly.

    Tell me you’d have fish-mouthed those inserts just for pretty, after noting the factory didn’t bother fishmouthing the vertical tubes before welding them in place.

    But it was good for generous dose of Quality Shop Time!