So the oven igniter I installed in January failed to ignite the oven when its current draw fell far enough below the valve’s 3.3 A minimum:

Of course, the seller no longer offers that particular igniter.
I described the problem:
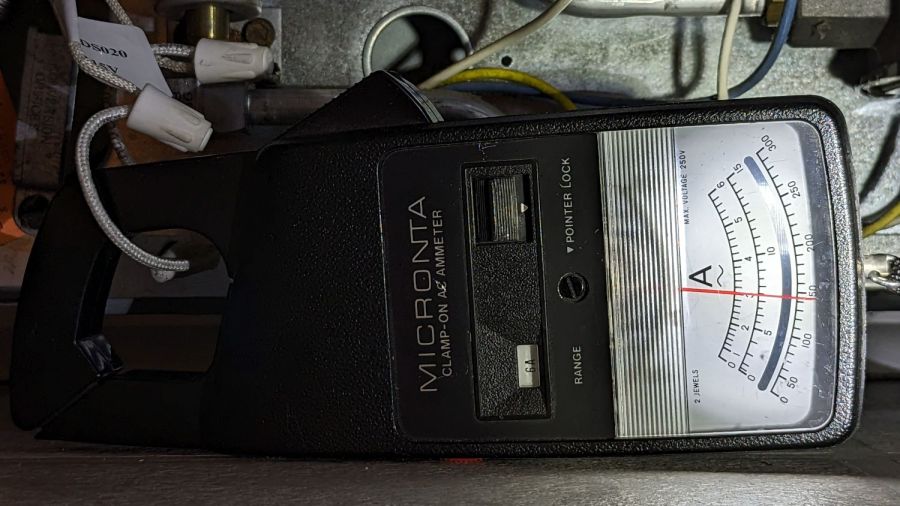
The igniter just failed. The oven gas valve requires 3.3 to 3.6 amps to open, but this igniter now draws only 2.3 amps, as shown by the clamp-on current meter.
Because of the low current, the valve does not open and the oven does not heat.
The igniter should last more than five months!
How do I go about getting a replacement or a refund?
Thanks …
Which generated pretty much the reply you’d expect:
We are very sorry, because your product is 5 months from the date of purchase, we cannot offer you a refund.
Please purchase another replacement.
Which made me a bit salty:
” the best quality for greater power connection, higher load and longer service life “
” We stand by our products, and our customers are our focus as a business. If you have any quality problem, please contact Funmit customer service team in time, and we will try our best to solve your problems “
So five months is “longer service life” with “the best quality”.
Bonus: now I understand what “try our best” means, too.
But to no avail:
Have a nice day! We are glad to serve you.
We are very sorry that you are not satisfied with our products.
Amazon.com Return Policy:Amazon.com Voluntary 30-Day Return Guarantee: You can return many items you have purchased within 30 days following delivery of the item to you. Our Voluntary 30-Day Return Guarantee does not affect your legal right of withdrawal in any way.
However, the product has passed the return and exchange period, so it cannot provide you with a warranty.
If you have other questions, please contact us in time, we will serve you wholeheartedly. Thank you.
Sincere wishes,
–By Funmit
So I bought a slightly more expensive igniter from a different randomly named seller that draws a slightly under-spec but entirely typical 3 A:
This one, however, allegedly comes with a one year warranty:
Quality you can Trust – All Snap Products are made with premium materials and are tested so they last
Buy with Confidence – Snap Supply Parts always come with a 1 Year Warranty
Which surely requires the seller remaining in business until then.
We shall see how this works out.