The Smell of Molten Projects in the Morning

Ed Nisley's Blog: Shop notes, electronics, firmware, machinery, 3D printing, laser cuttery, and curiosities. Contents: 100% human thinking, 0% AI slop.

Tag: Repairs

If it used to work, it can work again

  • Tour Easy Coolback Seat Restringing

    Tour Easy Coolback Seat Restringing

    The Kevlar cord on Mary’s bike survived the crash without breaking, but it was badly scuffed and holding on by only a few strands. Unlike in years gone by, Kevlar cord is now cheap & readily available, so I decided to restring the thing:

    Tour Easy - seat cord - restrung
    Tour Easy – seat cord – restrung

    The cord path isn’t at all obvious, even given the smudges on the seat struts:

    Tour Easy - seat mesh removed
    Tour Easy – seat mesh removed

    Pictures of the original cord as installed at the Easy Racers “factory” served as guidance:

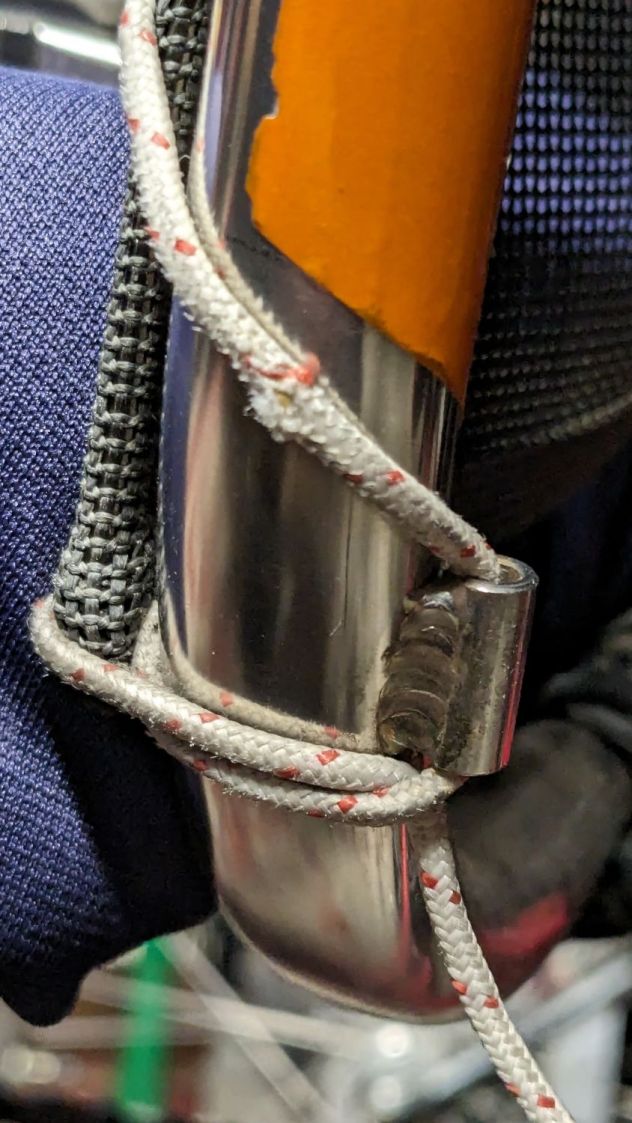
    The knots joining the cord at the top, taken juuust before I pulled the right knot apart:

    Tour Easy - seat cord - knots
    Tour Easy – seat cord – knots

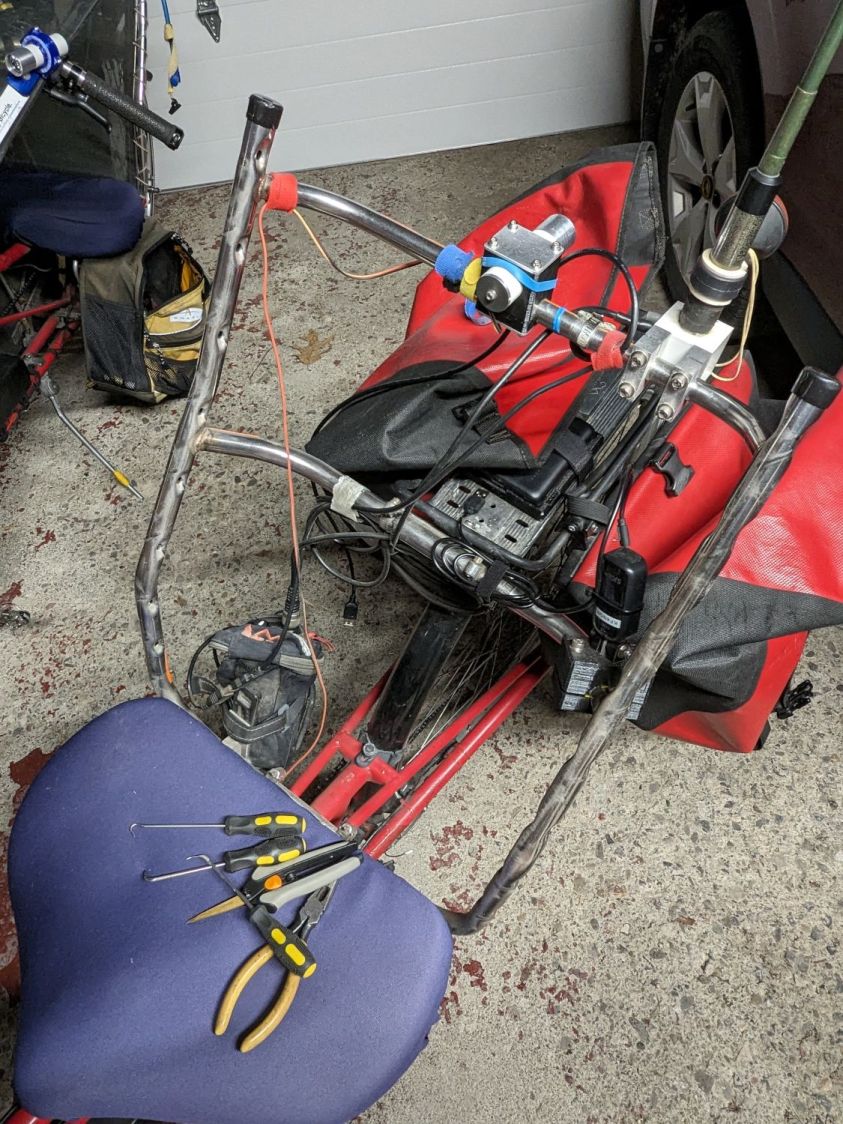
    Those are in addition to my Tour Easy a few feet away, but you can never have enough pictures.

    A 3.5 meter cord will be plenty long enough and marking the midpoint simplifies equalizing the two sides. The cord crosses the seat frame at the bottom from the lower guides, although I’m reasonably sure it wouldn’t matter if you ran separate lengths up the two sides with a knot in the lower guide.

    The new cord claims to be 1000 pound test (200 pound working), but the vital dimension is its 2.6 mm diameter to match the OEM cord. It does not claim to be UV stabilized, which may turn out to be a problem over the course of a few years.

    Tightening the cord proceeded as before and a test ride indicated the installation was all good.

  • Mailbox Post Repair

    Mailbox Post Repair

    One doorbell ding came from a guy who sheepishly admitted he had just collided with our mailbox, which sits on the outside of a gentle curve and sticks out, IMO, a bit too far into the street.

    This not being my first time in this rodeo, I allowed as how if he’d replace whatever broke, I’d do the fixing and it’d be all good. As it turned out, the only broken part was the foamed-plastic post, which split neatly along its length around the crosspiece hole. After looking things over, I said I’d just epoxy it together and call it done.

    That afternoon, I mixed up a generous cup of the casting epoxy I’d been using for coasters and suchlike. It is now well past its best-used-by date and somewhat cloudy, but I figured it would suffice for the purpose; nobody will notice cloudy epoxy on a mailbox post.

    I have Too. Many. Clamps. and know how to use them:

    Mailbox post repair
    Mailbox post repair

    He departed, quite literally in tears, over my not raking him through the coals. I figured anybody who’d stop and admit to property damage needed encouragement, not chastisement, and replacing the headlight on his pickup would be more than enough punishment.

    That was easy.

  • Drop-leaf Table Repair

    Drop-leaf Table Repair

    An old antique drop-leaf table serves as a plant stand and time reference:

    Drop leaf table - in use
    Drop leaf table – in use

    While adjusting the clock for Daylight Saving Time, one of the folding leaves … folded, dumping the clock on the floor.

    It turns out the latches holding the leaves in place have been repaired / replaced many times since the table left the factory:

    Drop leaf table - random latches
    Drop leaf table – random latches

    I’m certain the latch in the upper right came from my father’s hands.

    Although it’s an antique, it’s not a priceless antique, so I had no compunction about drilling out the wood screw holes, installing metric threaded inserts, and converting all the screws to M4 button heads:

    Drop leaf table - wood insert
    Drop leaf table – wood insert

    That’s a brad-point bit intended to produce clean-sided flat-bottom holes (modulo a triangular pit from the tip) exactly right for screwing an insert all the way down. The table top just barely fit on the drill press, so I could set the depth stop to make the answer come out right every time.

    A dot of low-strength threadlocker keeps the screws from turning, although the table has pretty much reached a steady state these days.

    That was easy …

  • Novus Polish vs. Fairing Fragment

    Novus Polish vs. Fairing Fragment

    A fairing fragment provided an excuse to practice plastic polishing:

    Fairing polish - start
    Fairing polish – start

    That’s from a EZR-SZ Zzipper fairing ridden about 2000 miles a year since 2001, so it’s spent far too much time in the sun and definitely not gotten all the finicky care it deserves. It’s tinted 60 mil polycarbonate, vacuum-molded into the bubble shape required to fit on a Tour Easy recumbent.

    Fairing Flashlight Mount - Mary approaching
    Fairing Flashlight Mount – Mary approaching

    On the other paw, Karl Abbe (the guy behind Zzipper) says the typical fairing survives maybe half a decade, so it doesn’t owe us anything.

    I applied all three bottles of Novus Plastic Polish in descending numeric order, using snippets of Official Polish Mates (which could be a Krakow escort service) with a vigorous circular motion, ending up with a reasonable result:

    Fairing polish - transmission
    Fairing polish – transmission

    I cut the smaller chunk from the fairing for comparison. It’s been washed to dislodge loose crud, but is otherwise as-ridden.

    The fairing has deeper scratches than Novus can buff out, but removing the surface scuffs and haze definitely improves the clarity:

    Fairing polish - clarity
    Fairing polish – clarity

    The view from father away:

    Fairing polish - clarity
    Fairing polish – clarity

    Eks describes this sort of thing as a “Used Car Finish” = high polish over deep scratches:

    Fairing polish - surface finish
    Fairing polish – surface finish

    All in all, a nice result from very little effort.

    The canonical Novus Polish application is removing the haze from plastic headlight covers, but our decade-old Forester is a garage queen and the headlights remain in fine shape.

  • Sump Pump Tether Switch Harvest

    Sump Pump Tether Switch Harvest

    The basement curtain drain sump pits contained two ancient sump pumps badly in need of replacement, so I got to find out what made their tethered switch floats rattle like that.

    Having recently stood up the Main Workbench with its big vise, I could saw without compunction:

    Sump pump tether switch - sawing
    Sump pump tether switch – sawing

    Which revealed an ordinary snap-action switch:

    Sump pump tether switch - opened
    Sump pump tether switch – opened

    Further sawing exposed the rattler:

    Sump pump tether switch - parts
    Sump pump tether switch – parts

    Those 1 inch steel balls now nestle in the Big Box o’ Bearings and I’m sure the snap-action switches will come in handy for something.

  • LED Light Switch: FAIL

    LED Light Switch: FAIL

    As a temporary expedient while awaiting more outlets in the basement, I screwed several hundred watts of LED strip lighting to the floor joists so I could see where I was going:

    First pass at basement lighting
    First pass at basement lighting

    The switch seemed to run warm, which I attributed to being snuggled up against one of the LED strips, eventually became intermittent, and finally failed with the lights out.

    Prying apart the snapped-together case destroyed it, but that didn’t really matter when I saw the innards:

    T8 LED power switch
    T8 LED power switch

    The “intermittent” action came from the melted post on the switch actuator at the top of the photo. The “warm” came from the barely crimped black wire on the right side of the switch, which *might* have had half a dozen strands caught in the flattened crimp triangles.

    I replaced it with an identical switch from the assortment that came with the lamps. That one seems to run cooler, although I doubt the crimps are really up to any reasonable quality standards.

    In addition to adding basement outlets & lighting circuits, the rest of the house has some electrical wiring peculiarities; the kitchen microwave really shouldn’t share a circuit with the dining room lights.

  • Doorbell Switch Re-LED-ing

    Doorbell Switch Re-LED-ing

    Having had several folks ding our front doorbell in recent weeks, I thought it would be nice if the switch had a light inside and was mildly surprised it didn’t. Taking it apart revealed an even bigger surprise:

    Doorbell - circuitry
    Doorbell – circuitry

    Much electronic! Many solder!

    Obviously, that’s a bridge rectifier (MB6S for the curious) in the middle, with a pair of paralleled 1 kΩ SMD resistors on either side ballasting two white LEDs in series on the other side. As far as I could tell, both LEDs had stopped being diodes, most likely after one failed short and took the other down with it.

    Having recently unpacked the small parts cabinet containing SMD LEDs, I could do this:

    Doorbell - blue LEDs
    Doorbell – blue LEDs

    While I had the iron hot, I resoldered the fractured blobs attaching the spring contacts to their solder pads. I think the 201107 along the left edge is the PCB date code, so the switch has been in place for maybe a decade.

    You gotta admit blue is distinctive:

    Doorbell - installed
    Doorbell – installed

    While taking it off, I discovered it’s the second doorbell button in that spot; you can’t see the bottom screw hole and wood scar when you’re standing at the door. Unless, I suppose, you’re three feet tall, but most folks of that stature aren’t curious about doorbells.

    Update: An alert reader provided more information:

    I recently bought a doorbell button, Heath Zenith SL-315-1-90. […] My board is different but has the same circuit as yours. In case it’s helpful, I believe your button might be Heath Zenith SL-257-02.

    That’s a perfect example of a “brand name” completely detached from its entire history and put to work doing something entirely different. AFAICT, I honored the Heath name by resoldering the poor thing.

    Alas, the doorbell switch on the back door turned out to be a dead loss. Perhaps when they replaced the door, the wire got sliced just above the sill plate, leaving a stub in the basement and no way to fish a new wire to the switch. Anybody arriving via the trail from the Vassar College property out back must bang on the door to get our attention.