Ed Nisley's Blog: Shop notes, electronics, firmware, machinery, 3D printing, laser cuttery, and curiosities. Contents: 100% human thinking, 0% AI slop.
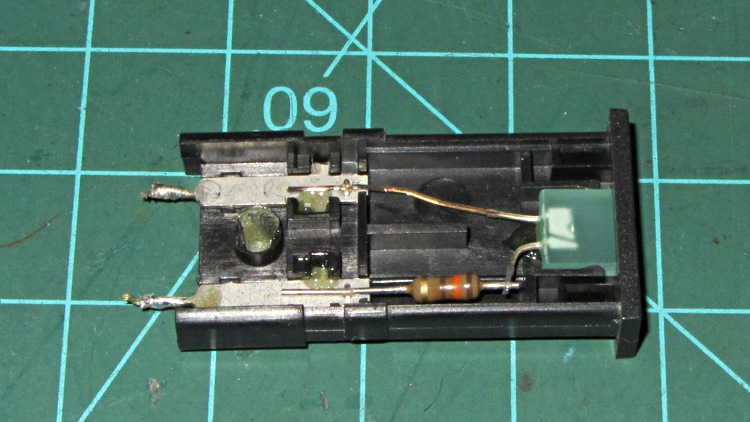
This panel-mount LED indicator glued to the Z-axis stage of my Thing-O-Matic had been dutifully showing a bright green glow when the extruder heater was active:
Failed LED panel indicator
Of late, it began flickering erratically whenever the heater turned on. It used to flicker when the PID loop (hacked to be a bang-bang controller) drove the extruder temperature past the switching threshold, but this was worse.
It’s rated for 5 VDC, 25 mA and has an internal resistor to make that happen. Channeling the true spirit of DIY 3D printer electronics, I deliberately connected it directly across the 12 V extruder power and let it burn at 80 mA. The poor thing was surprisingly bright for an ancient green LED ( the 8124 date code stamped on the side I pried off for the picture says it’s three decades old) and, even under that abuse, it lasted for a year: not to be sniffed at.
I’d expect the LED to fail open when a bond wire burned through, but you just never can tell. It worked fine on the bench, which is typical of all intermittent failures.
So I popped an identical indicator off the stack, conservatively added a 270 Ω series resistor to drop the excess voltage, and it’s all good again.
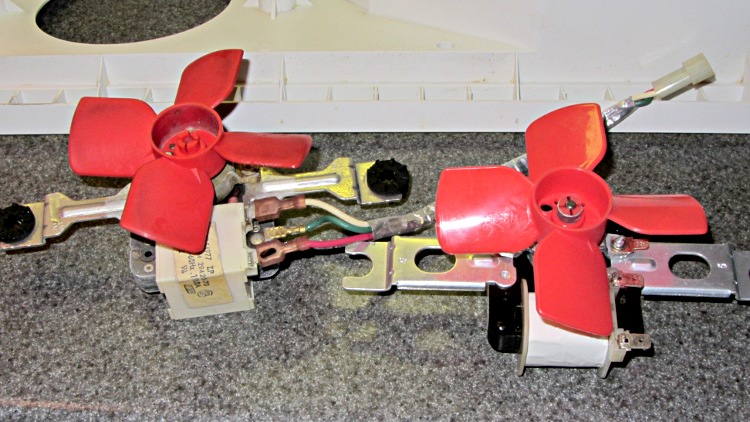
Back in 2006, our ancient (19-ish years old) Whirlpool refrigerator started making weird howling noises suggested someone broke into the house and stuffed a dog inside the freezer. Turned out to be the fan behind the rear panel of the freezer compartment that moves air across the cooling coils and down into the refrigerator compartment; evidently the sintered bronze bearings wore just enough to let the shaft oscillate side-to-side while rotating.
I ordered a replacement, but then decided to try an old fix: put a dollop of STP in the bearings. That added enough damping to kill the resonance and let the old fan turn freely. It worked so well that I put the new fan on the shelf in case it came in handy later on.
Years passed… and then, as if by magic, the freezer dog reappeared.
Mary moved the contents to the downstairs chest freezer (she’s much more organized than I and wanted to find things again), I pulled the old fan out, installed the “new” fan, buttoned up the freezer, and it ran fine.
Whirlpool refrigerator fans
Until about two in the morning, when the freezer dog began howling again…
As nearly as I can tell, the new fan’s bearings arrived just slightly oversize; I doubt they’re pre-worn.
So I applied the STP fix to the new fan:
Remove the compression fitting from the fan blade hub
Remove the fan blades from the shaft
Remove the screws & nuts holding the frame together
Remove motor shaft from bearings
Put a drop of STP into the rear bearing
Slather a ring of STP around the front bearing
Deliberately misalign the self-aligning bearings to redistribute the slack
Reassemble in reverse order
It’s been running silently for a day, which suggests it’ll be good for quite a while…
Having suffered flat tires due to the tire liner chafing the tube, I’ve been running the Tour Easy without a rear tire liner since last year. Worked fine, up until the steering went mushy on a recent ride:
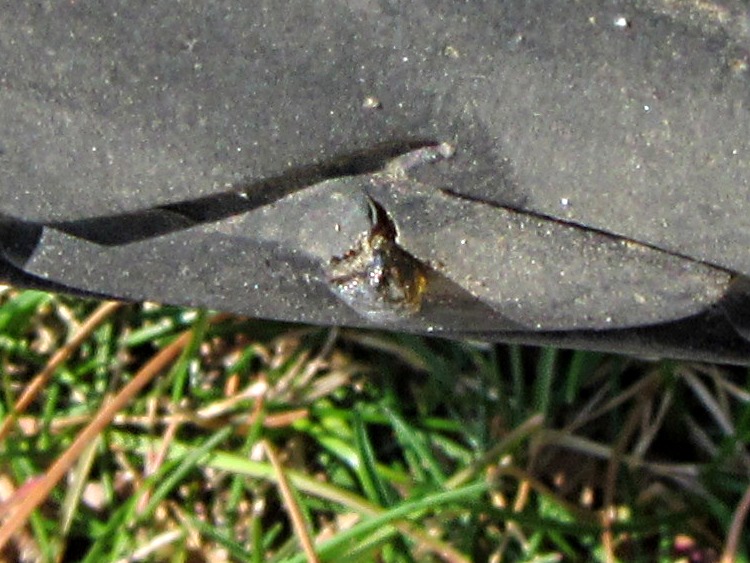
Brown glass chip – in tire
Ever notice how a rear flat means you can’t steer and a front flat means you can’t pedal? Works that way on our recumbents, too. Weird.
The chip probably came from a beer bottle tossed out a car window, those being the canonical source of brown glass on the road. That razor edge punched right through the Kevlar belt in the Schwalbe Marathon tire and just barely penetrated the tube:
Brown glass chip – detail
Fortunately, I discovered all that in a nice grassy area, patched the tube, fired a pair of CO2 capsules into the thing, and rode another 20 miles around the block on a lovely day. Unfortunately, I managed to pinch the tube while installing it, producing a very slow leak that flatted the tire by the next morning.
While repairing that flat in the comfort & convenience of the Basement Laboratory Repair Wing, I installed a tire liner with two strips of silicone tape over the ends to see if that reduces the abrasion:
Silicone tape on tire liner
Silicone tape doesn’t adhere to anything other than itself, so I added two duct tape snippets to hold them in position while I buttoned up the tire. And, yes, I left the transparent plastic cover tape in place, in the hope that it can’t do any harm.
Perhaps the inevitable slow leak will produce a flat in the garage, not on the road…
… look like they ought to fit some sort of tubing and, indeed, a bit of rummaging produced a hank of suitable thick-walled plastic stuff. Heating one end until it went clear and floppy, then jamming it over a syringe’s Luer fitting produced a workable flushing tool:
Syringe with tubing to fit R380
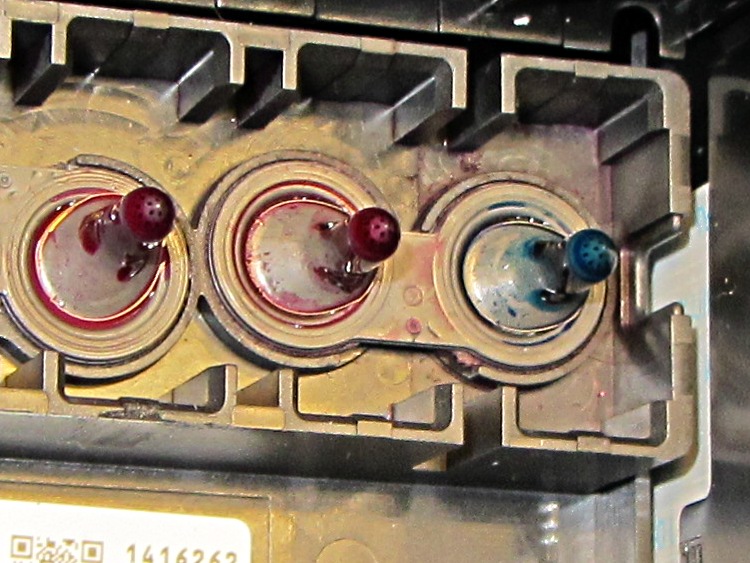
I folded a tissue, laid it over the sponges and wipers at the printhead park position, then pushed the ink tank carrier over the tissue to absorb the spray. Squirting three syringes full of 10% ethanol through the head cleaned out a few of the blocked jets, but didn’t produce a complete fix.
Next up: homebrew window cleaner, diluted about 1:3 to knock back the ammonia concentration.
I dropped that lens cap and the sheet-metal disk popped out; evidently the acrylic caulk doesn’t really count as an adhesive. Cleaned out the residue, ran a thin layer of urethane adhesive around the rim, and applied some clamps:
Re-clamping the cover
Cleaned out the inevitable urethane bubbles that emerge from even the most minute opening and it’s all good.
So the Epson R380’s magenta printhead has clogged and cleaning it doesn’t have any effect. I figured I’d pop the printhead out, rinse off the crud, and see if that improved the situation. Turns out, you can’t get there from here…
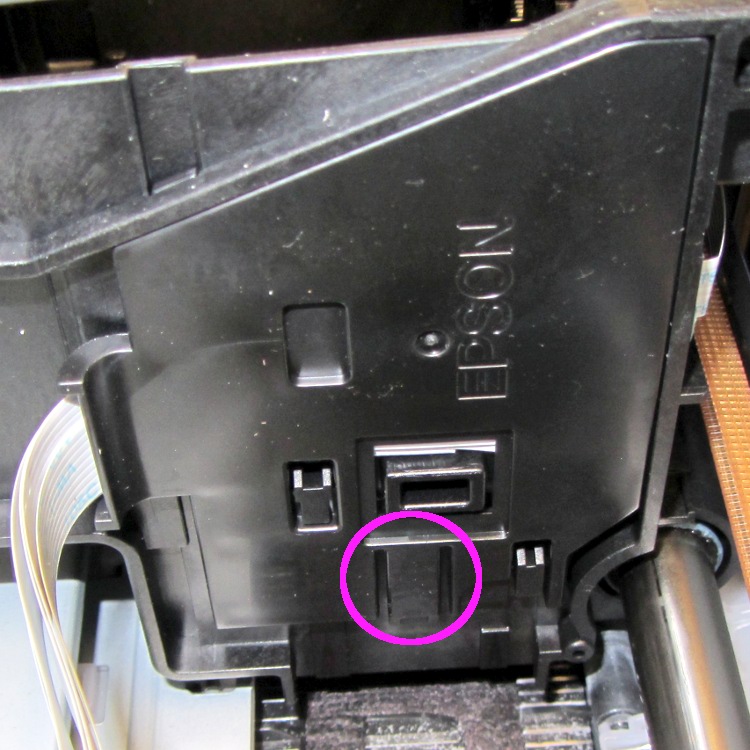
The first step is removing the printer side panels, which involves sliding a steel strip into the not-really-vent slots along the side to release the catches as described there. This picture shows what’s going on inside:
R380 side panel locking tab release
You must hit that slot in the catch with the strip, so the strip must be no wider than 15 mm = 5/8 inch and tapering the end would certainly help. After I removed the panels, I broke those latch tabs off; the panel has locating tabs that align the edges, so the latch tabs just keep you out.
In any rational printer, accessing the printhead for cleaning would be trivially easy. Epson has a different attitude: KEEP OUT!
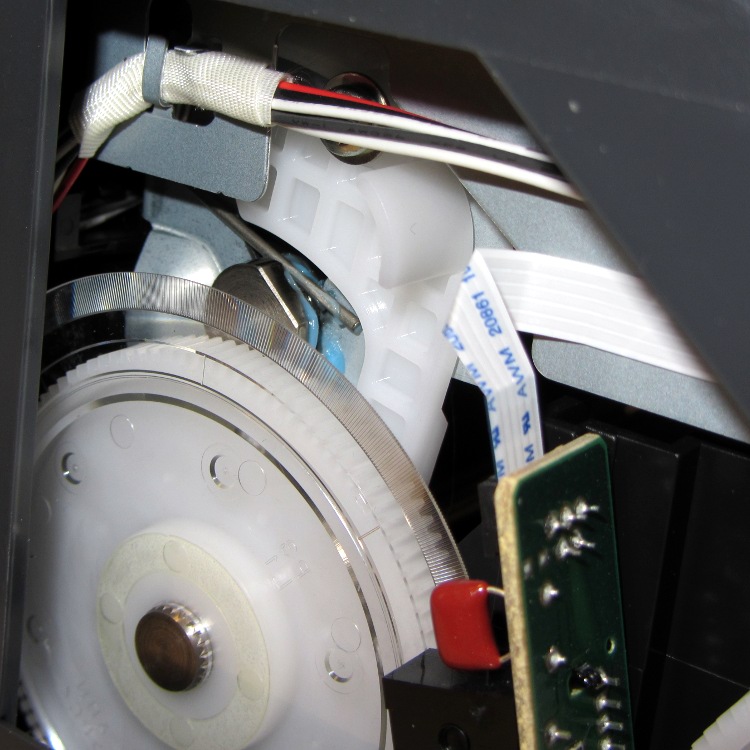
My original idea was to release the rod upon which the ink tank carrier slides, then pull the whole thing out, but it turns out the rod is also a shaft that transmits rotary motion from one side of the printer to the other, plus a mechanism to raise and lower the printhead over the cleaning station (and, perhaps, the DVD carrier that I’ve never used). A vast assortment of gears, clips, encoder wheels, and doodads affixed to each end convinced me not to go that route right now.
The left side includes an impossibly delicate rotary encoder disk blocking the end of the shaft:
R380 left side mechanism
Prying the spring out of the shaft notch allows it to slide to the right until another spring clip slams up against the inside of the frame on the right side. That clip may be pry-able, but it’s carefully arranged so as to be maximally inconvenient to reach.
R380 right side interior
The ring holding the gear in place must be removable, somehow or another, even without an obvious hole or tab:
R380 right side mechanism
With that encoder wheel blocking the left end of the rod, I gave up.
Then I tried to dismantle enough of the ink tank carrier to release the printhead. The first step removed the tank carrier’s two side panels, both of which use pull-out clips to prevent them from sliding. A view of the removed panels shows the tabs:
R380 Ink Tank Carrier side panels latches
The outside panel requires jamming a small screwdriver behind that tab at an awkward angle, then the panel slides downward:
R380 Ink Tank Carrier – right side cover
You can release the inside panel with a fingernail near the top of the (unmarked, but obvious) tab outlined in white on the far right side, then slide upward:
R380 Ink Tank carrier – interior
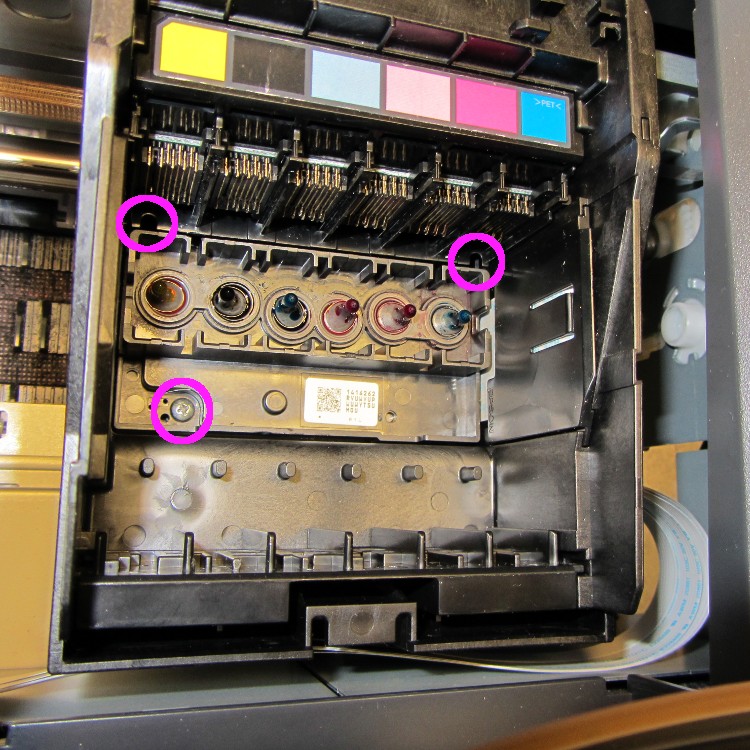
The magenta circles mark three screws that secure the printhead plate to the carrier, but it won’t do you any good. The two rear screws require a narrow-shaft Philips #1 driver and you cannot get the screws out through the holes; I managed to get them back in place, but don’t loosen them until you figure out how to remove the assembly holding the electrical contacts for the ink tanks.
That assembly, marked by the six color panels, slides vertically into the rear wall of the carrier and seems to have a latch on the rear wall of the tank carrier. Of course, you can’t access the latch without dismantling the damn printer.
So I put everything back together again and the printer works no worse than it did before. I’m considering connecting a syringe with length of tubing to the magenta inlet port, then forcing a toxic mix of water, alcohol, and detergent through the printhead:
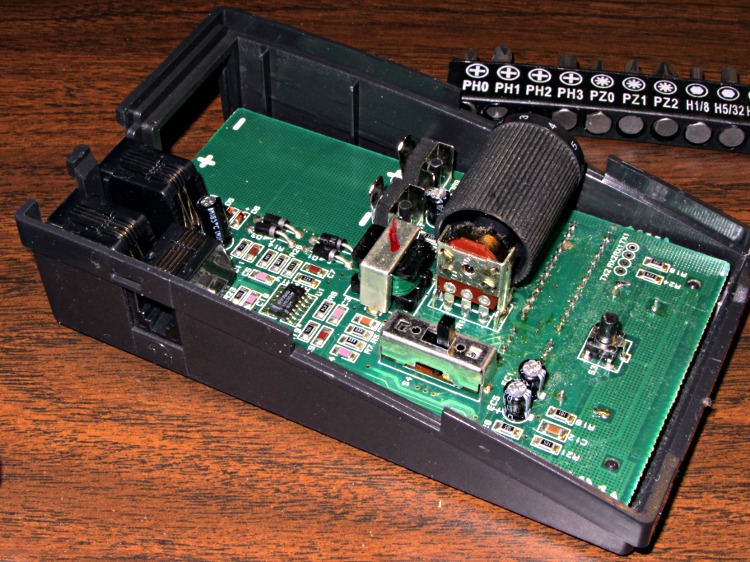
The headset / phone switch in my ancient HelloDirect phone headset became increasingly intermittent and finally stopped switching at all, so I tore the thing apart. It has two snap latches on each side in addition to the single screw in the bottom:
HelloDirect headset interface – top interior
The 4PDT switch just to this side of the volume drum can’t be taken off the board without unsoldering all 12 terminals and two case anchors, so I just eased some DeOxit Red into the openings and vigorously exercised it. That seems to have done the trick.
I cleaned out a bunch of fuzz and a spider husk while the hood was up…