Ed Nisley's Blog: Shop notes, electronics, firmware, machinery, 3D printing, laser cuttery, and curiosities. Contents: 100% human thinking, 0% AI slop.
Very recently, Youtube videos (including mine) took on a Smurf aspect: blue skin tones and other weird colors. I don’t spend a lot of time watching videos, but I’m pulling together a talk and wanted to be sure my videos still worked.
Having installed Ubuntu 12.04 on that Lenovo box, which has an nVidia graphics chip, we find there’s an error somewhere inside the current 295.40 (and perhaps previous versions) of the proprietary nVidia driver that causes random video lockups which generally require rebooting that sucker. Of course, the default Unity desktop requires that driver for 3D operations like compositing, because the Free Software drivers don’t / can’t do 3D in hardware.
How is it that a (nominally) Open Source / Free Software OS requires proprietary drivers just to present the UI? Oh, right, 3D is glitzy and that’s what matters most in these degenerate days.
Anyhow.
The least-likely-to-fail solution seems to be disabling the nVidia driver, which enables the Nouveau driver, which does 2D just fine, which lets Unity stumble along. Reverting to 295.33 seems to work for some folks, but I have other things to do…
The plastic handle for the rear hatch snapped as I opened it to load some groceries. I slapped some tape over the opening to keep the loose parts from falling out on the way home: if you lose the parts, you’ve lost the game.
It turns out that the hatch doesn’t have an interior handle:
Sienna van hatch – interior
So we unloaded the groceries through the side doors, crawling over the middle seats. We don’t use the van all that much, but this was the height of the Vassar Farms garden setup season and we needed the back end for fenceposts, deer fencing, and suchlike.
Searching with the obvious keywords shows that this is a common problem for Toyota Sienna vans, many people experience it just a few years after buying a new van, it’s an extremely expensive dealer repair ($75-ish for the handle and $300-ish for labor half a decade ago), and that the Genuine Toyota replacement handle is made of the same plastic and tends to break the same way in short order. I ordered a metal handle from the usual eBay supplier for $20 and it should arrive shortly.
But an expedient repair is in order…
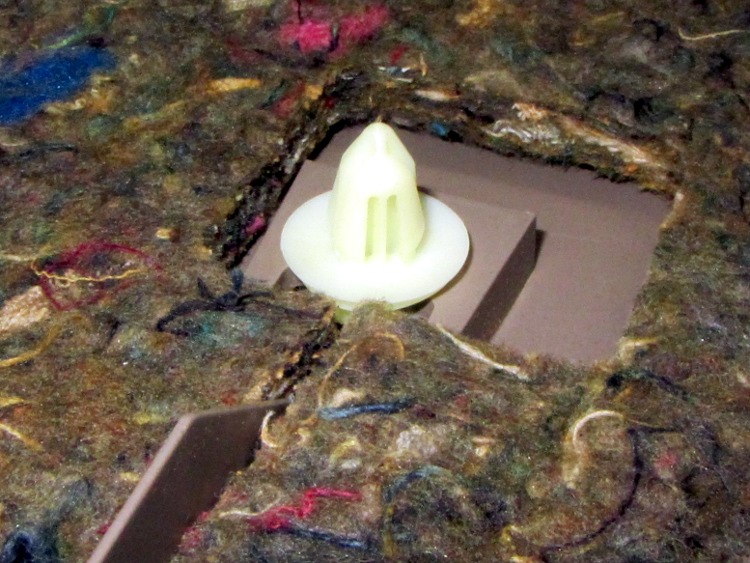
Pull the trim plates off the grab handle and dangling strap, apply a 10 mm socket to the three bolts thus exposed, work fingers under the cover near the latch near the center bottom, pull hard, and work your fingers around the cover as the dozen-or-so expanding button rivet fasterer thingies pop free with alarming sounds:
Sienna hatch – trim fasteners
The handle / latch handle assembly fits neatly between the exterior bodywork and the interior hatch frame, where it’s barely visible. The claw-like doodad sticking up from the left should pull down on the metal (!) lever just above it, which pivots on a pin and pulls upward on a cable (the round button visible near the top of the assembly) that actually does the unlatching:
broken latch
Remove the three nuts (one visible in that picture), squeeze the expanding plastic snap with pliers, and push it through the hole. Then you can loosen the bezel holding the handle assembly and the two license plate lamps:
Sienna hatch – bezel released
Disconnect the lamp cable connector, push the sealing button through the hole with a screwdriver, and then you can pull the entire bezel off the hatch. That exposes the problem:
Sienna hatch – latch parts
You can’t quite see the two screws that secure the handle assembly to the bezel, but they’re just inboard of the two bolts that hold it to the hatch. Undo those, remove the Jesus Clip from the long rod, slide it out, and extract the handle. That claw-like doodad snapped off the plastic handle:
Sienna hatch – handle
Of course, it’s an engineering plastic that shrugs off ordinary solvent glue, which you wouldn’t trust for a permanent repair anyway. The general ideal is to reposition the broken part, epoxy it in place, drill a hole through it and the handle, run a long 4-40 screw through the mess, and butter it up with more epoxy.
The first step is to put the two pieces in the right alignment and secure them well enough to permit drilling. Other folks swear by cyanoacrylates, but for a job like this I invoke the mantra The Bigger the Blob, the Better the Job. Believe it or not, the broken part stands on its own amid the epoxy around its base:
Sienna hatch – handle epoxy
Unfortunately, it tilted slightly, but not enough to matter, as the epoxy cured. I couldn’t figure out how to both hold it in position and hold it in exact alignment on the handle; maybe positioning a few clamps around it would have been better. In any event, the result was close enough.
Grab the handle in the drill press, align the claw vertically, face it with an end mill to let a twist drill start properly, and drill right down the middle:
Sienna hatch – handle drilling
Flip it over, use the same drill to align the bore, and mill a counterbore for the screw head:
Sienna hatch – handle counterboring
That may not be strictly necessary, but there’s not much clearance between the handle and the rest of the frippery in the assembly. Reduce the diameter of the screw head to fit the counterbore, do the same for the nut that’ll go on the other end:
Sienna hatch – nut shaping
Butter up the counterbore with epoxy, slide the screw in place, secure with the nut, and butter up that end, too. Reassemble everything and you can see how far off-center the claw is:
Sienna hatch – latch rebuilt
You can just barely make out the epoxy blob covering the nut below the claw, but it still engages the metal lever that will pull the cable:
Sienna hatch – latch assembly
Reassemble everything in reverse order and it works fine. I left the interior trim cover off, pending installing the metal replacement handle, and discovered that the brake lights spill plenty of light inside the van after dark.
Memo to Self: The fixtures are the hardest part of any adhesive repair. Get those right and the rest is easy!
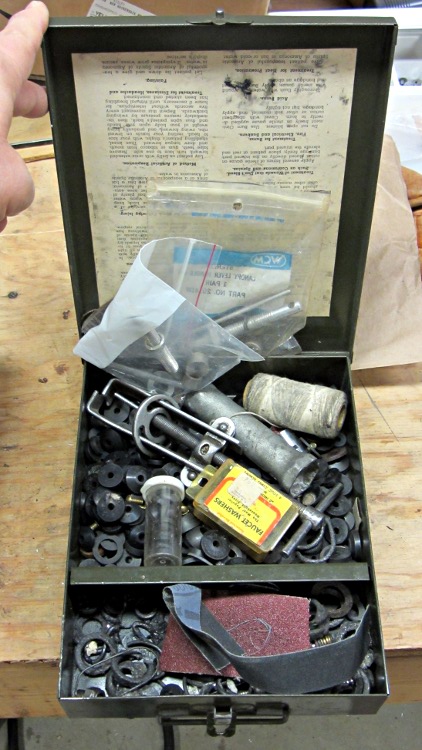
As part of replacing that frostproof faucet, I had recourse to some tools & hardware that Came With the House: the previous owner had a well-stocked supply of stuff and we bought the place “with contents.”
This box of assorted washers, screws, and tools has already been more than a lifetime supply for one person:
Box of faucet washers and tools
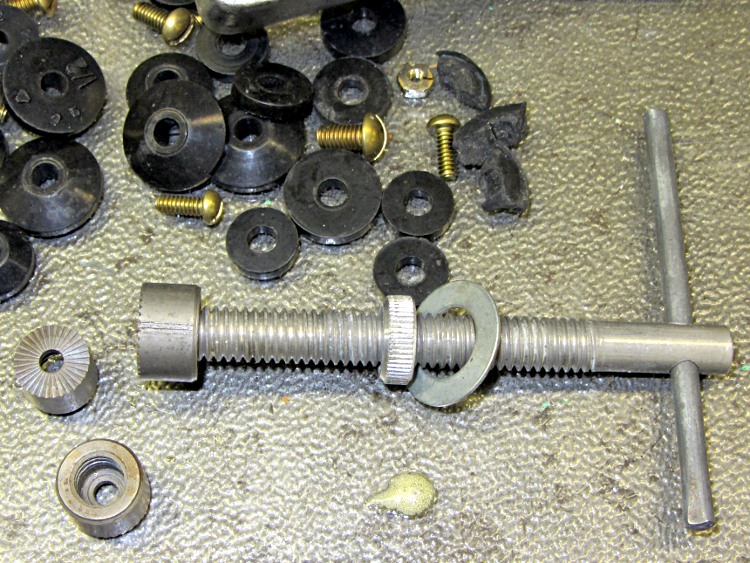
I already had a faucet seat reamer that came in handy in our previous houses and now I have two:
Faucet seat reamer
The threaded shaft isn’t nearly long enough for a frostproof faucet, but it’s a standard thread and I have enough all-thread rod to cobble up something. When I get around to fixing the other outdoor faucets, I’ll give that a try.
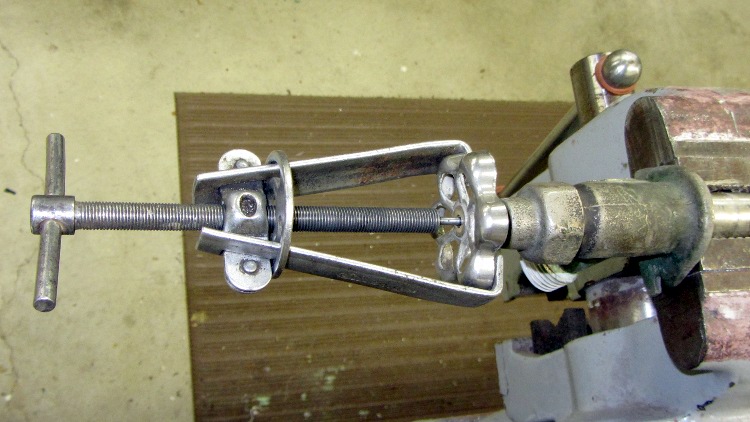
Although I didn’t need a handle puller to dismantle the old valve (this is a staged photo op), it’s been vital elsewhere:
So I picked up a $8 quarter-turn ball valve faucet with a 1/2 inch copper pipe sweat fitting, plus a 1/2 inch male NPT adapter. I have plenty of 1/2 inch copper pipe on the rack and, as it turned out, a few of the adapters. One key advantage: I could cut the pipe to make the length come out right.
Unfortunately, the frostproof valve emerges on the interior wall above the top shelf of a built-in rack in a far corner of the Basement Laboratory Storage Wing, an arm’s length away where you (well, I) can’t get any leverage. The absolute last thing I wanted was to crack a solder joint, tear the pipe loose, or wreck the 1/2 inch female NPT fitting on the pipe: I had no idea how firmly the valve was stuck in the fitting.
Based on the new valves I’d seen, I assumed there were no fins or doodads that would prevent the whole valve body from rotating in the as-yet-undisturbed cement holding it in place.
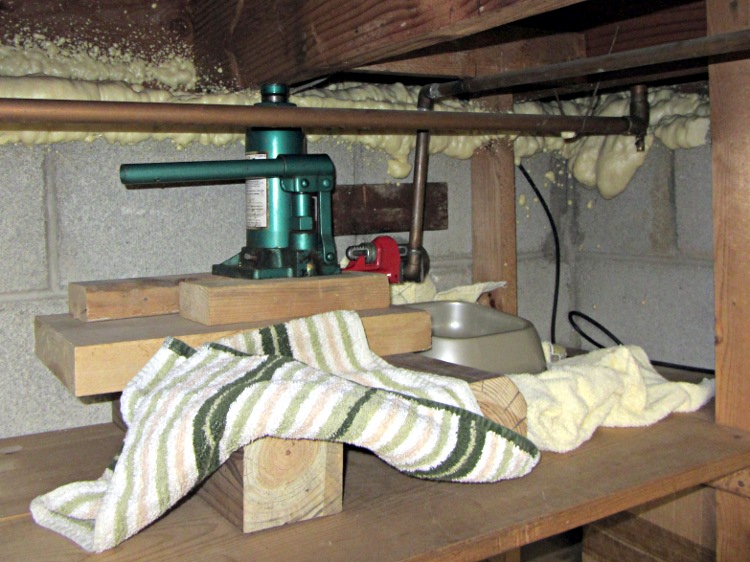
So I attached the medium pipe wrench to the fitting, laid in some cribbing atop the shelf to support a bottle jack over the wrench handle, and pumped the jack just enough to take up the slack. The jack transfers torque from the wrench to the floor joist overhead, the cement in the foundation wall constrains the valve body from moving laterally, and I was going to be really careful to not shove the valve while turning it.
Positioning a dog dish (yes, one of those) to catch most of the water, plus an assortment of scrap towels to catch the rest, produced this arrangement:
Frostproof faucet – inlet wrench bracing
Retiring to the garage with the large pipe wrench, I was delighted to find all that preparation let me simply turn the valve body with no drama. Mary monitored the process from inside to make sure nothing surprising happened, the valve broke free from the fitting without too much effort, and after two turns I could spin it loose by hand… whew!
Incidentally, a pair of amateur radio HTs simplified communication through the foundation wall. We were about four feet apart, but unaided voice communication didn’t work at all. I’m not much for just talking on the radio, but ham radio makes a great adjunct to other activities.
With the valve body loose, I chiseled the mortar out of both ends and found the central body hadn’t been cemented in place: the whole thing pulled straight out into the garage.
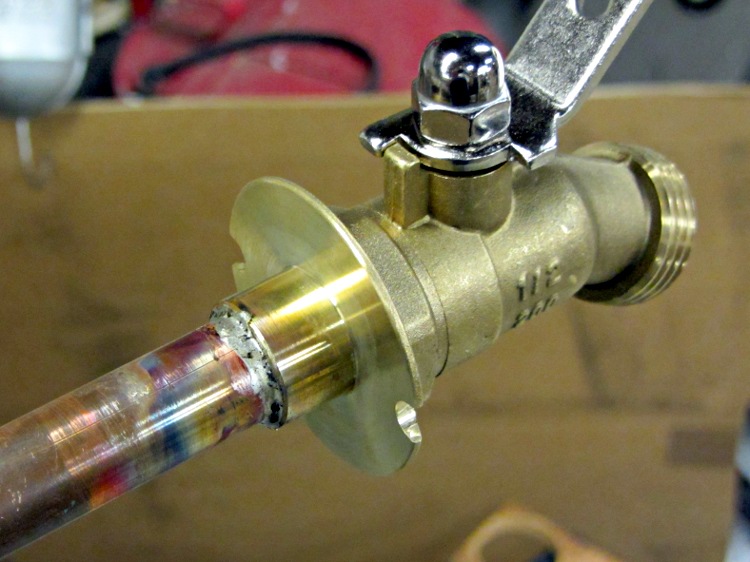
Screw the adapter into the interior pipe, stick the pipe into the adapter from the garage, measure to the outside wall surface, add 1/4 inch, clamp the pipe in the bench vise, and solder the ball valve to the pipe:
Garden faucet – sweat-soldered fitting
Then solder the NPT adapter on the other end:
Garden faucet – sweat-soldered adapter
I love the smell of molten projects, even late in the day… and it’s much easier to sweat good solder joints on the bench than working left-handed, tucked away in a far corner, up under the floor joists, standing on a short ladder, leaning far off to one side.
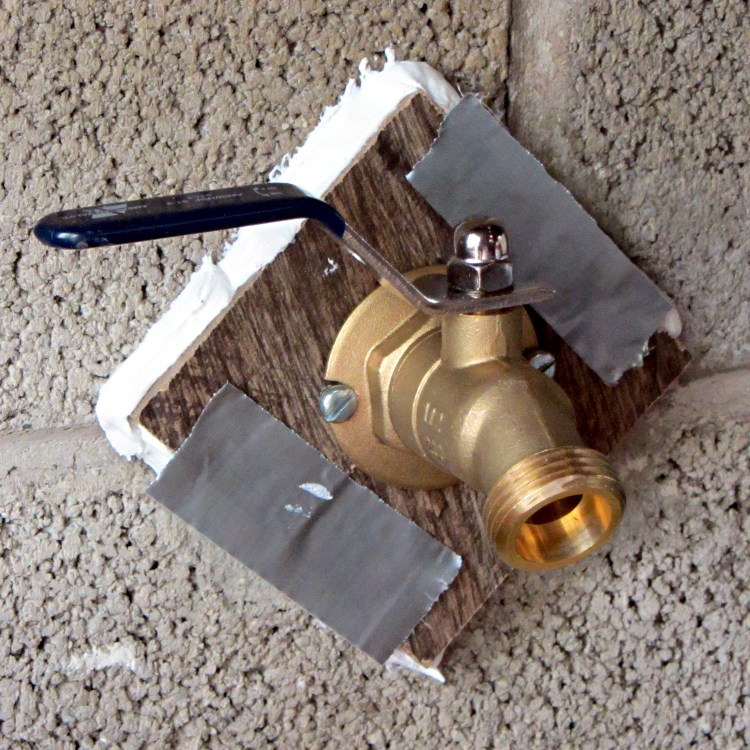
Wait for it to cool, stick the assembly through the garage wall with some masking tape to keep grit out of the threads and pipe, wrap a few layers of PTFE tape around the male adapter, ease them together, tighten until the valve handle is directly on top, turn the water back on, verify no leaks: that’s enough for one day.
The next day I drilled / sawed backer boards from some random paneling that came with the house and stuck them in place with generous beads of acrylic caulk. Looks a bit odd (the tape holds the sides in alignment and came off a day later), but it should hold the pipe in a fixed position and keep the critters out of the basement just as well as the cement:
Having established that simply replacing the beveled washer wasn’t going to work, I examined the marks left by the valve seat on the washer. Obviously, it wasn’t quite sealing all the way around the seat’s inner diameter: much of the washer had an indentation, but about 1/4 of the perimeter was unmarked.
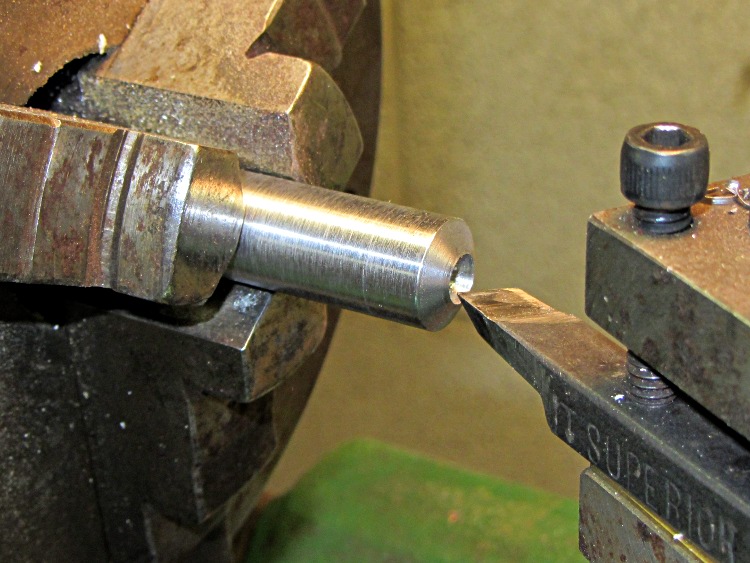
I couldn’t determine if the valve seat was flat or beveled by looking into the partially water-filled body, but I figured that if I could burnish the edge of the ID to make it more even, then whatever was left should seal better against the washer. Measuring the included angle of several different beveled washers showed each size has its own angle, so I turned the end of a steel rod to match the washer installed on the faucet shaft:
Frostproof faucet – lathe-turned burnishing rod
With that in hand, I filed some shallow radial indentations on the bevel, eased it into the faucet body against the seat, and gave it a few turns while pushing firmly. The intention: smooth the existing brass, not cut a new seat.
Although the plan made perfect sense, the faucet leaked much more vigorously with the valve cranked closed.
In retrospect, I should have tried a stack of flat washers in hopes that they would seal across the entire valve seat. However, the screw in the end of the valve stem reached the end of its tapped hole at the right distance for a beveled washer, leaving far more space than any single flat washer could fill, so this obviously wasn’t the right way to go. Here’s the screw again, seated firmly at the bottom of its hole:
Frostproof faucet – valve with washer
At this point, I had to decide whether to continue futzing with the valve or chisel it out of the wall and replace it. Time for a trip to the Big Box Home Repair store to see what’s in stock… which turned out to be an assortment of frostproof valves in 2 inch increments from 6 inches to 12 inches, with the latter about $28. The quality appeared to be marginal, the designs included fragile plastic bits (some of which were already broken in the shipping bags), and it was not obvious that they’d outlast the gardening season. The online reviews were, shall we say, equivocal.
Our house has three frostproof hose faucets, with the closest one to the garden being inside the garage. Unlike ordinary garden faucets (a.k.a., hose bibs), these have the valve seat at the end of a foot-long tube that projects inside the foundation wall where it (usually) can’t freeze. The valve has required increasing amounts of force to turn off (meaning the ancient washer inside has solidified) and the packing around the stem has begun leaking copiously with the faucet turned on (despite tightening the cap).
I’ve been putting this repair off ever since we bought the house, because I knew how it would end, but with no rain for nearly a month before planting season the garden needed water. So, we begin…
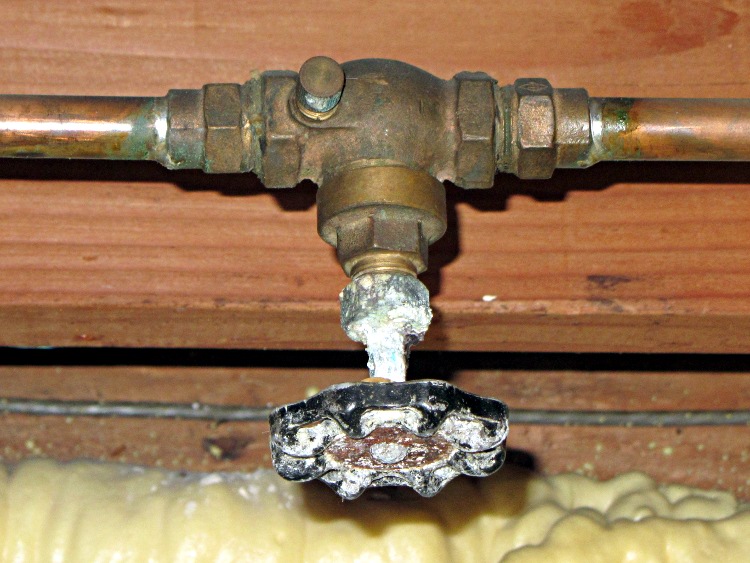
The first complication is that, while there’s a shutoff valve for the faucet, I’m reluctant to turn its corroded-in-place stem for fear of starting up an indoor leak:
Corroded gate valve
The small stem to the left of the valve body is a drain cap, which means that one can, in theory, turn off the valve and remove the cap to drain water from the line to the left. That line leads downhill to the faucet, which will turn out to be critically important later in this story. FWIW, I think it’s a gate valve, given the length of the casting around the stem, but for obvious reasons I haven’t opened it up to find out. If it’s a washer-based valve, it hasn’t been closed in decades and I expect the washer & seat to be in poor condition.
The house has an unusual plumbing arrangement: a direct line from the water inlet to the outdoor faucets, toilet flush valves, and a separate faucet at the kitchen sink. This originally fed well water directly to those points, meaning that the largest water consumers didn’t go through the water softener and they weren’t watering the lawn with soft water. I took pains to preserve that arrangement while replacing the softener and having the town water supply plumbed into the house.
In any event, I shut off the water upstream of the shutoff valve (hence, no toilet flushing for the duration) and proceeded.
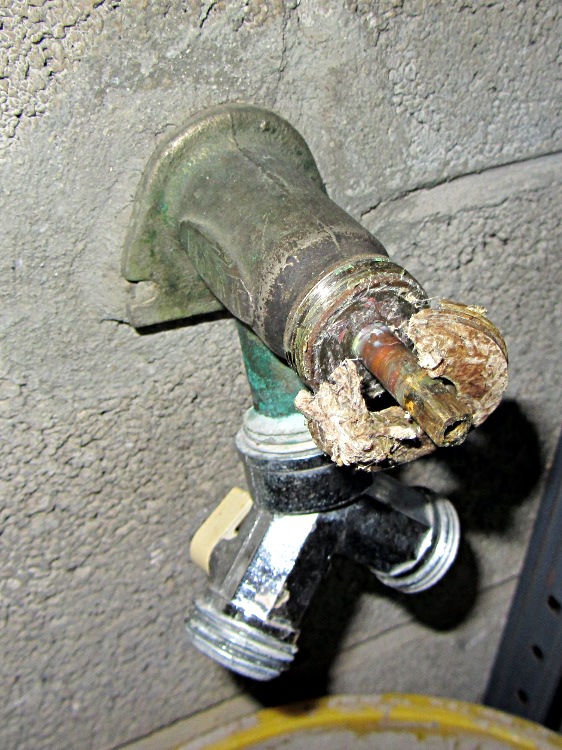
The valve handle came off easily, as did the cap, revealing the crumbling stem packing inside:
Frostproof faucet – stem packing material
Nota bene: the builder firmly cemented the faucet into the foundation wall. The same cement was applied on the inside wall, so removing the faucet requires chiseling out what might be the entire depth of the faucet through the foundation blocks. That’s one of the many reasons I didn’t want to do this project: the possible failure modes looked grim.
With that out of the way, the stem support came loose easily; old-school heavy brass construction works great:
Frostproof faucet – stem support
Unfortunately, unscrewing the stem eventually reached the point where it spun freely, but refused to pull out. That means the washer a foot inside the valve has swollen beyond the minor diameter of the threads near the seal and that means I must destroy the washer to extract it. The usual advice recommends pulling on the stem with pliers, but … suffice it to say that was not sufficient in this situation, not to mention that I didn’t want to goober up the stem.
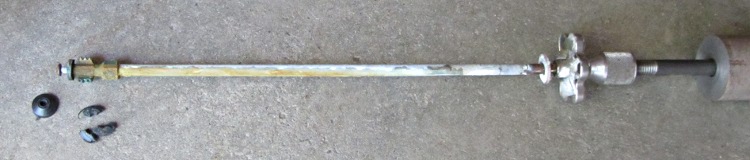
Here’s the nose of my homebrew slide hammer, with a 10-24 steel screw in the valve stem and a pair of nuts jamming everything in place:
Frostproof faucet – valve handle with slide hammer nose
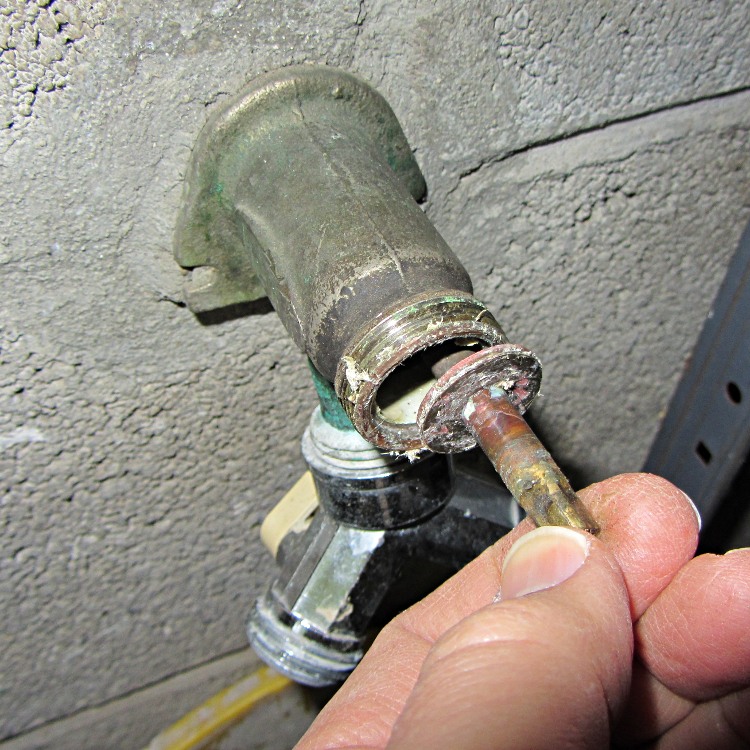
I hoped that the valve handle would prevent the screw from distorting the stem if this operation required force majeure and that part worked out perfectly: a few whacks pulled the stem out and left the washer behind. Some tedious fishing, using various all-thread rods to grab the washer and then fragments of the washer and then fragments of the fragments, eventually produced this tableau:
Frostproof faucet – stem with slide hammer
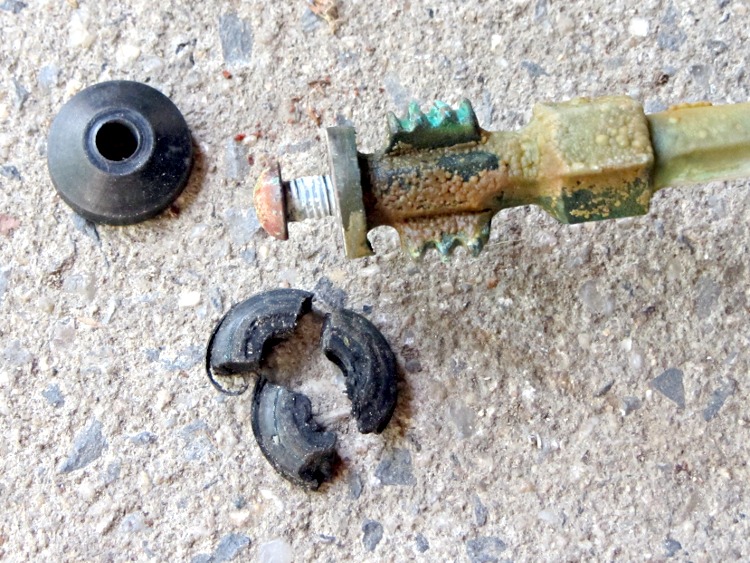
A closeup of the seal end, with the larger fragments of the old washer and a replacement beveled washer of about the right size:
Frostproof faucet – valve with washer
The brass screw turned out easily, the new washer went on, I reassembled everything in reverse order, put new valve packing material under the cap, and… of course, the valve leaked when I turned it off.
A frostproof valve tends to dribble after being shut off, because there’s a foot of nearly horizontal pipe that must drain completely, but this leak was in the gallon-per-hour territory. Obviously, the situation had gone from bad to worse, exactly as I’d expected.