Ed Nisley's Blog: Shop notes, electronics, firmware, machinery, 3D printing, laser cuttery, and curiosities. Contents: 100% human thinking, 0% AI slop.
A friend, anticipating a stream of visitors for their freshly hatched baby, asked for help with a defunct remote doorbell. A bit of probing showed that shorting across the pushbutton switch contacts reliably triggered the bell, so I unsoldered it:
Doorbell switch – intact
A similar switch from the heap had a longer stem that was easy enough to shorten, so the repair didn’t take very long at all: ya gotta have stuff!
An autopsy reveals the expected contact corrosion:
Doorbell switch – parts
Underexposing the image by about two stops retained some texture on the contact dome.
The IC date codes suggest the box is over a decade old, which is as much life as one can expect from cheap consumer electronics, particularly with an unsealed switch placed outdoors.
After years of neglect, an NYS DOT crew started a really nice repair job on the inside edge of the curve just north of our house. They milled out the deteriorated road surface, cleaned out the debris, and laid in a patch flush with the road surface. That’s quite unlike their usual shovel-some-cold-patch / hand-tamp / drive-over-it process, made familiareverywhere elsearound here.
Unfortunately, for unknown reasons, they didn’t fill in the last two feet of the milled-out trench, leaving a tooth-shattering pair of perpendicular edges exactly where you’d least expect them:
Rt 376 north of Heathbrook – unfinished patch
Ran out of asphalt? Lunch break? Called off to another emergency? We’ll never know.
I sent a note, with that picture, to the NYS DOT Bicycle & Pedestrian Coordinator, asking what happened; perhaps they planned another layer atop the whole curve to seal the rest of the cracked pavement?
The next day a crew filled in the hole, which I find far more than coincidental.
Although it’s better than it was, there’s now a joint that will deteriorate more rapidly than the uniform asphalt layer they should have created.
Obviously, I don’t have enough adapters: I need one with N male to UHF male.
I actually spent money to get from the reverse-polarity SMA connector on the Wouxun radios directly to UHF female, matching the cable to the antenna mount in one step.
Sometimes an unsteady ziggurat of adapters isn’t appropriate.
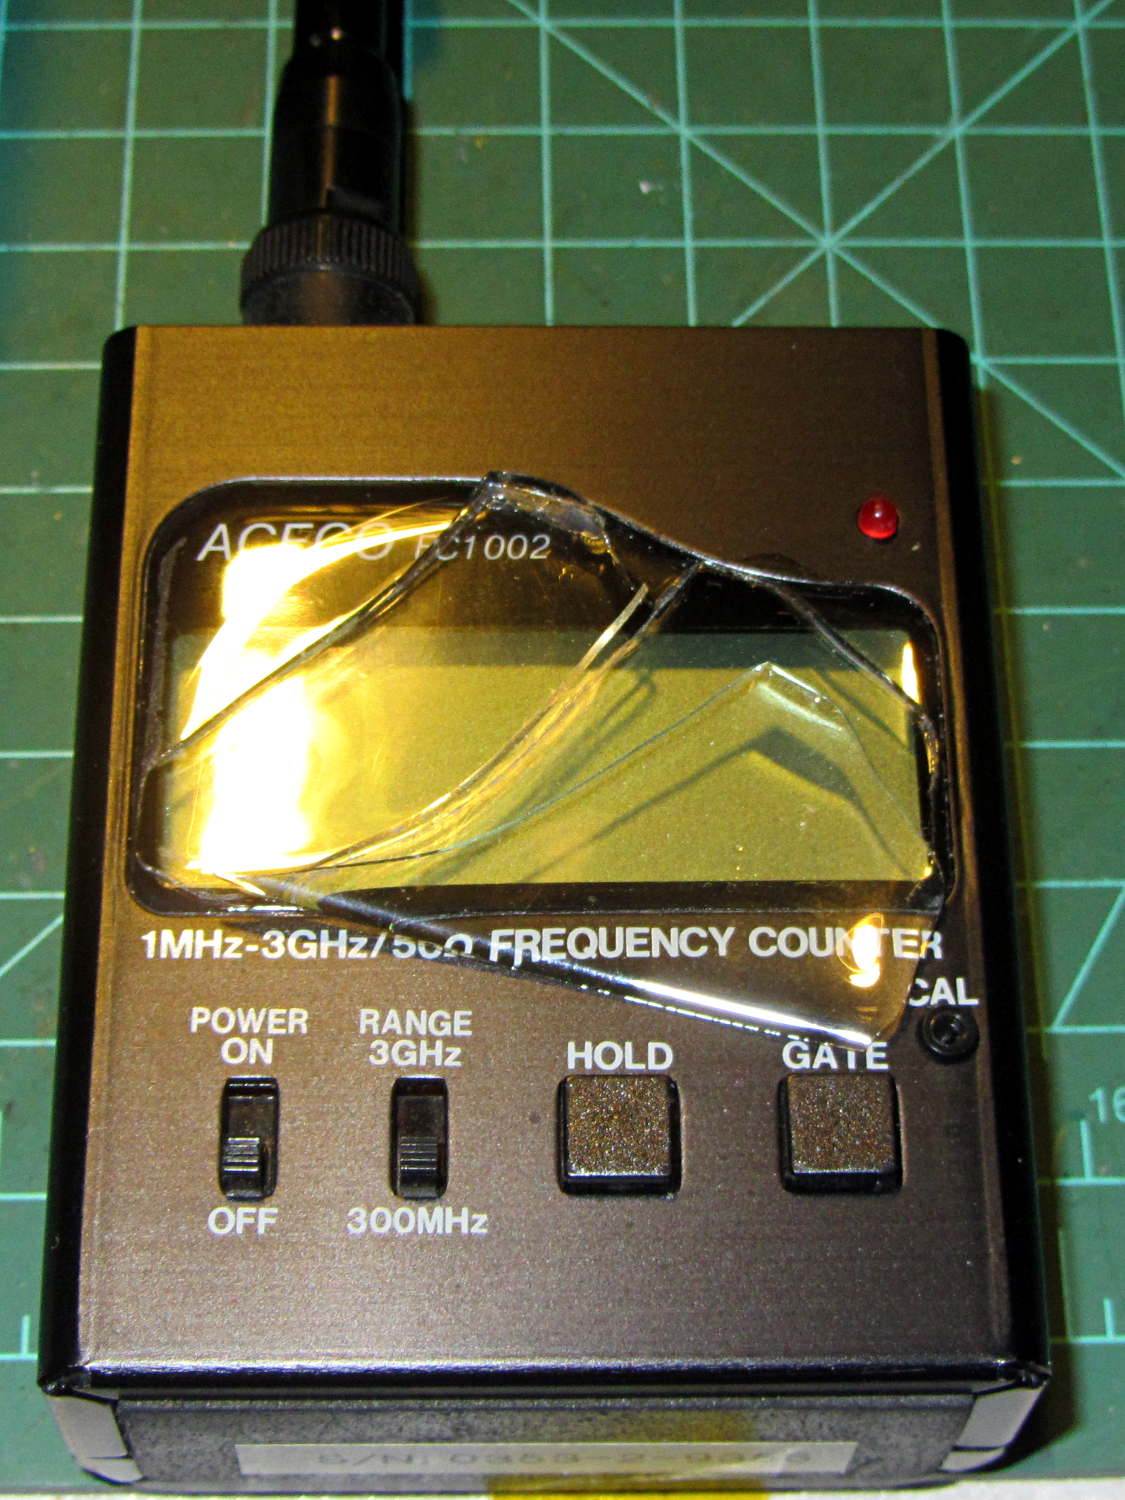
So I picked up the frequency counter and found this:
FC1002 Frequency Counter – split shattered faceplate
The outer, previously cracked pieces of the faceplate split parallel to the front panel, separating into two layers, and popped free of their mount. The layer closest to the panel remains intact.
The fragments were flexible and the bottom layer was rigid, suggesting the faceplate consisted of two parts, perhaps an acrylic (?) base with a soft silicone (?) poured atop it for armor and scratch protection.
It still works fine and the acrylic (?) layer will suffice for my simple needs, despite being slightly marred by the cyanoacrylate glue I slobbered into the cracks.
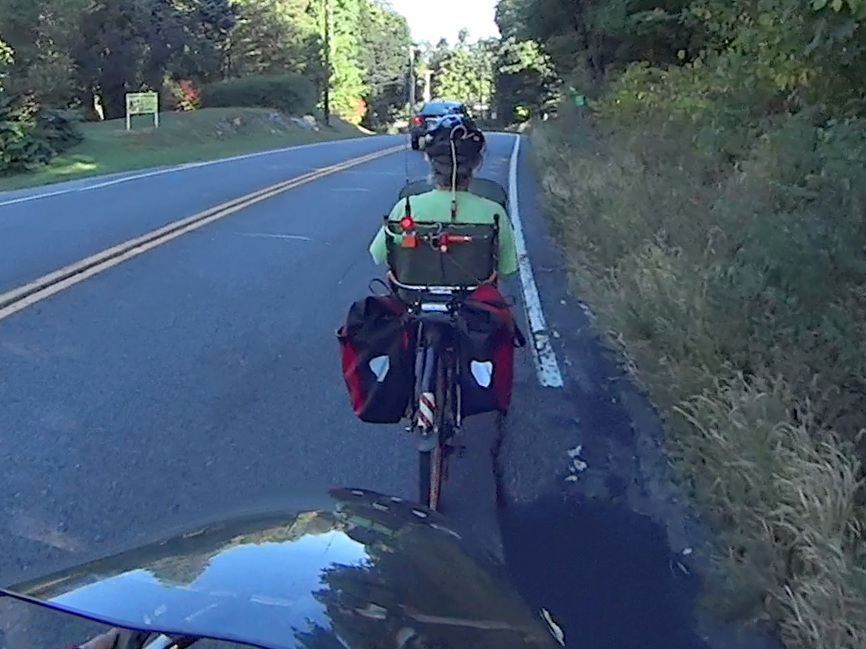
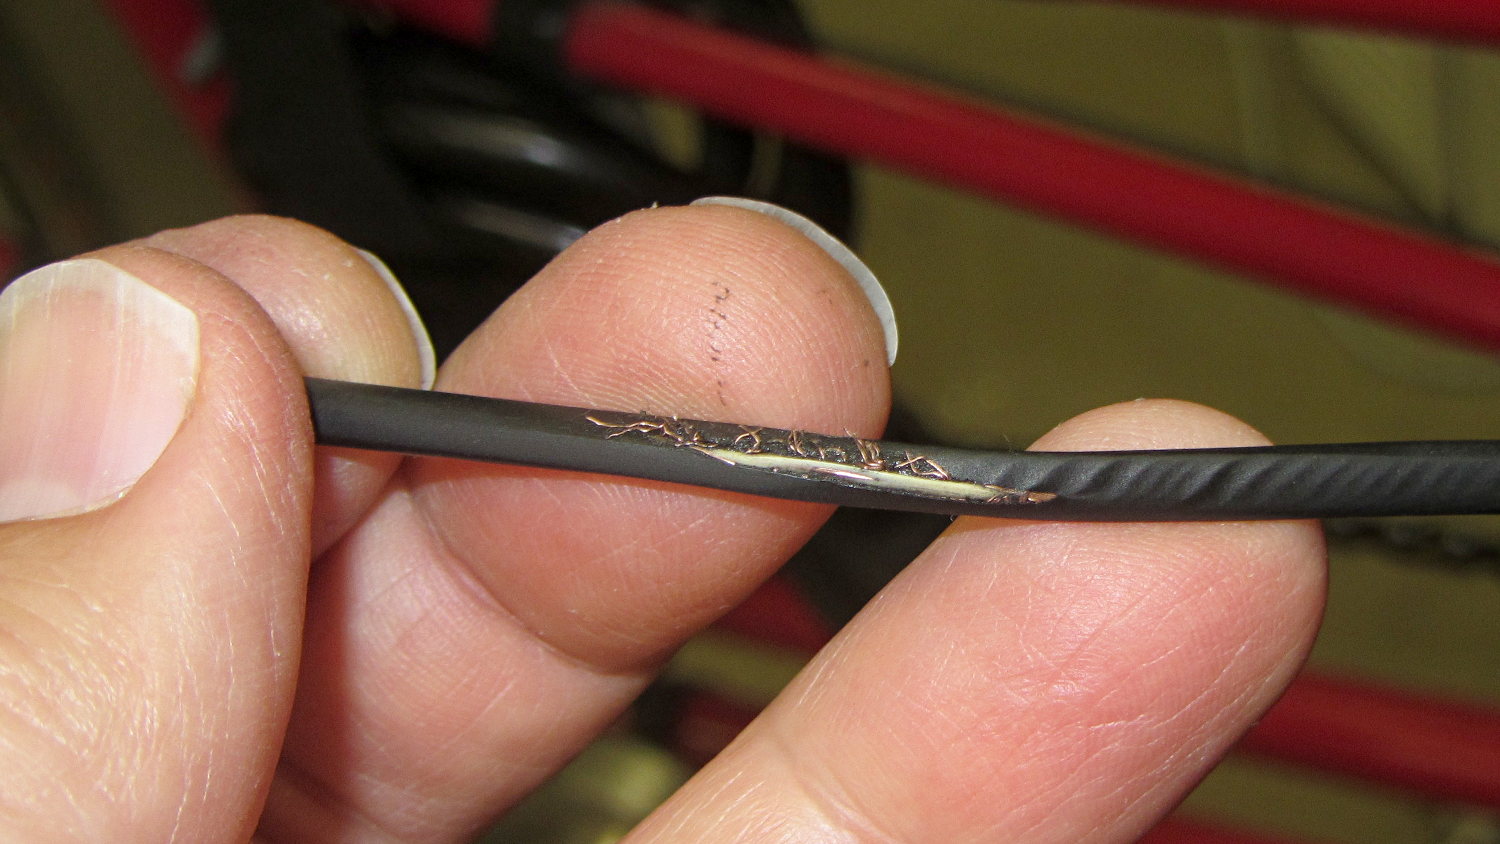
While installing new underseat packs (about which, more later) on my Tour Easy, I discovered a bight of PTT cable had been touching the top of the chain:
Eroded PTT cable – Tour Easy
The gentle ripples to the right of the worn-through section seem particularly nice; you couldn’t do that deliberately if you had to.
This section of cable should have been taped to the upper frame bars. It’s hidden under the seat, just in front of the rear fender, and between the under-seat packs, so it’s basically invisible from any angle.
Soooo, that probably explains a bit of the intermittent trouble I’d been having with the PTT switch, although most of it came from the corroded switch contacts.
Rather than replace the whole cable, I cut out the eroded section, spliced the conductors, and taped it firmly back on the tubes.
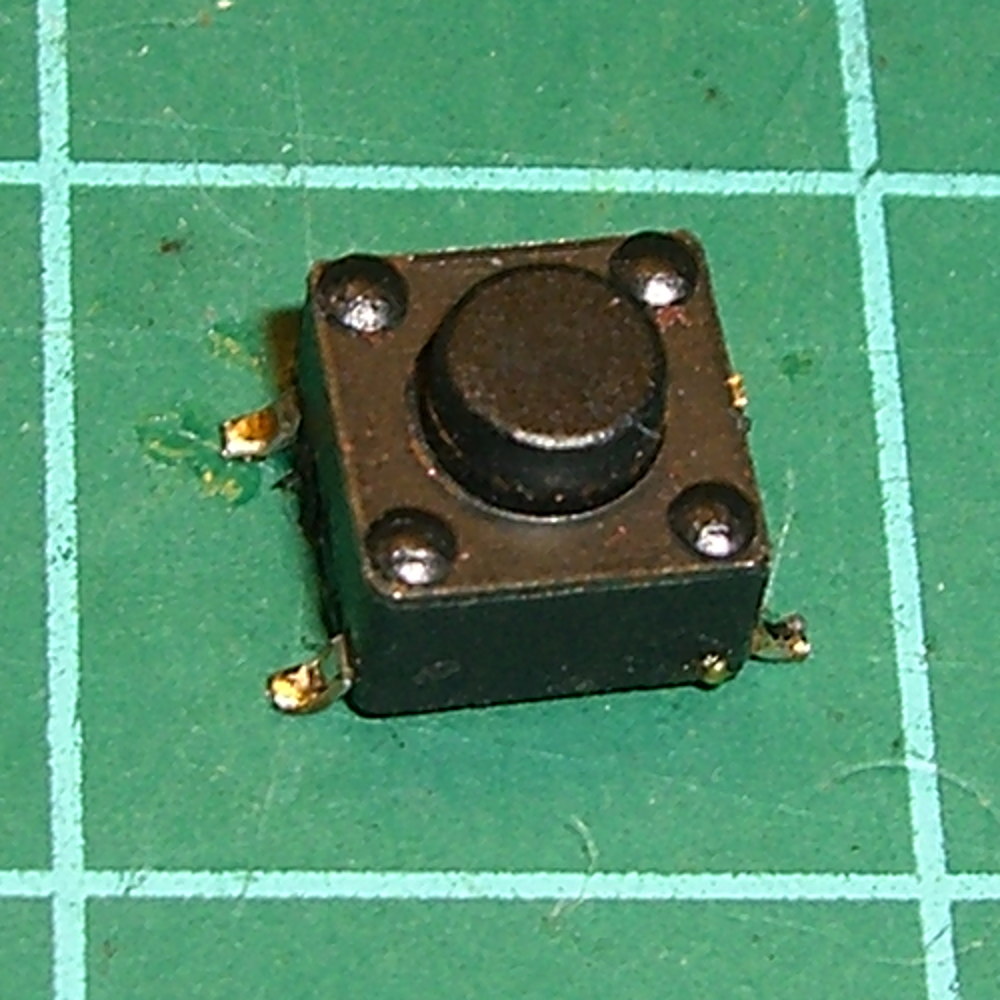
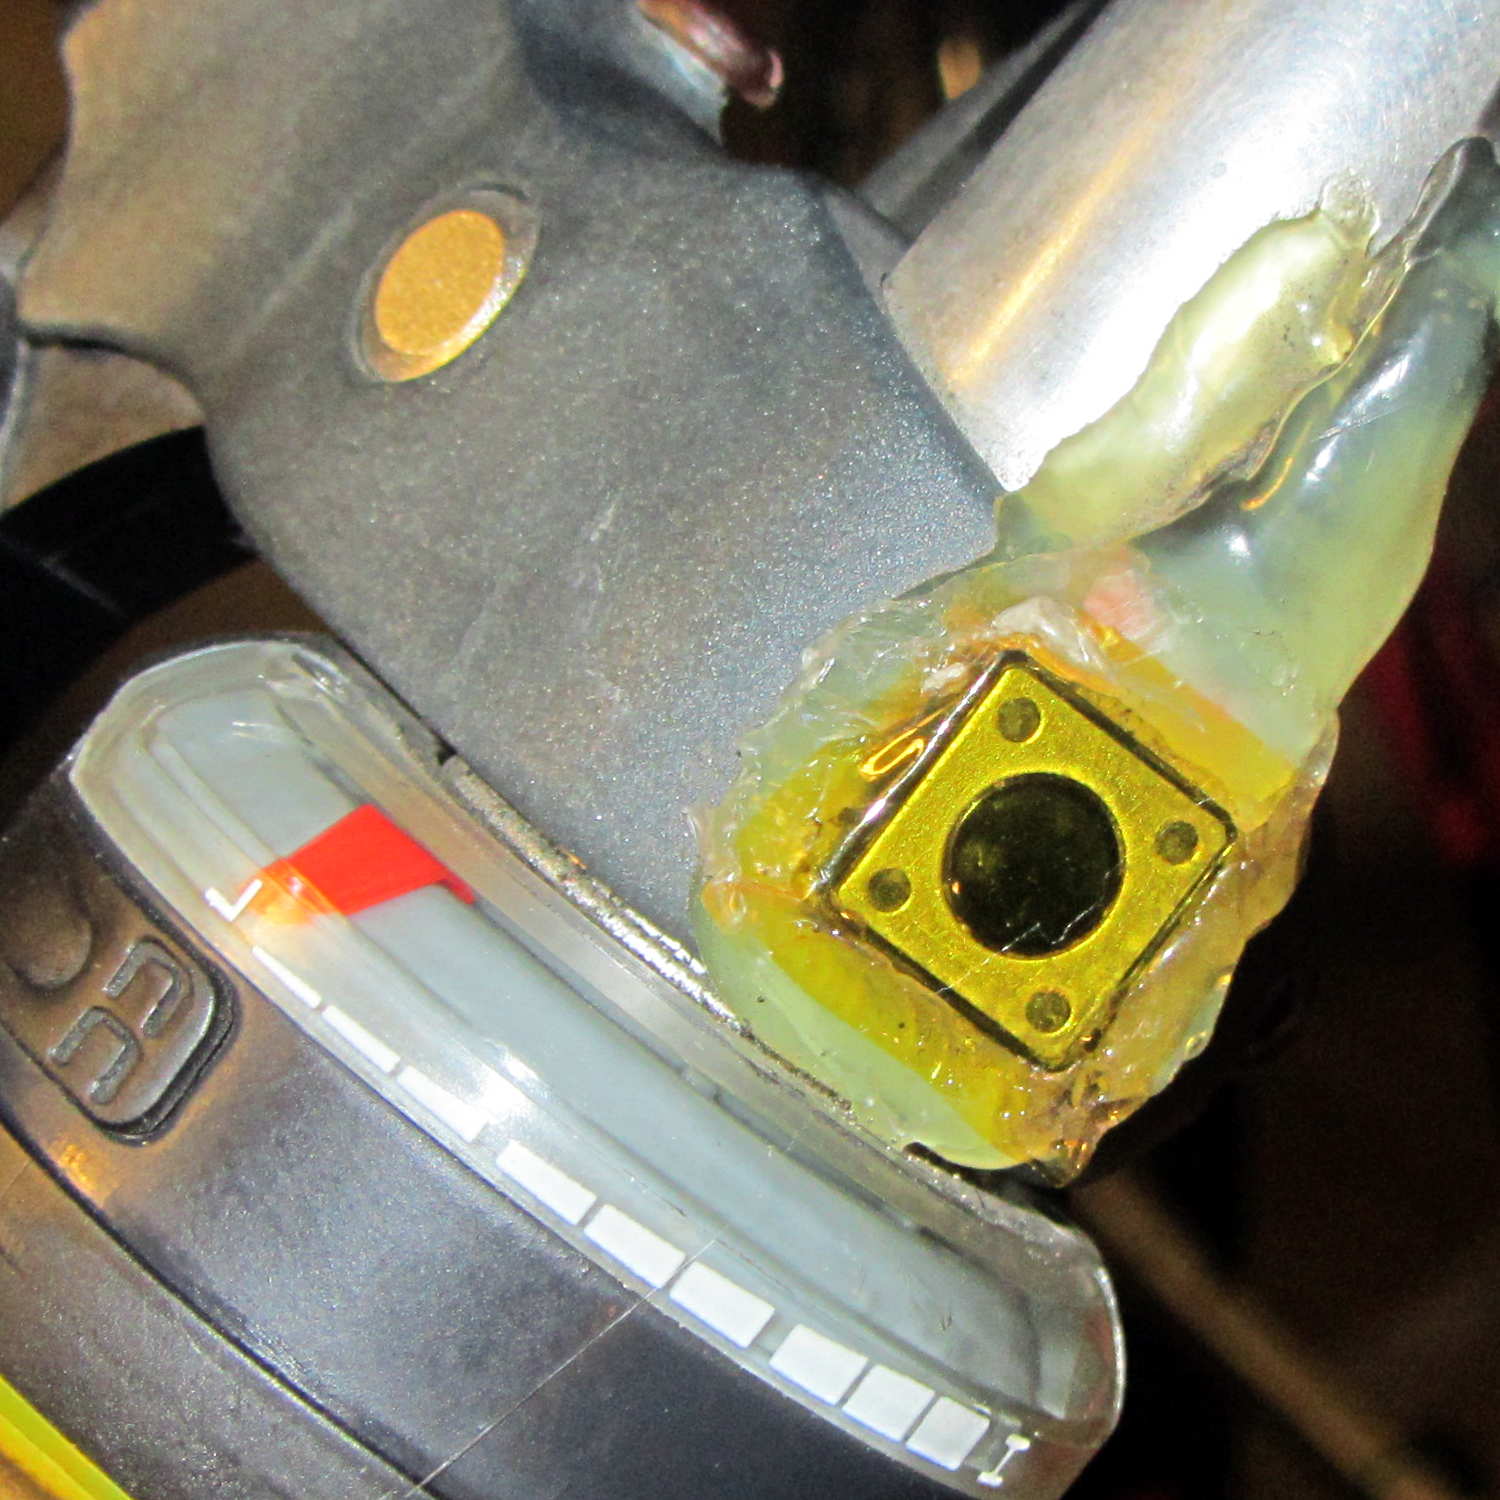
The handlebar-mounted PTT button for the amateur radio on my bike once again went toes-up, most like due to the accumlation of road dust and rainwater over the years. Rather than replace the switch, which would require peeling off a massive glob of hot melt glue and resoldering the wires, I just carved the tops off the rivets holding the cover in place, pried off the cover, and removed the button to reveal the top of the switch dome:
Handlebar PTT switch – corroded dome
Blech!
The dome flexes outward to contact the (rather crusty) terminals on either side, so all the action happens under the dome.
A lineup of the plastic button, the inverted dome, and the cover plate:
Handlebar PTT switch – components
The top and bottom of the dome show some grit: that’s where it contacted the switch terminals.
Wiping the crud out of the switch body, scrubulating everything with contact cleaner, and putting it all back together restored the switch to working order. There’s (once again) a snippet of Kapton tape over the cover holding it in place, but I don’t expect this to last very long:
Mary bought a pair of Revlon tweezers a while ago, picking a Name Brand to avoid hassles with bottom-dollar crap:
Revlon tweezers – bad spot welds
Well, that didn’t work.
I contend that the only difference between Name Brands and the bottom-dollar crap I tend to buy is a bit of QC and a lot of price. I’ll agree that’s not strictly true, but it does fit a goodly chunk of the observed data.
Anyhow.
I milled a recess into the corner of some scrap plastic to locate the handle end, then arranged a step block to capture the business end:
Revlon tweezers – drilling setup
That setup ensures the holes go into the corresponding spots on both pieces, because I couldn’t figure out how to clamp them together and drill them both at once. I drilled the other piece with its good side up to align the holes; doing it bad side up would offset the holes if they’re not exactly along the center line.
A closer look:
Revlon tweezers – drilling fixture
Talk about a precarious grip on the workpiece!
I filed the welds flat before drilling, so the pieces lay flat and didn’t distract the drill.
Then:
Center-drill
Drill 2-56 clearance
Scuff up mating surfaces with coarse sandpaper
Apply epoxy
Insert screws
Add Loctite
Tighten nuts to a snug fit
Align jaws
Tighten nuts
Fine-tune jaw alignment
Apply mild clamping force to hold jaws together
Wait overnight
Saw screws and file flush
Done!
The clamping step:
Revlon tweezers – epoxy curing
Those nicely aligned and ground-to-fit jaws were the reason Mary bought this thing in the first place.
The screw heads look OK, in a techie sort of way:
Revlon tweezers – fixed – front
The backside won’t win any awards:
Revlon tweezers – fixed – rear
But it won’t come apart ever again!
There’s surely a Revlon warranty covering manufacturing defects, printed on the long-discarded packaging, that requires mailing the parts with the original receipt back to some random address at our own expense.