The Smell of Molten Projects in the Morning

Ed Nisley's Blog: Shop notes, electronics, firmware, machinery, 3D printing, laser cuttery, and curiosities. Contents: 100% human thinking, 0% AI slop.

Tag: Repairs

If it used to work, it can work again

  • Toyota Sienna: ABS Trouble Codes

    The Sienna lit up the tire pressure warning light and the ABS trouble light on the trip from Rochester. The pressures were OK, if a bit low, but the early Toyota TPMS used wheel rotation sensors rather than direct pressure sensors, and we suspect a sensor went bad.

    The ABS doesn’t report errors through the OBD II interface, requiring a jumper between TC and E1 in the ABS diagnostic interface block under the hood. Our Larval Engineer shows much respect for the engineer who included the pin ID layout under the flip-top lid, eliminating the need for scratch paper.

    Despite diligent searching, there seems to be no Official Documentation of the blink codes appearing on the ABS trouble indicator. Fragmentary evidence suggests that a table applying to a Toyota MR2 MKII sports car would be generally applicable, which is hereby ripped to forestall link rot:

    Code Number Diagnosis
    11 open circuit in solenoid relay circuit
    12 short circuit in solenoid relay circuit
    13 open circuit in pump motor relay circuit
    14 short circuit in pump motor relay circuit
    21 open or short circuit in 3 position solenoid of front right wheel
    22 open or short circuit in 3 position solenoid of front left wheel
    23 open or short circuit in 3 position solenoid of rear wheels
    31 front right wheel speed sensor signal malfunction
    32 front left wheel speed sensor signal malfunction
    33 rear right wheel speed sensor signal malfunction
    34 rear left wheel speed sensor signal malfunction
    35 open circuit in front left or rear right wheel speed sensor
    36 open circuit in front right or rear left wheel speed sensor
    41 abnormal battery voltage ( < 9.5 or > 17 )
    51 pump motor of actuator locked or open circuit in pump motor circuit in actuator
    ALWAYS ON computer malfunction

    The  3-4 blink code indicates a left rear wheel sensor failure. Such sensors (or their cables) seem to be either $35 or $175 from the usual sources, with no indication of why some are far more expensive than others. The pictures and descriptions are unhelpful, to say the least.

    We’ll try cleaning the sensor, which probably won’t improve the situation, and then replace the poor thing.

  • HP 7475A Plotter: Refilling Disposable Liquid Ink Pens

    A while back, Keith Ward sent a Big Box o’ Plotter Pens that:

    • Should suffice for the rest of the plotter’s life… if not mine
    • Obliterate any need for my Sakura pen adapters

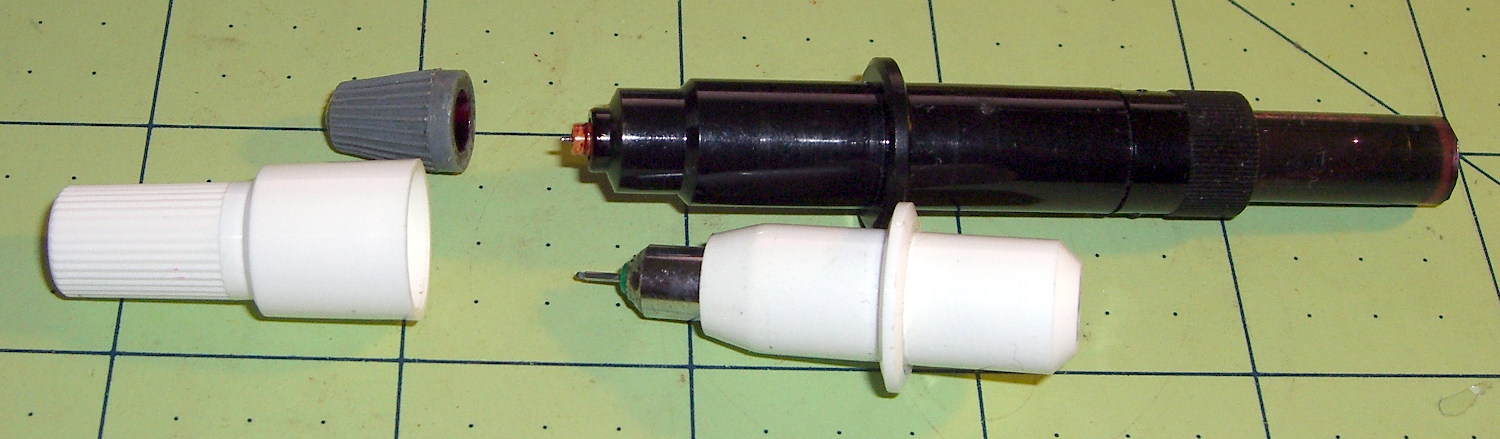
    After a bit of sorting, I had a quartet of “disposable” liquid ink pens with contents ranging from desiccated to gummy. With nothing to lose (and having already cut a clearance slot in the plotter case), I drilled a small hole in the top of each reservoir, squirted some inkjet printer ink into the void, and taped the hole closed.

    Surprisingly, a little liquid love restored all but the black pen to working condition, if not perfect heath:

    HP7475A disposable liquid pen - refilled
    HP7475A disposable liquid pen – refilled

    I think the blurred white disk floating in the reservoir sealed the end where you jam the tip in place to activate the pen. The blob of dark gunk shows the reservoir didn’t start with yellow ink, but I had nothing to lose.

    The top pen in this picture is another style / brand with a smaller reservoir:

    HP7475A pens - disposable liquid  and ceramic tip
    HP7475A pens – disposable liquid and ceramic tip

    The white pen in the foreground has a 0.3 mm ceramic tip, contains its original green ink, and works as well as it ever did; it might be refillable, too.

    The liquid-ink pens have a serpentine vent in the tip. This is a Genuine New-Old-Stock pen in a four-pen case labeled HP 5061-7566:

    HP7475A disposable liquid pen - new
    HP7475A disposable liquid pen – new

    The serpentine path connects the exterior vent opening (facing you) to a tiny hole (on the other side of the blue shaft) into the ink chamber. As it turns out, a new hole drilled in the reservoir admits enough air to drain the (freshly refilled) liquid ink through the serpentine path all over the workbench. Having some experience with refilling inkjet cartridges, I deployed a towel decorated with colorful splotches in anticipation of such an unexpected event, although my fingers looked considerably more cheerful than usual for a few days.

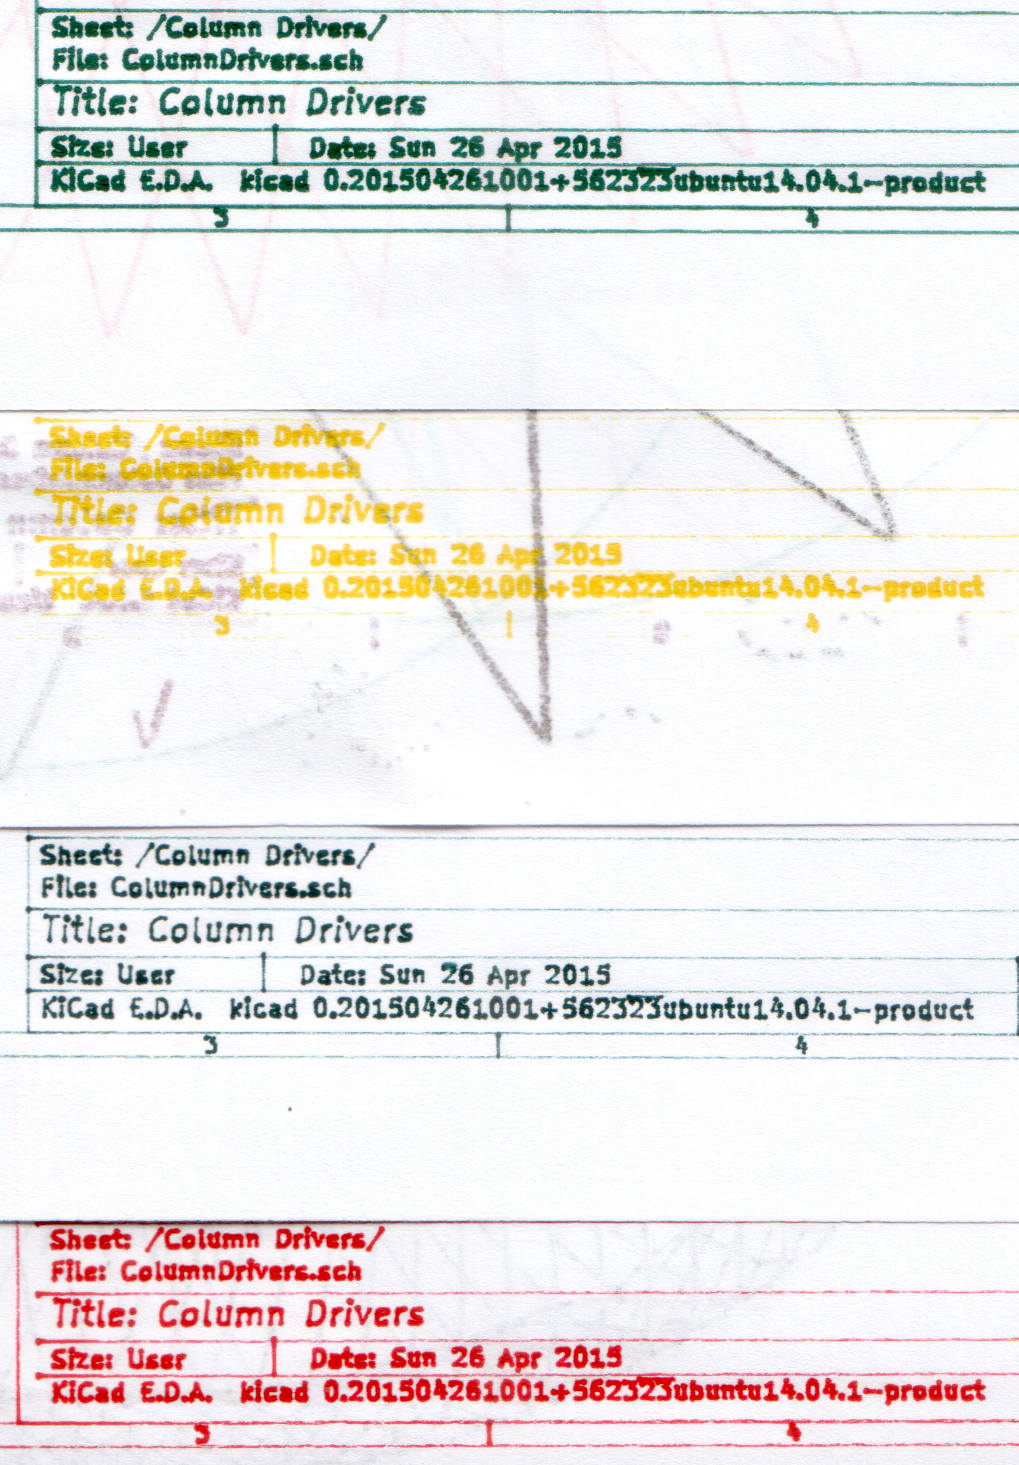
    The black pen never worked quite right, but the other three did fine. The ceramic pen is at the top:

    HP7475A - KBR to YCM Refilled disposable pens - G ceramic pen
    HP7475A – KBR to YCM Refilled disposable pens – G ceramic pen

    Protip: the blown contrast and rear-surface bleedthrough behind the yellow ink should tell you it isn’t visible in normal room light. I must mix yellow with another color if I ever refill that pen that again.

    KiCad uses only one pen for the entire schematic, even when you select “plot in color”, suggesting nobody has sent the “plotter” output stream to an actual plotter in a long, long time.

    Despite the charm of watching the plotter crank out an entire schematic page, it’s not a compelling enough user experience to replace an inkjet printer. For an art project, one might be seeking an entirely different user experience and the answer might be different, too.

    Selah.

  • Extract-copying A Video Clip

    The magic incantation to extract a few seconds of video from a longer clip and set the output file to use the same codecs:

    avconv -ss 00:00:01 -i /mnt/video/2015-05-30/08420001.AVI -codec copy -t 5 08420001-clip.avi
    

    The parameter order matters: the -ss must come before the -i input file name and the -t must come after it. Otherwise, avconv will copy the entire file before extracting the clip, which can be tedious.

    The Fly6 camera produced a video file containing ten minutes of variations on this theme:

    Fly6 - 0842001.AVI - Video compression failure
    Fly6 – 0842001.AVI – Video compression failure

    The top of the image looked pretty good, but then the decompression stalls and smears a single, slowly degenerating, line down the rest of the frame. The other files from that trip looked just fine.

    As it turned out, extracting a few seconds with avconv or binary-copying the first few megabytes with dd produced playable copies: the original file tripped vlc’s decompression, but the source data was in the file and the copies worked.

    Soooo, I could recover the video. Not that it was particularly important, but knowing how might matter some day.

    Video is weird.

    The Cycliq tech support folks recommend regularly formatting the MicroSD card using the Official SD Association Program (Windows-only, of course), not erasing any video files, and generally letting the camera handle the card. This whole affair seems remarkably fragile.

  • Michelin Pilot City Tire Bead-Carcass Joint Failure

    A year or so ago, I picked up a Michelin Pilot City tire (700x32C) to see how they compare with the twice-as-expensive Schwalbe Marathons we’ve been using on the Tour Easy recumbents.

    Having replaced a worn-out Marathon last summer, this was unexpected:

    Michelin Pilot City Protek tire - blown bead
    Michelin Pilot City Protek tire – blown bead

    I’d blame that failure on overpressure, but I’ve been running the back tires around 70 psi, well inside their 87 psi (that’s a nice, round 6 bar) sidewall rating.

    Being able to swap a back tire in the Basement Laboratory Repair Facility made up for a lot…

  • Tour Easy: Cracked Fork Autopsy

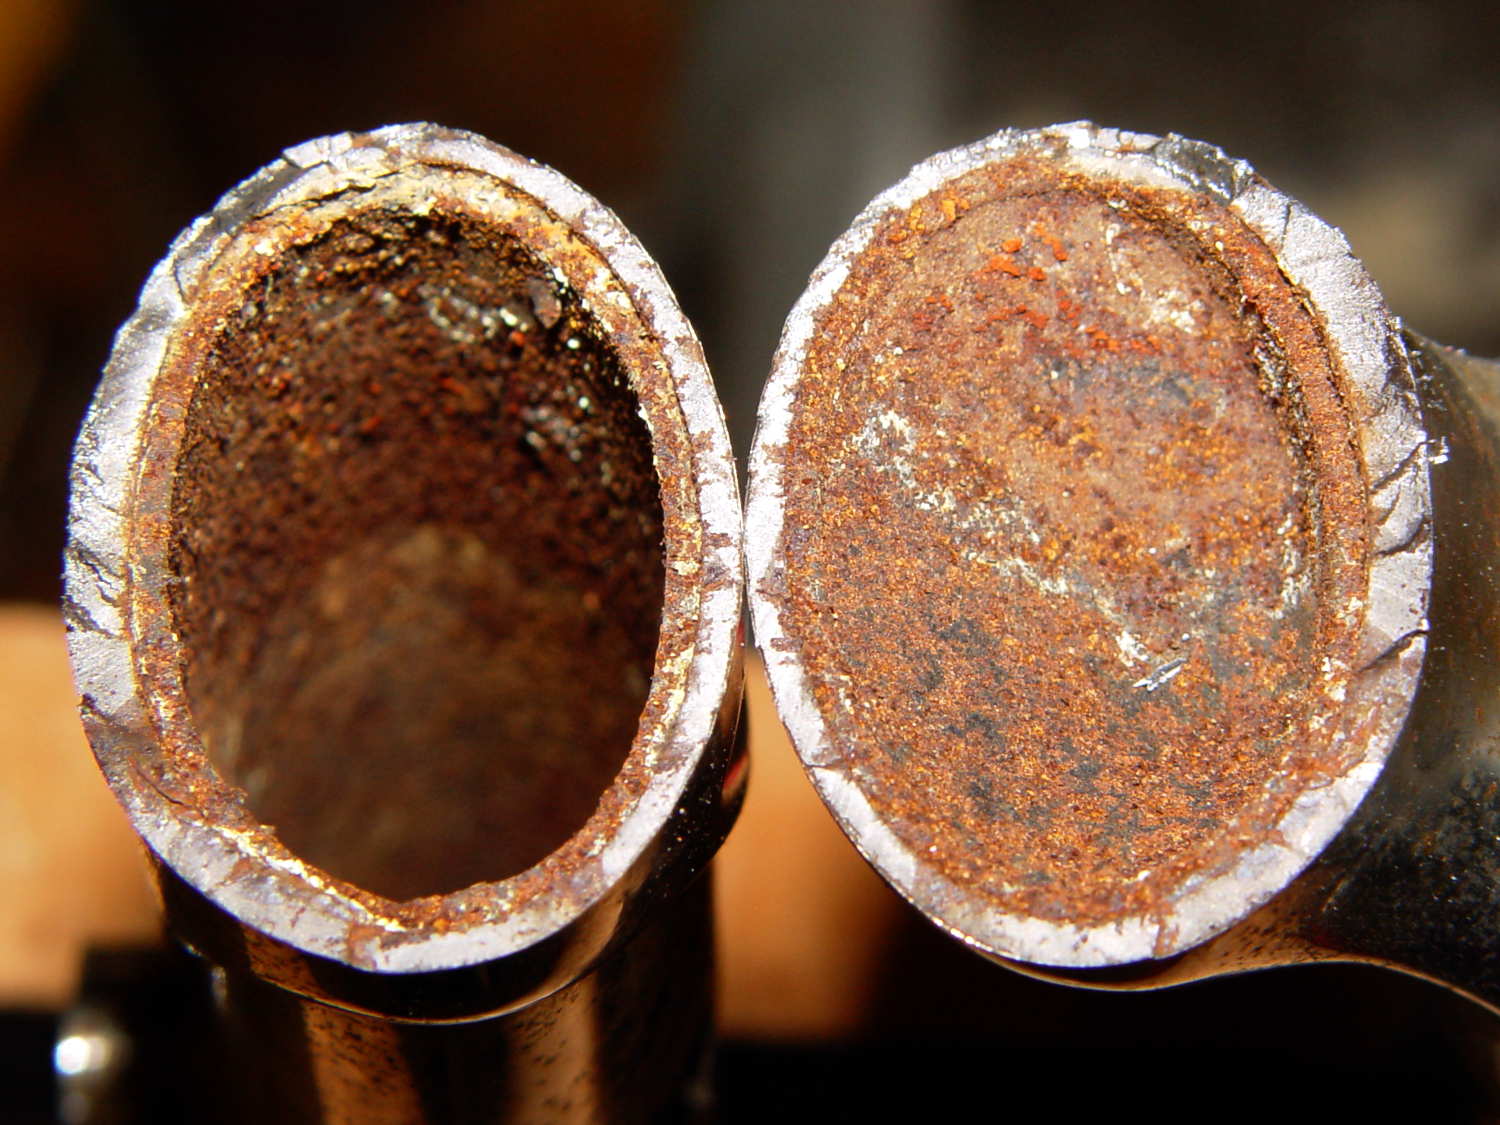
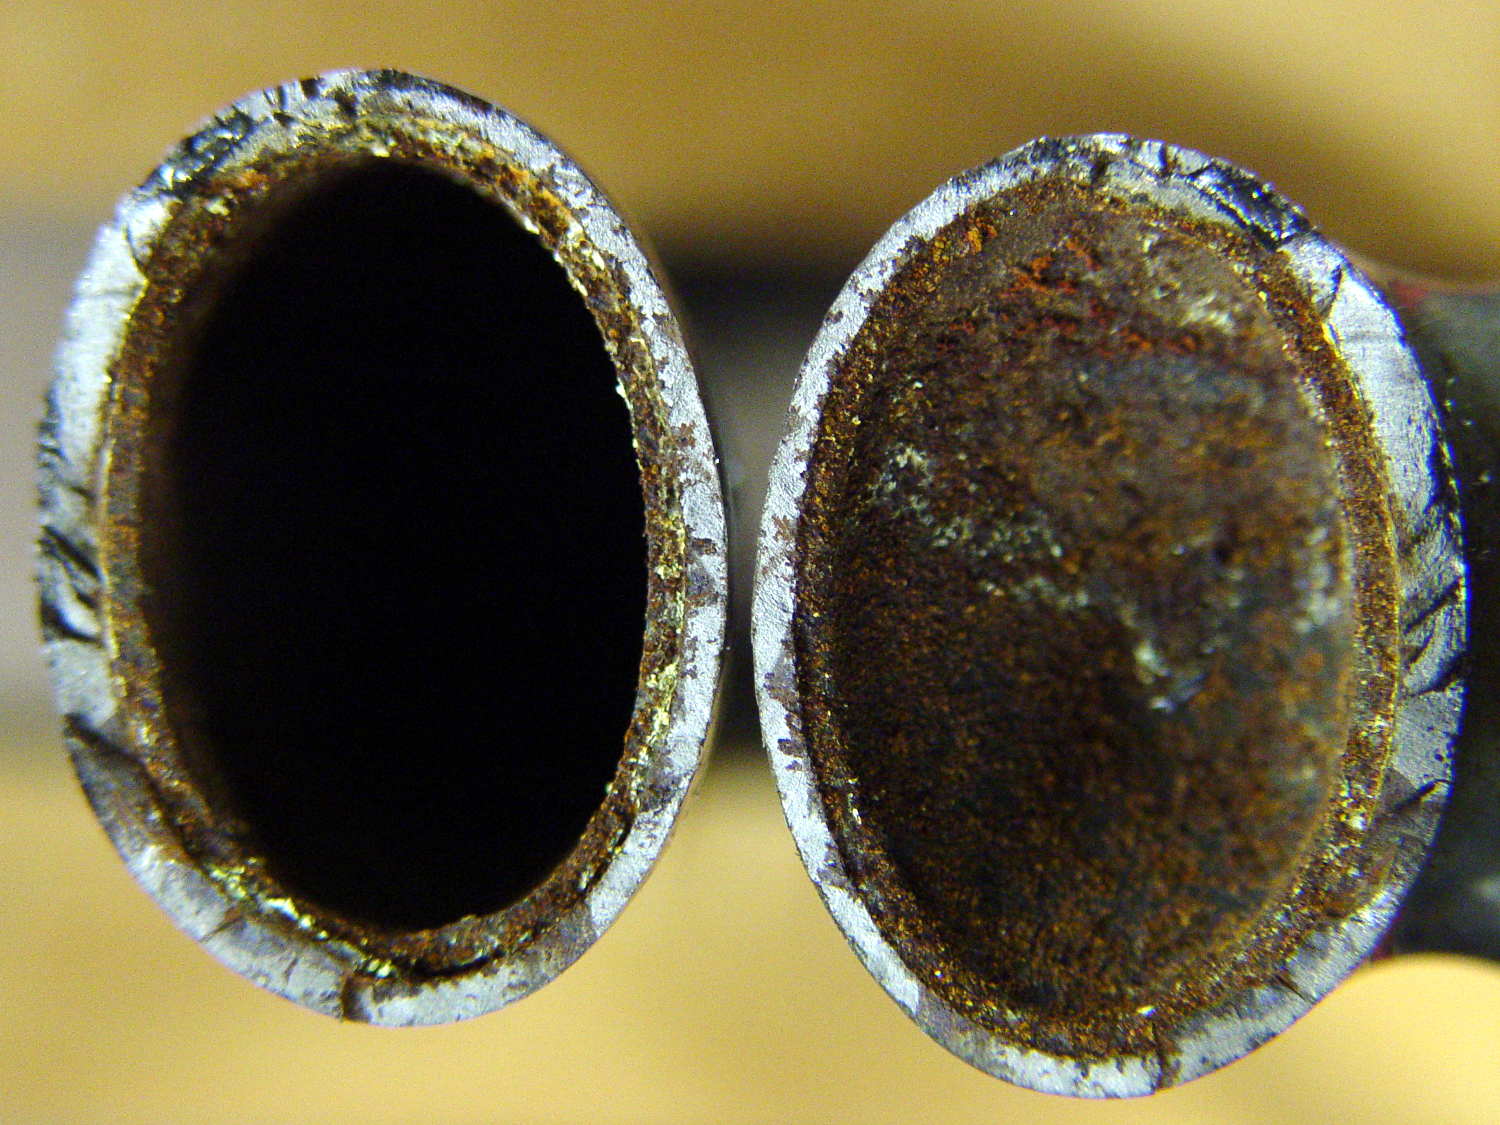
    A look inside the cracked fork lug from my Tour Easy shows that it really did fracture at the top of the fork blade:

    Tour Easy - cracked fork - interior flash
    Tour Easy – cracked fork – interior flash

    Minus the flash, plus contrast enhancement:

    Tour Easy - cracked fork - interior
    Tour Easy – cracked fork – interior

    Looks rather grotendous in there, doesn’t it? Yeah, show me the interior of your fork…

    The front is at the top, blade on the left and crown on the right. The little shiny rectangle at 1 o’clock on the crown was probably the last fragment holding the blade in place.

    Finished!

  • Tour Easy: New Front Fork

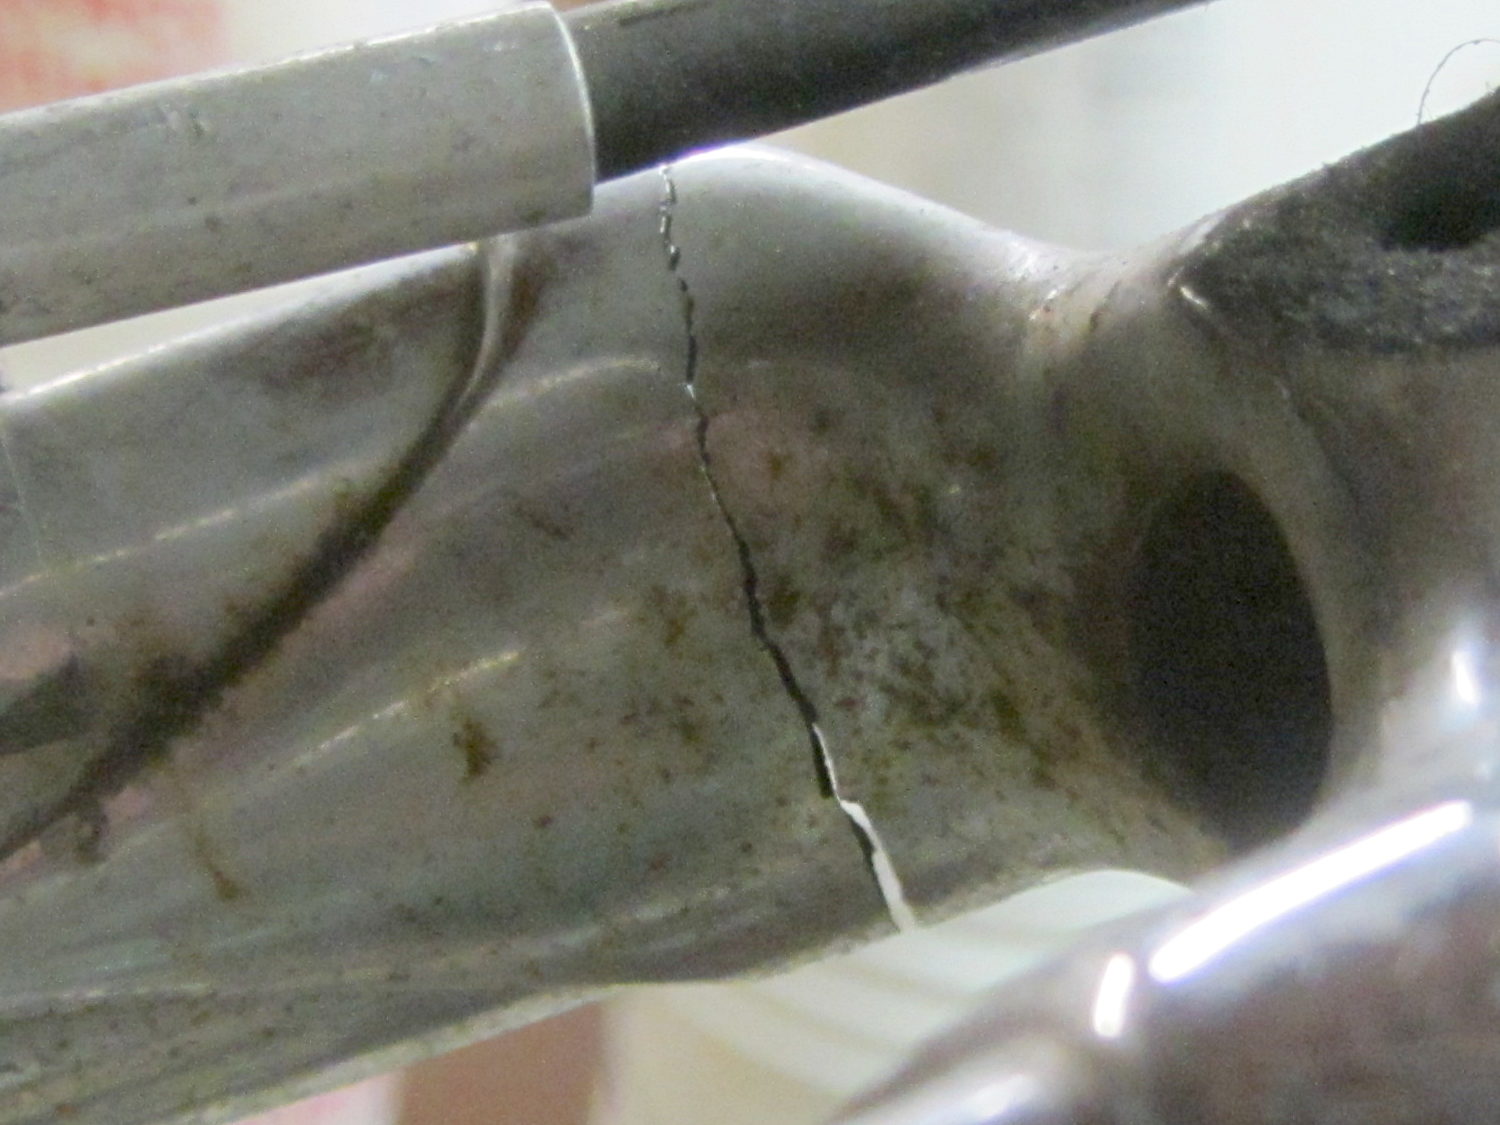
    A view from the wheel side shows the crack in my Tour Easy’s fork lug had opened a bit more to the rear, which is about what you’d expect from the forces involved:

    Tour Easy - cracked fork lug
    Tour Easy – cracked fork lug

    Removing the handlebar stem from the fork steerer tube requires removing the fairing, its mounting brackets, the fender, a speed sensor, then snipping cable ties to release all the cables and wires. Minus the prep work, removing the fork from the bike isn’t anything special.

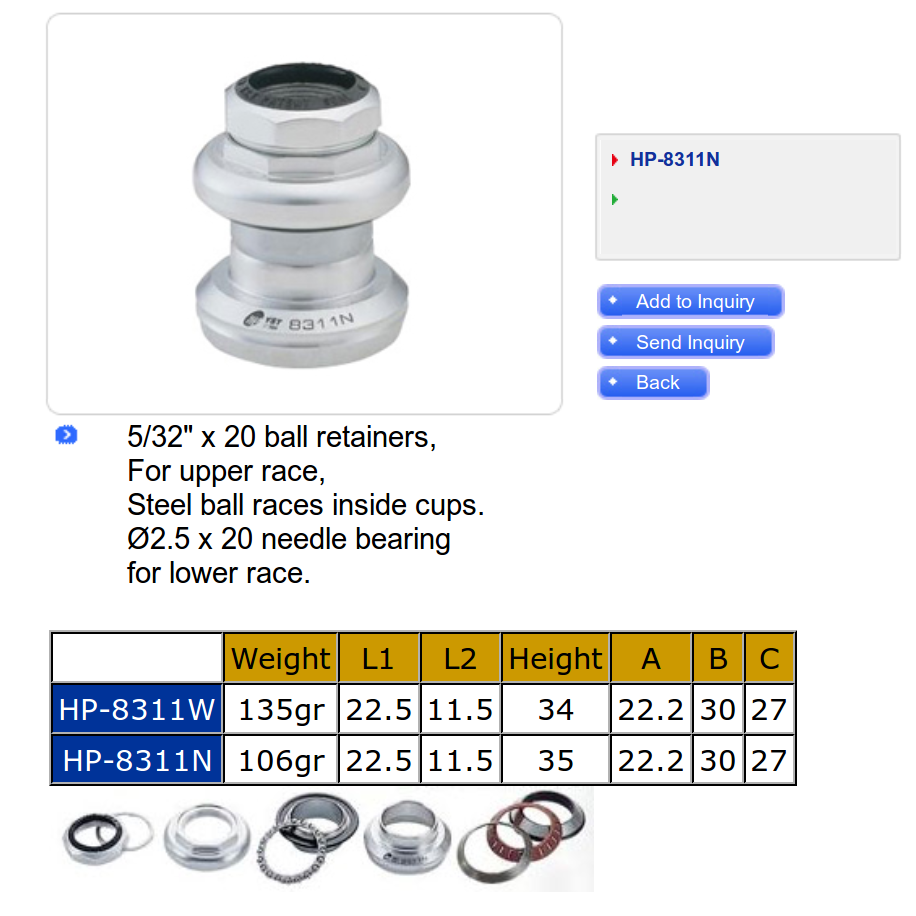
    The lower bearing (a YST 8311N in black) has rollers, not balls. The headset has J.I.S. 1 inch dimensions, captured in a screen grab to forestall link rot:

    YST 8311N headset data
    YST 8311N headset data

    Which means cheap & readily available ISO standard headsets aren’t a drop-in replacement. The incomparable Harris Cyclery has J.I.S. ball-bearing headsets in stock and their Tange Levin CDS HD1002 needs just 1.6 mm of additional washer to match the YST’s 35 mm stack height…

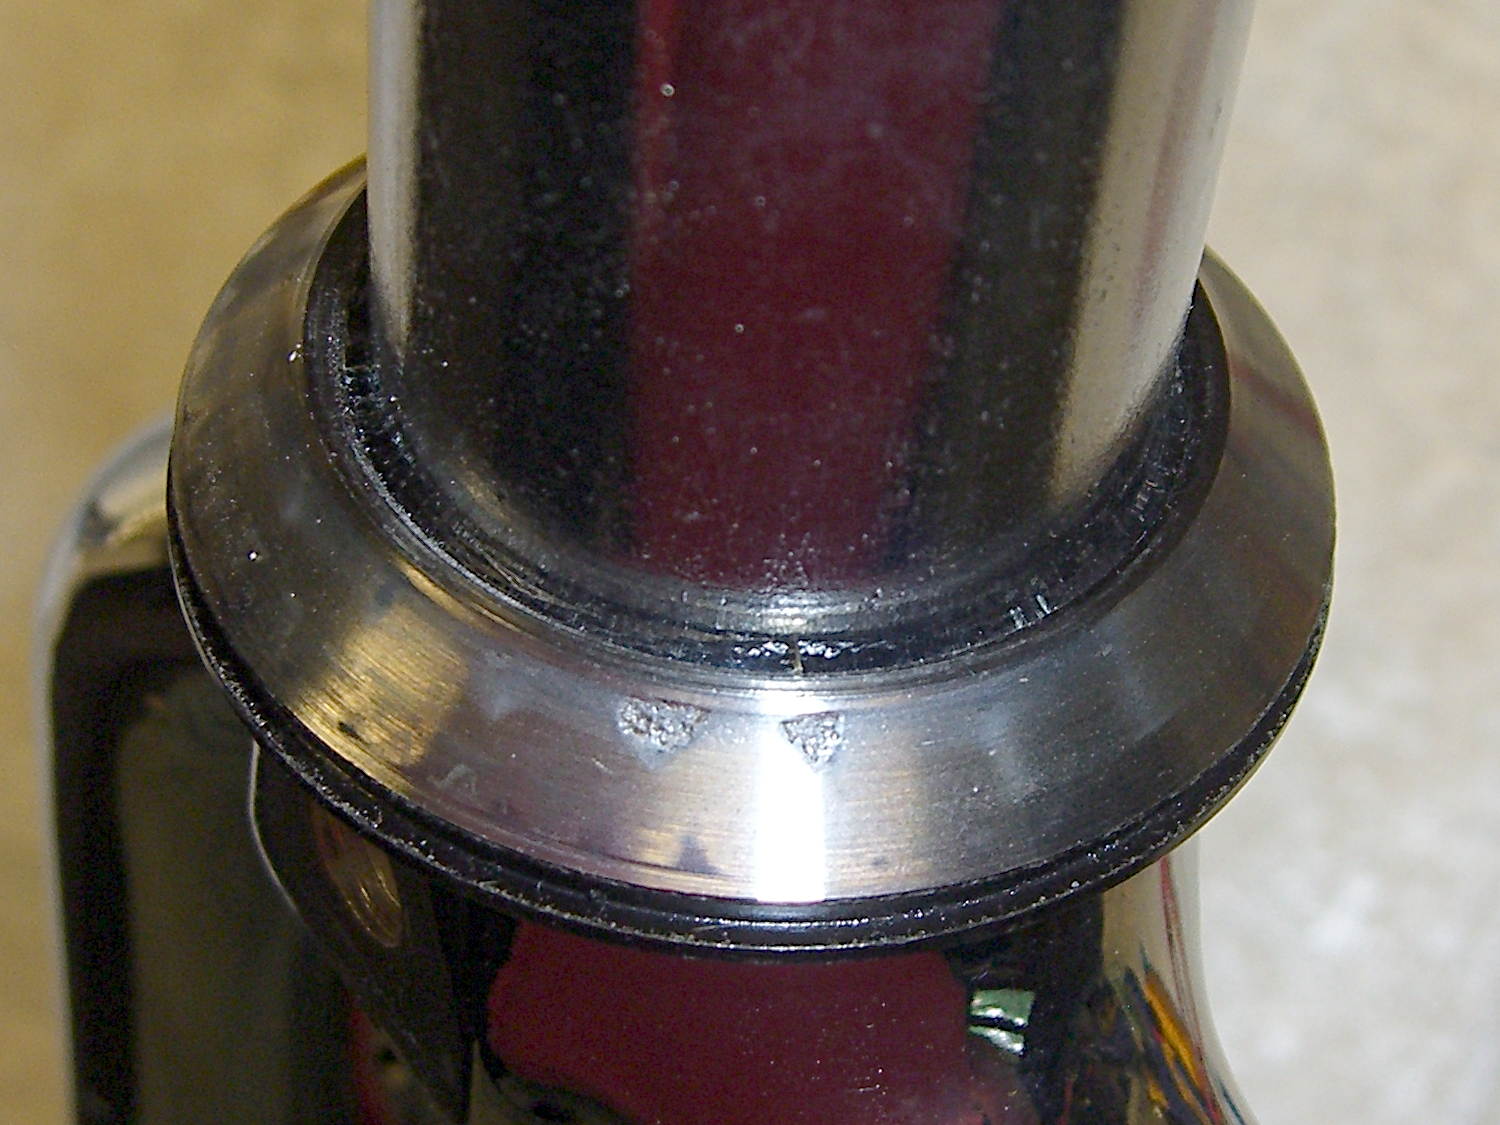
    The front side of the crown got rather graunched over the last 14 years, but I punted the problem by rotating the race half a turn to put the eroded spots toward the rear, where they’ll be under minimal stress:

    Tour Easy crown bearing - damage
    Tour Easy crown bearing – damage

    Re-seating the race brought an ancient Headsetter tool from the drawer:

    Tour Easy fork with Headsetter
    Tour Easy fork with Headsetter

    It’s basically galvanized pipe, chamfered on one end, with a set of nuts & washers on a length of all-thread rod just slightly too short for the occasion: this might be the second time I’ve used the thing and I had to supply my own all-thread & nuts. Ah, well, it probably predates the Tour Easy’s design by a decade.

    The lower headset race looked to be in pretty good shape, so I left it alone. Normally, such bearing damage gives you indexed steering, but Tour Easy handlebars provide so much lever arm that nothing interferes with the bike’s steering.

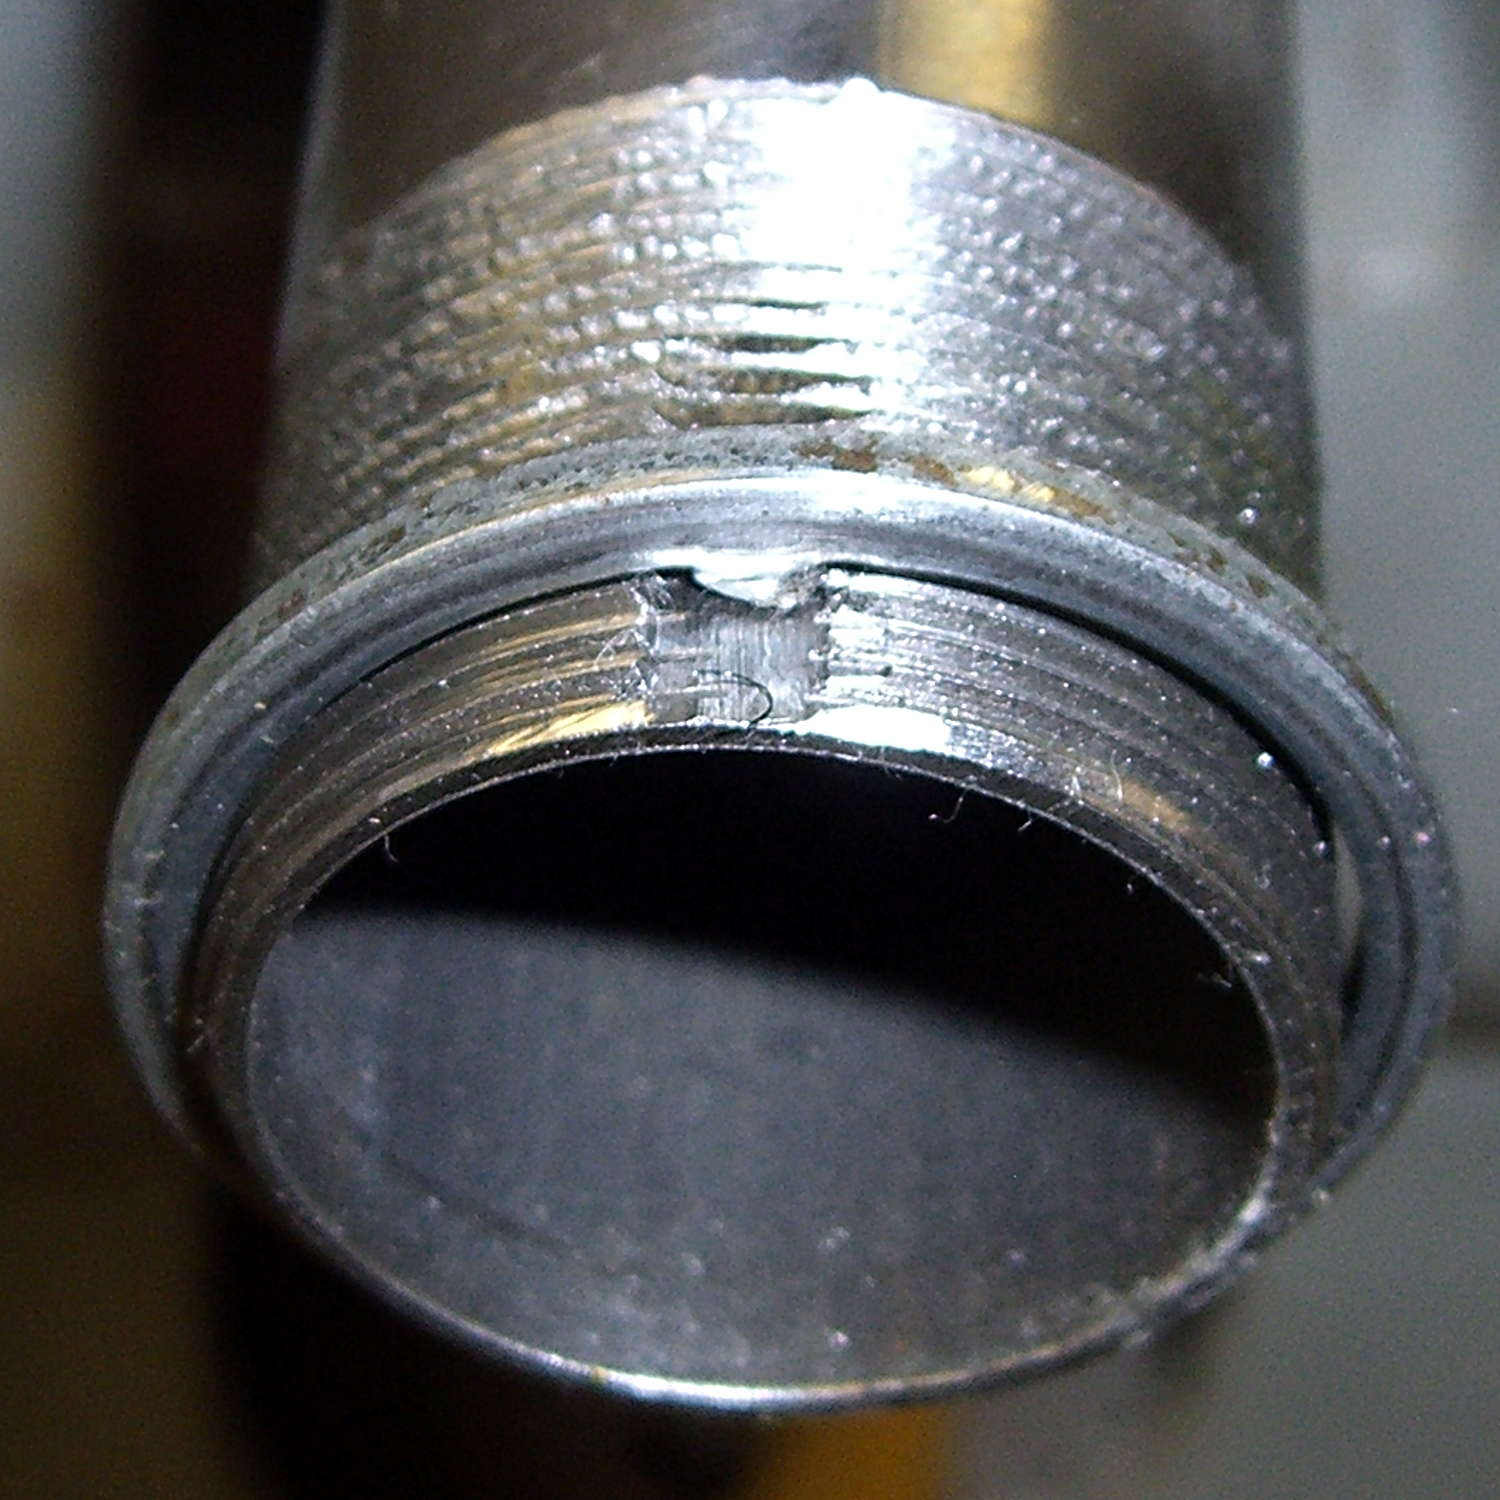
    The new fork didn’t have a notch for the keyed washer isolating the locknut from the upper bearing race. The usual advice is to file off the key and apply threadlocker, which makes adjusting the two nuts tedious, so I restored the notch in the steerer threads:

    Tour Easy - filed steerer tube key slot
    Tour Easy – filed steerer tube key slot

    Yes, that’s a lethally sharp steel shaving from the not-very-well-reamed ID curling up in the middle of the notch.

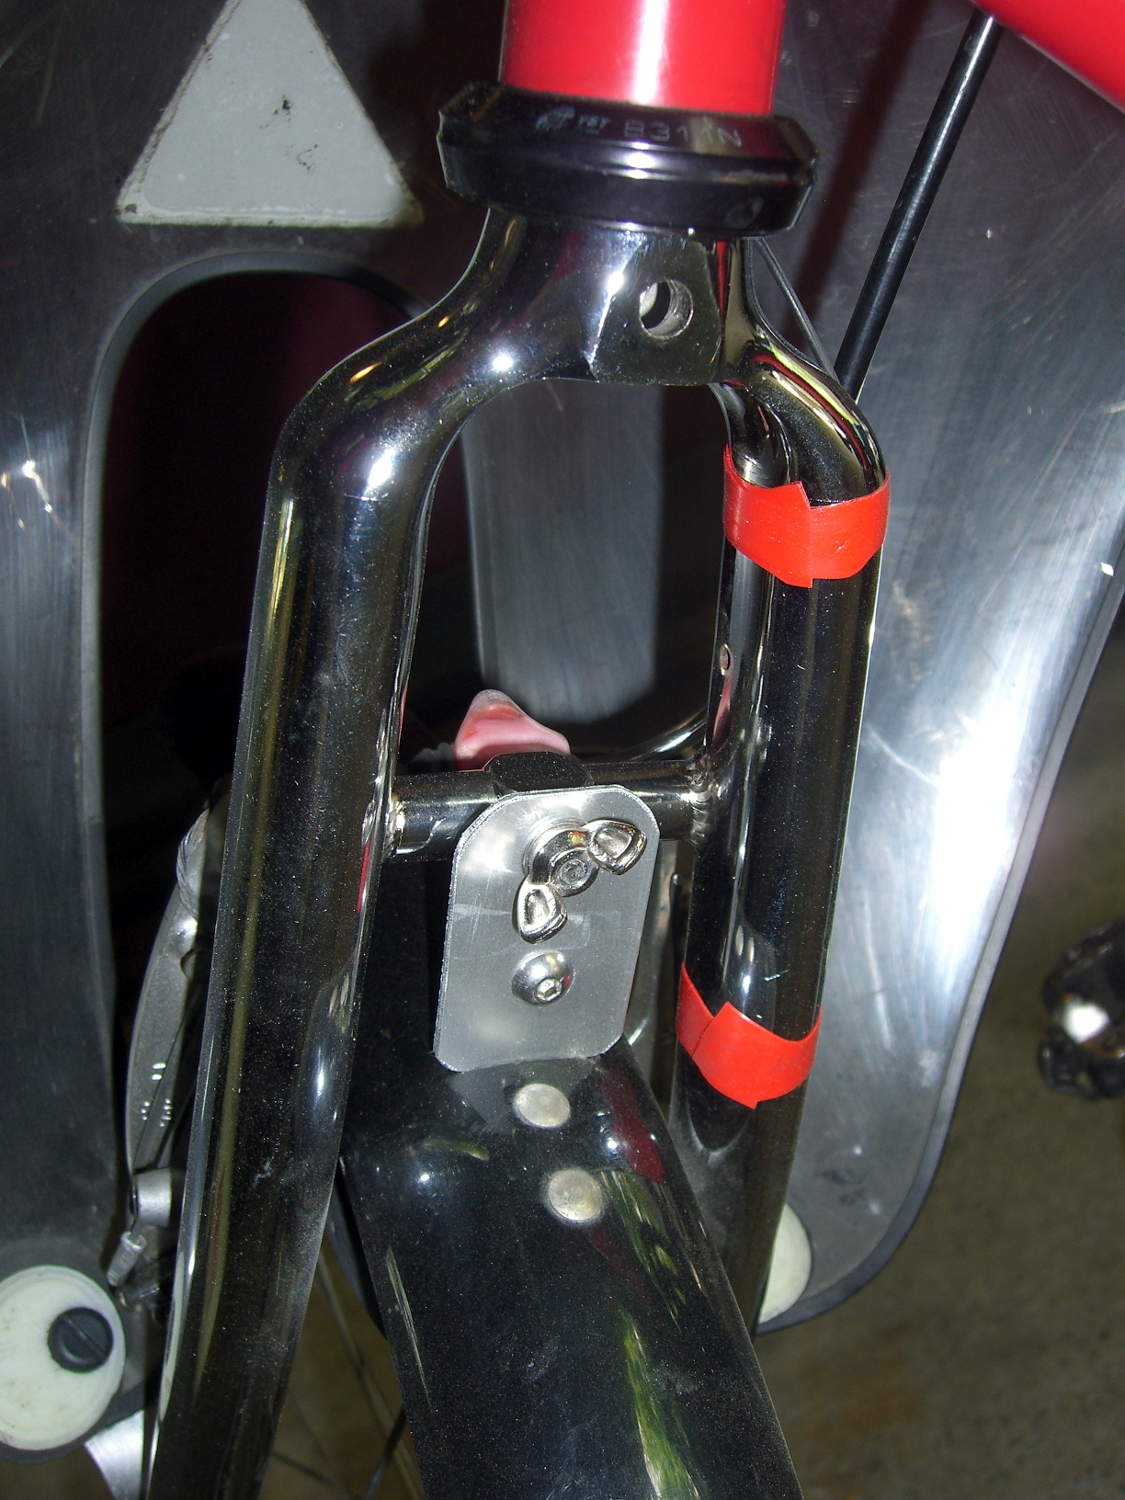
    The fender mount bridge on the new fork sits half an inch higher in relation to the brake bosses, putting the fender against the V-brake cable hardware.  Anything touching the V-brake messes up the pad-to-rim alignment, so I conjured a snippet of aluminum to lower the fender just enough to clear the brakes:

    Tour Easy - new fork - fender extender
    Tour Easy – new fork – fender extender

    I think that calls for a nice 3D printed bracket, too, but the snippet got me back on the bike faster. When I preemptively replace the fork on Mary’s bike, then I’ll do a proper bracket for both of us.

    The garish red silicone tape replaces the previous black cable ties. It matches the tube paint surprisingly well and doesn’t look good on the fork, so I’ll replace it with cable ties in due course.

    A few miles of shakedown riding settled the crown race against the fork, another 1/6 turn of the upper race / lock nut snugged up the bearings, and it’s all good again.

    Wow, it’s great to be back on the bike!

    (Due to the vagaries of writing this stuff up ahead of time, there’s actually two weeks of realtime between the post that appeared on Monday and this one.)

  • Tour Easy: Cracked Fork!

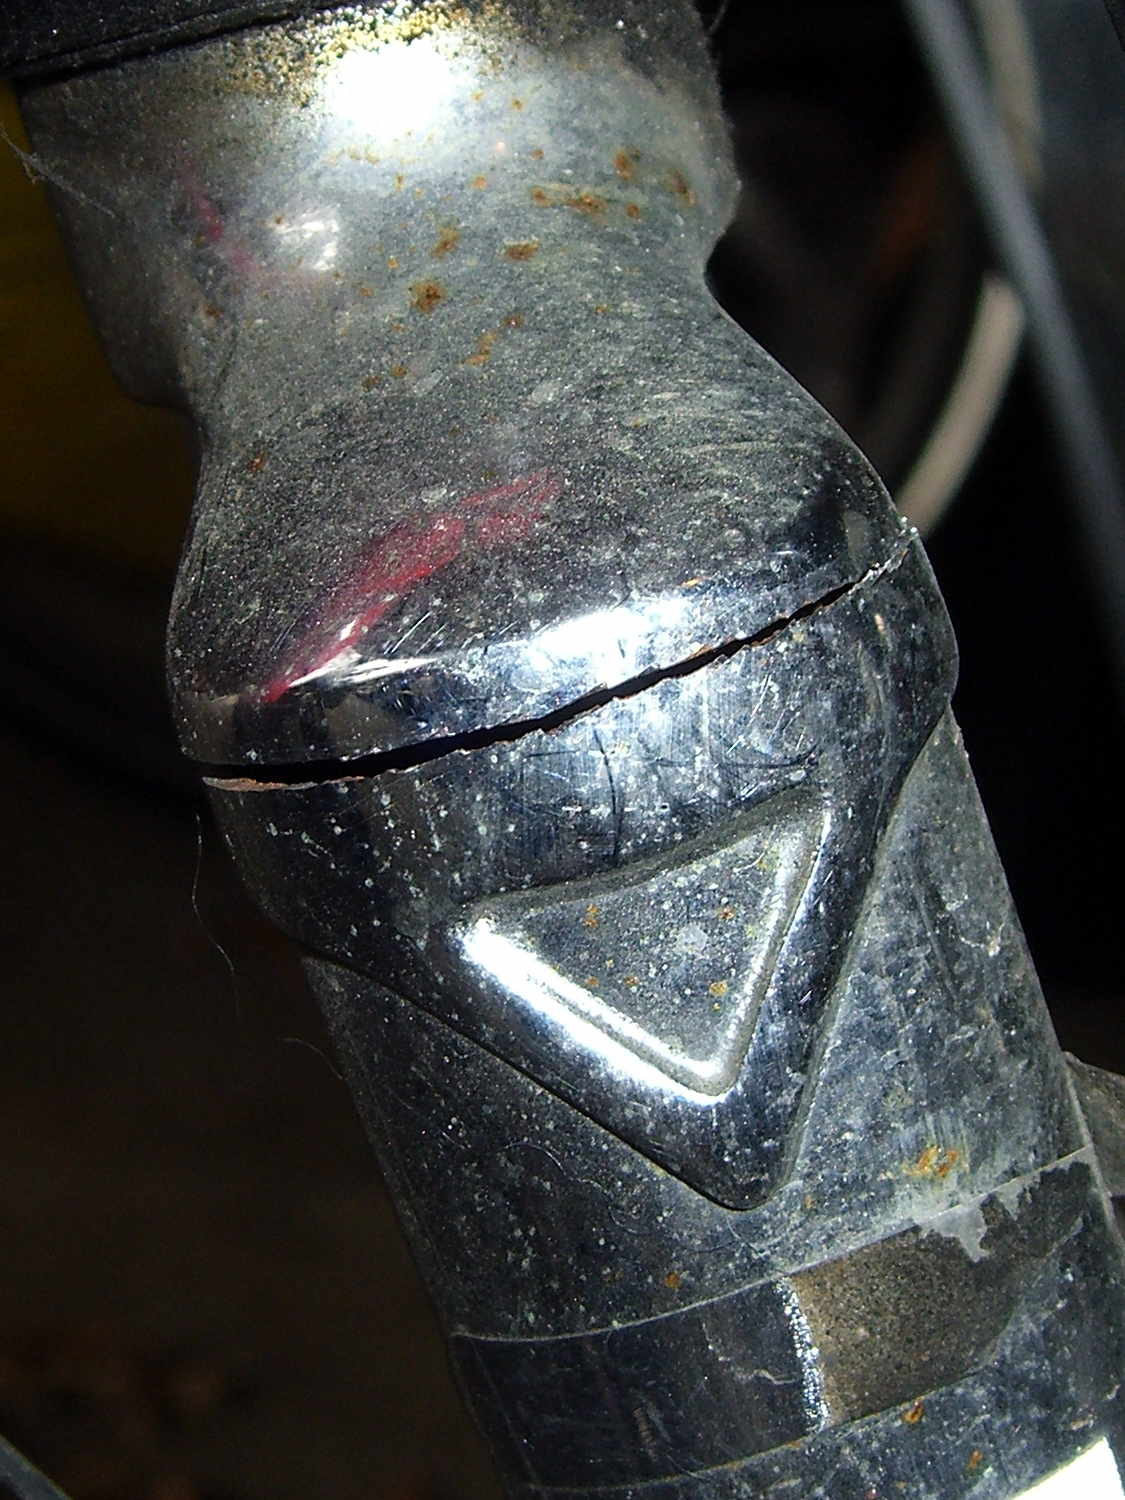
    The fairing on my Tour Easy started making unusually loud booming sounds while we were out on an errand, so when we got home I poked around the front end to see what had worked itself loose. I finally managed to produce the sound, which turned out to be due to a very small motion in the fork:

    Cracked Tour Easy Fork
    Cracked Tour Easy Fork

    That’s after 14 years and maybe 30,000 miles, so I’d say it did pretty well, all things considered.

    On an upright bike a front fork failure kills you: the broken blade rotates forward, jams into the ground, and flips you over the handlebars. I rode about 8 miles with a broken fork and nothing exciting happened.

    The Tour Easy’s design dates back to the mid-1970s, when custom bike parts weren’t readily available, and the front fork seems sized for 26 inch tires. A tubular bridge welded across just over the 20 inch (37-406) tire provides a fender mount, stiffens the blades, and, in my case, acts as a second bridge. On my bike, the fork supports the polycarbonate fairing and the Phil Wood hub provides an absolutely rigid connection between the blade dropouts.

    For reference, the headset uses J.I.S 1 inch dimensions, with a 27.0 mm ID crown bearing. The stack height runs around 35 mm, but I don’t know the head tube ID.

    A pair of forks are on their way; I’ll replace the one on Mary’s bike before it fails…