Ed Nisley's Blog: Shop notes, electronics, firmware, machinery, 3D printing, laser cuttery, and curiosities. Contents: 100% human thinking, 0% AI slop.
Category: Science
If you measure something often enough, it becomes science
For future reference, the rebuilt wheel spoke tensions came out around 25, slightly lower than the 27-ish I measured on Mary’s bike; it didn’t occur to me to measure the tension until after I’d relaxed the spokes. I’ll ride it for a while before doing any tweakage.
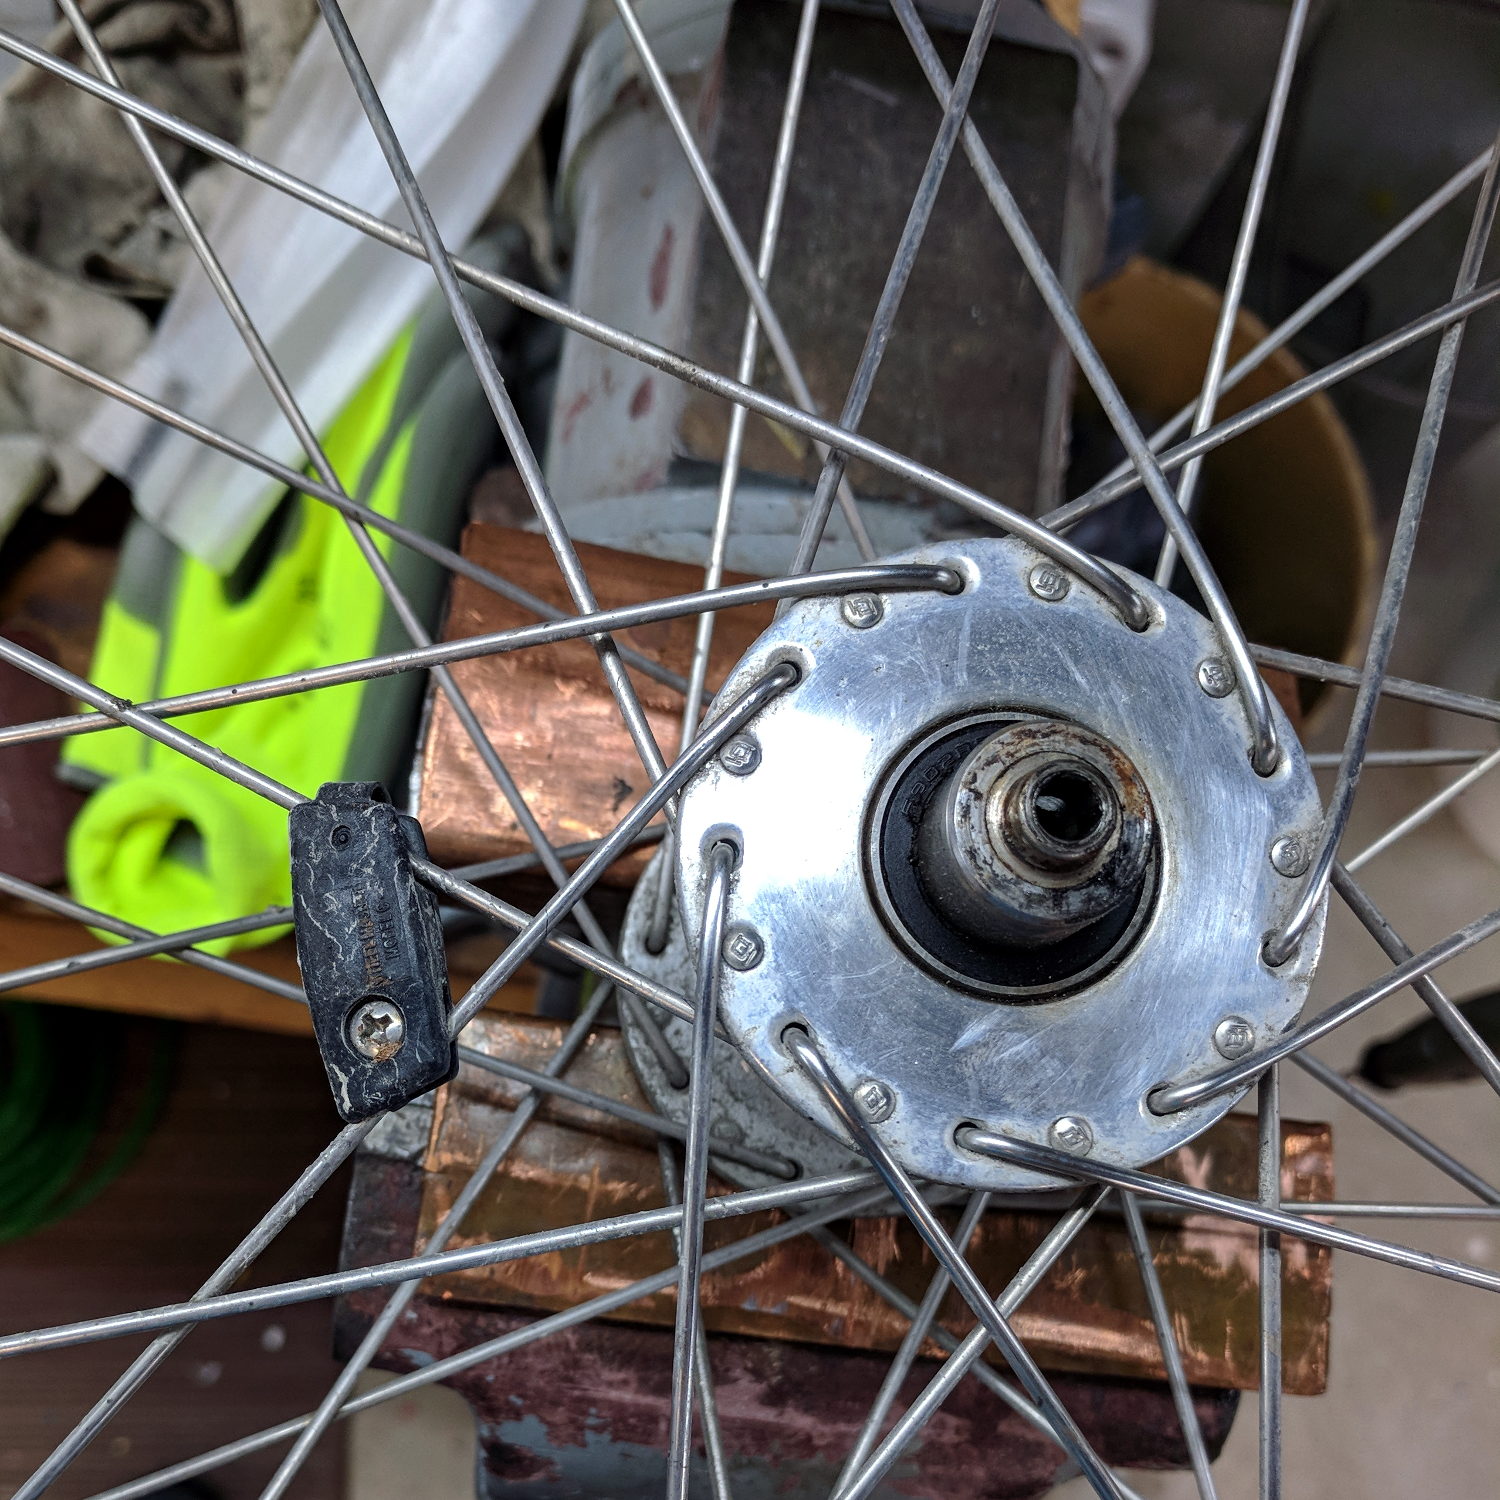
The spoke pattern is pretty close to four-cross, due to the large-flange Phil Wood hubs:
Tour Easy Front Spoke Pattern
Which makes for a hella-strong wheel, particularly seeing as how it’s very lightly loaded. The Tour Easy we got for our lass came with a radially spoked rim around a Phil hub.
I transferred the hub and laced spokes intact to the new rim by the simple expedient of duct-taping the spokes into platters, removing the nipples, stacking the rims, sliding the spokes across into their new homes, reinstalling the nipples, then tightening as usual.
We’ve been using it daily ever since and it spends most of its life drip-drying in the dish drainer. I added a third opening to the cheerful orange measuring spoon holder just for the slicer.
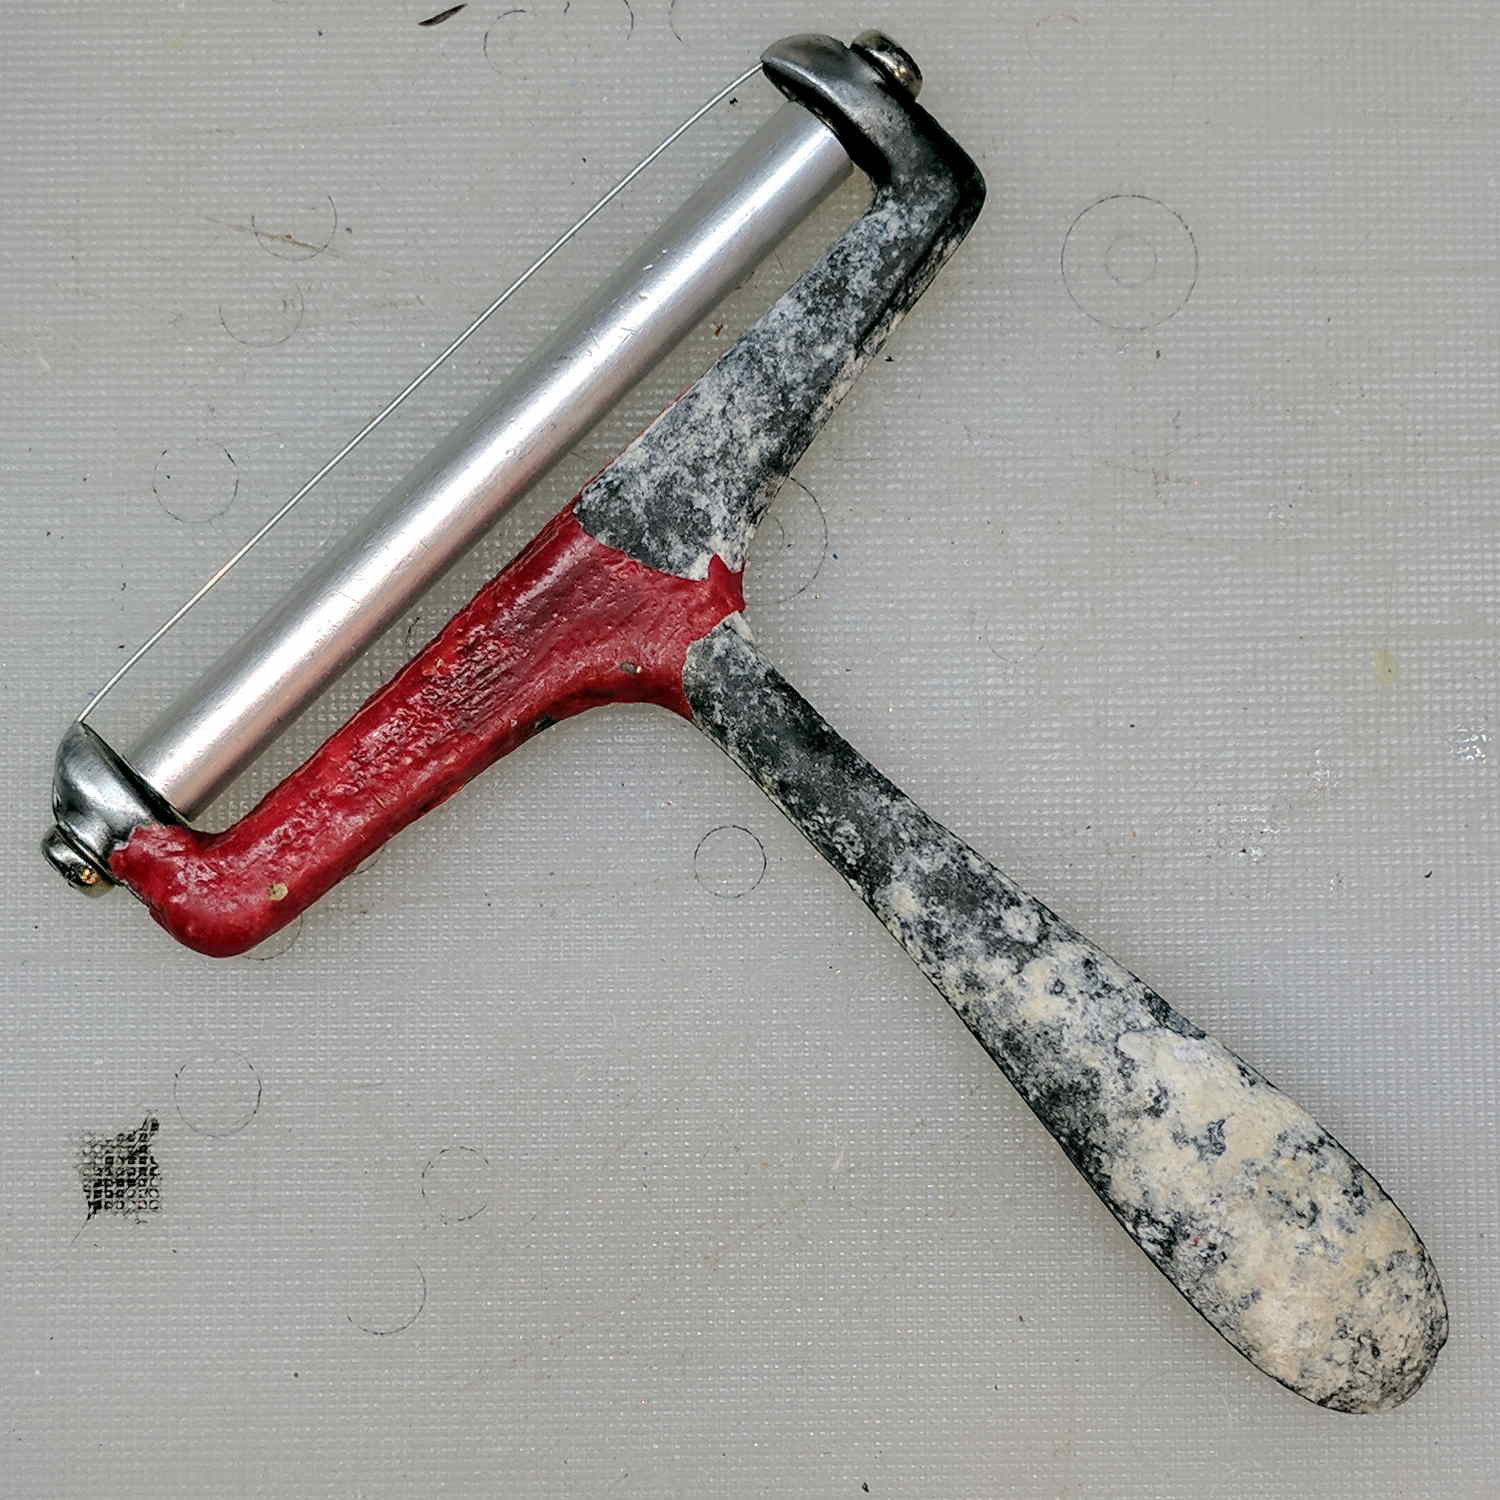
A few weeks ago I noticed corrosion once again growing on the handle:
Cheese Slicer – epoxy coat – corrosion – detail
I think the rot comes from water diffusing through the epoxy, rather than gross leaks through damage or pinholes. The tip of the handle has the most corrosion, probably due to the water drop hanging there, even though it also has the thickest epoxy coating: it cured with the handle pointing downward.
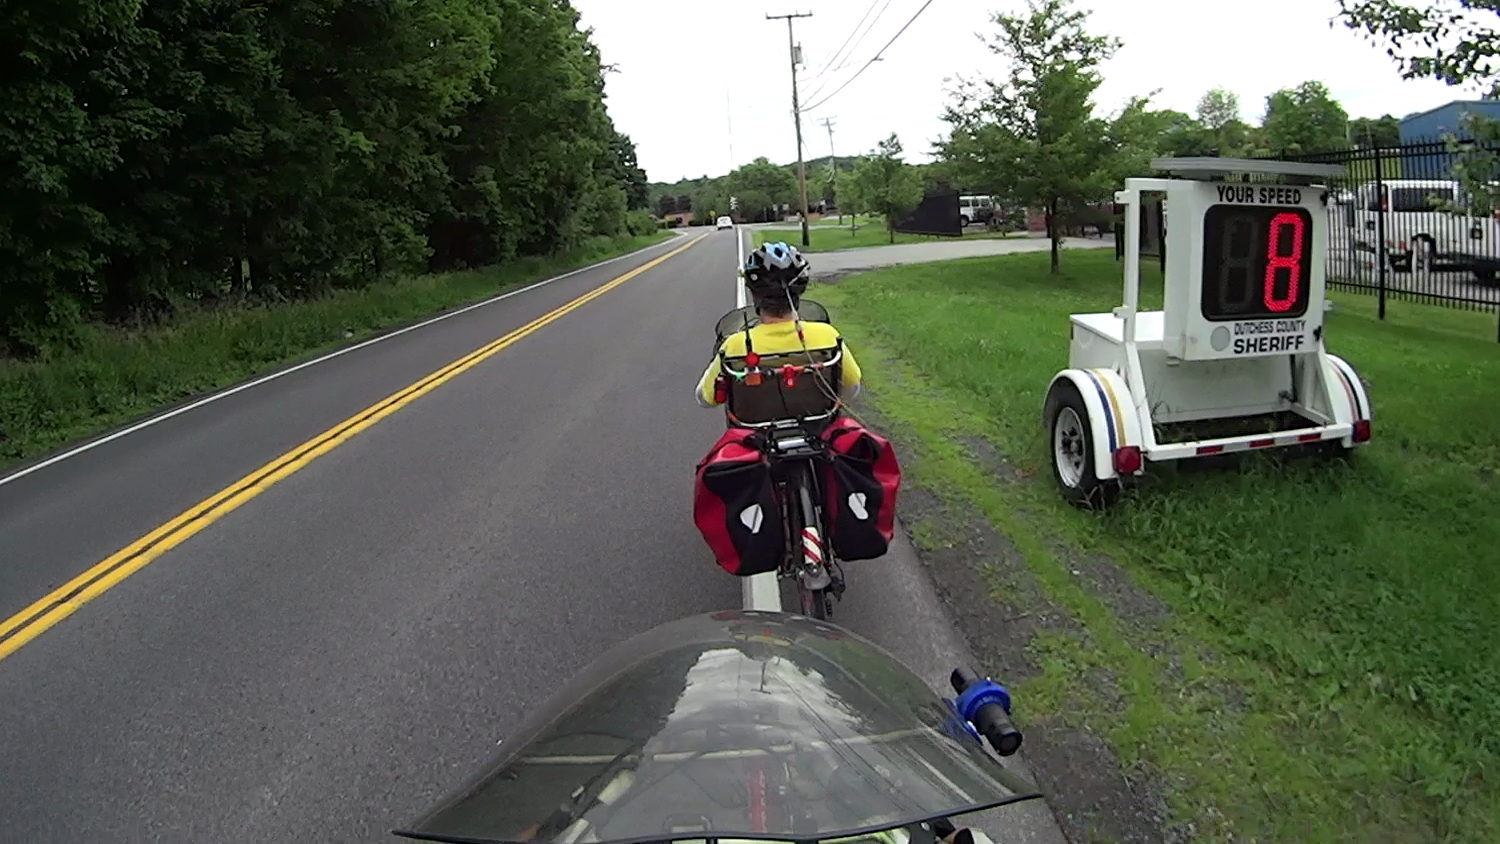
Apparently folks have been going around the curve in front of the Dutchess County BOCES site at a pretty good clip. I didn’t spot any scars in the grass off the high side, but ya never know.
We’re at the top of an uphill section and, riding together, we’re not sprinting for town line signs.
Ex post facto notes from the third Squidwrench Electronics Workshop.
Exhibit various 50 Ω resistors, including my all-time favorite, a 600 W 3 GHz dummy load:
600 W Dummy Load Resistor
… down to a 1/8 Ω metal film resistor.
The dummy load’s N connector triggered a regrettable digression into RF, belatedly squelched because I wasn’t prepared to extemporize on AC concepts like reactance which we haven’t covered yet.
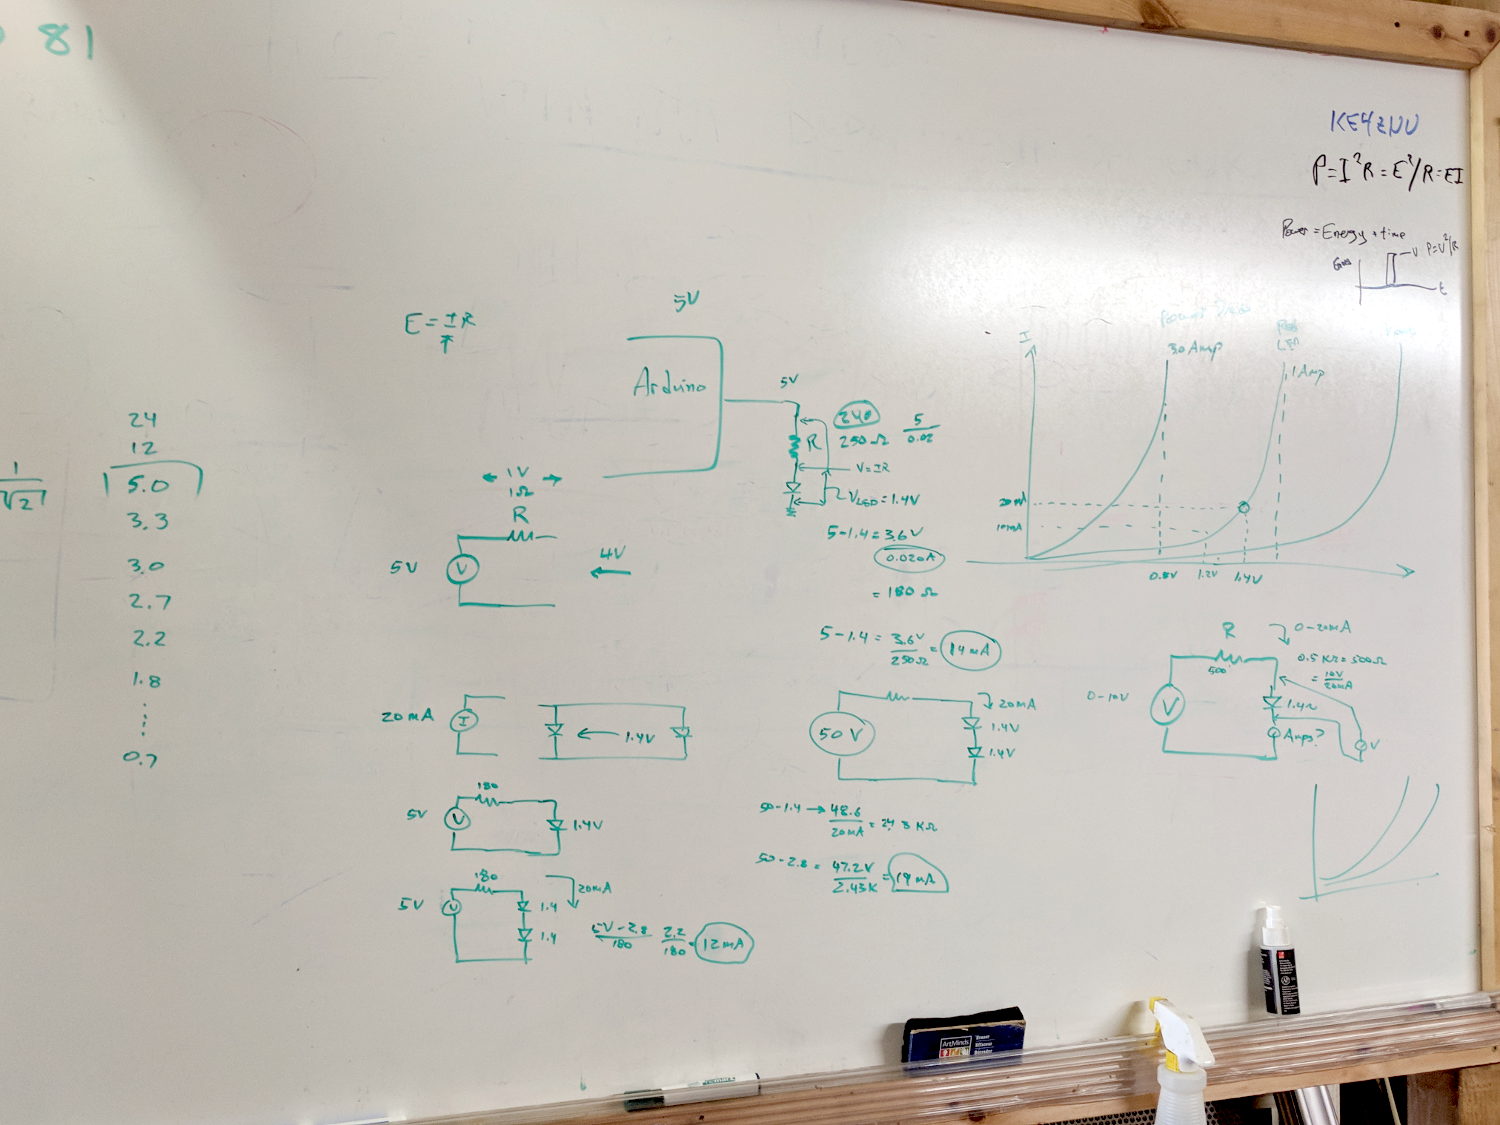
Discussion of resistor applications, power handling, power derating with temperature, etc:
Whiteboard – Session 3 – Resistor power derating
Why you generally won’t find 50 Ω load resistors in Raspberry Pi circuits. Cartridge heaters for 3D printers, not aluminum power resistors, although everyone agrees they look great:
Power resistors on heat spreader
Discussion of voltage vs. current sources, why voltage sources want low internal resistances and current sources want high resistances. Bungled discussion of current sources by putting diodes in parallel; they should go in series to show how added voltage doesn’t change current (much!) in sources driven from higher voltages through higher resistances:
Whiteboard – Session 3 – Voltage vs Current Sources
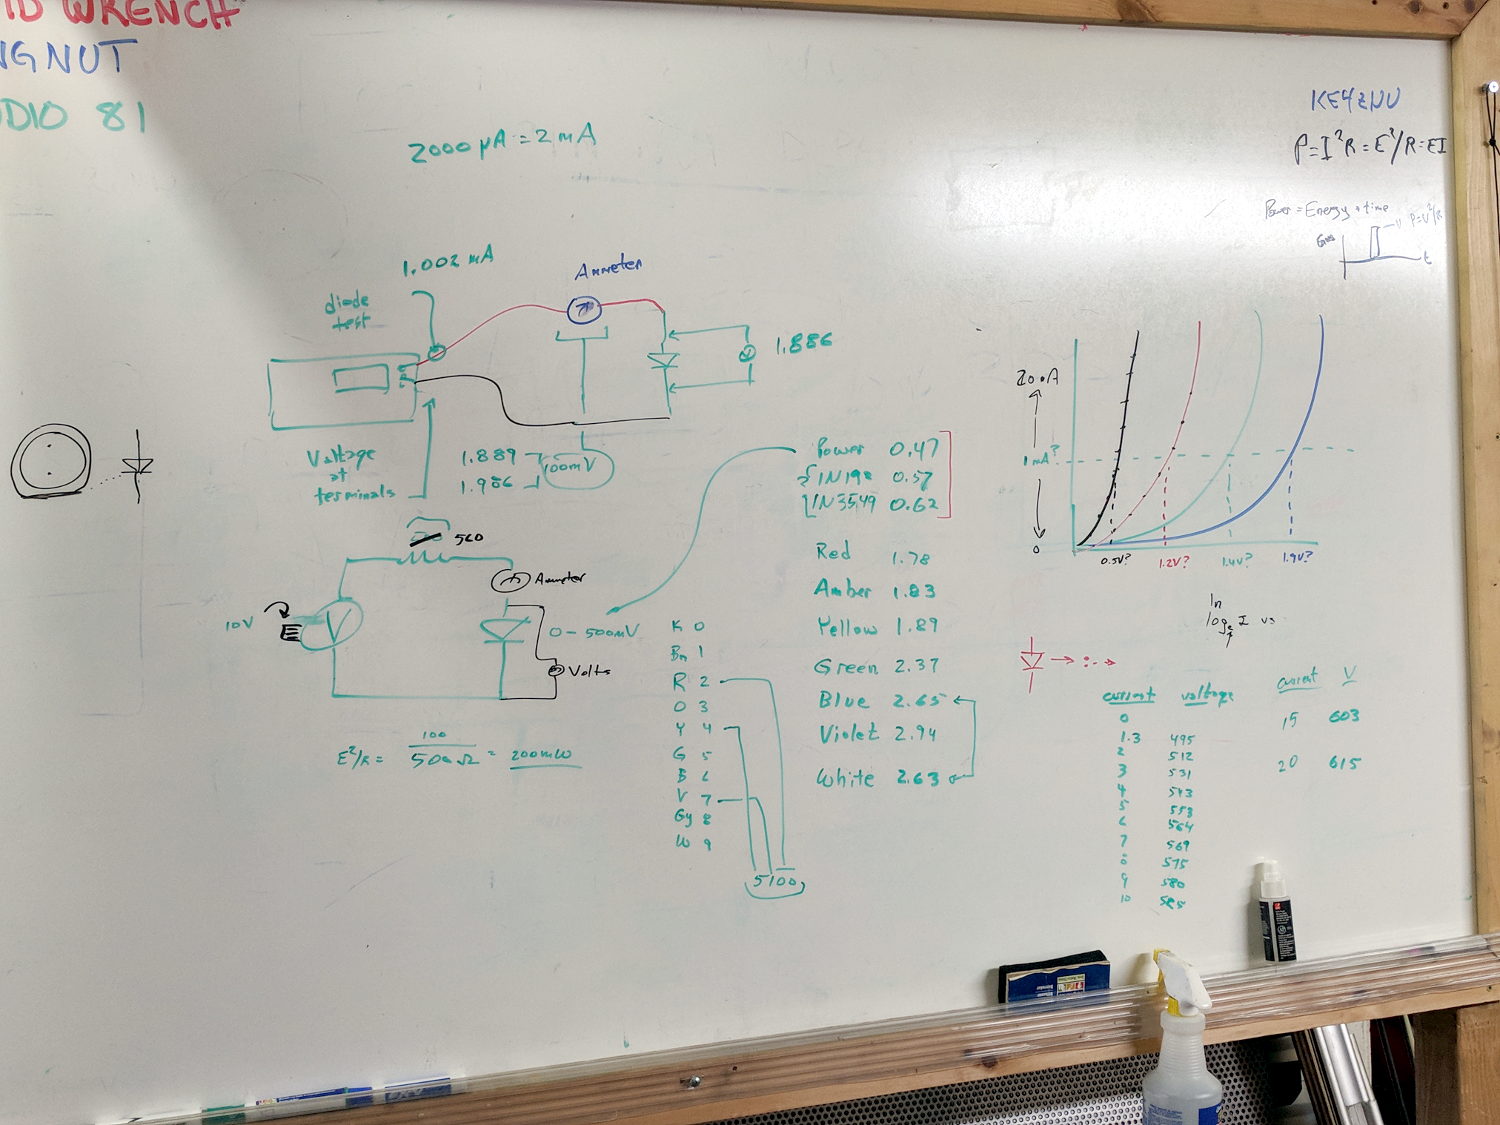
Use Siglent SDM3045X DMM in diode test mode to measure forward drop of power / signal / colored LEDs, discuss voltage variation with color / photon energy. Measure 1.000 mA test current for all forward voltages.
Compute series resistor (500 Ω) to convert adjustable power supply (the digital tattoo box, a lesson in itself) into reasonable current source; roughly 10 V → 20 mA. Find suitable resistor (560 Ω) in SqWr junk box parts assortment, digression into color band reading.
Wire circuit with meters to measure diode current (series!) and voltage (parallel!), measure same hulking power diode (after discovering insulating washers now in full effect) as before in 1 mA steps to 10 mA, then 15 and 20 mA, tabulate & plot results:
Whiteboard – Session 3 – Diode current vs forward drop
Discover warm resistor, compute power at 20 mA, introduce cautionary tales.
Lesson learned about never returning parts to inventory, with 560 Ω resistor appearing in diode drawer. Cautionary tales about having benchtop can of used parts as front-end cache for inventory backing store.
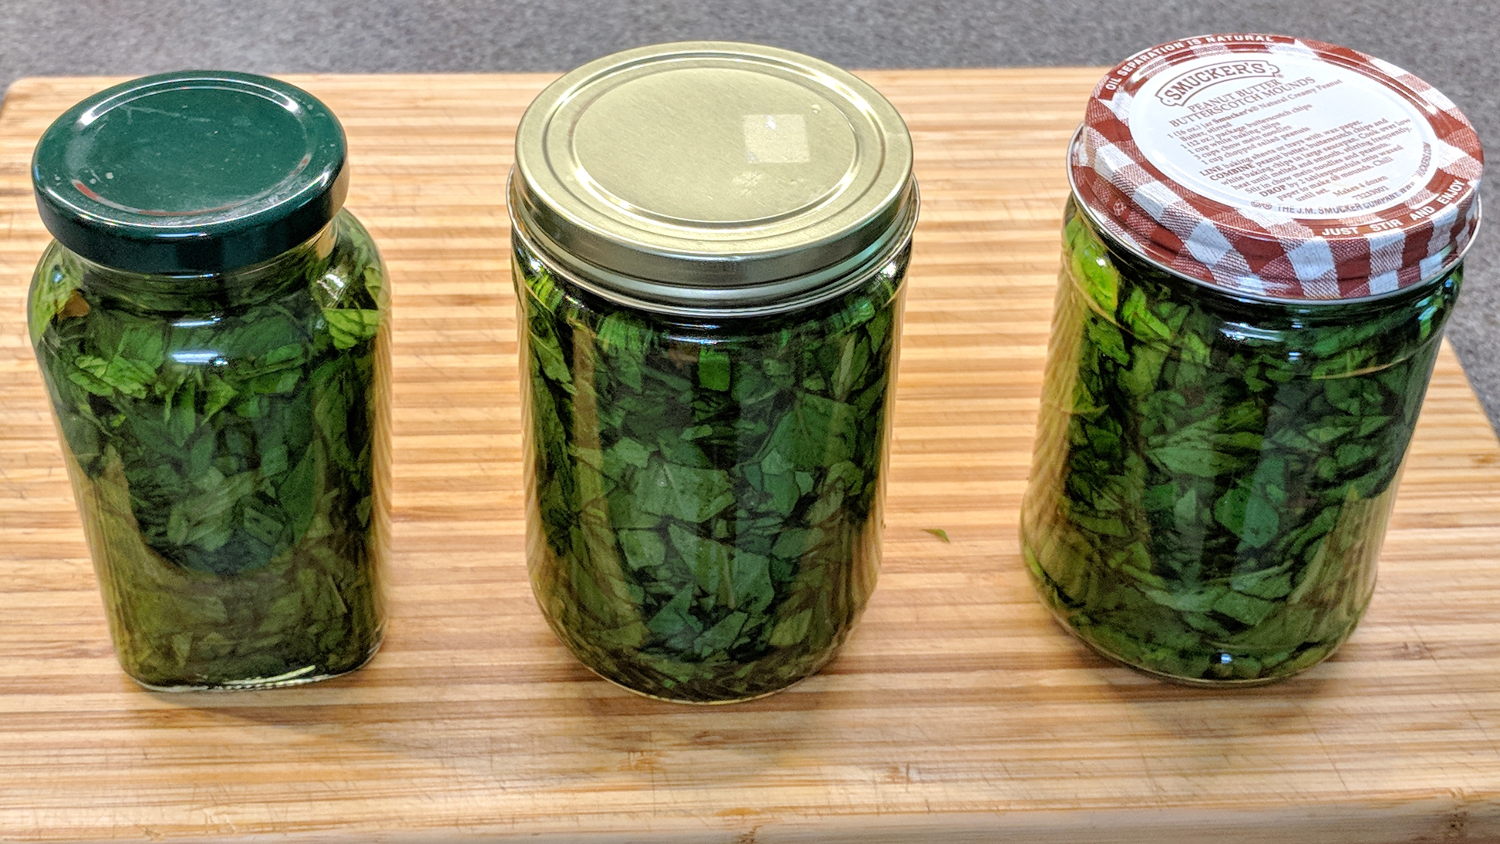
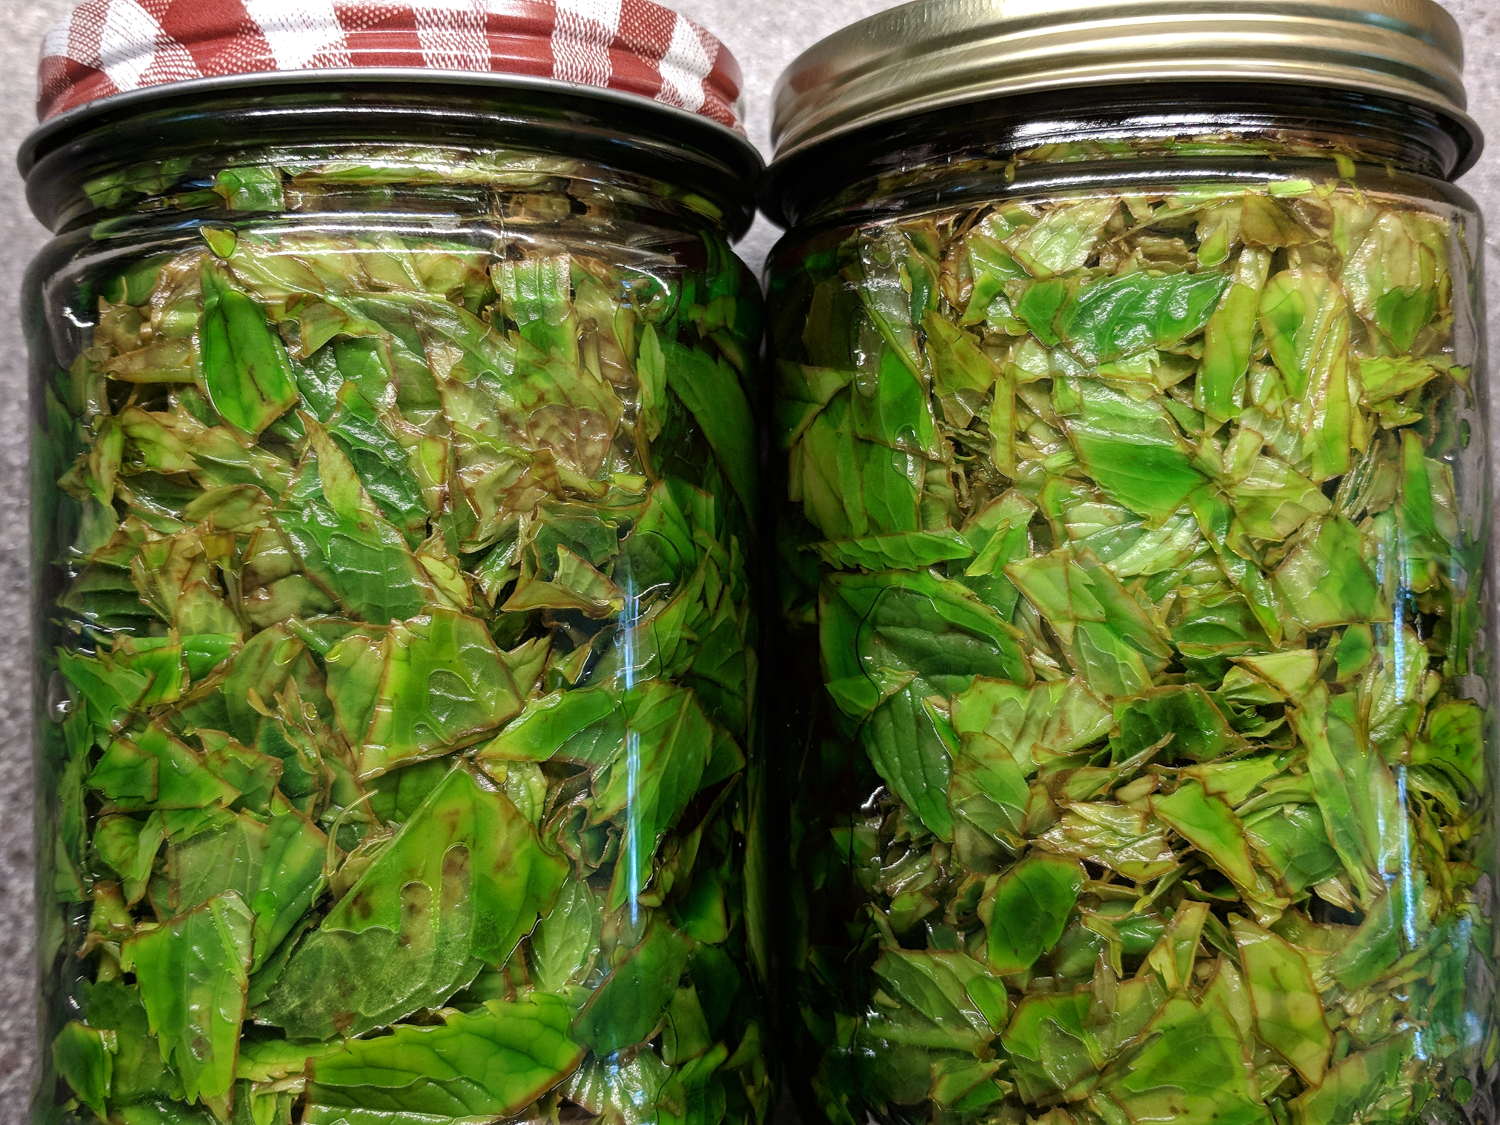
Mary harvested a great bunch of spearmint from a place where it wouldn’t be missed and, after rinsing, plucking, and chopping, we now have a liter of Mint Extract in the making:
Mint Extract – start – 2018-05-29
The big jars got 3 oz of coarse-chopped leaves apiece, the smaller jar 1 oz, and the (removed) stems added up to 3.5 oz, so call it 1/3 waste. Not that this is an exact science, but I’d say 3/4 pound of just-picked mint, packed slightly tighter than those jars, would produce a liter of extract.
Because we started with fresh-picked leaves, a liter of 190 proof = 95% ethanol Everclear (*) will extract the oil better than the 80 proof = 40% ethanol vodka I used for dried vanilla beans.
A day later, the leaves definitely look dehydrated:
Mint Extract – browning leaves – 2018-05-30
Those bottles are lying on their sides with the camera above, looking through the air bubble to the leaves. Unlike commercial mint extract, this stuff is green!
It’ll be finished after a month of daily agitation, but surely it’s an exponential process: a few hundred μl already pep up a mug o’ cocoa just fine.
In very round numbers, I get 10 drops / 0.1 ml, so 1 drop = 10 μl.
Bonus: the cutting board smells wonderful.
(*) It may be Olde White Guy Privilege, but clerks don’t even blink when I stagger up to the counter clutching a bottle of high-octane hooch; they don’t even card my age!
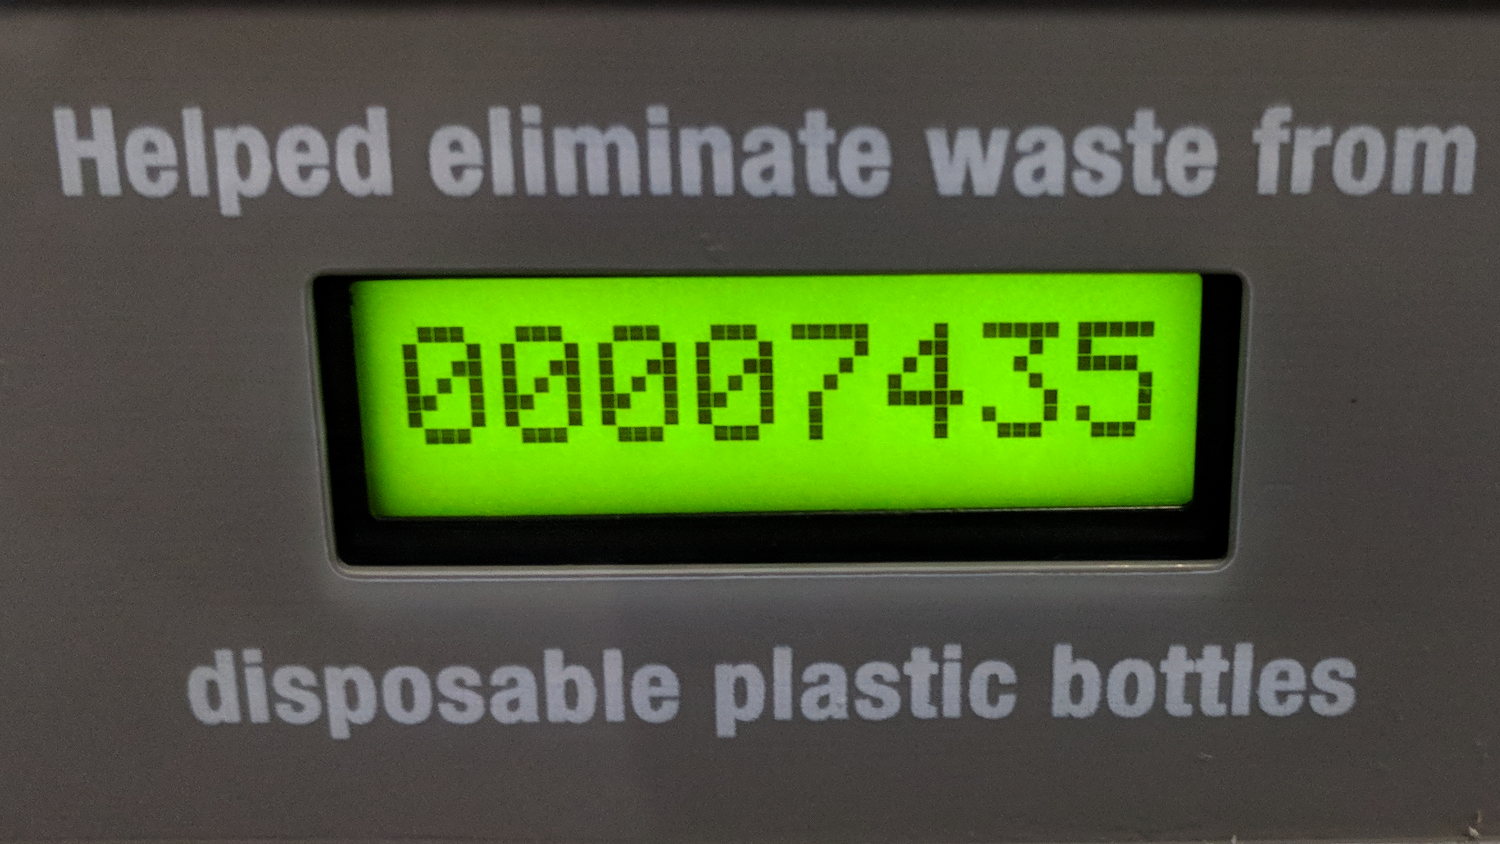
The bottle shape on the back of each fountain marks the sensor for its water bottle refill spout. The small rectangular block above and right of the sensor is a virtue signalling display giving the number of disposable bottles allegedly not consigned to a landfill.
The left fountain:
Water bottle refill station – left
The center fountain:
Water bottle refill station – center
The right fountain:
Water bottle refill station – right
Which looked exactly like either a test pattern or a failed display, until I waved my hand over the senor and watched it increment to 00008889. Timing is everything!
The other trio of fountains had the same progression, so it must be a chirality thing.
I can’t say whether you should use the left fountain to avoid some germs or the right fountain for the freshest water. Not having to maneuver our bottle under the usual arch from a drinking nozzle was a big win, though, so mad props to ’em.