Ed Nisley's Blog: Shop notes, electronics, firmware, machinery, 3D printing, laser cuttery, and curiosities. Contents: 100% human thinking, 0% AI slop.
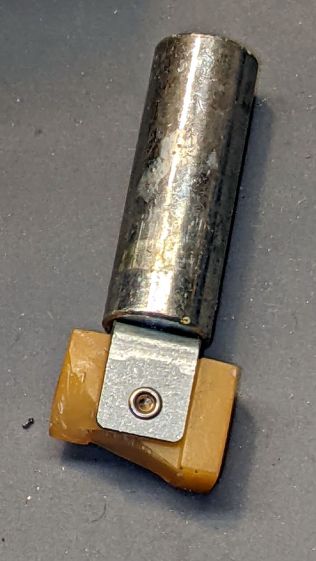
Mary’s folks asked me to figure out why the carousel on their Kodak 750H projector no longer turned. Some initial poking around suggested a problem with the solenoid, which only clunked when the projector was upside-down on the desk. I thought it might just have gummed up after all those years, but disassembling the thing (per the Service Manual and the usual Youtube videos) produced the root cause:
Kodak 750H Projector – broken solenoid link
That explained the yellowish plastic fragments rattling around inside.
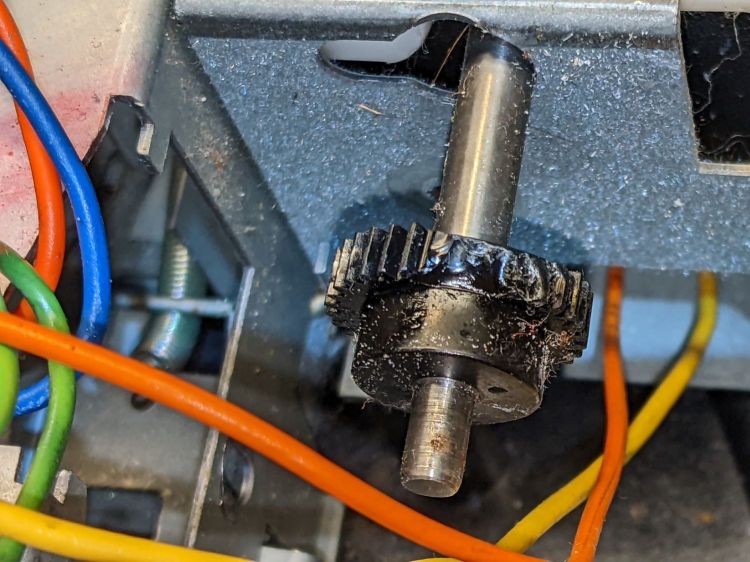
As predicted, it’s impossible to remove the solenoid without breaking the equally brittle focus gear in the process:
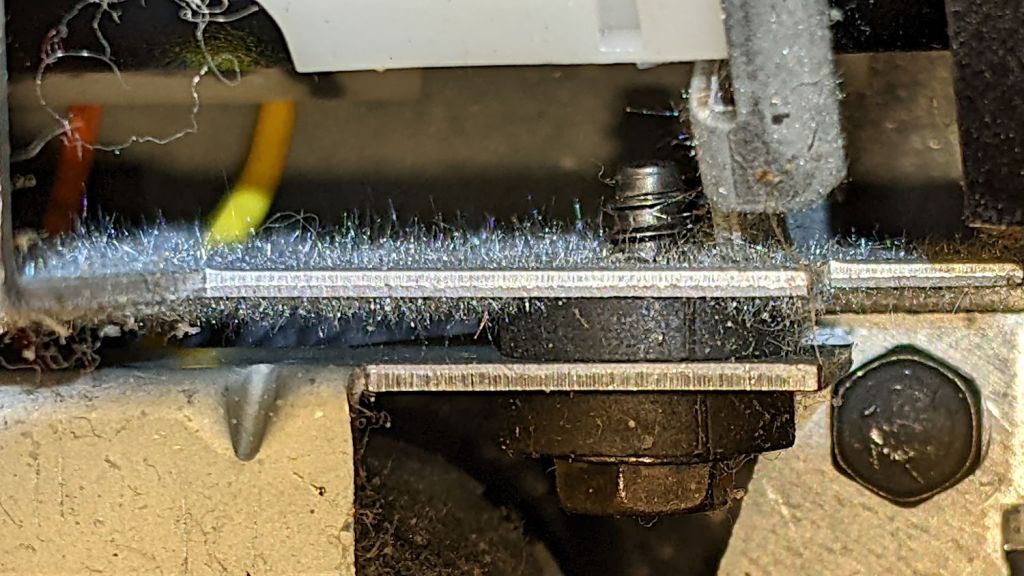
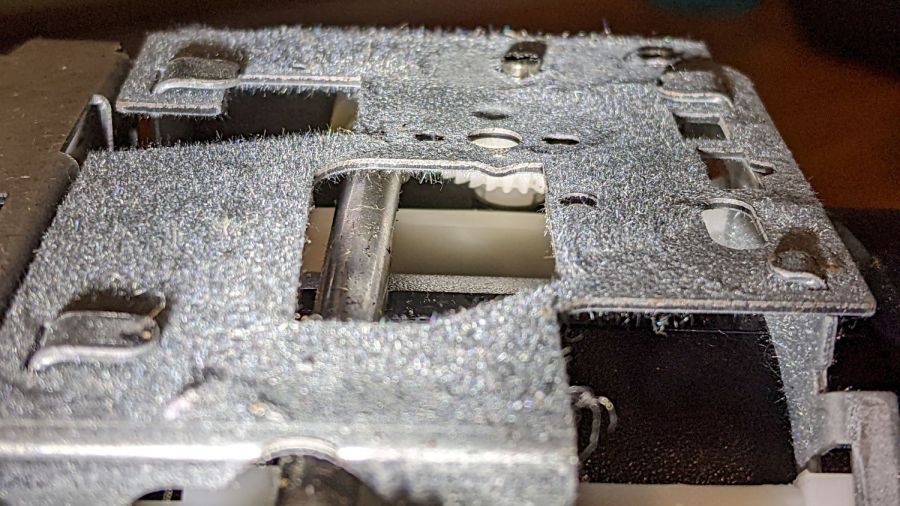
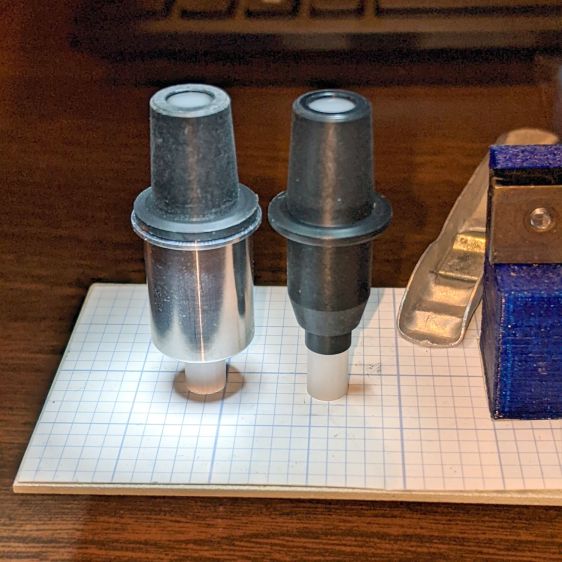
Some of the interior sheet metal has a dark surface, likely heavy tin plating, covered with a thick coat of whiskers:
Kodak 750H Projector – tin whiskers
Kodak 750H Projector – tin whiskers
Kodak 750H Projector – tin whiskers
Kodak 750H Projector – tin whiskers
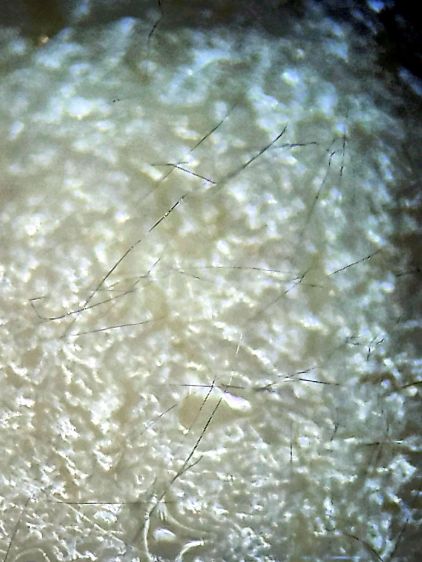
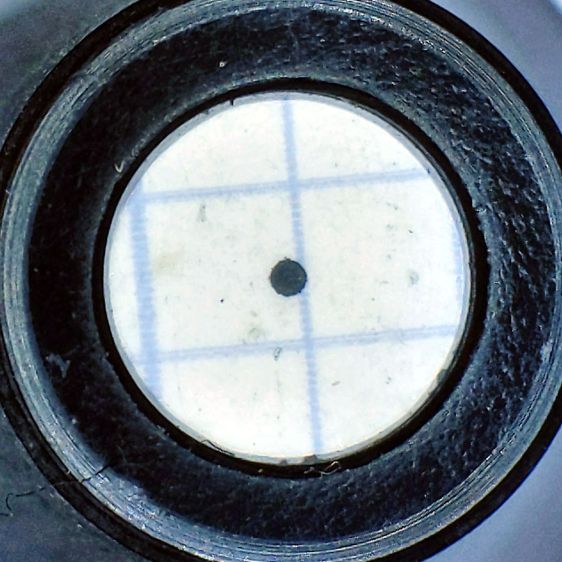
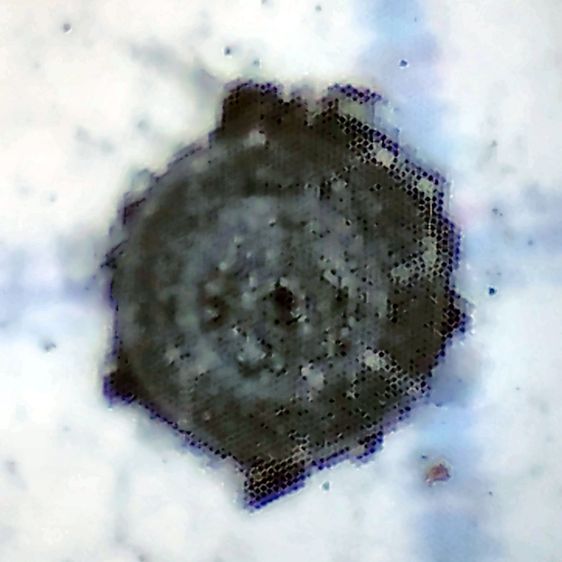
Touching a whiskered surface with masking tape captures the culprits, whereupon zooming the microscope and camera all the way in makes them just barely visible: they’re a few millimeters long and a few atoms wide:
Kodak 750H Projector – tin whiskers – detail
I have surely contaminated the entire Basement Laboratory with tin whiskers. Makes me itchy just thinking about them …
Whoever composed this wall of text knew the next person in line would update the placeholder:
HelloFresh Intro Offer Card – missed directions
As you can tell from the prices, this dates back to late last year. Since then, the two red LED panels on each side had at least one pinball panic and were replaced with much dimmer units:
Mobil gas price puzzle
And a friend pointed me at this bit of innocently twisted signage from a Twitter thread:
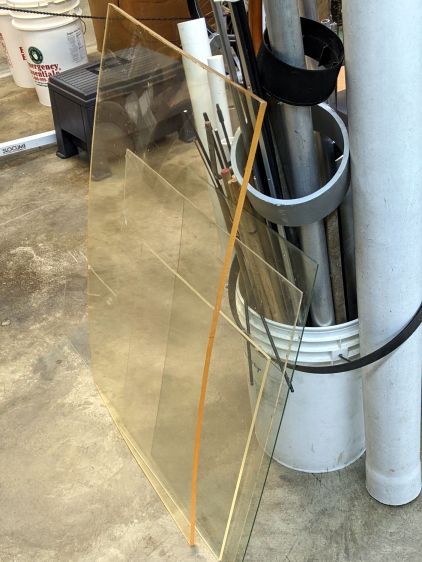
Concerted rummaging in the Basement Warehouse produced some rather old acrylic sheets:
Acrylic Stockpile
Washing with detergent and denatured alcohol cleaned off a lot of grunge, but the yellow tint says it’s been around for a while. In fact, It Came With The House™ when we bought it three decades ago.
One sheet was a status board in an automobile machine shop:
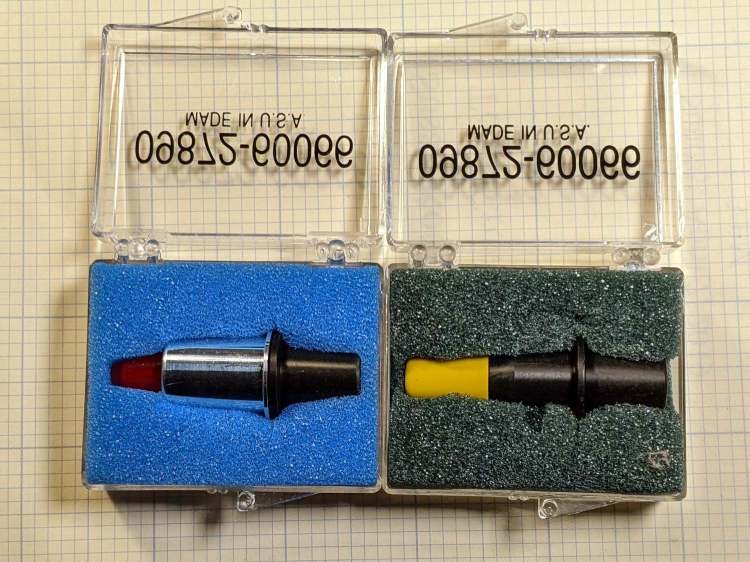
The metal-shell version is advertised as “09872-60066 Calibration Pen for fit HP DesignJet 2000CP 2500CP 2800CP 3000CP 3500CP 3800CP Original New” which makes absolutely no sense, as those were inkjet and laser printers with (AFAICT) no need for a “calibration pen”. Because nobody with those printers will buy (or even look for) a widget they can’t use, the price is surprisingly low, compared to the real ones occasionally found on eBay.
My guess: somebody halfway around the planet found a pile of Genuine HP plastic snap boxes, filled them with knockoff sights vaguely similar to the original (perhaps intended for a different plotter?), and marketed them with the usual (lack of) attention to veracity.
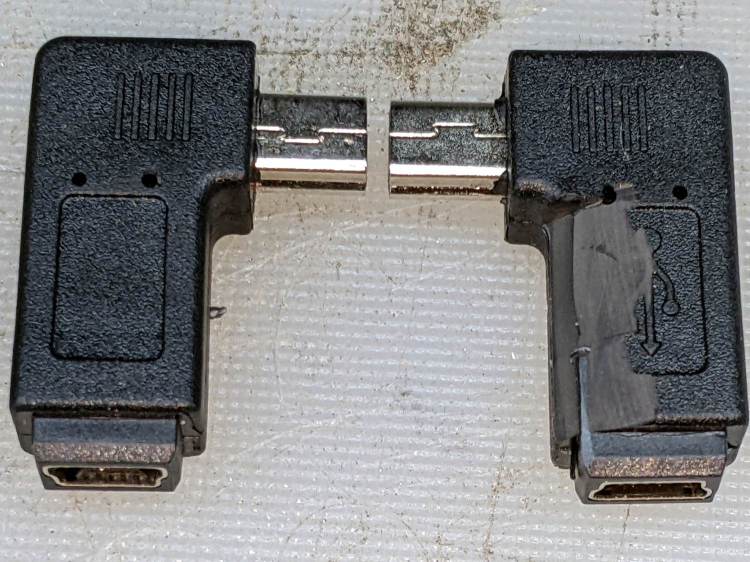
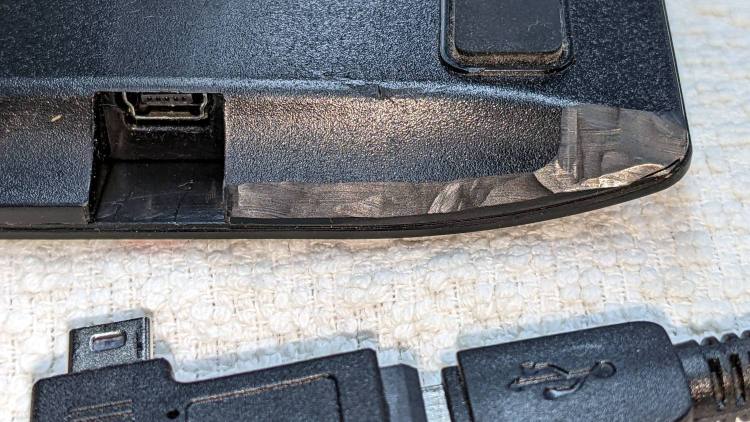
The Huion tablet on my desk has its USB cable sticking straight out of the left side, whereupon it must loop around to burrow under the shelf under my monitor on its way to the port on the back of the PC case. The loop snagged on all the clutter atop the desk and I finally got around to Fixing That Problem:
Which is a “left angle” adapter and which is a “right angle” adapter depends on which supplier you ask and how much you trust their descriptions / product photos, so you should get a set containing both: it’s the only way to be sure.
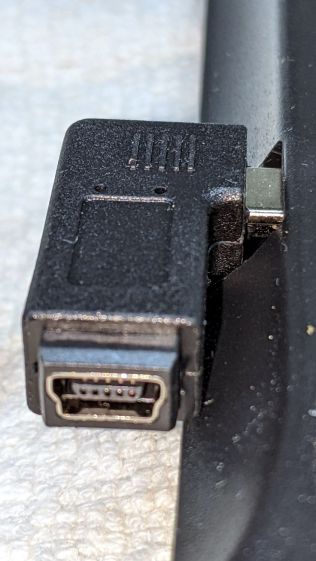
The one on the right (a “right angle”) shows a bit of carving, which came after the completely unsurprising discovery that the stylin’ curves on the side of the tablet collided with the rectangular adapter:
Huion tablet – misfit adapter
Some diligent X-Acto knife work carved away enough of both the adapter and the tablet case to snugly join them:
Huion tablet – plastic surgery
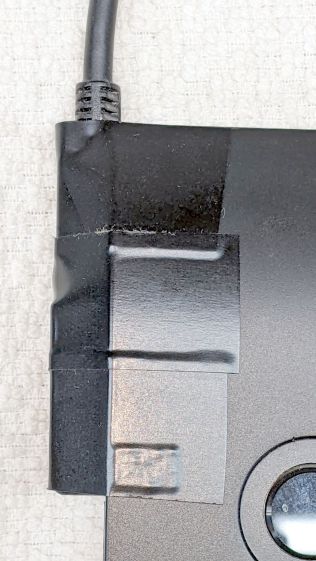
The hackery over on the far right fits around the USB cable’s molded connector. I simply cut away any parts that touched until the adapter seated firmly in the USB socket and the cable exited parallel to the edge.
Part of this involved not carving deeply enough into the adapter or cable connector to expose the internal wiring. I assumed the tablet didn’t have anything vital immediately inside that fancy curve, so that’s where I dug deepest.
Stick adapter + cable to the tablet with good-quality electrical tape and now the cable points directly to where it should go.
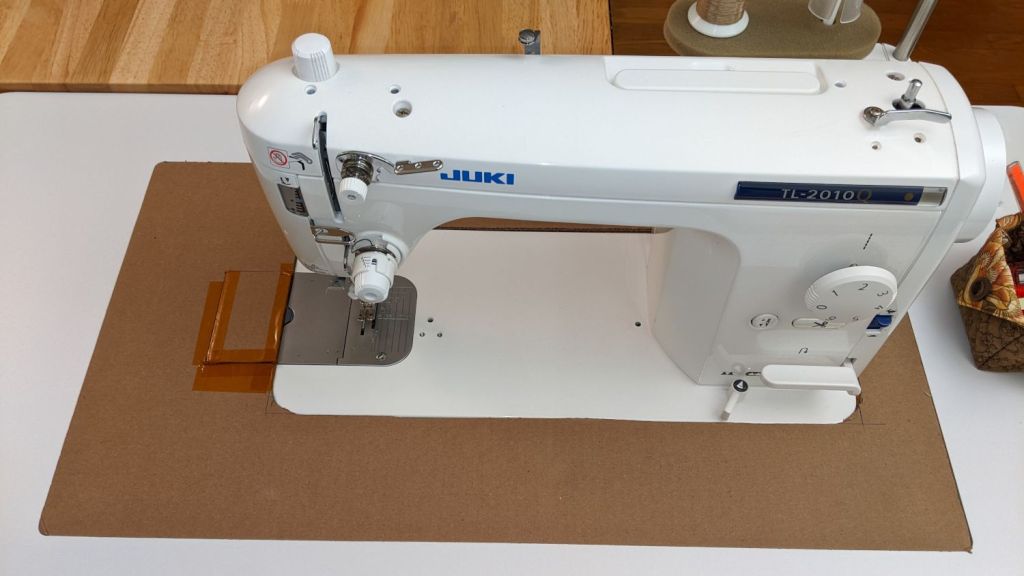
Mary’s new sewing table just arrived, but the laser-cut acrylic insert fitting around her Juki sewing machine is still a month or two away. Until then, a simple cardboard replacement must suffice to fill the gap:
Juki temporary table insert
The rectangle just to the left of the needle is a hatch for bobbin changes. Sheer faith and an interference fit between layers of Kapton tape holds it in place with surprising force.
I wanted to tape the cardboard edges to the machine and the table to smooth out the transitions, but her Supreme Slider slippery sheet may solve the problem without adhesives:
Juki temporary table insert – Super Slider
The “insert” is a 1/4 inch thick double-layer corrugated cardboard sheet, utility-knifed from a huge box. She layers cardboard under the wood chips in her Vassar Farms garden paths to discourage the weeds; this seemed like a perfectly reasonable diversion.
Plotting the backlash / calibration target on both the CNC-3018XL and the MPCNC quickly showed, contrary to what I expected, the MPCNC was dead-on accurate, albeit with some wobbulation and a trace of backlash:
MPCNC – Backlash test – detail
Although it looks ug-u-lee, the (lower speed) drag knife cuts come out nice and, because the entry and exit moves match the main cut, the minimal backlash wasn’t a problem.
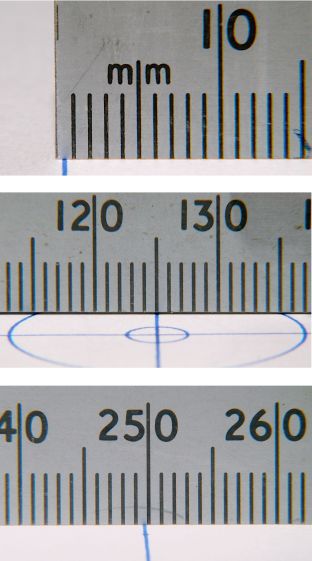
Turns out only the X axis on the 3018XL had a problem:
Cal Target – 400 step-mm – merged
Apparently the longer leadscrew I installed as part of the “XL” conversion has a small thread pitch error: about 1 mm short in every 250 mm of travel. I don’t have any (definite, non-handwavy) method to measure the pitch directly, other than by running the follower nut and measuring the results, but it’s consistently short.
Quite some time ago (after blowing up the OEM controller board), I set up the Protoneer CNC board in 1:8 microstep mode, making the GRBL $100 setting a nice, round 400 step/mm for a two-start leadscrew with 2 mm pitch and 4 mm lead:
After a few more measurements suggesting the leadscrew actually traveled 249.2 mm, the correct value will be:
401.28 step/mm = 400 step/mm × 250 mm / 249.2 mm
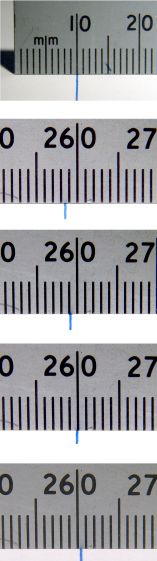
To verify I understood the problem and solution, I set $100 to a few integer values around the goal:
Cal Target – stacked – 399-402 step-mm
The top image shows the leftmost line at the 10 mm mark on the scale, because it’s easier for me to match the ink line with an engraved line, rather than the non-line at the end of the ruler.
The other images show the results for $100 set to 399, 400, 401, and 402 step/mm, respectively. The results last two results bracket the desired 250 mm outcome, with 401 step/mm being Close Enough™. GRBL accepts a floating point step/mm value, so I set $100 to 401.28, but I was unable to convince myself the result came out consistently different than 401.00.
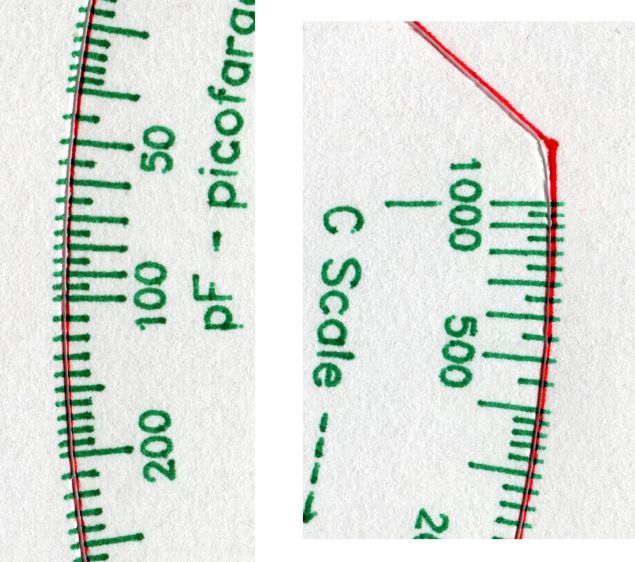
Plotting both the tick marks (green) and the knife path (red) on the 3018XL, then cutting the bare paper on the MPCNC, showed the two machines now agree on where the knife should fall. The outer end of the tick marks extends 1 mm beyond the cut line to ensure small misalignments do not produce an obvious white gap around the edge of the deck.
The Y axis continues to match:
Tek CC – 2022-02-14 – Y detail
And now the X axis looks just as good:
Tek CC – 2022-02-14 – X detail
The drag knife corners are rounded, as you’d expect. The cut seems slightly offset from a small origin touch-off error, but the scales now match.