The Smell of Molten Projects in the Morning

Ed Nisley's Blog: Shop notes, electronics, firmware, machinery, 3D printing, laser cuttery, and curiosities. Contents: 100% human thinking, 0% AI slop.

Category: Machine Shop

Mechanical widgetry

  • CNC 3018-Pro: Hard Drive Platter Fixture

    A variation on the CD fixture produces a 3.5 inch hard drive platter fixture:

    Platter Fixtures - Hard Drive on 3018
    Platter Fixtures – Hard Drive on 3018

    Which needed just a touch of milling for a snug fit around the platter:

    CNC 3018-Pro - HD platter fixture - test fit
    CNC 3018-Pro – HD platter fixture – test fit

    Tape it down on the 3018’s platform, set XY=0 at the center, and It Just Works™:

    CNC 3018-Pro - HD platter fixture - 70 g
    CNC 3018-Pro – HD platter fixture – 70 g

    The rather faint line shows engraving at -1.0 mm = 70 g downforce isn’t quite enough. Another test with the same pattern at -3.0 mm = 140 g came out better:

    CNC 3018-Pro - HD platter fixture - 140 g
    CNC 3018-Pro – HD platter fixture – 140 g

    It’s in the same OpenSCAD file as the CD fixture, in the unlikely event you need one.

  • Suet Feeder Bracket Painting

    The 4 inch column on the rear patio holds a bracket, probably intended for a welcoming sign or some such, which keeps the suet feeder mostly out of reach. It desperately wanted a coat of black paint to match the railing, so I stripped the old paint and applied Evapo-Rust:

    Suet Feeder Bracket Hardware - Evapo-Rust bath
    Suet Feeder Bracket Hardware – Evapo-Rust bath

    The dark areas are iron oxide being converted to loose iron sulfide, which is what Evapo-Rust does for a living.

    One could, of course, simply buy new eye screws & nuts, but we’re deep into historical preservation around here.

    An hour of soaking and a few minutes of wire-wheeling got everything down to bare metal, ready for some rattle-can primer and black paint action:

    Suet Feeder Bracket Hardware - installed
    Suet Feeder Bracket Hardware – installed

    It’s a version of what Eks calls a “used car finish”: high shine over deep pits.

    Discussion of why one should not paint threaded parts will be unavailing; in this case, paint serves as permanent threadlock. I re-spritzed the eyescrews & nuts after getting everything aligned, so as to produce a lovely two-coat over-all finish.

    The birds won’t care one way or the other and, as long as the paint lasts, neither will we.

  • MPCNC: Z-Axis Height Probe

    A slight modification to the MPCNC LM12UU collet pen holder turns it into a long-reach Z-Axis Height Probe:

    CNC 3018-Pro - Z-Axis height probe - overview
    CNC 3018-Pro – Z-Axis height probe – overview

    A flange on the top plate holds a Makerbot-style endstop switch:

    Collet Holder - LM12UU - switch plate - solid model
    Collet Holder – LM12UU – switch plate – solid model

    The brass probe rod sports a 3/32 inch ball epoxied on its tip, although for my simple needs I could probably use the bare rod:

    CNC 3018-Pro - Z-Axis height probe - ball tip detail
    CNC 3018-Pro – Z-Axis height probe – ball tip detail

    I clamped the rod to extend a bit beyond the plate, where it can soak up most of the switch release travel, leaving just enough to reset the clickiness after each probe:

    CNC 3018-Pro - Z-Axis height probe - detail
    CNC 3018-Pro – Z-Axis height probe – detail

    The probe responds only to Z motion, not tip deflection in XY, so it’s not particularly good for soft objects with sloped sides, like the insole shown above. It works fine for rigid objects and should suffice to figure the modeling workflow.

    The bCNC Auto-Level probe routine scans a grid over a rectangular region:

    Insole - bCNC AutoLevel Probe Map - detail
    Insole – bCNC AutoLevel Probe Map – detail

    Which Meshlab turns into a solid model:

    Insole - Meshlab triangulation
    Insole – Meshlab triangulation

    That’s the bottom of the insole probed on a 5 mm grid, which takes something over an hour to accomplish.

    The OpenSCAD code as a GitHub Gist:

    // Collet pen cartridge holder using LM12UU linear bearing
    // Ed Nisley KE4ZNU – 2019-04-26
    // 2019-06 Adapted from LM12UU drag knife holder
    // 2019-09 Probe switch mount plate
    Layout = "Build"; // [Build, Show, Puck, Mount, Plate, SwitchPlate]
    /* [Hidden] */
    // Extrusion parameters
    ThreadThick = 0.25; // [0.20, 0.25]
    ThreadWidth = 0.40; // [0.40]
    // Constants
    Protrusion = 0.1; // [0.01, 0.1]
    HoleWindage = 0.2;
    inch = 25.4;
    function IntegerMultiple(Size,Unit) = Unit * ceil(Size / Unit);
    ID = 0;
    OD = 1;
    LENGTH = 2;
    //- Adjust hole diameter to make the size come out right
    module PolyCyl(Dia,Height,ForceSides=0) { // based on nophead's polyholes
    Sides = (ForceSides != 0) ? ForceSides : (ceil(Dia) + 2);
    FixDia = Dia / cos(180/Sides);
    cylinder(r=(FixDia + HoleWindage)/2,h=Height,$fn=Sides);
    }
    //- Dimensions
    // Basic shape of DW660 snout fitting into the holder
    // Lip goes upward to lock into MPCNC mount
    Snout = [44.6,50.0,9.6]; // LENGTH = ID height
    Lip = 4.0; // height of lip at end of snout
    // Holder & suchlike
    PenShaft = 3.5; // hole to pass pen cartridge
    WallThick = 4.0; // minimum thickness / width
    Screw = [4.0,8.5,25.0]; // thread ID, washer OD, length
    Insert = [4.0,6.0,10.0]; // brass insert
    Bearing = [12.0,21.0,30.0]; // linear bearing body
    Plate = [PenShaft,Snout[OD] – WallThick,WallThick]; // spring reaction plate
    echo(str("Plate: ",Plate));
    SpringSeat = [0.56,7.5,2*ThreadThick]; // wire = ID, coil = OD, seat depth = length
    PuckOAL = max(Bearing[LENGTH],(Snout[LENGTH] + Lip)); // total height of DW660 fitting
    echo(str("PuckOAL: ",PuckOAL));
    Key = [Snout[ID],25.7,(Snout[LENGTH] + Lip)]; // rectangular key
    NumScrews = 3;
    //ScrewBCD = 2.0*(Bearing[OD]/2 + Insert[OD]/2 + WallThick);
    ScrewBCD = (Snout[ID] + Bearing[OD])/2;
    echo(str("Screw BCD: ",ScrewBCD));
    NumSides = 9*4; // cylinder facets (multiple of 3 for lathe trimming)
    // MBI Endstop switch PCB
    PCB = [40.0,1.6,16.5]; // endstop PCB, switch downward, facing parts
    Touchpoint = [-4.8,4.8,4.5]; // contact point from PCB edges, solder side
    TapeThick = 1.0; // foam mounting tape
    SwitchMount = [PCB.x,WallThick,PCB.z + Touchpoint.z + Plate.z];
    module DW660Puck() {
    translate([0,0,PuckOAL])
    rotate([180,0,0]) {
    cylinder(d=Snout[OD],h=Lip/2,$fn=NumSides);
    translate([0,0,Lip/2])
    cylinder(d1=Snout[OD],d2=Snout[ID],h=Lip/2,$fn=NumSides);
    cylinder(d=Snout[ID],h=(Snout[LENGTH] + Lip),$fn=NumSides);
    translate([0,0,(Snout[LENGTH] + Lip) – Protrusion])
    cylinder(d1=Snout[ID],d2=2*WallThick + Bearing[OD],h=PuckOAL – (Snout[LENGTH] + Lip),$fn=NumSides);
    intersection() {
    translate([0,0,0*Lip + Key.z/2])
    cube(Key,center=true);
    cylinder(d=Snout[OD],h=Lip + Key.z,$fn=NumSides);
    }
    }
    }
    module MountBase() {
    difference() {
    DW660Puck();
    translate([0,0,-Protrusion]) // bearing
    PolyCyl(Bearing[OD],2*PuckOAL,NumSides);
    for (i=[0:NumScrews – 1]) // clamp screws
    rotate(i*360/NumScrews)
    translate([ScrewBCD/2,0,-Protrusion])
    rotate(180/8)
    PolyCyl(Insert[OD],2*PuckOAL,8);
    }
    }
    module SpringPlate() {
    difference() {
    cylinder(d=Plate[OD],h=Plate[LENGTH],$fn=NumSides);
    translate([0,0,-Protrusion]) // pen cartridge hole
    PolyCyl(PenShaft,2*Plate[LENGTH],NumSides);
    translate([0,0,Plate.z – SpringSeat[LENGTH]]) // spring retaining recess
    PolyCyl(SpringSeat[OD],SpringSeat[LENGTH] + Protrusion,NumSides);
    for (i=[0:NumScrews – 1]) // clamp screws
    rotate(i*360/NumScrews)
    translate([ScrewBCD/2,0,-Protrusion])
    rotate(180/8)
    PolyCyl(Screw[ID],2*PuckOAL,8);
    }
    }
    module SwitchPlate() {
    translate([0,0,Plate.z])
    rotate([180,0,0])
    SpringPlate();
    rotate(45)
    translate([Touchpoint.x,Touchpoint.y + TapeThick,0])
    cube(SwitchMount,center=false);
    }
    //—–
    // Build it
    if (Layout == "Puck")
    DW660Puck();
    if (Layout == "Plate")
    SpringPlate();
    if (Layout == "SwitchPlate")
    SwitchPlate();
    if (Layout == "Mount")
    MountBase();
    if (Layout == "Show") {
    MountBase();
    translate([0,0,1.6*PuckOAL])
    rotate([180,0,0])
    SpringPlate();
    }
    if (Layout == "Build") {
    translate([0,Snout[OD]/2,PuckOAL])
    rotate([180,0,0])
    MountBase();
    translate([0,-Snout[OD]/2,0])
    SpringPlate();
    }

  • Branson Ultrasonic Cleaner Switch Cover

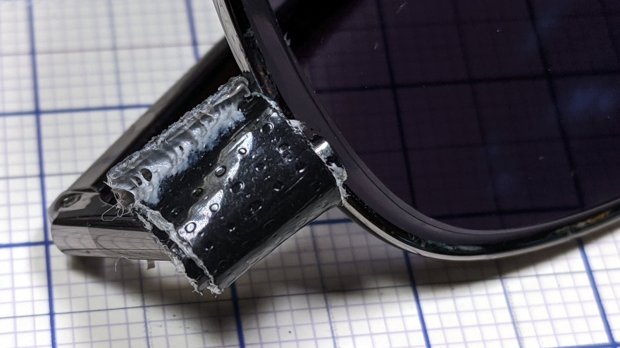
    Back in the early 90s, I bought a Branson Ultrasonic Cleaner for small parts. It turned out to be ideal for eyeglasses, migrated to the bathroom, and has been used at least daily ever since. After nigh onto three decades, this happened:

    Branson ultrasonic cleaner - failed switch cover
    Branson ultrasonic cleaner – failed switch cover

    We tend to push the ON button and let it turn off by itself after a little over four minutes (exactly 255 seconds!), so the gray plastic sheet over the ON switch failed first. You can barely see the outline of the transparent film previously covering both switches, which probably helped waterproof the switches.

    The gray plastic disk sits atop the switch actuator, so I punched a slightly larger polypropylene disk (from my stash of clamshell packages), stuck it to the disk with double-sided tape, lined it up over the hole, and covered the mess with Kapton tape:

    Branson ultrasonic cleaner - expedient fix
    Branson ultrasonic cleaner – expedient fix

    This is in the nature of an expedient fix, as I’m not sure the polypro disk is flexible enough. The next iteration will cover the entire gray area and I’ll see about a transparent tape covering.

    Maybe in another decade?

  • CNC 3018-Pro: CD Fixture Probe Camera Target

    Taping the CD fixture to the CNC 3018-Pro’s raised platform solves the repeatability problem by putting the CD at a fixed location relative to the machine’s Home coordinates. The next step puts the XY=0 coordinate origin at the exact center of the platter, so the pattern comes out exactly centered on the disc:

    CNC 3018-Pro - CD fixture
    CNC 3018-Pro – CD fixture

    The fixture has a central boss:

    Platter Fixtures - CD on 3018 - tape flange
    Platter Fixtures – CD on 3018 – tape flange

    The blue boss centers the CD’s hub hole, the red plateau supports the disc, and the white background lies 5 mm below the CD’s upper surface:

    CNC 3018-Pro - CD holder target
    CNC 3018-Pro – CD holder target

    Yup, red and blue Sharpies FTW.

    The bCNC probe camera image includes two faint cyan rings centered on the crosshair:

    CNC 3018-Pro - bCNC probe camera - red-blue CD target
    CNC 3018-Pro – bCNC probe camera – red-blue CD target

    Set the diameter to 15 mm (or a bit less), center the outer ring on the hub hole = the border between blue & red, set XY=0, and it’s within maybe ±0.1 mm of the true center.

    Done!

  • bCNC Probe Camera Calibration

    I’m sure I’ll do this again some time …

    Focus the camera at whatever distance needed to clear the longest tooling you’ll use or, at least, some convenient distance from the platform. You must touch off Z=0 at the surface before using bCNC’s probe camera alignment, because it will move the camera to the preset focus distance.

    Align the camera’s optical axis perpendicular to the table by making it stare into a mirror flat on the platform, then tweaking the camera angles until the crosshair centers on the reflected lens image. This isn’t dead centered, but it’s pretty close:

    CNC 3018-Pro - bCNC Probe Camera - collimation - detail
    CNC 3018-Pro – bCNC Probe Camera – collimation – detail

    The camera will be focused on the mirror, not the reflection, as you can tell by the in-focus crud on the mirror. Whenever you focus the lens, you’ll probably move the optical axis, so do the best you can with the fuzzy image.

    You can adjust small misalignments with the Haircross (seems backwards to me) Offset values.

    A cheap camera’s lens barrel may not be aligned with its optical axis, giving the lens a jaunty tilt when it’s correctly set up:

    CNC 3018-Pro - Engraving - taped
    CNC 3018-Pro – Engraving – taped

    With the camera focus set correctly, calibrate the camera Offset from the tool (a.k.a. Spindle) axis:

    • Put a pointy tool at XY=0
    • Touch off Z=0 on a stack of masking tape
    • Put a dent in the tape with the bit
    • Move to the camera’s focused Z level
    • Make the dent more conspicuous with a Sharpie, as needed
    • Register the spindle location
    • Jog to center the crosshair on the dent
    • Register the camera location

    Calibrate the Crosshair ring diameter thusly:

    • Put an object with a known size on the platform
    • Touch off Z=0 at its surface
    • Move to the camera’s focused Z level
    • Set the Crosshair diameter equal to the known object size
    • Adjust the Scale value to make the Crosshair overlay reality

    For example, calibrating the diameter to 10 mm against a shop scale:

    CNC 3018-Pro Probe Camera - scale factor - detail
    CNC 3018-Pro Probe Camera – scale factor – detail

    At 10 mm above the CD, setting the camera’s resolution to 11.5 pixel/mm:

    CNC 3018-Pro - bCNC probe camera - settings
    CNC 3018-Pro – bCNC probe camera – settings

    Makes the outer circle exactly 15.0 mm in diameter to match the CD hub ring ID:

    CNC 3018-Pro - bCNC probe camera - red-blue CD target
    CNC 3018-Pro – bCNC probe camera – red-blue CD target

    I doubt anybody can find the pixel/mm value from first principles, so you must work backwards from an object’s actual size.

  • CNC 3018-Pro: Diamond Drag Engraving Test Disk

    The smaller and more rigid CNC 3018-Pro should be able to engrave text faster than the larger and rather springy MPCNC, which could engrave text at about 50 mm/min. This test pattern pushes both cutting depth and engraving speed to absurd values:

    Engraving Test Pattern - 2019-09-18
    Engraving Test Pattern – 2019-09-18

    Compile the GCMC source to generate G-Code, lash a CD / DVD to the platform (masking tape works fine), touch off the XY coordinates in the center, touch off Z=0 on the surface, then see what happens:

    CNC 3018-Pro - Engraving test pattern - curved text
    CNC 3018-Pro – Engraving test pattern – curved text

    The “engraving depth” translates directly into the force applied to the diamond point, because the spring converts displacement into force. Knowing the Z depth, you can calculate or guesstimate the force.

    Early results from the 3018 suggest it can engrave good-looking text about 20 times faster than the MPCNC:

    CNC 3018-Pro - Engraving - speeds
    CNC 3018-Pro – Engraving – speeds

    You must trade off speed with accuracy on your very own machine, as your mileage will certainly differ!

    The GCMC source code as a GitHub Gist:

    // Engraving test piece
    // Ed Nisley KE4ZNU – 2019-09
    //—–
    // Command line parameters
    // -D OuterDia=number
    if (!isdefined("OuterDia")) {
    OuterDia = 120mm – 2mm; // CD = 120, 3.5 inch drive = 95
    }
    OuterRad = OuterDia / 2.0;
    comment("Outer Diameter: ",OuterDia);
    comment(" Radius: ",OuterRad);
    //—–
    // Library routines
    include("tracepath.inc.gcmc");
    include("engrave.inc.gcmc");
    //—–
    // Bend text around an arc
    function ArcText(TextPath,Center,Radius,BaseAngle,Align) {
    PathLength = TextPath[-1].x;
    Circumf = 2*pi()*Radius;
    TextAngle = to_deg(360 * PathLength / Circumf);
    AlignAngle = BaseAngle + (Align == "Left" ? 0 :
    Align == "Center" ? -TextAngle / 2 :
    Align == "Right" ? -TextAngle :
    0);
    ArcPath = {};
    foreach(TextPath; pt) {
    if (!isundef(pt.x) && !isundef(pt.y) && isundef(pt.z)) { // XY motion, no Z
    r = Radius – pt.y;
    a = 360deg * (pt.x / Circumf) + AlignAngle;
    ArcPath += {[r*cos(a) + Center.x, r*sin(a) + Center.y,-]};
    }
    elif (isundef(pt.x) && isundef(pt.y) && !isundef(pt.z)) { // no XY, Z up/down
    ArcPath += {pt};
    }
    else {
    error("Point is not pure XY or pure Z: " + to_string(pt));
    }
    }
    return ArcPath;
    }
    //—–
    // Set up for drawing
    SafeZ = 10.0mm; // above clamps and screws
    TravelZ = 1.0mm; // above workpiece
    PlotZ = -0.5mm; // tune for best results
    TextSpeed = 1000mm; // intricate detail
    DrawSpeed = 2000mm; // smooth curves
    TextFont = FONT_HSANS_1_RS;
    TextSize = [2.0mm,2.0mm];
    TextLeading = 2*TextSize.y; // line spacing
    DiskCenter = [0mm,0mm]; // middle of the platter
    InnerDia = 40mm;
    InnerRad = InnerDia / 2.0;
    comment("Inner Diameter: ",InnerDia);
    comment(" Radius: ",InnerRad);
    NumRings = ceil((OuterRad – (InnerRad + TextLeading))/TextLeading); // number of rings to draw
    comment("Numer of rings: ",NumRings);
    if (1) {
    comment("Text Size begins");
    feedrate(TextSpeed);
    ts = "Text size: " + to_string(TextSize);
    tp = scale(typeset(ts,TextFont),TextSize);
    tpa = ArcText(tp,DiskCenter,OuterRad,90deg,"Left");
    engrave(tpa,TravelZ,PlotZ);
    }
    if (1) {
    comment("Depth variations begin");
    TextRadius = OuterRad;
    pz = 0.0mm;
    repeat(NumRings ; i) {
    comment(" depth: " + to_string(pz));
    feedrate(TextSpeed);
    ts = "Depth: " + to_string(pz) + " at " + to_string(TextSpeed) + "/min";
    tp = scale(typeset(ts,TextFont),TextSize);
    tpa = ArcText(tp,DiskCenter,TextRadius,-5deg,"Right");
    engrave(tpa,TravelZ,pz);
    feedrate(DrawSpeed);
    goto([0,-TextRadius,-]);
    move([-,-,pz]);
    arc_ccw([-TextRadius,0,-],-TextRadius);
    goto([-,-,TravelZ]);
    feedrate(TextSpeed);
    tp = scale(typeset("Rad: " + to_string(TextRadius),TextFont),TextSize);
    tpa = ArcText(tp,DiskCenter,TextRadius,180deg,"Right");
    engrave(tpa,TravelZ,PlotZ);
    TextRadius -= TextLeading;
    pz -= 0.10mm;
    }
    }
    if (1) {
    comment("Feedrate variations begin");
    TextRadius = OuterRad;
    ps = 250mm;
    repeat(NumRings ; i) {
    comment(" speed: " + to_string(ps) + "/min");
    feedrate(ps);
    ts = "Speed: " + to_string(ps) + "/min at " + to_string(PlotZ);
    tp = scale(typeset(ts,TextFont),TextSize);
    tpa = ArcText(tp,DiskCenter,TextRadius,5deg,"Left");
    engrave(tpa,TravelZ,PlotZ);
    TextRadius -= TextLeading;
    ps += 250mm;
    }
    }
    if (1) {
    comment("Off-center text arcs begin");
    feedrate(TextSpeed);
    tc = [-40mm/sqrt(2),-40mm/sqrt(2)]; // center point
    r = 3mm;
    s = [0.5mm,0.5mm];
    ts = "Radius: " + to_string(r) + " Size: " + to_string(s);
    tp = scale(typeset(ts,TextFont),s);
    tpa = ArcText(tp,tc,r,0deg,"Center");
    engrave(tpa,TravelZ,PlotZ);
    r = 5mm;
    s = [1.0mm,1.0mm];
    ts = "Radius: " + to_string(r) + " Size: " + to_string(s);
    tp = scale(typeset(ts,TextFont),s);
    tpa = ArcText(tp,tc,r,0deg,"Center");
    engrave(tpa,TravelZ,PlotZ);
    r = 8mm;
    s = [1.5mm,1.5mm];
    ts = "Radius: " + to_string(r) + " Size: " + to_string(s);
    tp = scale(typeset(ts,TextFont),s);
    tpa = ArcText(tp,tc,r,0deg,"Center");
    engrave(tpa,TravelZ,PlotZ);
    r = 15mm;
    s = [3.0mm,3.0mm];
    ts = "Radius: " + to_string(r) + " Size: " + to_string(s);
    tp = scale(typeset(ts,FONT_HSCRIPT_2),s);
    tpa = ArcText(tp,tc,r,0deg,"Center");
    engrave(tpa,TravelZ,PlotZ);
    }
    if (1) {
    comment("Attribution begins");
    feedrate(TextSpeed);
    tp = scale(typeset("Ed Nisley – KE4ZNU – softsolder.com",TextFont),TextSize);
    tpa = ArcText(tp,DiskCenter,15mm,0deg,"Center");
    engrave(tpa,TravelZ,PlotZ);
    tp = scale(typeset("Engraving Test Disc",TextFont),TextSize);
    tpa = ArcText(tp,DiskCenter,15mm,180deg,"Center");
    engrave(tpa,TravelZ,PlotZ);
    }
    goto([-,-,SafeZ]);
    goto([0mm,0mm,-]);
    comment("Done!");
    #!/bin/bash
    # Engraving test pattern generator
    # Ed Nisley KE4ZNU – 2019-08
    Diameter='OuterDia=116mm'
    Flags='-P 3 –pedantic'
    # Set these to match your file layout
    LibPath='/opt/gcmc/library'
    Prolog='/mnt/bulkdata/Project Files/CNC 3018-Pro Router/Patterns/gcmc/prolog.gcmc'
    Epilog='/mnt/bulkdata/Project Files/CNC 3018-Pro Router/Patterns/gcmc/epilog.gcmc'
    Script='/mnt/bulkdata/Project Files/CNC 3018-Pro Router/Patterns/Engraving Test.gcmc'
    ts=$(date +%Y%m%d-%H%M%S)
    fn='TestPattern_'${ts}'.ngc'
    echo Output: $fn
    rm -f $fn
    echo "(File: "$fn")" > $fn
    /opt/gcmc/src/gcmc -D $Diameter $Flags \
    –include "$LibPath" –prologue "$Prolog" –epilogue "$Epilog" \
    "$Script" >> $fn