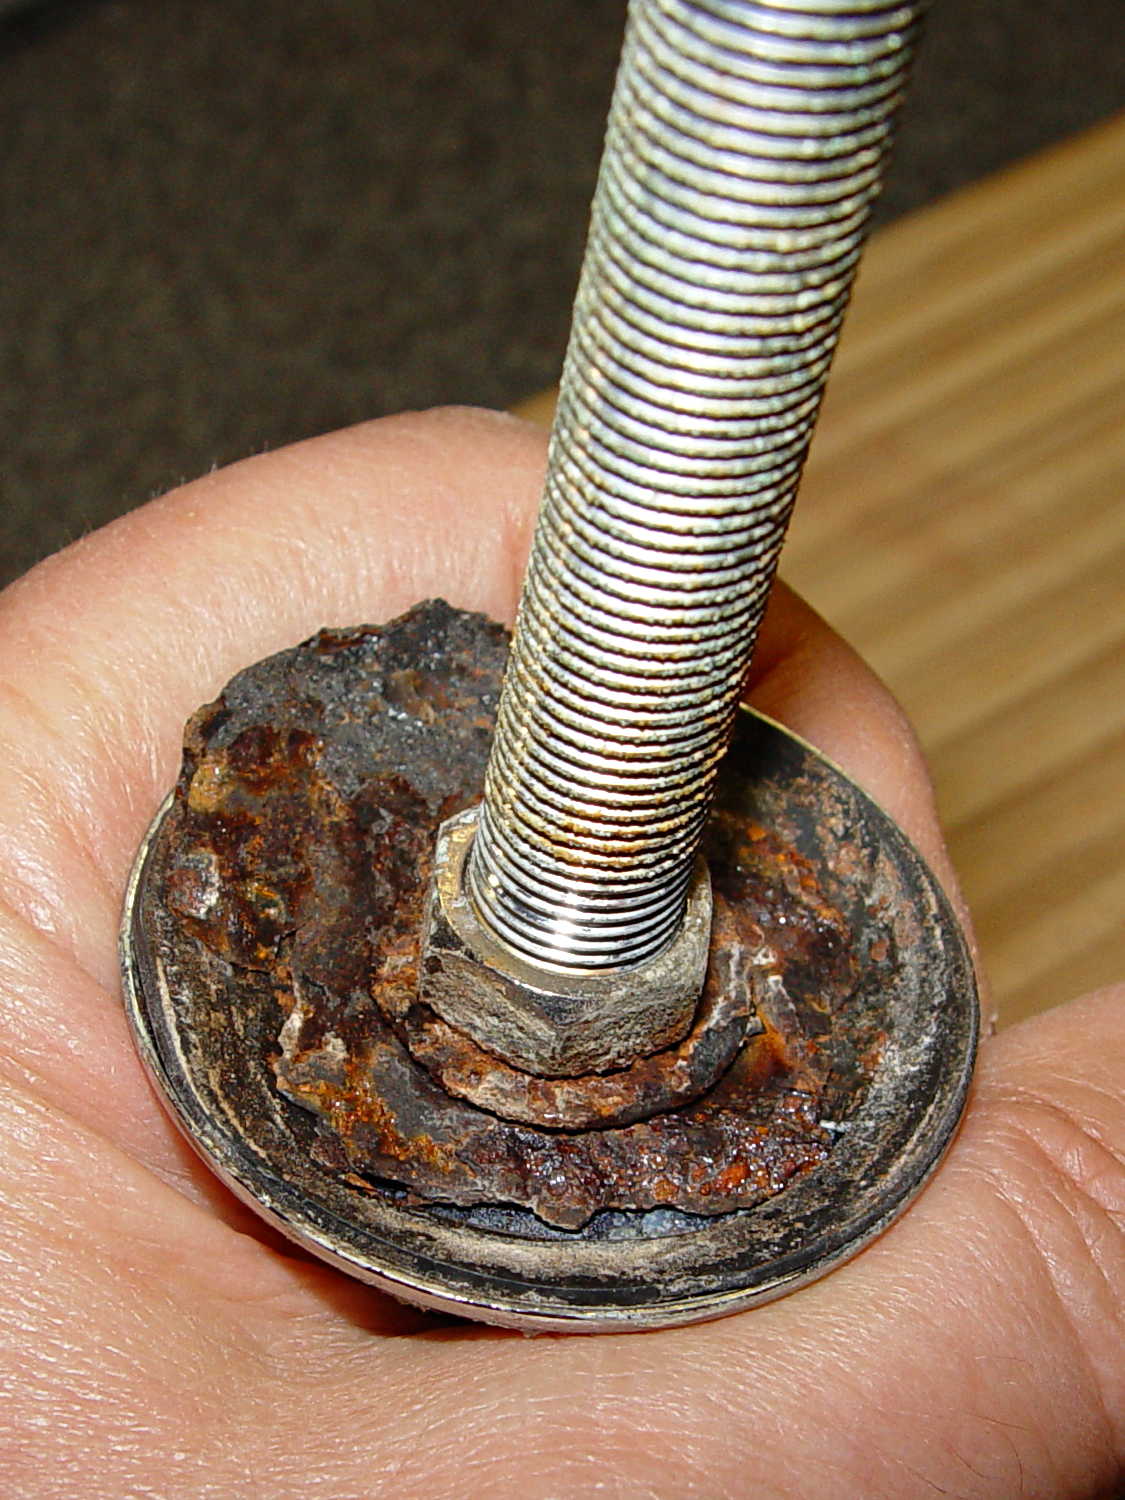
The kitchen sink has a small faucet that used to connect directly to the well out back, but now delivers town water from a line bypassing the water softener. The large steel washer below the sink deck has been shedding rust for a while and finally disintegrated:
Well, this is a perfect application for plastic, not steel, so I conjured up a pair of disks:
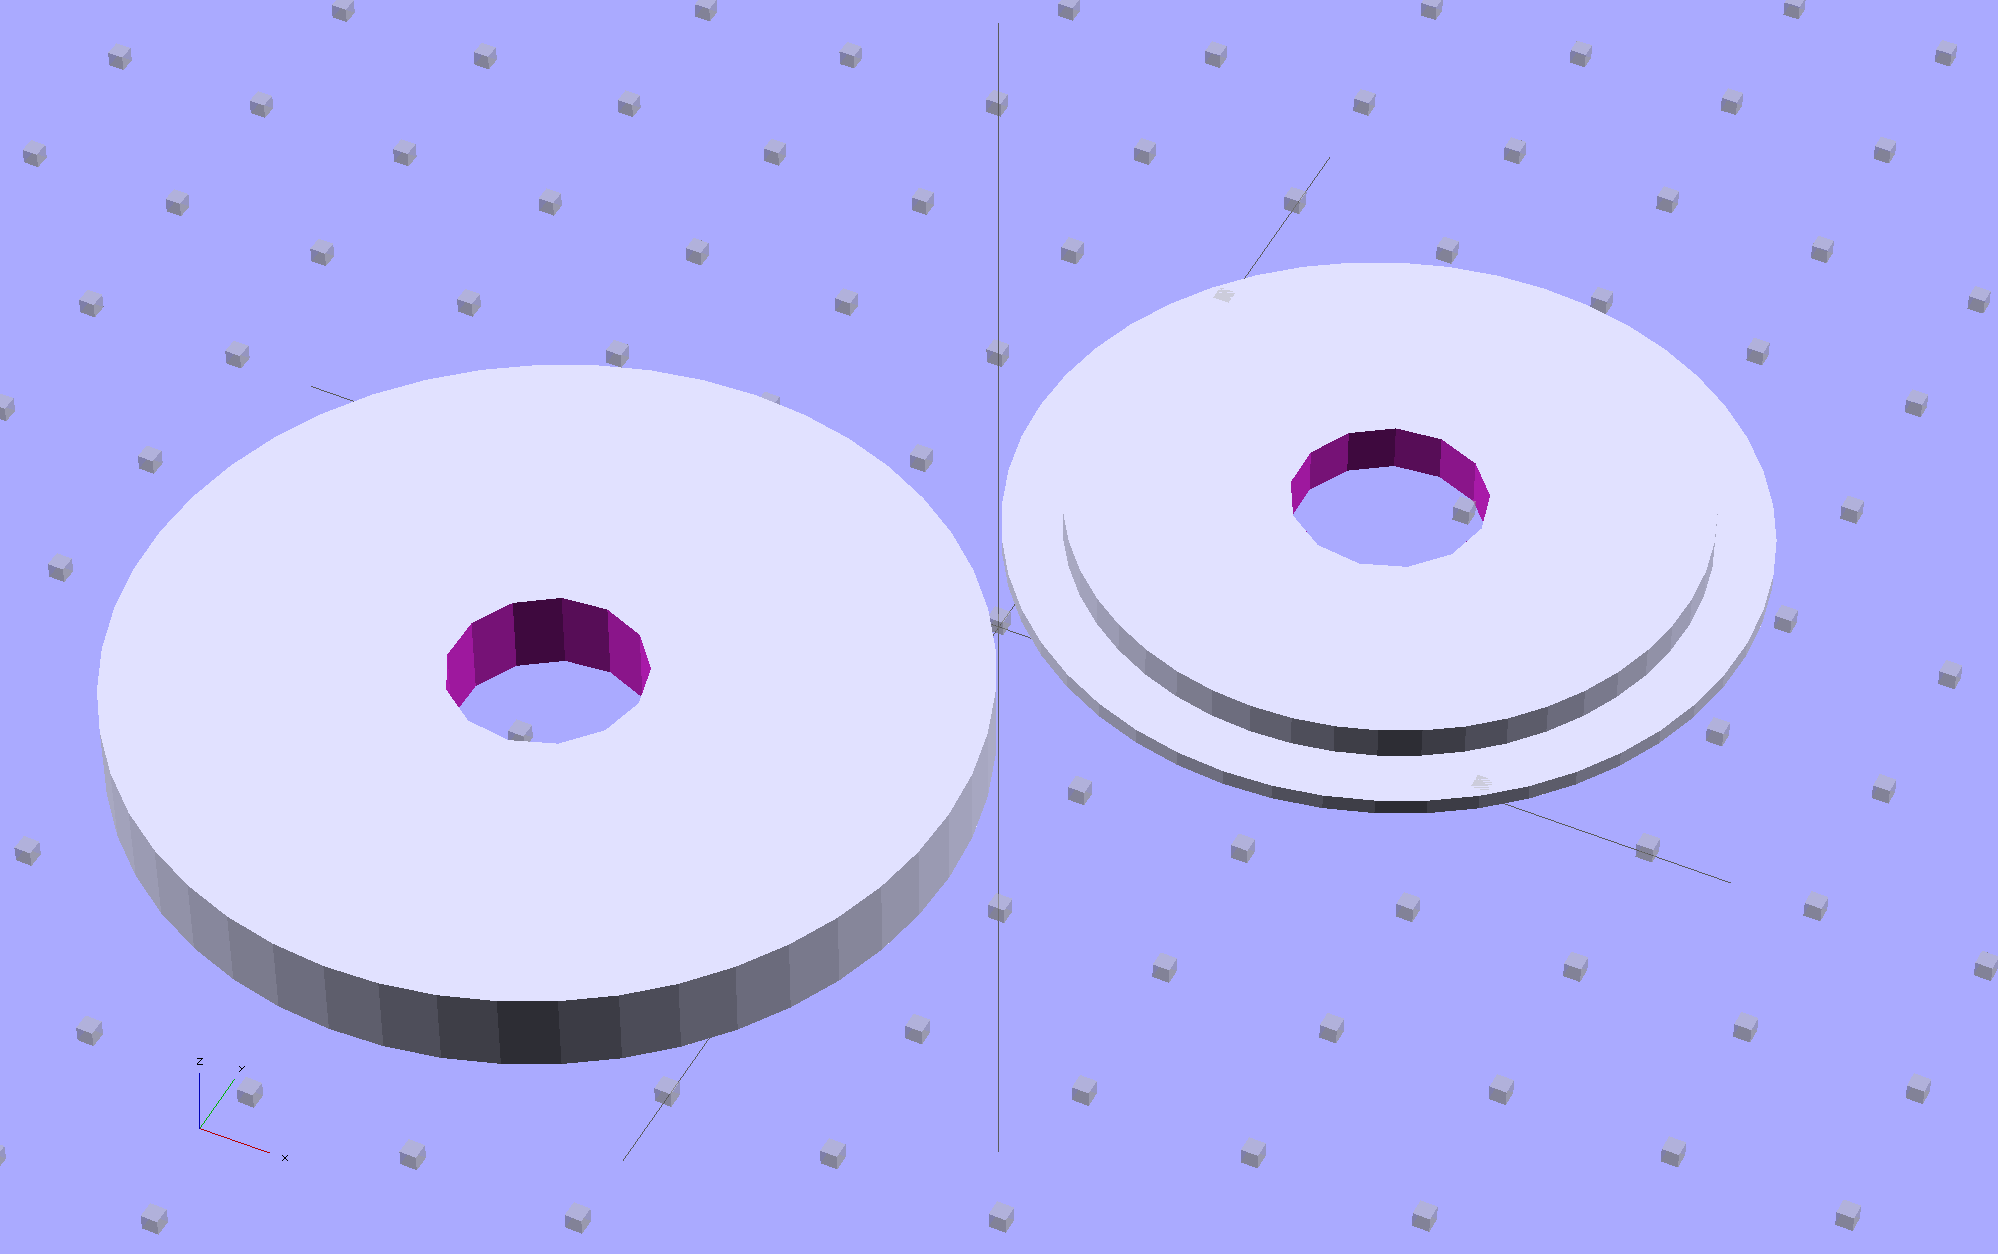
The large flat one goes below the sink deck in place of the steel washer and the smaller part of the stepped disk fits inside the deck opening to stabilize the faucet:

The two dark rings bracketing the deck between the orange plastic disks represent a pair of gaskets / washers / seals cut from 1 mm rubber sheet with a straight razor toting compass:
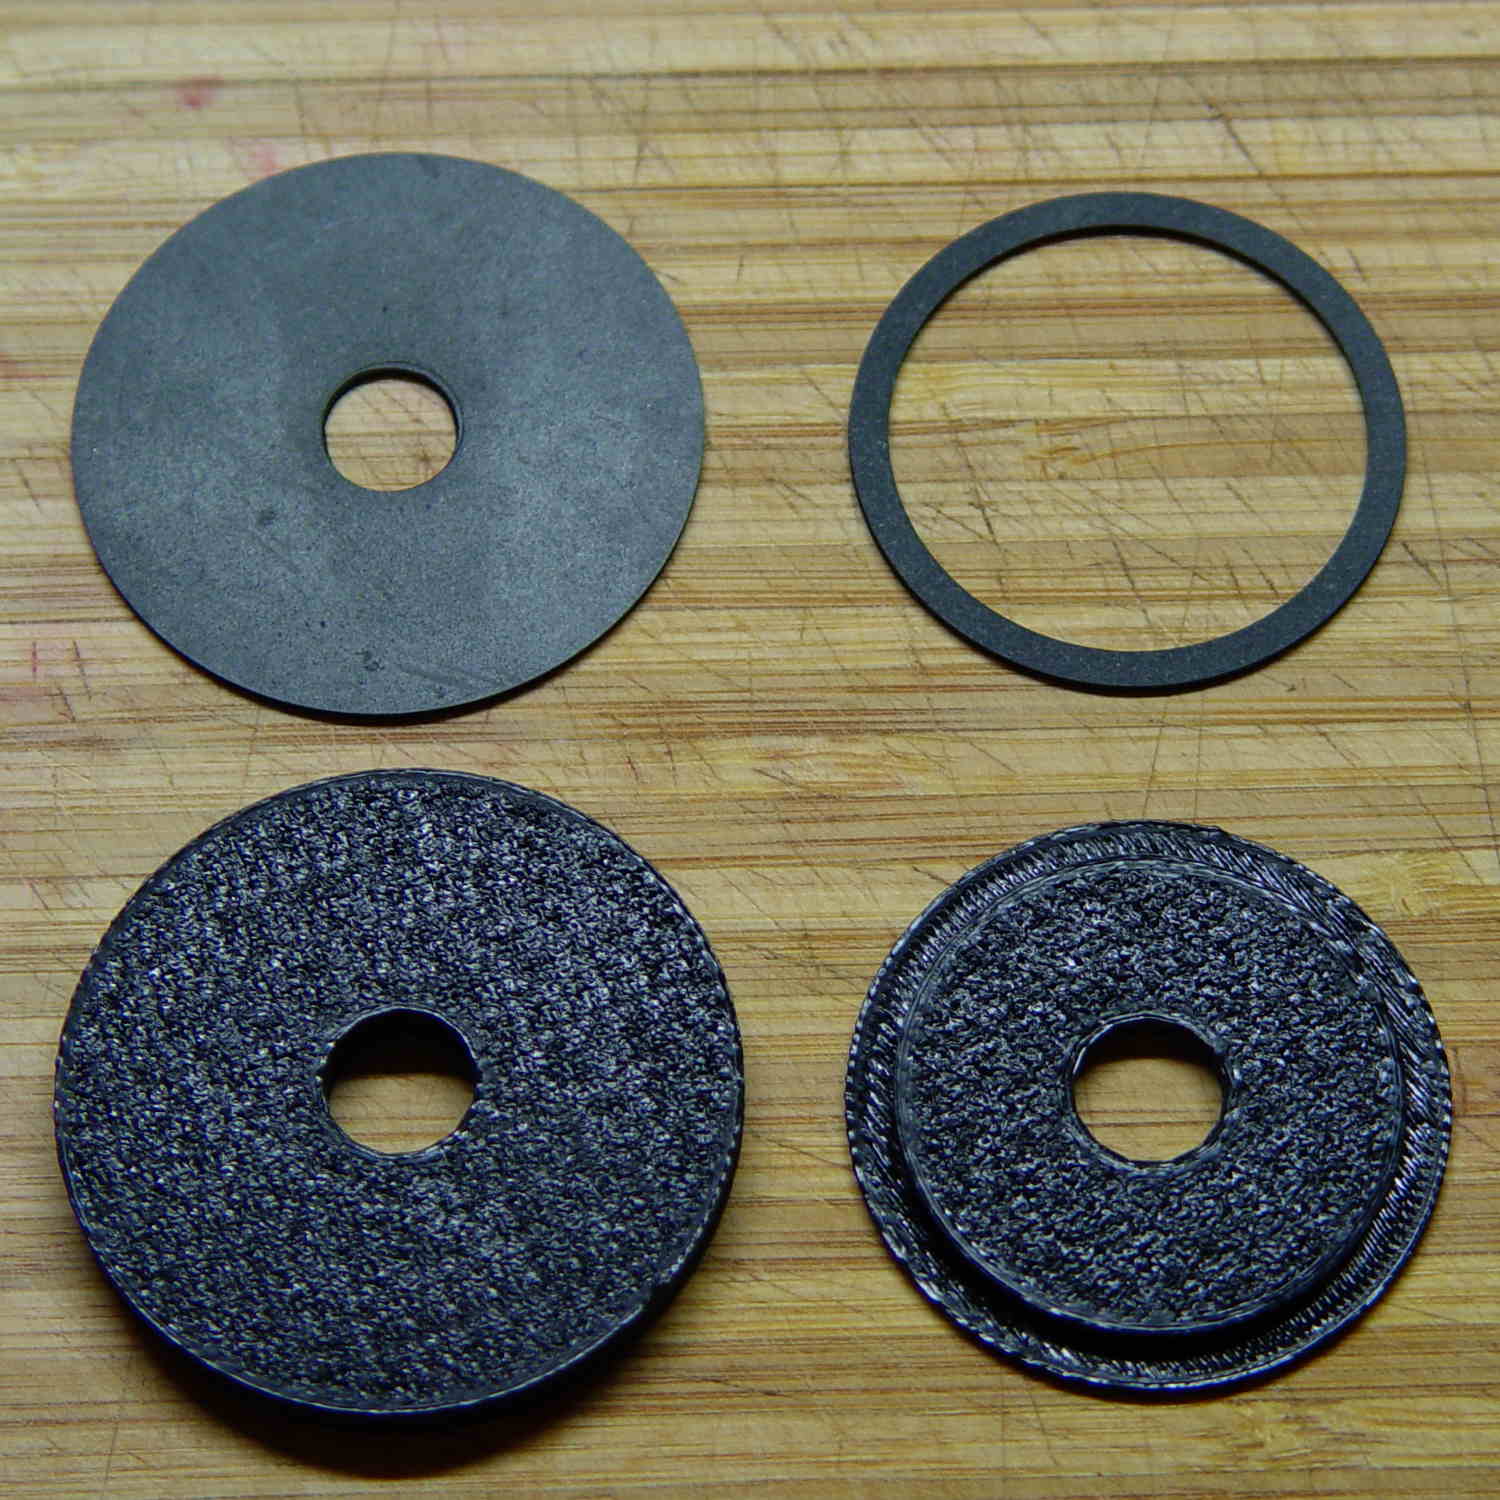
Just for fun, I used Slic3r’s Hilbert Curve top and bottom fill pattern. It produces a nice, grainy texture that feels appropriate for anything needing a non-slip grip (at least on the top, as the bottom surface is glass-smooth).
Everything stacks up thusly, with the top dark ring representing a rubber seal that came with the faucet:

It looks about the same in real life, albeit minus all the colors:
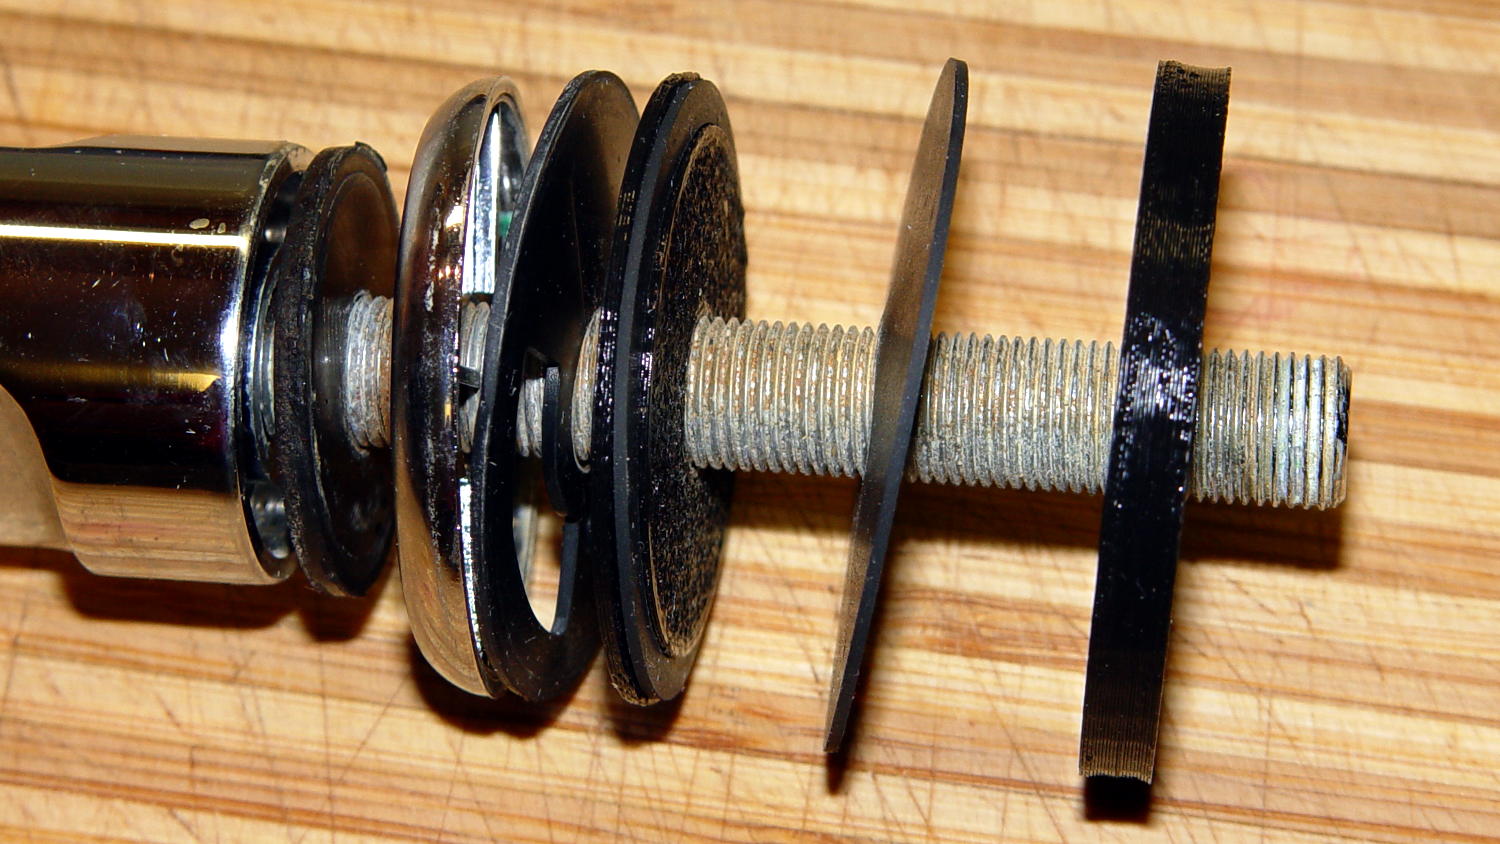
The black plastic and black rubber blend together and vanish amid all the chrome:

Alas, when I turned the water on, Mary said “That doesn’t sound right…” at about the same time I discovered a fine mist under the sink. See if you can spot the problem:
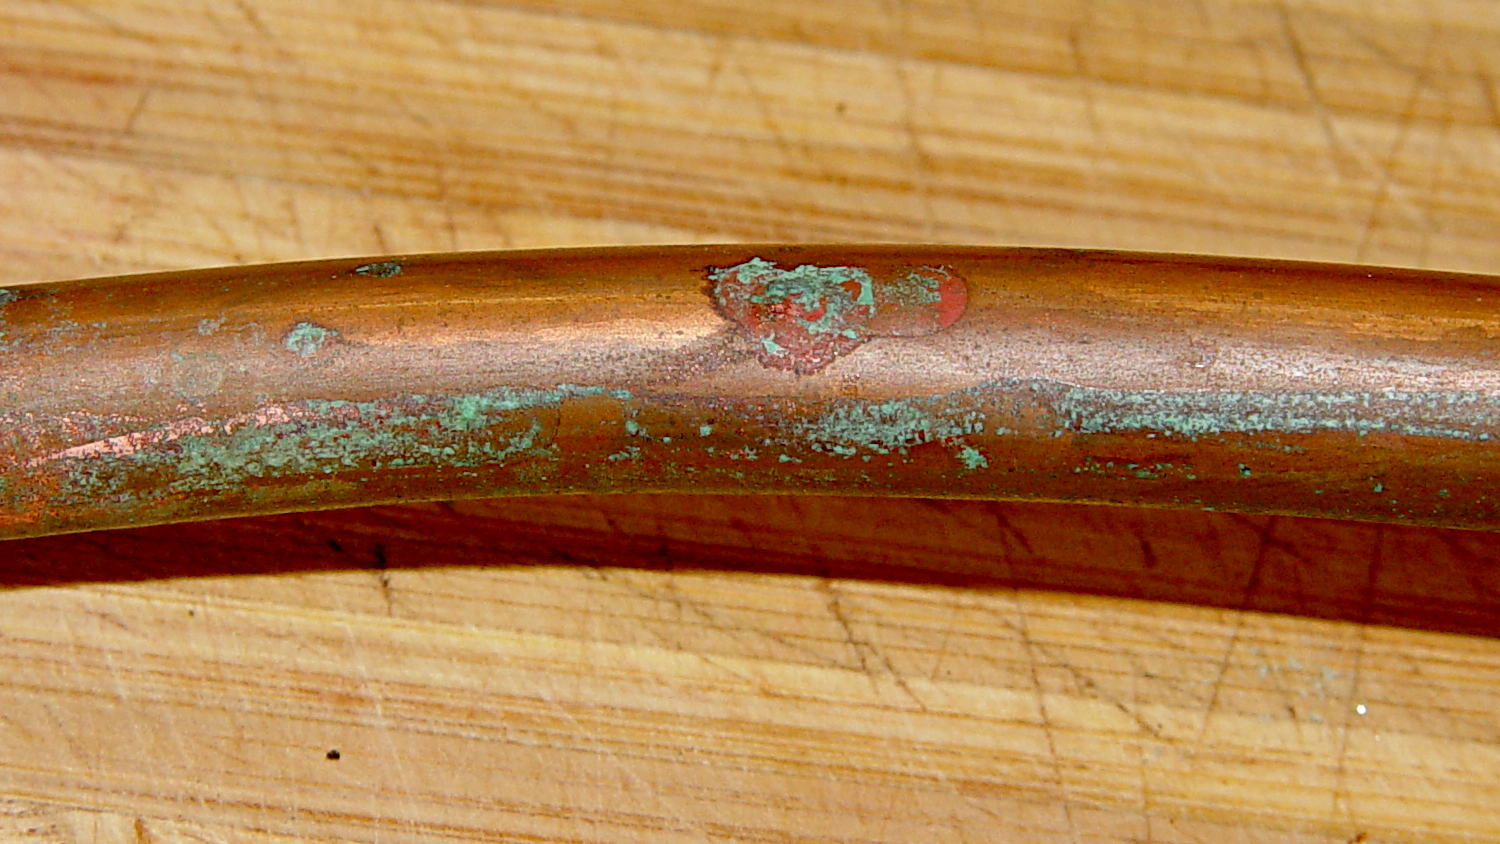
A shined-up view should make it obvious:

A trip to the precious metals aisle of the Big Box Home Repair Store produced a roll of 3/8 inch copper tubing, although I should have the stub end of that original roll somewhere in the heap. The fitting at the bottom of the faucet turned out to be completely non-standard and I had to re-use it with the new tubing, but it still sealed perfectly.
I hate plumbing jobs. That fix better last for another decade…
The OpenSCAD source code:
// Sink faucet bottom seal
// Ed Nisley KE4ZNU - Oct 2013

Layout = "Assemble";				// Build Show Upper Lower Gasket

Plastic = "Orange";
Rubber = "DarkSlateGray";

//- Extrusion parameters - must match reality!

ThreadThick = 0.25;
ThreadWidth = 0.40;

function IntegerMultiple(Size,Unit) = Unit * ceil(Size / Unit);

Protrusion = 0.1;

HoleWindage = 0.2;

Gap = 10.0;

//- Dimensions

FaucetOD = 32.0;

UpperOD = 44.5;
UpperThick = IntegerMultiple(1.0,ThreadThick);

DeckHoleOD = 37.5;
DeckThick = IntegerMultiple(1.0,ThreadThick);

LowerOD = 50.0;
LowerThick = IntegerMultiple(5.0,ThreadThick);

PipeOD = 11.0;
PipeLength = 50;			// for Show layout

GasketThick = 1.0;
TopGasket = [FaucetOD,PipeOD,GasketThick];
MidGasket = [UpperOD,DeckHoleOD,GasketThick];
BotGasket = [LowerOD,PipeOD,GasketThick];

NumSides = 4*12;

//- Adjust hole diameter to make the size come out right

module PolyCyl(Dia,Height,ForceSides=0) {			// based on nophead's polyholes

  Sides = (ForceSides != 0) ? ForceSides : (ceil(Dia) + 2);

  FixDia = Dia / cos(180/Sides);

  cylinder(r=(FixDia + HoleWindage)/2,h=Height,$fn=Sides);
}

//- Put peg grid on build surface

module ShowPegGrid(Space = 10.0,Size = 1.0) {

  RangeX = floor(100 / Space);
  RangeY = floor(125 / Space);

	for (x=[-RangeX:RangeX])
	  for (y=[-RangeY:RangeY])
		translate([x*Space,y*Space,Size/2])
		  %cube(Size,center=true);

}

module UpperDisk() {
	difference() {
		union() {
			cylinder(r=UpperOD/2,h=UpperThick,$fn=NumSides);
			cylinder(r=DeckHoleOD/2,h=(DeckThick + UpperThick + GasketThick),$fn=NumSides);
		}
		translate([0,0,-Protrusion])
			PolyCyl(PipeOD,(DeckThick + UpperThick + GasketThick + 2*Protrusion));
	}
}

module LowerDisk() {
	difference() {
		cylinder(r=LowerOD/2,h=LowerThick,$fn=NumSides);
		translate([0,0,-Protrusion])
			PolyCyl(PipeOD,(LowerThick + 2*Protrusion));
	}
}

module MakeGasket(Gasket=[10,5,1],Color=Rubber) {
	color(Color)
		difference() {
			cylinder(r=Gasket[0]/2,h=Gasket[2]);
			translate([0,0,-Protrusion])
				PolyCyl(Gasket[1],(Gasket[2] + 2*Protrusion));
		}

}

module SinkDeck() {
	color("LightSlateGray")
		difference() {
			translate([-LowerOD,-LowerOD,0])
				cube([2*LowerOD,2*LowerOD,DeckThick]);
			translate([0,0,-DeckThick])
				cylinder(r=DeckHoleOD/2,h=3*DeckThick);
		}

}

//- Build it

ShowPegGrid();

if (Layout == "Upper")
	UpperDisk();

if (Layout == "Lower")
	LowerDisk();

if (Layout == "Gasket")
	MakeGasket(MidGasket);

if (Layout == "Show") {
	color(Plastic)
	translate([0,0,(UpperThick + DeckThick + Gap)])
		rotate([180,0,0])
			UpperDisk();

	color(Plastic)
	translate([0,0,-(Gap + LowerThick)])
		LowerDisk();

	color("Yellow",0.25)
		translate([0,0,-PipeLength/2])
			PolyCyl(0.9*PipeOD,PipeLength,NumSides);

	color("DarkSlateGray")
		difference() {
			translate([0,0,3*Gap/2])
				cylinder(r=FaucetOD/2,h=GasketThick);
			translate([0,0,-25])
				cylinder(r=PipeOD/2,h=50);
		}

	translate([0,0,3*Gap/2])
		MakeGasket(TopGasket);

	translate([0,0,-DeckThick])
		SinkDeck();

	translate([0,0,Gap/2])
		MakeGasket(MidGasket);

	translate([0,0,-Gap/2])
		MakeGasket(BotGasket);

}

if (Layout == "Assemble") {
	color(Plastic)
	translate([0,0,(UpperThick + GasketThick)])
		rotate([180,0,0])
			UpperDisk();

	color(Plastic)
	translate([0,0,-(LowerThick + DeckThick + GasketThick)])
		LowerDisk();

	color("Yellow",0.25)
		translate([0,0,-PipeLength/2])
			PolyCyl(PipeOD,PipeLength,NumSides);

	translate([0,0,-DeckThick])
		SinkDeck();

	color("DarkSlateGray")
		difference() {
			translate([0,0,3*Gap/2])
				cylinder(r=FaucetOD/2,h=GasketThick);
			translate([0,0,-25])
				cylinder(r=PipeOD/2,h=50);
		}

	translate([0,0,3*Gap/2])
		MakeGasket(TopGasket);

	MakeGasket(MidGasket);

	translate([0,0,-(DeckThick + GasketThick)])
		MakeGasket(BotGasket);

}

if (Layout == "Build") {
	translate(0.75*[UpperOD,UpperOD,0]/2)
		UpperDisk();
	translate(0.75*[-LowerOD,-LowerOD,0]/2)
		LowerDisk();
}
As a reward for being the type of person who reads all the way to the end, yes, that’s a riff on Poke Salad Annie.