Saw this after fat-fingering my PIN at a drive-up ATM:
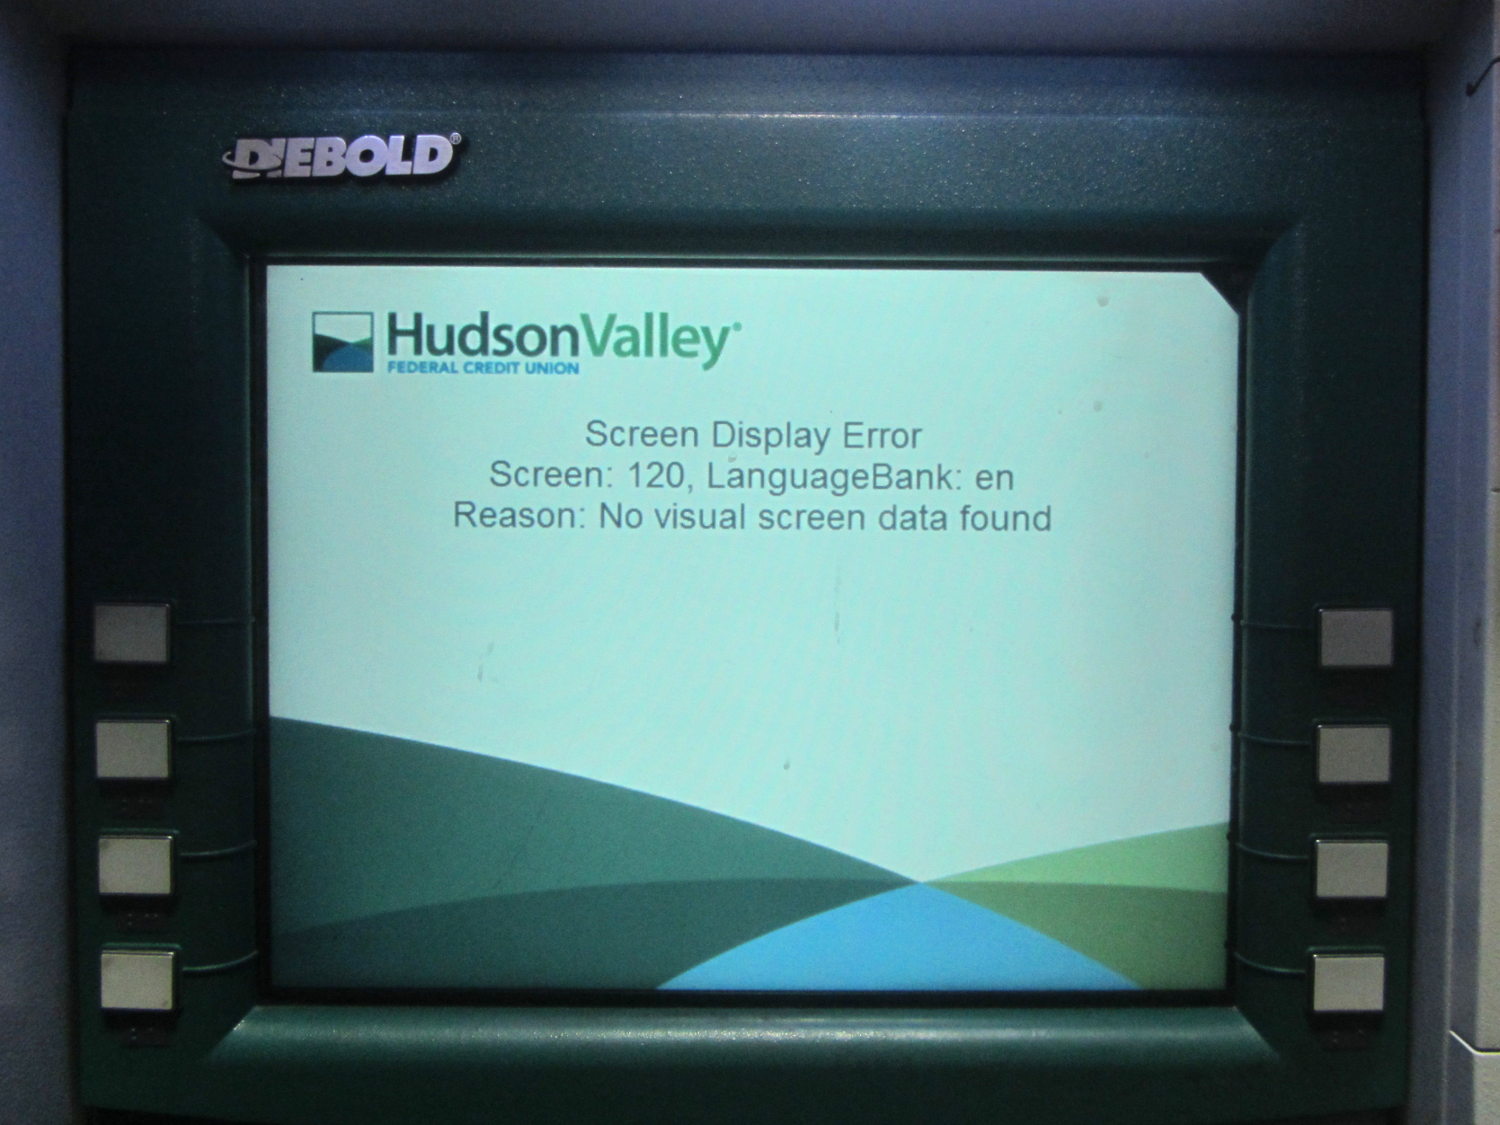
That’s off-putting, isn’t it?
The Smell of Molten Projects in the Morning
Ed Nisley's Blog: Shop notes, electronics, firmware, machinery, 3D printing, laser cuttery, and curiosities. Contents: 100% human thinking, 0% AI slop.
Saw this after fat-fingering my PIN at a drive-up ATM:
That’s off-putting, isn’t it?
We recently had one of those rare “Get the fuck off the road” incidents on Raymond. To set the stage, we’re on our way for groceries and I’m towing the trailer.
The rear view shows the second car behind us veering far to the right side of the lane, trying to see around the car ahead of him, with much blowing of horn:

The big GMC had been following us at a reasonable distance from the Juliet roundabout as we trundled along Raymond at about 12 mph, riding out of the Door Strike Zone for well and good reason.
The GMC passed us at the end of the median, which let the impatient driver zoom up next to us. You can’t hear the horn that will blow as he pulls up next to me:

Our usual route takes us into Davis St, so Mary’s already leaning into the right turn. I think he intended to go straight on Raymond for at least another block to the arterial, but he made an abrupt right turn into Davis St directly in front of me:

Perhaps that’s to Teach Us A Lesson after all the horn-blowing?
I always ride behind Mary and slightly to her left, so that if / when bad shit goes down, I can bring it down on me, rather than her. In this case, she was safely beyond what was about to happen:

The wide-angle lens is deceiving, as I’m less than three feet from the car and closing rapidly; I’m obviously not turning as sharply as he expected and I’m not slowing to avoid a collision. There’s a parked car just ahead of Mary, to her right, and her path is as far to the right as it can get.
He apparently realized that Teaching Me A Lesson would produce a nasty scuff on the side of his shiny black car and, perhaps having spotted the helmet camera, a nasty loss in the ensuing insurance squabble. He also wasn’t willing to swing wide, head-on into the oncoming lane of Davis, so he stopped dead in the intersection:

That’s fine with me.
I continued wide past the parked car on Davis. He accelerated hard, decided, once again, not to ram me from behind, turned abruptly left into the parking lot, and proceeded to the eastbound arterial:

I’m stopped in that picture to aim the helmet camera backwards over my left shoulder. The car behind the white one is parked near the intersection, just to my right in the previous picture.
As nearly as I could make out, he shouted, in addition to the usual obscenities, “Roads are for automobiles!”, a surprisingly articulate word under the circumstances. Evidently, he hadn’t noticed NYSDOT’s “Share the Road” signage helpfully posted on the far end of Raymond.
Elapsed time from the Juliet roundabout to the parking lot: 45 seconds.
Maybe he had a cake in the oven?
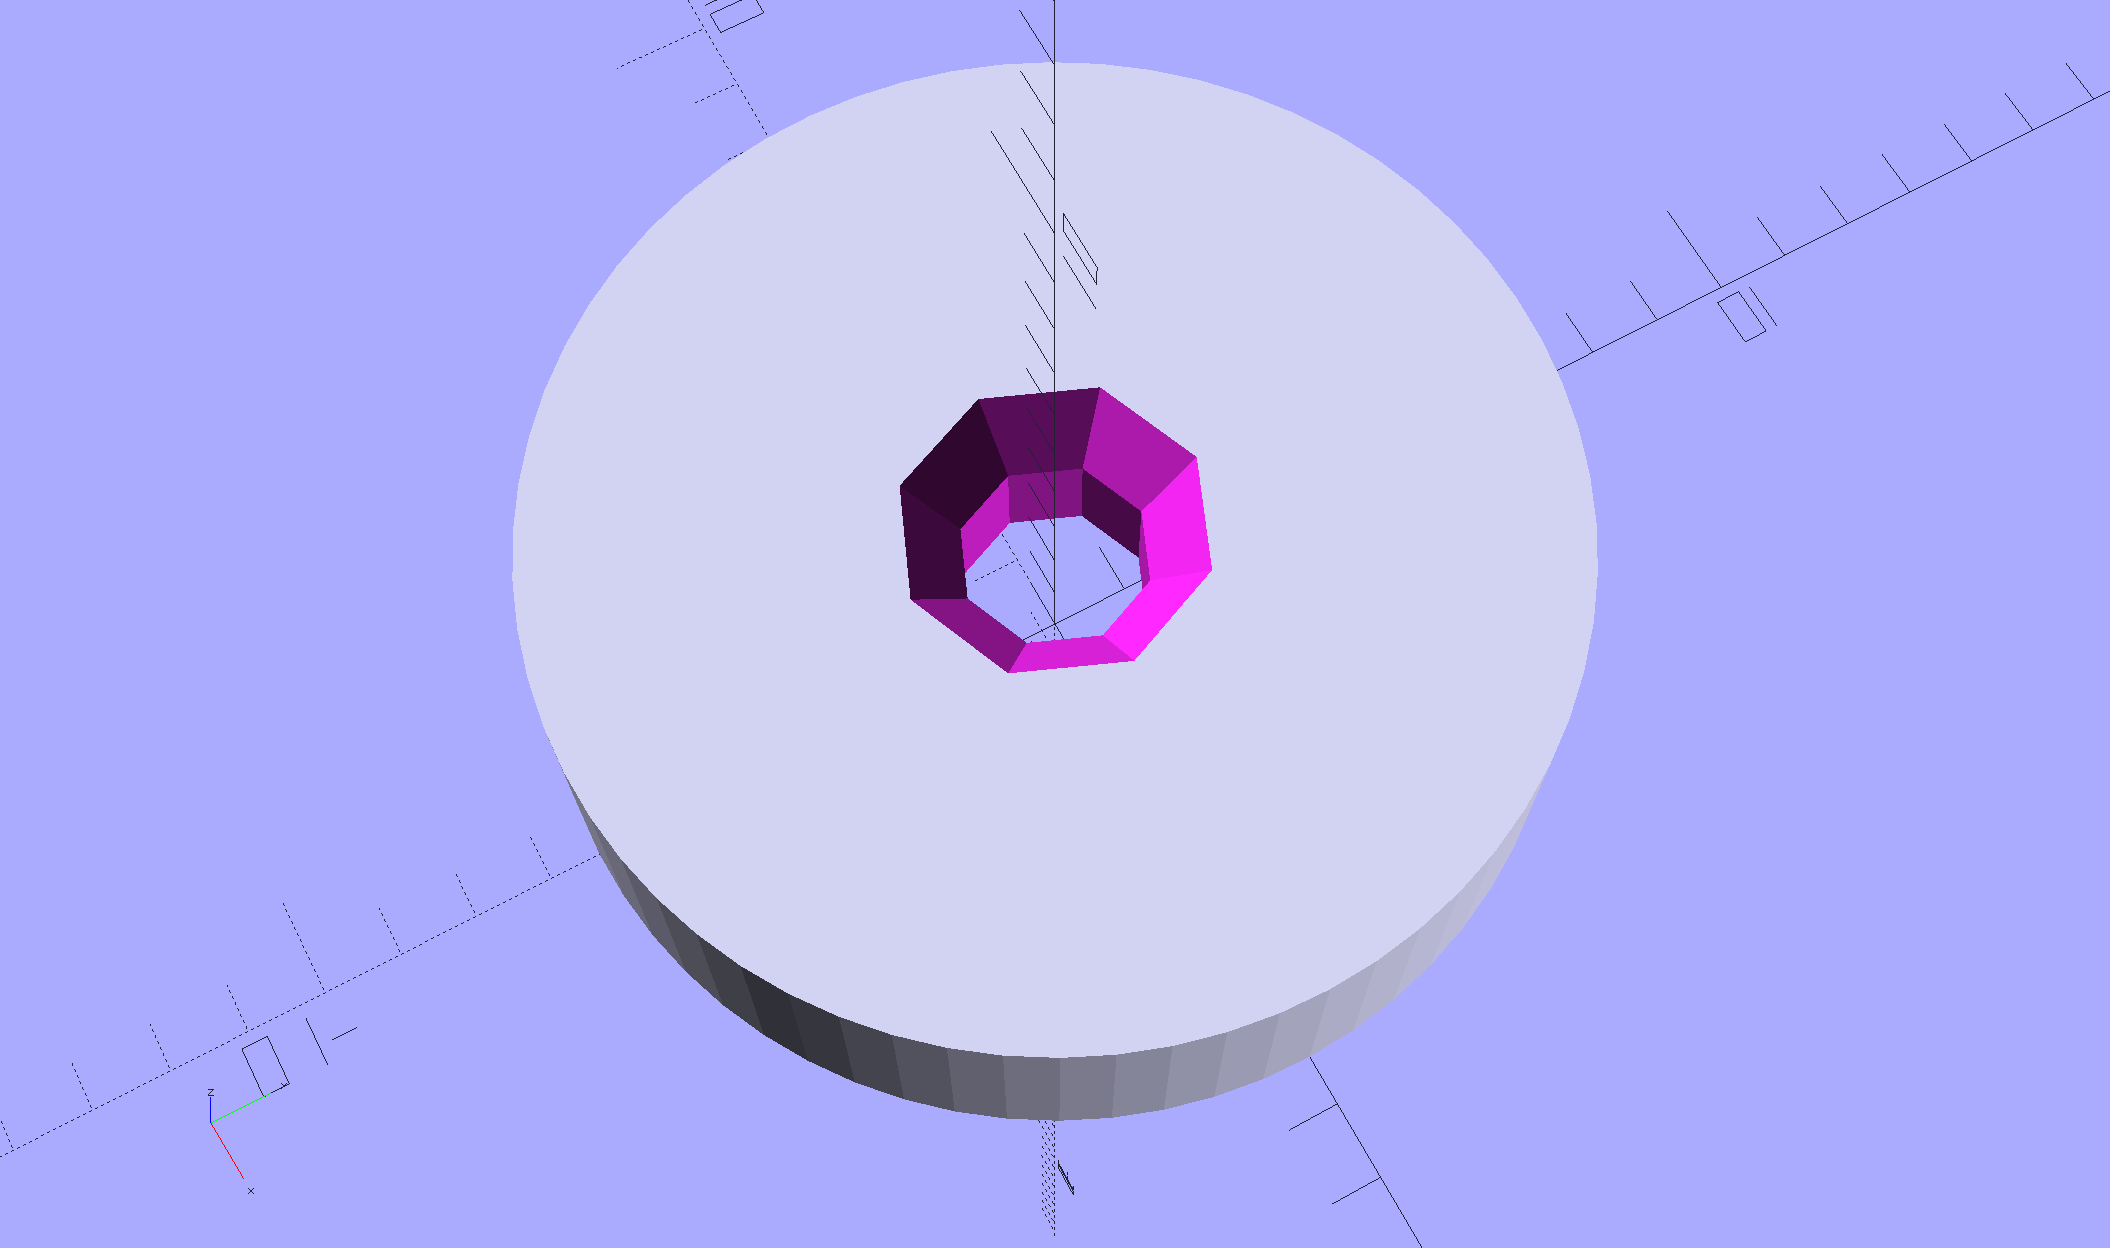
I made the pencil guides to help Mary design ruler quilting patterns, but sometimes she must line up the ruler with a feature on an existing pattern. To that end, we now have a reticle guide:
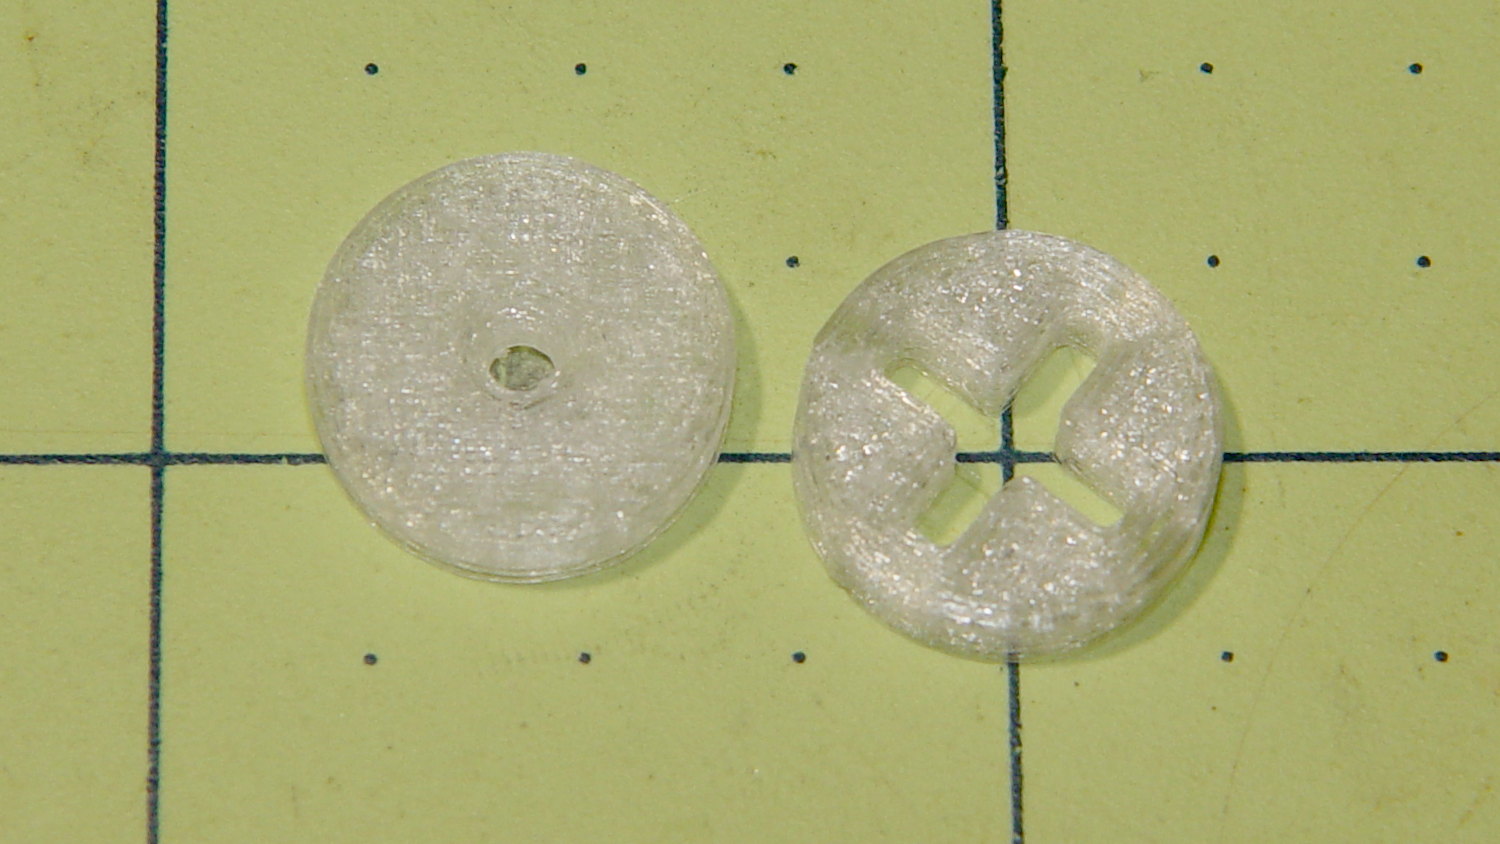
The general idea is that it’s easier to see the pattern on paper through the crosshair than through a small hole. You put the button over a feature, align the reticle, put the ruler against the button, replace it with pencil guide, and away you go.
The solid model looks much more lively than you’d expect:

Printing up a pair of each button produces the same surface finish as before; life is good!
The OpenSCAD source code as a GitHub Gist:
| // Quilting Ruler Adapters | |
| // Ed Nisley KE4ZNU October 2016 | |
| //- Extrusion parameters must match reality! | |
| ThreadThick = 0.25; | |
| ThreadWidth = 0.40; | |
| HoleWindage = 0.2; | |
| Protrusion = 0.1; // make holes end cleanly | |
| inch = 25.4; | |
| function IntegerMultiple(Size,Unit) = Unit * ceil(Size / Unit); | |
| //———- | |
| // Dimensions | |
| ID = 0; | |
| OD = 1; | |
| LENGTH = 2; | |
| Offset = 0.25 * inch; | |
| Template = [2.0,2*Offset,3.0]; | |
| NumSides = 16*4; | |
| HoleSides = 8; | |
| //———————- | |
| // Useful routines | |
| module PolyCyl(Dia,Height,ForceSides=0) { // based on nophead's polyholes | |
| Sides = (ForceSides != 0) ? ForceSides : (ceil(Dia) + 2); | |
| FixDia = Dia / cos(180/Sides); | |
| cylinder(d=(FixDia + HoleWindage),h=Height,$fn=Sides); | |
| } | |
| //———- | |
| // Build them | |
| translate([-Template[OD],0,0]) | |
| difference() { | |
| cylinder(d=Template[OD],h=Template[LENGTH],$fn=NumSides); | |
| translate([0,0,-Template[LENGTH]]) | |
| PolyCyl(Template[ID],3*Template[LENGTH],HoleSides); | |
| translate([0,0,-Protrusion]) | |
| cylinder(d1=2*Template[ID],d2=Template[ID],h=Template[LENGTH]/3 + Protrusion,$fn=HoleSides); | |
| translate([0,0,Template[LENGTH] + Protrusion]) | |
| mirror([0,0,1]) | |
| cylinder(d1=2*Template[ID],d2=Template[ID],h=Template[LENGTH]/3 + Protrusion,$fn=HoleSides); | |
| } | |
| translate([Template[OD],0,0]) | |
| difference() { | |
| cylinder(d=Template[OD],h=Template[LENGTH],$fn=NumSides); | |
| for (a=[45,135]) | |
| rotate(a) | |
| cube([0.70*Template[OD],0.15*Template[OD],3*Template[LENGTH]],center=true); | |
| } | |
This critter has been ravaging the broccoli plants in Mary’s Vassar Farms plot:

Nothing to do but eat, excrete, and procreate in the warm sun:

Life is good!
She can’t bring herself to mash it, as she does with the myriad other critters having no redeeming virtues. Grasshoppers, it seems, have good PR agents.
A hawk, perhaps an immature Red-Tailed, landed on a branch outside the kitchen window while we were eating lunch.
After a minute or so, a squirrel ran up the maple and began taunting (?) the hawk:
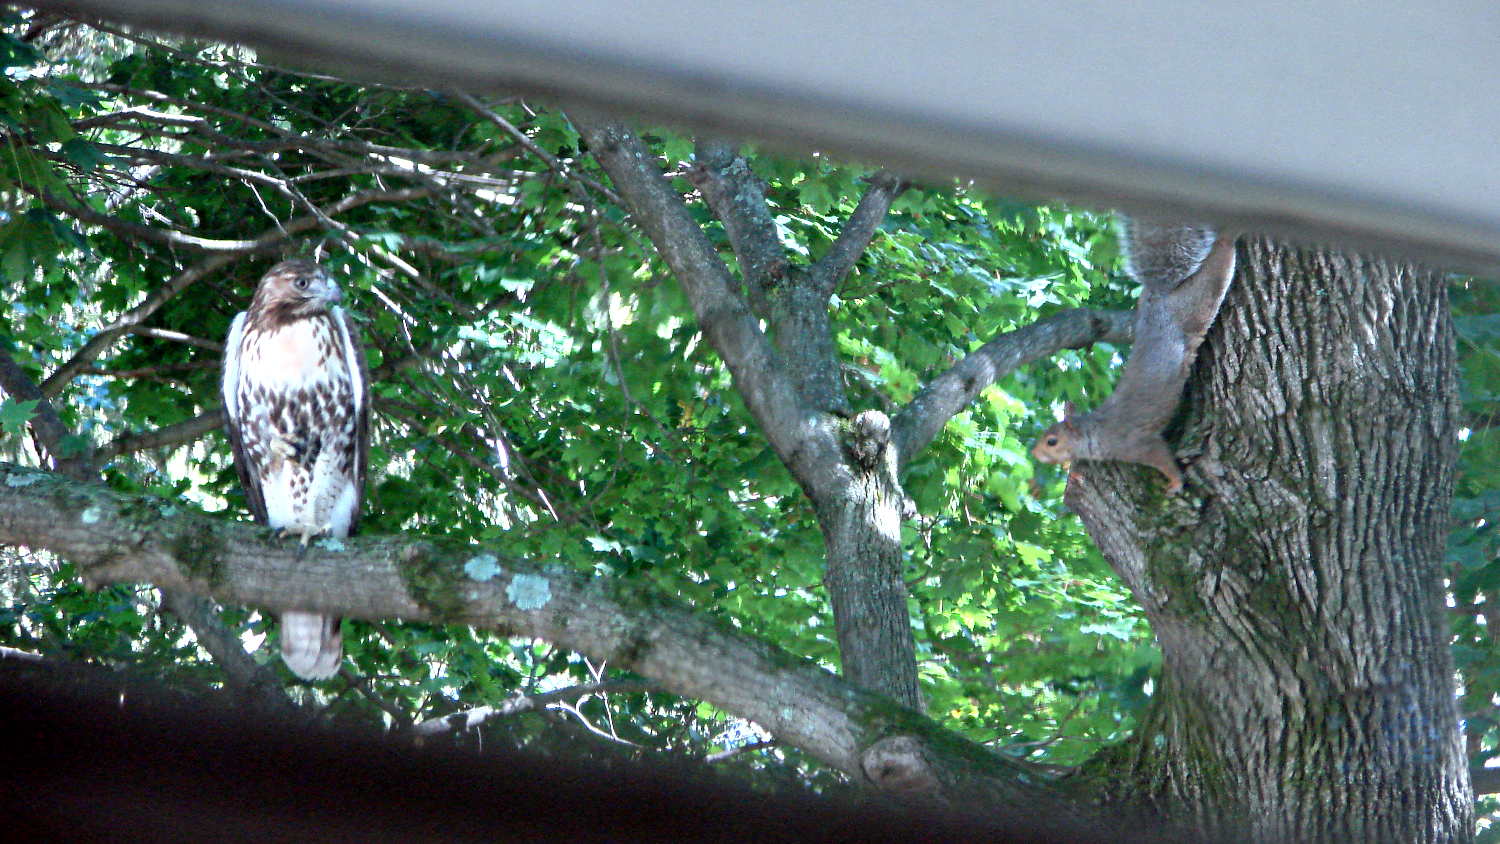
The hawk obviously had no clue what’s going on inside that critter’s little brain:

The squirrel alternated between inching out on the branch, closer each time, and dashing back to the tree trunk, for maybe ten minutes. It eventually reached the rightmost patch of lichen, a foot from the hawk, without suffering any damage, after which it ran down the tree and away. We have no explanation.
Perhaps this is the same squirrel as before? All we know: (over)confidence goeth before gibbage.
Taken with the DSC-H5 near the end of the adventure; it took me a while to deploy the camera. The first picture looks diagonally upward from the kitchen, through three layers of 1950-era glass. The second comes from the back door, zoomed about 10x, with no tele-adapter. Obviously, good color correction didn’t happen here…
The single moving part on my first-generation (2011) Kindle Fire tablet stopped working: the power switch became erratic, to the point where the only dependable way to turn the thing on required the USB charging cable. Obviously not a long-term solution.
Having nothing to lose, I consulted the Internet’s vast steaming pile of advice on how to pop the Kindle’s cover, picked one, and ran with it. Basically, you jam a sharp tool into the end with the speakers, then crack the back off along both sides, leading to this:
Things to note:
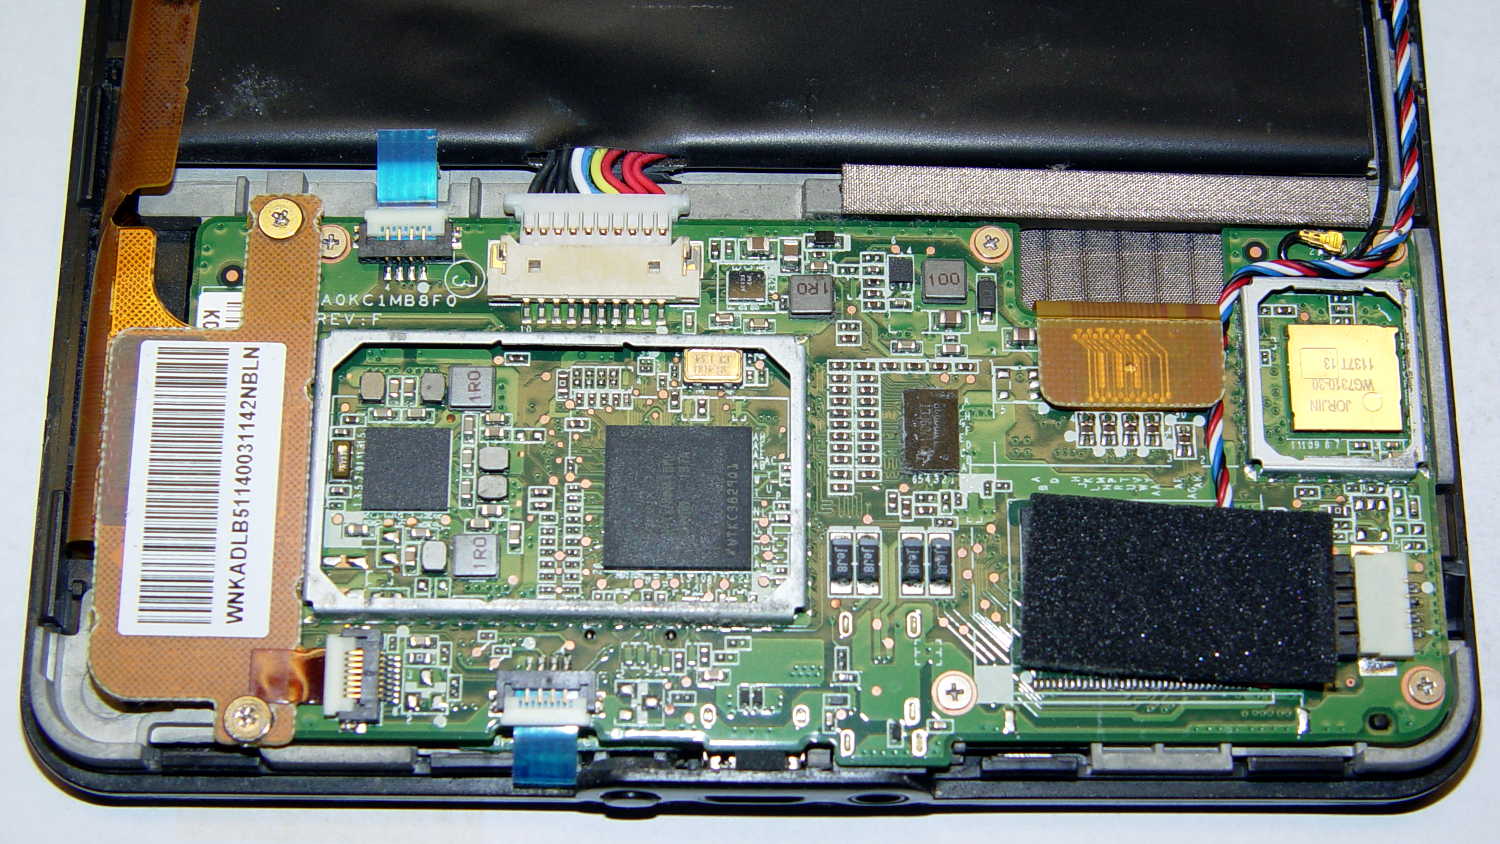
Remove the six obvious screws, pull the battery edge of the board upward, and rotate the whole affair out of the chassis:

Protip: the power switch is not mounted on the tiny PCB (under the ribbon cable with the blue tab) sometimes advertised as the Power Button Board. That tiny PCB suspends an amber/green LED behind the visible button, but a yoke surrounds the LED to transfer the button motion to the power switch soldered to the CPU board. Replacing that board will not cure an erratic power switch; I think the entire CPU board is the FRU.
Fortunately, I can actually see the power switch and know sorta-kinda what to expect.
A bit of awkward multimeter probing showed the switch was defunct, with intermittent action and generally high resistance when pressed. I unsoldered the switch, verified that it didn’t work in isolation, and examined some likely candidates from the Big Box o’ Small Switches:

Some could be made to fit and maybe actually function, with effort ranging from tedious to Really Hard.
Then it occurred to me that maybe, just maybe, I could refurbish / clean / repair the Kindle’s switch contacts. Shaving off the two heat-staked plastic bumps on the front and prying the side latches outward produced an explosion of small parts:
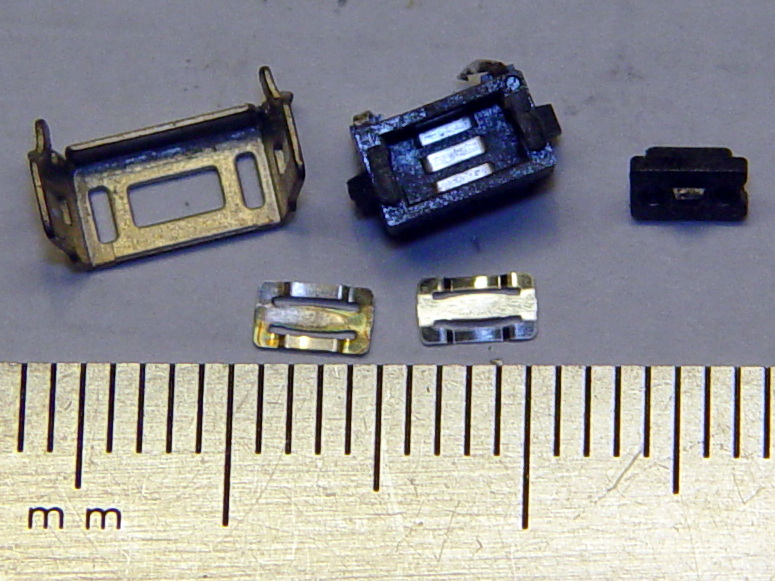
That’s after cleaning the expected grunge from the three contact strips in the body and the innermost of the two (!) buckling-spring contact doodads (bottom left). I scrubbed with the cardboard-ish stem of a cotton swab and, as always, a dot of DeoxIT Red, inserted the unused-and-pristine contact spring doodad (bottom right) first, and reassembled the switch in reverse order.
The metal shell around the body has two locating tabs that fit in two PCB holes, giving the switch positive alignment and good strain relief. The front view shows the three human-scale components amid a sea of 0201 SMD parts:

For completeness, the view from the battery side:

It’s worth noting that you can see right through the 3.5 mm headphone jack, which accounts for the remarkable amount of dust & fuzz I blew out of the chassis. The overall dust sealing isn’t great, but after five years of life in my pocket, I suppose that’s to be expected.
Installing the board requires holding all the cables out of the way (tape the antenna & speaker wires to the battery), aiming the USB connector into its cutout, rotating the battery edge of the board downward, pushing the mesh EMI shield along the battery upward to clear the board edge, not forcing anything, and eventually it slides into place.
Insert cables, latch latches, plug in the battery, snap the rear cover in place, and It Just Works again. The power switch responds to a light touch with complete reliability; it hasn’t worked this well in a year.
Bonus: To my utter & complete astonishment, disconnecting the battery for few hours had no effect on the stored data: it powered up just fine with all the usual settings in place. I expected most of the settings to live in the Flash file system, but apparently nothing permanent lives in RAM.
Take that, entropy!
Mary has been doing Ruler Quilting and wanted a pencil guide (similar to the machine’s ruler foot) to let her sketch layouts before committing stitches to fabric. The general idea is to offset the pencil by 1/4 inch from the edge of the ruler:
That was easy.
Print three to provide a bit of cooling time and let her pass ’em around at her next quilting bee:

Her favorite doodling pencil shoves a 0.9 mm lead through a 2 mm ferrule, so ream the center hole with a #44 drill (86 mil = 2.1 mm) to suit:
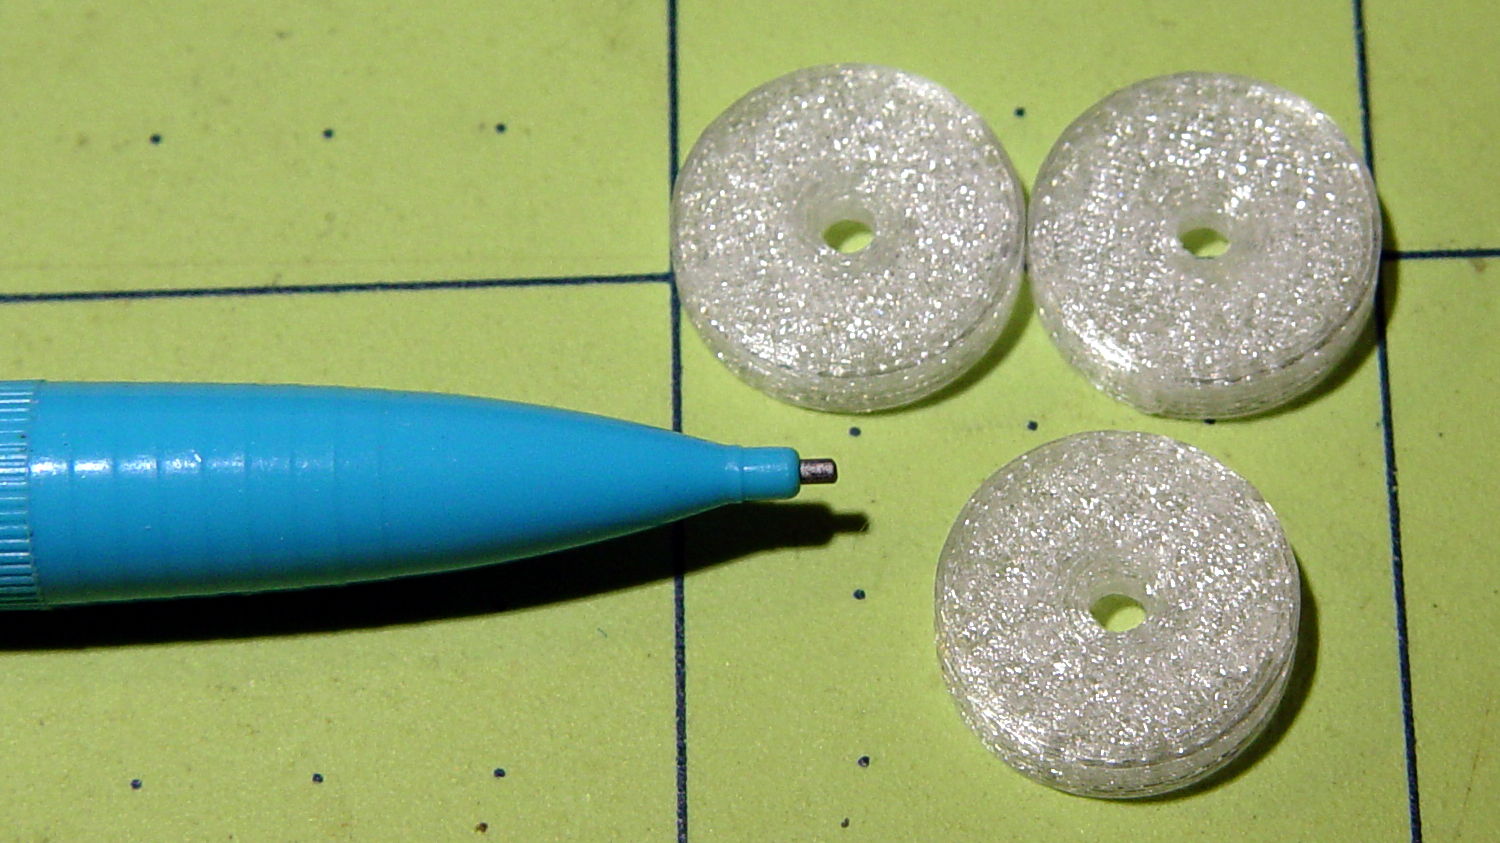
The outer perimeters have 64 facets, an unusually high number for my models, so they’re nice & smooth on the ruler. Even though I didn’t build them sequentially, they had zero perimeter zits and the OD came out 0.500 inch on the dot.
The chamfers guide the pencil point into the hole and provide a bit of relief for the pencil’s snout.
If I had a laser cutter, I could make special rulers for her, too …
The OpenSCAD source code as a GitHub Gist:
| // Quilting Ruler Adapters | |
| // Ed Nisley KE4ZNU October 2016 | |
| //- Extrusion parameters must match reality! | |
| ThreadThick = 0.25; | |
| ThreadWidth = 0.40; | |
| HoleWindage = 0.2; | |
| Protrusion = 0.1; // make holes end cleanly | |
| inch = 25.4; | |
| function IntegerMultiple(Size,Unit) = Unit * ceil(Size / Unit); | |
| //———- | |
| // Dimensions | |
| ID = 0; | |
| OD = 1; | |
| LENGTH = 2; | |
| Offset = 0.25 * inch; | |
| Template = [2.0,2*Offset,3.0]; | |
| NumSides = 16*4; | |
| HoleSides = 8; | |
| //———————- | |
| // Useful routines | |
| module PolyCyl(Dia,Height,ForceSides=0) { // based on nophead's polyholes | |
| Sides = (ForceSides != 0) ? ForceSides : (ceil(Dia) + 2); | |
| FixDia = Dia / cos(180/Sides); | |
| cylinder(d=(FixDia + HoleWindage),h=Height,$fn=Sides); | |
| } | |
| //———- | |
| // Build it | |
| difference() { | |
| cylinder(d=Template[OD],h=Template[LENGTH],$fn=NumSides); | |
| translate([0,0,-Template[LENGTH]]) | |
| PolyCyl(Template[ID],3*Template[LENGTH],HoleSides); | |
| translate([0,0,-Protrusion]) | |
| cylinder(d1=2*Template[ID],d2=Template[ID],h=Template[LENGTH]/3 + Protrusion,$fn=HoleSides); | |
| translate([0,0,Template[LENGTH] + Protrusion]) | |
| mirror([0,0,1]) | |
| cylinder(d1=2*Template[ID],d2=Template[ID],h=Template[LENGTH]/3 + Protrusion,$fn=HoleSides); | |
| } |
