Ed Nisley's Blog: Shop notes, electronics, firmware, machinery, 3D printing, laser cuttery, and curiosities. Contents: 100% human thinking, 0% AI slop.
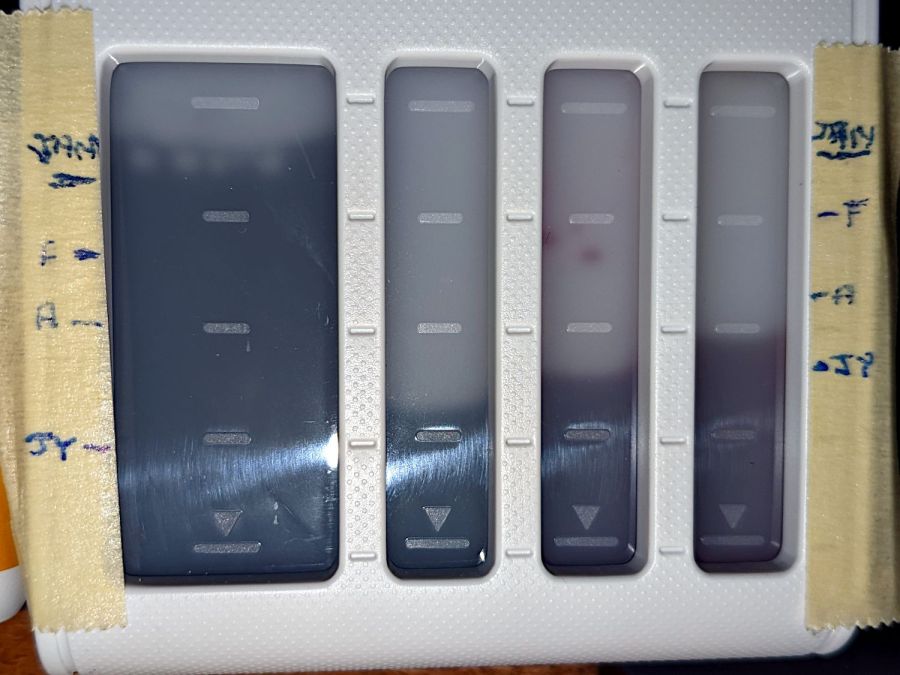
While running some finger-joint test pieces, this happened:
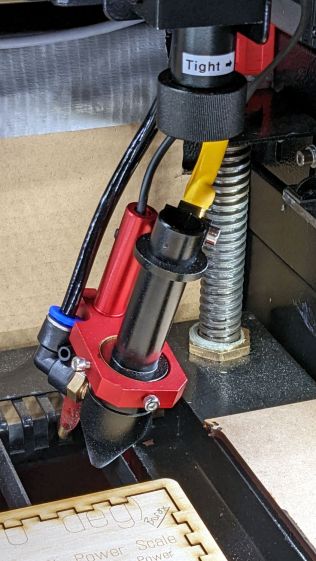
Detached laser lens holder
The knurled ring just below the Tight→ label worked its way loose and released the lens holder tube collet, whereupon the whole affair fell out and dangled on the air hose & wires as the gantry continued to zigzag along the finger pattern.
As is my custom, I was watching the proceedings and managed to poke the controller’s STOP button, which was a mistake. What I should have done was slap the EMERGENCY STOP mushroom switch, because the STOP button just tells the controller to cancel the current action and return to the home position, which resulted in dragging the lens holder across the plywood and platform.
The more typical laser cutter failure seems to be having the controller execute the Halt and Catch Fire instruction, resulting in at least a ruined workpiece, sometimes a ruined laser, and occasionally a serious conflagration.
Lesson learned: practice slapping the Big Red Switch every now and then.
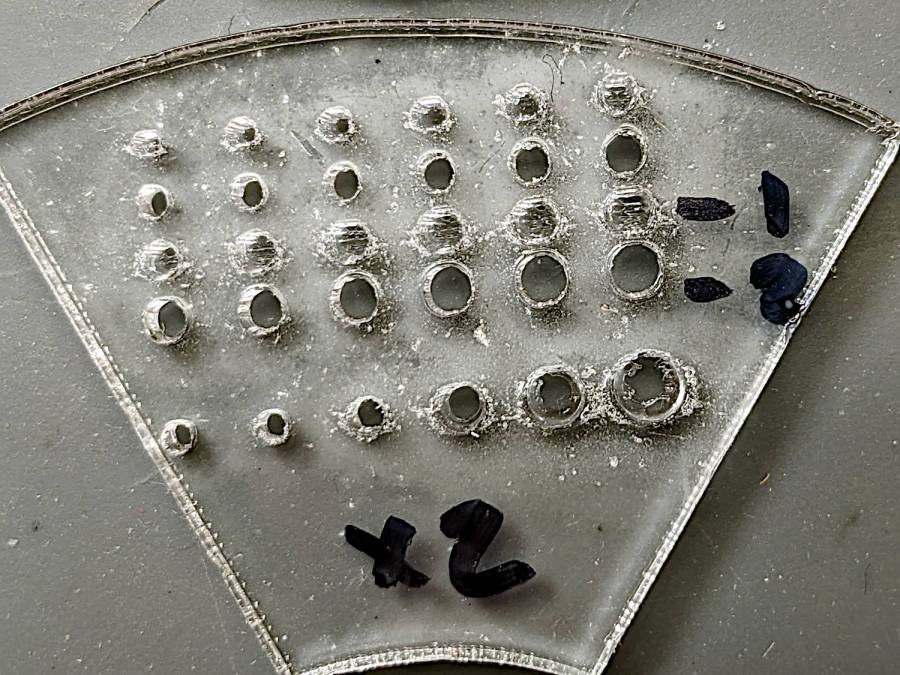
Laser-cutting alignment pin holes in the most recent smashed-glass coaster raised the question of whether it’s feasible to engrave a deep recess around a hole with Good Enough accuracy for things like recessed screw heads.
The test image:
Scan vs cut offset
The top two rows create engraved recesses and cut holes from 1.0 to 1.5 mm and the next two rows run from 1.5 to 2.0 mm. The bottom row has 1.0 mm holes centered in engraved pits from 0.5 mm to 3.0 mm; obviously, the first hole will subsume its pit.
The first pass looked promising, although the edges of the engraved pits seemed ragged:
Scan vs cut alignment – first test
Perhaps the replacement power supply has different timing than the original one?
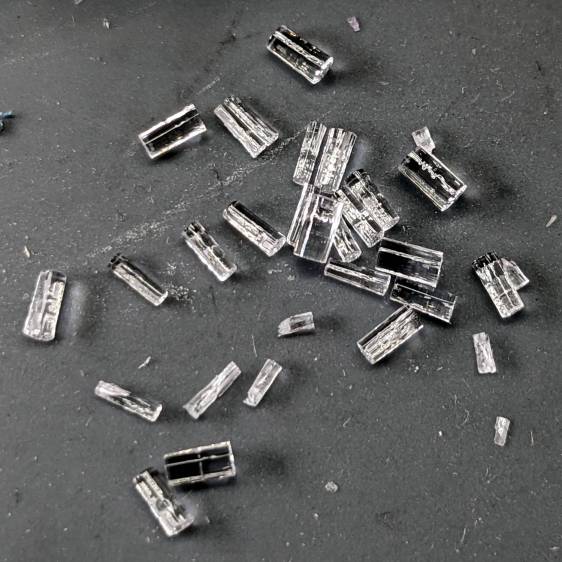
I’m still surprised that the core of a laser-cut hole falls right out of the sheet, right down to a sliver from a 1 mm hole:
Cut hole cores
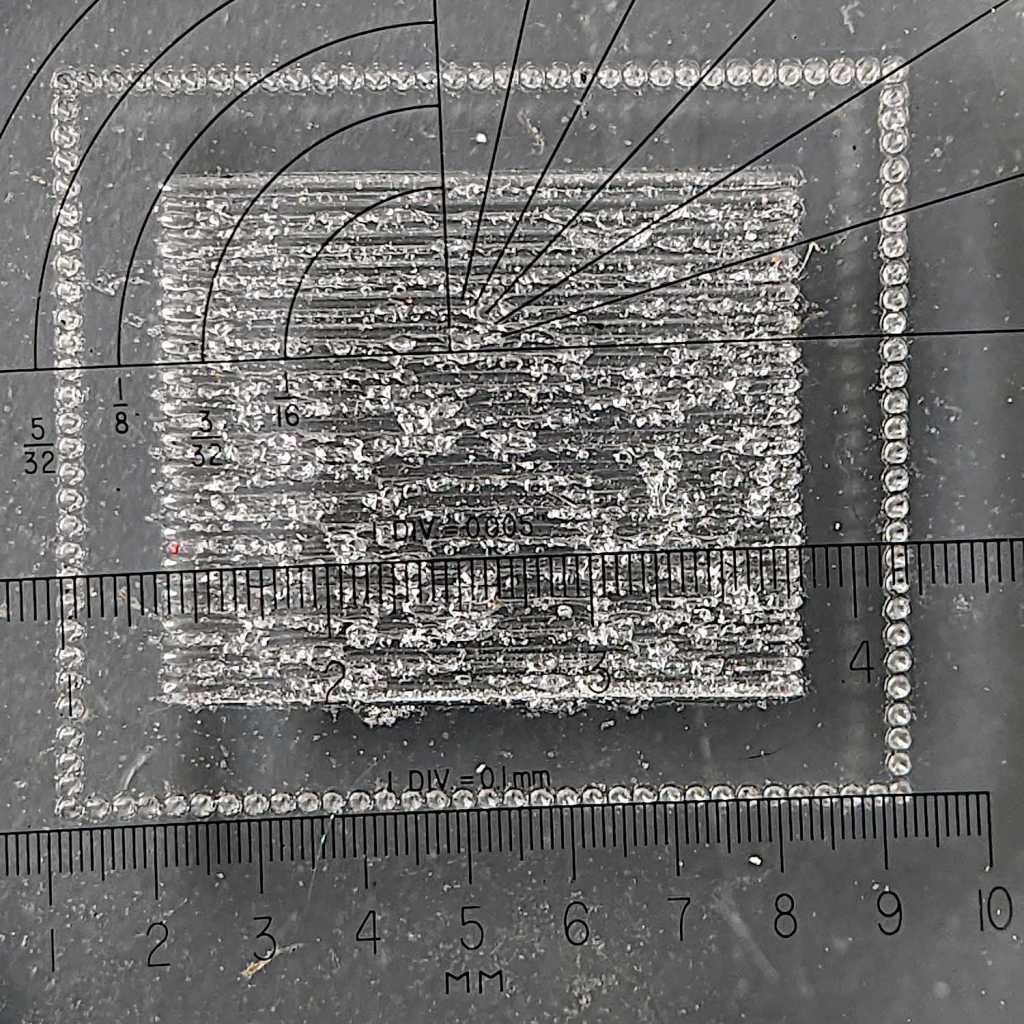
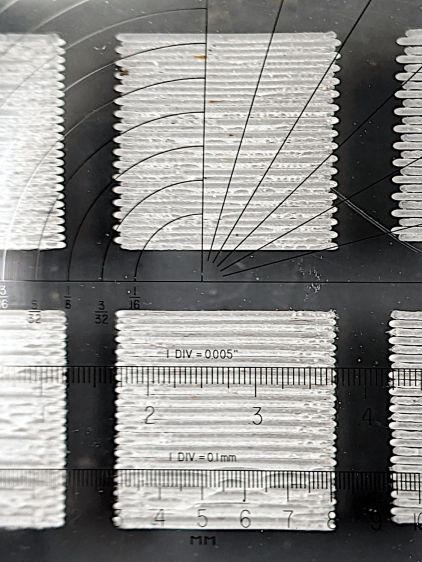
Recalibrating the scan offset got the errors down to 0.1 mm in either direction:
Scan offset – 300 200 mm-s 0.15mm offset
The lines in the middle column are spaced 0.15 mm apart at scan speeds of 300 mm/s (top) and 200 mm/s (bottom).
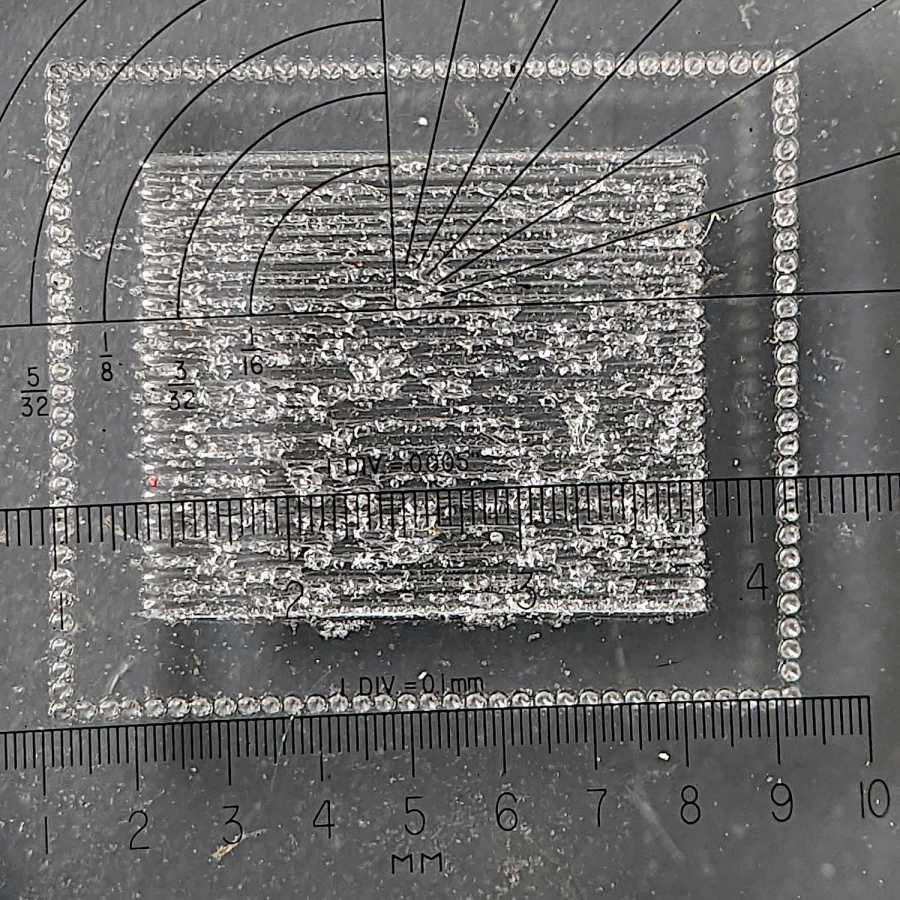
Another test pattern puts an engraved rectangle inside a dot-mode cut line with 1 mm spacing on all sides:
Scan vs cut alignment – 300 mm-s 0.15mm
That’s wonderfully accurate!
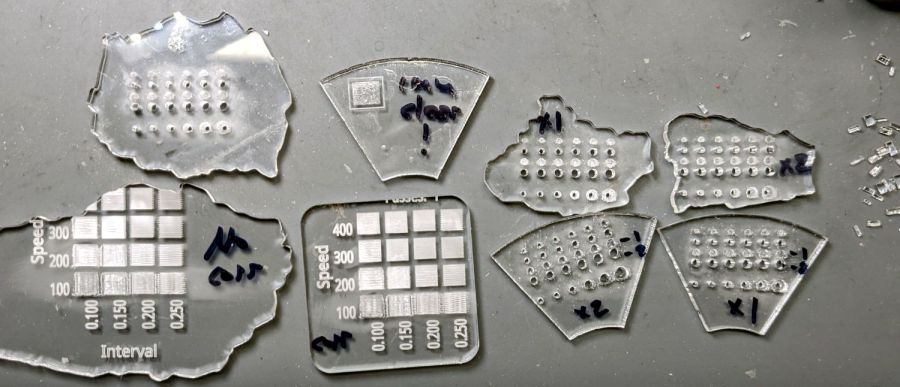
A few more test pieces later:
Scan vs cut alignment – test pieces
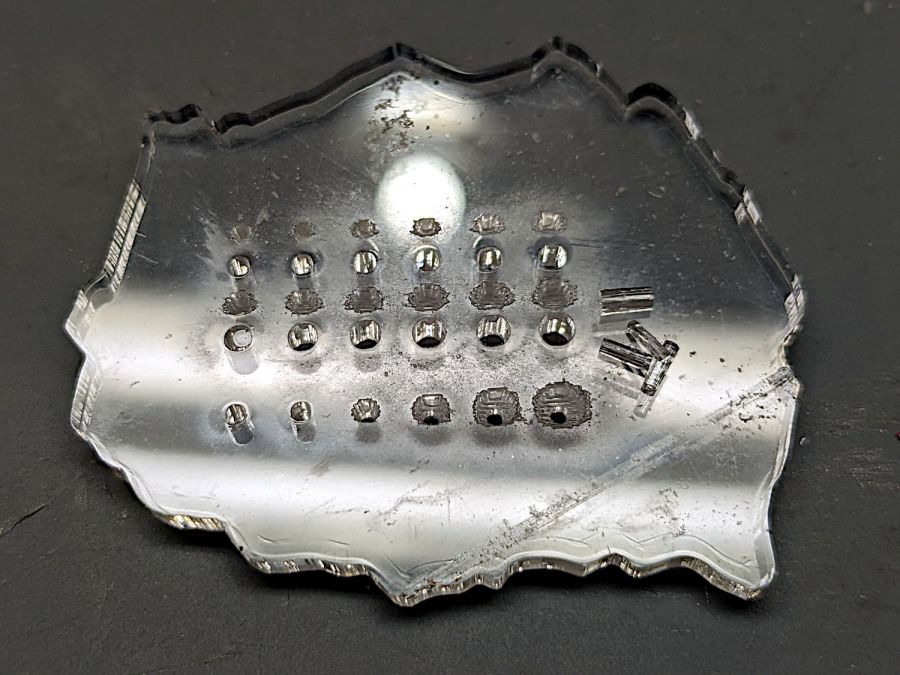
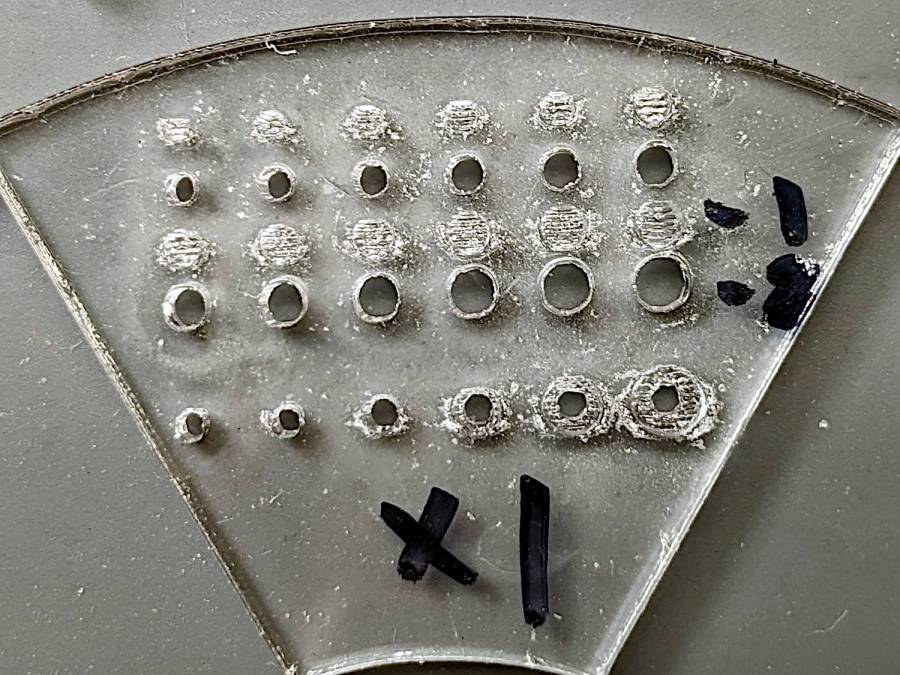
Returning to the pits-and-holes test, with one engraving pass:
Scan vs cut alignment – holes x1 engrave
That’s lined up to be looking directly down the 3 mm pit in the lower right, which looks fine.
Two engraving passes makes the pits deeper (nearly through the 2.5 mm arylic) and somewhat messier, but still nicely aligned with the holes:
Scan vs cut alignment – holes x2 engrave
Engraving the recess before cutting the hole seems to produce a better result, perhaps because both the engraving and the cutting encounter uniform surfaces.
All in all, this worked out better than I expected.
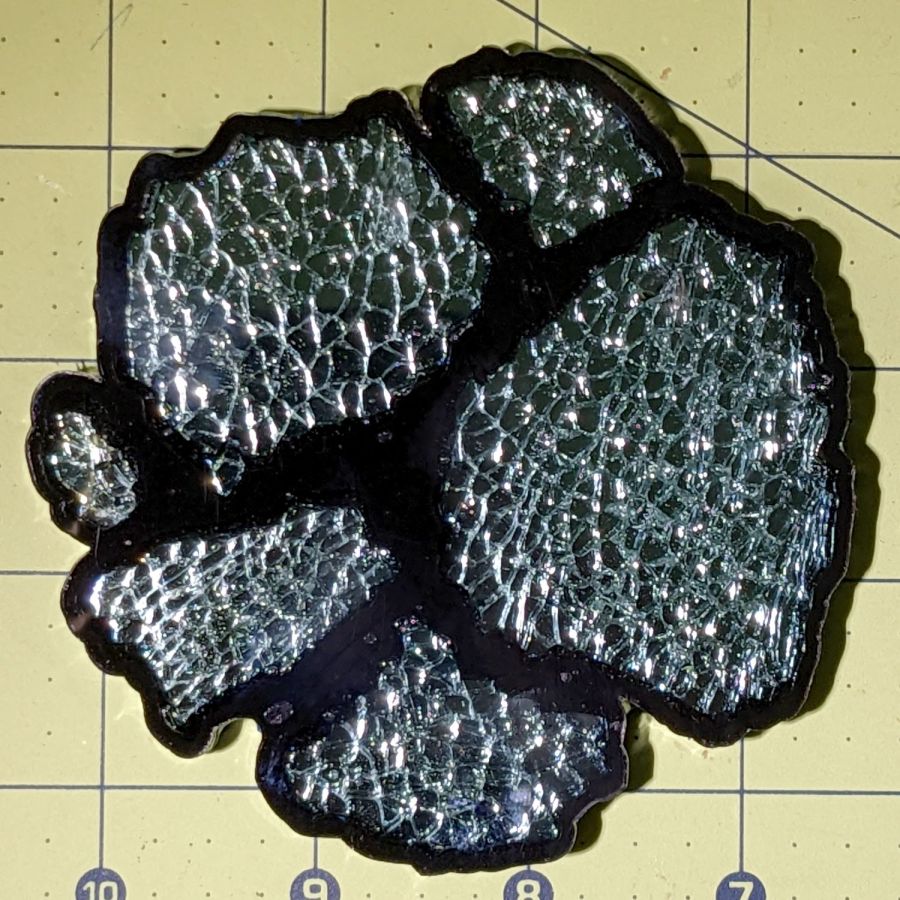
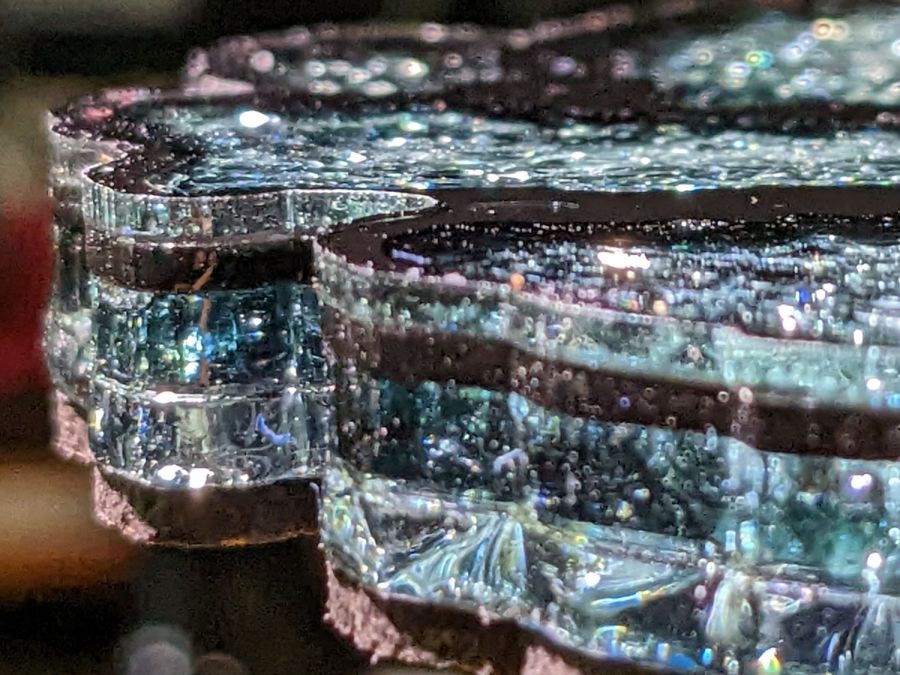
Epoxy tinted with transparent black dye does a pretty good job of not obliterating the cracks between the cuboids. In person, the cracks seem less conspicuous around the borders of the glass pieces, but they’re visible enough for this ahem use case.
Under the proper lighting, a few bubbles appear along and above the black layer:
The conical end comes from grabbing an 8 mm snippet of 3/64 inch steel rod in a pin vise and twirling it against Mr Bench Grinder for a few seconds.
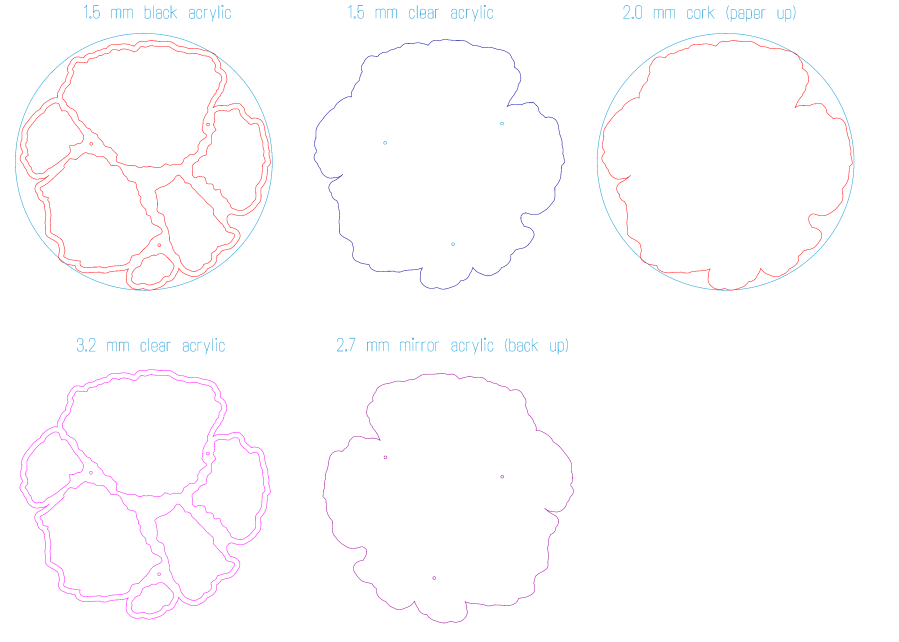
The pins pretty much dropped into 1.1 mm holes created while cutting the sheets. The tiny circles mark the laser path around the pin holes:
Coaster 5 – layers
The “holes” in the top sheet (upper middle) are in the Tool 2 layer so they’re not cut, because it was easier to match-drill holes halfway into the top sheet with the drill press than to figure out how to convince the laser to not punch all the way through. Engraving (along the lines of the earring borders) might work, but I’m not sure how well a high-aspect-ratio hole will engrave.
The mirror sheet is reversed left-to-right in order to cut it from the back of the reflective layer. I’m not certain this is necessary, because acrylic is basically opaque to 10.6 µm IR light and any doubly attenuated reflected light will diverge strongly from the focus point at the top surface, but it’s the recommended procedure and easy enough to do.
The cork cuts with its adhesive layer up and blue tape on the bottom to prevent soot from accumulating in all the surface crevices.
The alignment pins worked surprisingly well:
Smashed Glass Coaster 5 – edge alignment A
The top sheet sticks out 0.3 mm on one side:
Smashed Glass Coaster 5 – edge alignment B
Oddly, there’s no place where the top sheet is indented by any noticeable amount, so there may be slight size differences depending on all the colors and ages in that stack of plastic sheets.
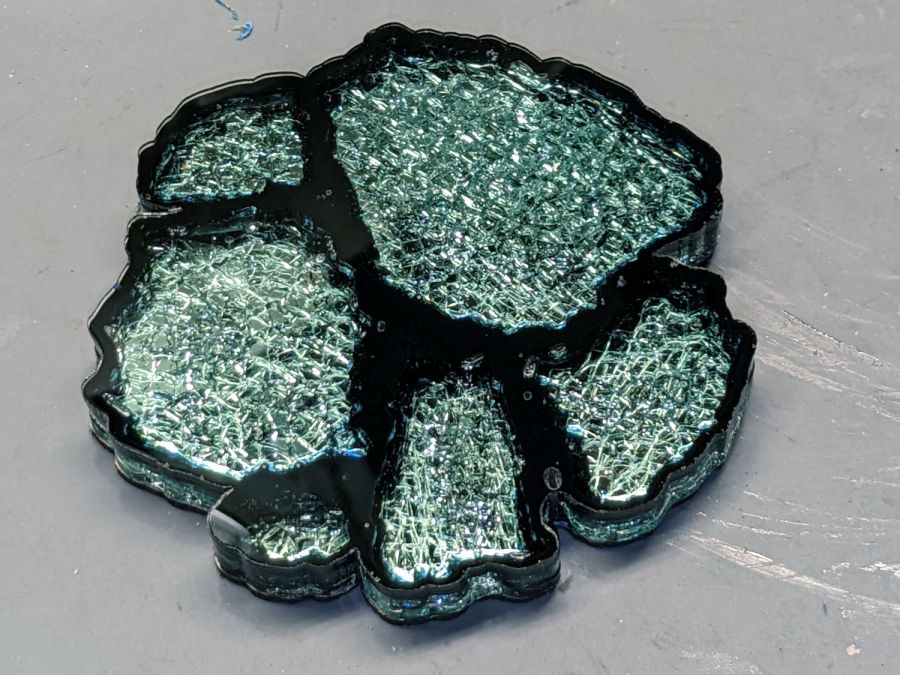
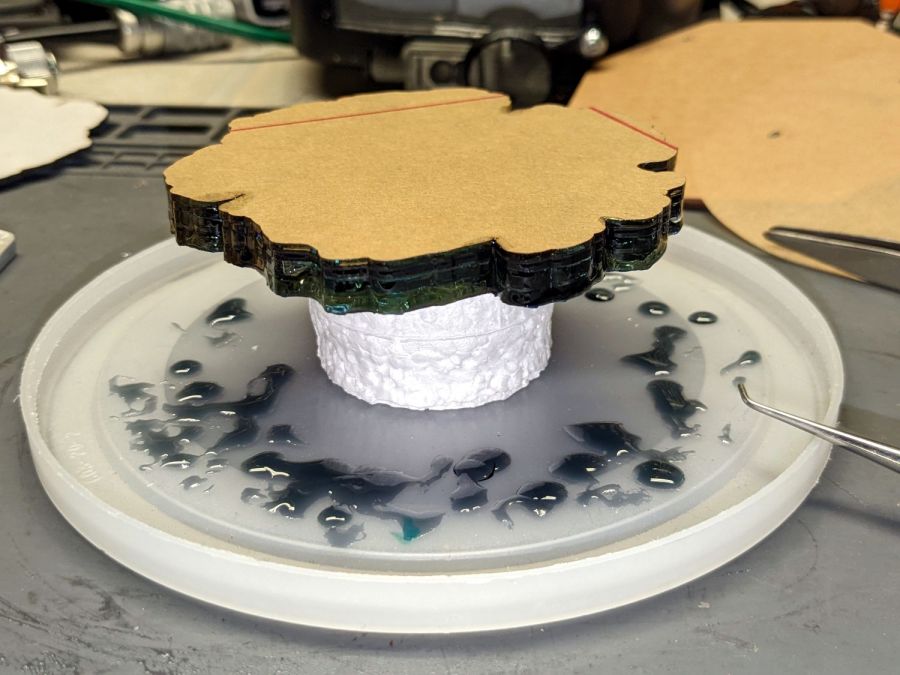
I’ll cure the next one top-side down, giving the bubbles an opportunity to rise toward the mirror layer and maybe become less conspicuous:
Smashed Glass Coaster 5 – curing
The tricky part: finding and arranging glass chunks within a 100 mm circle!
Avoiding narrow gaps and acute angles in the perimeter, as the notch on the left side, should simplify draining the epoxy.
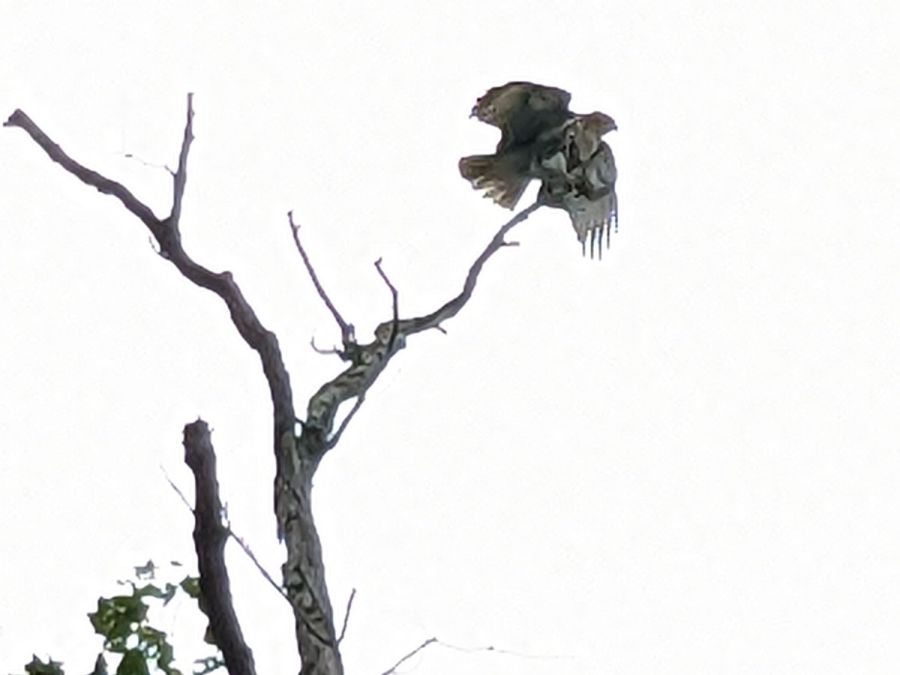
Despite the crappy image (Google Pixel 6a, digitally zoomed as tight as it’ll go), it’s a second-year juvenileBald Eagle. It followed ahead of us along Rt 376, landing atop successive utility poles as we walked toward the intersection:
Red Oaks Mill Eagle – B
It sometimes perched on the (presumably) live primary wires, so a few kV of electric field doesn’t ruffle its feathers enough to worry about.
Its duties included keeping an eye on us down by the creek:
Red Oaks Mill Eagle – C
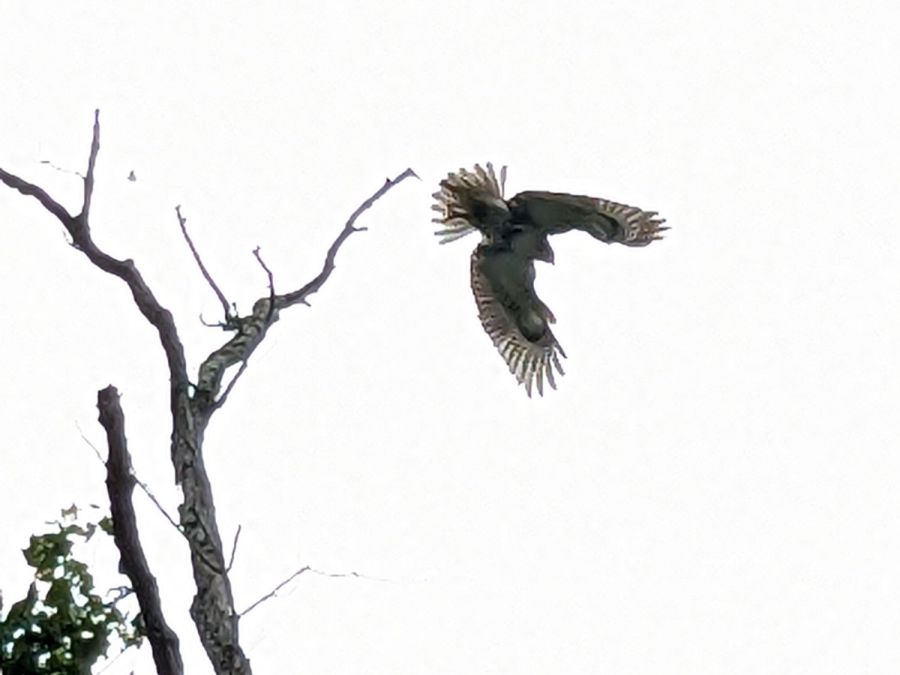
It eventually decided we needed no further supervision:
Red Oaks Mill Eagle – D
Earlier this year it swooped along our driveway and landed atop a utility pole in our yard, causing great concern among the songbirds and rodents.
Having an eagle in the neighborhood seems like a good sign …
Every now and again, an upshift to the large chainring on my Tour Easy would go awry and drop the chain off the outside, where it would sometimes jam between the pedal crank and the spider. In the worst case the flailing chain would also jam in the TerraCycle idler, but I fixed that a while ago.
Contemporary chainrings (i.e., anything made since the trailing decades of the last millennium) generally have a chain drop pin positioned against the crank specifically to prevent such chain jamming.
Making a chain drop pin is no big deal if you’ve got a lathe and an M4 tap:
Tour Easy – DIY Chain Drop pin
A closer look:
Tour Easy – DIY Chain Drop pin – detail
That’s a 10 mm length of 5/16 inch brass rod drilled with a recess to fit the head of a 10 mm M4 socket-head cap screw.
The pin should be a micro-smidgen shorter, as it just touches the crank, but, if anything, moving the chainring inward by one micro-smidgen improved the upshifts and I’m inclined to go with the flow.
Their camouflage works better in the wild than atop a trash can lid:
Tree frog – on trash can lid
They are much smaller than you’d expect from their voices in the night:
Tree frog – on trash can lid – thumb for scale
We think the drought brings them closer to the house in search of water, as Mary collects rainwater in the trash cans where the frogs easily walk up & down the inside surfaces.
Although the blurb for the Epson ET-3830 All-In-One scanner / printer says “up to 2 years of ink in the box”, the black ink hit the bottom line of the tank near the end of August:
Being that type of guy, I keep track of ink vs. time:
Epson ET-3830 – ink status
In round numbers, it looks like we use nearly all of a 127 ml bottle of black ink and a bit more than half of an 70 ml bottle of color ink every eight months.
I find it much easier to read long articles and tech documents while slumped in the Power Chair than to scroll through them on big or little screens, so we go through much more ink and paper than most folks.