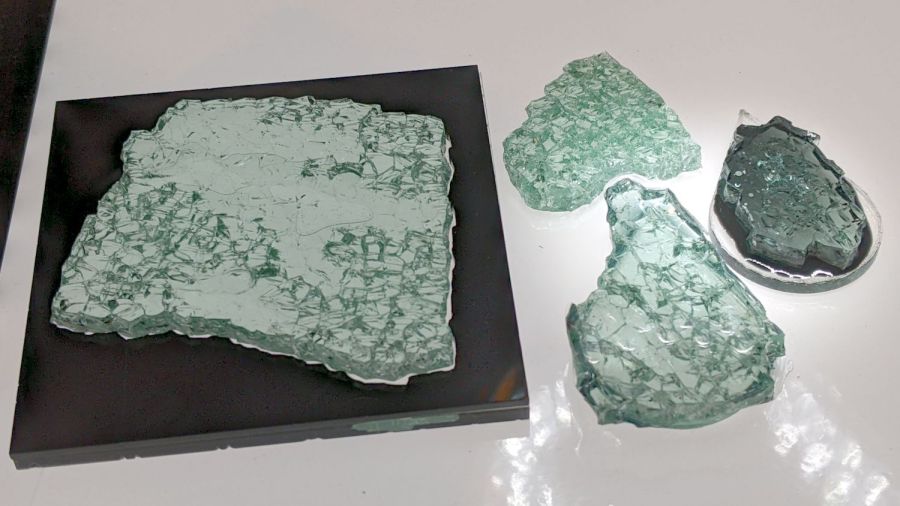
Just to see what happens, I laid some smashed glass in puddles of epoxy:
Backlighting with the LED light pad reveals more detail:

The chunk on the left is the proof-of-concept shot glass coaster with a form-fit black acrylic mask atop a clear epoxy layer on a clear acrylic base. The chunk at the top is raw shattered glass fresh from the pile. The two chunks on teardrop acrylic scraps are bedded in transparent black and opaque black tinted epoxy.
A look through the microscope at all four, laid out in that order, with the contrast blown out to emphasize the grain boundaries:
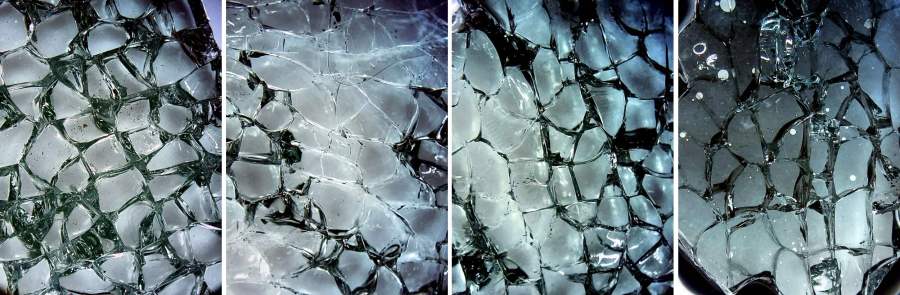
You may want to open the image in a new tab for more detail.
The raw chunk has air between all its cuboids, so it’s nicely glittery. All the others have much of their air replaced by epoxy.
Clear epoxy produces an essentially transparent layer where it fills the gaps, because its refractive index comes close enough to the glass. The stretched contrast makes the gaps visible again, but the backlit image shows the unassisted eyeball view.
Transparent black dye sounds like an oxymoron, but it fills the gaps with enough contrast to remain visible. The overall chunk is not particularly glittery, but it’s OK.
Opaque black dye produces a much darker tint; the slightly tapered thin layer between the glass and acrylic (the small white circles are air bubbles) cuts down on the transmitted light. The gaps remain nearly as prominent as in the air-filled chunk, although with very little glitter.
Bedding the glass in epoxy against an acrylic sheet should reduce its tendency to fall apart at the slightest provocation, although the proof-of-concept poured coaster showed the epoxy must cover the entire edge of the glass sheet to bond all the slivers in place.

Comments
2 responses to “Smashed Glass vs. Epoxy”
[…] Filling the cracks with black epoxy makes them stand out: […]
[…] Epoxy tinted with transparent black dye does a pretty good job of not obliterating the cracks between the cuboids. In person, the cracks seem less conspicuous around the borders of the glass pieces, but they’re visible enough for this ahem use case. […]