Ed Nisley's Blog: Shop notes, electronics, firmware, machinery, 3D printing, laser cuttery, and curiosities. Contents: 100% human thinking, 0% AI slop.
The final garden harvest included several carrots minus their leafy tops:
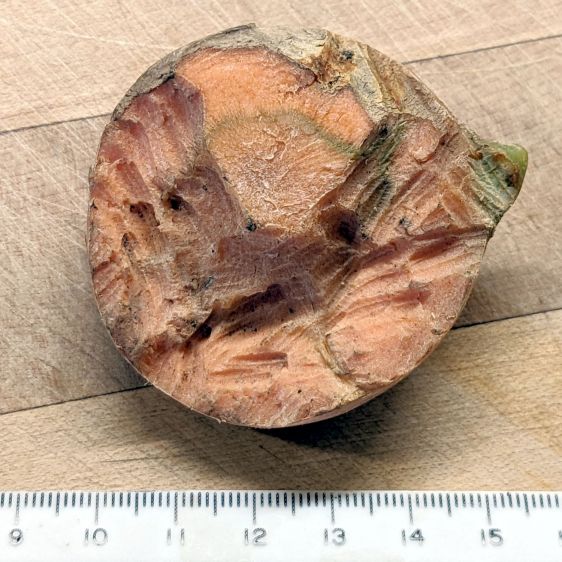
Rodent-approved Carrot
I sliced that top from a rather rotund carrot and the broad tooth marks suggest a large rodent. Mary found and blocked a tunnel under the fence, so we think it was a groundhog, rather than a rabbit, but we’ll never know the rest of the story.
The rest of the carrot was fine, so the unknown critter had mmmm good taste. Unfortunately, it sampled far too many root crops as it toured the buffet, leaving Mary’s root-cellared stockpile unusually low for our winter meals.
For the record, it is possible to get a piece of paper jammed so far inside the duplexer rollers in the back of an Epson ET-3830 Multifunction Printer / Scanner that it is not only completely invisible from the inside, but that it cannot be removed without disassembling the duplexer:
Epson ET-3830 duplexer jam
It jammed while attempting to print another batch of Geek Scratch Paper with a semilog grid, without actually duplexing the sheets. The specs say the printer can handle 4×6 paper, so I assumed 4.24×5.5 paper would be Close Enough. Apparently not.
Print ’em two-up, chop the sheets down the middle, pad and glue, and it’s all good:
OMTech CO2 laser power supply – bandwidth tests – semilog graph
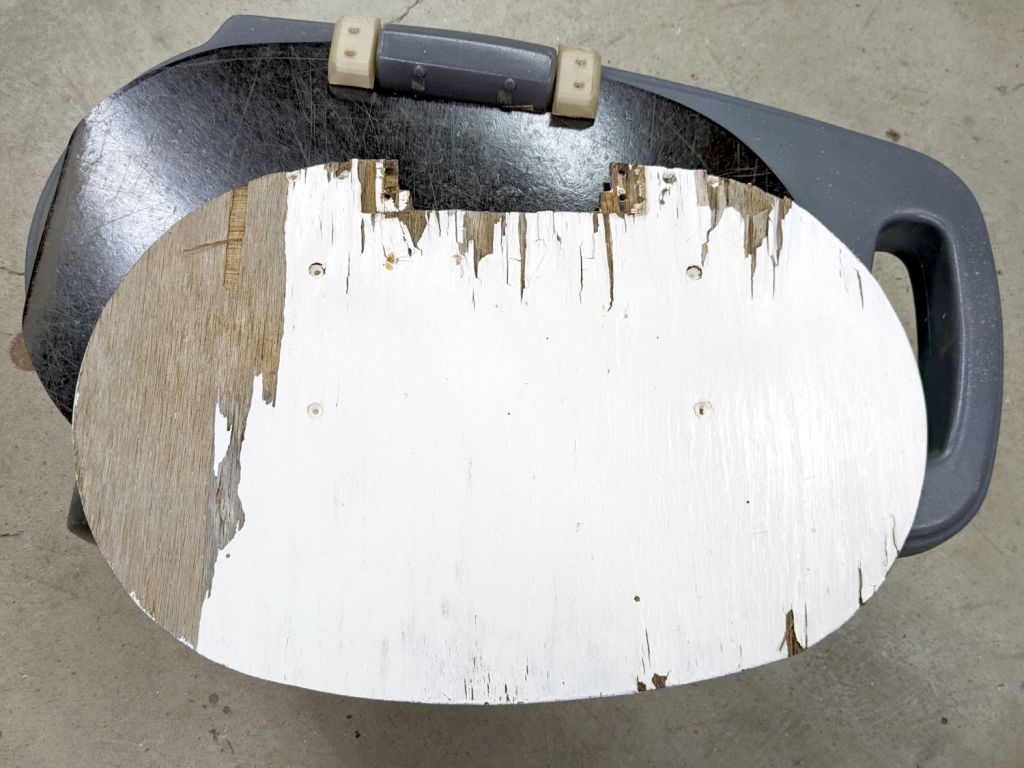
Another tray becomes a replacement for the plywood on the Step2 rolling seat in the Vassar Farms plot:
Step2 Garden Seat – weathered plywood
I reused the old hinges, as this tray seems to be slightly thicker than the one on the home garden seat. The straight edges show it’s also somewhat smaller, but it’ll work just fine.
The bottom of the tray with its Silite logo now faces upward, because the top surface has eroded to a matte finish while supporting a bunch of plants outdoors during several summers:
After two seasons, the first tray doesn’t look any the worse for wear: Silite trays really will survive the Apocalypse and be ready to serve breakfast the next day.
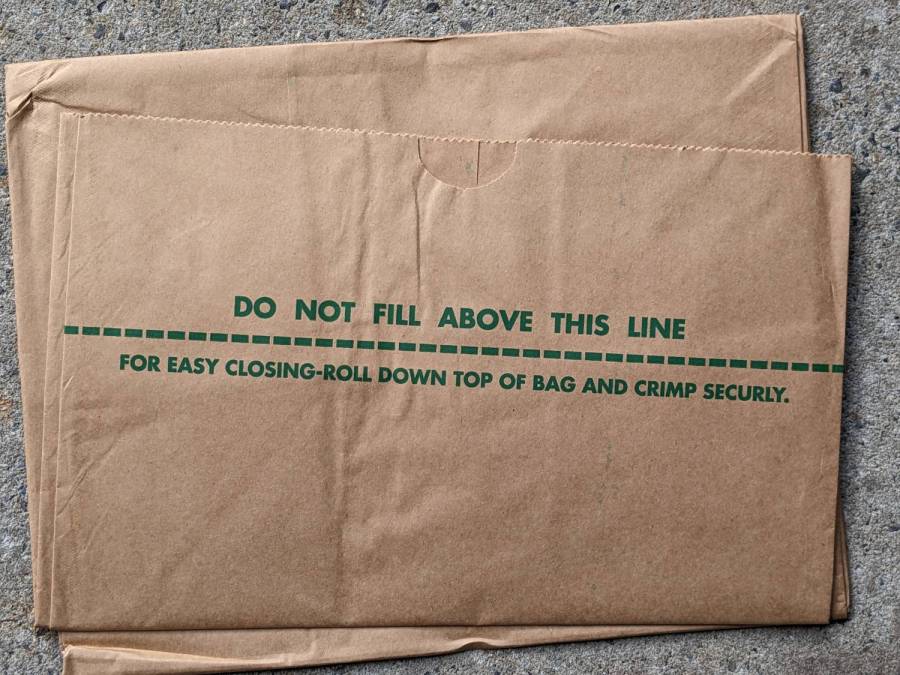
Which is immediately belied by the situation at the other end of the bag:
Dano Leaf Bag – crimp line typo
OK, it’s just a typo that could happen to anyone, but it first appeared last year and seems to be continuing. Possibly the Town of Poughkeepsie bought a lot of bags and we’re working through the stack.
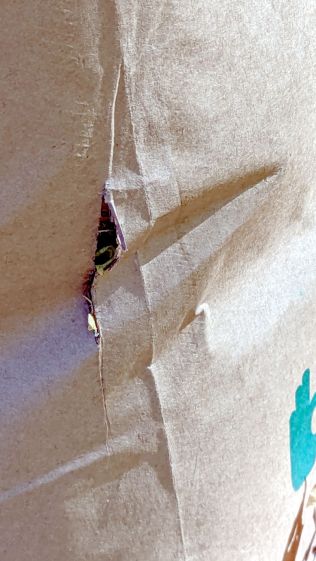
However, the built-in gashes along the sides of some bags were a new feature this year:
Which frosted Mary pretty severely, as she recycles the used bags as garden path pavers after distributing their contents as mulch, so she’ll be stripping plenty of tape next year.
Although I’m not privy to the Town’s dealings, Dano’s chart suggests the bags cost about 40¢ in truckload lots, about as much as Lowe’s charges for similar bags in retail five-packs. Surprisingly, you can also buy the same Lowe’s bags from Amazon fora lot more, suggesting some folks live much further from a Lowe’s than we do.
I wear 30 dB over-the-ear protectors with a pair of Bluetooth earbuds tucked inside for a rhythm track. I had been carrying my Pixel 6a in a side pocket, until I noticed a remarkable amount of crud inside the glass protector over the camera lens:
Pixel 6a camera protector dirt
How crud could get inside (what I thought should be) a sealed compartment inside the phone’s armor case became obvious after peeling the protector off:
Pixel 6a camera protector dirt – overview
Come to find out the protector’s adhesive layer has an opening near the edge of the camera, leaving a slot allowing the howling chaff storm onto the camera glass. Random pocket fuzz certainly contributed some particles, but the entire phone case had a surprising amount of yellow-brown dust tucked inside.
So I left the protector off, dumped the music files into my old Pixel 3a (which never had a camera protector), and will henceforth leave the 6a indoors during similar adventures.
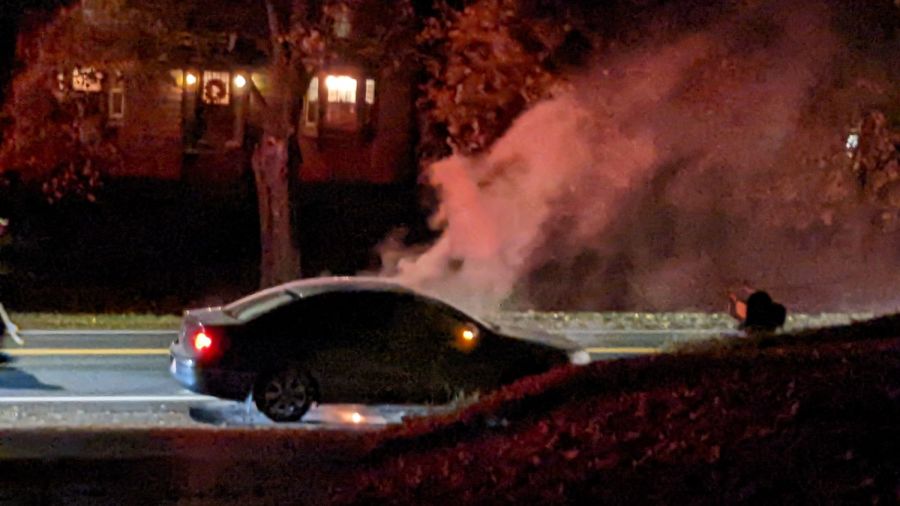
From the living room window, I wasn’t quite sure what was going on out there, but halfway down the driveway it became obvious:
Car Fire – arrival
The bright spot underneath the car came from liquid fire dripping on the asphalt. For one terrifying moment I thought we were about to take delivery of a lithium fire, but later developments showed it was a just an ordinary fire in an old-school gasoline car.
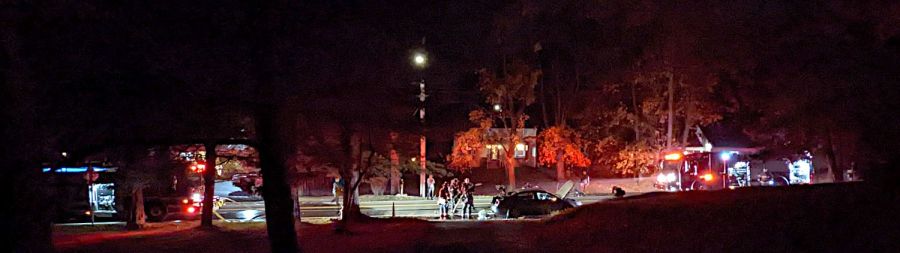
A few minutes later, fire equipment blocked the road in both directions, with more vehicles out of sight:
Car Fire – overview
From what I overheard, multiple 911 calls resulted in firefighters chasing the car from one of the fire stations along either Vassar Rd or Spackenkill, the driver finally noticed the lights, and pulled over as the sirens spooled down in front of our house. It had a Georgia plate, so maybe this was near the end of a really long day.
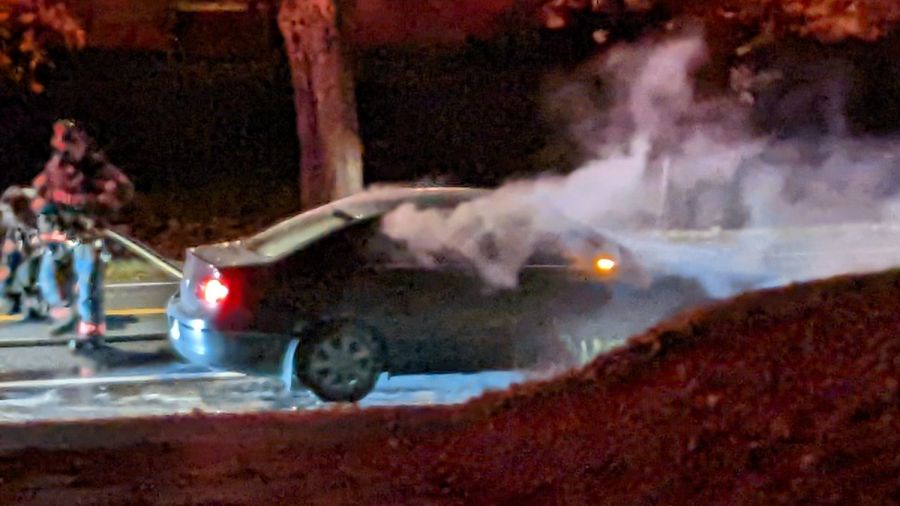
The first operation got a water lance under the car to knock back the undercarriage fire:
Car Fire – first water lance
Then they punched through the tail lights to lance the trunk:
Car Fire – trunk water lance
Smash the windows and chop the trunk lid open to flood all the interior spaces:
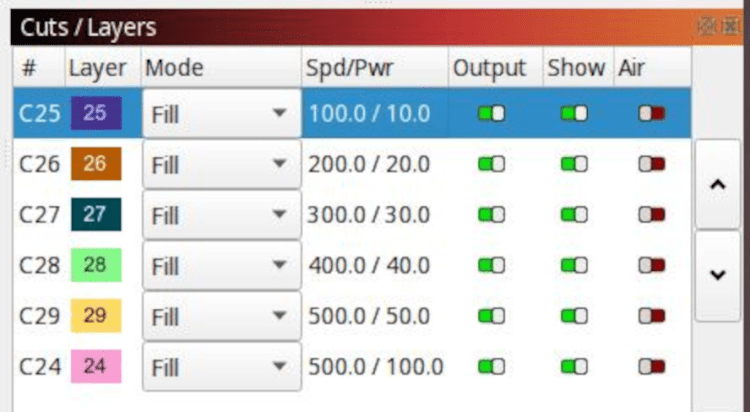
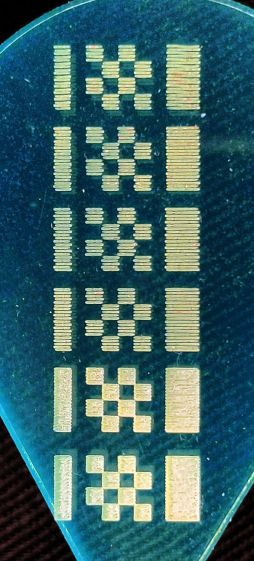
Unleash the laser on a scrap of fluorescent green acrylic:
Scan Offset uncorrected – 100 to 500 mm-s
Measure the distance between successive line ends at each speed, divide by two, then fill in the offset adjustment table:
LightBurn Scanning Offset table
Burn another scrap:
Scan Offset – 100 to 500 mm-s
That looks better …
Not incidentally, it also provides illustrations for an upcoming Digital Machinist column about small-scale engraving-as-machining and why good scanning compensation matters.