A LightBurn forum discussion about problems making Z-scale (1:220) bricks led me to trying a few ideas on the way to figuring out what was going wrong.
Each brick is about 1.0×0.5 mm, so an entire wall doesn’t cover much territory:
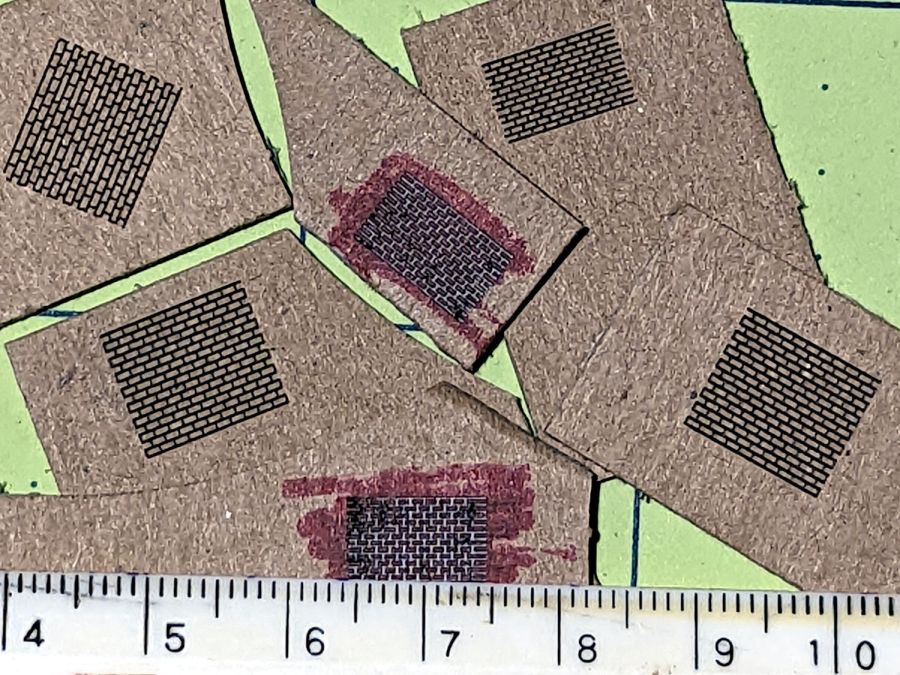
Yes, those are millimeters along the scale.
The kerf on my 60 W CO₂ laser seems slightly wider than the “mortar” lines should be, so I made a layout with the vertical lines slightly inset from the horizontal ones:

That let the kerf complete the lines without burning into the adjacent bricks:

The cuts are obviously too wide (and deep!), but just for fun I colored the chipboard with red marker and rubbed a pinch of flour into the lines:

Which looks chunky, but not terrible, for what it is. Maybe concrete blocks would look better?
The next attempt started with a raster bitmap scaled at 254 dpi = 10 pix/mm, so that single-pixel “mortar” lines between 10×5 pixel bricks would be 0.1 mm wide:

Scanning the image at 100 mm/s makes each pixel 1 ms “wide” and, because the power supply risetime is on the order of 1 ms, the laser won’t quite reach the 10% power level across the vertical lines:

The raster lines come out lighter and (IMO) better looking:

The horizontal lines are darker because the beam remains on at 10% across their full length, but the overall result seems much closer to the desired result.
The original poster will use a diode laser and, combining all the ideas we came up with, now has a path toward making good, albeit invisibly small, bricks.
His modeling (and coloring!) hand is strong!