Another turkey figured out how to get the best seeds from under the bird feeder in the far corner of the patio:
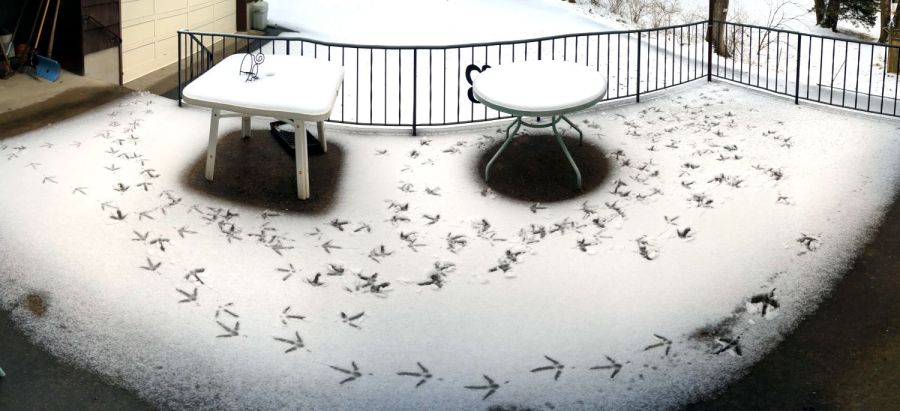
Jake, our affectionate term for whichever turkey is having trouble, eventually walked from right to left closest to the house, down the patio steps, and rejoined the flock. The tip of his “arrow” tracks aims backwards, because all three toes point forward.
It turns out turkeys panic when they’re behind a barrier and see the rest of their flock moving away. A panicked turkey makes a lot of noise while rushing back and forth, the rest of the flock contributes what must be advice, and the resulting tumult suffices to wake the dead.
That would be me, in the bedroom off to the left, but my cold-boot sequence takes long enough that I missed the action.
Some years ago, we discovered how distressed a trapped turkey can get when the flock descended from trees in an adjacent yard, with (a different) Jake landing in the garden, on the other side of the fence from the flock. Over the course of the next several hours, Jake ran back and forth along the fence while the rest of the flock alternated between sympathetic honking and disinterested feeding, until eventually he remembered his wings and managed a short-field takeoff over the fence.
Never a dull moment around here …