Ed Nisley's Blog: Shop notes, electronics, firmware, machinery, 3D printing, laser cuttery, and curiosities. Contents: 100% human thinking, 0% AI slop.
Without looking at the captions, match each of the following pictures with its description:
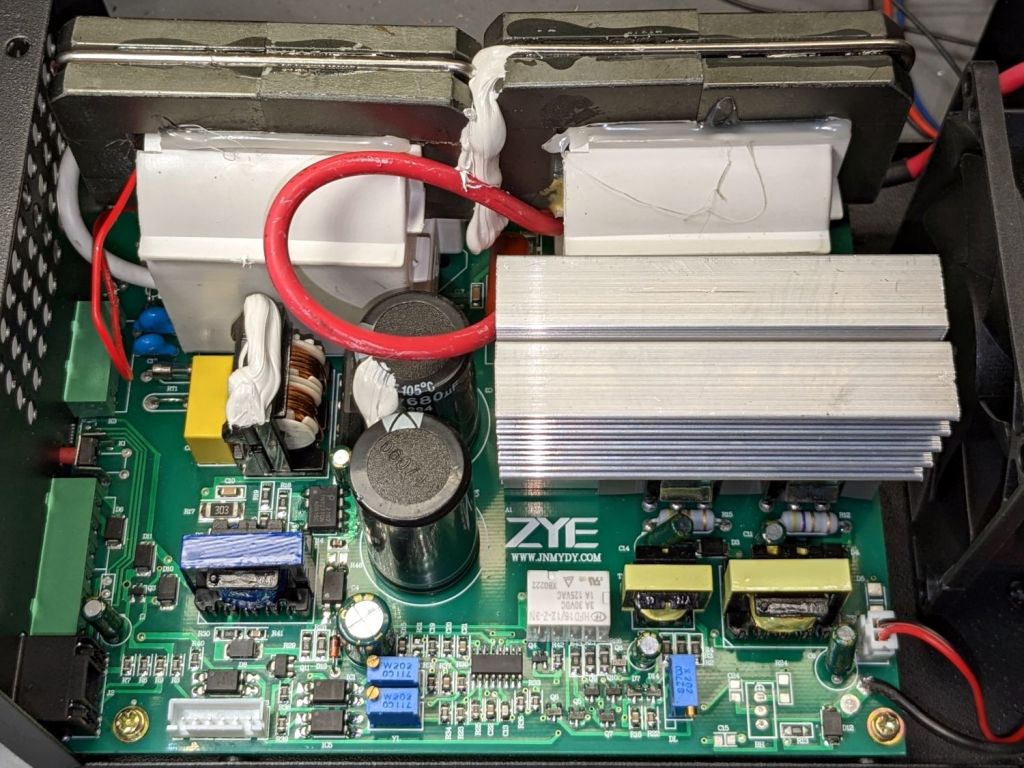
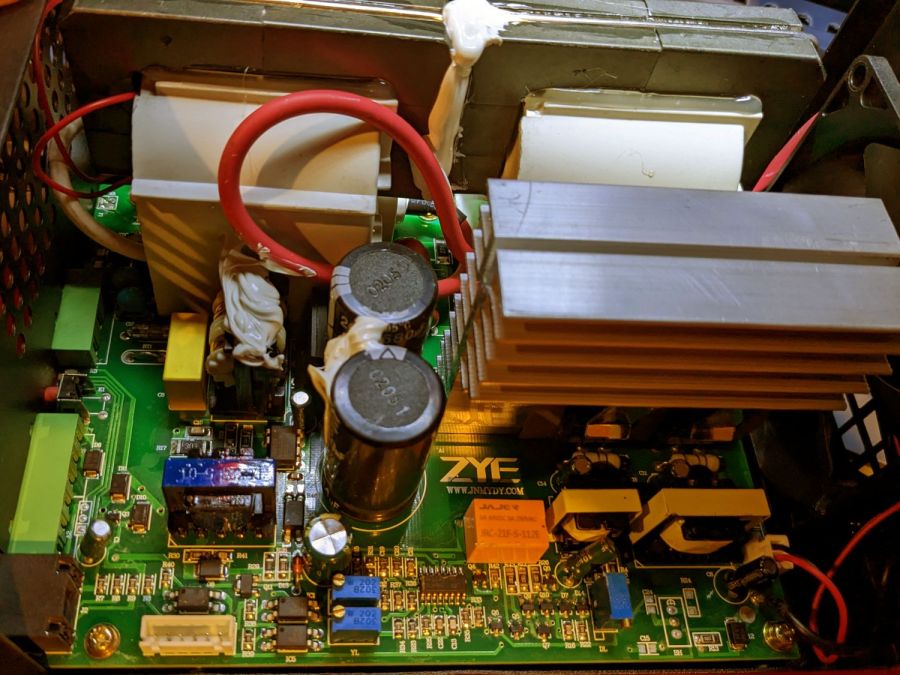
a failed ZYE MYJG60W-Y-1 (came with OMTech laser)
an unbranded MYJG60W replacement from OMTech
a Cloudray M60 (bought as a backup)
HV Power Supply – ZYE MYJG60W-Y-1 – failedHV Power Supply – unbranded MYJG60WHV Power Supply – Cloudray M60
That was easy, wasn’t it?
As I said in the forum:
My guess is there’s only one ZYE factory (or a dozen clones) producing all the power supplies, then applying whatever sticker the order calls for on the case before dropping it in the carton.
Perhaps Cloudray buys more quality control than the anonymous “brands”, but I wouldn’t lay much money on finding more than two QC bins at the end of the assembly line: either it runs or it doesn’t.
Mary cut out a simple cloth liner for her ResMed F20 CPAP mask (a.k.a. “cushion”) and snipped away at the fabric until it felt about right. I scanned the result and turned it into a bitmap mask (which is entirely different from a CPAP mask):
Mask liner – scanned
Given that as a start:
Import the scanned image into LightBurn
Fair a few curves around the perimeters by hand, rather than attempting to trace the thing
Rationalize the sizes
Make it symmetric
Cut a few prototypes while tweaking the fit
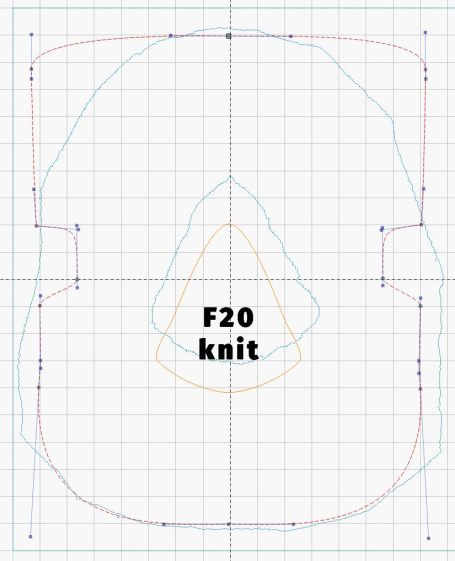
Which leads to a pattern like this:
CPAP Mask Liner – F20 knit – spline fit
The rectangular upper part forms a simple eyeshade that also keeps minor leaks from disturbing her sleep. Your mileage may vary, depending on how much you toss and turn during the night.
We found the fit depends on the fabric, with woven fabric requiring a taller opening:
CPAP Mask Liner – F20 knit woven – LB layout
The engraved legend verifies I used the proper design for the fabric:
Laser cut CPAP Mask Liner – F20 – knit fabric
The opening has tabs holding it in place while cutting, at least until we get this down to a routine.
Then make enough for a while:
Laser cut CPAP Mask Liner – F20 – production
The usual woodstove odor vanishes after half a day sitting atop the clothes washer. Putting them in a mesh bag and tossing them into the regular wash refreshes them after use.
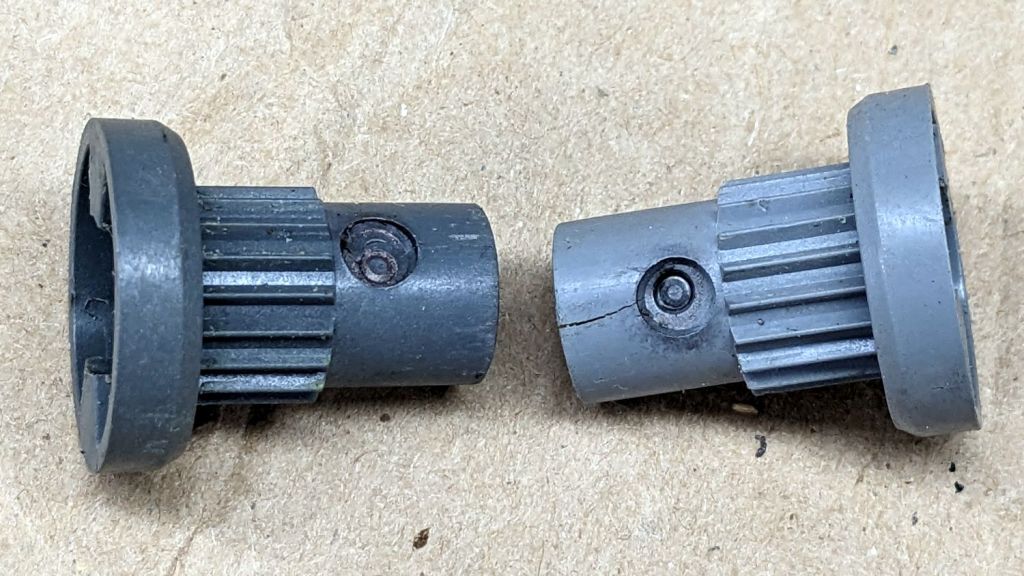
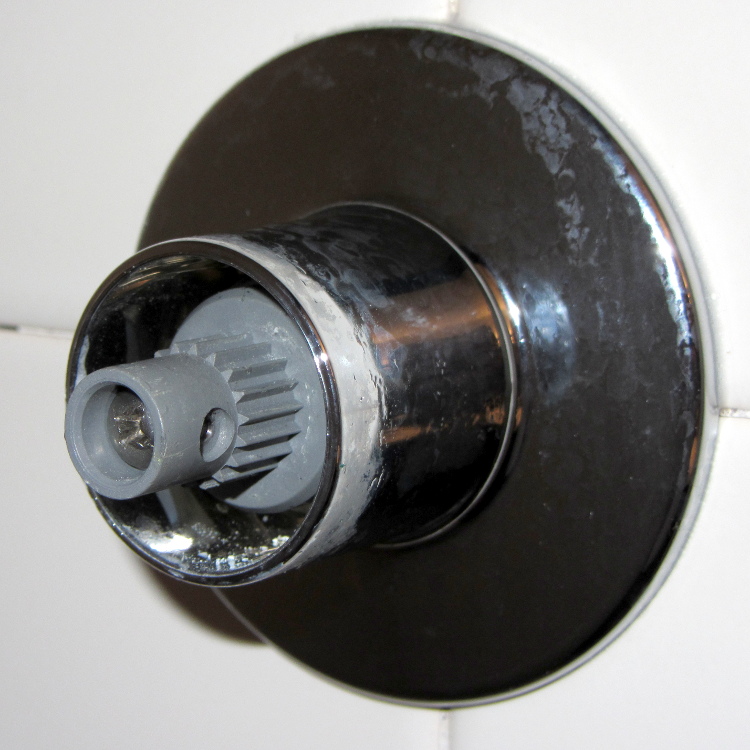
The shower faucet handles have been getting looser, but once a decade seems reasonable. This time around, however, the setscrews had dug themselves so far into the splined plastic fittings that they had run out of thread:
American Standard Shower Handle rebuild – gouged setscrew sockets
Wipe out the crud, clean out what’s left with alcohol to encourage stick-to-it-ivity, and fill the cavities with JB Kwikweld epoxy:
American Standard Shower Handle rebuild – epoxy fill
When it cures, file a flat across the sockets:
American Standard Shower Handle rebuild – flatted
Reinstall in reverse order with a dot of NeverSeez on the setscrews for good measure.
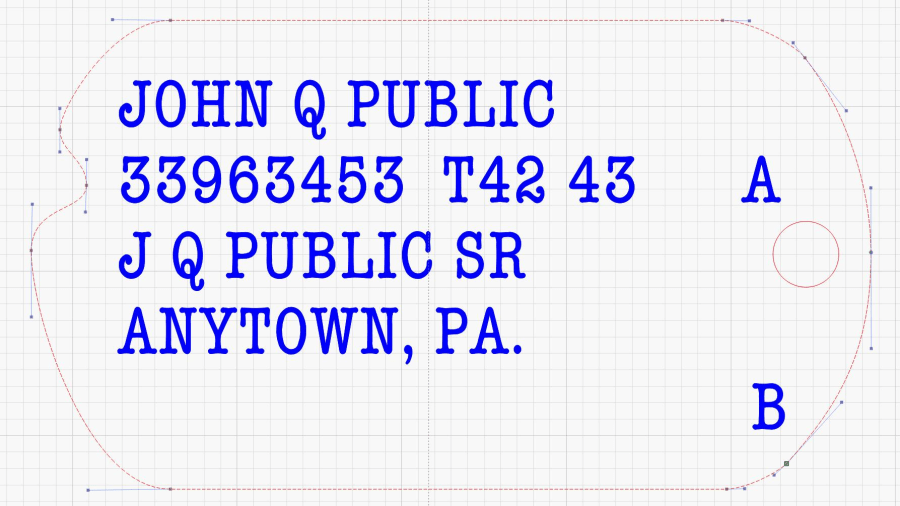
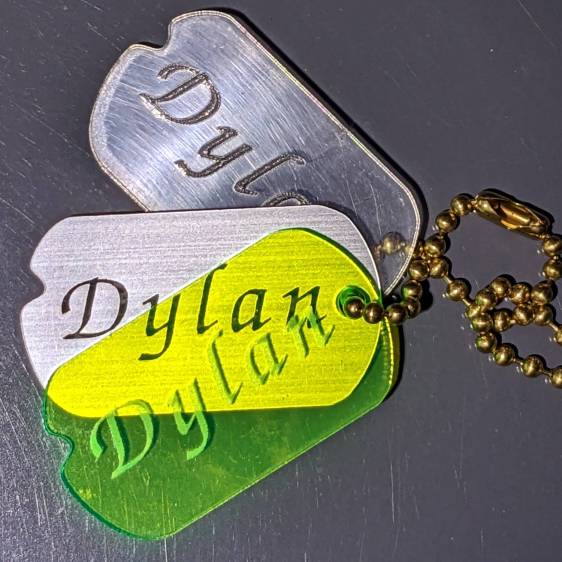
The outline traces a scanned image of my father’s tag, fitting a few hand-laid splines around the curves:
John Q Public – WWII dog tag – spline curves
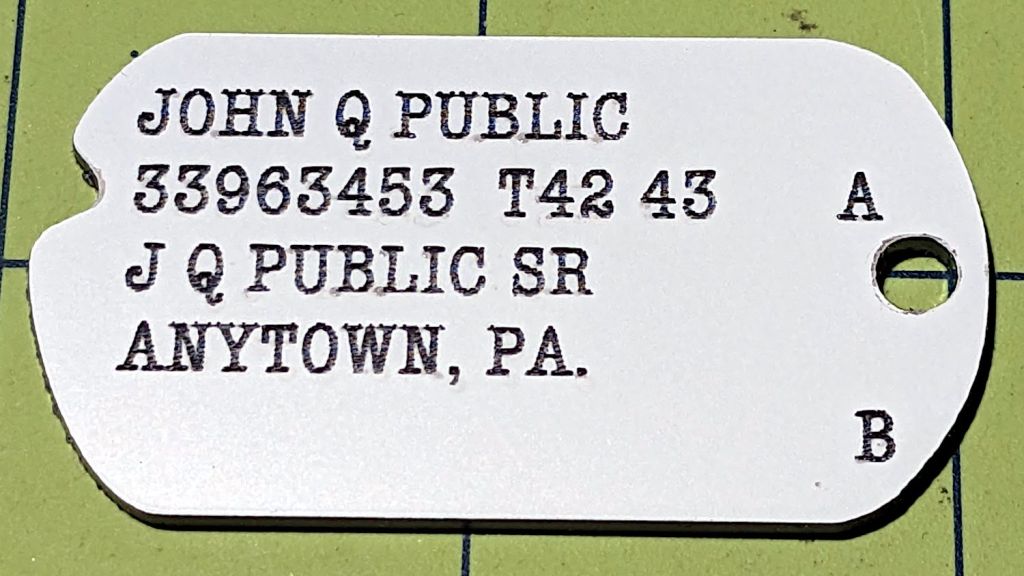
I generated a random serial number based on my father’s draftee status (he was in his early 30s during his South Sea Island tour) and state of residence; my apologies to anyone carrying it for real. His blood type was A and (I think) the religion code marks him as “Brethren”, a common group in my ancestry.
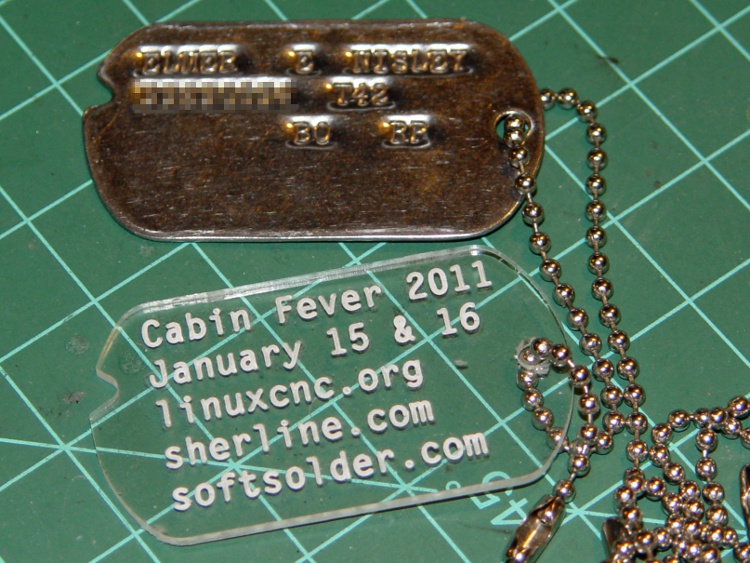
Given the outline, various plastics, and a laser, other effects become possible:
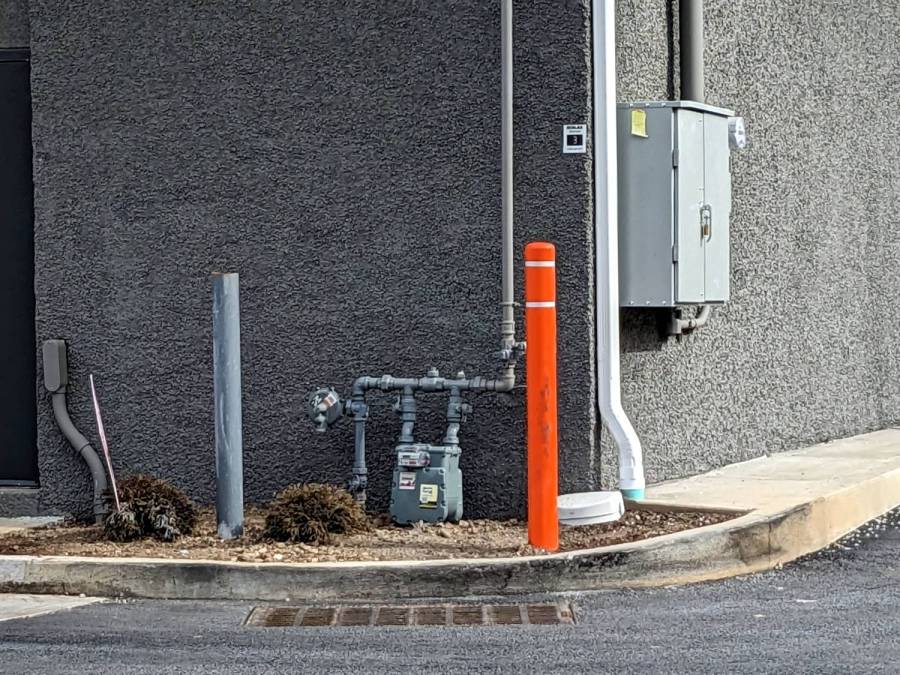
I can’t tell whether the bollard stands in more concrete this time, but the gray pipe to the left of the gas meter is definitely new.
In round numbers, it took less than a week for the first impact, a week for the first repair, and … we shall see.
The white disk just behind it is a rat trap, with a subtle explanatory sign directly above it. The building has three such traps, so they’re apparently trying to stay ahead of a known problem; we find similar traps around most commercial establishments.
The fuzzy felt feet on the lift chairs raised them enough to slide both floor lamp bases underneath with the backs in the upright state, but reclining the chair with the light more than halfway back along the side of the chair crunched the lamp base.
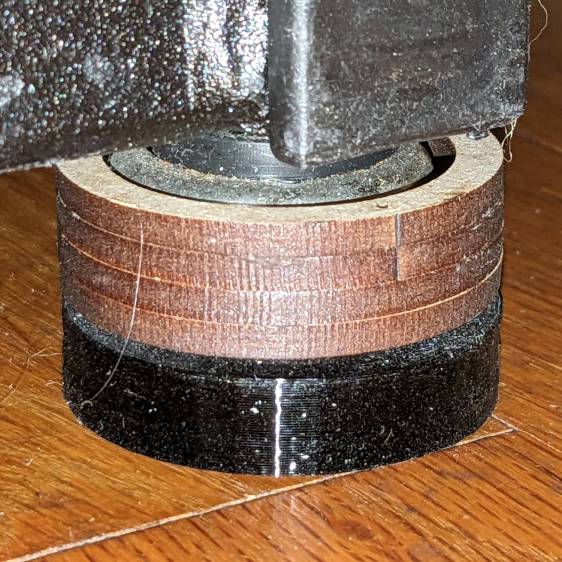
Rather than print taller fuzzy feet, which takes a long time, I knocked out two quartets of laser-cut risers:
Lift Chair Foot Riser – installed
They’re six layers of 3 mm MDF or plywood:
Lift Chair Foot Riser – assembled
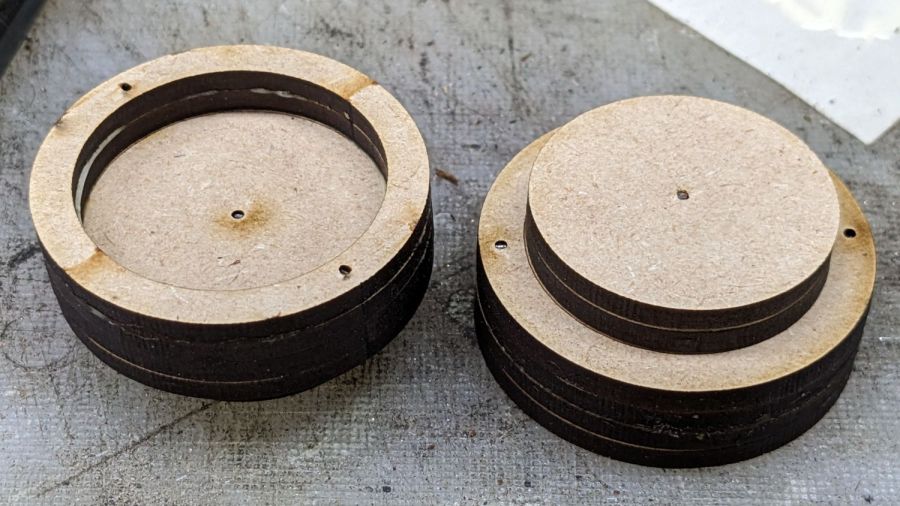
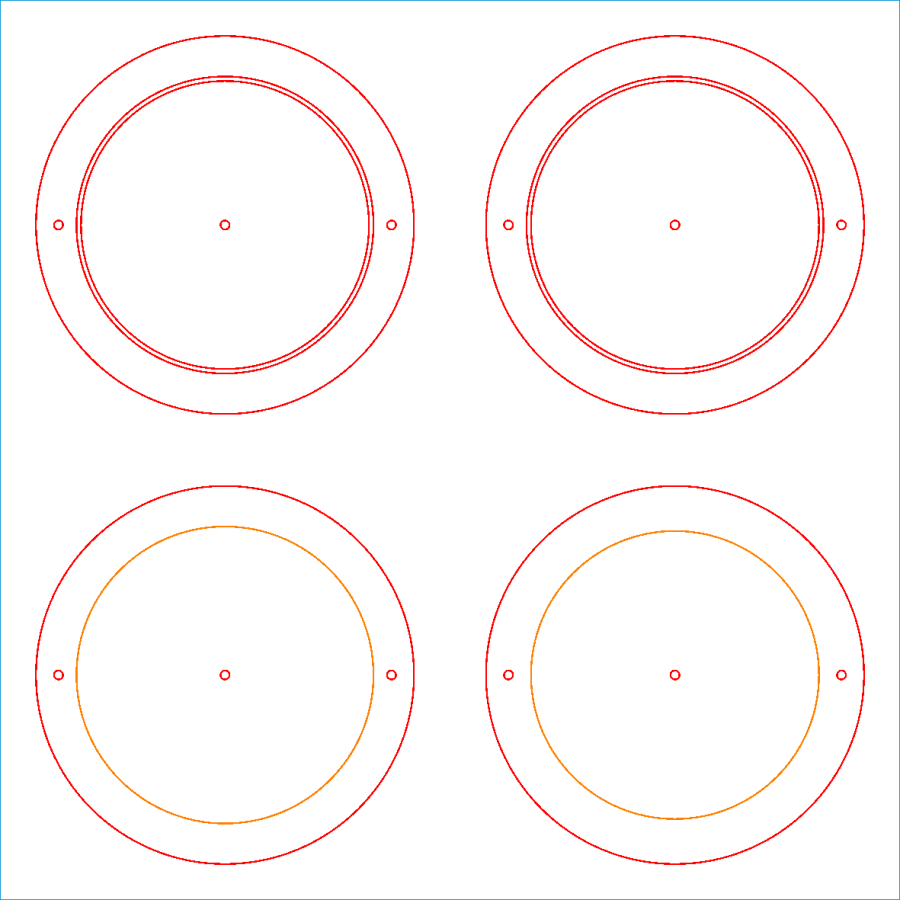
The LightBurn layout makes one riser:
Lift Chair Feet Extenders – LB layout
The upper two discs become two rings and two pads, with the lower two disks forming the middle layers. The ring ID clears the chair foot and the pad OD fits into the existing printed fuzzy felt foot. The two cuts making that happen leave the thinnest imaginable ring of MDF in place.
The tiny circles cut holes for 11 mm snippets of 1.1 mm hard steel wire aligning the layers:
Lift Chair Foot Riser – locating pins
Assembly sequence:
Tap two pins into a ring
Butter the ring with yellow wood glue
Slide the other ring over the pins
Butter
Slide a disk over the pins
Drive a pin into a pad
Butter
Slide the other pad over the pin
Butter
Slide a disk over the pin atop the pads
Butter one of the disks
Slide the disks together over all three pins
Tap all pins below their surface
Make two and clamp them together to ensure everything sticks firmly.
Repeat to make four risers
Install, recline, and enjoy not hearing a mysterious crunch from the lamp base.
The alert reader will note the 6 mm stack of two pads leaves a slight gap above the printed foot. Turns out the recess is 5 mm deep and I decided to just live with a 1 mm gap down there.
The IR sensor on the under-cabinet LED lights I installed half a dozen years ago became increasingly flaky. Its wall wart power supply was on the hot side of uncomfortably warm, so I had an obvious culprit.
The data plate says it’s UL Listed, which is comforting:
Flypower LED wart – data plate
The open-circuit output of a 12 VDC power supply should not look like this:
FlyPower 12V 1A – no load
The horizontal scale is 100 ms/div, so those ramps seem much more languid than you might expect from a 60 Hz wall wart.
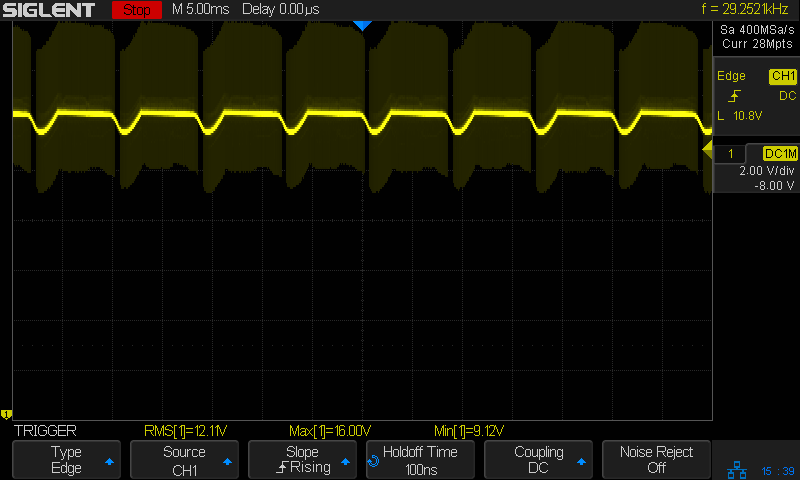
Adding a 16 Ω load to draw maybe 750 mA got its attention:
FlyPower 12V 1A – 16ohm load
The average may be 12 V with too-large dips at the expected 120 Hz, but looky at all the hash riding the output!
No wonder the IR sensor was having such a hard time. When the LEDs are off the voltage ramps between 16 and 5 V. When it eventually turns on the supply has impossible noise levels.
So I cracked the case and extracted the electronics:
Flypower LED wart – components
Those caps over there on the left rear don’t look healthy, do they?
Flypower LED wart – failed caps
No. No, they don’t and you shouldn’t be able to see the wiring inside the inductor between them, either.
Probing the Box o’ Wall Warts produced a similar-ish wart that only required harvesting and splicing the teeny coax plug from the failed adapter to put the LED strips back into normal operation.


