My stereo zoom microscope neatly filled the entrance pupil of the late, lamented Casio EX-Z850, so that a simple adapter holding it on the eyepiece produced credible images:
Alas, the shutter failed after that image, leaving me with pictures untaken and naught to take them with.
The least-awful alternative seems to be gimmicking up an adapter for a small USB camera from the usual eBay source:

The camera’s 640×480 VGA resolution is marginally Good Enough for the purpose, as I can zoom the microscope to completely fill all those pixels. The optics aren’t up to the standard set by the microscope, but we can cope with that for a while.
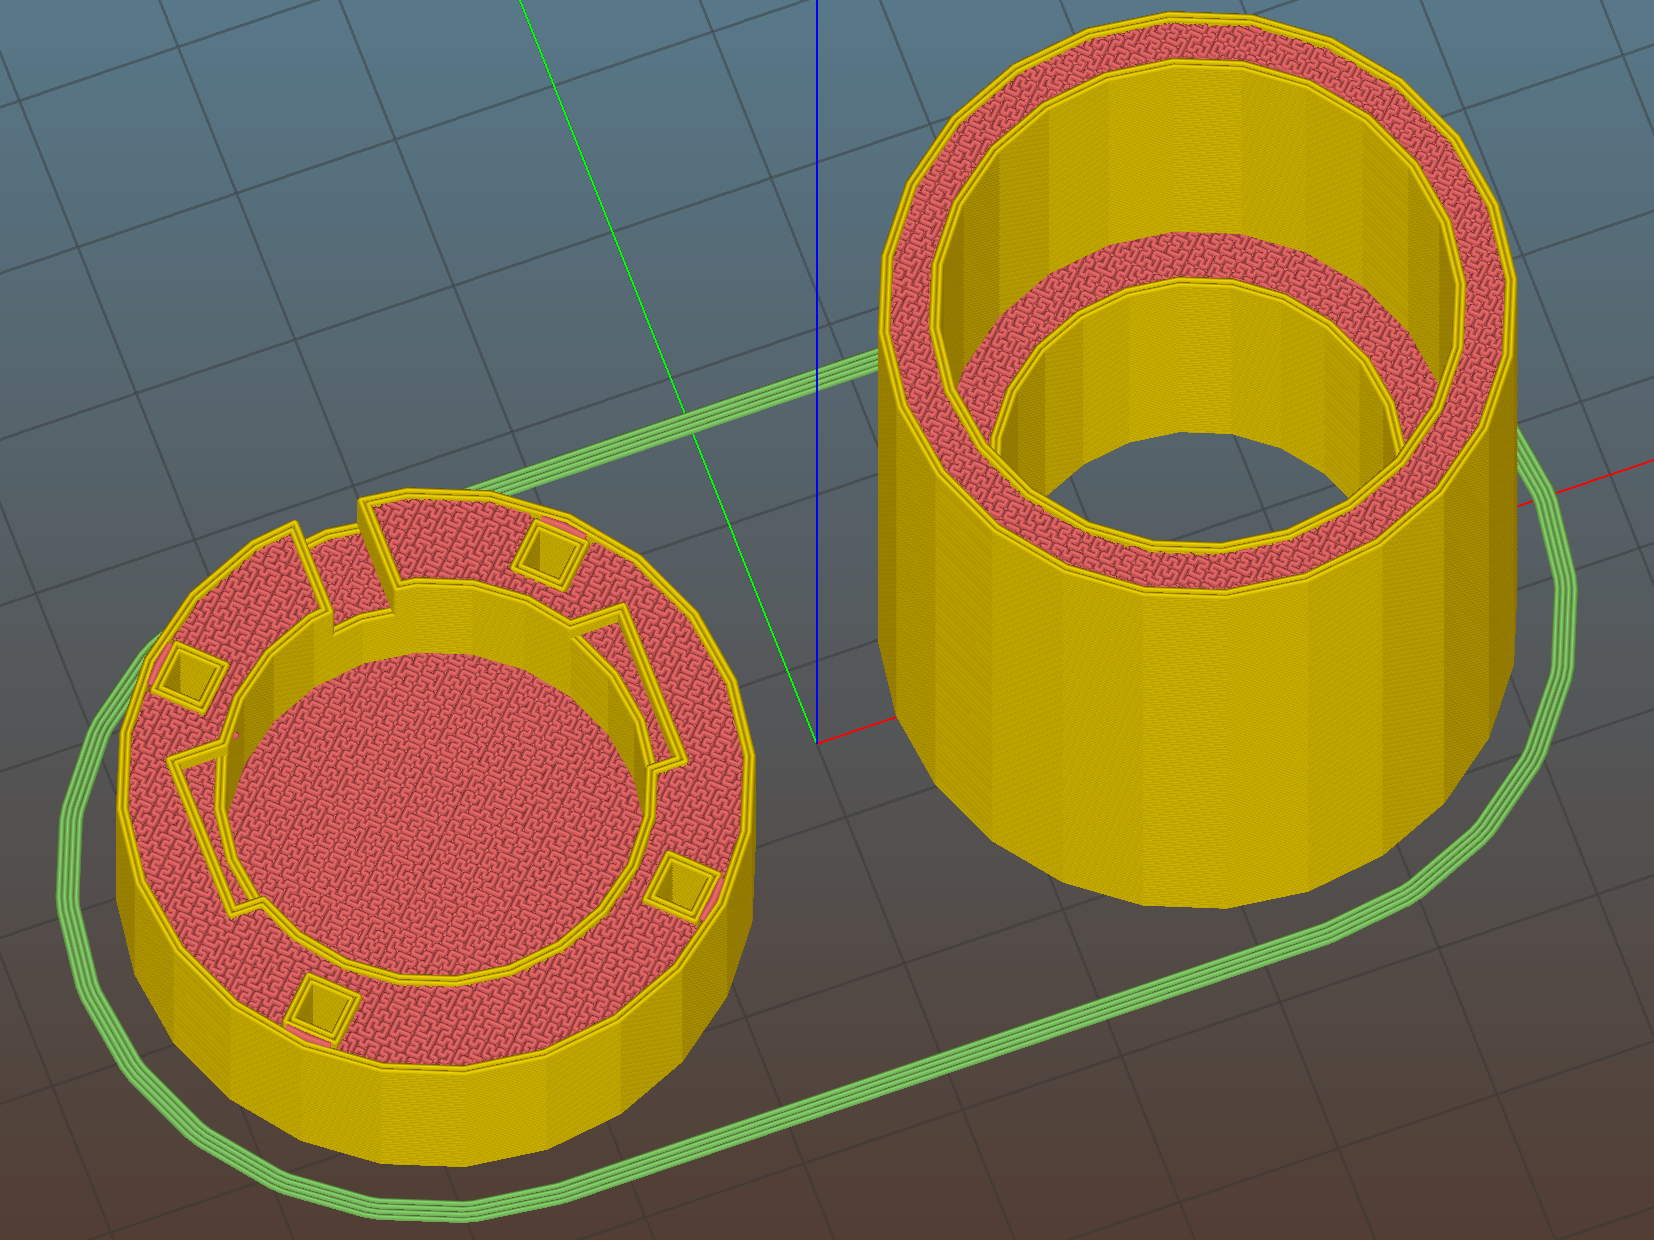
A bit of doodling & OpenSCAD tinkering produced a suitable adapter:

To which Slic3r applied the usual finishing touches:
A bit of silicone tape holds the sloppy focusing thread in place:

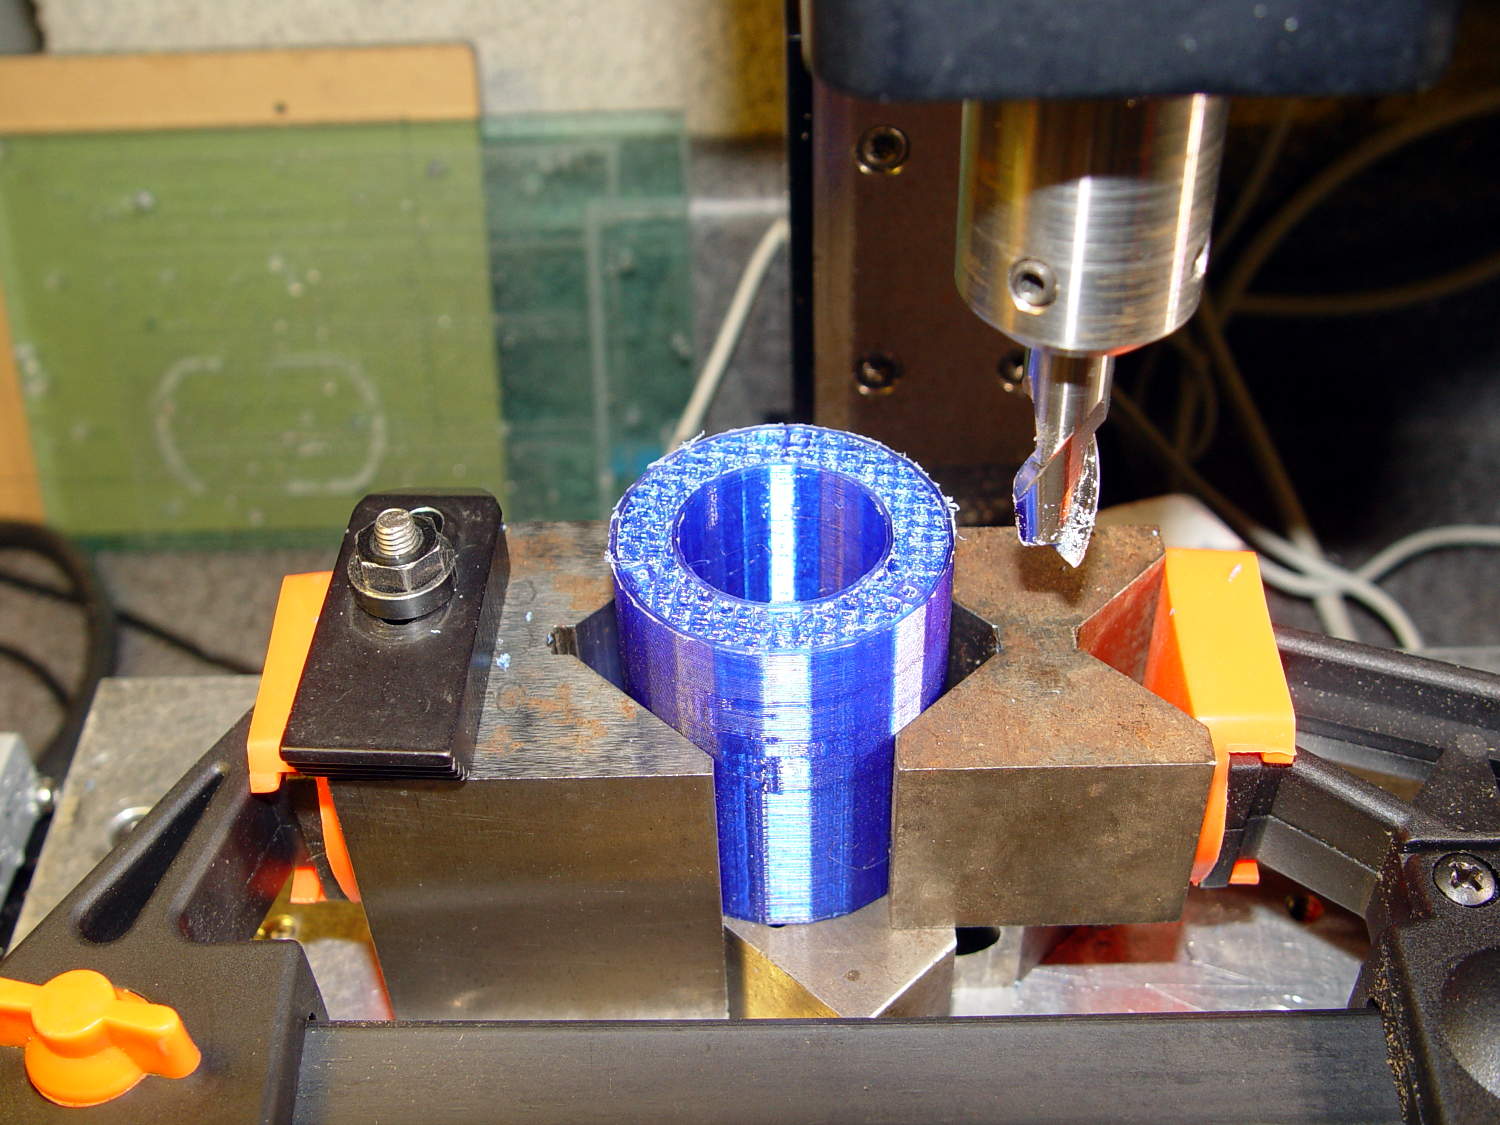
Those are 2-56 screws that will hold the cap onto the tube. I drilled out the clearance holes in the cap and tapped the holes in the eyepiece adapter by hand, grabbing the bits with a pin vise.
Focus the lens at infinity, which in this case meant an old DDJ cover poster on the far wall of the Basement Laboratory, and then it’ll be just as happy with the image coming out of the eyepiece as a human eyeball would be.
I put a few snippets of black electrical tape atop the PCB locating tabs before screwing the tube in place. The tube ID is 1 mm smaller than the PCB OD, in order to hold the PCB perpendicular to the optical axis and clamp it firmly in place. Come to find out that the optical axis of the lens isn’t perfectly perpendicular to the PCB, but it’s close enough for my simple needs.
And then it fits just like you’d expect:

Actually, that’s the second version. The distance from the camera lens (equivalently: the PCB below the optical block, which I used as the datum plane) to the eyepiece is a critical dimension that determines whether the image fills the entrance pupil. I guesstimated the first version by hand-holding the camera and measuring with a caliper, tried it out, then iteratively whacked 2 mm off the tube until the image lit up properly:
Minus 4 mm made it slightly too short, but then I could measure the correct position, tweak that dimension in the code, and get another adapter, just like the first one (plus a few other minor changes), except that it worked:

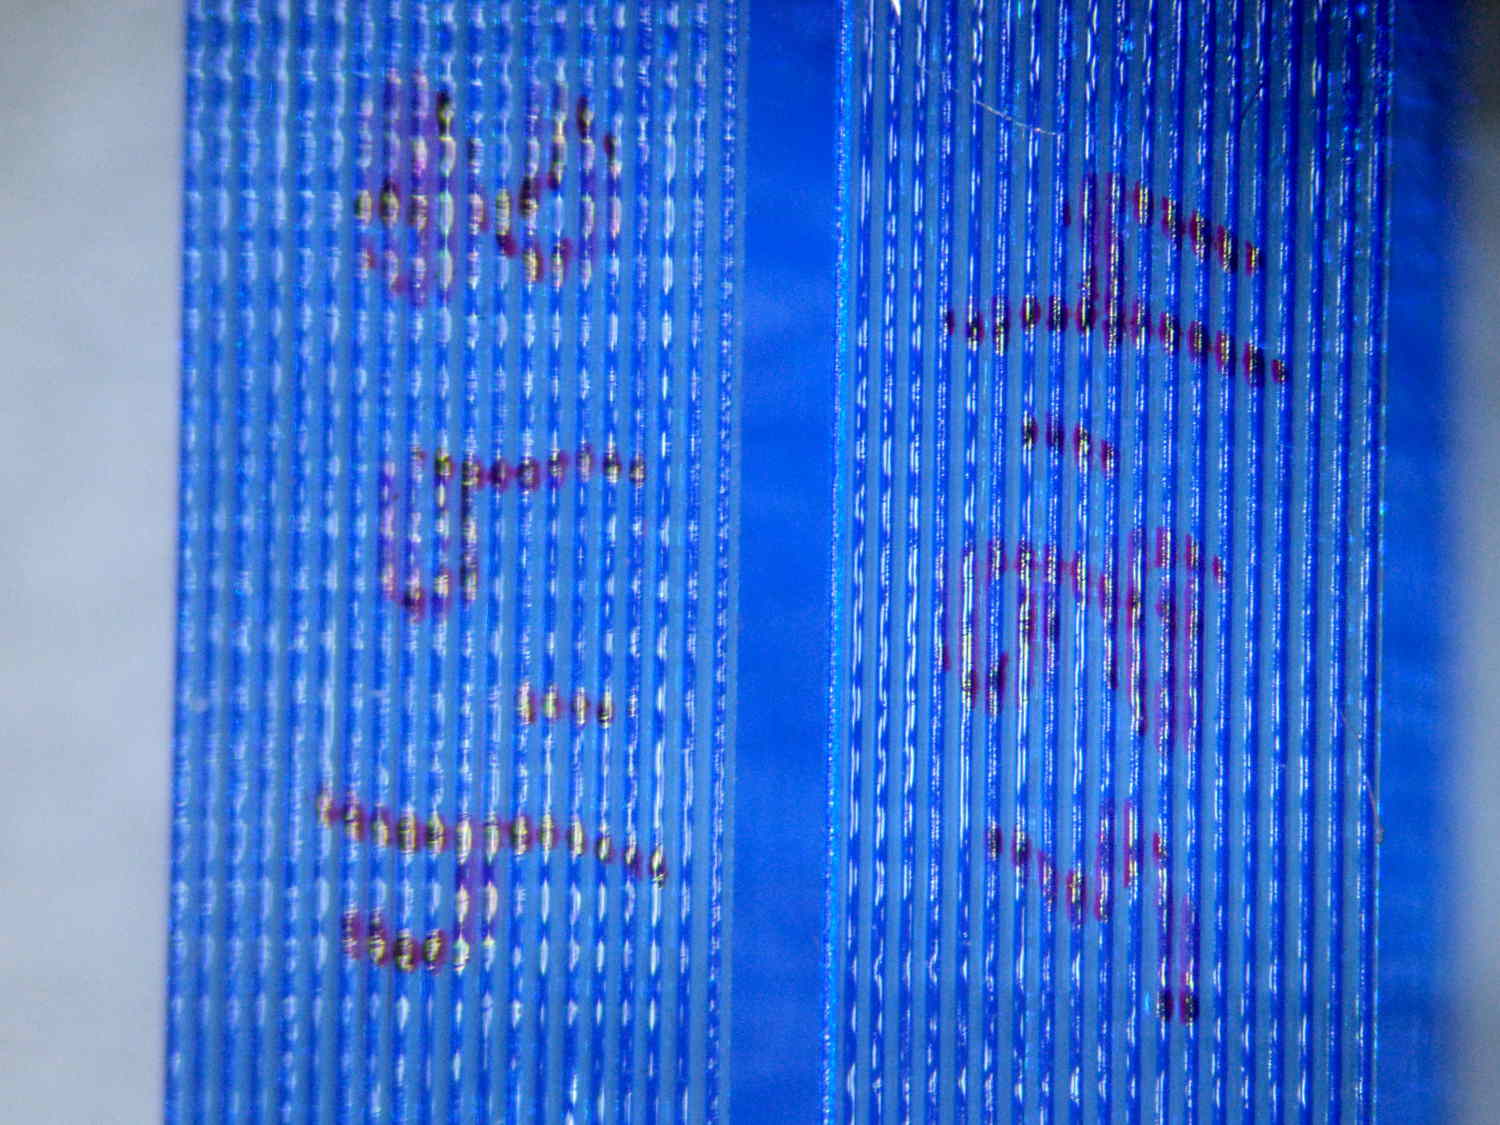
That’s a screen capture from VLC, which plays from /dev/video0 perfectly. Some manual exposure & color balance adjustment may be in order, but it’s pretty good for First Light.
It turns out that removing the eyepiece and holding the bare sensor over the opening also works fine. The real image from the objective fills much more area than the camera’s tiny sensor: the video image covers about one digit in that picture, but gimmicking up a bare-sensor adapter might be useful.
The OpenSCAD source code:
// USB Camera mount for Microscope Eyepiece
// Ed Nisley KE4ZNU - August 2015

Layout = "Build";                    // Show Build Mount Cap

//-------
//- Extrusion parameters must match reality!
//  Print with 2 shells

ThreadThick = 0.25;
ThreadWidth = 0.40;

HoleWindage = 0.2;

Protrusion = 0.1;           // make holes end cleanly

function IntegerMultiple(Size,Unit) = Unit * ceil(Size / Unit);

inch = 25.4;

Tap2_56 = 0.070 * inch;
Clear2_56 = 0.082 * inch;
Head2_56 = 0.156 * inch;
Head2_56Thick = 0.055 * inch;
Nut2_56Dia = 0.204 * inch;
Nut2_56Thick = 0.065 * inch;
Washer2_56OD = 0.200 * inch;
Washer2_56ID = 0.095 * inch;

BuildGap = 5.0;

//-------
// Dimensions

//-- Camera

PCBThick = 1.1;
PCBDia = 24.5;
PCBClampDia = 23.0;

KeySize = [IntegerMultiple(27.6,ThreadWidth),IntegerMultiple(9.5,ThreadWidth),IntegerMultiple(PCBThick,ThreadThick)];
KeyOffset = [0.0,1.5,0];

CameraOffset = 22.3;                    // distance from eyepiece to camera PCB

WallThick = 4.0;

EyePieceOD = 30.0;
EyePieceLen = 30.0;

BodyOD = EyePieceOD + 2*WallThick;
BodyLen = CameraOffset + EyePieceLen - 5.0;

echo(str("Body length: ",BodyLen));

CapSocket = 10;
CapLen = CapSocket + WallThick;
CableOD = 3.7;

echo(str("Cap length: ",CapLen));


echo(str("Total length: ",BodyLen + CapLen));

NumScrews = 4;
ScrewAngle = 45;

NumSides = 6*4;

//-------

module PolyCyl(Dia,Height,ForceSides=0) {           // based on nophead's polyholes
    Sides = (ForceSides != 0) ? ForceSides : (ceil(Dia) + 2);
    FixDia = Dia / cos(180/Sides);
    cylinder(r=(FixDia + HoleWindage)/2,
             h=Height,
             $fn=Sides);
}


//-------
// Components

module LensMount() {

    difference() {
        cylinder(d=BodyOD,h=BodyLen,$fn=NumSides);
        translate([0,0,CameraOffset])
            PolyCyl(EyePieceOD,EyePieceLen,NumSides);
        translate([0,0,-Protrusion])
            PolyCyl(PCBClampDia,(BodyLen + 2*Protrusion),NumSides);
        for (i=[0:NumScrews-1])
            rotate(ScrewAngle + i*360/NumScrews)
                translate([(BodyOD/2 - 1.5*Head2_56/2),0,-Protrusion])
                    rotate(180/4)
                        PolyCyl(Tap2_56,10.0,4);
    }
}

module CamCap() {
    difference() {
        cylinder(d=BodyOD,h=CapLen,$fn=NumSides);
        translate([0,0,WallThick])
            PolyCyl(PCBDia,CapLen,NumSides);
        translate(KeyOffset + [0,0,(CapLen - KeySize[2]/2 + Protrusion/2)])
            cube((KeySize + [0,0,Protrusion]),center=true);
        if (false)
            translate([0,0,-Protrusion])
                PolyCyl(CableOD,CapLen,8);
        else
            translate([0,BodyOD/2,(CapLen - CableOD/2 + Protrusion/2)])
                rotate([90,0,0])
                    cube([CableOD,(CableOD + Protrusion),BodyOD],center=true);
        for (i=[0:NumScrews-1])
            rotate(ScrewAngle + i*360/NumScrews)
                translate([(BodyOD/2 - 1.5*Head2_56/2),0,-Protrusion])
                    rotate(180/4)
                        PolyCyl(Clear2_56,(CapLen + 2*Protrusion),4);

    }
}

//-------
// Build it!

if (Layout == "Mount")
    LensMount();

if (Layout == "Cap")
    CamCap();

if (Layout == "Show") {
    CamCap();
    translate([0,0,CapLen + 5])
        LensMount();
}
if (Layout == "Build") {
    translate([-(BodyOD/2 + BuildGap),0,0])
        CamCap();
        translate([(BodyOD/2 + BuildGap),0,0])
        LensMount();
}

Comments
3 responses to “Stereo Zoom Microscope: USB Camera Mount”
that is pretty cool, loving your work
That microscope makes many things much easier, including photography!
Thanks for the good words…
[…] bit less than a month later, after producing several iterations of unrelated […]