After replacing that washer, the last step in the platform alignment required 1/6 turn on the front screw between the top two sets of measurements:
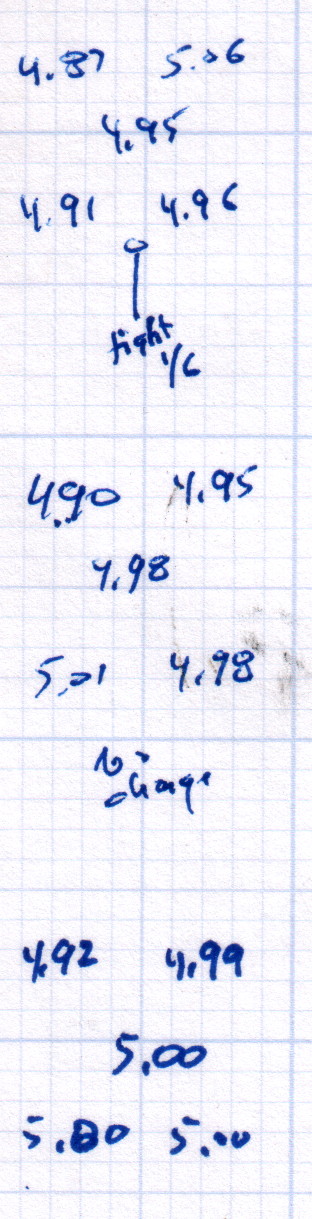
The last two sets show the sample-to-sample variation with no adjustments, which didn’t amount to much.
Without changing anything else, I then switched from magenta PETG filament to cyan and ran off two more sets of thinwall hollow boxes (in addition to other doodads) over the next two days:

A bit less than a month later, after producing several iterations of unrelated doodads:

The variation in the center box height from 4.94 mm to 5.00 mm shows that sensing the platform Z-axis position directly on the glass surface actually works the way it should: ±0.03 mm is as good as it gets. Given that my measurement error / eyeballometric averaging on any given box runs around ±0.02 mm, the far corners also seem rock-stable and certainly don’t justify automatic alignment probing and adjustment.
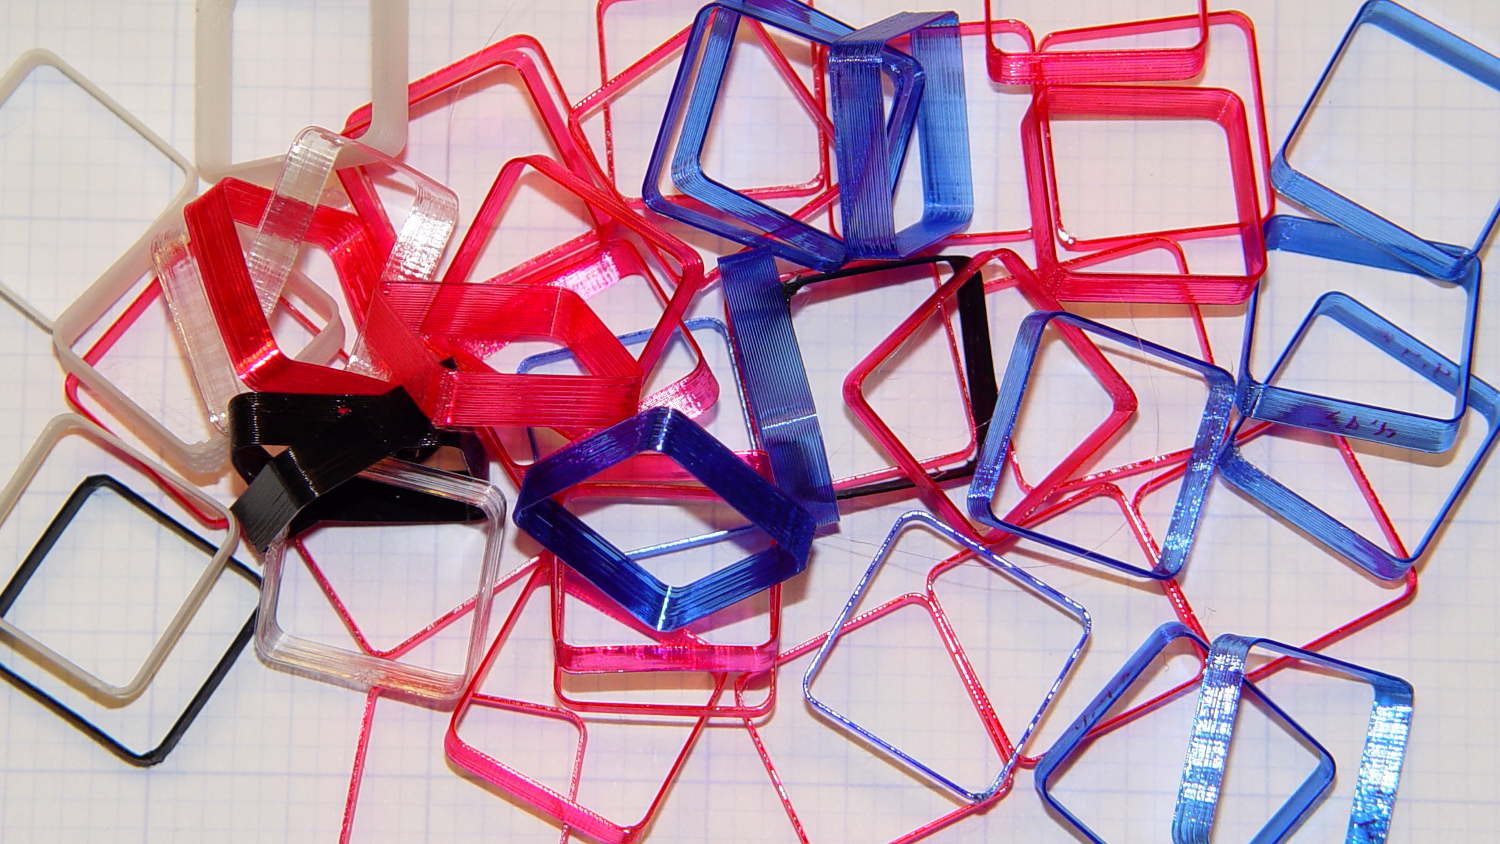
Thinwall hollow boxes make good handouts at 3D printing presentations…

Comments
4 responses to “Makergear M2: Platform Stability”
I’ve ran thinwall calibration routine you mentioned few days ago and got out a nice calibration objects, wall thickness bang on, brim and completed height within reason (both under +/-0.05mm).
Then I tried printing other stuff with new calibrated parameters, but now my brims and bottom level and especially infills look wrong and underextruded. I’m using no name PLA which prints nicely from 190C and these tests were done at 210C so I don’t think more heat is the way to go. Platform height is determined with induction probe which seems to work fine. Filament is feeding evenly without stripping, skipping steps or slipping.
Before calibration my extrusion multiplier was set to produce nice solid infills at 1.15 which seemed much too high, and obviously wrong since parts were oversized. Calibration suggests 1.01 is the right multiplier, and I’m currently using 1.06 which tends to produce sparse brims but does almost acceptable job on on the first level and infill.
Do you have any suggestions? Any idea what I’m doing wrong?
Setting the proper Extrusion Multiplier means that the machine lays down the plastic just as the slicer expects. Once you get that working, you can begin tweaking all the other adjustments…
However, I’d be very, very, very suspicious of the platform position sensor, because every problem you describe can be explained by an overly tall first layer caused by incorrect Z homing. That will cause what looks like underextrusion and it can continue well up into the object.
Why would the sensor work for thinwall open boxes and fail for other objects? Haven’t a clue, but that’s where I’d start looking. Try both open and solid boxes of the same overall outside dimension; varying the infill percentage for the solid boxes may provide more evidence.
Bottom line: it sounds like a mechanical problem…
Consistency is a virtue here, so make sure you can actually measure the results in all the objects. I can’t defend an intermittently bad first layer, but that’s a very good thing to rule out.