The hose going into the handle of the never–sufficently-to-be-damned Samsung VAC-9048R suck dog has been collapsing for quite some time, but I couldn’t figure out how to take the handle apart. Recently, the lock ring that I would have sworn was glued in place came loose, revealing the secret:

You slide four lugs on the lock ring into the open slots, then turn the ring clockwise to force the lugs over barriers into recesses that capture them and hold the lock ring against the handle. The handle under the lock ring isn’t quite circular, nor is the lock ring, and I think (based on later events) that they expect the ring to deform as it turns in order to let the lugs spring over the barriers.
Anyhow, with the lock ring loose, removing four screws released the two halves of the handle:
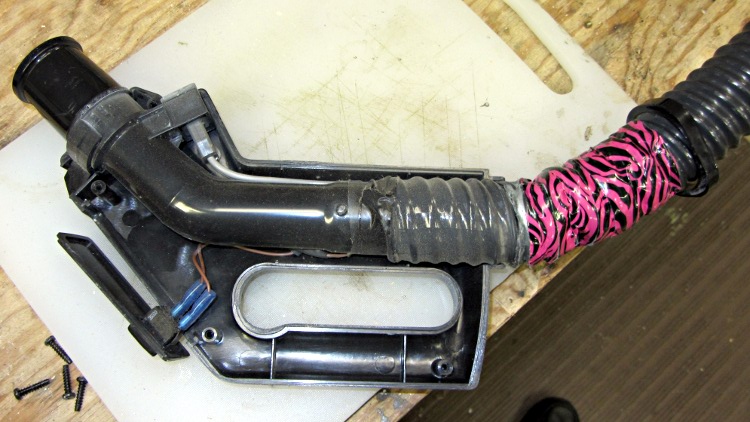
The handle includes a switch for the powered floor brush, which we rarely use, and a suction control lever that’s basically a binary leak: on or off. With the handle opened in front of you, remove the innards, unwrap the decorative duct tape, unwind enough of the two power conductor / spring wire ribs to allow for rebuilding the electrical connections, and cut off the damaged part of the hose.
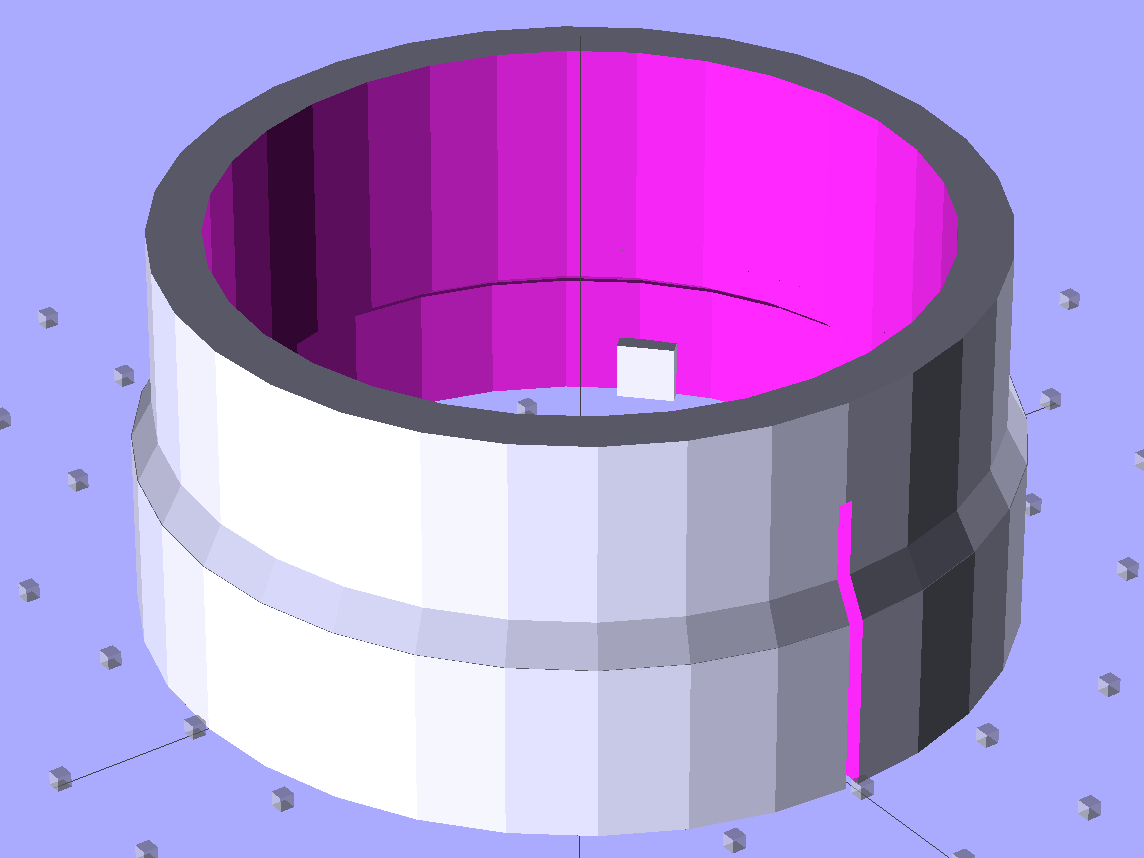
Now, obviously, what that hose needs is a little bit of strain relief, along the lines of the hideous snout I’d affixed to its other end a while ago. The general idea is to replace the lock ring with a little attachment that will hold the heatshrink tubing in place. Something like this:
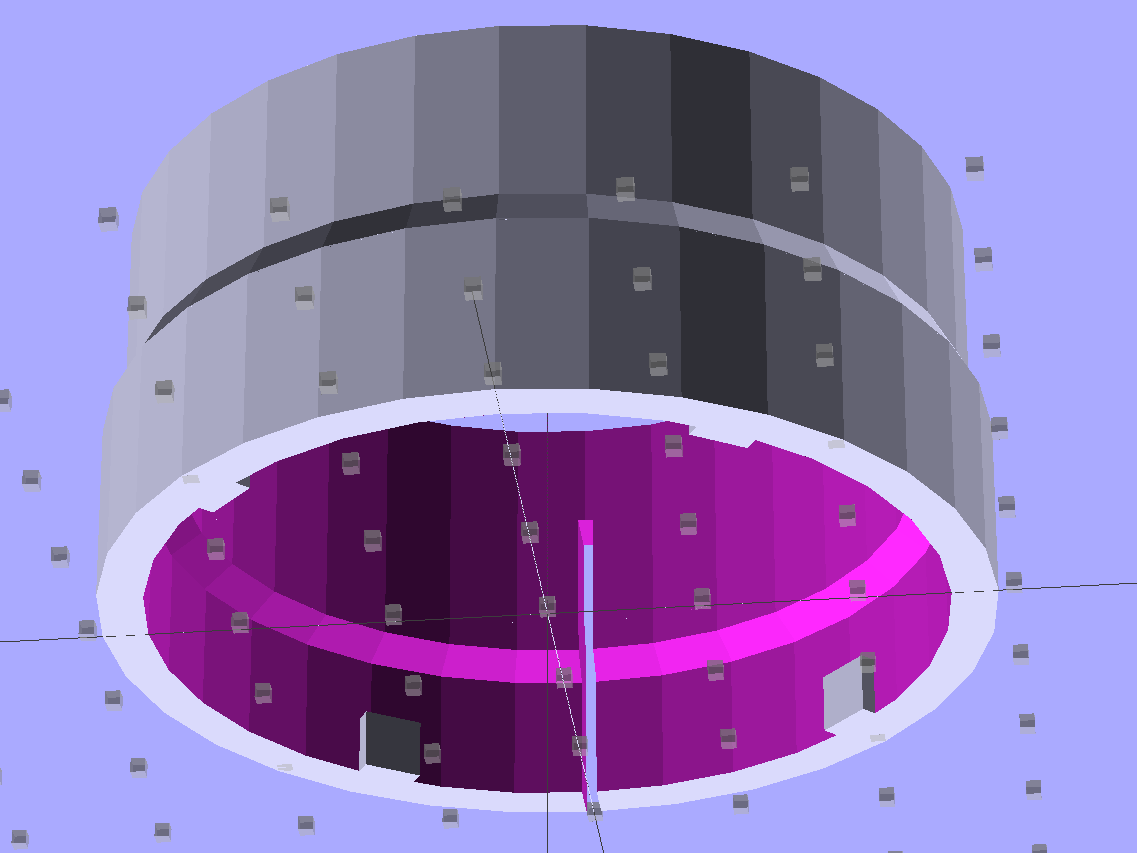
The bottom view, looking up through the layer of 1 mm cubes defining the Z=0 plane, shows the lugs:
I thought the slit would provide enough springiness to let the lugs bump over the ridges, but it wasn’t quite enough: the relatively stiff ABS isn’t nearly as springy as the original black plastic for about the same thickness. For the next version, I’ll try four slits, all of which must end at different levels to avoid concentrating the stress on a single layer.
In any event, it came out about like you’d expect:

As with many projects, though, I had to make a pair of simpler prototypes to get the measurements correct. The lugs, for example, are not 90° apart, spaced neatly around the handle’s midline seam, as I assumed for Prototype 1 on the right:

Prototype 2, on the left, has a support structure holding up a horizontal step that butted against the handle, which turned out to be unnecessary. The OpenSCAD version substitutes a pair of conical transitions that worked much better; they’re at different levels with a thicker wall section between them.
With the ring and somewhat preshrunk heatshrink tubing slipped along the hose, rewiring proceeds in reverse order. Next time, I’ll add a QD fitting in the hose-to-socket wire so I can take the whole thing apart again without cutting that wire:

Assemble the handle, snap the glaring white strain relief fitting in place, shrink the tubing, add a cable tie mostly for show:
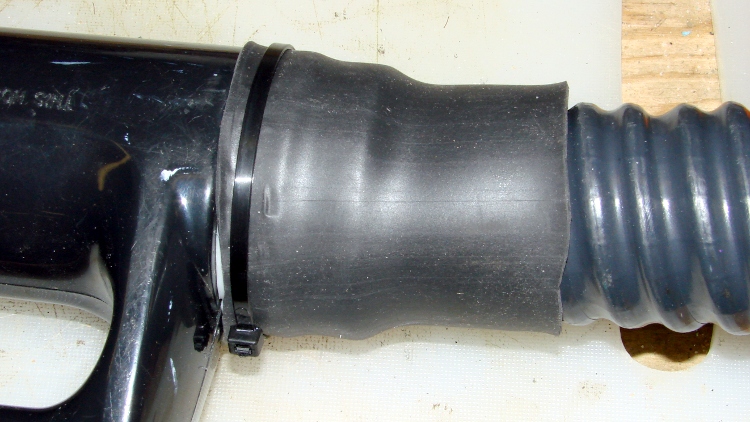
I cut a few slits in the tubing’s end to improve its bendiness, but it’s already Much Better than it was.
A few things I’d do differently:
- Add a recess for the cable tie, with a flat spot for its latch
- Four slits, not just one
- Ribs on the snout to help anchor the tubing
- Longer snout?
The OpenSCAD source code for the final version, with a module for the support ring that you won’t need:
// Samsung Vacuum cleaner hose bushing
// Ed Nisley KE4ZNU January 2013

// Layout options

Layout = "Build";
                    // Overall layout: Show Build
                    // Parts: Ring Sleeve

//- Extrusion parameters must match reality!
//  Print with +1 shells and 3 solid layers

ThreadThick = 0.25;
ThreadWidth = 2.0 * ThreadThick;

HoleWindage = 0.75;

function IntegerMultiple(Size,Unit) = Unit * ceil(Size / Unit);

Protrusion = 0.1;           // make holes end cleanly

//----------------------
// Dimensions

HoseOD = 47.0;					// spiral tube diameter
TubeWall = 1.4;					// heatshrink tubing wall thickness
HandleRingLong = 8.5;			// length of ring stub on handle

RingID = 51.0;					// lock ring over handle end
RingOD = 58.0;
RingLong = 12.0;

Locks = 4;						// bumps inside lock ring
LockLength = 4.0;
LockWide = 4.0;
LockThick = 0.75;

LockAngleOffset = 52.0;			// offset of lock bump from handle top dead center
LockAngleIncluded = 102.4;		// between first and second lock bump (also 3 & 4)
LockAngles = [-LockAngleOffset,
				-(LockAngleOffset+LockAngleIncluded),
				-(LockAngleOffset+180),
				-(LockAngleOffset+LockAngleIncluded+180)];

BushID = HoseOD + 1.0;			// over spiral hose
BushOD = RingOD - 2*TubeWall;	// allow flush heatshrink fit
BushLength = 15.0;

SlitWidth = 2*ThreadWidth;		// allow expansion of lock ring, sorta kinda
SlitHeight = 20.0;
SlitAngle = 0;
SlitLength = max(RingOD,BushOD);

RingSides = 4*8;
RingAlign = 360/(2*RingSides);
$fn = RingSides;

//----------------------
// Useful routines

module PolyCyl(Dia,Height,ForceSides=0) {           // based on nophead's polyholes

Sides = (ForceSides != 0) ? ForceSides : (ceil(Dia) + 2);

FixDia = Dia / cos(180/Sides);

cylinder(r=(FixDia + HoleWindage)/2,
         h=Height,
         $fn=Sides);
}

module ShowPegGrid(Space = 10.0,Size = 1.0) {

    Range = floor(50 / Space);

    for (x=[-Range:Range])
        for (y=[-Range:Range])
            translate([x*Space,y*Space,Size/2])
            %cube(Size,center=true);

}

//-------------------
// Component parts

module Ring() {
	union() {
		difference() {
			union() {
				cylinder(r=RingOD/2,h=(RingLong + Protrusion));
				translate([0,0,RingLong])
					cylinder(r1=(RingOD/2),r2=(BushOD - Protrusion)/2,h=(RingOD - BushOD));
			}
			translate([0,0,-Protrusion]) {
				PolyCyl(RingID,(HandleRingLong + Protrusion),RingSides);
				cylinder(r=BushID/2,h=(2*RingLong));
			}
			translate([0,0,(HandleRingLong - Protrusion)])
				cylinder(r1=((RingID/2) / cos(180/RingSides) + HoleWindage),
						 r2=BushID/2,
						 h=(RingID - BushID)/2);
		}
		for (i=[0:Locks-1])
			rotate(LockAngles[i] + RingAlign)
				translate([(RingID/2),0,LockWide/2])
					cube([2*LockThick,LockLength,LockWide],center=true);
	}
}

module Sleeve() {
	difference() {
		cylinder(r=BushOD/2,h=(BushLength + Protrusion));
		translate([0,0,-Protrusion])
			cylinder(r=BushID/2,h=BushLength + 3*Protrusion);
	}
}

module Bushing() {
	difference() {
		union() {
			Ring();
			translate([0,0,RingLong])
				Sleeve();
		}
		rotate(SlitAngle)
			translate([SlitLength/2,0,(SlitHeight - Protrusion)/2])
				cube([SlitLength,SlitWidth,(SlitHeight + Protrusion)],center=true);
	}
}

// This turned out to be unnecessary after tapering the transitions
module Support() {

SuppHeight = RingLong - ThreadThick;

	color("Yellow")
	union() {
		difference() {
			cylinder(r=(RingID/2 - LockThick - ThreadWidth/2),h=SuppHeight);
			translate([0,0,-Protrusion])
				cylinder(r=(BushID/2 - ThreadWidth),h=2*RingLong);
			for (i=[0:RingSides-1])
				rotate(i*2*RingAlign)
					translate([RingID/4,0,SuppHeight - ThreadThick/2 + Protrusion/2])
						cube([RingID/2,(LockLength - 3*ThreadWidth),(ThreadThick + Protrusion)],center=true);
		}
	}
}

//----------------------
// Build it!

ShowPegGrid();

if (Layout == "Build")
	union() {
		Bushing();
//		Support();
	}

if (Layout == "Show")
	Bushing();

if (Layout == "Ring")
	Ring();

if (Layout == "Sleeve")
	Sleeve();

if (Layout == "Support")
	Support();

Comments
3 responses to “Samsung VAC-9048R Vacuum Cleaner: Nozzle Handle Hose Bushing”
Wild thought; could you adapt a 1.25″ shop/vac hose to replace the Samsung one? Home Depot sells such in kits, with a 12′ (I think) standard. (Other diameters available, too.) It’s soft enough to cut to length, too. Not as pretty as a new one, but might offer fewer frustrations.
I scrapped a well abused canister vac from church a while ago. So much dust had gotten to the motor and impeller that it wasn’t worth trying to salvage anything. If I needed a noise maker, maybe…
FWIW, I’m slowly working on setting up that Oneida Air Dust Deputy. The plastic construction (there’s a steel one, at a much higher price) warrants strong measures to keep strain off it, and I’m adapting a Woodsmith Shop design to mount the vacuum and DD with drum. I’ll do a picture and an evaluation when it’s running.
Good idea!
That would likely work fine, as we rarely need the power head around here. It’d still need strain relief on both ends, though, because Samsung unjustifiably expected the hose to haul the canister around with no complaints about sharp bends, and I don’t know if it’d be too stretchy. If we haven’t replaced that thing when the hose fails again, I’ll give it a try.
Thanks…
[…] « Samsung VAC-9048R Vacuum Cleaner: Nozzle Handle Hose Bushing […]