Ed Nisley's Blog: Shop notes, electronics, firmware, machinery, 3D printing, laser cuttery, and curiosities. Contents: 100% human thinking, 0% AI slop.
The mowing crew we encountered half a mile ahead had a chainsaw and cleared the remainder.
Stay alert out there!
Although I don’t have a picture, there was a freshly dead bat lying underneath the main trunk. I think it rode the tree down, only to get slapped hard against the gravel beside the trail. I’m sure bats power up faster than I do, but not quite fast enough.
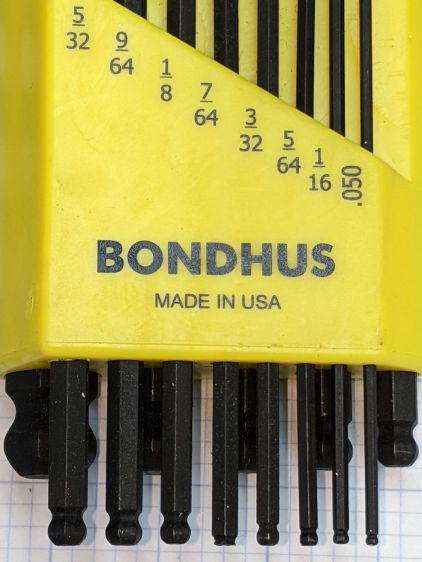
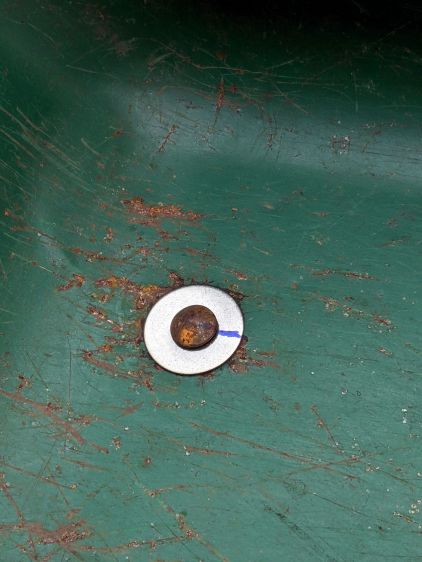
When I applied the 7/64 wrench to a setscrew, the missing ball came as a surprise.
Even though the inch wrench set doesn’t get a lot of use, it’s possible I broke the ball off during a previous adventure, but a look at the end shows the black oxide coating covering the end:
Bondhus hex wrenches – missing 7-64 ball – detail
Yeah, it was born that way.
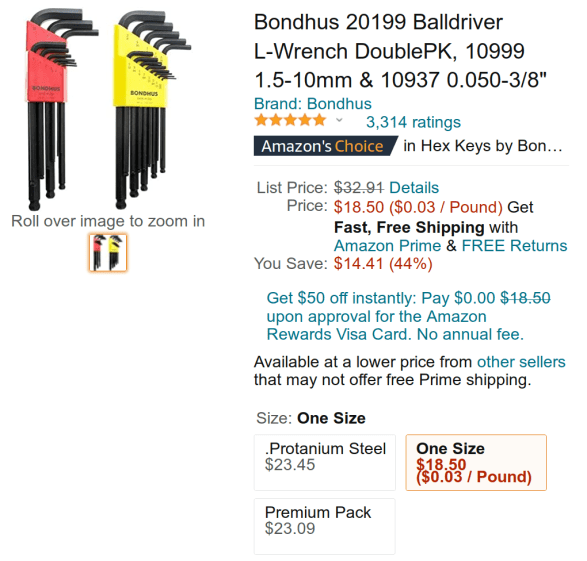
I wonder if and how their lifetime guarantee works.
Protip: as of this writing, the Amazon listing has two other “sizes” showing exactly the same set at significantly higher prices from two randomly named sellers:
Bondhus hex wrench set – Amazon listing
It is safe to assume Amazon no longer has its customers’ best interests in mind.
Four years ago I got a folding Bluetooth keyboard for my then-newish Pixel phone:
Folding keyboard – front
A few days ago, the 2 W S X Win keys stopped working, suggesting a problem with the matrix scan of that column.
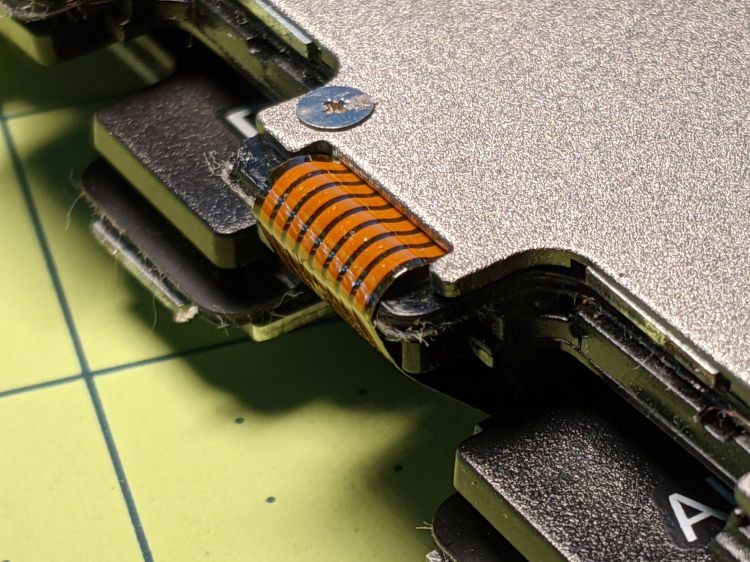
The trim cover over the fold on the back of the keyboard disengages from the hinge with gentle prying at the obvious places, exposing a flex cable pressed against a disturbingly right-angled edge:
Folding keyboard – acute cable fold edge
Unfolding the keyboard makes the acute bend against the case obvious, even though it’s hidden under the cable:
Folding keyboard – failed cable – borrom view
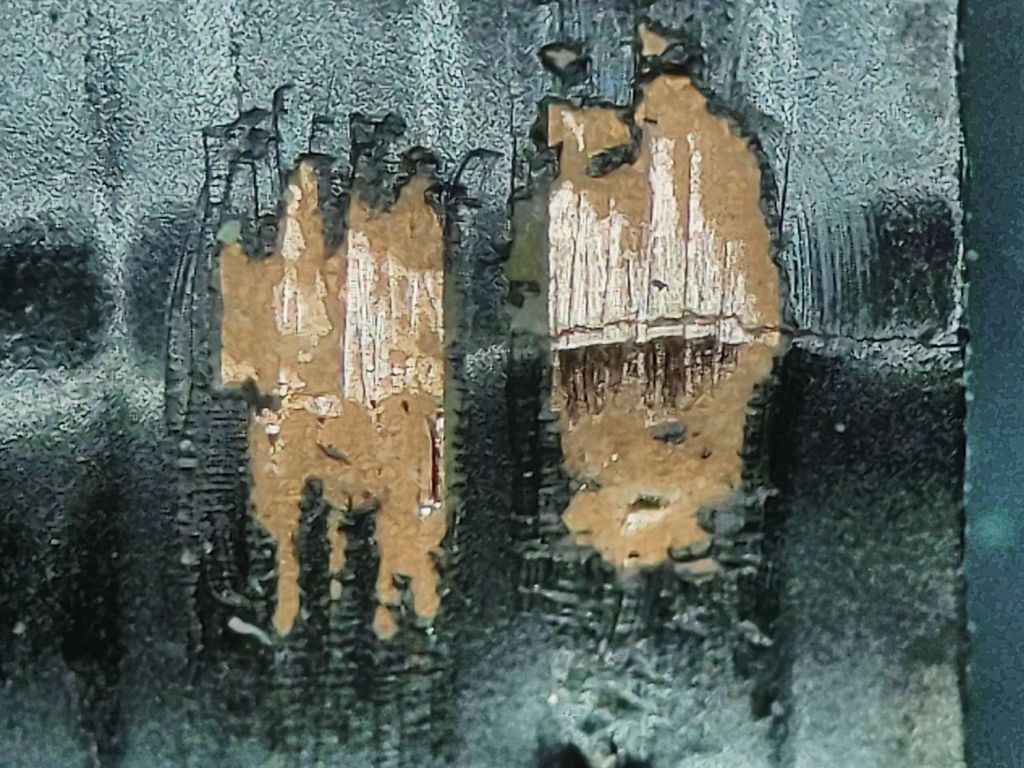
Some tedious poking around with a continuity meter revealed not only a broken trace, but a crack in the flex cable:
Folding keyboard – cracked flex conductor
Protip: when you have nothing to lose, poke a pin through the flex cable into the trace to localize the break. The point leaves little holes, but so what?
I scraped off the black coating and the insulation over the traces with an Xacto knife under the microscope, which definitely reveals my need for a tiny Waldo manipulator.
Coating the exposed copper with solder and bridging the crack with one strand of the finest wire in my collection produced a truly horrific scene:
Folding keyboard – patched flex conductors
The glop on the left is flux applied before soldering. The rugged terrain on the right is the exceedingly gummy adhesive holding the cable to the keyboard, which turned out to be surprisingly heat-sensitive.
Fairly obviously, those patches will not survive much more flexing, so wrap the cable with Kapton tape and apply a stiffening layer of thick plastic tape:
Folding keyboard – reinforced cable section
Apply more reinforcing tape and button it up again:
Folding keyboard – reinforced cable flex edge
I stuck the flex cable down with the repaired joint about a millimeter under that sharp edge, with double-sided sticky tape underneath to help immobilize the bruised area.
While I had the covers off, I also reinforced the same section of the cable on the other side of the keyboard, in the hopes of preventing a crack.
The alert reader will have noted the cable has eight traces, enough for a 3×5 matrix of 15 keys, but the folding wing has 16 keys: the second row has four keys. I have no idea how they made that work, other than perhaps resistive coding for some of the keys.
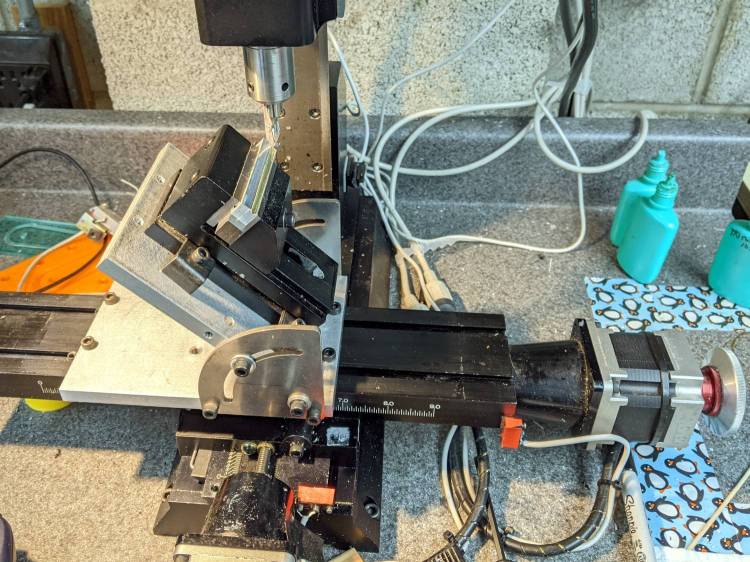
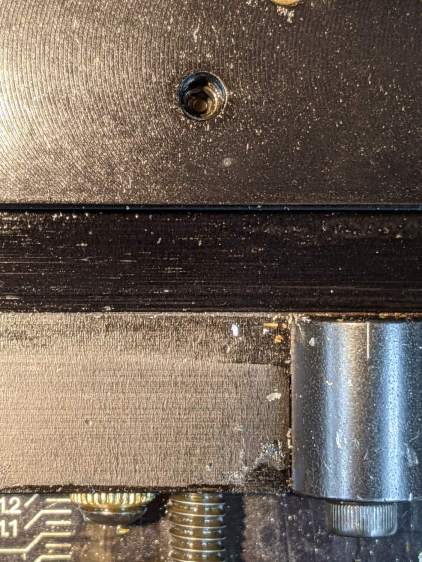
The need to gnaw a V groove into the side of two 60 mm aluminum bars led to this Sherline CNC mill setup:
Sherline Y-Axis Nut Mishap – setup
Milling the near end of the bars put the angle plate’s rear lock screw within a millimeter of the column; the vise fits in exactly one spot on the angle plate and that’s where the jaws must be.
While controlling the mill with the Joggy Thing and some manual command entry, because it’s easier than real CNC programming, I overshot the near end and rammed the column with enough enthusiasm to dislodge the Y-axis leadscrew nut. An interlude of utter confusion ended with the backlash preload nut firmly jammed against the leadscrew coupler on the other end of travel:
Sherline Y-Axis Nut Mishap – stuck preload nut
The paper shreds show where the bellows formerly stuck on the Y axis stage.
The backlash nut chewed off a few star lock gear teeth on its way out, as seen here just above where they mesh:
Sherline Y-Axis Nut Mishap – chewed star nut
It’s been quite a few years since I took the thing apart to replace the nuts, so I used the opportunity to lube the otherwise inacessible X axis leadscrew inside its table upside down on the bench.
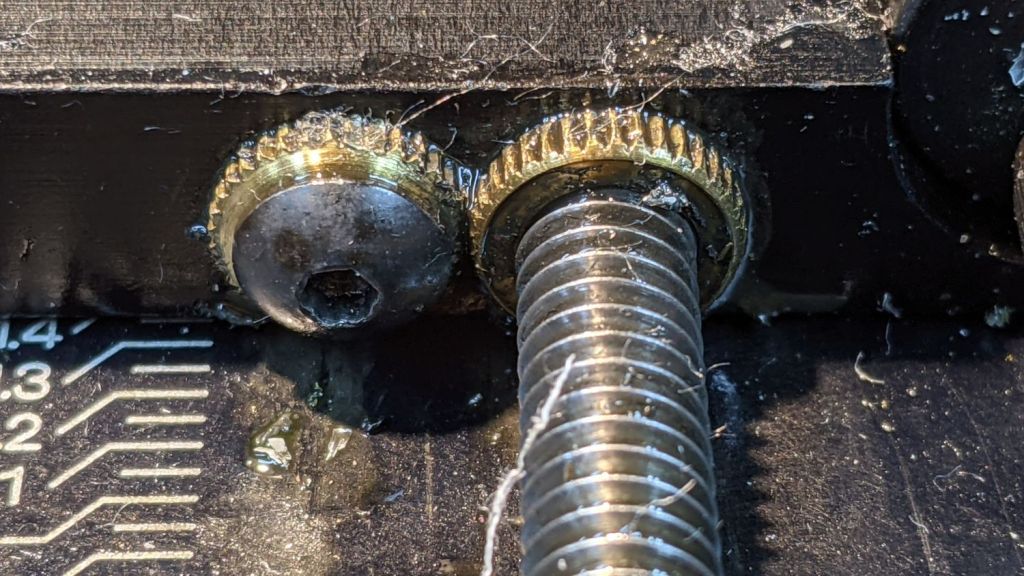
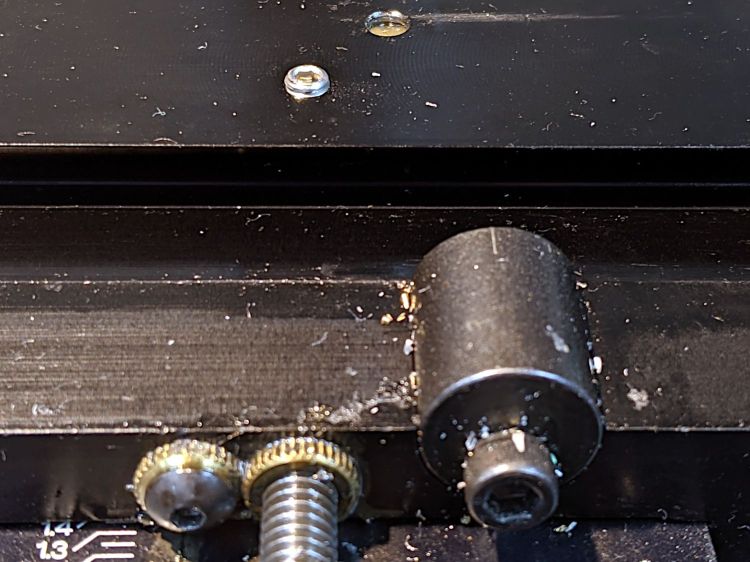
The setscrew locking the Y axis leadscrew nut in place heaves into view with the X axis table off:
Sherline Y-Axis Nut Mishap – setscrew
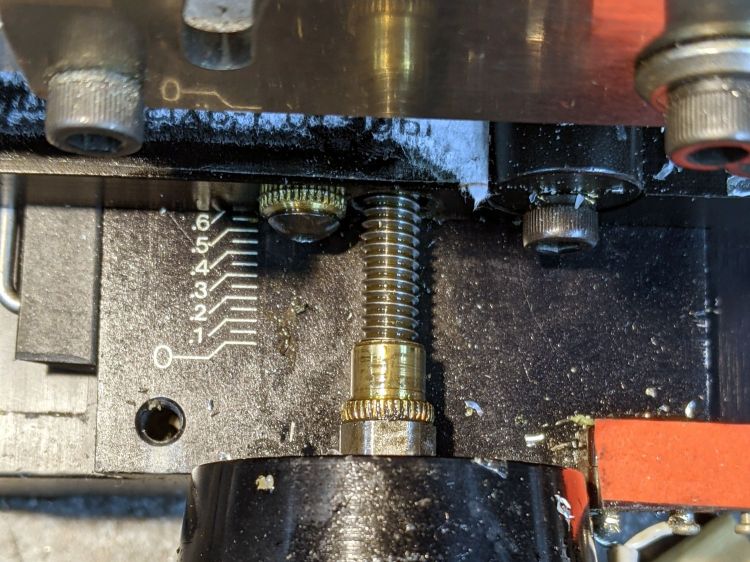
I thought about jamming it in place with a second 10-32 setscrew, but the ones on hand were just an itsy too long and collided with the X-axis table:
Sherline Y-Axis Nut Mishap – doubled setscrew
The thought of having the additional setscrew work loose, grind into the underside of the table, and require major surgery for recovery persuaded me to drop it back in the drawer.
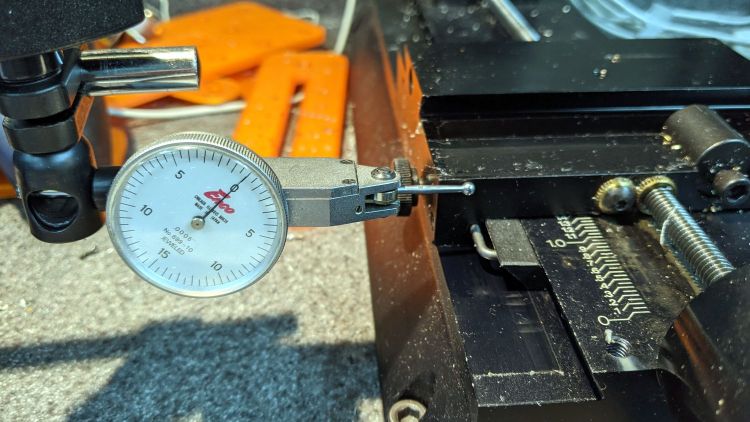
With everything in place, I adjusted the backlash (on both axes) down to a few mils:
Sherline Y-Axis Nut Mishap – backlash test
Tweaking the X axis preload nut under the table is not my idea of a good time, but it’s been quite a while since I had to do that.
Folding the new paper bellows and installing them took about as long as repairing the mill.
Milling the second V groove worked fine; all is right with the Sherline again.
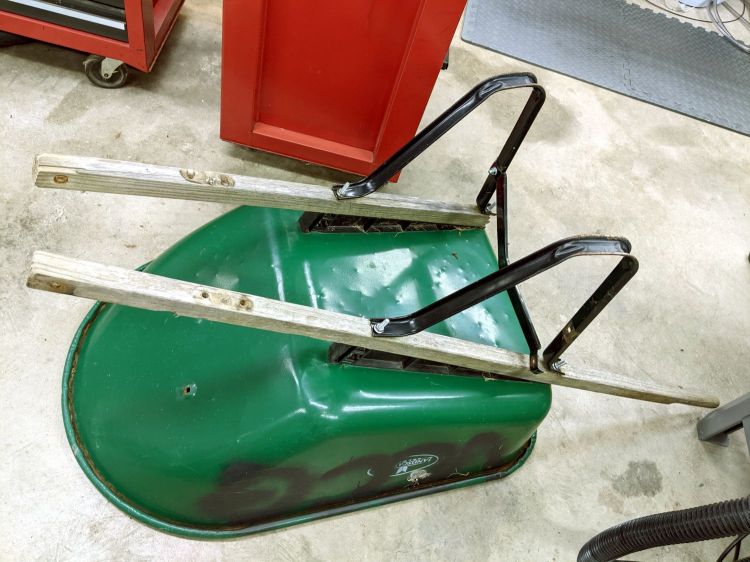
For reasons that should be obvious by now, I volunteered to rebuild a wheelbarrow used at the Vassar Community Garden plots. It spent all its time outdoors and one of the handles eventually broke off:
Wheelbarrow rebuild – old handles
I’d already removed the wheel and front strap, which were in good condition.
The new handles were undrilled, so I marked and drilled them with a nice brad-point bit to get clean holes:
Wheelbarrow rebuild – handle drilling
The metal “barrow” had cracked around the carriage bolts holding it to the frame, so I filed a quartet of fender washers to fit the square section under the heads:
Wheelbarrow rebuild – fender washer holes
After a false start, I marked the bolt heads and washers to line them up properly while tightening the nuts on the other end:
Wheelbarrow rebuild – fender washer installed
One front strut had gone missing, so I replaced it with a mashed-and-drilled section of ski pole:
Wheelbarrow rebuild – front strut
All in all, a few hours of Quality Shop Time interspersed with a few pleasant bike rides to various local stores, wherein I learned who doesn’t stock the necessary hardware.
Protip: Home Depot has the highest-entropy hardware assortment.
For the record, all the bolts have a 5/16-18 thread.
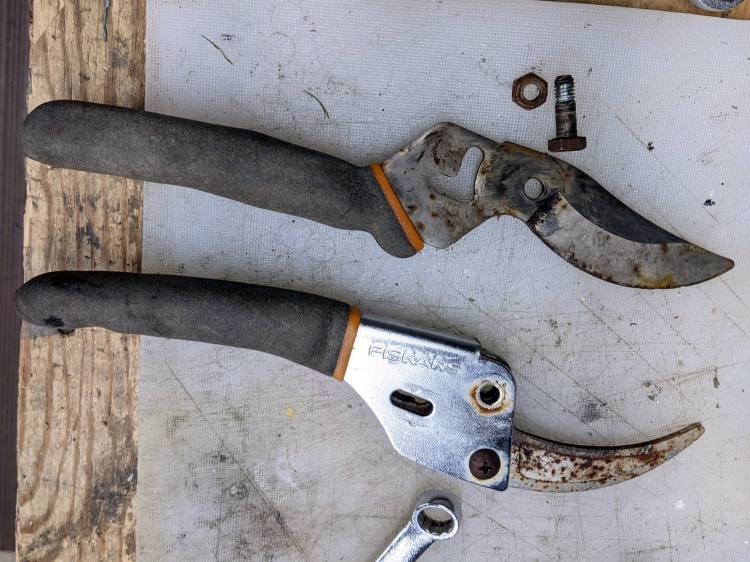
Mary found a rusted Fiskars bypass pruner in the trash pile near her Vassar Farms plot and brought it home for proper disposal. The nuts and screws responded to an overnight penetrating oil treatment and it came apart easily:
Fiskars bypass pruner – as found
The movable jaw may have once sported a PTFE coating, but it’s likely just a different steel alloy.
After scrubbing the pieces with an abrasive pad, a little diamond filing, and (at the insistence of the Squidwrench chorus) some Dremel wire-wheel action, it looks almost new:
Fiskars bypass pruner – restored
The blades sport a few nicks from their previous life, but work well enough.