The Smell of Molten Projects in the Morning

Ed Nisley's Blog: Shop notes, electronics, firmware, machinery, 3D printing, laser cuttery, and curiosities. Contents: 100% human thinking, 0% AI slop.

Tag: Repairs

If it used to work, it can work again

  • Replacement Muntin Clips

    Replacement Muntin Clips

    Terminology I had to look up:

    • Window: something in a wall you can see through
    • Sash: a sliding panel in a window
    • Mullion: vertical post separating two windows
    • Muntin: strips separating glass panes in a sash

    TIL: Muntin, which I’d always known was called a Mullion.

    With that as preface, one of Mary’s quilting cronies lives in a very old house updated with vinyl windows sporting wood muntins arranged in a grille. The wood strips forming the grille end in plastic clips that snap into the sash, thereby holding the grill in place to make the window look more-or-less historically correct, while not being a dead loss as far as winter heating goes.

    Time passed, sun-drenched plastic became brittle, and eventually enough clips broke that the grilles fell out. An afternoon quilting bee produced a question about the possibility of making a 3D printed clip, as the original manufacturer is either defunct or no longer offers that particular style of clip as a replacement part.

    Well, I can do that:

    Window Muntin Clips
    Window Muntin Clips

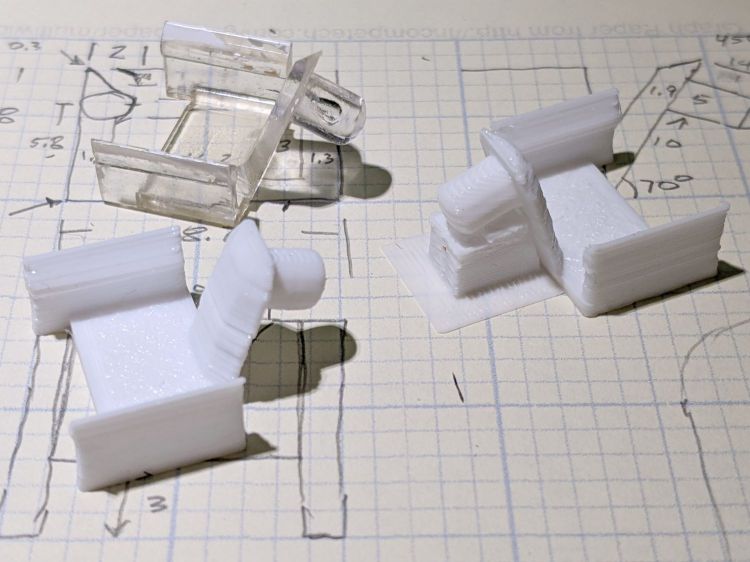
    The original is (obviously) the transparent injection-molded part in the upper left. The other two come hot off the M2’s platform, with the one on the right showing the support material under the sash pin.

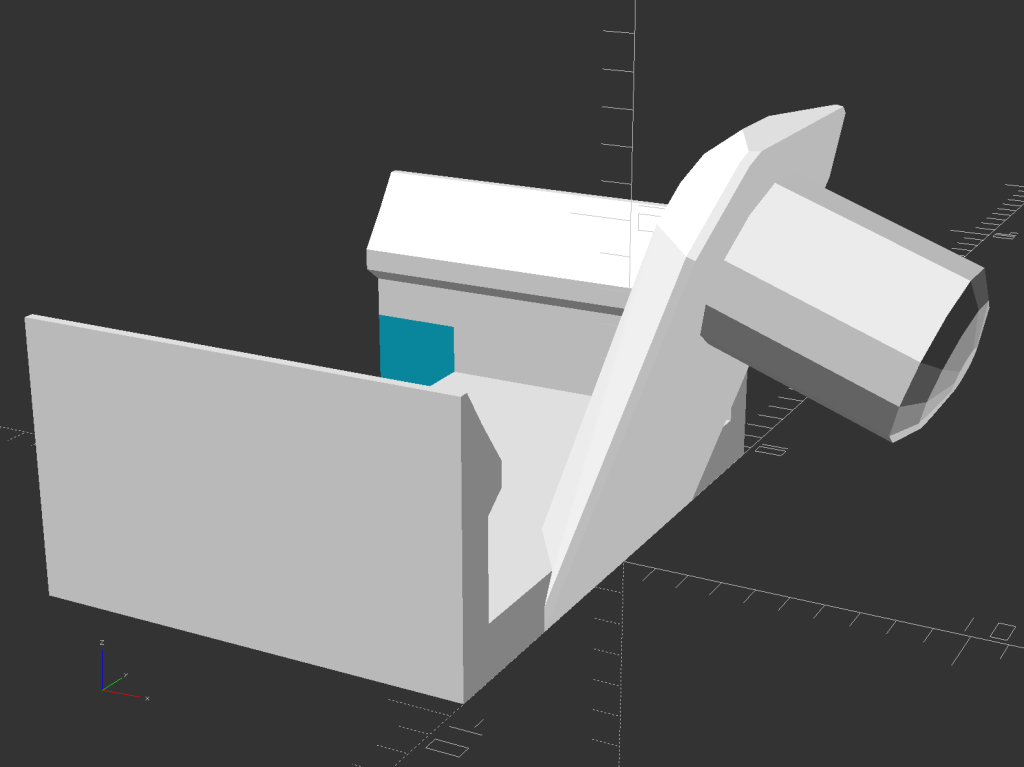
    The solid model looks about like you’d expect:

    Window Muntin Clip - solid model
    Window Muntin Clip – solid model

    There is obviously no way to build it without support material, so I painted the bottom facet of the sash pin with a PrusaSlicer support enforcer:

    Window Muntin Clip - PrusaSlicer
    Window Muntin Clip – PrusaSlicer

    The pin comes out slightly elongated top-to-bottom, but it’s still within the tolerances of the original part and ought to pop right into the sash. We’ll know how well it works shortly after the next quilting bee.

    The doodle with useful measurements amid some ideas that did not work out:

    Window Muntin Clip - Dimension Doodle
    Window Muntin Clip – Dimension Doodle

    The OpenSCAD source code as a GitHub Gist:

    // Window Muntin Clips
    // Ed Nisley KE4ZNU June 2022
    Layout = "Show"; // [Build, Show]
    /* [Hidden] */
    ThreadThick = 0.25;
    ThreadWidth = 0.40;
    HoleWindage = 0.2;
    Protrusion = 0.1; // make holes end cleanly
    inch = 25.4;
    ID = 0;
    OD = 1;
    LENGTH = 2;
    function IntegerMultiple(Size,Unit) = Unit * ceil(Size / Unit);
    //———————-
    // Dimensions
    ClipOA = [13.0,18.7,8.0];
    TongueAngle = 70;
    TongueOA = [14.0,10.0,1.8 – 0.2]; // minus Z windage for angular slices
    BuildGap = 5.0;
    //———————-
    // Useful routines
    module PolyCyl(Dia,Height,ForceSides=0) { // based on nophead's polyholes
    Sides = (ForceSides != 0) ? ForceSides : (ceil(Dia) + 2);
    FixDia = Dia / cos(180/Sides);
    cylinder(r=(FixDia + HoleWindage)/2,
    h=Height,
    $fn=Sides);
    }
    //———————-
    // Pieces
    module Shell() {
    // Clip base as 2D polygon
    // Magic numbers from measurements
    cx = ClipOA.x;
    cy = ClipOA.y;
    cz = ClipOA.z;
    ClipPts = [
    [0,0],[0,cz],[0.3,cz],
    [1.0,cz-1.0],[2.0,cz-2.3],[2.0,cz-3.0],[1.3,cz-3.5],
    [1.3,1.6],[17.4,1.6],
    [17.4,cz-3.5],[16.7,cz-3.0],[16.7,cz-2.3],[17.7,cz-1.0],
    [18.4,cz],[18.7,cz],[18.7,0.0],[0,0]
    ];
    difference() {
    translate([-ClipOA.x,-ClipOA.y/2,0])
    rotate([90,0,90])
    linear_extrude(height=ClipOA.x,convexity=3)
    polygon(convexity=3,points=ClipPts);
    translate([-(ClipOA.x – 3.0/2 + Protrusion),0,0])
    cube([3.0 + Protrusion,ClipOA.y – 2*1.3,4*1.6],center=true);
    }
    }
    module Tongue() {
    tx = TongueOA.x;
    ty = TongueOA.y;
    tz = TongueOA.z;
    tt = ty – 2*sqrt(2)*tz; // width at top of tapers
    td = ThreadWidth; // min size of features
    intersection() {
    rotate([0,-TongueAngle,0]) {
    difference() {
    union() {
    hull() {
    for (j=[-1,1]) {
    translate([td/2,j*(ty – td)/2,td/2])
    cube(td,center=true);
    translate([td/2,j*(tt – td)/2,tz – td/2])
    cube(td,center=true);
    }
    translate([10.0,0,0])
    rotate(180/12)
    cylinder(d=ty,h=td,center=false,$fn=12);
    translate([10.0,0,tz – td/2])
    rotate(180/12)
    cylinder(d=tt,h=td,center=false,$fn=12);
    };
    translate([10.0,0,-5.2])
    rotate(180/12)
    cylinder(d=5.0,h=5.2,center=false,$fn=12);
    translate([10.0,0,-5.2])
    rotate(180/12)
    resize([0,0,2.0])
    sphere(d=5.0/cos(180/12),$fn=12);
    }
    if (false)
    translate([10.0,0,-10]) // stiffening hole
    rotate(180/6)
    PolyCyl(0.1,20,6);
    }
    }
    cube([2*ClipOA.x,2*ClipOA.y,2*IntegerMultiple(13.0,ThreadThick)],center=true);
    }
    }
    module Clip() {
    Shell();
    Tongue();
    }
    //———————-
    // Build it
    if (Layout == "Show") {
    Clip();
    }
    if (Layout == "Build") {
    Clip();
    }

  • Kenmore HE3 Washer: End of Life

    Kenmore HE3 Washer: End of Life

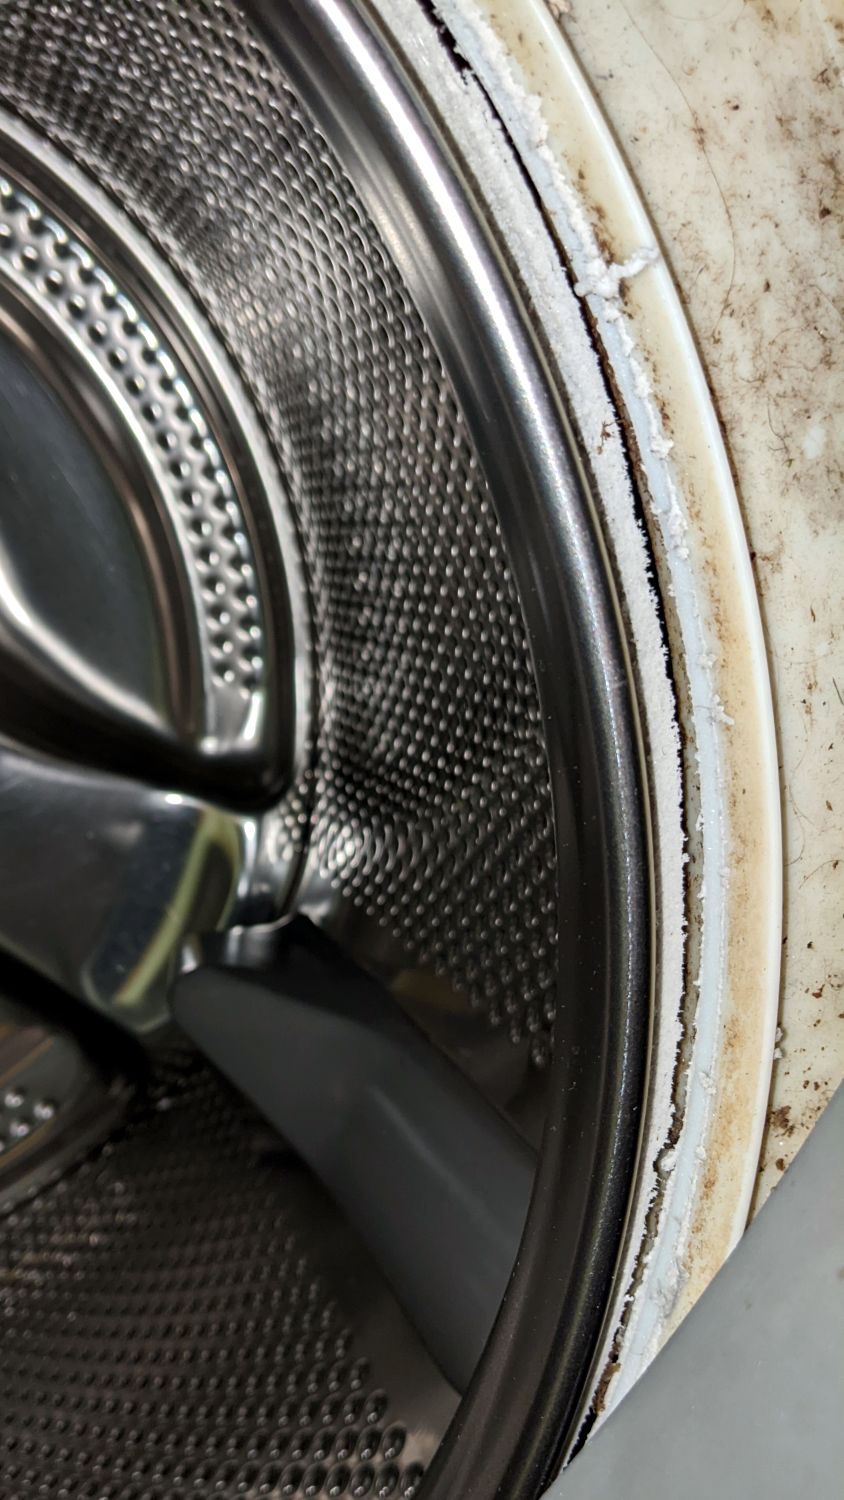
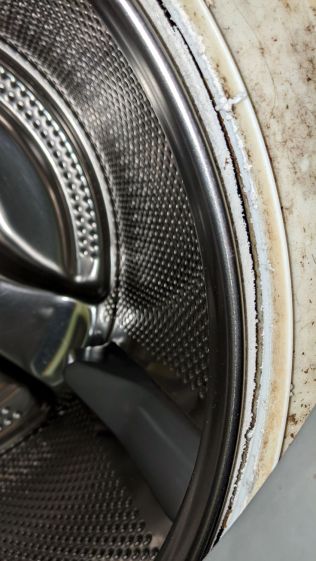
    After eighteen years and one basket / tub replacement, our venerable Kenmore HE3 clothes washer has reached End of Life:

    • Kenmore washer - eroded tub A
    • Kenmore washer - eroded tub B
    • Kenmore washer - eroded tub C

    I had looked in there (between the door gasket and the tub) to find any foreign objects making the horrible noise and again, perhaps a week later, when I replaced the shock absorbers, after which the corroded spider in the back finally broke enough to let the basket flop around continuously during the spin cycle and erode the tub rim.

    In round numbers, we heard the first sign of trouble three weeks ago: a very loud, but only occasional, KLONK due to protrusions on the side of the basket or the fractured part of the spider on its back hitting indentations in the tub. The KLONK remained intermittent during half a dozen loads, until it became pretty much continuous.

    We installed the washer in early 2004, replaced the tub and basket in 2010, and it’s now 2022: the first spider failed after six years and its replacement lasted twelve. After nearly two decades, the tub and basket are no longer available from the usual appliance part sources, so (even if I wanted to) I cannot repair the washer.

    Another washer, also a front-loader, also highly rated, will arrive shortly. For the first time ever, we bought an Extended Service Plan good for five years. The alert reader will note the difference between the first failure and the length of the plan, but reviews of similar new machines suggest having Lemon Replacement coverage. In this situation, I am willing to pay for the talismanic effect of coverage that may never pay off, if that makes any sense.

  • Kenmore HE3 Washer Shock Absorber Shims

    Kenmore HE3 Washer Shock Absorber Shims

    As part of diagnosing a Terrible Sound inside our two decade old washer, I replaced the OEM shock absorber struts with cheap knockoffs. Although it didn’t solve the problem (spoiler: another tub spider bites the dust), the experience may come in handy elsewhere.

    The left rear (as seen from the front) shock stood in a pile of rust on the baseplate that came from a drip in the water feed nozzle to the detergent / bleach / whatever dispenser drawer. The affected parts are no longer available and I have never had any luck finding a replacement O-ring of the proper size, so I just pulled the nozzle out, ran a small bead of acrylic sealant around the O-ring, and squished it back in place:

    Kenmore washer - dispenser nozzle seal
    Kenmore washer – dispenser nozzle seal

    It’s the Y connection between the two black hoses, held in place on the dispenser by a relentless little clip. Release the two hose clamps, remove the hoses, pull it out, apply sealant, squish, reinstall in reverse order.

    As for the shocks, don a pair of work gloves and turn the upper mount (on the tub) counterclockwise as you look along the shock. The tub has molded-in latches that make turning it the wrong way difficult, but not impossible.

    With the shock loose, you can now try to turn the lower mounts counterclockwise as you look along the shock, but I had to deploy the BFW in very cramped quarters to get enough traction. This will likely wreck the little latches holding the mount in place, but you were going to replace it anyway.

    The new left-rear latch snapped firmly into place:

    Kenmore washer shock - left rear
    Kenmore washer shock – left rear

    Yes, that’s after I cleaned off as much of the rust as made sense.

    The remaining three latches did not snap firmly into place, so I made shims to soak up the slop:

    Kenmore washer shock - shim laser cut
    Kenmore washer shock – shim laser cut

    They slip around the central pillar with clearance for the latches, although the thicker shim didn’t leave much engagement:

    Kenmore washer shock - shim installed
    Kenmore washer shock – shim installed

    They ranged from 0.8 mm down to 0.2, based entirely on feel, and I used PETG, LDPE, and polypropylene clamshell of the right thickness.

    The left front got the thickest:

    Kenmore washer shock - left front
    Kenmore washer shock – left front

    Right front thinnest:

    Kenmore washer shock - right front
    Kenmore washer shock – right front

    And right rear in the middle:

    Kenmore washer shock - right rear
    Kenmore washer shock – right rear

    The shims aren’t precisely lined up with the feet, because I couldn’t make that work out, but they definitely prevented the mounts from shaking in their boots during the spin cycle.

    You will inevitably want to take the mounts off the shocks, which will prove surprisingly difficult. The two halves are identical, with triangular latches that snap together with no provision for release:

    Kenmore washer shock - foot internals
    Kenmore washer shock – foot internals

    Brute force applied with a small screwdriver may suffice, but don’t be surprised if strong words are required.

  • Nothing Lasts, Chemical Edition

    Nothing Lasts, Chemical Edition

    Cleanup after painting the hairlines involved opening the cap of the rarely used can of methyl ethyl ketone:

    MEK can - fractured cap
    MEK can – fractured cap

    It seems white-tinted polyethylene deteriorates after a dozen years of exposure to concentrated MEK fumes, suggesting I don’t use nearly enough enamel paint.

    The Container Stockpile disgorged a pair of pure polyethylene jars that should last another decade.

  • DripWorks Valve Fracture

    DripWorks Valve Fracture

    Early in the irrigation season, Mary turned on a DripWorks Micro-Flow Valve, only to have the knob + stem pop out and release a stream of water in the wrong place. Mary jammed it back in place until I could chop out the offending valve and install a known-clear replacement.

    The knob broke off the stem when I tried to pry it out of the valve body:

    Failed Dripworks valve - parts
    Failed Dripworks valve – parts

    The lip around the inside of the cap snaps over the top of the body, which is why I wrecked the stem, but the chip broke off the cap while Mary was turning it just before the stem popped out. Her fingers are barely strong enough to turn the valve, which means something had gone wrong before she started turning.

    A look straight into the valve body:

    Failed Dripworks valve - top view
    Failed Dripworks valve – top view

    The stem has swarf left over from drilling out the mold flash last year:

    Failed Dripworks valve - stem
    Failed Dripworks valve – stem

    All in all, the Dripworks drip irrigation system works well, but their overall attention to QC leaves something to be desired.

  • CR2032 Lithium Cell Lifetime

    CR2032 Lithium Cell Lifetime

    The Dell Optiplex 9010 acting as a file server woke up dead after I plugged it in after returning from a road trip. Its ID sticker shows a manufacturing date almost exactly nine years ago and the problem was exactly what you might expect:

    Optiplex CR2032
    Optiplex CR2032

    I’d never measured 100 mV on a CR2032 before.

    Because the Optiplex runs headless in the basement, diagnosis required hauling it upstairs, booting it with a display & keyboard, whacking the date into the current decade, then resetting a few other vital bits.

    The electrolytic caps looked to be in fine shape, though.

  • Sunbeam 3035 Clothes Iron: Rusted Spring

    Sunbeam 3035 Clothes Iron: Rusted Spring

    Some weeks ago the Sunbeam clothes iron Mary uses for her quilting projects stopped retracting its cord and a few days ago the entire compartment holding the cord spool simply fell off:

    Sunbeam 3035 Iron - detached cord compartment
    Sunbeam 3035 Iron – detached cord compartment

    One plastic stud and two thin plastic tabs held the compartment onto the rest of the iron. How they lasted this long I do not know, but they are neither replaceable nor fixable.

    When you see badly rusted screws in an electrical device, you know the story cannot end well:

    Sunbeam 3035 Iron - cord connections
    Sunbeam 3035 Iron – cord connections

    And, indeed, it hasn’t:

    Sunbeam 3035 Iron - retraction spring rust
    Sunbeam 3035 Iron – retraction spring rust

    This being a steam iron, it has a water tank that gets filled through an awkward port with a sliding cover. Mary is as conscientious a person as you’ll ever meet, but the occasional spill has certainly happened and it is painfully obvious the iron’s designers anticipated no such events.

    The coil spring had rusted into a solid mass:

    Sunbeam 3035 Iron - spring rust - detail
    Sunbeam 3035 Iron – spring rust – detail

    I removed the spring, soaked it in Evapo-Rust for a few hours, then cleaned and oiled it:

    Sunbeam 3035 Iron - relaxed spring
    Sunbeam 3035 Iron – relaxed spring

    Rewinding and reinstalling the spring showed it has lost its mojo and cannot retract more than a few feet of cord.

    She’s in the middle of a quilting project and will replace the iron with whatever cheapnified piece of crap might be available these days. Similar irons have reviews reporting they begin spitting rust after a few months, which suggests the plastic tank or stainless steel hardware in this one have been cost-reduced with no regard for fitness-for-use.