Ed Nisley's Blog: Shop notes, electronics, firmware, machinery, 3D printing, laser cuttery, and curiosities. Contents: 100% human thinking, 0% AI slop.
Although compact fluorescent lamps have fallen out of favor, I’m burning through a box of the things donated by a friend who upgraded to LEDs and figured I could put them to good use. In general, complex electronic doodads (like CFL or even LED lamps) used in hostile situations (like an ordinary downlight fixture) seem to fail too quickly to justify the power savings; searching for “cfl fail” will produce some evidence from around here.
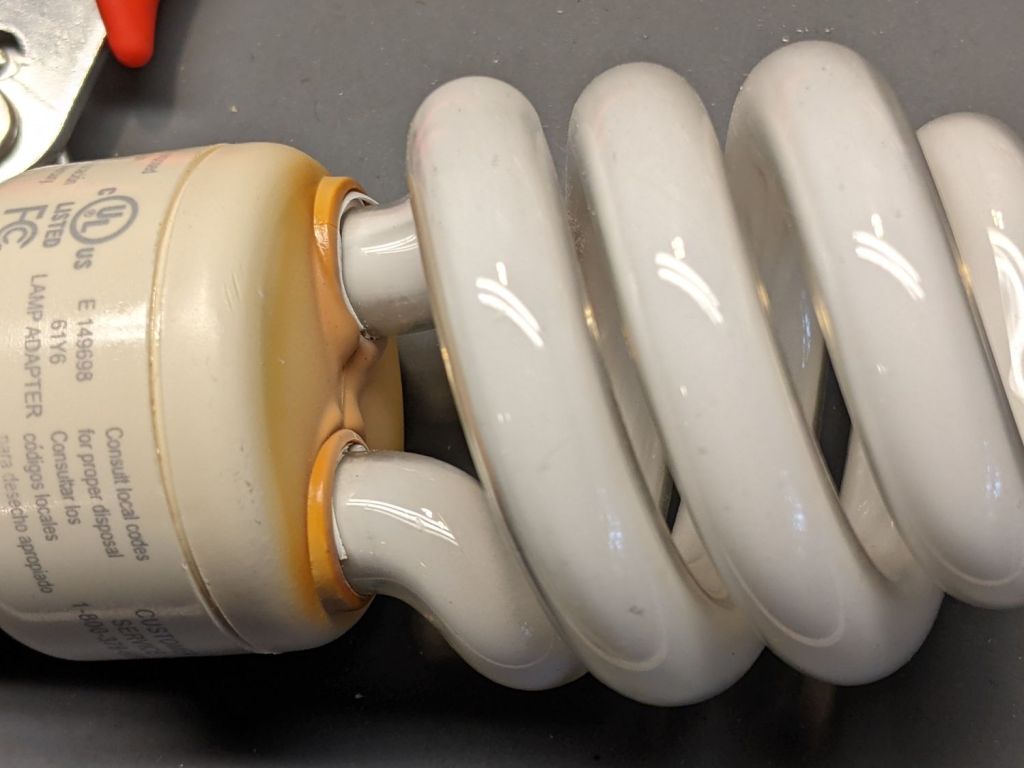
One of the downlights in the Basement Office just killed this specimen:
Dead CFL – detail
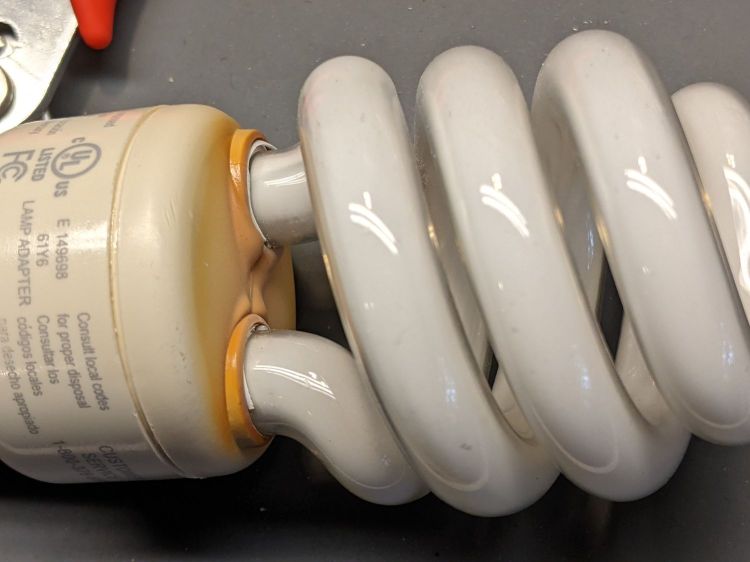
Much to my surprise, however, it survived for more than five years:
Dead CFL – over 5 years
The previous CFL bulb in that fixture lasted only two years, so their average lifetime is entirely too short.
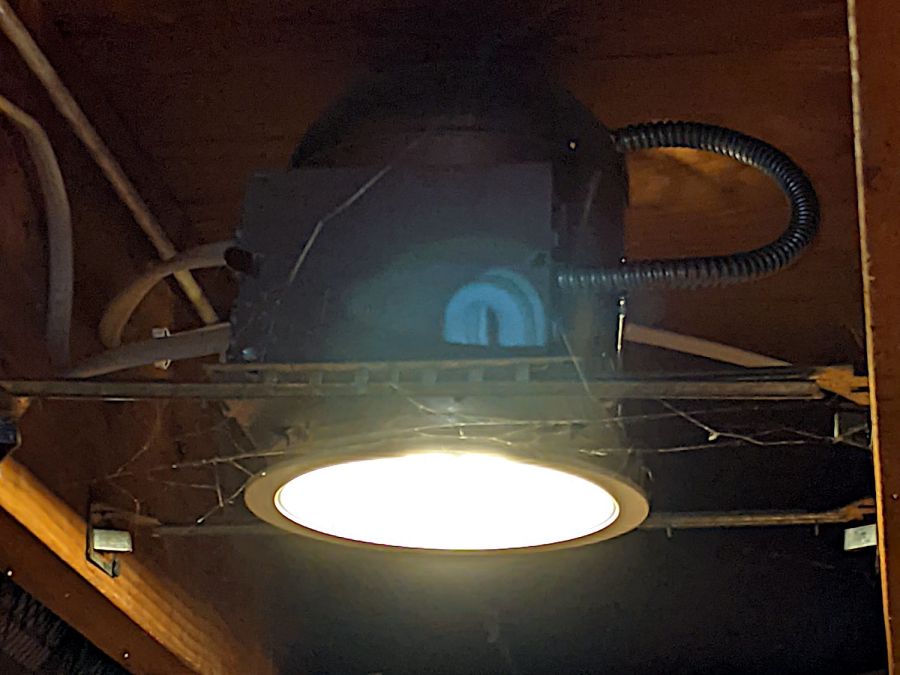
A taller bulb does a better job of lighting up that corner, although it started with enough power-on hours to suggest it won’t survive for another five years:
Dead CFL – replacement
The ghostly humps above the overexposed glare are the long CFL tubes reflected inside the Pixel’s camera optics.
I didn’t see much point in nailing a ceiling to too-low floor joists.
C-Max CMMR-60 WWVB receiver – AA alkaline test setup
Given the fragility of that ferrite bar, I should conjure a wide D-cell base, a bar holder to cover the ends, and a PCB mount of some sort.
The receiver data pin drives the red LED of an RGB piranha through a 2.2 kΩ SMD resistor, so it’s visible in a dim room. Given that the thing flickers constantly during WWVB’s poor-reception daylight hours, reducing the LED current counts for almost everything.
The antenna has a cap under that heatshrink tubing, which called for a resonance check:
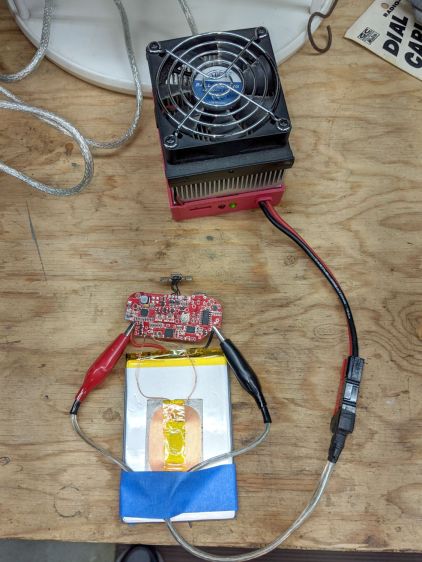
Mostly because I have the technology, here’s a battery rundown test for the (guts of the) Alpatronix iPhone case:
Alpatronix iPhone XS case – battery test setup
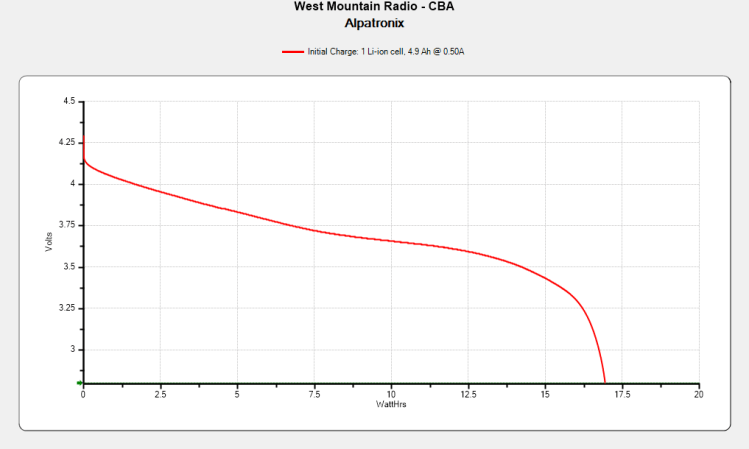
Bypassing the entire battery controller doesn’t tell you when it thinks the lights should go out, but does give an indication of the raw battery capacity:
Alpatronix iPhoneXS Charger – 2021-11-06
Multiplying the nominal 3.7 V by the nominal 5 A·hr capacity says it should have a nominal 18.5 W·hr capacity at some unrealistically low discharge rate. Given that I found it at the end of the driveway with no provenance, I didn’t expect much.
To my utter astonishment, it delivered 17 W·hr at 500 mA!
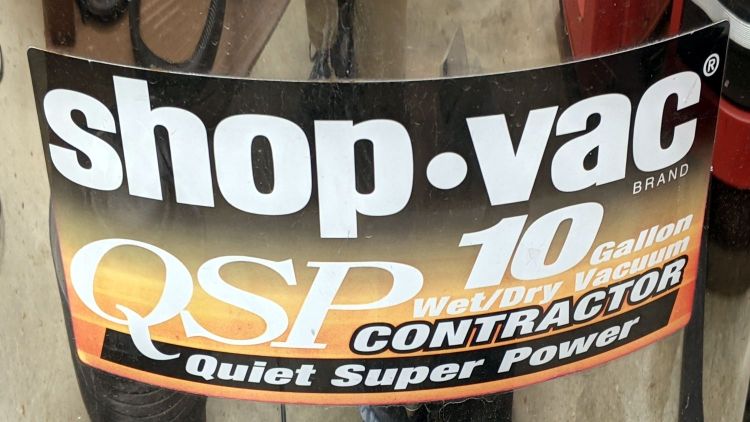
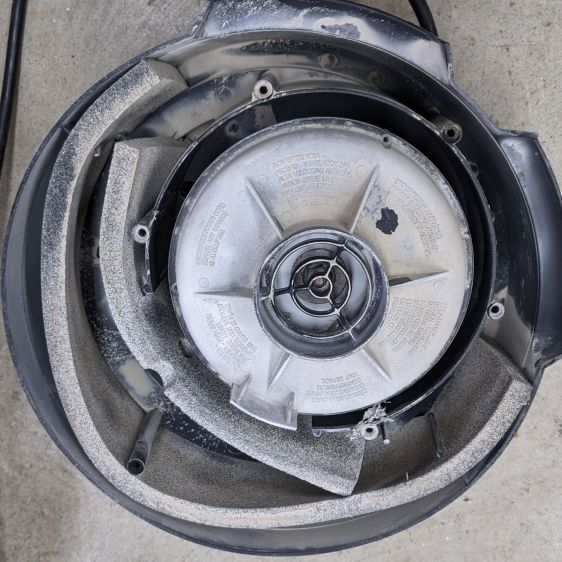
The Greatest Shopvac emitted an intense smell of electrical death while inhaling fuzzballs from the Basement Shop stairs, prompting me to tear it down. For the record, it’s a Genuine Shop·Vac QSP 10 (Quiet Super Power):
Shopvac QSP – label
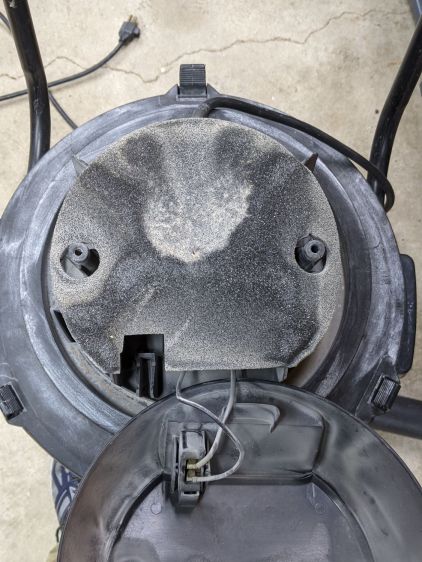
Removing the handle and upper plate reveals a slab of (presumably) sound-deadening foam over the motor cooling fan. As far as I can tell, the last job this vacuum had before the previous owner discarded it was inhaling drywall dust without a filter:
Shopvac QSP – upper sound baffle
Flipping the motor assembly over and removing the bottom plate revealed a pair of equally solidified foam slabs baffling the main exhaust path:
Shopvac QSP – sound baffle foam
They eventually became Clean Enough™ after protracted rinsing, so maybe the thing now runs as quietly as the name would lead you to believe, if you believed in names.
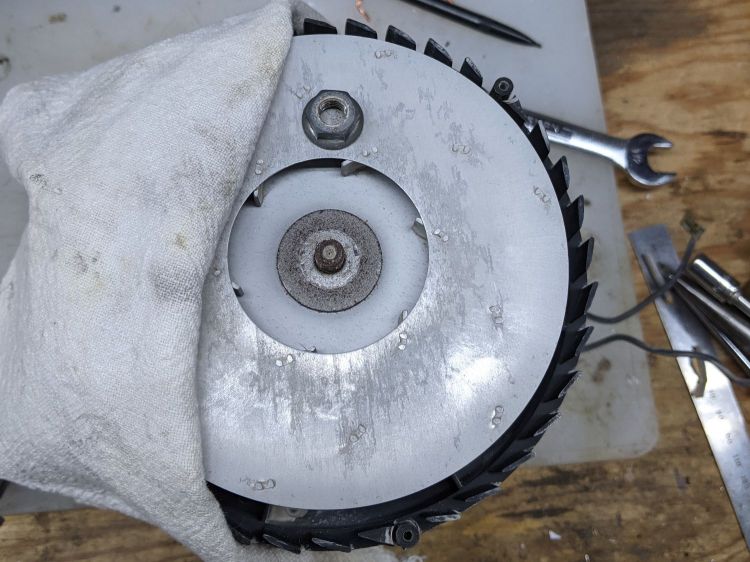
Disconnecting and extracting the motor revealed the razor-sharp impeller disk. A shop rag prevents lacerations while torquing off the nut holding it to the shaft:
Shopvac QSP – impeller nut
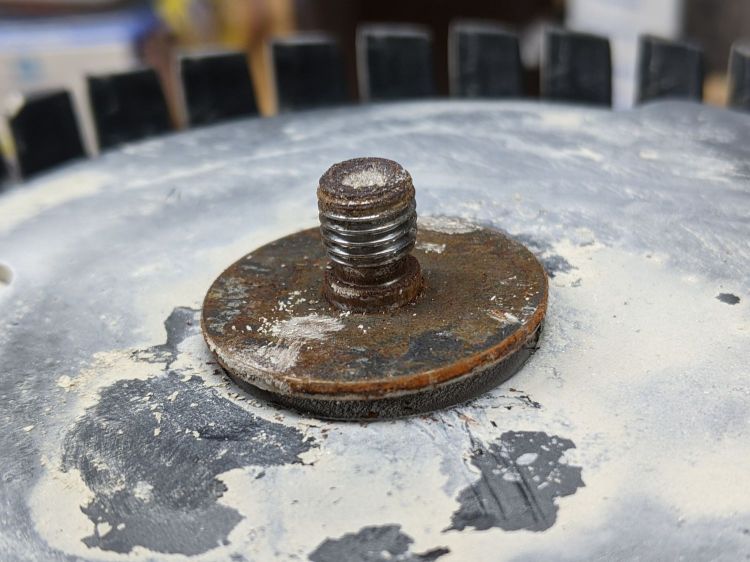
Rust on the washer below the impeller, along with the layer of caked white cement, suggested water accompanied the drywall dust:
Shopvac QSP – impeller washer
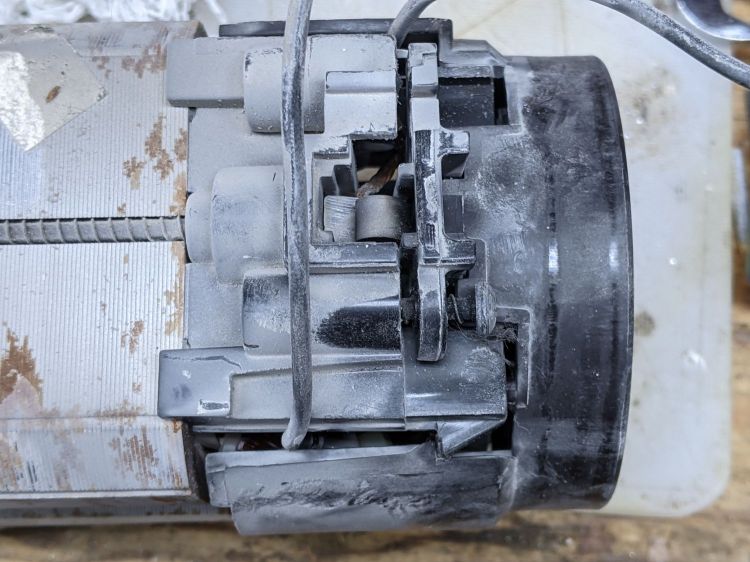
Gentle suasion from the Designated Prydriver eventually eased the washer off the shaft and freed the motor:
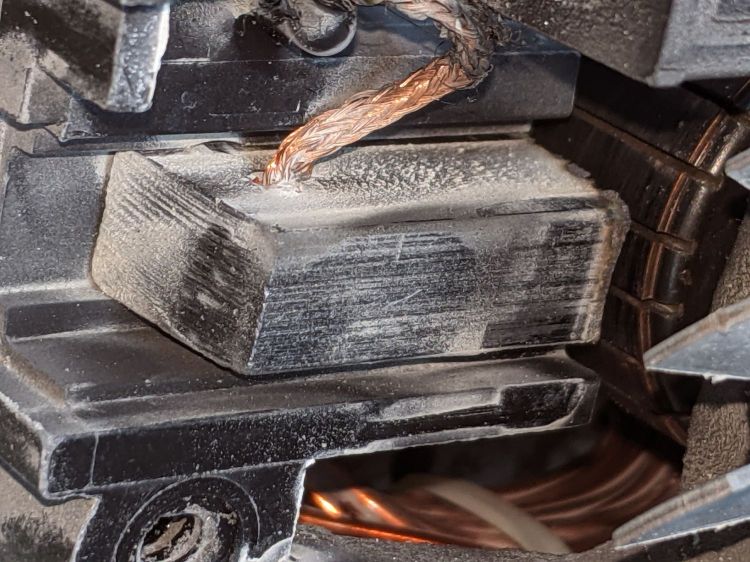
Shopvac QSP – motor brush layout
It’s an old-school series-wound brushed universal motor. The plastic plate in the middle of the picture has a helical spring pressing the carbon brush against the commutator:
Shopvac QSP – motor brush detail
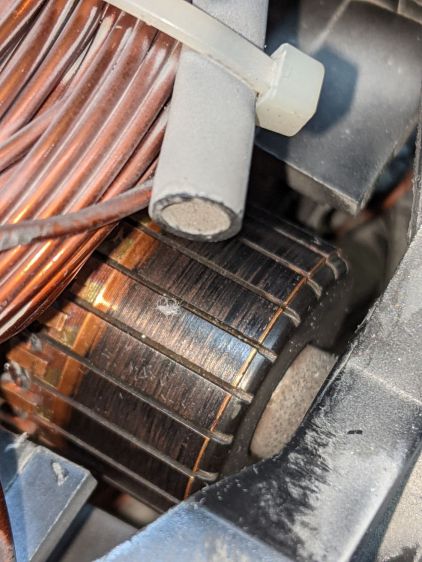
The rotor turned … reluctantly with the brushes in place and spun freely without them, suggesting the horrible smell of electrical death came from arcing across the gunk accumulated on the commutator:
Shopvac QSP – commutator as found
Many iterations of diligent scrubbing with denatured alcohol on cotton swabs and old t-shirt snippets got rid of the crud, although that commutator will never look all shiny-clean again:
Shopvac QSP – commutator cleaned
At least the brushes aren’t glued to it!
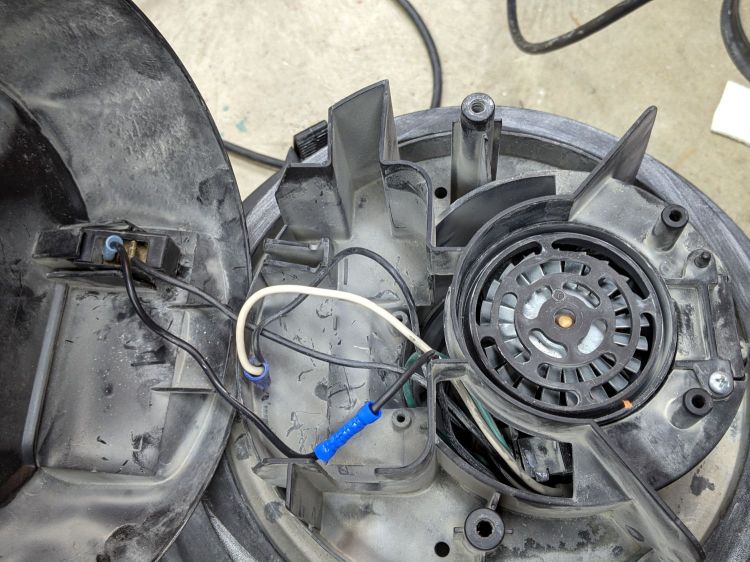
Reassembly is in reverse order, although I took the liberty of splicing a few inches of wire into the switch leads, because I’m not working under factory conditions with all the proper assembly fixtures:
Shopvac QSP – extended wires
The motor passed the smoke test and no longer smells like death, so it’s at least as good as it ever was.
It may run quieter with clean foam baffles, but I still turn off my power ears or don hearing protection when I fire up any shop vacuum.
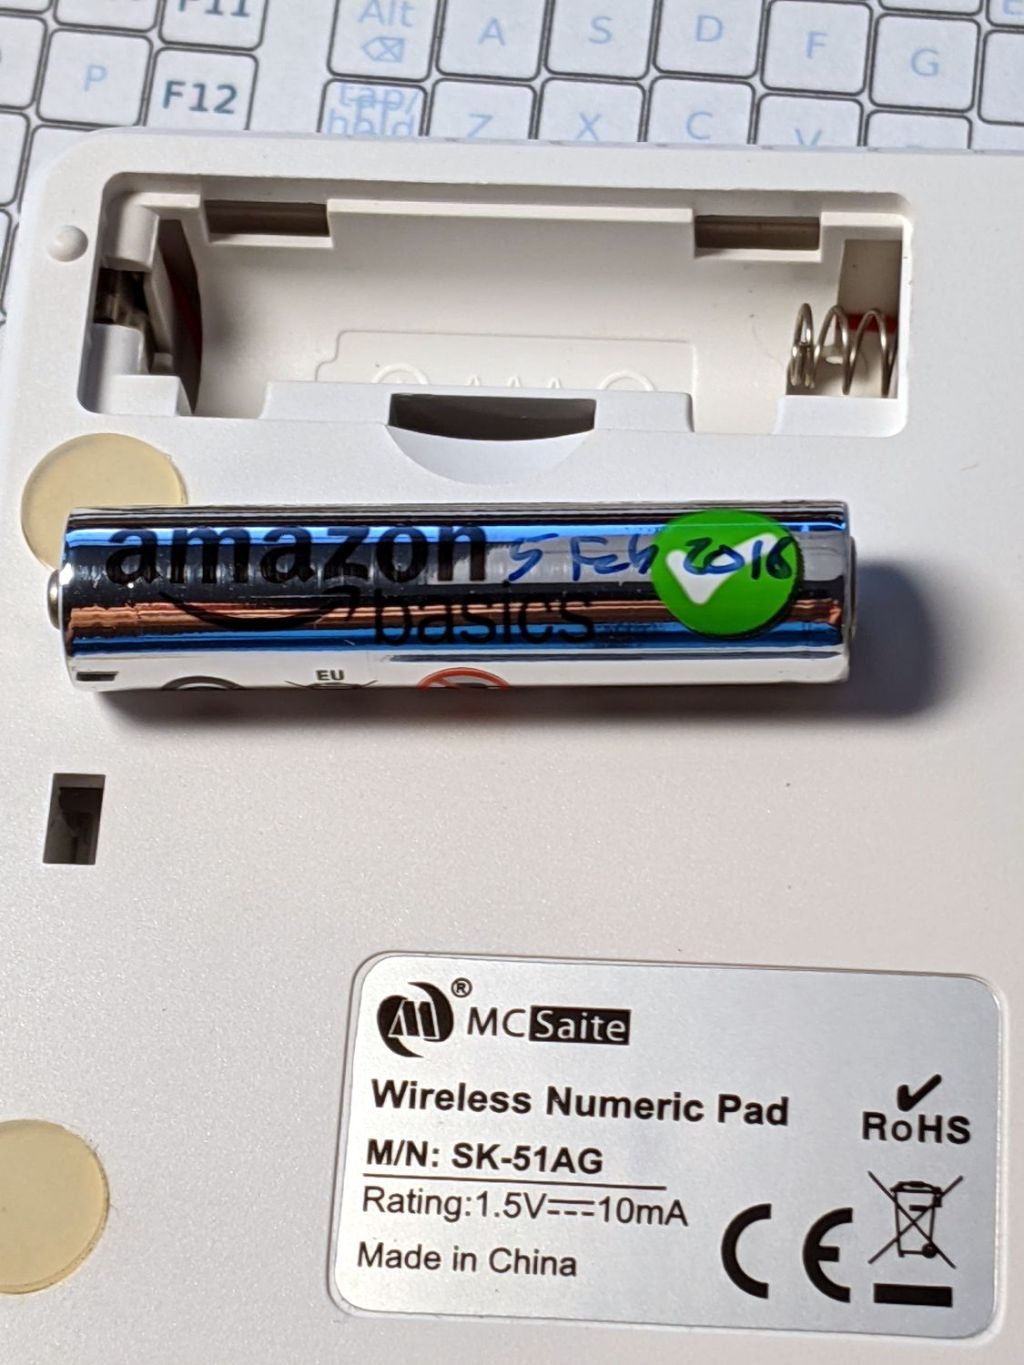
One of the streaming media players behaved funny, which always results in a numeric keypad battery replacement. This AmazonBasics AAA alkaline was down to about 0.5 V and long past its best-used-by date:
Suggestions that Amazon monitors their Marketplace sellers to figure out what’s profitable, then promote a Good Enough house brand product to kill off the competition, seem to describe the situation just about perfectly.
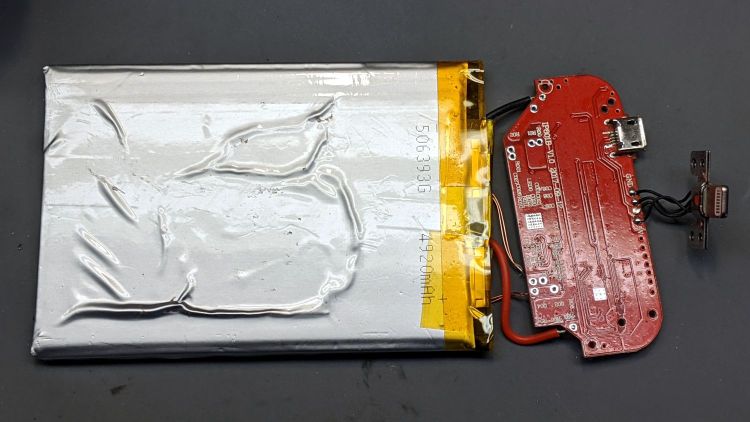
The iPhone was nowhere to be found, so harvesting its organs seemed appropriate:
Alpatronix iPhone XS case – opened
I assume the four steel disks aligned the coil with the wireless charger.
A few hours of steady tension relieved enough of the sticky tape to release the battery:
Alpatronix iPhone XS case – battery removal
Although its bag now sports a few wrinkles:
Alpatronix iPhone XS case – battery adhesion
The alert reader will note the outside of case proudly proclaimed “Capacity: 5000 mAh” while the underside of the battery says “4920 mAh”, but that’s surely close enough for consumer electronics these days.
The battery charges through either the Qi coil or a (mercifully standard Micro-B) USB jack and everything seems to work.
Not sure what I’ll do with a bare lithium cell and its charger, but they ought to come in handy for something around here.
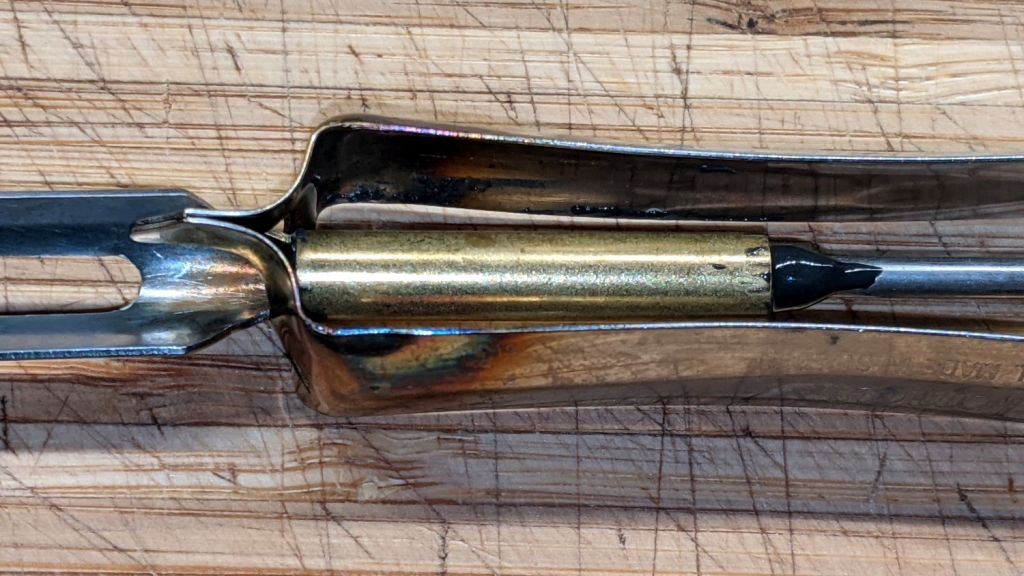
The blade on one of the Jonas vegetable peelers cracked, which suggests it’s the counterfeit version:
Jonas Peeler – cracked blade
I grooved the metal pin running through the handle:
Jonas Peeler – shaft grooving
A brass tube from the Little Tray o’ Cutoffs and some epoxy should hold things together forevermore:
Jonas Peeler – epoxy
The rainbow colors come from an instantly aborted attempt to silver-solder the parts together. The fact that I even tried a stunt like that shows I’m definitely not the brightest bulb in the chandelier these days.