Ed Nisley's Blog: Shop notes, electronics, firmware, machinery, 3D printing, laser cuttery, and curiosities. Contents: 100% human thinking, 0% AI slop.
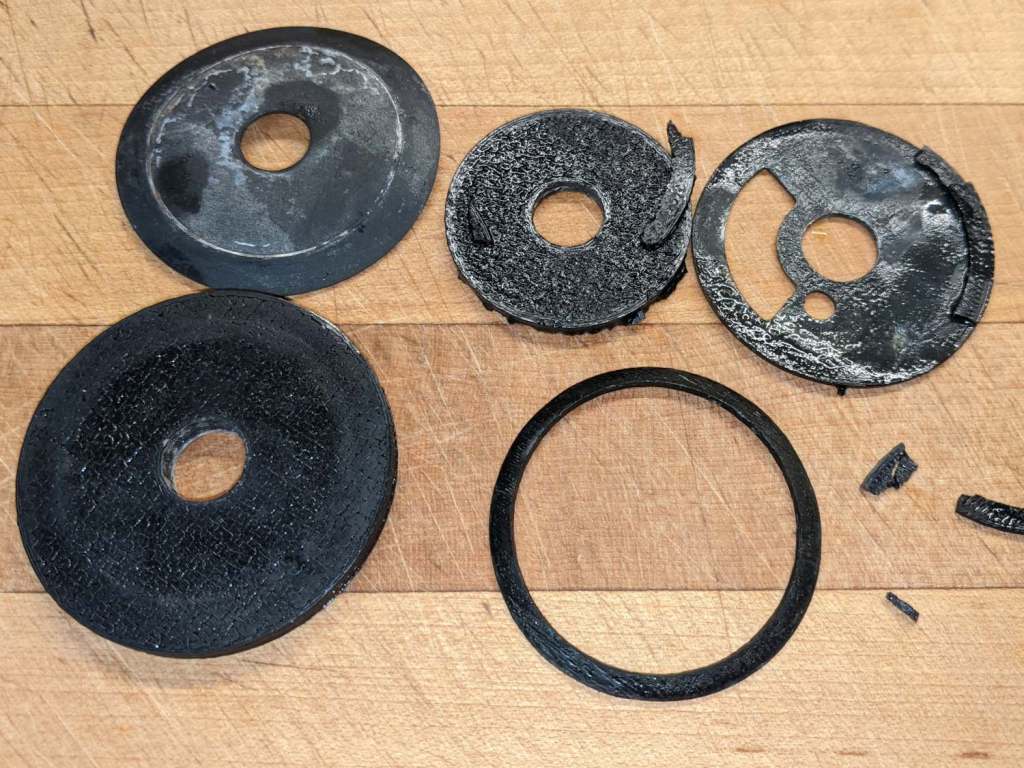
The lesser kitchen faucet began dribbling and required replacement, as there are no user serviceable parts within. One of the 3D printed adapters I built during the previous iteration had disintegrated:
Beverage faucet base plate adapter disintegration
The new faucet came with a somewhat different baseplate and I managed to conjure a firm, sealed mount from the various parts without further construction.
The nicely curved brass snout is the third in my collection. Surely they’ll come in handy for something!
While I was in a plumbing state of mind, I again replaced the spout O-rings in the never-sufficiently-to-be-damned American Standard Elite (hah!) faucet, as it was also dribbling.
This time, I used oxalic acid to remove the assorted scale and crud inside the spout. It seemed to be more effective than the usual white vinegar, although nothing seems to preserve the O-rings.
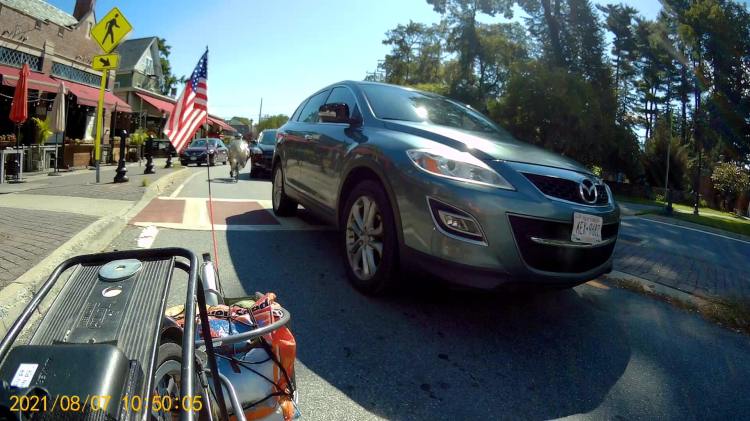
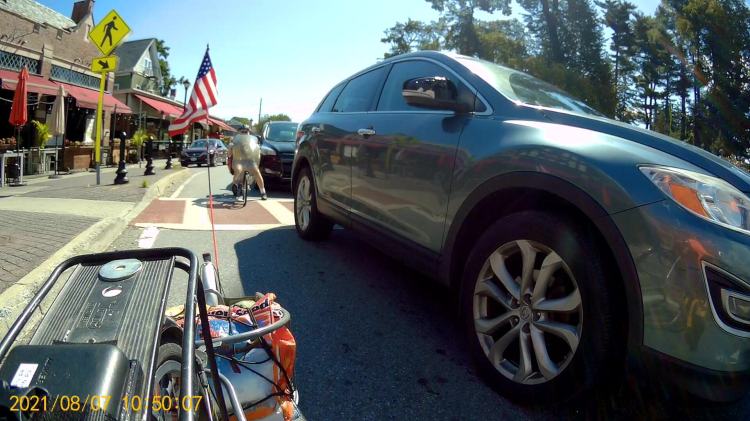
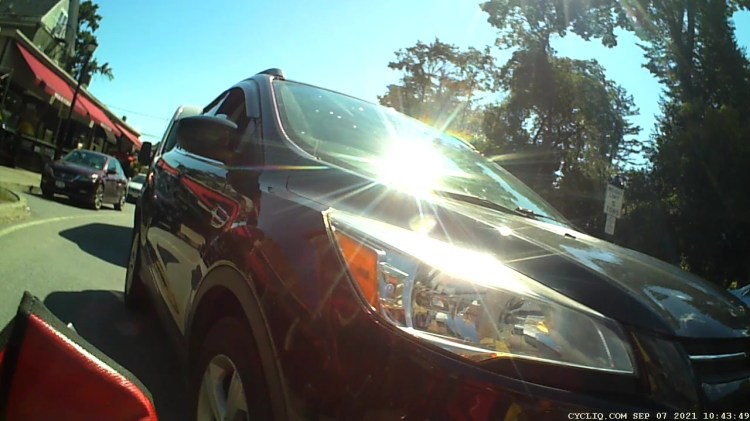
We’re bicycling on Collegeview Avenue, approaching the eastern traffic circle (of three) along Raymond Avenue. I’m in the lead, hauling a trailer with the week’s groceries:
Zero Clearance – Ed Front – 2021-09-07 – 0497
The four digit frame numbers tick along at 60 fps for my helmet camera and 30 fps for the rear cameras.
Note the “splitter” (a.k.a. “pedestrian refuge”) on the left, intended to separate Collegeview’s incoming and outgoing traffic. It formerly had one non-reflective black bollard on each side of the ladder crosswalk, but errant drivers destroyed so many bollards along Raymond that they’re now WONTFIX remnants. The flush concrete disk in the lower left of this picture will become relevant in a few seconds of real time:
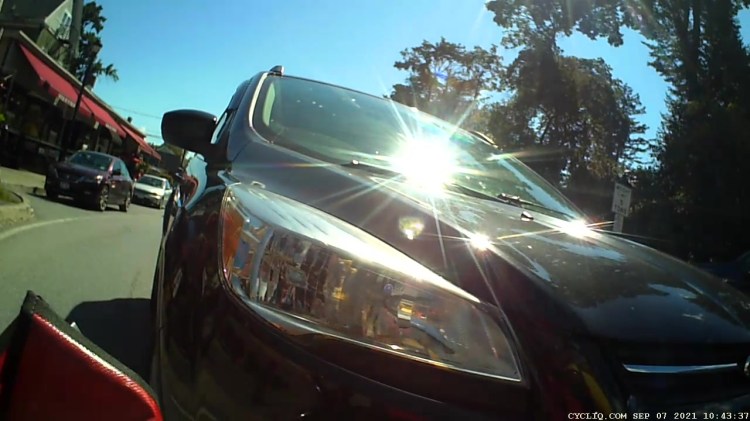
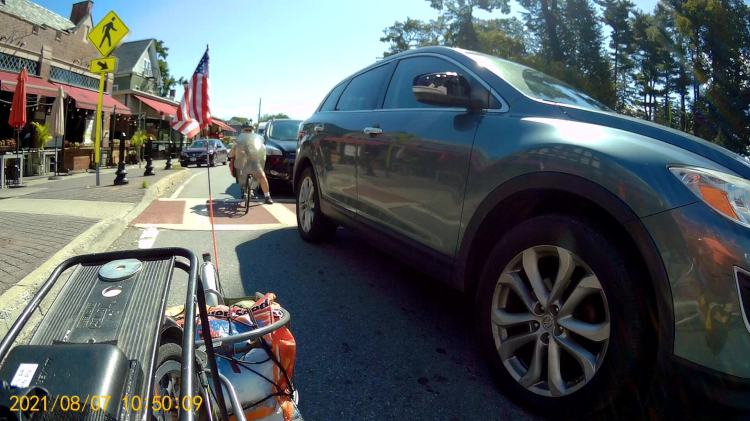
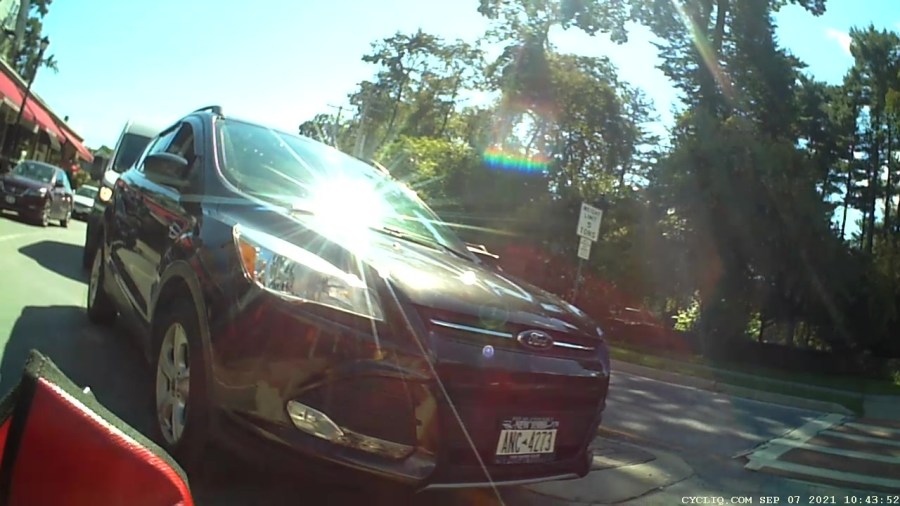
Zero Clearance – Ed Front – 2021-09-07 – 0593
Collegeview has the same deteriorating pavement as found along Raymond Avenue, so we must maneuver beside the potholes:
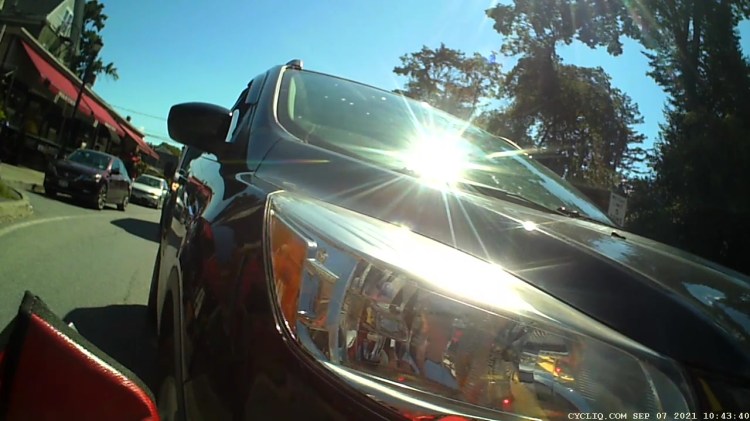
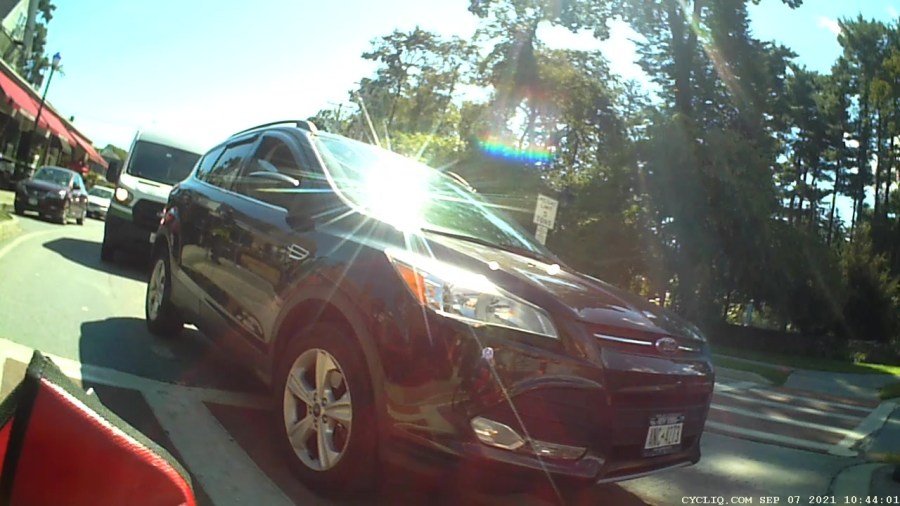
All of us are slowing to stop at the traffic circle, with Mary behind the car that will eventually stop beside me:
Zero Clearance – Ed Rear – 2021-09-07 – 1522
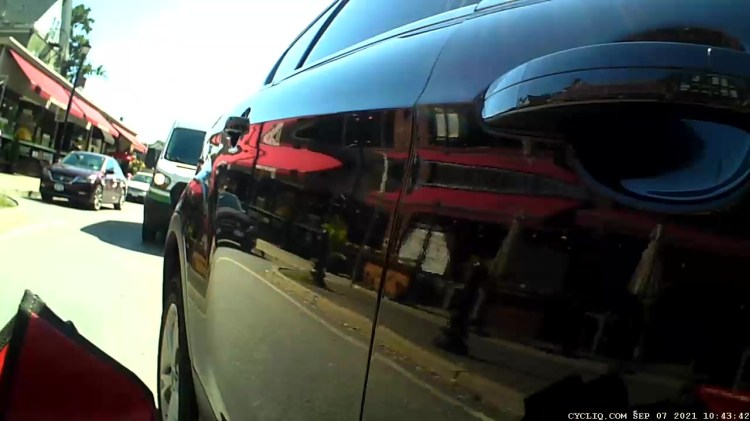
Mary could see the car behind her in her helmet mirror, but she’s slowing to stall speed with no time for sightseeing and no room for maneuvering. The view from the camera on the seat frame behind her left shoulder:
Zero Clearance – Mary – 2021-09-07 – 0957
Two seconds later:
Zero Clearance – Mary – 2021-09-07 – 1078
One second:
Zero Clearance – Mary – 2021-09-07 – 1110
Two more seconds:
Zero Clearance – Mary – 2021-09-07 – 1182
Mary has stopped, as shown by the parked car’s unchanging position in the frame over on the left in the next images. The driver, however, continues creeping slowly forward; there can be no doubt she sees Mary at this distance.
After three more seconds:
Zero Clearance – Mary – 2021-09-07 – 1270
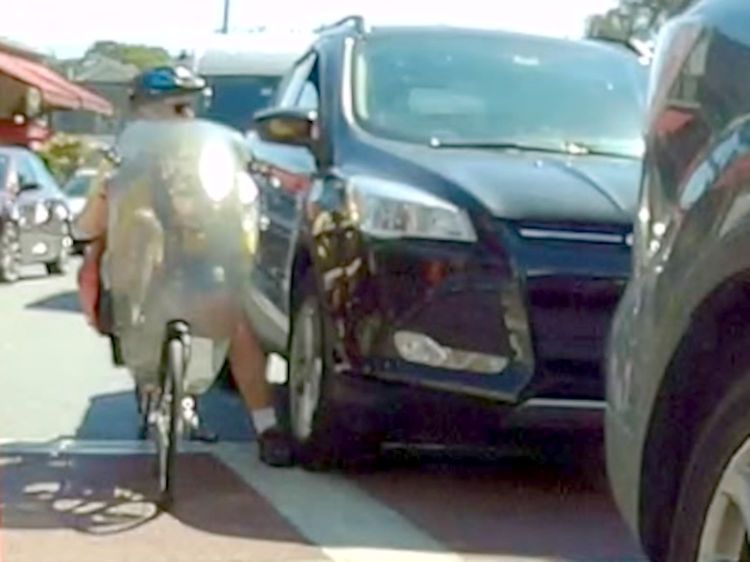
One second later, the front wheel is exactly at Mary’s left foot:
Zero Clearance – Mary – 2021-09-07 – 1308
The same events, viewed from the camera on my bike, start less than one second from the 1522 image above. I’m stopped, while the driver next to me continues to roll forward.
Mary is extending her left leg in preparation for a complete stop, at about the same time as the 1078 image:
Zero Clearance – Ed Rear – 2021-09-07 – 1542
Three seconds later her toe touches the pavement, while both she and the driver continue moving forward very slowly:
Zero Clearance – Ed Rear – 2021-09-07 – 1634
Five seconds later, she is stopped with her foot firmly planted:
Zero Clearance – Ed Rear – 2021-09-07 – 1773
And the driver continues moving:
Zero Clearance – Mary – 2021-09-07 – 1333
Another five seconds and the sidewall bulge of the car’s radial tire is pressing her foot to the pavement:
Zero Clearance – Ed Rear – 2021-09-07 – 1934
A closer look:
Zero Clearance – Ed Rear – 2021-09-07 – 1946 detail
She yanks her foot away:
Zero Clearance – Ed Rear – 2021-09-07 – 1953
While the driver continues to creep forward:
Zero Clearance – Mary – 2021-09-07 – 1397
Sometimes, it’s the only way to get some attention:
Zero Clearance – Ed Rear – 2021-09-07 – 2026
Mary is now off-balance, leaning on the car door, explaining what just happened:
Zero Clearance – Ed Rear – 2021-09-07 – 2152
Mary regains her balance as the driver backs cautiously away:
Zero Clearance – Mary – 2021-09-07 – 1546
Were the bollard still atop that sad concrete foundation, the driver might not have driven up on the splitter to get around Mary, if only to avoid scuffing a fender:
Zero Clearance – Ed Rear – 2021-09-07 – 2479
Compare this clearance with what you saw earlier in the 0957 image:
Zero Clearance – Mary – 2021-09-07 – 1627
Mary can’t get far enough away, but this must suffice:
Zero Clearance – Ed Rear – 2021-09-07 – 2761
Now the driver can pass her again with more clearance:
Zero Clearance – Mary – 2021-09-07 – 1891
I pointed to the car, then to the circle, and shouted “GO!” because neither of us wanted to be in front of that particular driver:
Zero Clearance – Ed Front – 2021-09-07 – 2540
We’ll surely meet her again, ideally with more clearance.
In mostly reverse chronological order, here are various commands I’ve puzzled out:
#xsetwacom --verbose set "HUION Huion Tablet stylus" MapToOutput "DP1-8"
xsetwacom --verbose set "HUION Huion Tablet stylus" MapToOutput "DP-1-8"
#xsetwacom --verbose set "HUION Huion Tablet Pen stylus" MapToOutput "DP-1"
#xsetwacom --verbose set "Wacom Graphire3 6x8 Pen stylus" MapToOutput "DP-1"
#xsetwacom --verbose set "Wacom Graphire3 6x8 Pen stylus" MapToOutput "HEAD-0"
#xsetwacom --verbose set "Wacom Graphire3 6x8 Pen eraser" MapToOutput "DP-1"
#xsetwacom --verbose set "Wacom Graphire3 6x8 Pen eraser" MapToOutput "HEAD-0"
Over the last two years, the display name changed from DP-1 to DP-1-8 to DP1-8, and back to DP-1-8. I grew accustomed to this with the Wacom tablet (HEAD-0‽)and now know where to look, but I still have no idea of the motivation.
Aaaand the tablet’s stylus name? The Wacom names were stable, but the Huion names apparently come from the Department of Redundancy Department.
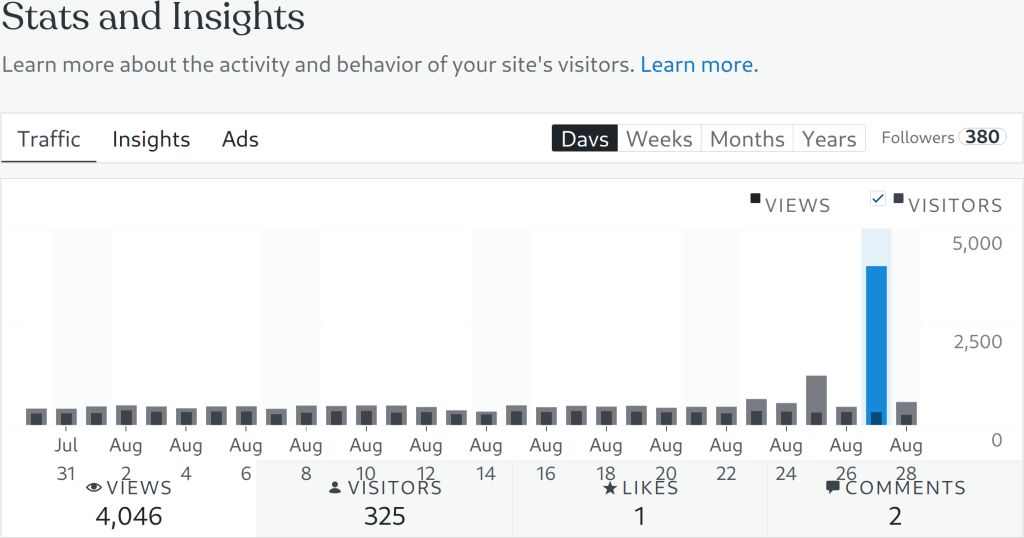
In this case, a German “visitor” read nearly all of my 4461 posts on two days: 822 + 3561 = 4383. I’m reasonably sure no human finds my writing that interesting, so it’s likely a scraper capturing my text for the purposes of spinning it into a blog-like site with “unique content” for the purposes of SEO.
Perhaps the first traffic spike was a targeting run?
I’ll never know the rest of the story, but if you happen to stumble across a blog with an uncanny resemblance to this one, written by something with a wide vocabulary and no techie knowledge, let me know.
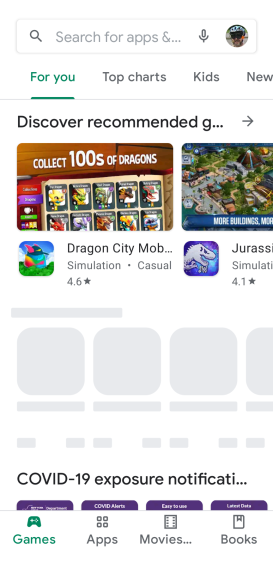
Being that type of guy, I turn my phone off during the night while it’s charging, turn it on for the next day’s adventures, and check the Google Play App Store to see which apps will get updates.
The vast machine learning / AI / whatever analyzing my every move still hasn’t figured out my morning ritual, so it desperately tries to sell me crap:
Google Play Store – app ad delay
My guess: those blank spots are placeholders for app ads, but, while the phone is busy scanning for malicious apps, the ad bidding process doesn’t complete fast enough to update the display before I see it.
FWIW, I had the Genuine NYS Covid-19 app installed for a while, but I very rarely go anywhere or see anybody, so it seemed to offer no net benefit.