Ed Nisley's Blog: Shop notes, electronics, firmware, machinery, 3D printing, laser cuttery, and curiosities. Contents: 100% human thinking, 0% AI slop.
Tag: Improvements
Making the world a better place, one piece at a time
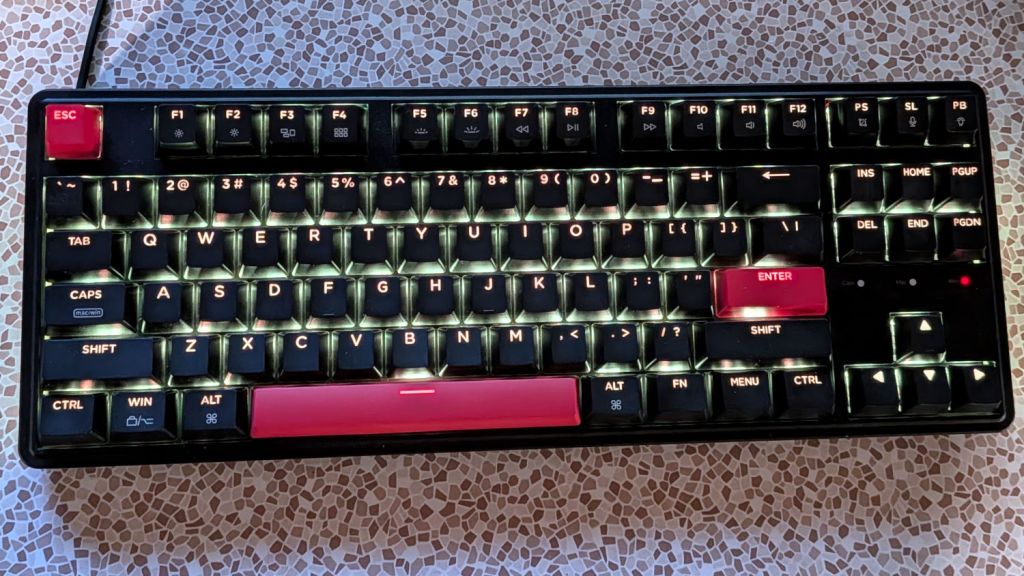
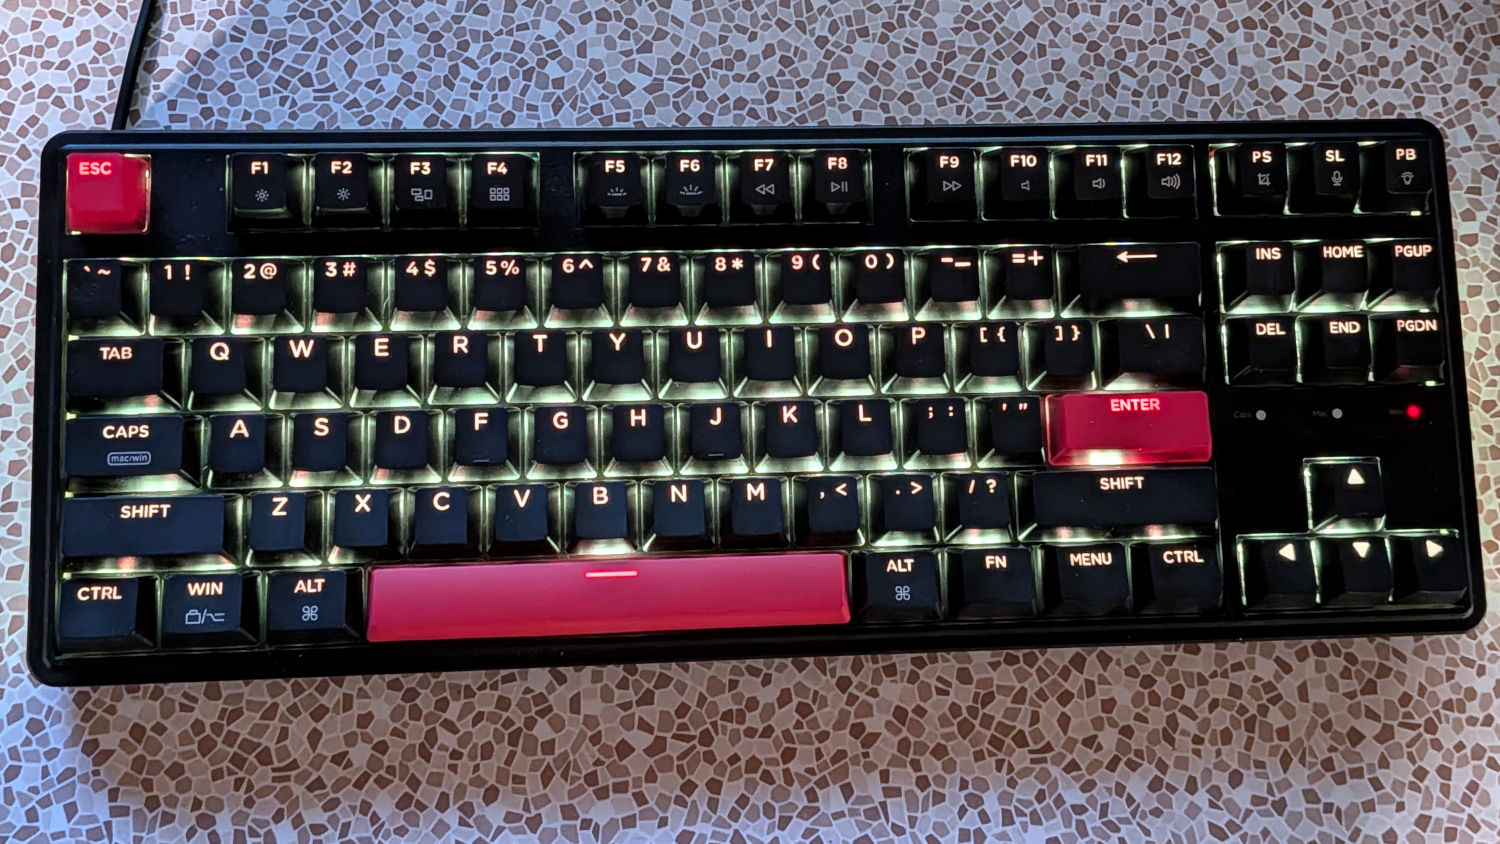
Having set the Moonlander to use Auto Shift, I’ve come to depend on it, so I got a Keychron C3 Pro keyboard for one of the Basement Shop’s PCs because it glows in the dark and can be configured with QMK:
Keychron C3 Pro – tamed
The default setup has rainbow hues cycling across the keyboard, which I find entirely too distracting. Although you can manually select the solid-color variant from the myriad possibilities using the keyboard, I forced a solid color with this config.h file:
#define RGB_MATRIX_DEFAULT_ON true // Sets the default enabled state, if none has been set
#define RGB_MATRIX_DEFAULT_MODE RGB_MATRIX_SOLID_COLOR // Sets the default mode, if none has been set
#define RGB_MATRIX_DEFAULT_HUE 36  // Sets the default hue value, if none has been set
#define RGB_MATRIX_DEFAULT_SAT 255 // Sets the default saturation value, if none has been set
#define RGB_MATRIX_DEFAULT_VAL 255 // Sets the default brightness value, if none has been set
Enabling Auto Shift requires this rules.mk file:
AUTO_SHIFT_ENABLE = yes
Both of those go in the keymap directory defining the keyboard mapping for my custom setup:
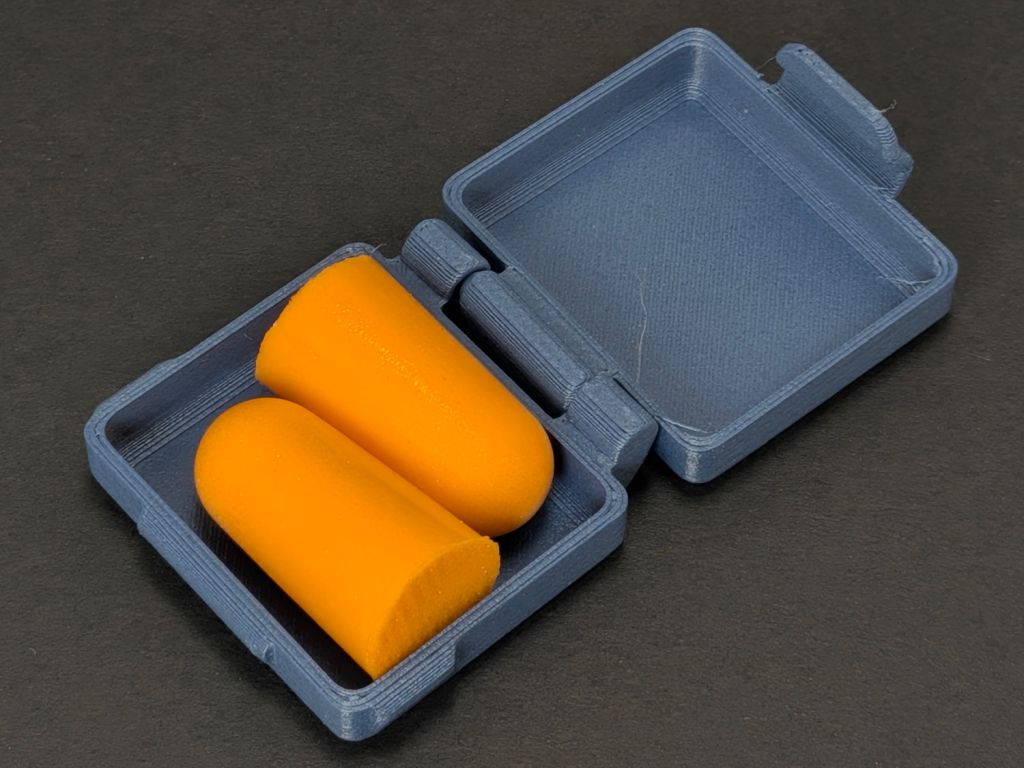
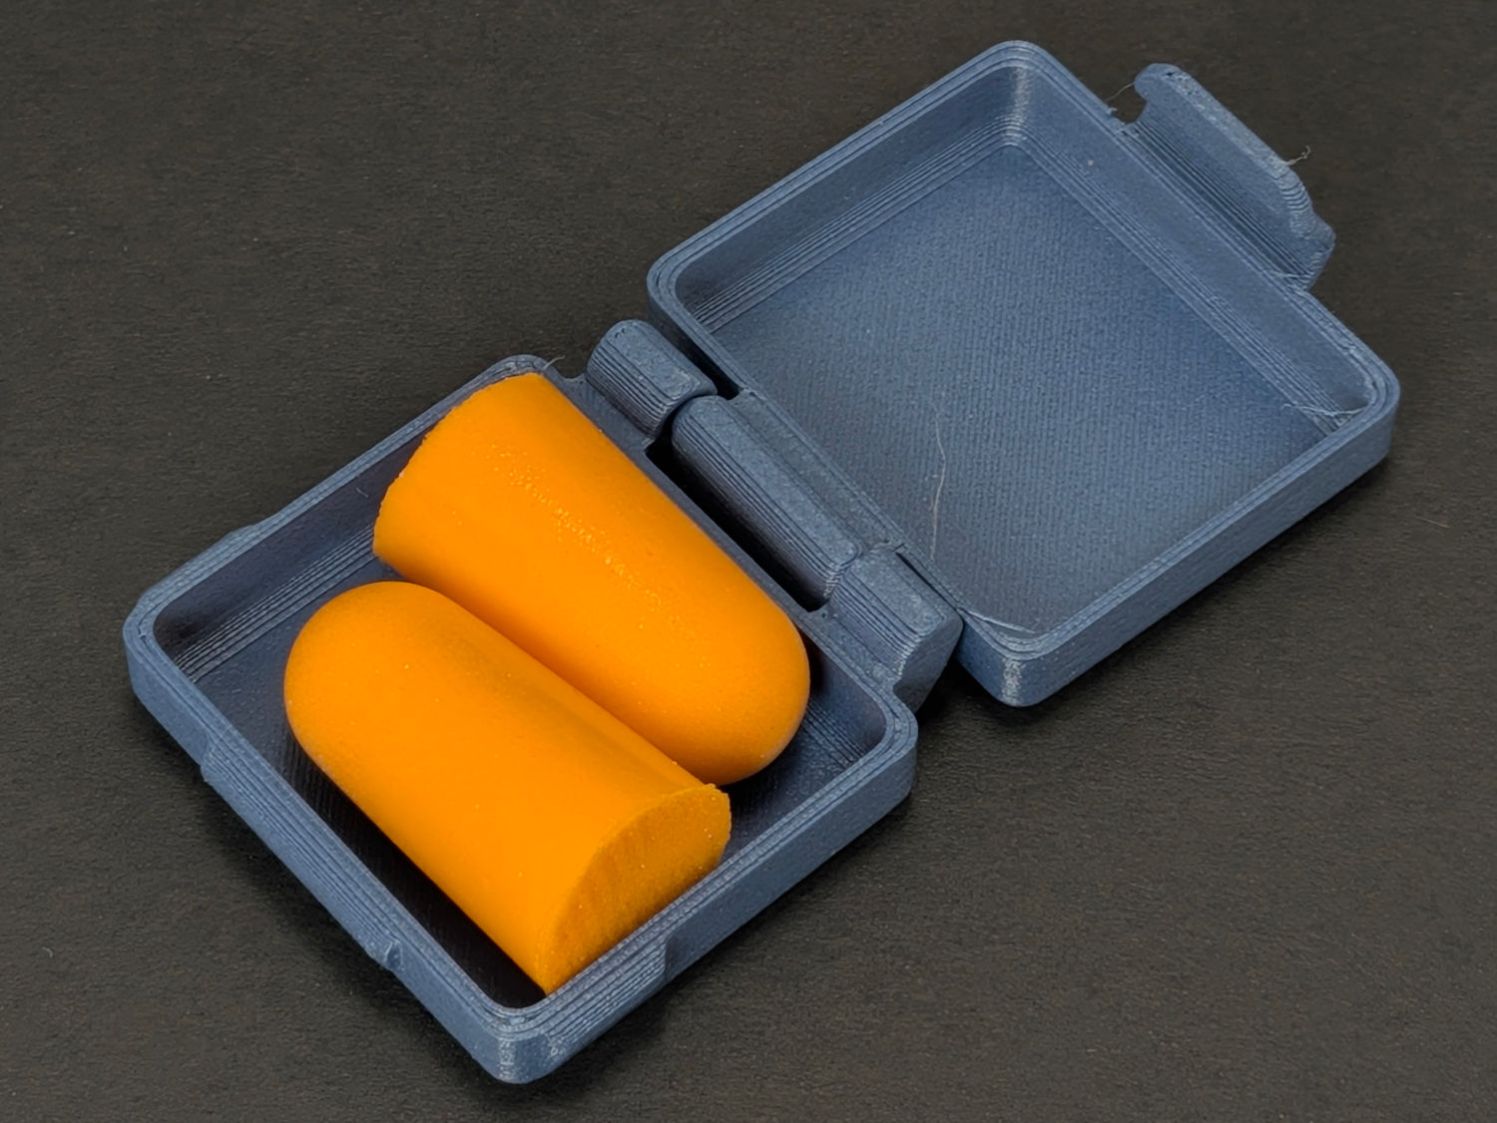
A no-assembly-needed earplug case from Printables will be more easily found in Mary’s purse than the previous small bag:
Earplug case
That’s the “grippy bits” version of the model, which really is easier to open than the straight-sided version.
I printed a few more, loaded them with earplugs, and put them where they may come in handy. In retrospect, I should have used clear PETG to show off the retina-burn plugs.
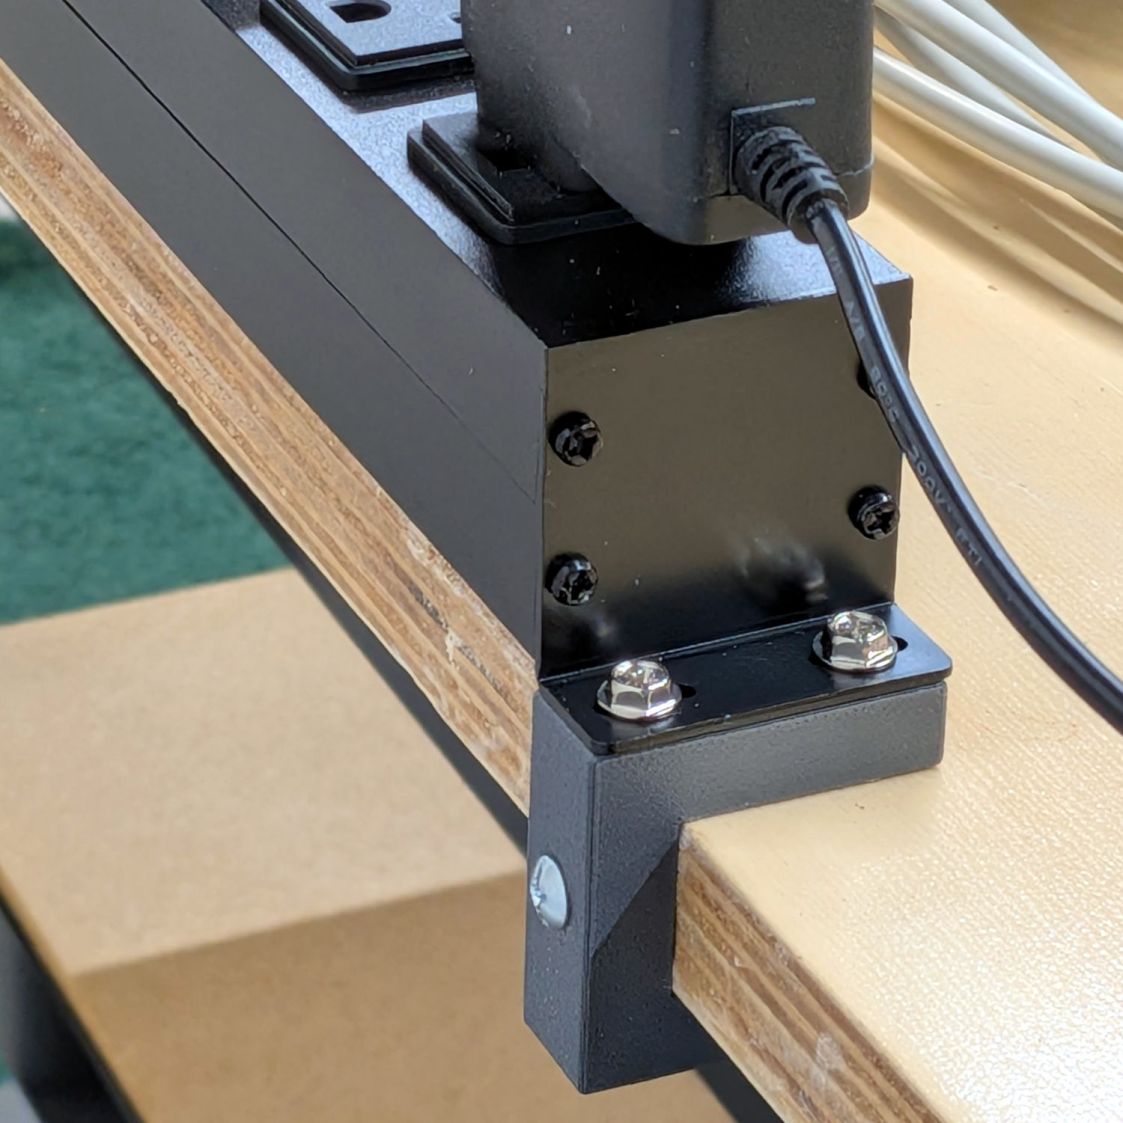
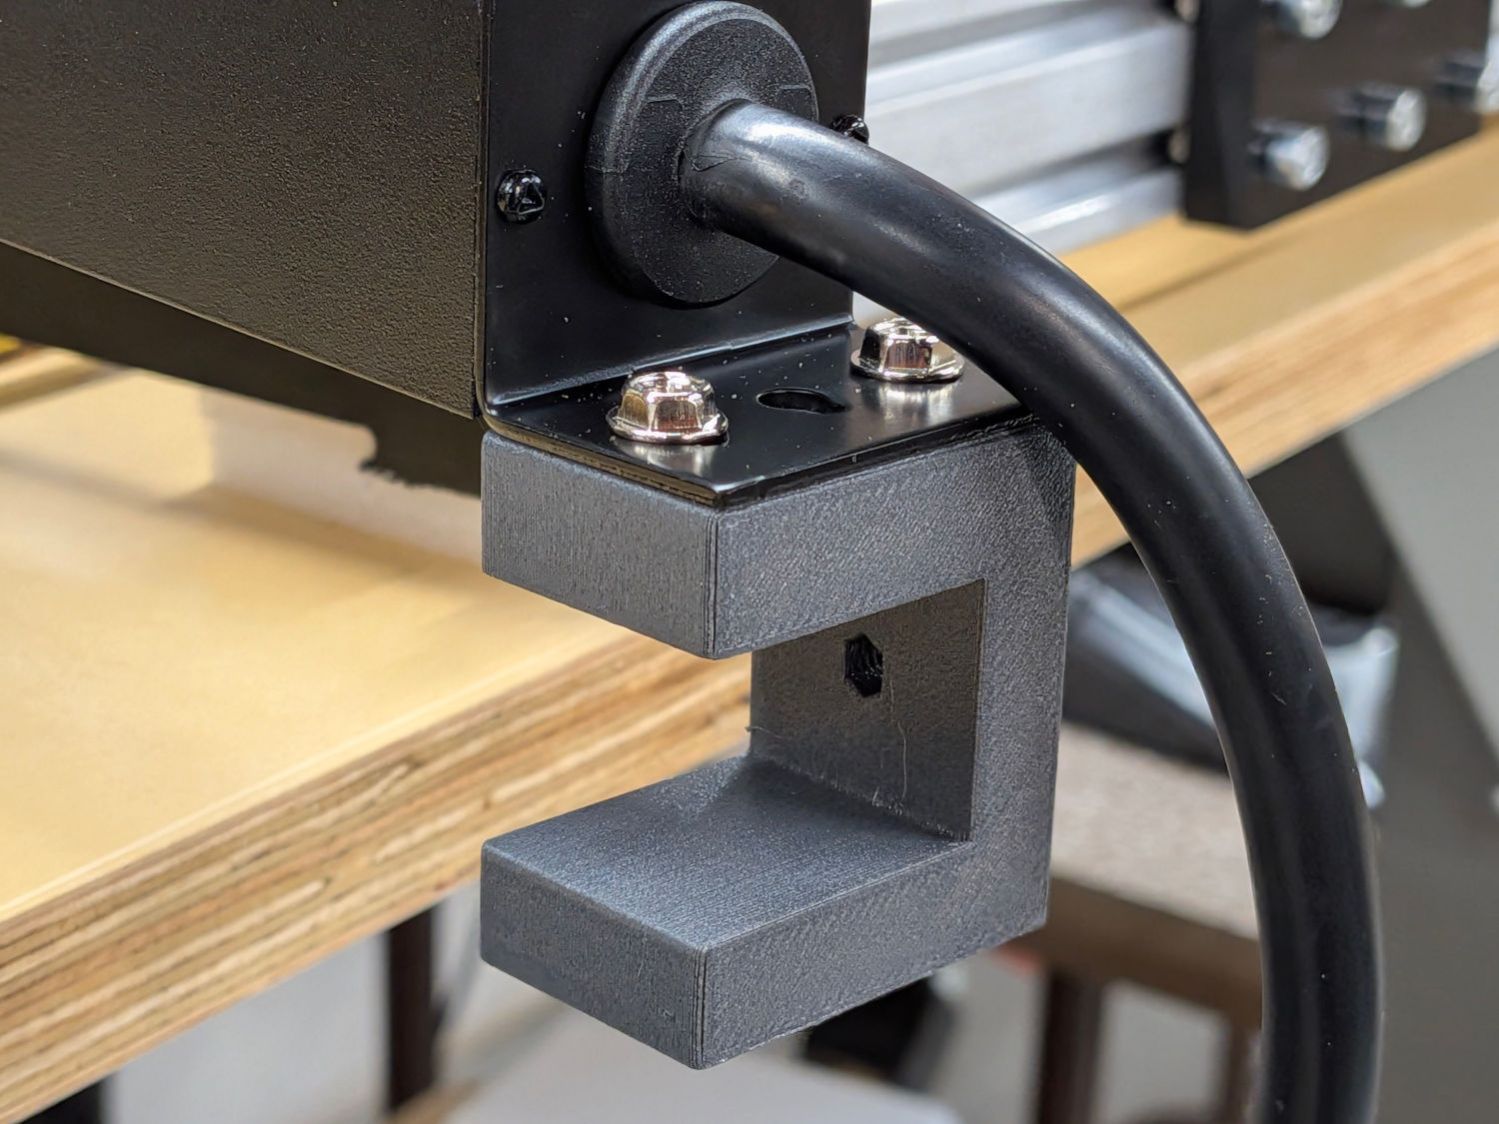
A spate of tidying-up led to mounting an outlet strip along the back of a bench:
Outlet Bench Mount – installed
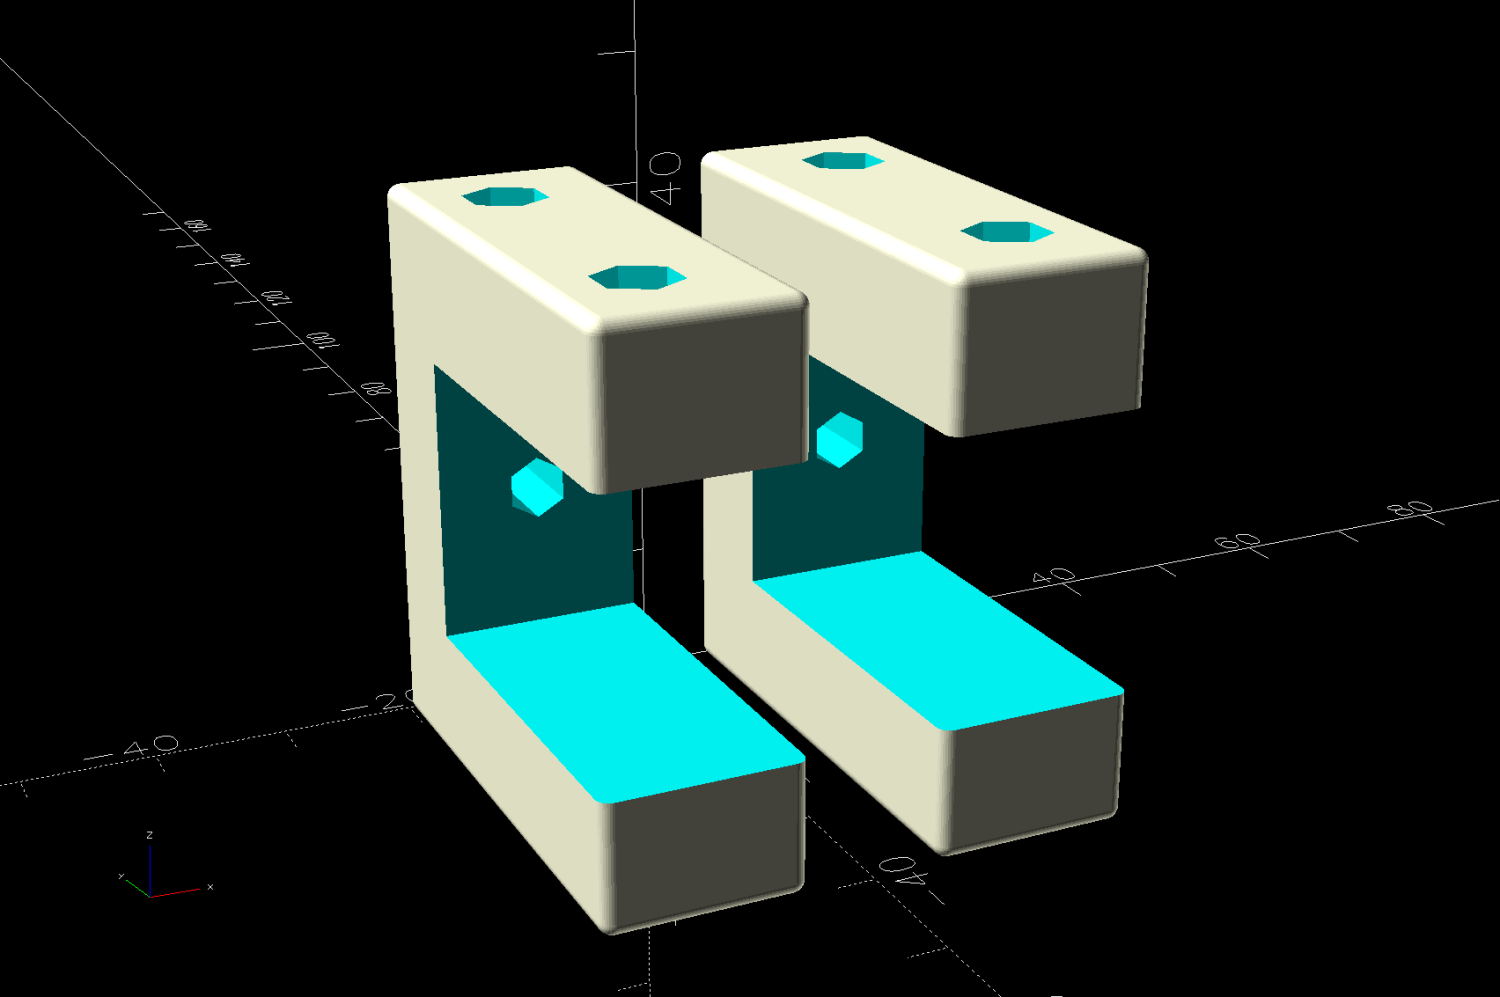
Rather than drill holes into the top of the bench for those screws, they fit into M4 brass inserts heat-staked into the brackets:
Outlet Bench Mount – show view
The holes for those inserts aren’t centered side-to-side on the brackets, because the screw holes aren’t centered on the bent-steel angles forming the outlet strip endplates.
The bottom arm on the brackets probably isn’t necessary, but they kept the outlet strip from crawling away while I match-drilled two holes for the screws into the side of the benchtop.
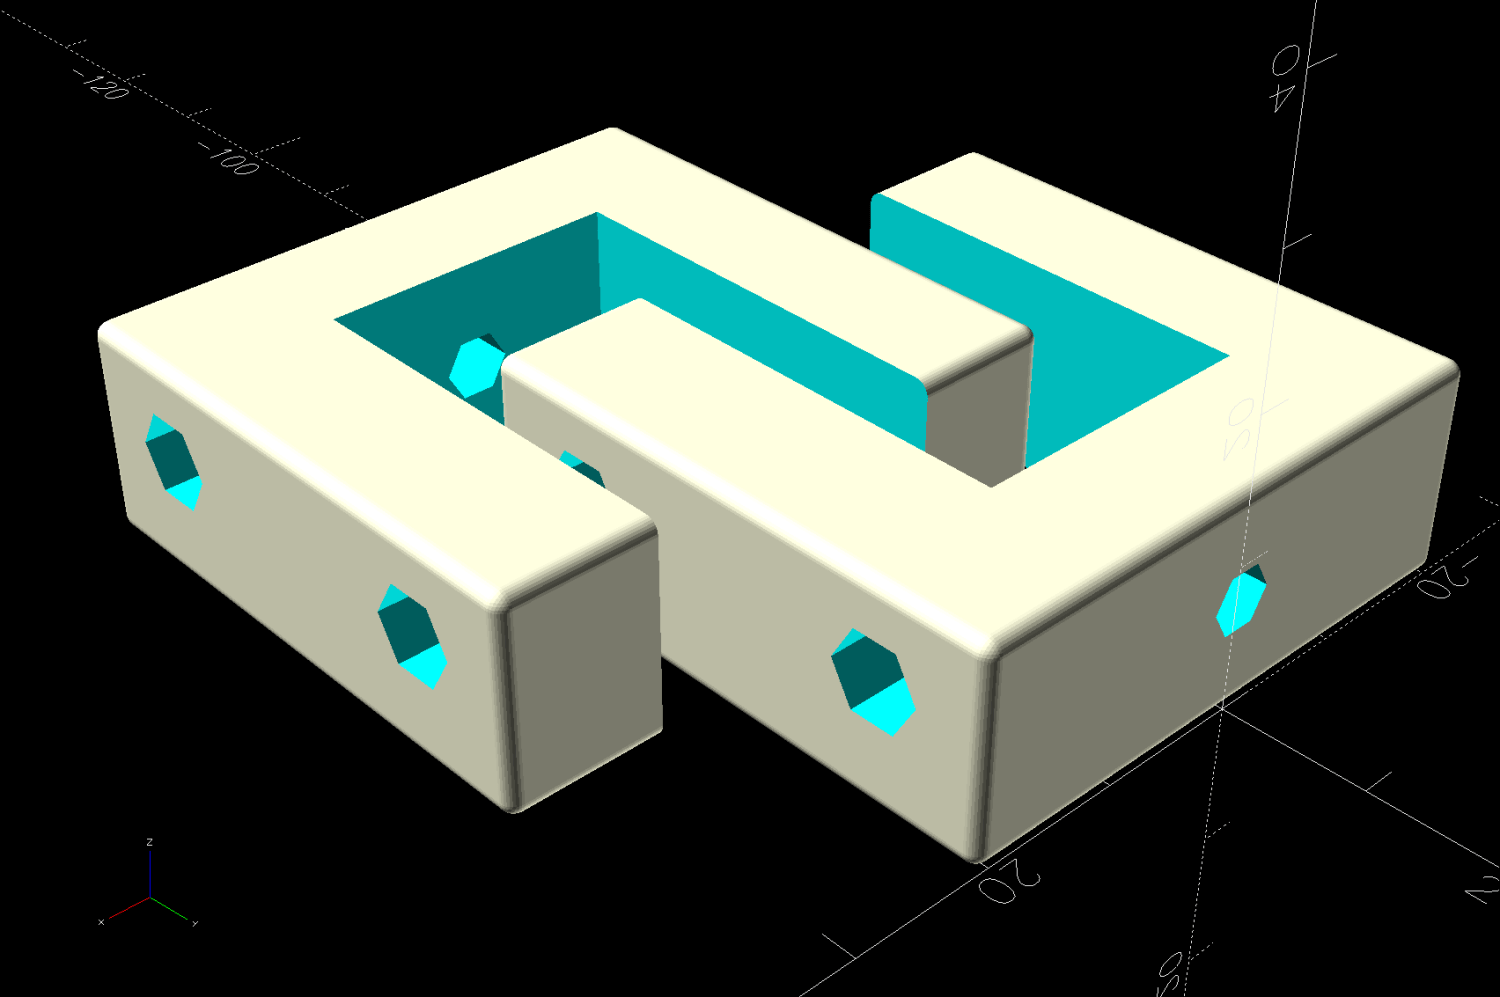
For obvious reasons, the brackets print on their sides:
Outlet Bench Mount – build view
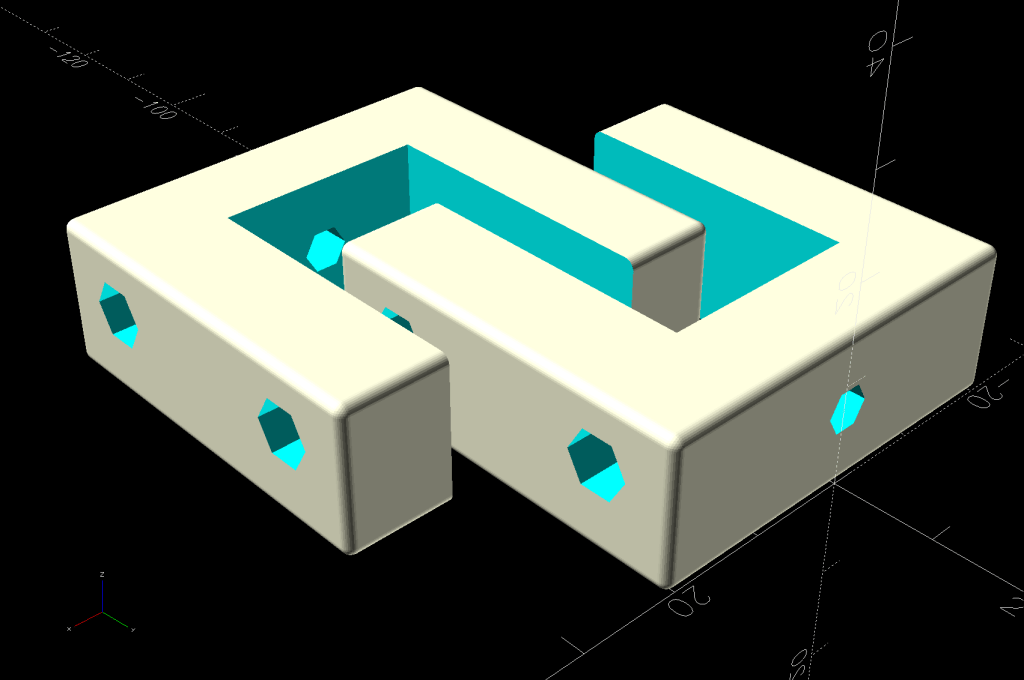
Another outlet strip from a different manufacturer is, of course, different, but changing three parameters in the OpenSCAD program summons a different bracket from the vasty digital deep:
Outlet Bench Mount – different brand
Parametric modeling and a 3D printer are exactly the right hammers for the job …
This file contains hidden or bidirectional Unicode text that may be interpreted or compiled differently than what appears below. To review, open the file in an editor that reveals hidden Unicode characters.
Learn more about bidirectional Unicode characters
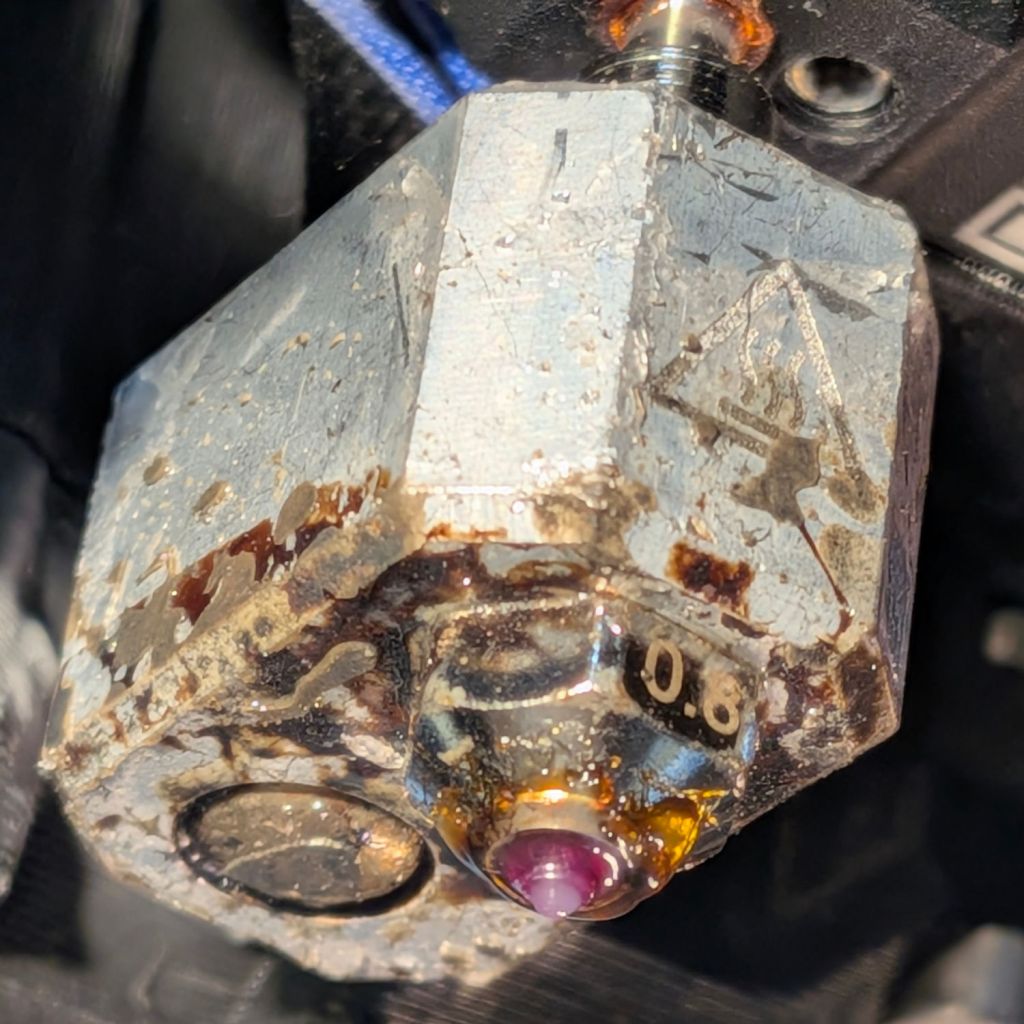
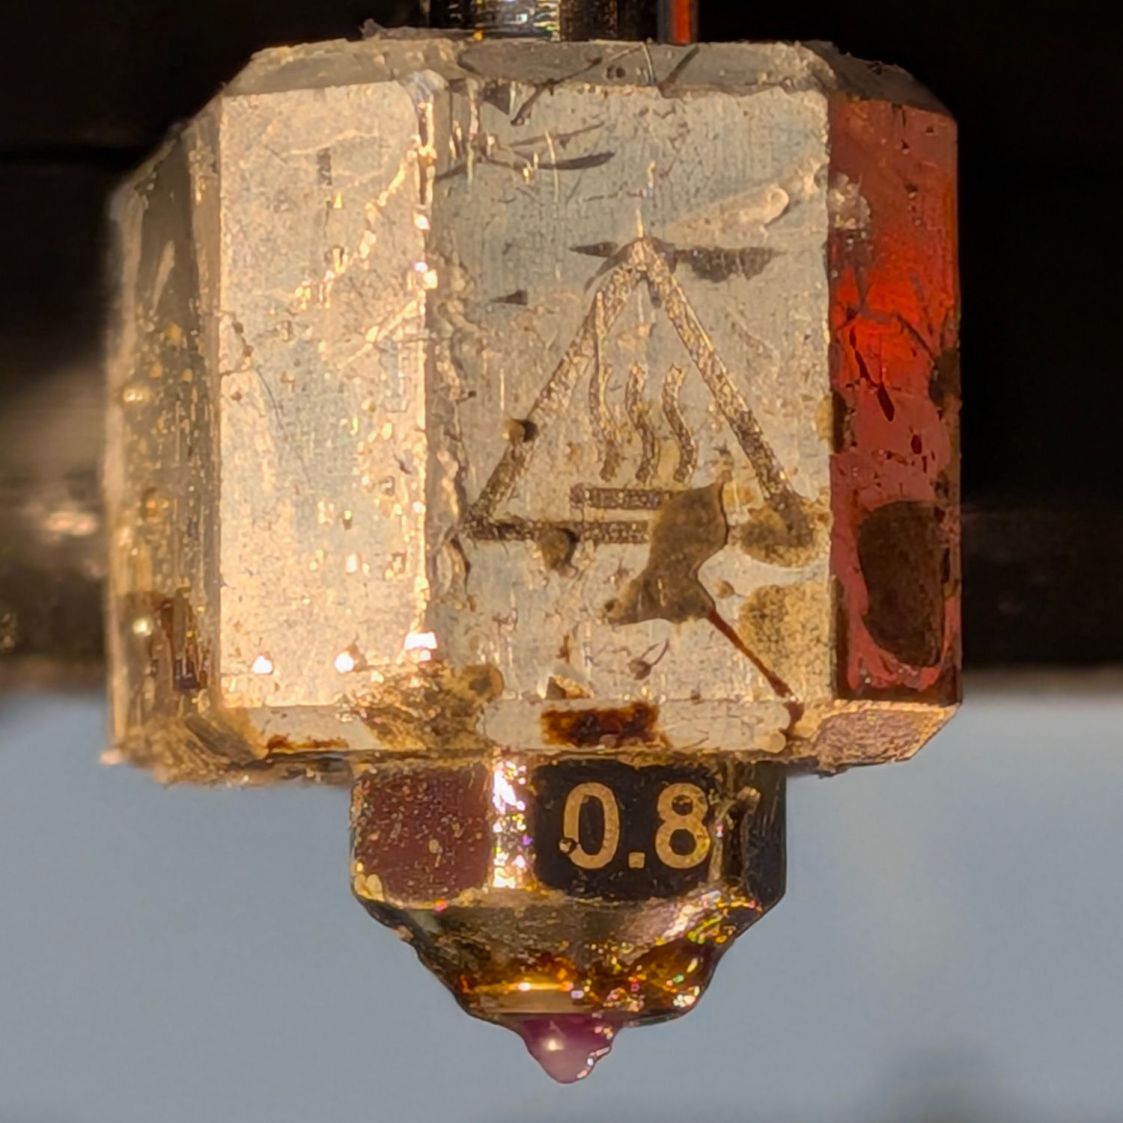
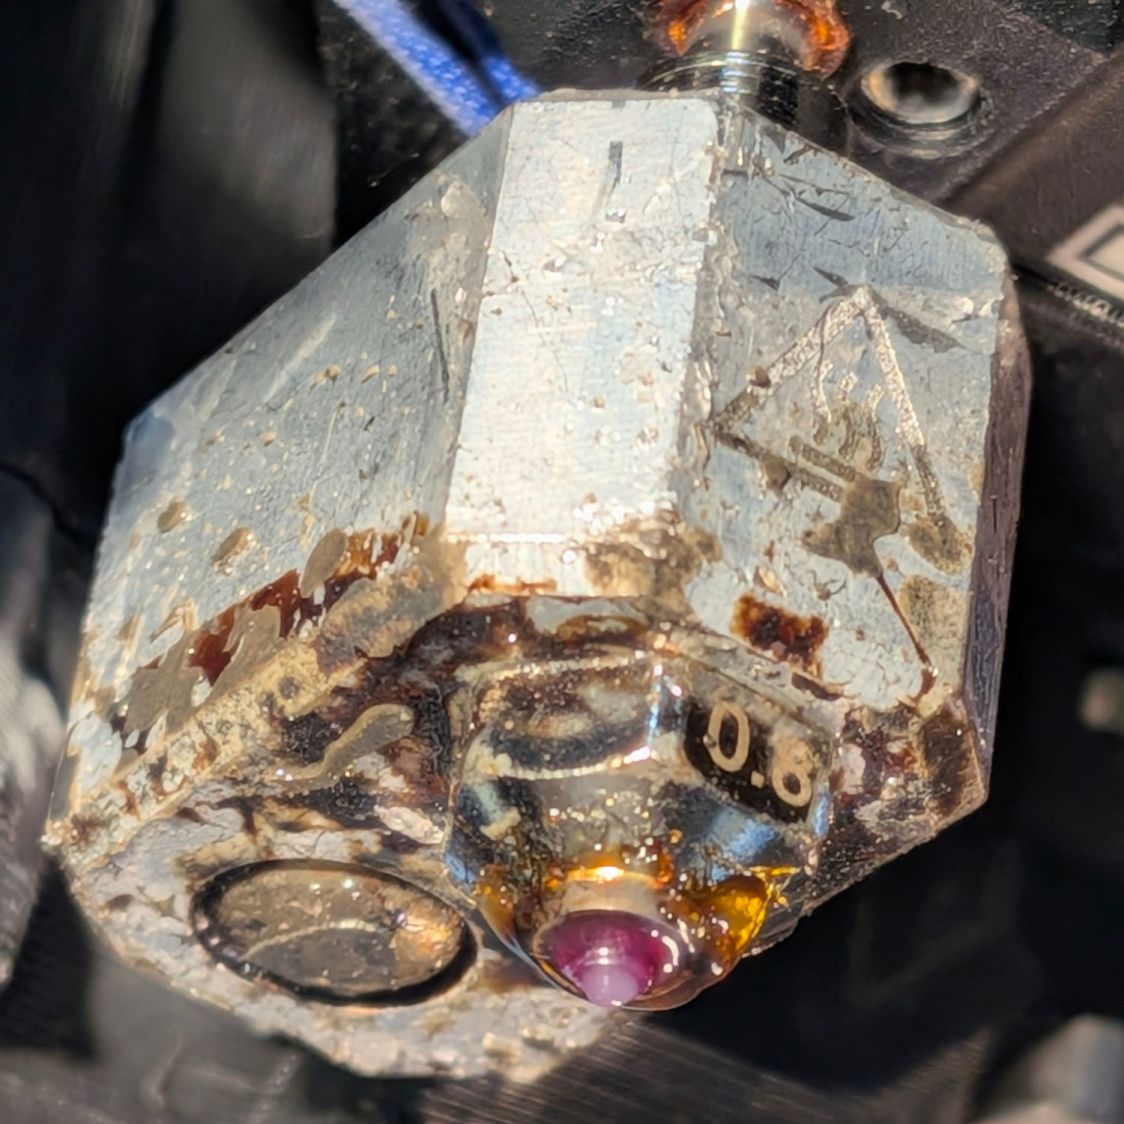
The aluminum block doesn’t look nearly as awful as these pictures suggest; those plastic smears serve as reminders of a few previous printing mishaps.
The nozzle is a 0.8 mm Durozzle with a ruby tip suitable for abrasive filaments like PETG-CF, although this is gooey squishy “natural” TPU:
Prusa MK4 hot end – 0.8 mm Durozzle ruby – bottom
The first patio table foot test piece in TPU had terrible adhesion to the Textured Sheet, which I eventually tracked down to an excessively thick first layer. Given that the MK4 homes the axes and performs mesh bed leveling probes over the build area, this was difficult to believe, particularly because it had never been a problem with the Prusa 0.4 mm ObXidian hardened steel nozzle.
More poking around showed some of the plastic drool left on the outside of the nozzle from the previous print session (as shown in the two pictures above) could remain hardened or at least “not squishy” despite the nozzle being heated before homing and mesh probing. Because probing depends on having the nozzle touch the platform, anything between the nozzle and the steel sheet will raise the Z=0 position and cause all the layers to be too high.
As far as I can tell, ruby has a thermal coefficient around 40 W/m·K, roughly the same as steel. Both are considerably lower than the 200-ish W/m·K for the aluminum block surrounding the nozzle tube, suggesting most of whatever temperature gradient there may be occurs between the heater and the nozzle, not in the nozzle.
While puzzling that out, I noticed the nozzle heated to only 160 °C prior to homing and probing, which seemed low for a filament calling for 230 to 250 °C during printing. Ordinary PETG heated to 170 °C, so something was different.
More puzzling showed the Start G-Code section of the printer’s Custom G-Code sets the home / probe temperature, herein reformatted for readability:
I had set up the eSun TPU 95A filament parameters based on Prusa’s TPU definition. I eventually discovered that definition includes the text MBL160 in its Notes section, which satisfies the regex in the first ternary operator:
Which sets the temperature to 10 °C below the first layer temperature, which I had set to 230 °C, so the probing now occurs at 220 °C.
I am not making this up.
Although that may be a bit too hot, the drool on the nozzle softens nicely and smashes flat during probing, thus solving the immediate problem and, without further ado, produced good round and square TPU feet.
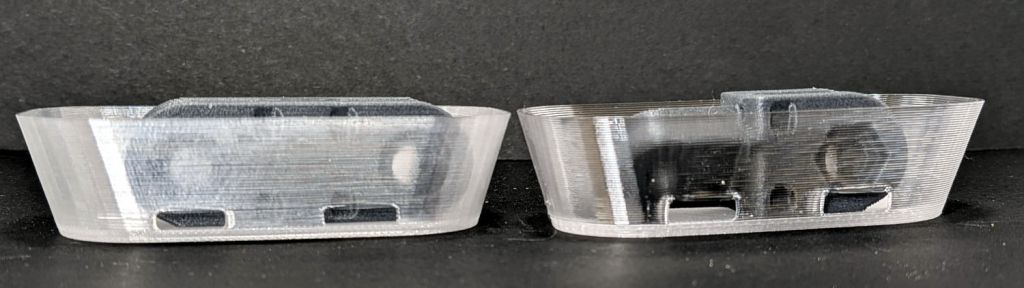
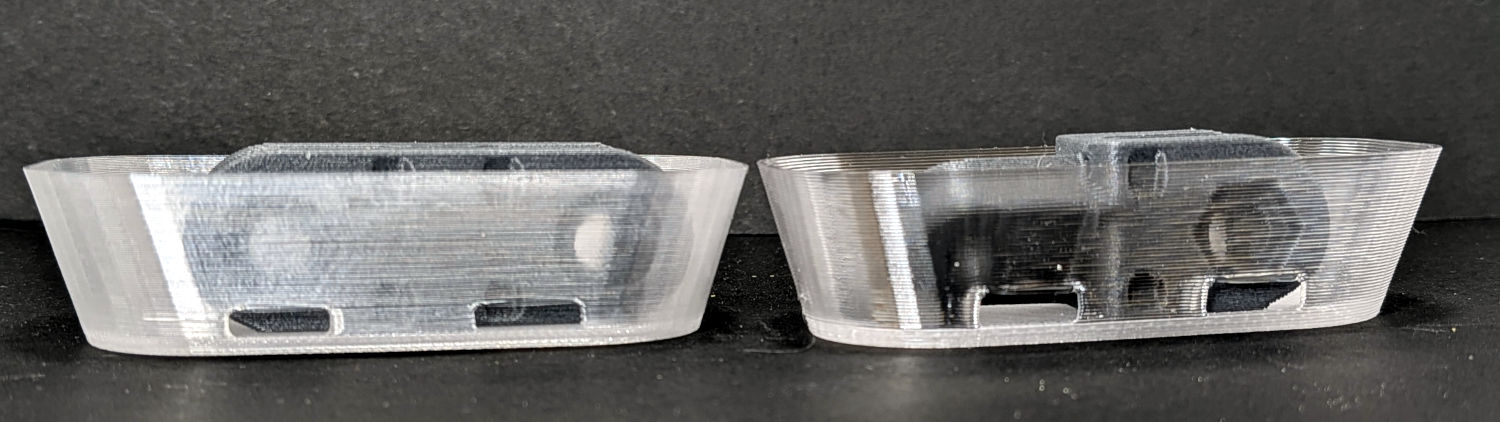
In addition to printing bendyobjects with TPU, the 0.8 mm nozzle 3D-prints PETG into thin walls with better transparency than the default 0.4 mm nozzle:
Clear PETG – 0.4 vs 0.8 mm nozzle – side view
The wall is now 1.0 mm thick, rather than 0.6 mm, and is much closer to being transparent. Those gray links from the RPi camera mount inside the dishes help show the difference.
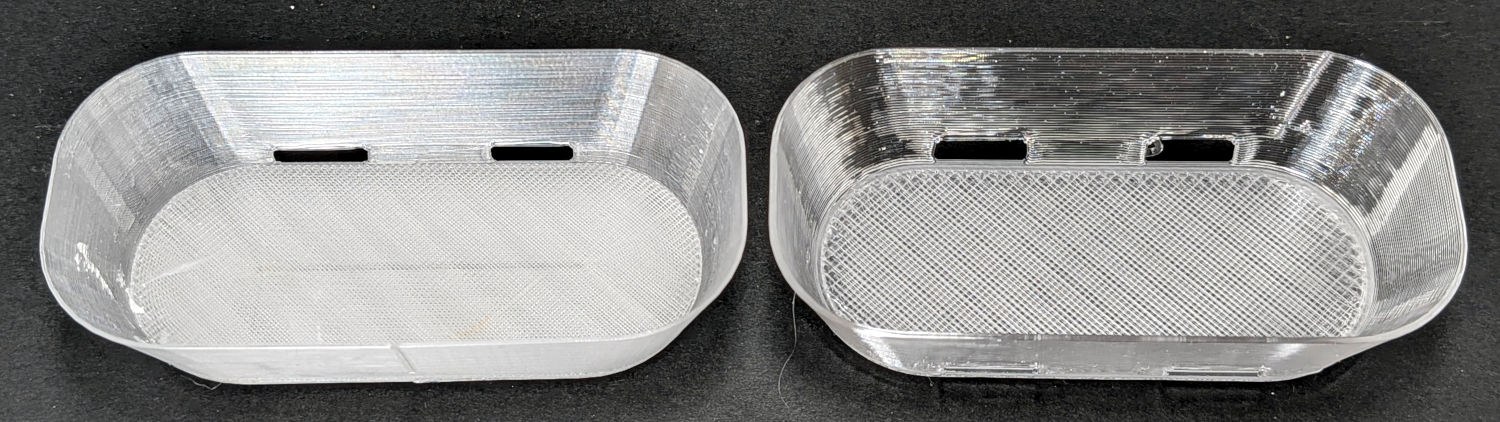
The 2.0 mm thick base plate is also more transparent, but mostly just reveals the 0.4 mm thick infill layers:
Clear PETG – 0.4 vs 0.8 mm nozzle – top view
More study is needed, even if we already have far more soap dishes than strictly necessary.
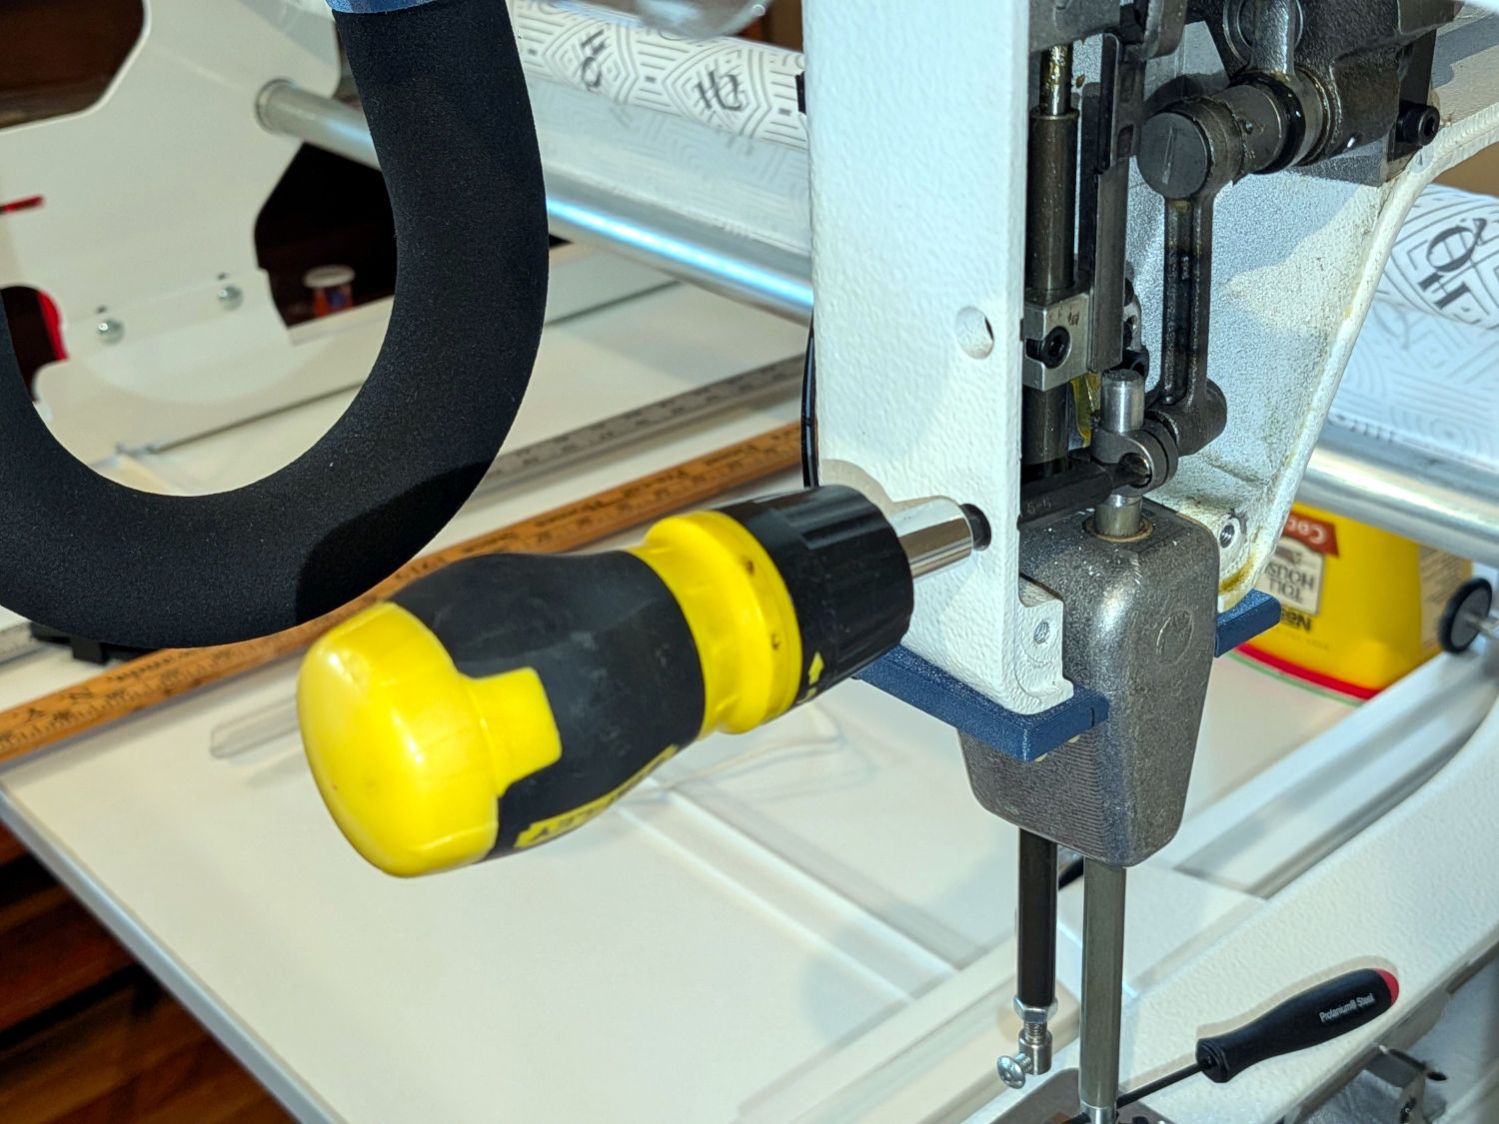
The original needle bar orientation for Mary’s Handiquilter HQ Sixteen put the needle clamp screw (a black-oxide socket head cap screw with the end flattened) about 45° from the rear of the needle bar:
HQ Sixteen – original needle foot orientation
The hex driver passes through the sight hole letting you verify the needle is inserted all the way into the holder before tightening the screw.
It turns out needles fitting the HQ Sixteen come in two varieties, both with nominal 2.0 mm shanks. Mary’s stock has slightly different and entirely consistent diameters around their eyeballometric typical value:
Round shank = 1.94 mm (-0.00 / +0.02 mm)
Flatted shank = 2.04 mm (-0.02 / +0.04 mm)
The round shank needles fit easily into the needle holder, but most of the flatted needles simply would not go in. The difference felt like a burr somewhere inside the bore, rather than a uniformly too-small bore: a burr is easy to imagine around the threaded hole for the lock screw.
Orienting a round-shank needle is exceedingly fiddly, because the groove above the thread hole must be aligned exactly to the front of the needle bar to mesh properly with the bobbin mechanism, but snugging the screw invariably rotates the shank.
While you might think the locking screw would properly orient flatted-shank needles by tightening on the flat, you would be wrong. The flat is at the back of the machine when the groove and hole are properly oriented, which means the locking screw bears on the rounded part of the needle, right at the edge of the flat. Mary was generally unable to use even the few flatted needles that fit into the needle bar, because tightening the screw tended to grab the flat, rotate the needle, and lock it firmly in the wrong orientation.
It is worth nothing that all of the other machines around here have locking screws arranged exactly as you’d expect: tightening the screw onto the shaft flat correctly aligns the needle with zero fiddling.
Pictures of various HQ Sixteen machines found on the InterWebs show their needle bar and locking screw can be oriented anywhere from nearly in front to entirely in the back, suggesting:
Whoever aligns those machines doesn’t care about needle orientation
Everybody uses round-shank needles
Anybody using flatted-shank needles is an outlier
I suggested rotating the needle bar to put the screw in back and, if possible, remove the burr inside the bore. After considerable discussion, my plan was approved.
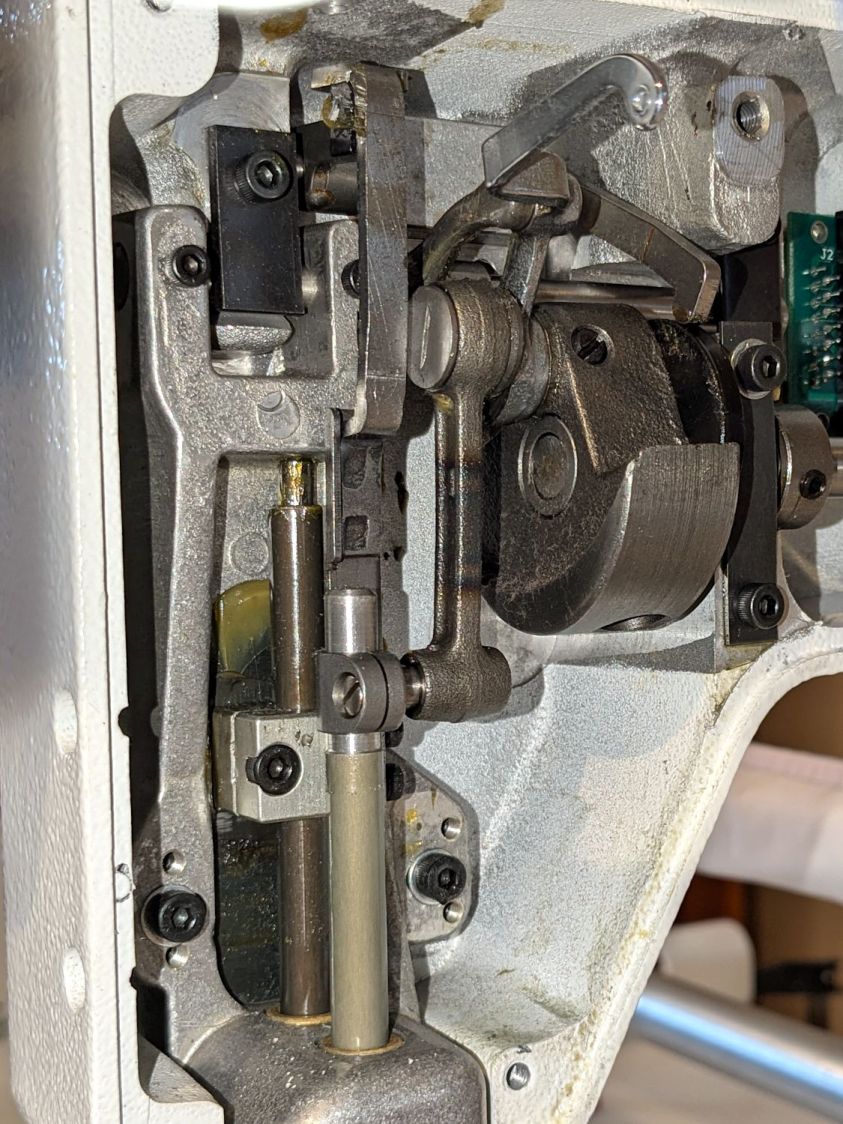
The needle bar slides vertically in a machined block, driven by a link attached to the machine’s main shaft, shown here at Top Dead Center:
HQ Sixteen Handi-feet conversion – foot rod clamp
The surface of the needle rod has a yellow / amber color from the slick coating that must not be disturbed, to the extent the maintenance instructions require a plastic-lined clamp for adjustments.
The vertical position of the needle rod in the clamp determines the “timing” of the needle with respect to the hook on the whirling bobbin case where the magic happens. Setting the timing requires a Special Service Tool that I do not have and likely never will, so the vertical position must not change while rotating the rod in the clamp.
So, we begin.
Removing the machine cover requires removing the Control Pod electronics box with all its cables to get access to the last screw, so this is a nontrivial operation.
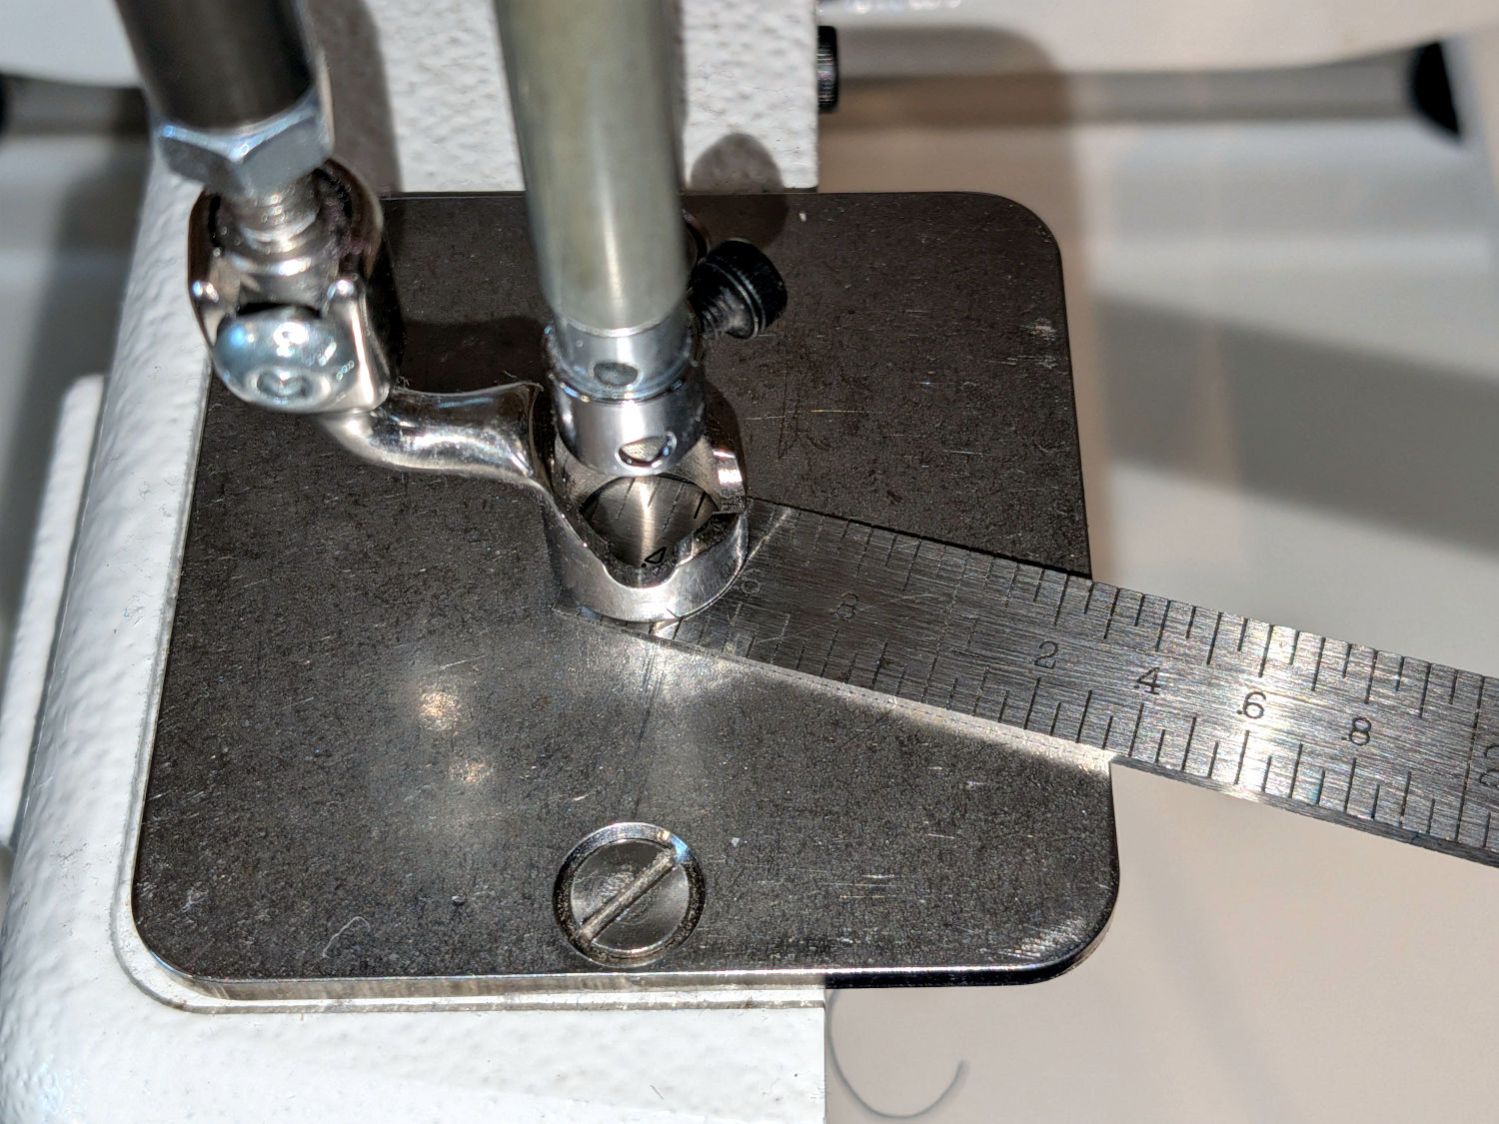
Position the shaft at Bottom Dead Center, then measure the distance from the ruler foot to the needle plate:
HQ Sixteen – Ruler foot clearance
The correct distance is 0.5 mm and the taper gauge shows it at 0.6 mm, but all I need here is putting it back at the same height after I remove the foot.
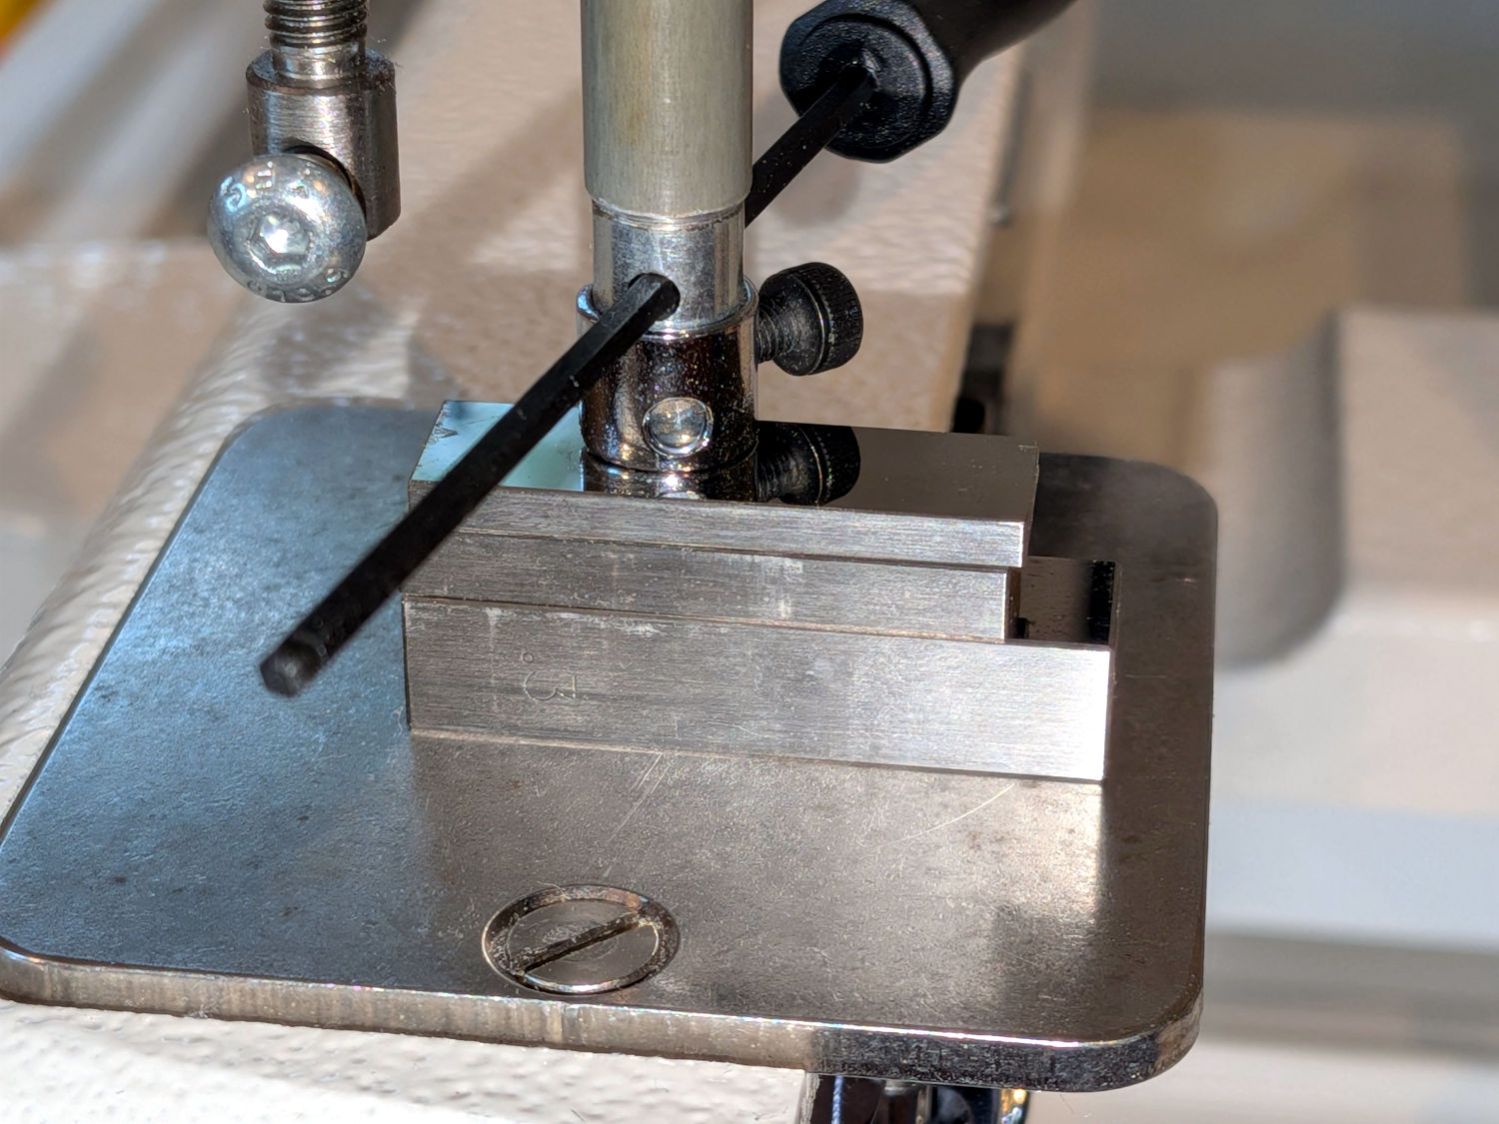
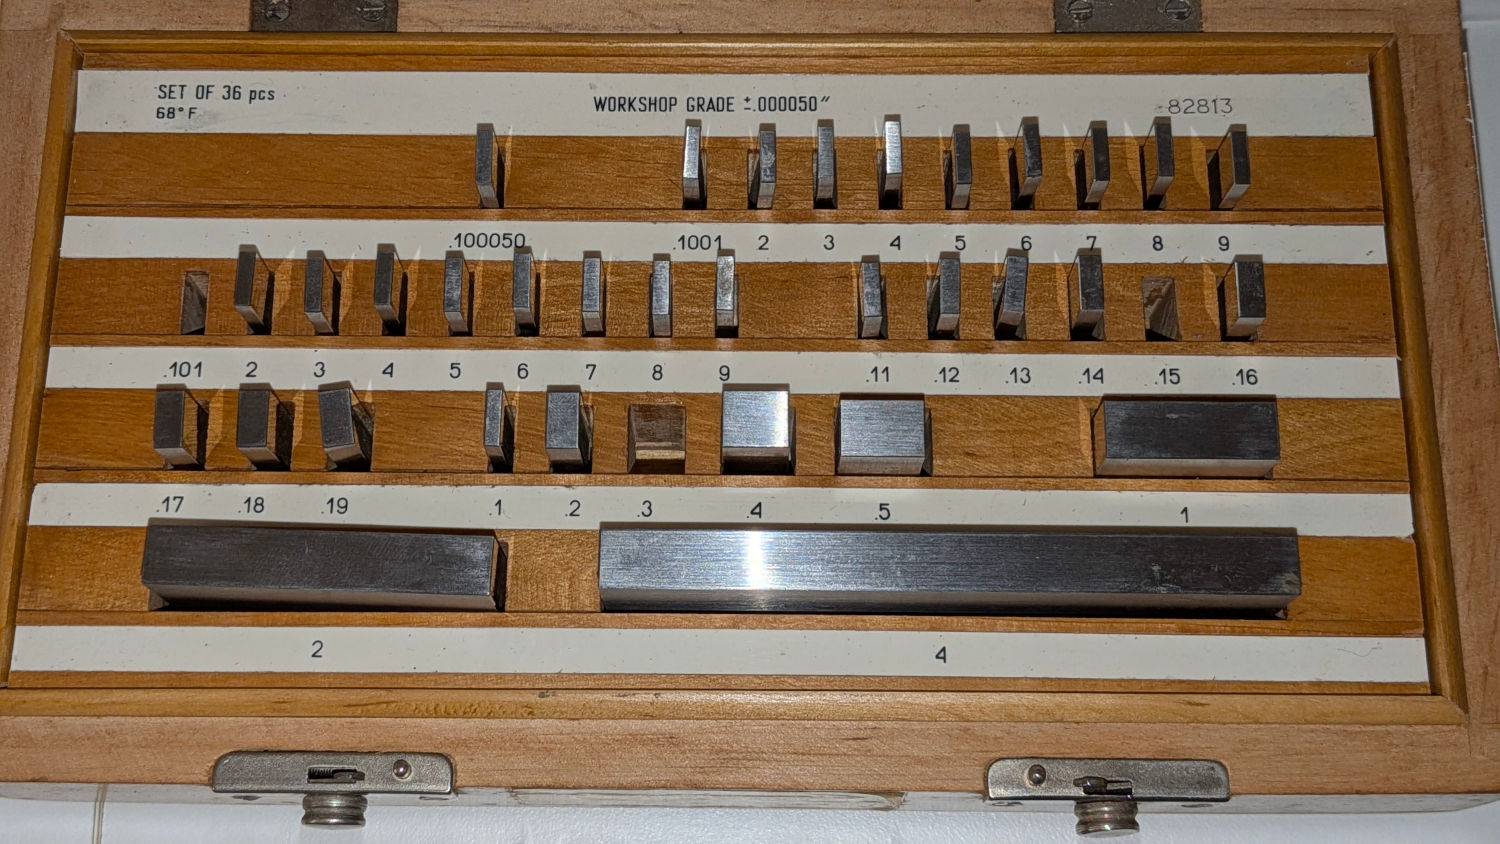
Ensure the shaft is exactly at Bottom Dead Center, then stack gauge blocks under the needle bar as shown in the top picture. For reference, the gauge block set showing which blocks went into that stack:
HQ Sixteen – gage blocks used
Although I didn’t need the absolute measurement, it’s 0.551 inch = 0.300 + 0.150 + 0.101 inch = 13.995 mm. It’s less than 0.552 inch = 14.021; I decided fiddling with the fourth decimal place would be counterproductive.
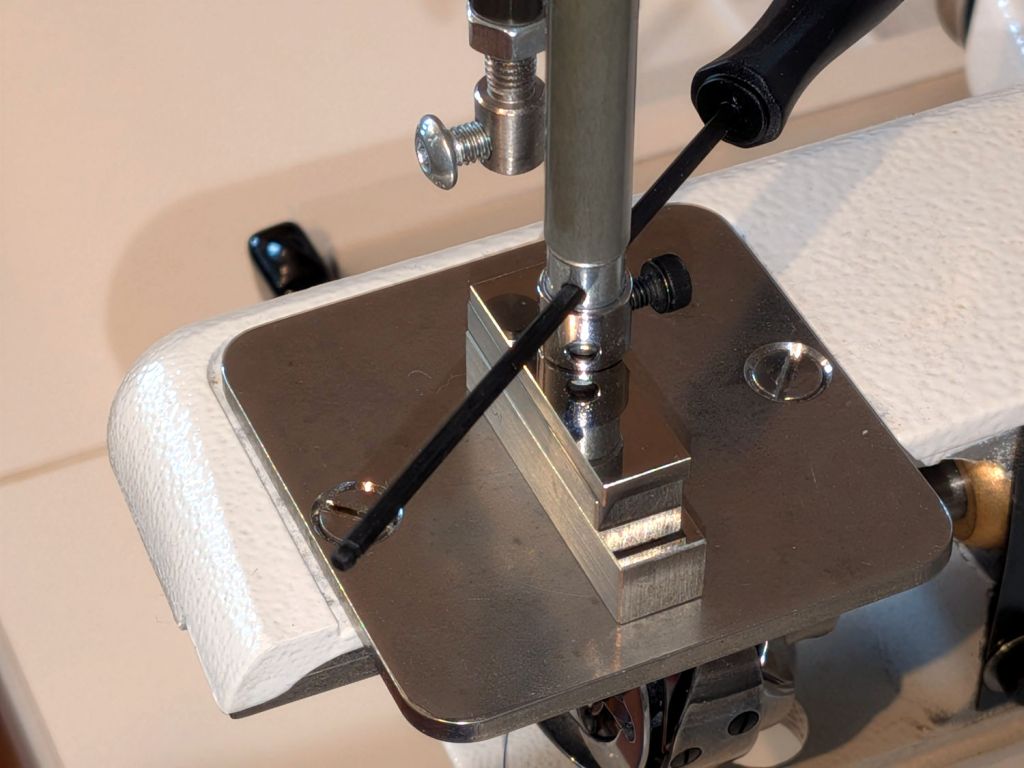
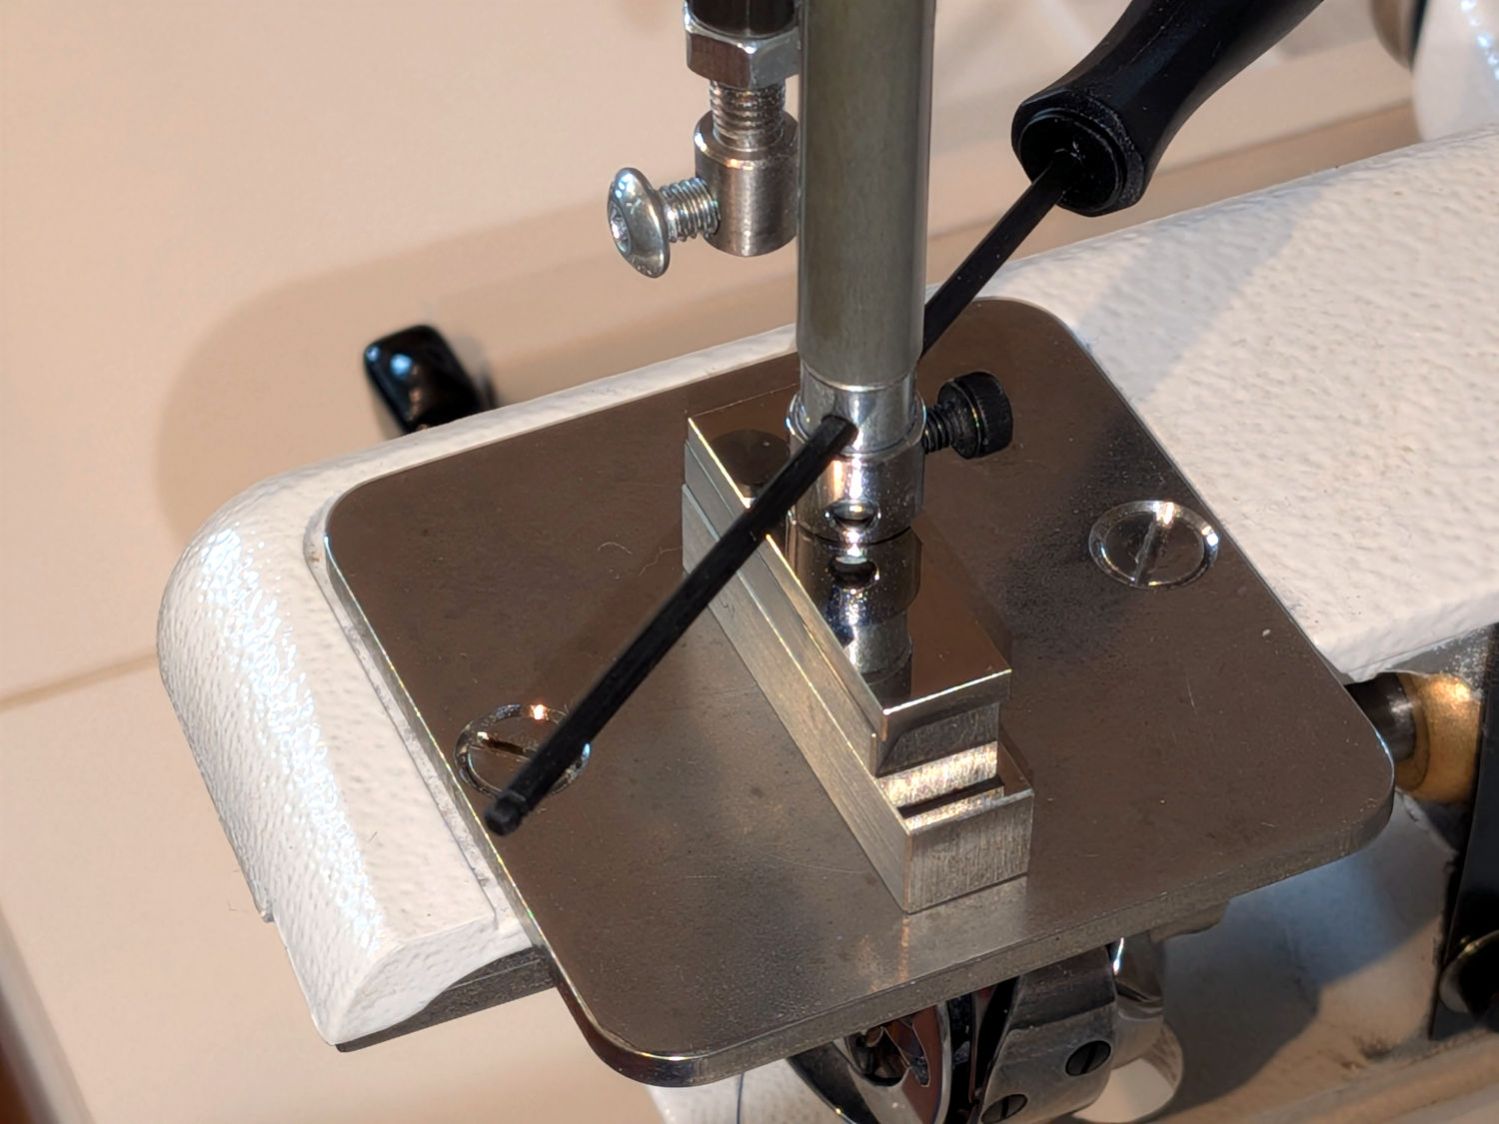
With the needle bar held at that height, stick a screwdriver through the hole intended for this purpose and loosen the clamp screw:
HQ Sixteen – needle bar clamp
Yes, the hole is slightly misaligned with the screw, presumably because aligning it properly would put the hole too close to the edge of the frame casting for comfortable drilling. You could make this adjustment without removing the cover, but I’m not that type of guy.
Rotate the needle bar to put the locking screw exactly at the back, verify the bottom of the bar rests on the gauge blocks, tighten the clamp screw, and verify the bottom of the bar rests on the gauge blocks:
HQ Sixteen – needle bar reoriented
Again, the hex driver shows the observation hole orientation.
Acceptance testing requires a practice quilt, but the machine lights up properly and moves smoothly with a needle in place, so it’s pretty close to being correct.
This was one of those jobs requiring about two hours of setup, twenty seconds of adjustment, and half an hour of put-away.
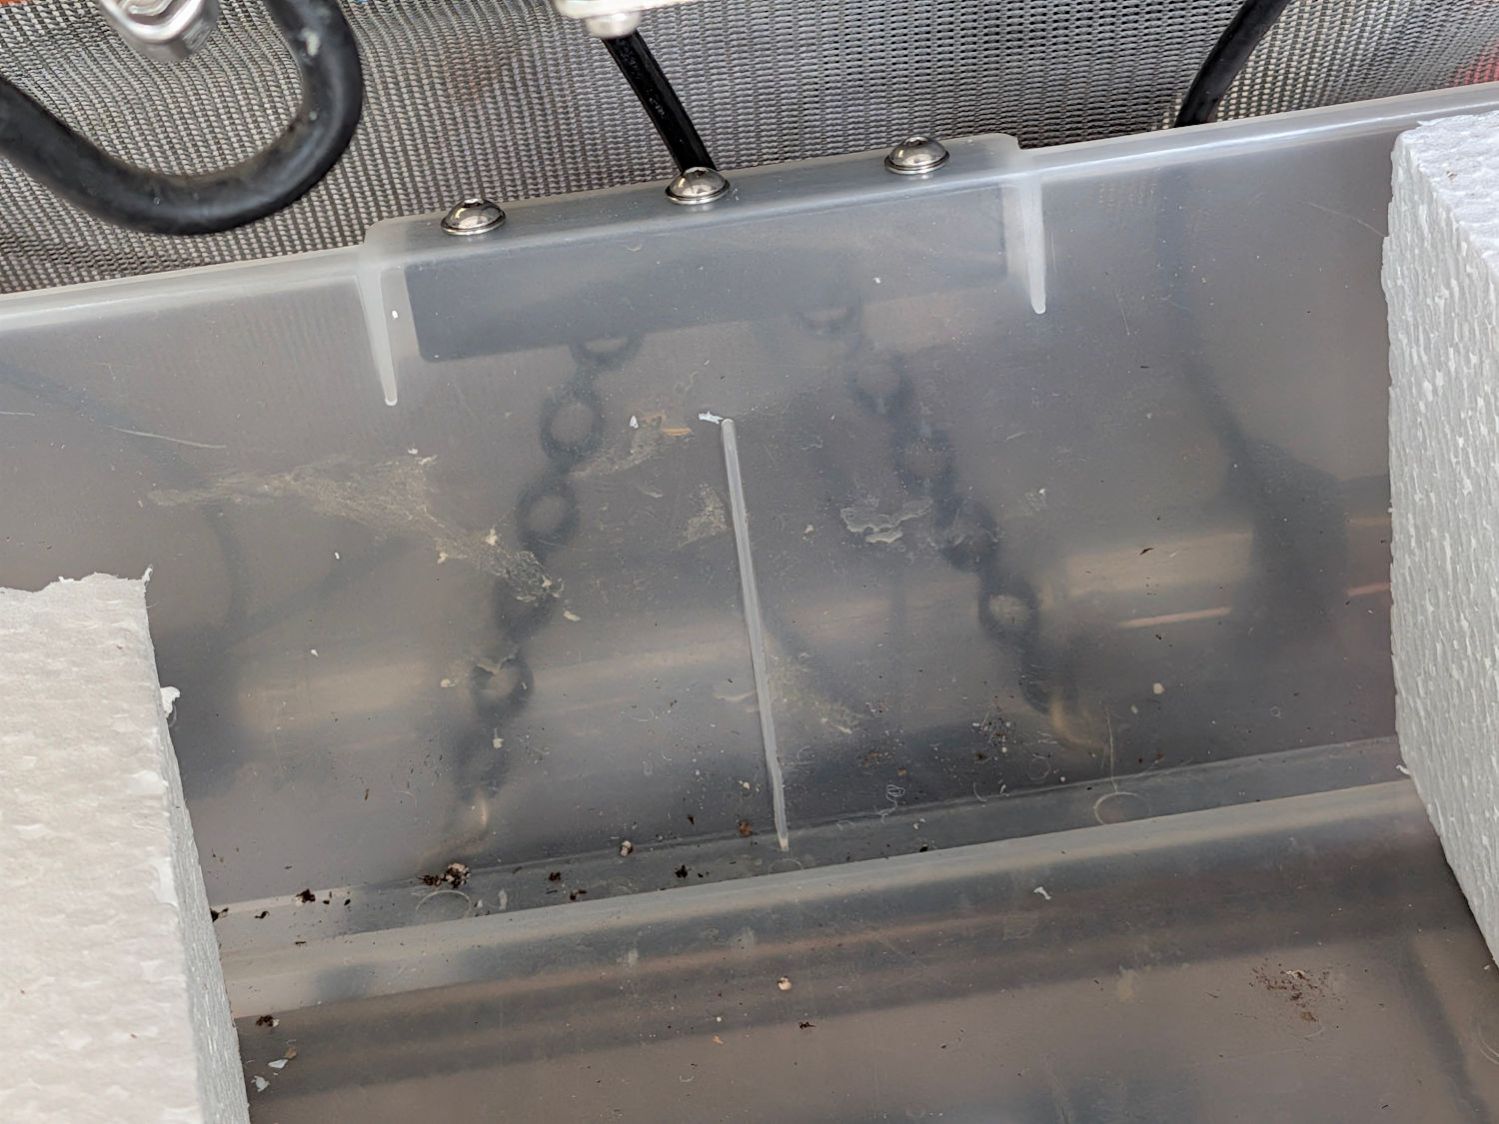
Except for having the bungee cord run across the middle of the tray where it blocks access for larger trays and tends to bend the taller leaves.
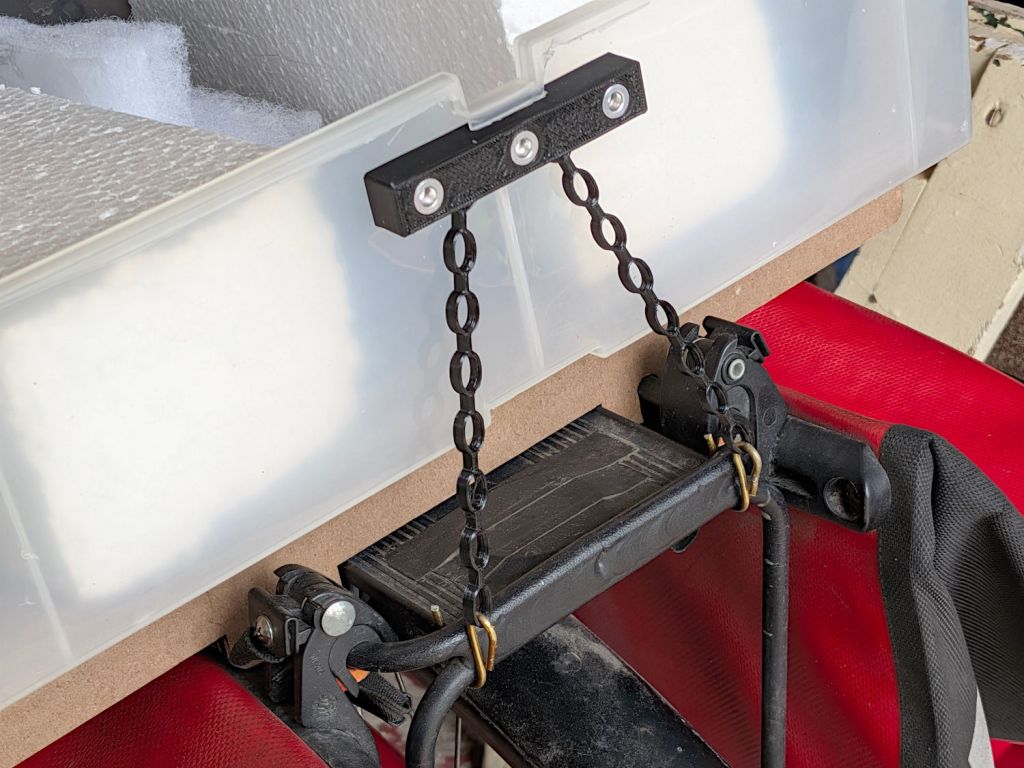
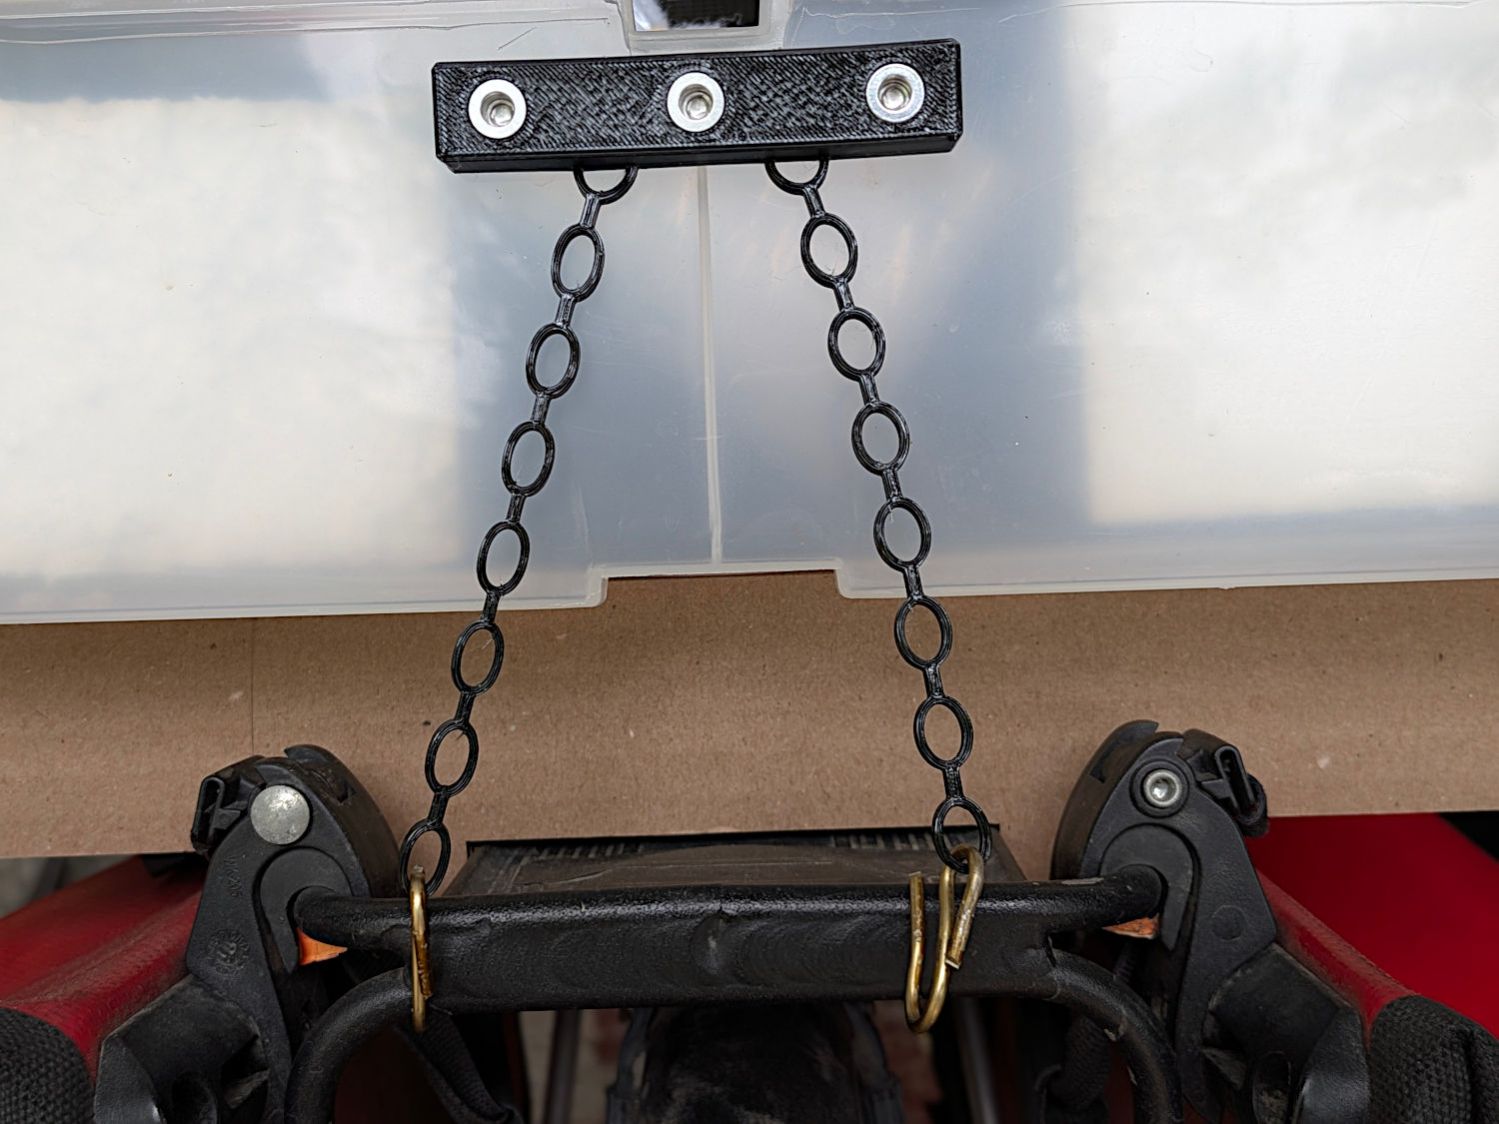
Well, I can fix that:
Bike Rack Tray Holder – straps – rear
The front tiedown is similar:
Bike Rack Tray Holder – straps – front
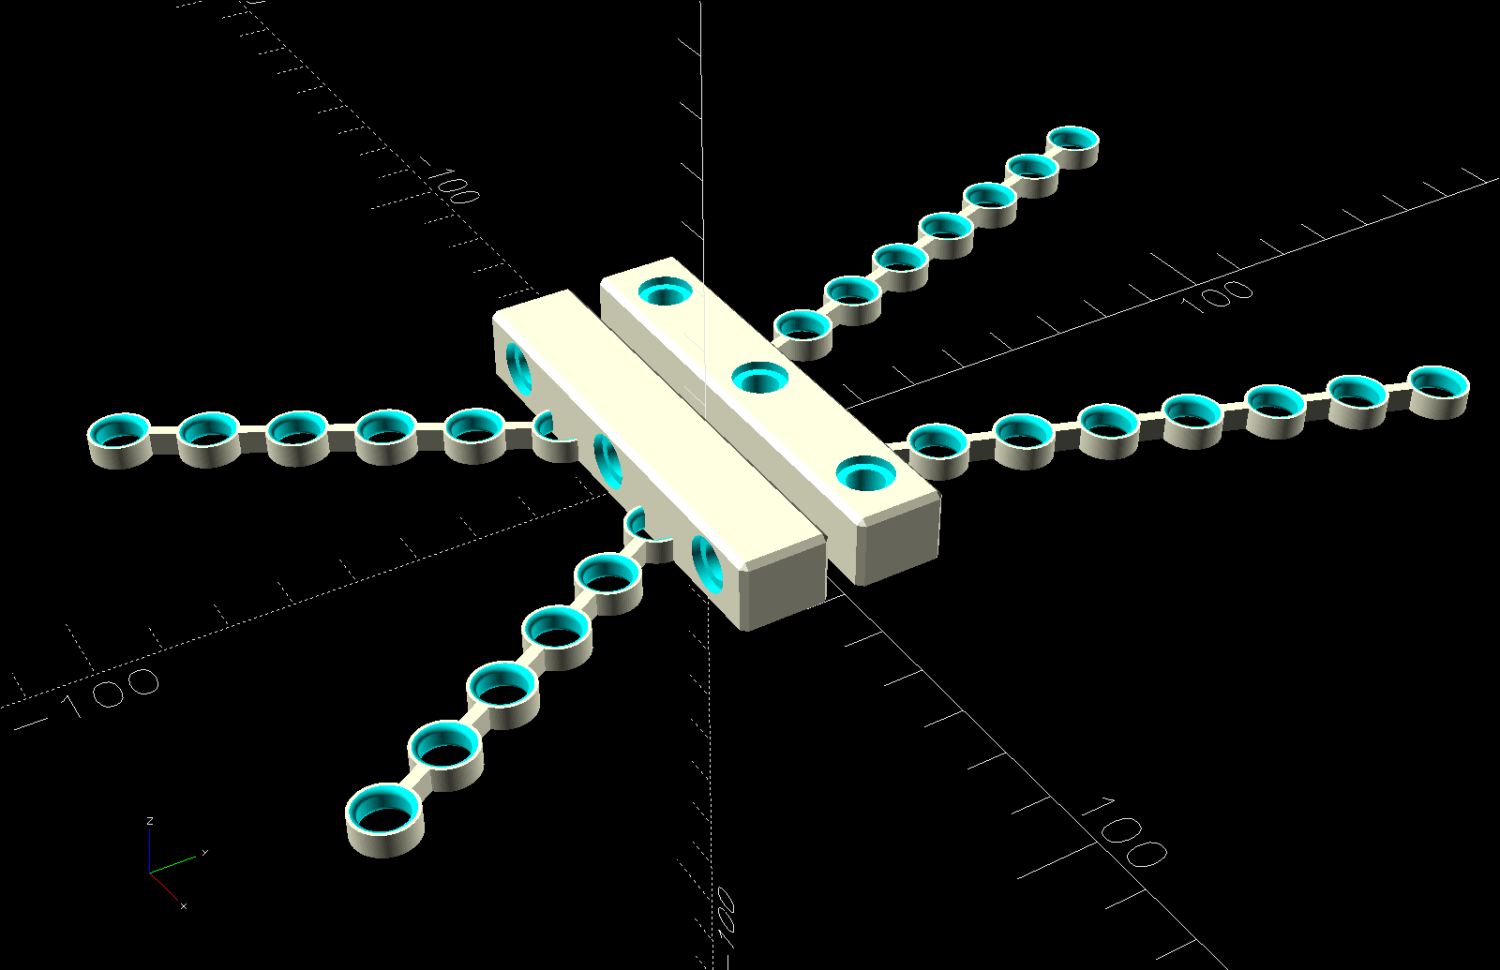
They’re printed from TPU: rectangular blocks and chains, ending in wire hooks bashed from a coat hanger. The M4 button-head screws thread into (uncrushed) rivnuts, which seemed easier to manage than square nuts in this situation.
The chains are just thick circles, with half of the top links sunk into the blocks:
Stretchy Straps – build layout
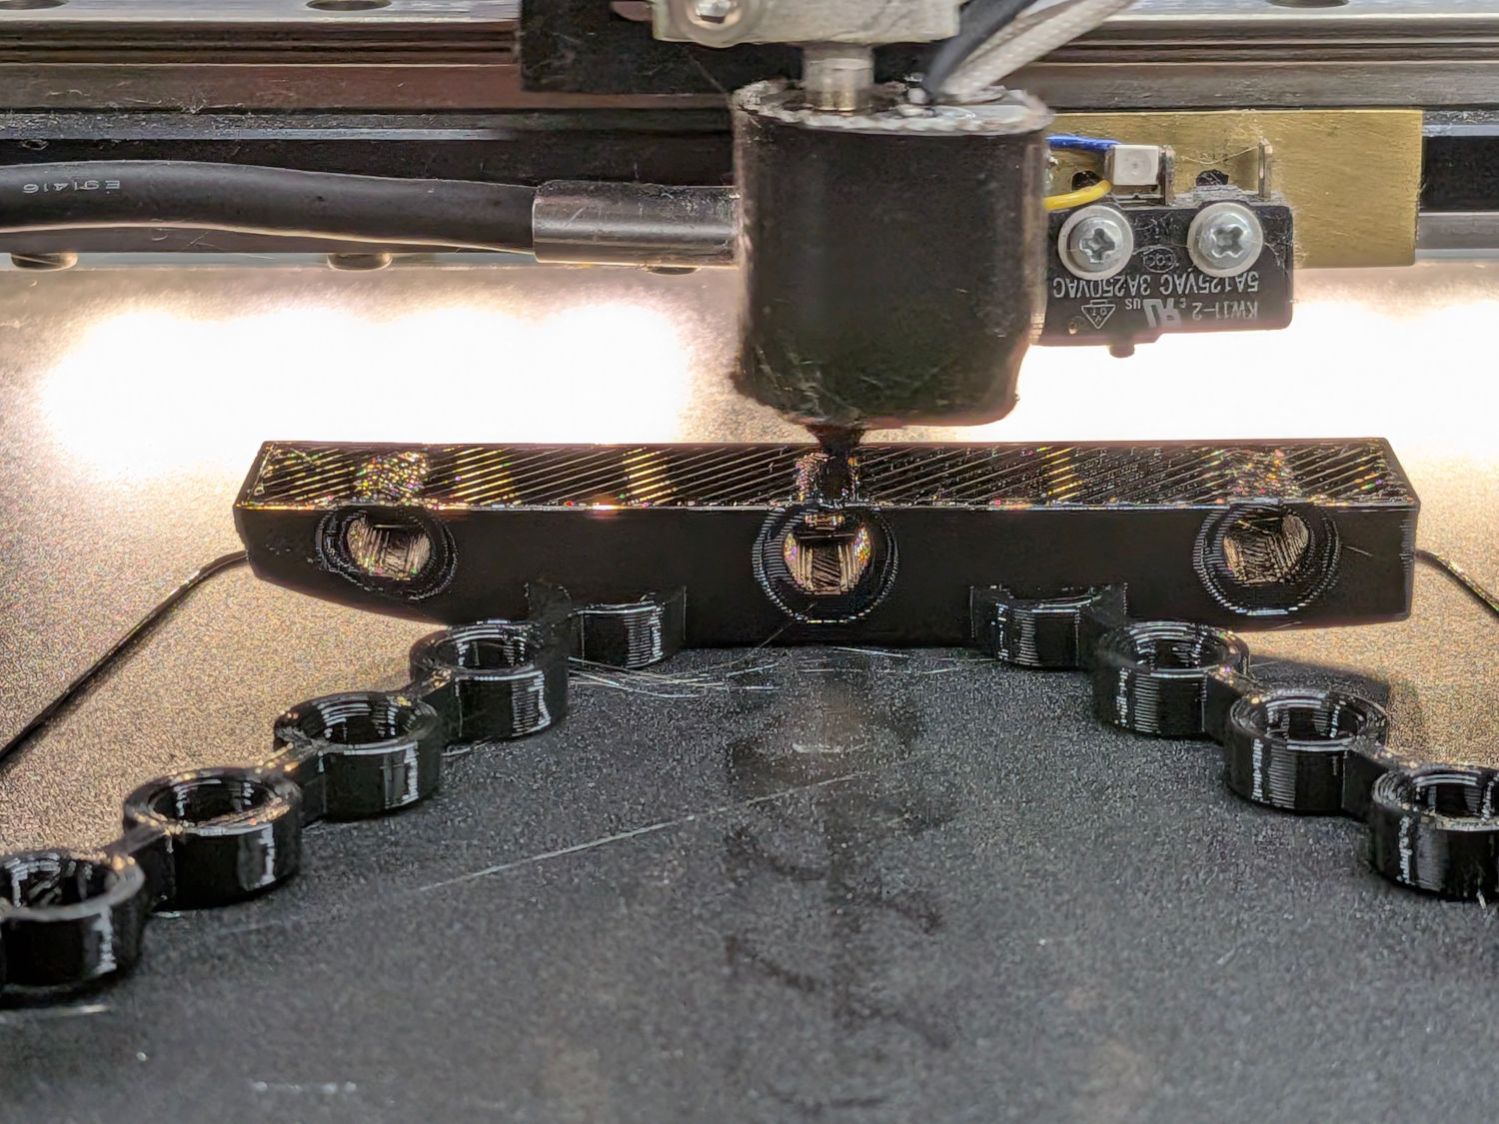
You’d (well, I’d) want to build them one at a time, because sometimes this happens:
Bike Rack Tray Holder – bad platform adhesion
Based on those measurements, I raised the extruder by 0.1 mm, but apparently did a poor job of cleaning / flattening the cold TPU on the nozzle and got it wrong. As a result, the first layer didn’t get squooshed properly onto the BuildTak, came unstuck, and produced art . The track down the middle of the photo shows traces of a previous, badly over-squooshed test chain.
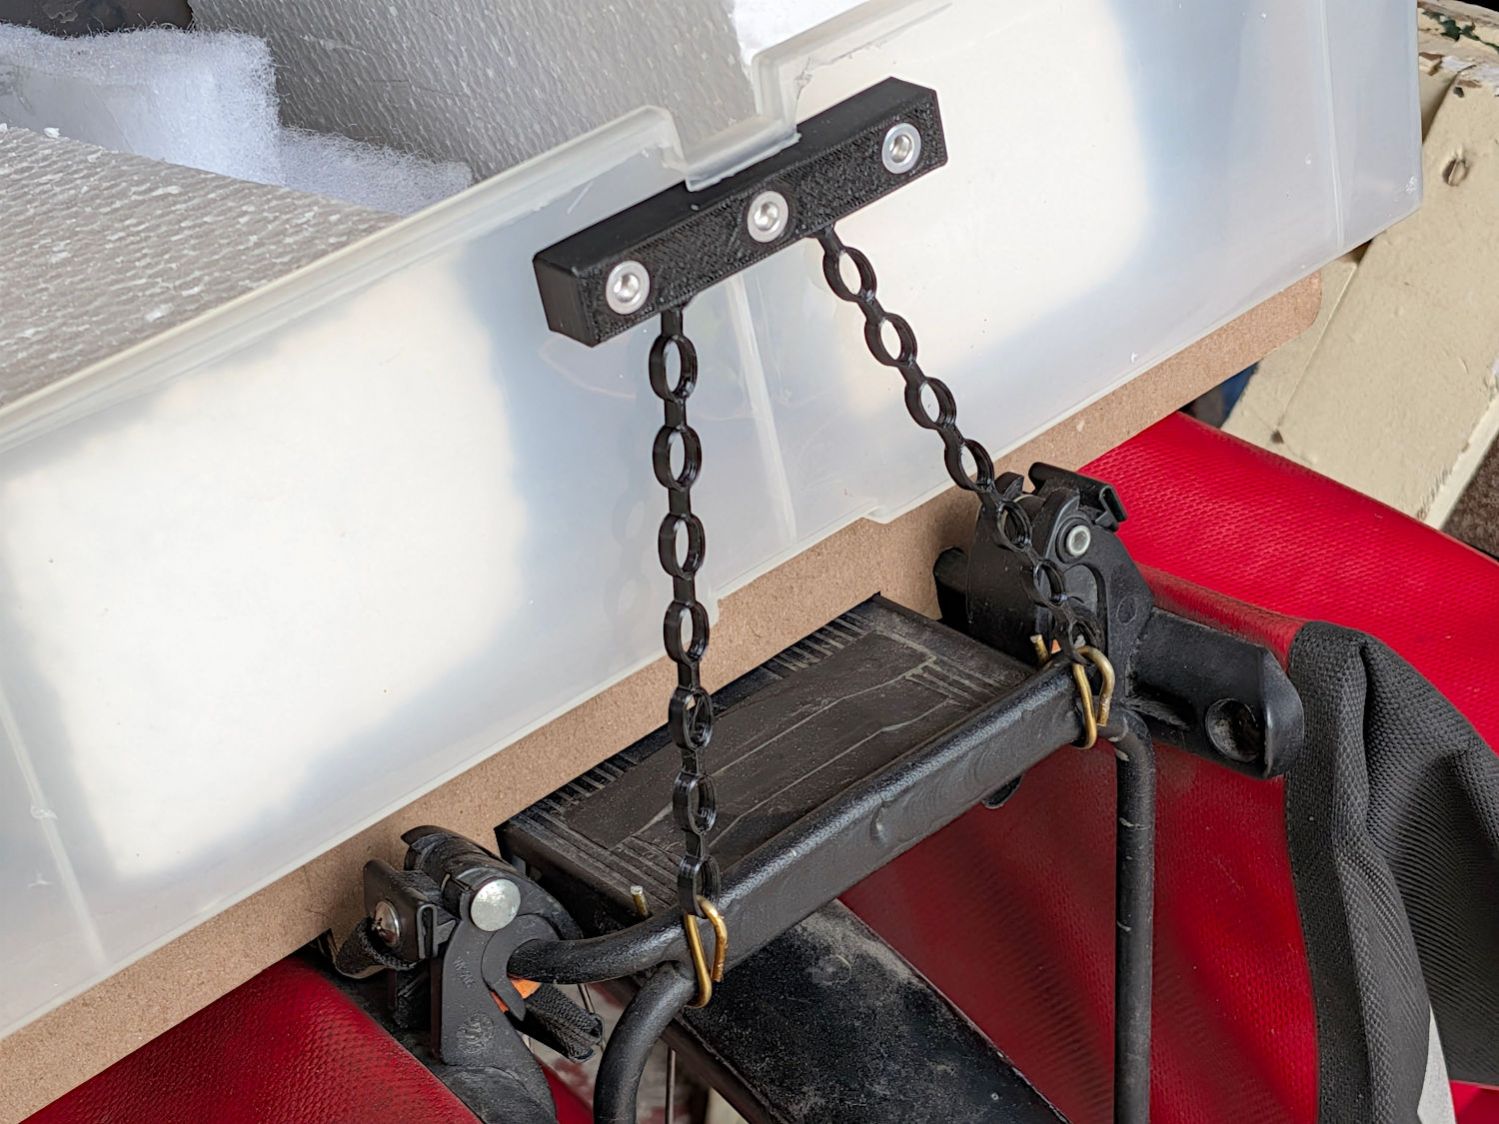
The stretched TPU relaxes enough to leave very little tension after a day, as shown by the unhooked right chain:
Bike Rack Tray Holder – straps – relaxing
However, that make the chains exactly the right length, so they require even more force to get the hooks off the rack. After relaxing for another day, the stretched chains return to roughly their original lengths, so it’s all good.
This file contains hidden or bidirectional Unicode text that may be interpreted or compiled differently than what appears below. To review, open the file in an editor that reveals hidden Unicode characters.
Learn more about bidirectional Unicode characters