The original needle bar orientation for Mary’s Handiquilter HQ Sixteen put the needle clamp screw (a black-oxide socket head cap screw with the end flattened) about 45° from the rear of the needle bar:
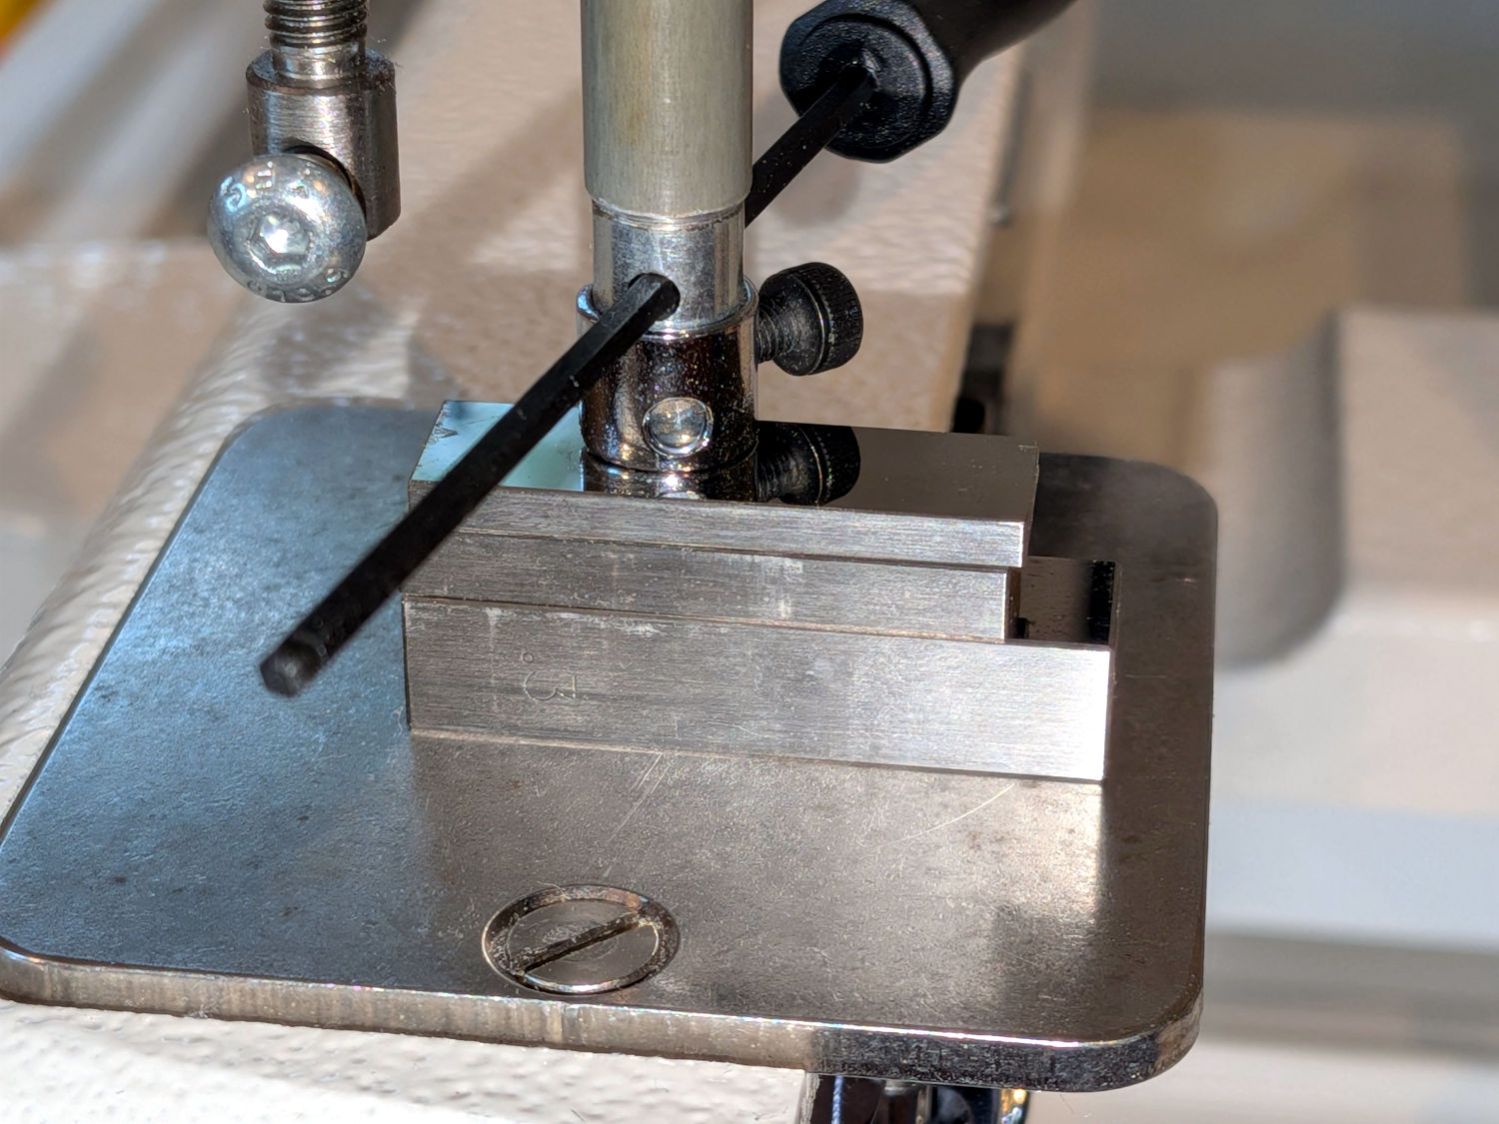
The hex driver passes through the sight hole letting you verify the needle is inserted all the way into the holder before tightening the screw.
It turns out needles fitting the HQ Sixteen come in two varieties, both with nominal 2.0 mm shanks. Mary’s stock has slightly different and entirely consistent diameters around their eyeballometric typical value:
- Round shank = 1.94 mm (-0.00 / +0.02 mm)
- Flatted shank = 2.04 mm (-0.02 / +0.04 mm)
The round shank needles fit easily into the needle holder, but most of the flatted needles simply would not go in. The difference felt like a burr somewhere inside the bore, rather than a uniformly too-small bore: a burr is easy to imagine around the threaded hole for the lock screw.
Orienting a round-shank needle is exceedingly fiddly, because the groove above the thread hole must be aligned exactly to the front of the needle bar to mesh properly with the bobbin mechanism, but snugging the screw invariably rotates the shank.
While you might think the locking screw would properly orient flatted-shank needles by tightening on the flat, you would be wrong. The flat is at the back of the machine when the groove and hole are properly oriented, which means the locking screw bears on the rounded part of the needle, right at the edge of the flat. Mary was generally unable to use even the few flatted needles that fit into the needle bar, because tightening the screw tended to grab the flat, rotate the needle, and lock it firmly in the wrong orientation.
It is worth nothing that all of the other machines around here have locking screws arranged exactly as you’d expect: tightening the screw onto the shaft flat correctly aligns the needle with zero fiddling.
Pictures of various HQ Sixteen machines found on the InterWebs show their needle bar and locking screw can be oriented anywhere from nearly in front to entirely in the back, suggesting:
- Whoever aligns those machines doesn’t care about needle orientation
- Everybody uses round-shank needles
- Anybody using flatted-shank needles is an outlier
I suggested rotating the needle bar to put the screw in back and, if possible, remove the burr inside the bore. After considerable discussion, my plan was approved.
The needle bar slides vertically in a machined block, driven by a link attached to the machine’s main shaft, shown here at Top Dead Center:
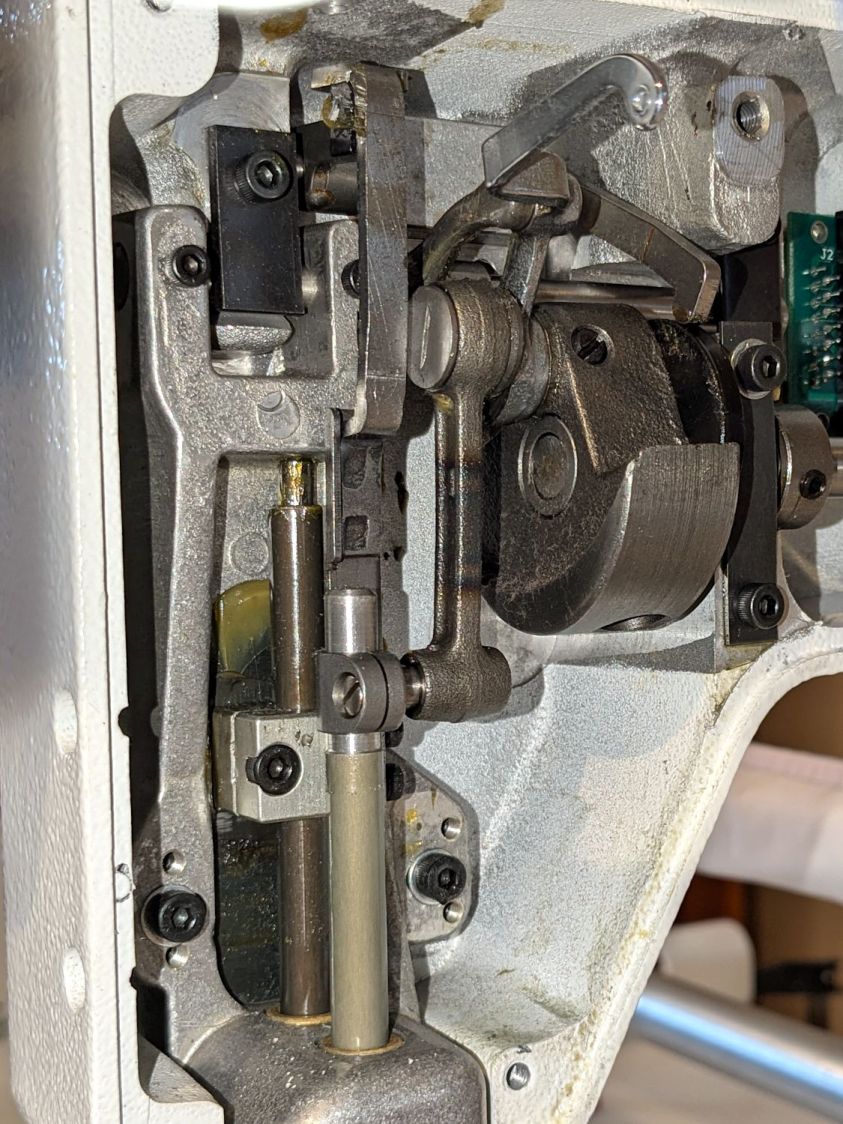
The surface of the needle rod has a yellow / amber color from the slick coating that must not be disturbed, to the extent the maintenance instructions require a plastic-lined clamp for adjustments.
The vertical position of the needle rod in the clamp determines the “timing” of the needle with respect to the hook on the whirling bobbin case where the magic happens. Setting the timing requires a Special Service Tool that I do not have and likely never will, so the vertical position must not change while rotating the rod in the clamp.
So, we begin.
Removing the machine cover requires removing the Control Pod electronics box with all its cables to get access to the last screw, so this is a nontrivial operation.
Position the shaft at Bottom Dead Center, then measure the distance from the ruler foot to the needle plate:
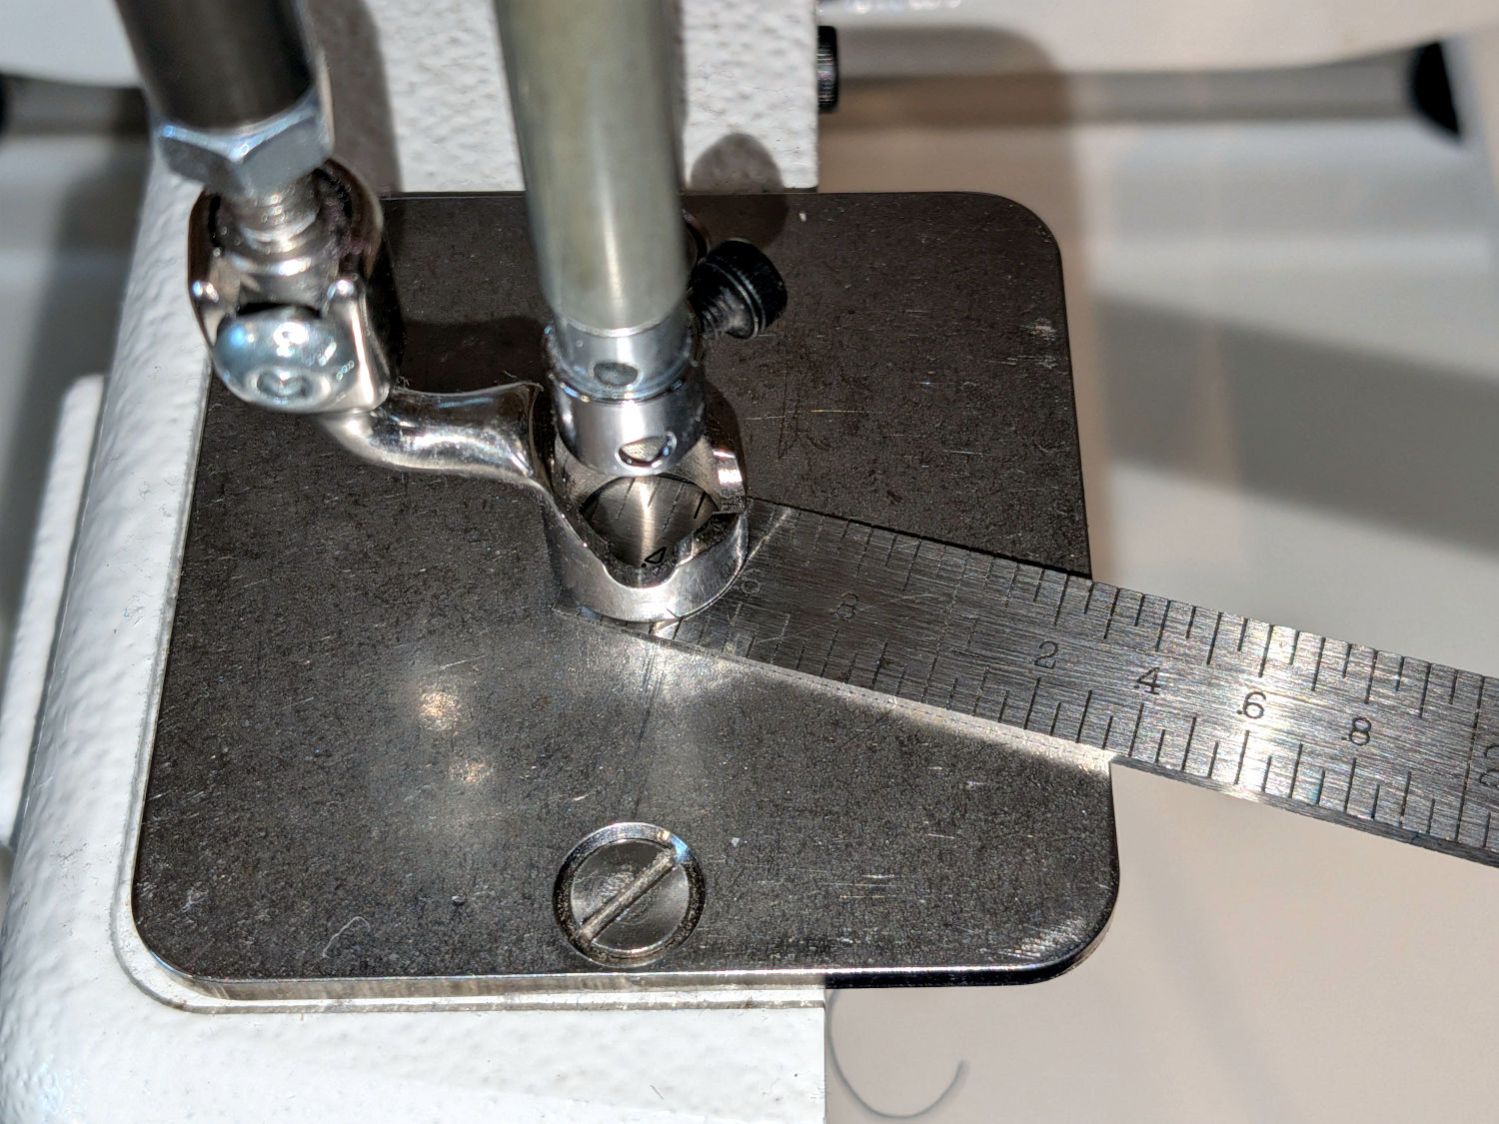
The correct distance is 0.5 mm and the taper gauge shows it at 0.6 mm, but all I need here is putting it back at the same height after I remove the foot.
Ensure the shaft is exactly at Bottom Dead Center, then stack gauge blocks under the needle bar as shown in the top picture. For reference, the gauge block set showing which blocks went into that stack:
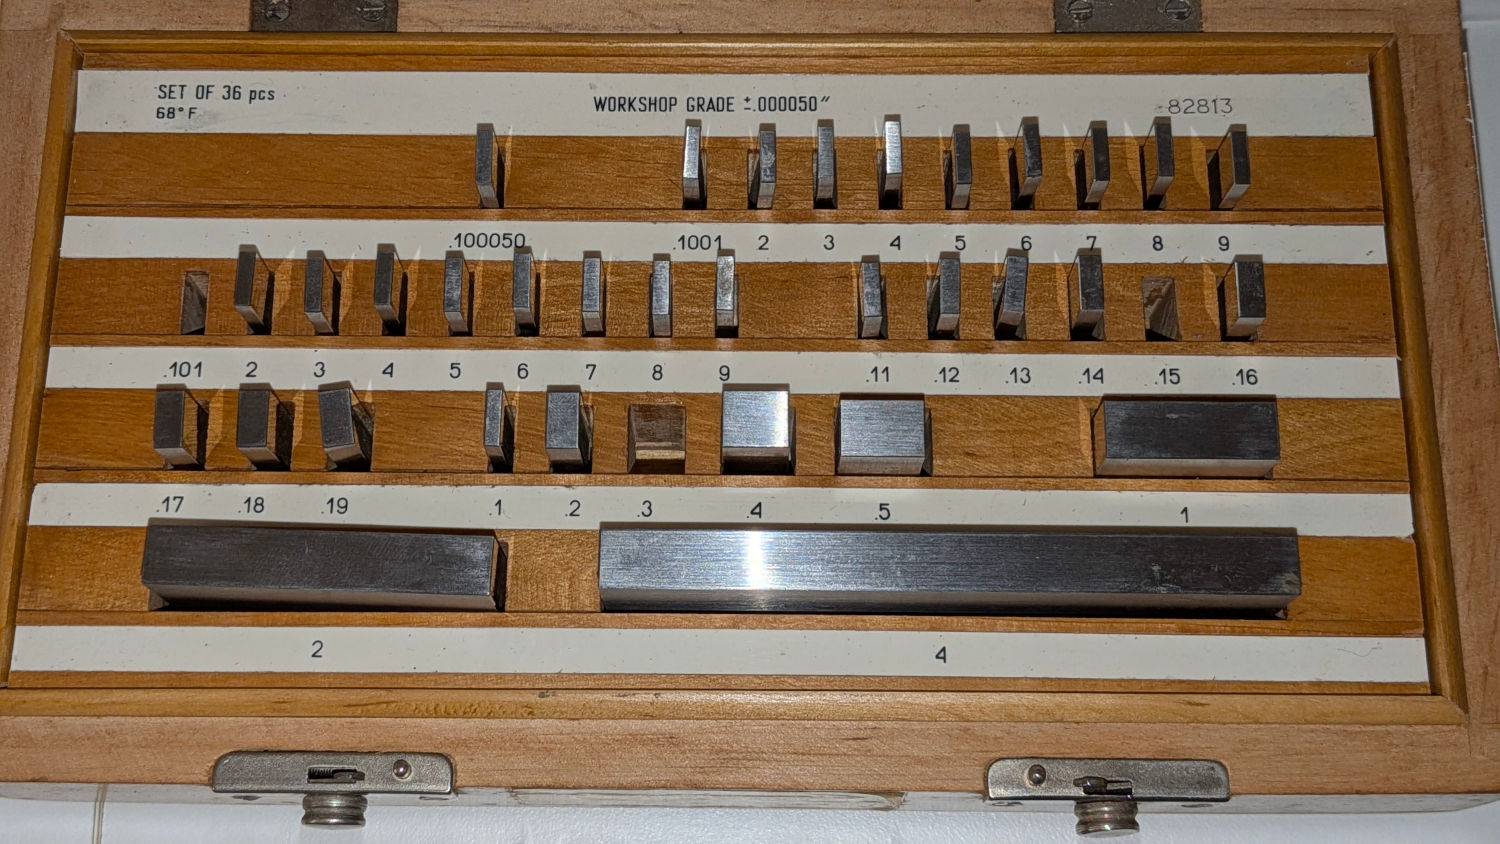
Although I didn’t need the absolute measurement, it’s 0.551 inch = 0.300 + 0.150 + 0.101 inch = 13.995 mm. It’s less than 0.552 inch = 14.021; I decided fiddling with the fourth decimal place would be counterproductive.
With the needle bar held at that height, stick a screwdriver through the hole intended for this purpose and loosen the clamp screw:
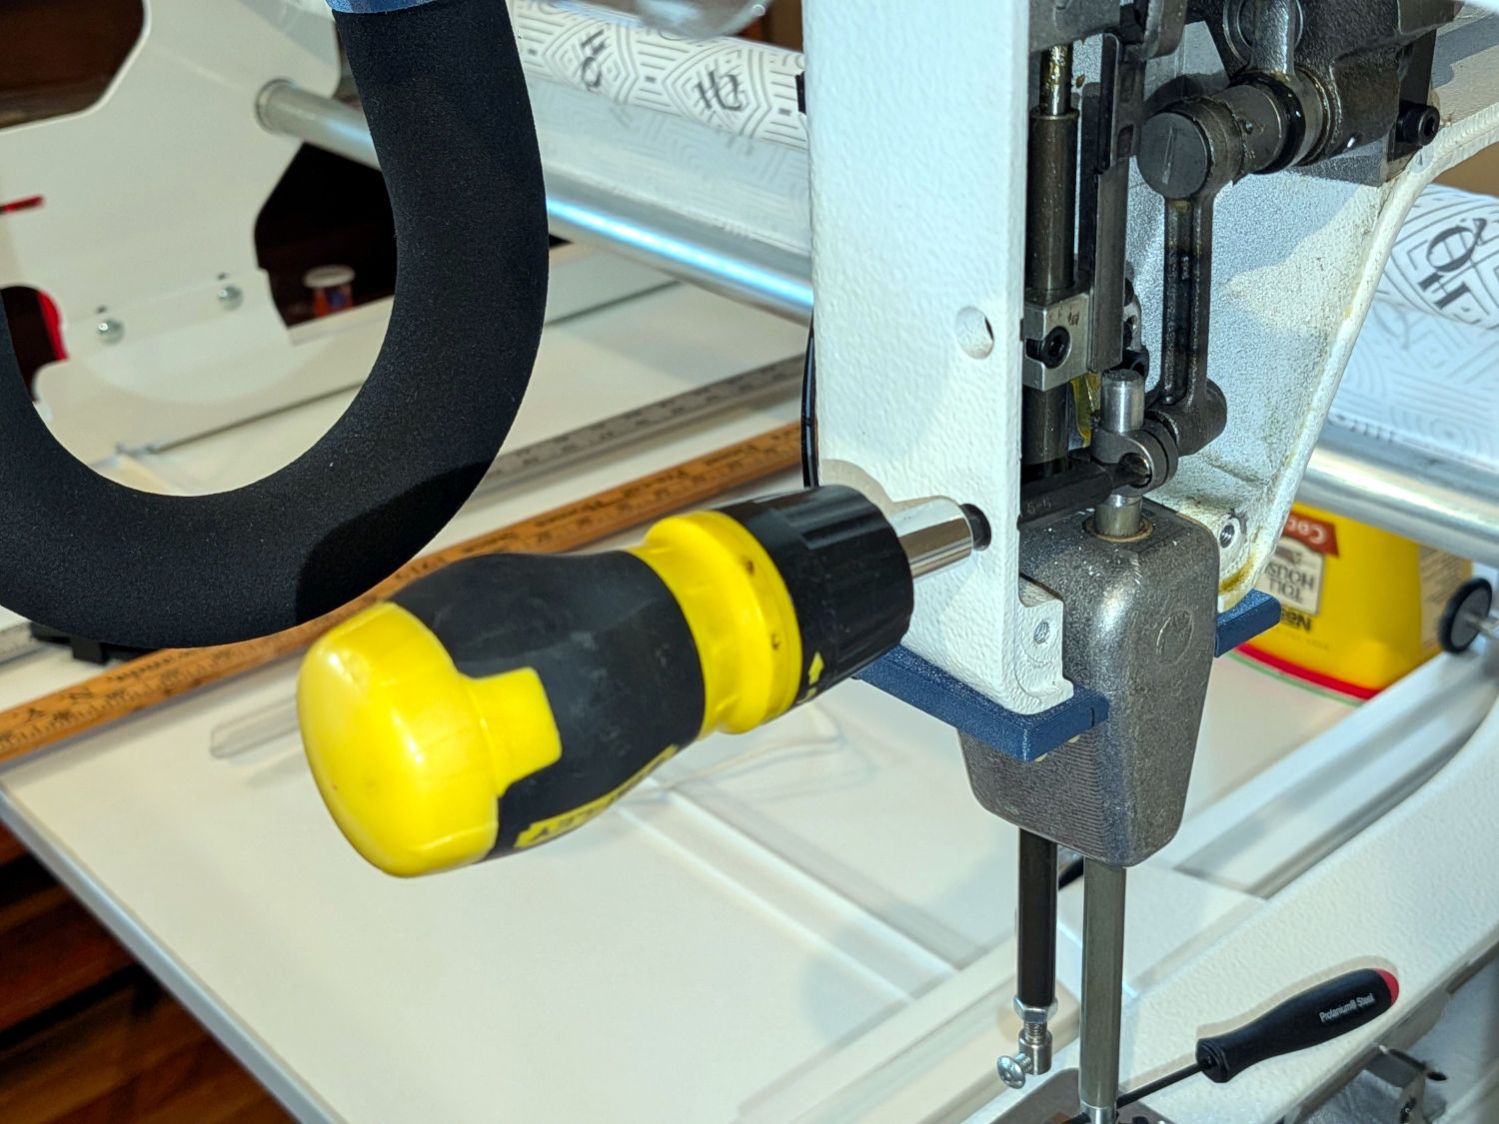
Yes, the hole is slightly misaligned with the screw, presumably because aligning it properly would put the hole too close to the edge of the frame casting for comfortable drilling. You could make this adjustment without removing the cover, but I’m not that type of guy.
Rotate the needle bar to put the locking screw exactly at the back, verify the bottom of the bar rests on the gauge blocks, tighten the clamp screw, and verify the bottom of the bar rests on the gauge blocks:
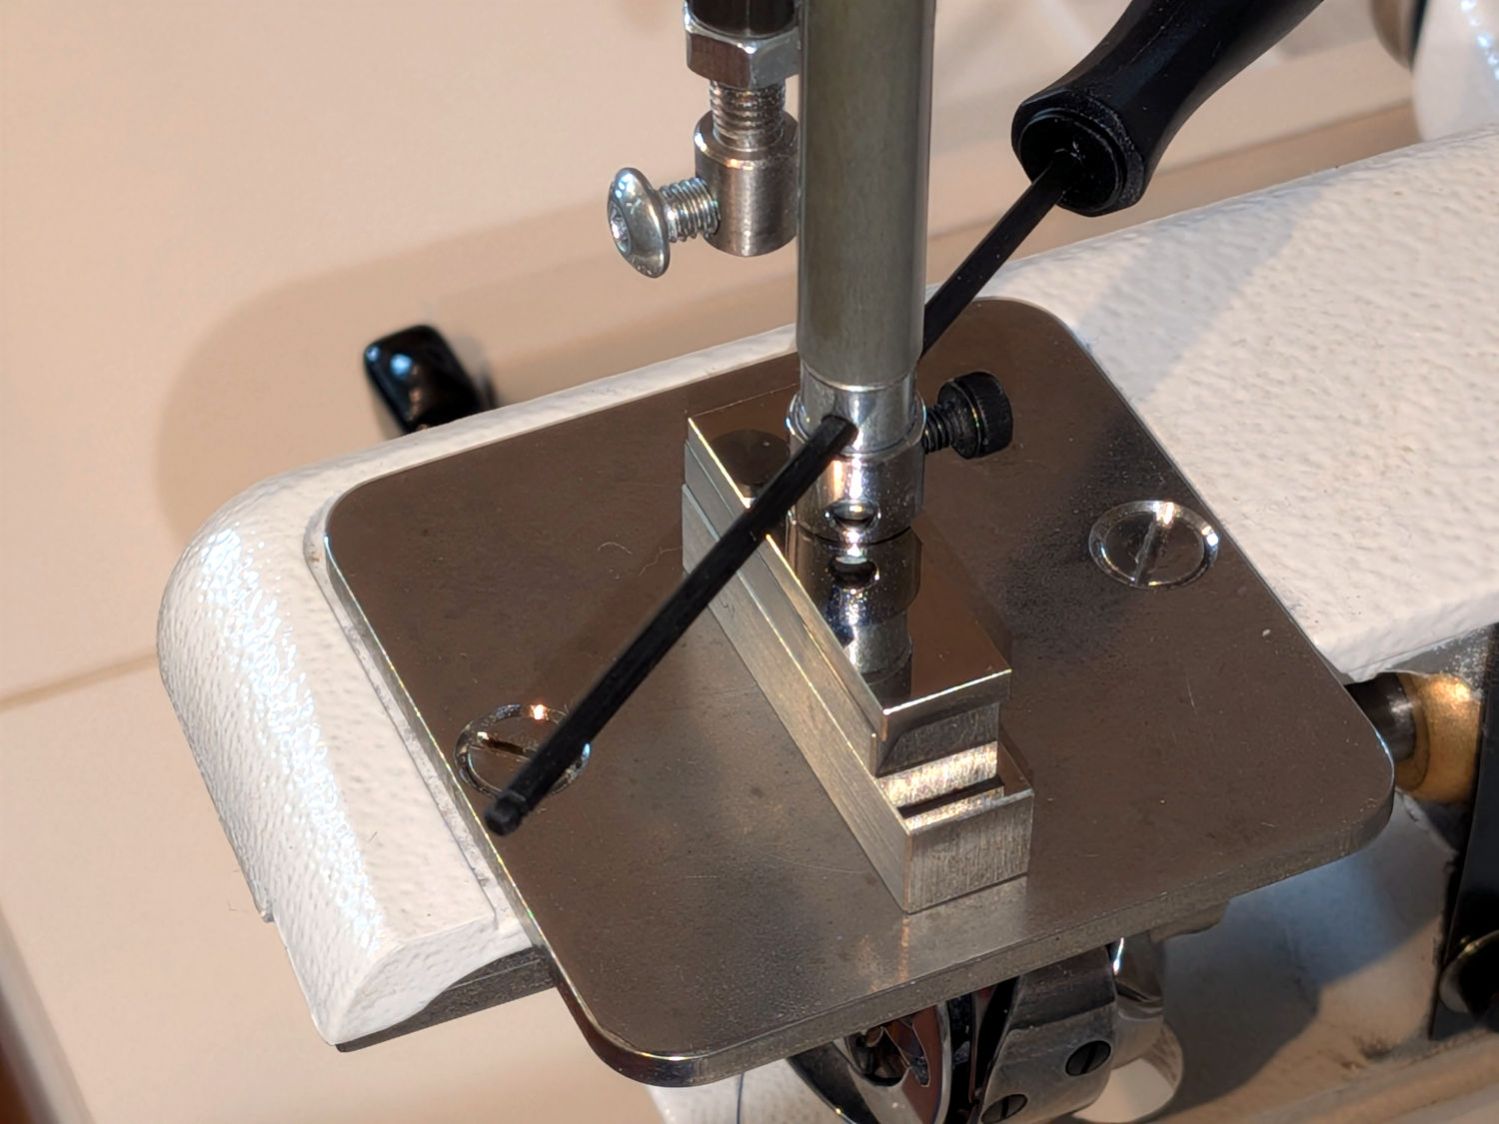
Again, the hex driver shows the observation hole orientation.
Acceptance testing requires a practice quilt, but the machine lights up properly and moves smoothly with a needle in place, so it’s pretty close to being correct.
This was one of those jobs requiring about two hours of setup, twenty seconds of adjustment, and half an hour of put-away.

