Cranked down as far as it would go, a new adjustable height workbench in Mary’s sewing room turned out to be just slightly higher than the other work surfaces adjoining it, so I replaced its 3 inch casters with 2 inch versions:
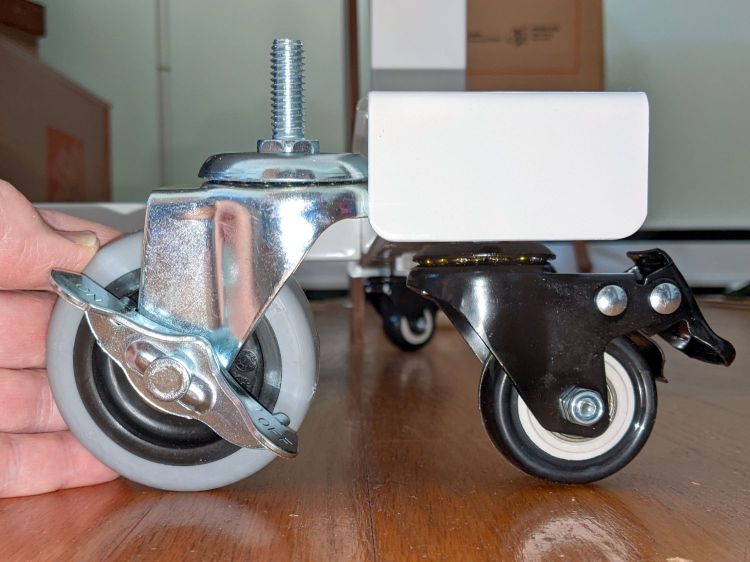
The bench arrived as a kit and included the 17 mm flat wrench required to snug the hex head on the 3/8-16 threaded stem atop the 3 inch caster against the bottom of the bench foot. The 2 inch caster also has a threaded stem, but of course it has a 14 mm hex head.
I traced around a 14 mm open-end wrench on a scrap of aluminum and introduced the outline to Tiny Bandsaw:

A little belt sander action cleaned up the outside, some hand filing matched the wrench to the hex, and it came out OK, even before I scrubbed the dirt off its white-ish pebble-finish coating:

The bare steel wrench arrived with the bench and has 13 and 17 mm openings. I briefly considered embiggening the 13 mm end, but came to my senses.
Aluminum isn’t a particularly good metal for wrench duty, but this one had to apply maybe 1/3 of a turn to each of four stems, stopping when snug, and it performed just fine. It’s now sleeping in the wrench drawer, dreaming of another job that may never arrive.
The smaller casters lowered the bench by about an inch, whereupon cranking the surface up a bit less than half an inch aligned it perfectly.